 6
6
GAMDIAS HERMES M5 Keyboard Review
Software & Performance »Disassembly


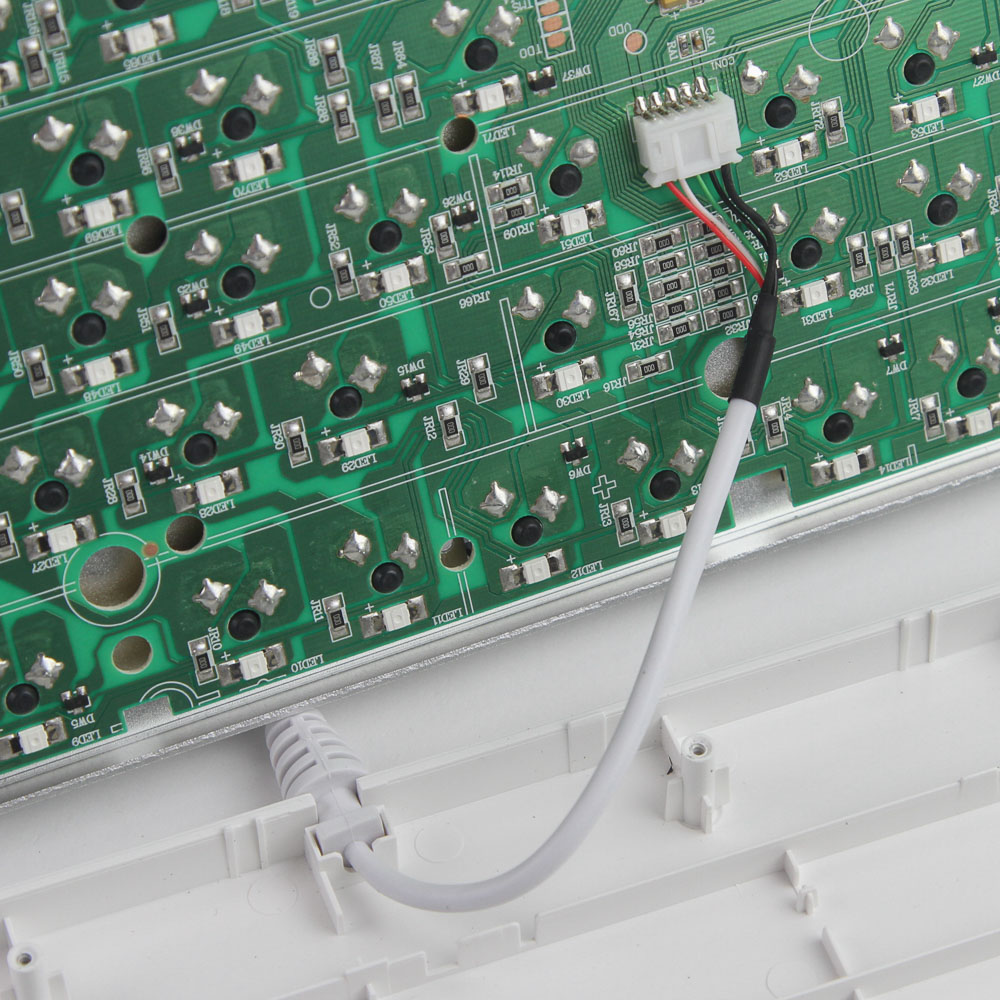
The GAMDIAS HERMES M5 is one of the simplest keyboards to take apart, which is always a good thing for me at least. 12 Phillips head screws keep the keyboard together, and these can be accessed by removing specific keycaps as seen above. A precision Phillips screwdriver comes in handy here, and after removing them, you can lift the metal frame piece off the bottom plastic panel. That said, don't yank it off since an internal USB cable connects the two.
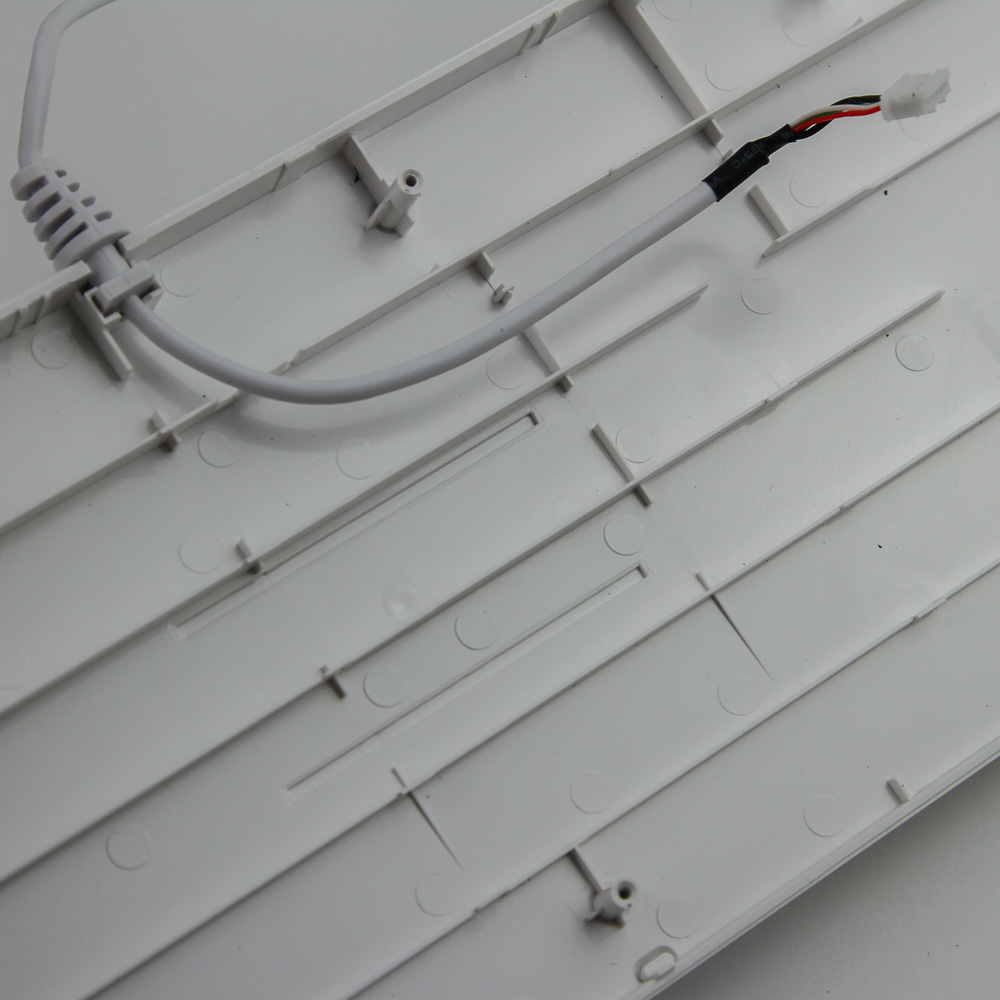
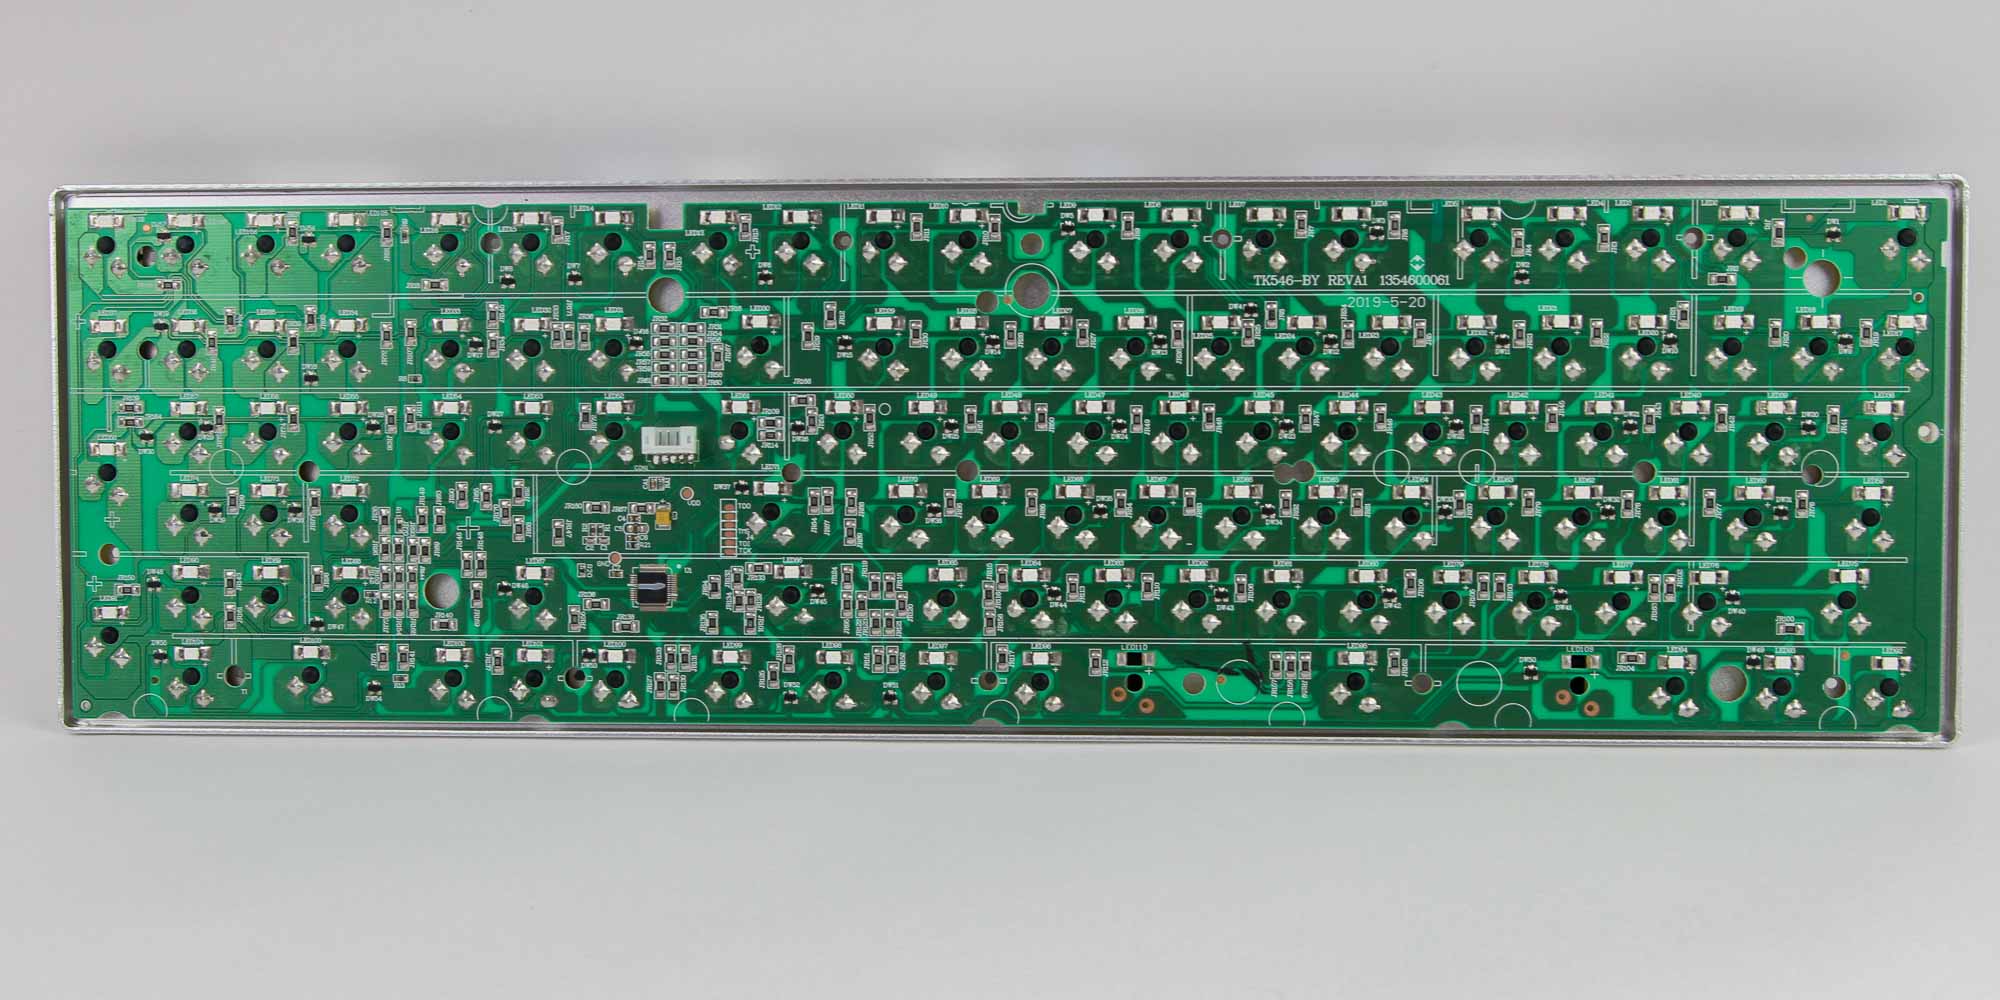
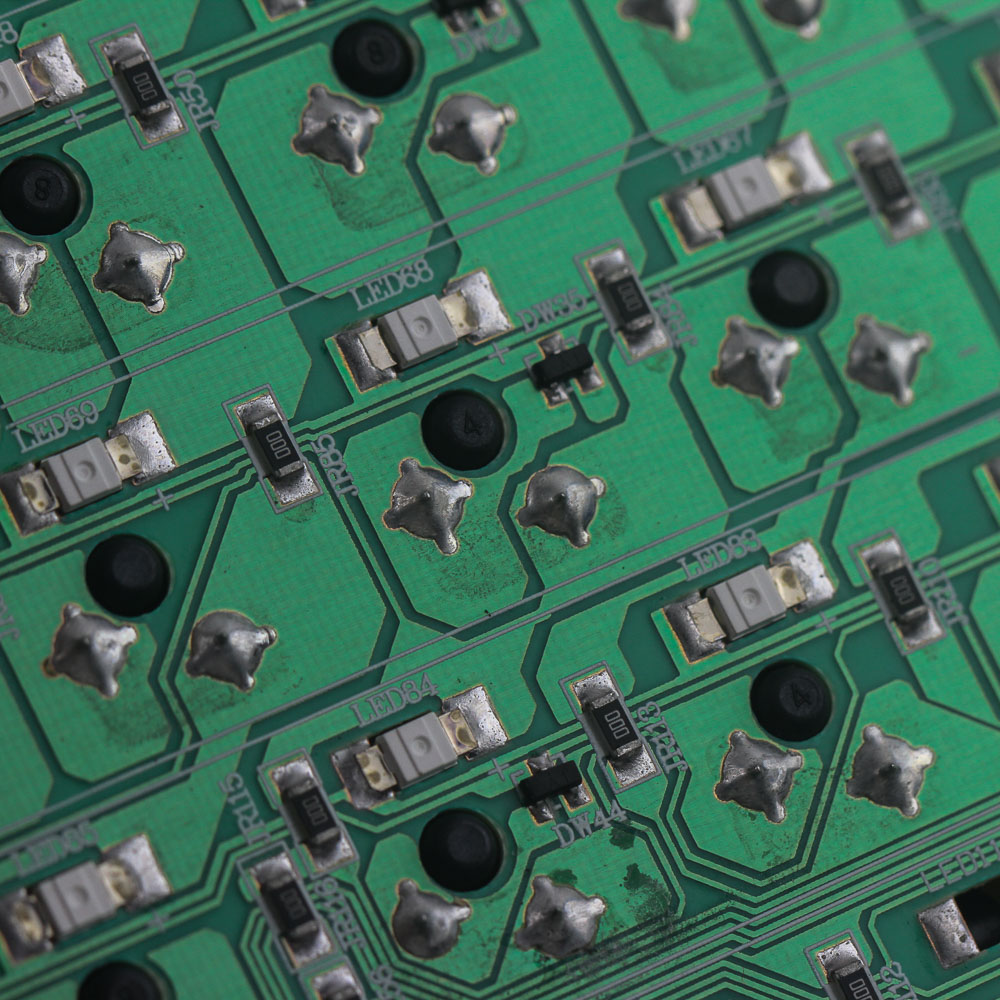
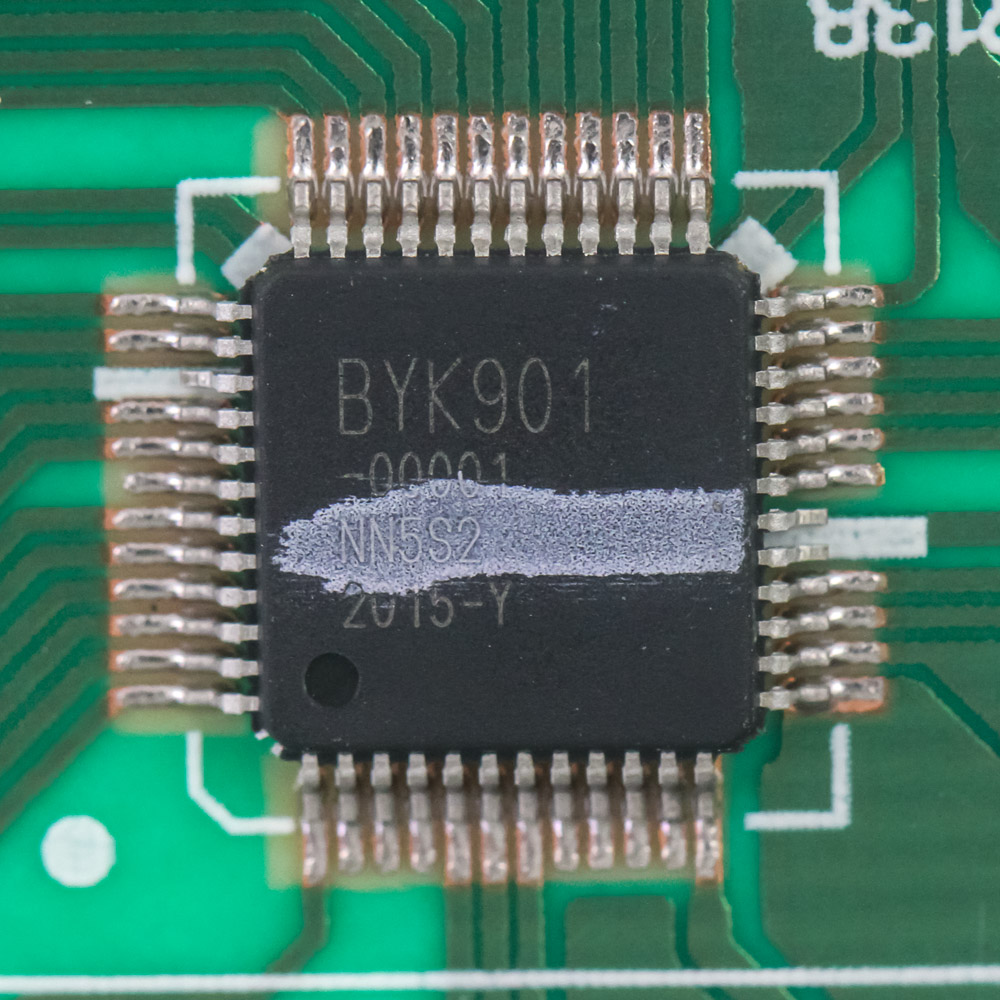

Dislodge the cable and you may now fully separate the two primary pieces. We see the use of a white ABS plastic bottom panel that has the keyboard cable going through it and onto the PCB itself. Speaking of which, GAMDIAS is using a shiny green PCB with at best adequate solder quality. Everything is completely fine functionally, though, so there are no points to be docked here. Powering the keyboard is a BYK901 USB microcontroller, which I can find no useful documentation for online, but it has been used in budget keyboards successfully enough before. GAMDIAS says this is a 32-bit ARM Cortex-M3 MCU, but pretty much every one used in a mechanical keyboard today tends to be. It may limit some of the customization possibilities with the HERMES M5, so let's check if that is the case on the next page. All the components, including the switches, LEDs, and capacitors, are soldered to a multi-layered PCB.
Before we move on, be advised that disassembly may void the warranty and that TechPowerUp is not liable for any damages incurred if you decide to go ahead and do so anyway.
May 4th, 2025 16:20 EDT
change timezone
Latest GPU Drivers
New Forum Posts
- PSU chirping sound (11)
- which cooler CPU is better? (8)
- Vertical mice in gaming (5)
- Question about photos (1)
- Thread '(thread name)' could use more distinction (3)
- Windows 11 General Discussion (6019)
- ASRock Z590 OC Formula. (33)
- Subsystem Id of my Asus Strix RTX 4090 OC / Random GPU detection problem (32)
- 5070 Ti power limit questions (82)
- Is RX 9070 VRAM temperature regular value or hotspot? (374)
Popular Reviews
- Clair Obscur: Expedition 33 Performance Benchmark Review - 33 GPUs Tested
- ASUS ROG Maximus Z890 Hero Review
- ASUS Radeon RX 9070 XT TUF OC Review
- Montech HS02 PRO Review
- NVIDIA GeForce RTX 5060 Ti 8 GB Review - So Many Compromises
- ASUS GeForce RTX 5090 Astral Liquid OC Review - The Most Expensive GPU I've Ever Tested
- Seasonic Vertex GX 850 W Review
- Upcoming Hardware Launches 2025 (Updated Apr 2025)
- ASRock Radeon RX 9070 XT Taichi OC Review - Excellent Cooling
- Sapphire Radeon RX 9070 XT Nitro+ Review - Beating NVIDIA
Controversial News Posts
- AMD Radeon RX 9060 XT to Roll Out 8 GB GDDR6 Edition, Despite Rumors (129)
- NVIDIA Sends MSRP Numbers to Partners: GeForce RTX 5060 Ti 8 GB at $379, RTX 5060 Ti 16 GB at $429 (128)
- NVIDIA Launches GeForce RTX 5060 Series, Beginning with RTX 5060 Ti This Week (115)
- Nintendo Confirms That Switch 2 Joy-Cons Will Not Utilize Hall Effect Stick Technology (105)
- NVIDIA PhysX and Flow Made Fully Open-Source (95)
- Sony Increases the PS5 Pricing in EMEA and ANZ by Around 25 Percent (84)
- Parts of NVIDIA GeForce RTX 50 Series GPU PCB Reach Over 100°C: Report (78)
- Intel "Bartlett Lake-S" Gaming CPU is Possible, More Hints Appear for a 12 P-Core SKU (77)