 5
5
Gigabyte Z690I AORUS Ultra Plus DDR4 Review
VRM Overview »Board Layout


Gigabyte Z690I AORUS Ultra Plus keeps the overall layout the same when comparing to the previous Gigabyte Intel Z590 (Socket LGA1200) ITX motherboard. Besides slight changes to the heatsink and VRM layout, to accommodate the new socket (LGA 1700), everything looks to be in the same place. The back has a support bracket to reinforce the PCB, keeping it straight when the LGA 1700 socket is under stress from the CPU cooler.
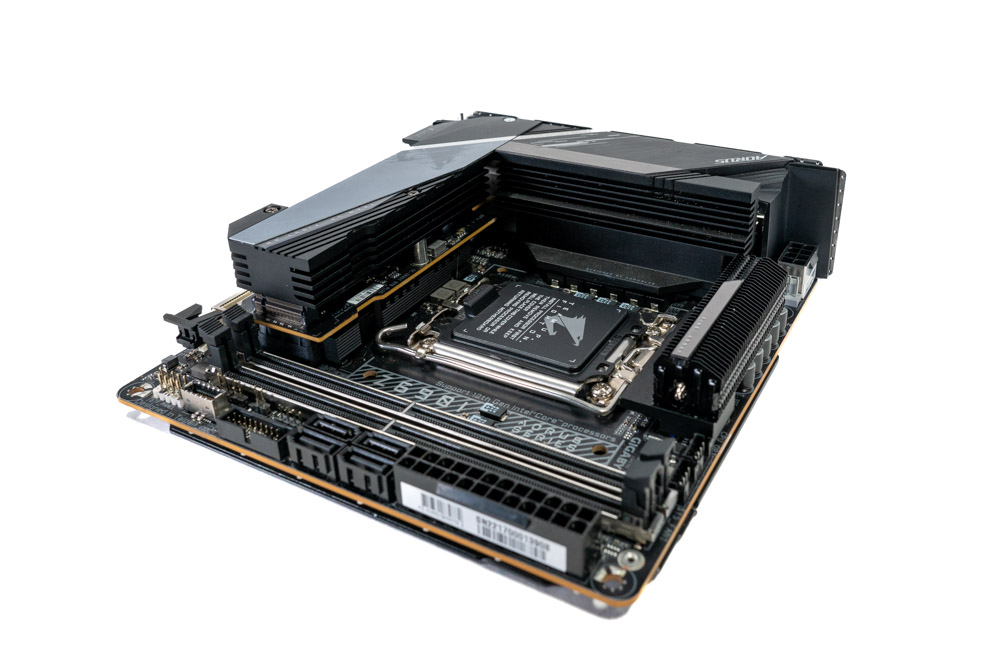
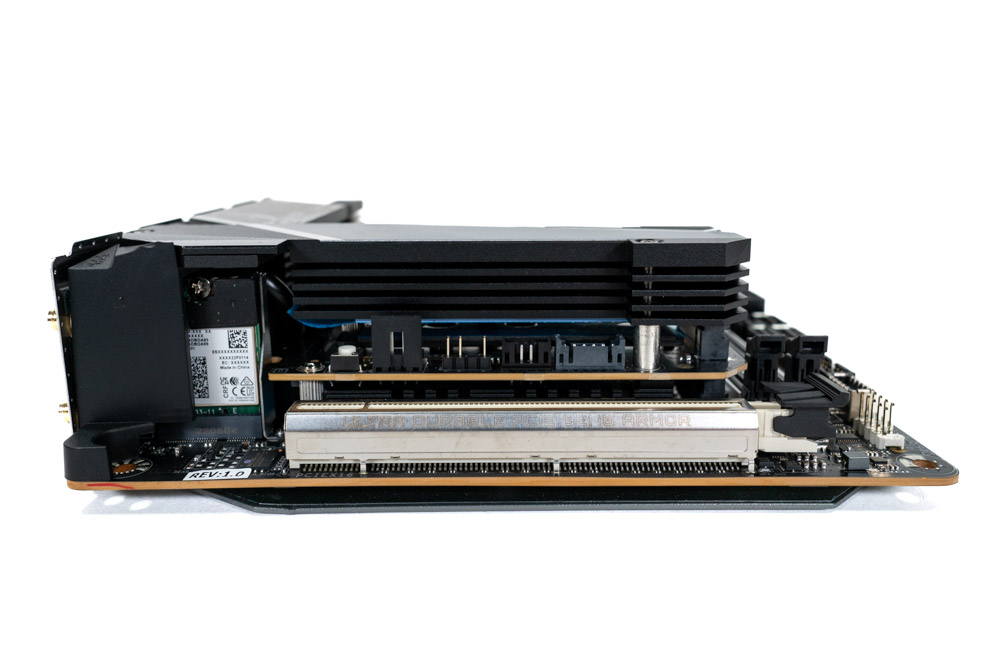
Sticking with the ITX SFF design, Gigabyte had an uphill battle to keep the socket clear of capacitors that could interfere with CPU cooler mounts. Because the VRM heatsinks are extra tall to combat high thermals, not all air coolers or AIOs will fit. From PCB to the top of the rear IO is 43 mm~ (1.7 in). Depending on how the cooler is mounted, removal of the heatsink may be required if you have large fingers, to get the mount installed. This is certainly true with the EKWB Velocity waterblock, requiring full disassembly to install two of the mounting posts.
The Gigabyte Z690I AORUS Ultra Plus DDR4 has a single x16 PCI Express Gen5 slot. It is structurally reinforced due to the lateral stress from installing a potentially large and heavy graphics card.


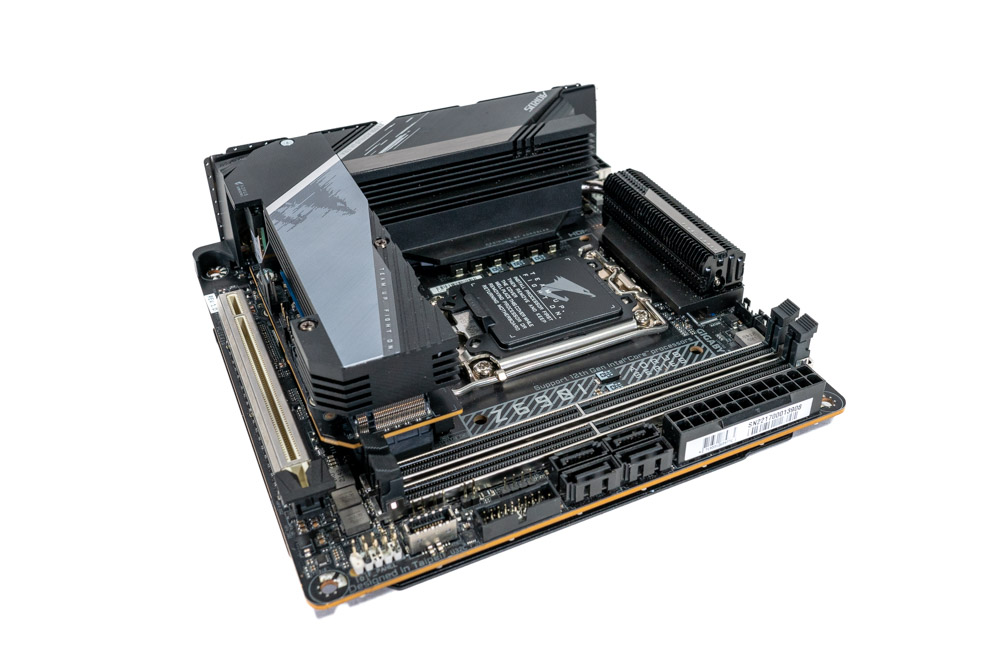
There are two M.2 2280 Gen4 x4 sockets connected by a daughterboard. Both M.2 drives have direct heatsink contact, for passive cooling.
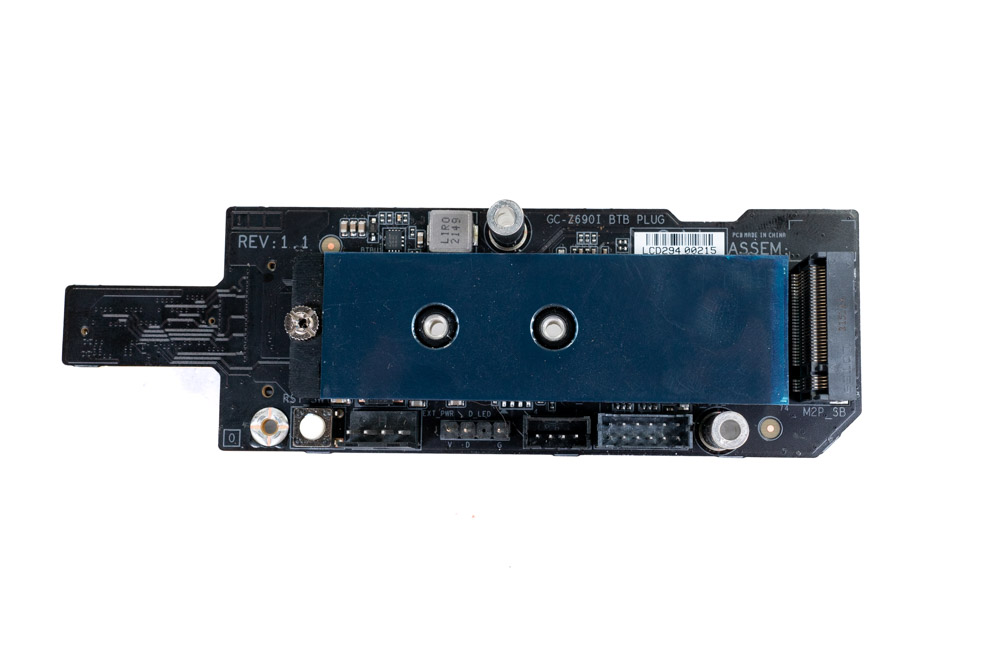

Here is a close up of that daughterboard. Since the ITX motherboard has limited space, It also has a various headers on this board. This will be covered in detail further along in this review.


At the bottom of the heatsink stack is the Z690 PCH.
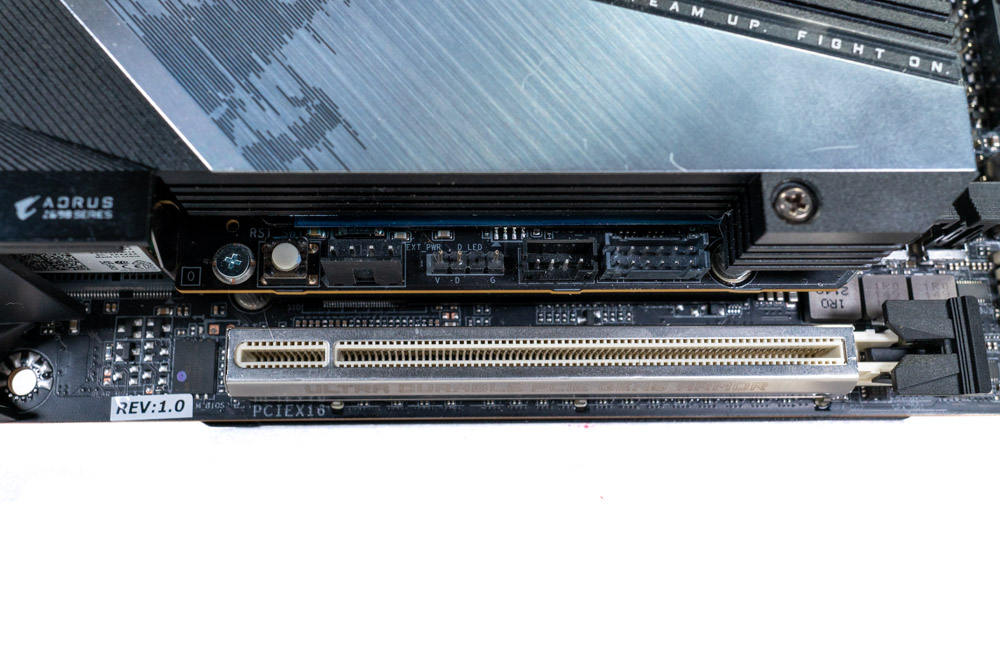

Due to space constraints, Gigabyte opted to place some of the motherboard headers on the M.2 daughterboard. Two of these here are slightly odd. First is a physical reset button used if the system header to the case isn't connected. It can also be reassigned in the BIOS to be another key (This was not tested). Second is an optional auxiliary power to the motherboard using a 4-Pin Molex connector. Neither of these are necessary and could have been replaced with Debug LEDs or an additional header.
The rest of these connectors are in the following order; 5 V RGB, 4-Pin Fan header, USB 2.0. They are useful none the less, even if the placement isn't ideal. But that comes with the territory of Small Form Factor.

The Gigabyte Z690I AORUS Ultra Plus DDR4 uses a single 8-Pin EPS connector. For those who have reservations about CPU overclocking with a single EPS, it is perfectly fine. Just make you follow modern ATX power specifications and use power cables with 16AWG wire or better.
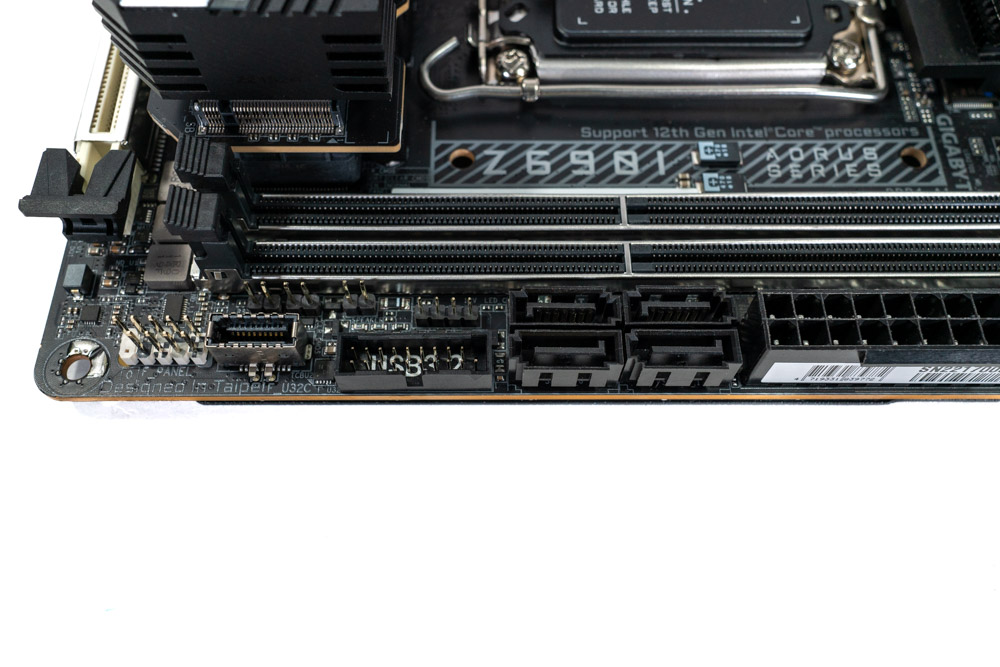
The motherboard has a total of four 6 Gbps SATA ports. Next to those ports is a 12 V RGB header, and additional headers for USB 3.2 Gen1 and USB-C. It should be noted that this motherboard does not have any Post Debug LEDs. If the motherboard fails to boot and you are stuck with a black screen, the way to know exactly what happened is to connect a speaker and listen to the beep codes.
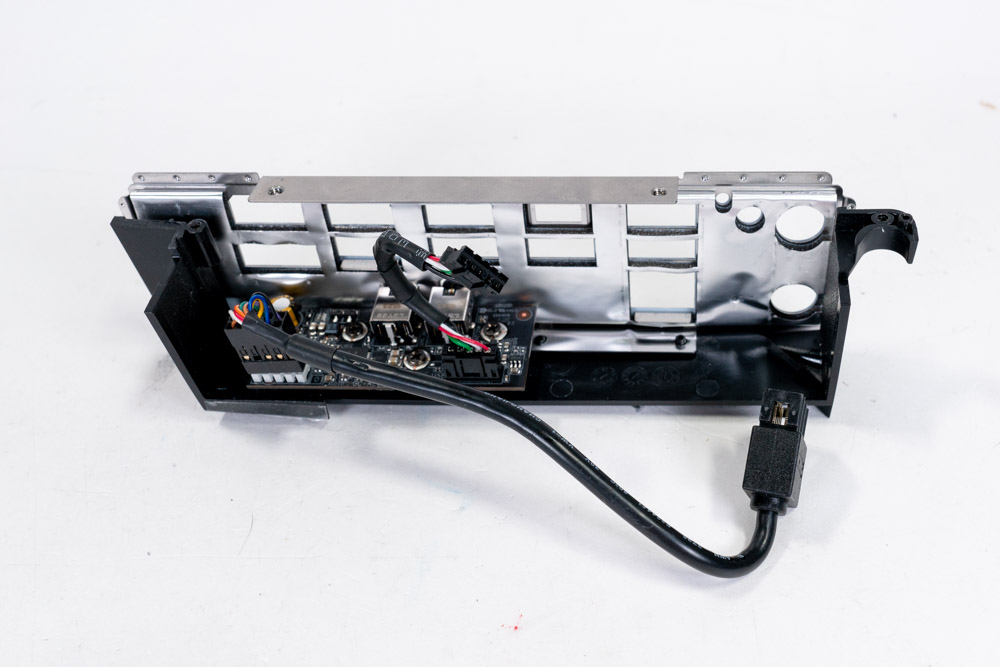

The Gigabyte Z690I AORUS Ultra Plus DDR4 has the audio section on a separate board. With a Realtek ALC4080 Codec, in theory, it should provide a good audio experience. However, Audio analysis could not be performed due to the lack of a Line In port. Mic In cannot be the substitute as it has a lower frequency range, and isn't suitable for the RightMark Audio benchmark.
Connected to this audio board is also the Front Panel Audio Header. It was tucked away, and initially blocked the M.2 daughterboard from being removed, so that a second M.2 SSD could be installed. Luckily, this disassembly was part of the review process anyways, ending up just being a minor inconvenience. It was a good idea from Gigabyte to save space by tucking the cable away, but it may end up causing assembly problems for the consumer.

Getting a peek at the Rear IO, we can see the that Gigabyte has stuck with the basics every Intel Z690 motherboard should have. With the idea that SFF computers have a wide range of use cases, including an HDMI 2.0 and DisplayPort 1.4 was a smart choice. Going through the USB ports, multiple high-speed 10 Gb/s ports can be found, which are colored red. Among those is a single USB-C port rated for 20 Gb/s.
- 2x Antenna ports
- HDMI 2.0 port
- DisplayPort 1.4
- 1x USB 3.2 Gen2 Type-C (20 Gb/s)
- 3x USB 3.2 Gen2 Type-A Ports (10 Gb/s) (Red)
- 2x USB 3.2 Gen1 Type-A Ports (5 Gb/s) (Blue)
- USB 2.0
- 2.5 GbE RJ-45 LAN
- 1x Q-Flash Plus button
- 2x HD audio jacks
Mar 10th, 2025 14:54 EDT
change timezone
Latest GPU Drivers
New Forum Posts
- I'm looking for a good tool to make the 3D scanning of my mini-pc using the photogrammetry and my Kinect 2. (49)
- AMD RX 9070 XT & RX 9070 non-XT thread (OC, undervolt, benchmarks, ...) (4)
- What's your latest tech purchase? (23272)
- Cryptocoin Value and Market Trend Discussion (1645)
- What are you playing? (23130)
- FlashMyBoard - Automated BIOS Update Tracking & Notification System (11)
- Nvidia's GPU market share hits 90% in Q4 2024 (gets closer to full monopoly) (772)
- I have latency batch file need some help with please (2)
- BIOS request 10DE:25A2 1043:13DC (9)
- RX 9000 series GPU Owners Club (40)
Popular Reviews
- Sapphire Radeon RX 9070 XT Nitro+ Review - Beating NVIDIA
- XFX Radeon RX 9070 XT Mercury OC Magnetic Air Review
- ASUS Radeon RX 9070 TUF OC Review
- MSI MAG B850 Tomahawk Max Wi-Fi Review
- NVIDIA GeForce RTX 5080 Founders Edition Review
- NVIDIA GeForce RTX 5070 Founders Edition Review
- Corsair Vengeance RGB CUDIMM DDR5-8800 48 GB CL42 Review
- AMD Ryzen 7 9800X3D Review - The Best Gaming Processor
- ASUS GeForce RTX 5070 Ti TUF OC Review
- MSI GeForce RTX 5070 Ti Gaming Trio OC+ Review
Controversial News Posts
- NVIDIA GeForce RTX 50 Cards Spotted with Missing ROPs, NVIDIA Confirms the Issue, Multiple Vendors Affected (513)
- AMD Plans Aggressive Price Competition with Radeon RX 9000 Series (277)
- AMD Radeon RX 9070 and 9070 XT Listed On Amazon - One Buyer Snags a Unit (261)
- AMD RDNA 4 and Radeon RX 9070 Series Unveiled: $549 & $599 (260)
- AMD Mentions Sub-$700 Pricing for Radeon RX 9070 GPU Series, Looks Like NV Minus $50 Again (248)
- NVIDIA Investigates GeForce RTX 50 Series "Blackwell" Black Screen and BSOD Issues (244)
- AMD Radeon RX 9070 and 9070 XT Official Performance Metrics Leaked, +42% 4K Performance Over Radeon RX 7900 GRE (195)
- AMD Radeon RX 9070-series Pricing Leaks Courtesy of MicroCenter (158)