 25
25
Gigabyte Z77X-UP5 TH Intel LGA 1155 Review
BIOS Walkthrough »The Board - A Closer Look
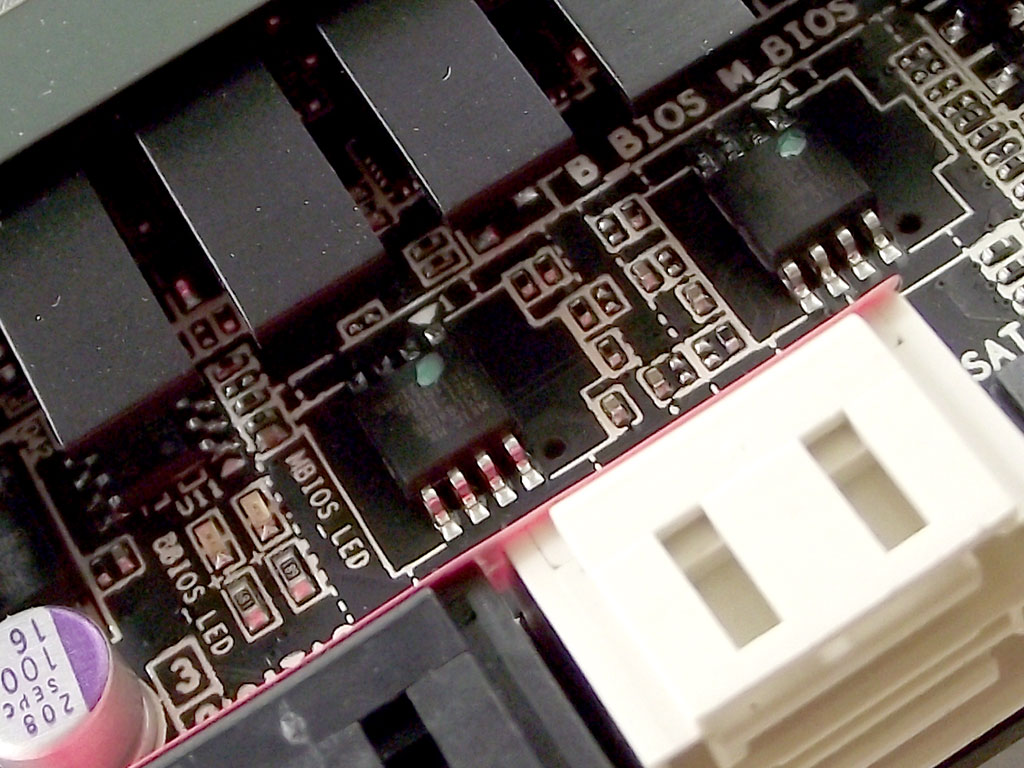
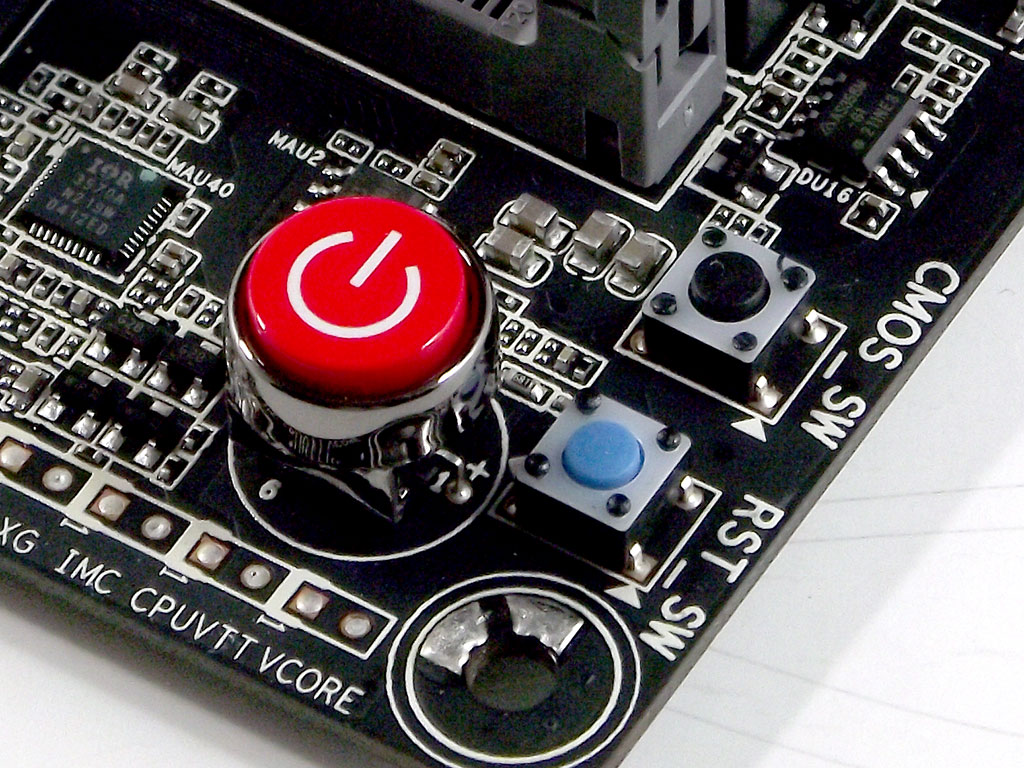
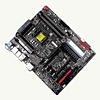
Gigabyte has definitely evolved its hardware BIOS design, with two actual chips placed onto the board's surface. Each has an LED close-by that indicates which is in use. The switch on the board's bottom edge also allows you to choose which one to use. There are several other switches located at the top-right of the board as well - one for ON/OFF, one for RESET, and one for CMOS Clear. I have to give Gigabyte credit for placing them in a spot that allows fairly easy access even after installation into a case. The ON/OFF switch also lights up in a bright orange that makes it easy to find inside the case. There's a dual-digit LED display between the DIMM slots and the 24-pin power plug, great for easy diagnosis of boot issues, should you hit that ON/OFF button and the POST process fails. It's also located in a spot where it can be seen all the time.
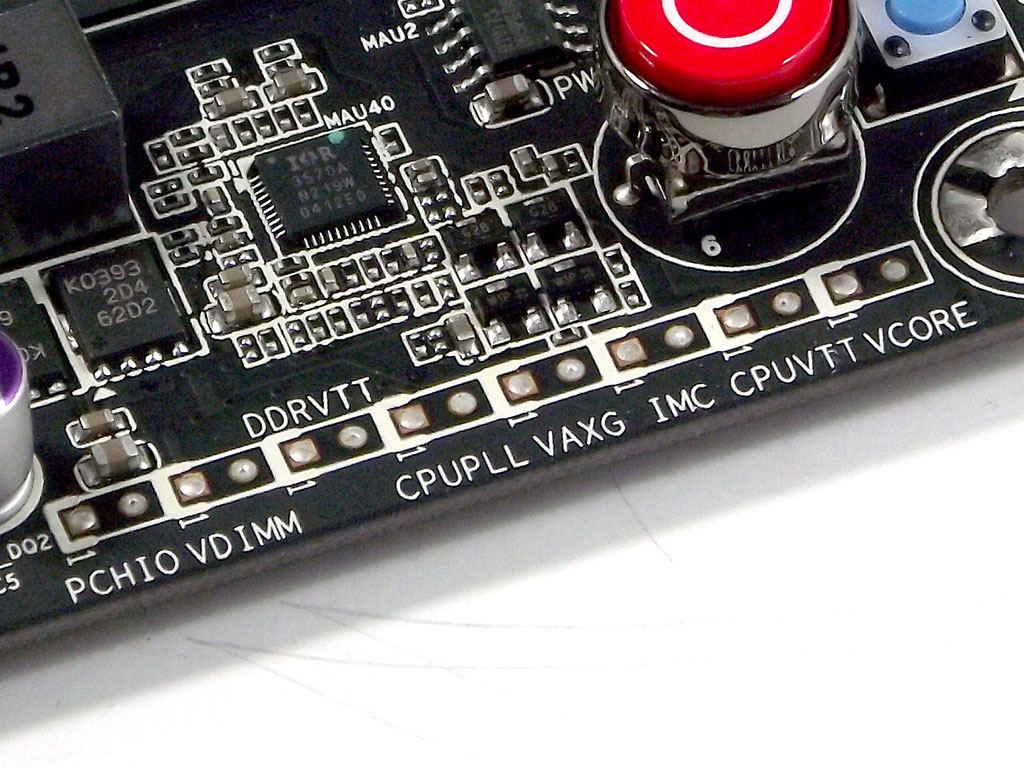
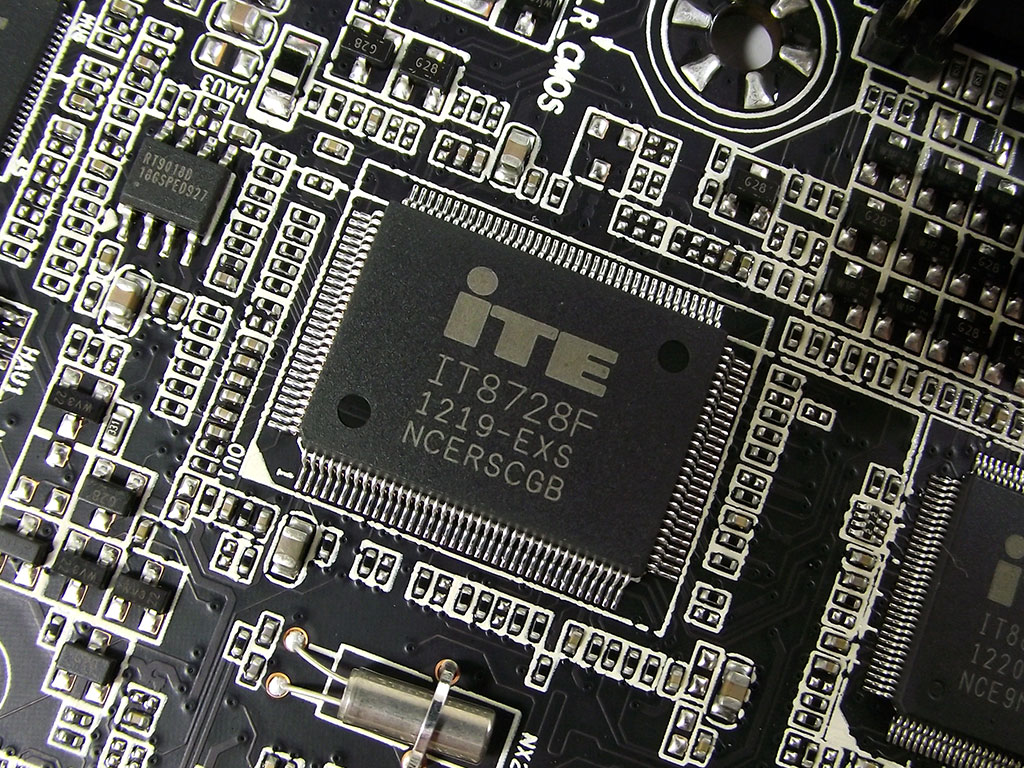
For voltage monitoring, Gigabyte includes a group of measuring points right on the PCB's edge, just above the 24-pin connector. If that's a bit too advanced for you, there's an ITE IT8728F Super I/O chip for software-based monitoring as well, although it's a bit limited in my books.
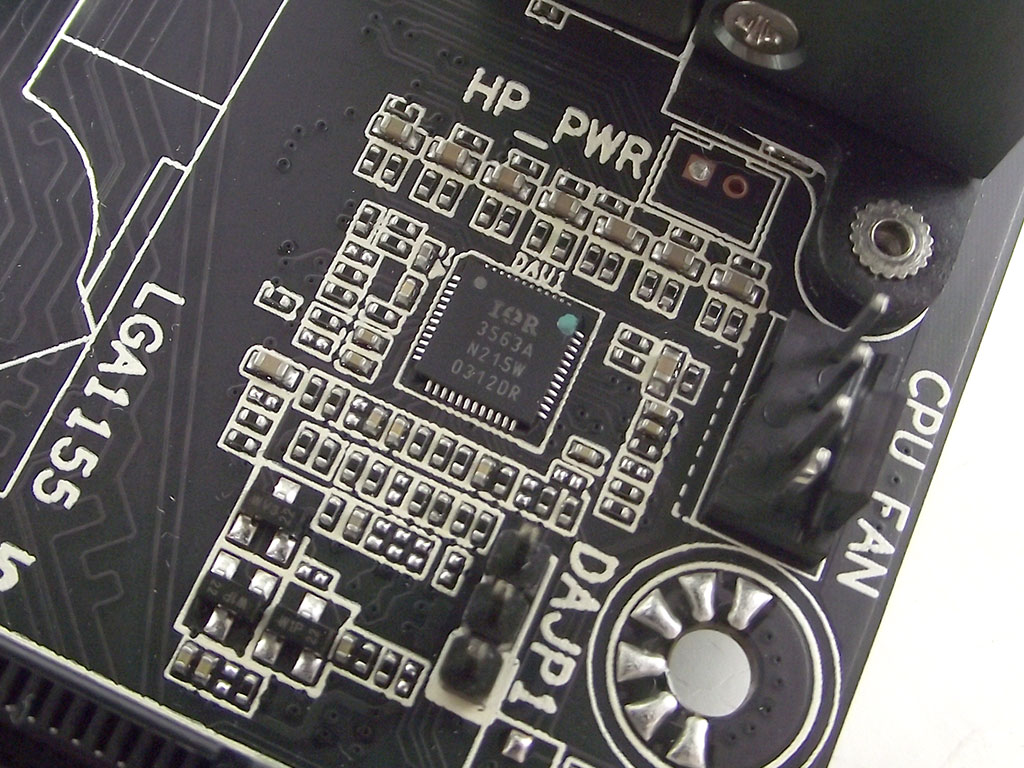
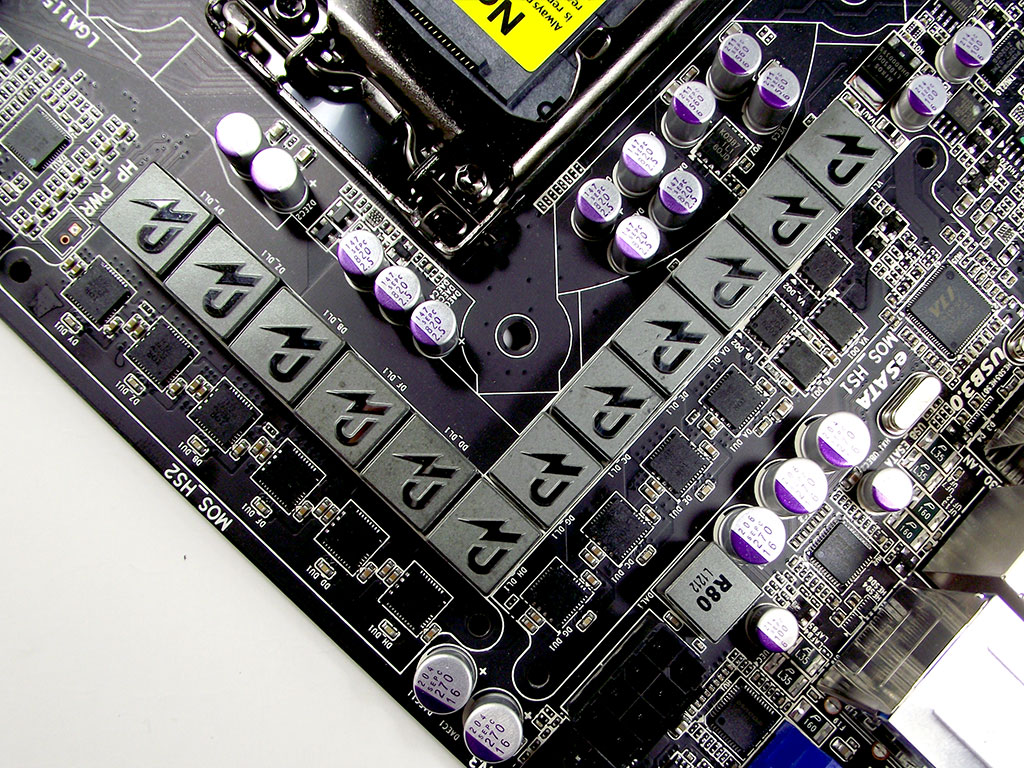
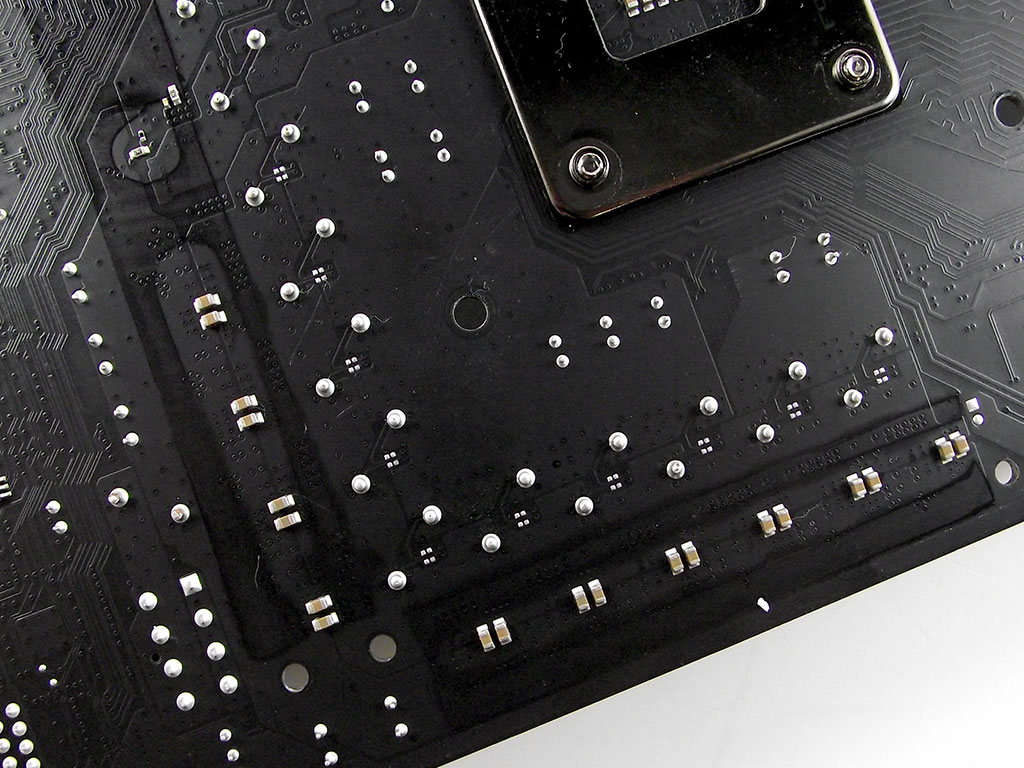
The CPU VRM is a new design, now carrying the "Ultra Durable 5" moniker. This includes International Rectifier controllers, an IR3563A for the CPU proper, and some new MOSFET/driver combo ICs that are touted to have greater efficiency as well as lower operating temperatures. I was rather shocked to see coolers on the socket rear with this component design, and, when I removed them, I only found very basic capacitors underneath.
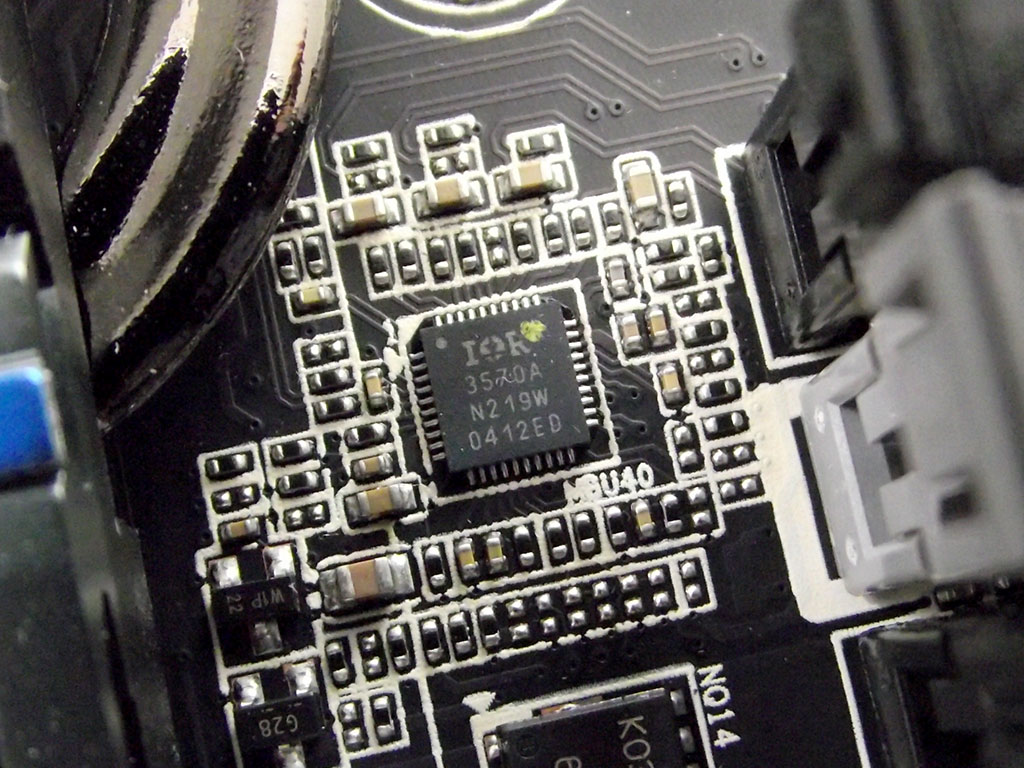
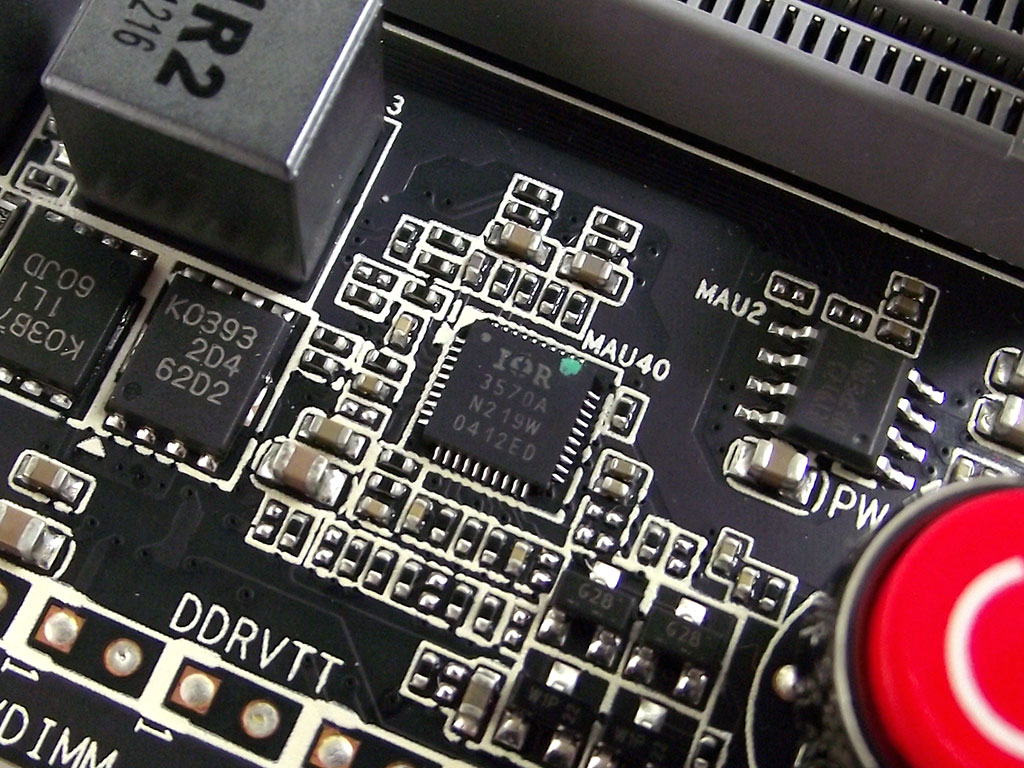
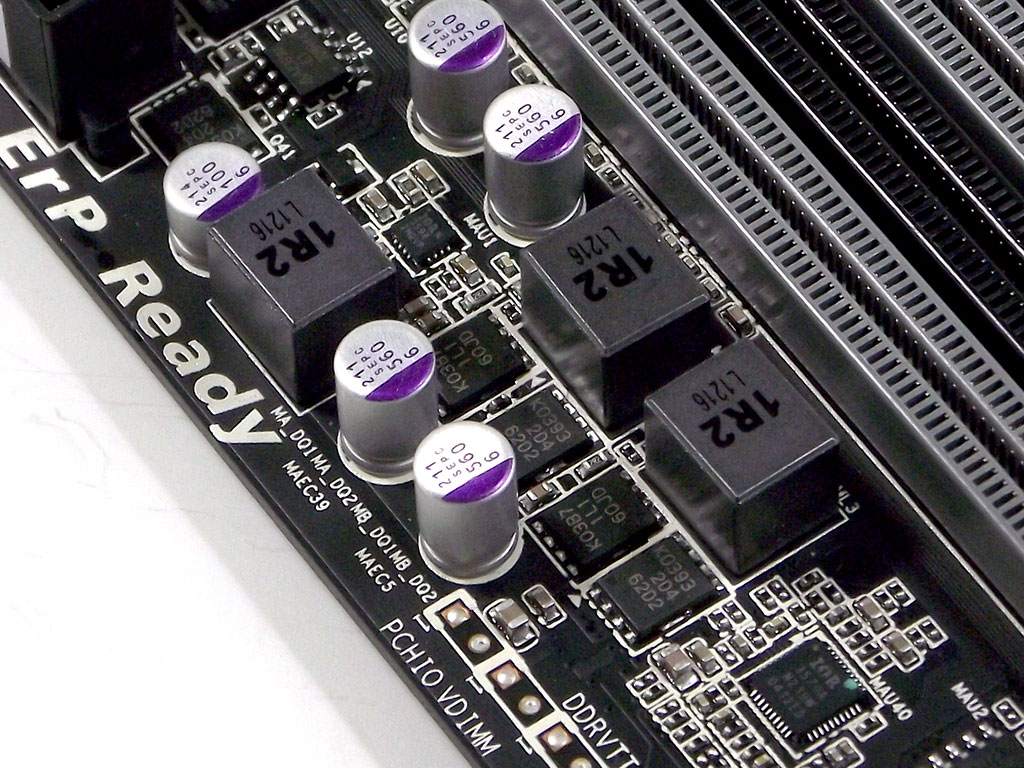
I found two other VRM controllers, one IR3570A for PCH and perhaps VTT delivery, while a second IR3570A controls DIMM power, which is a dual-phase design.
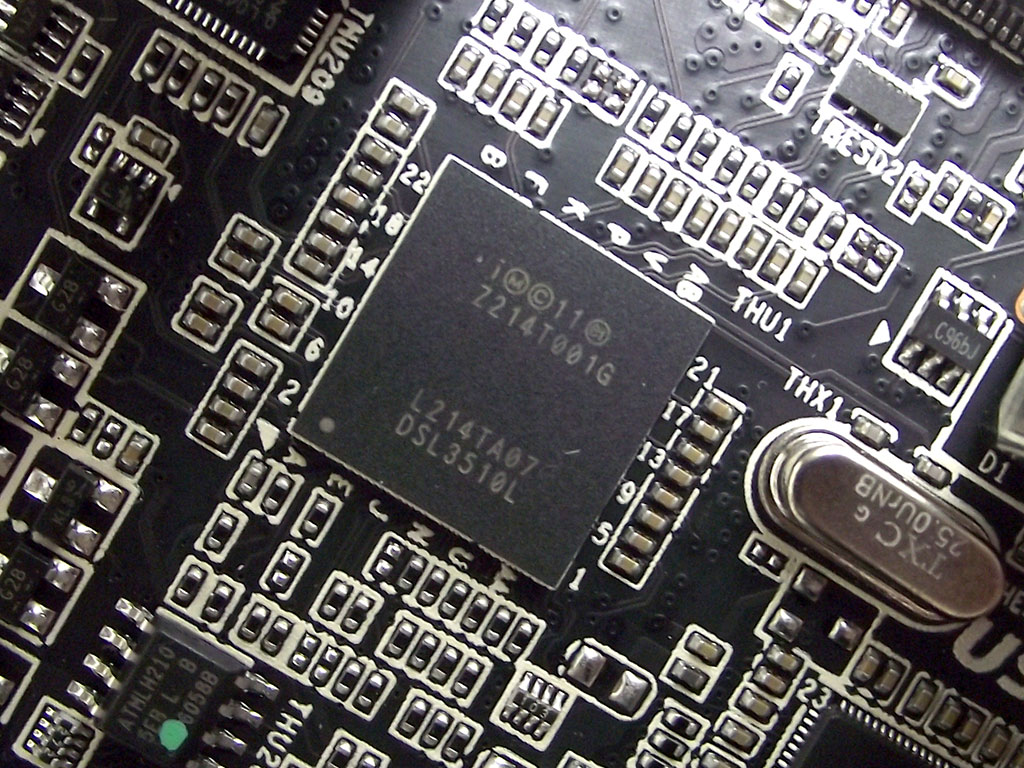

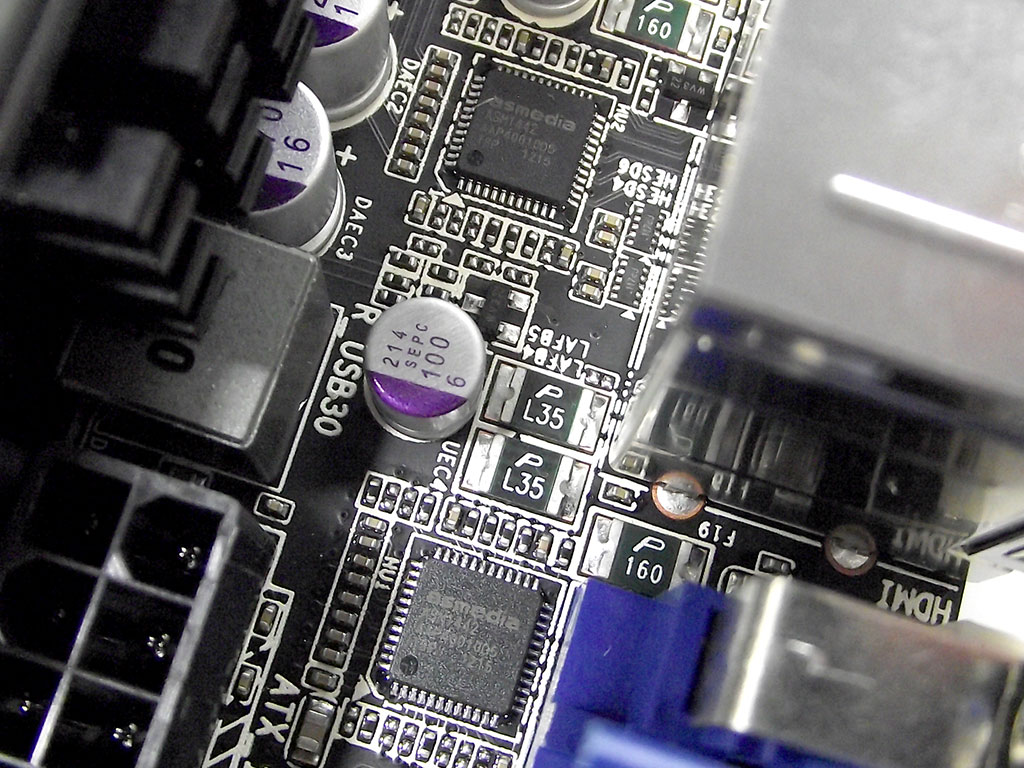
Thunderbolt support is provided by an Intel DSL3510L, a 4-channel, dual port IC that uses a PCIe x4 link, and consumes roughly 3 W. A VIA VT6308P FireWire controller handles I/O duties for the IEEE 1394 header on the board's bottom edge.


VIA also supplies the USB 3.0 controllers, both of which are VL810-Q8 parts, each of which can drive four ports.
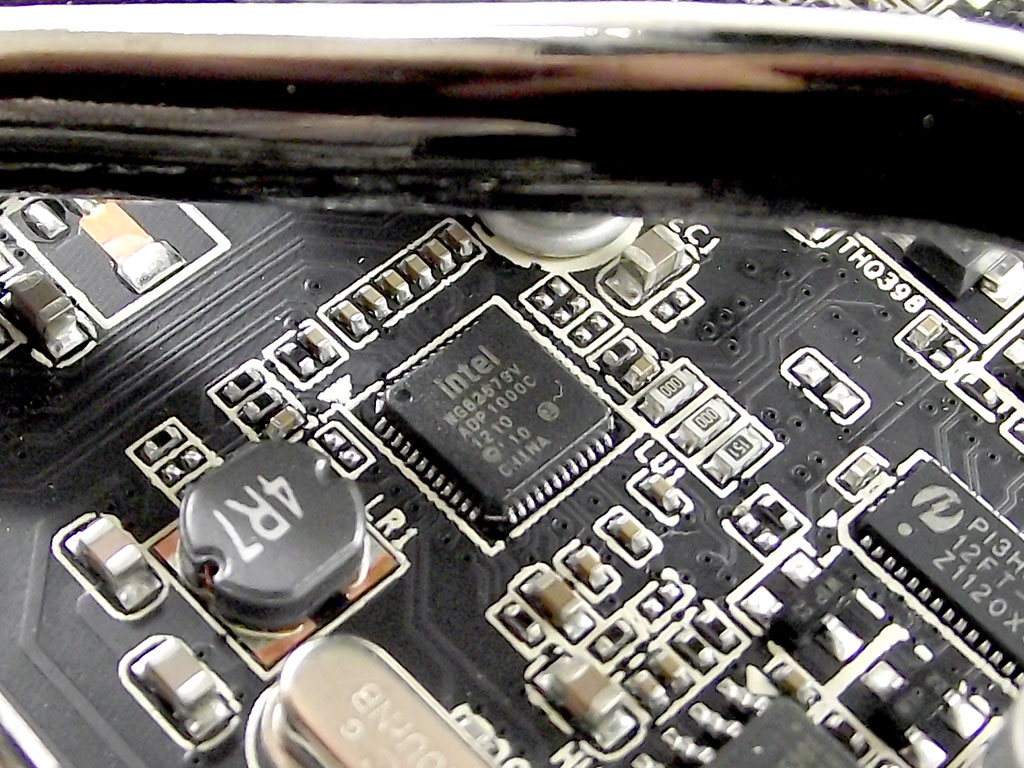
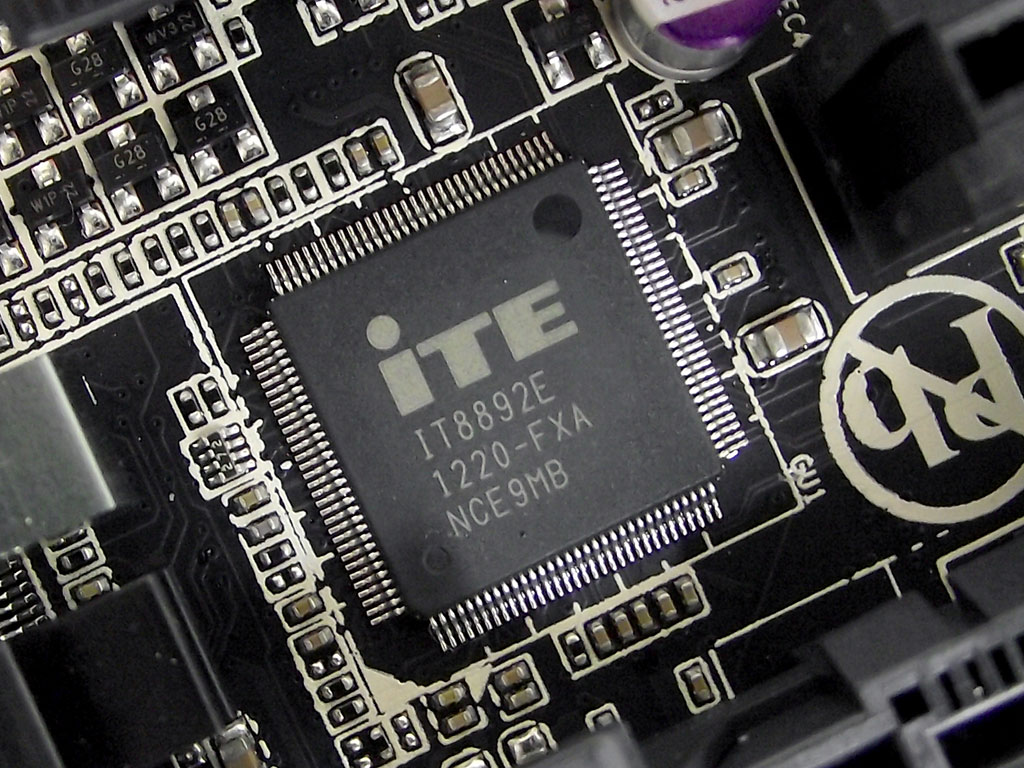
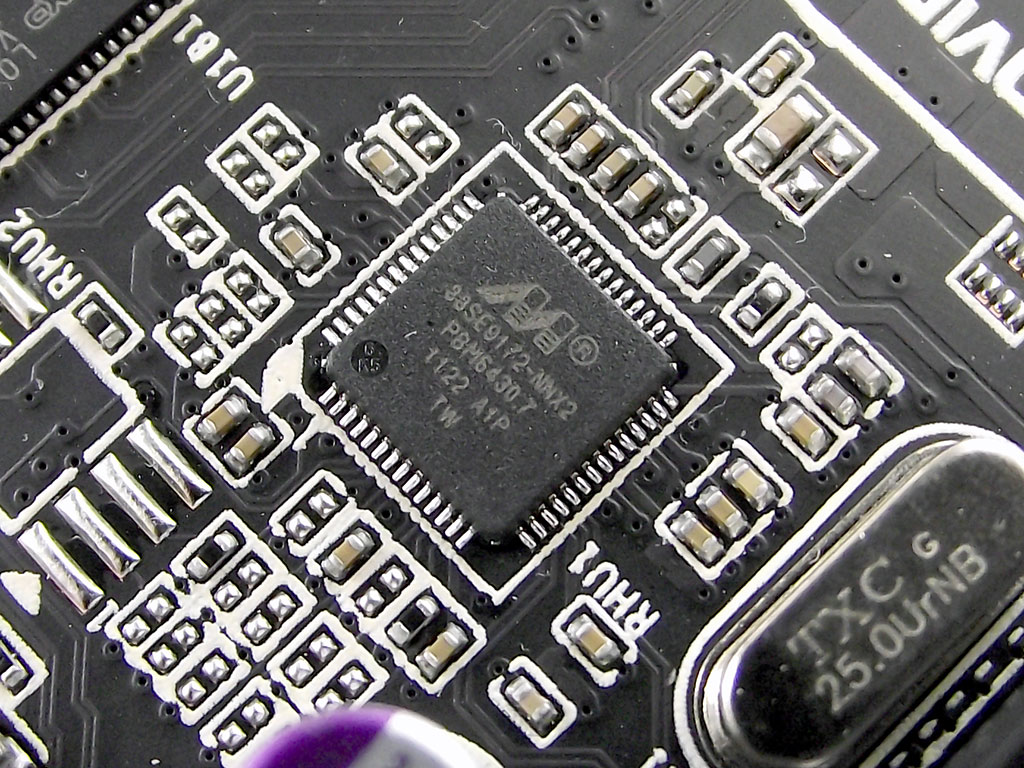
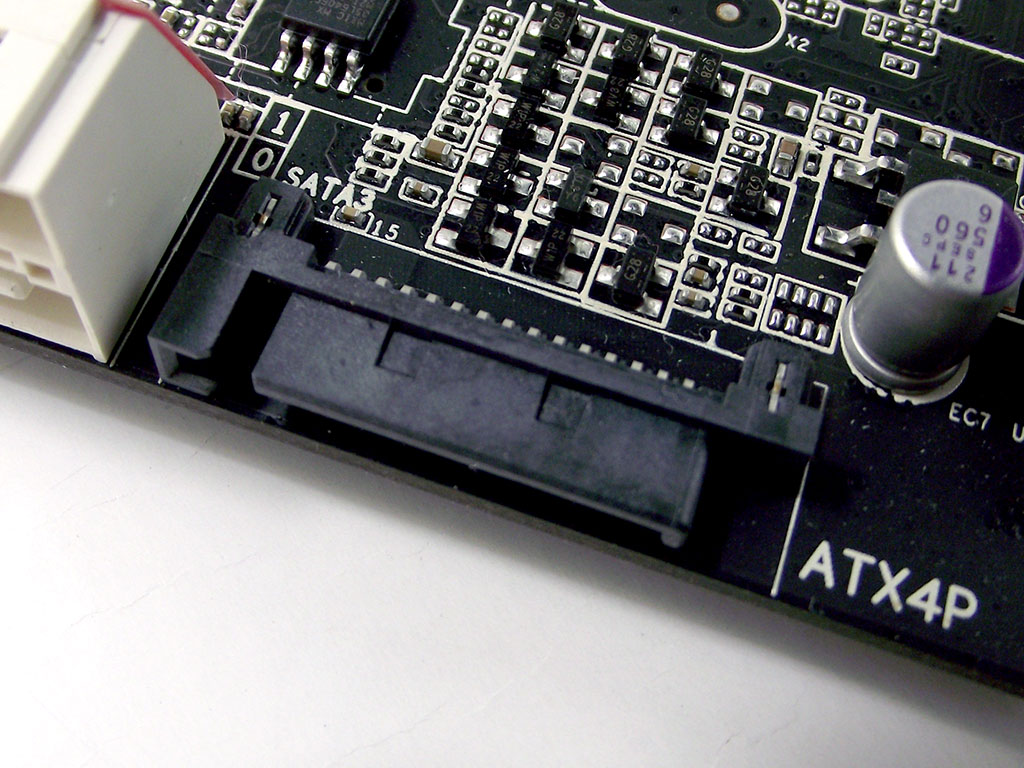
There's an Intel LAN controller, the favorite of many users out there, and another ITE part, an IT8892E driving the legacy PCI slot. Just about an inch above that slot, I found the Marvell 88SE9172 controller which controls the eSATA port and the internal SATA header on the board's bottom edge.
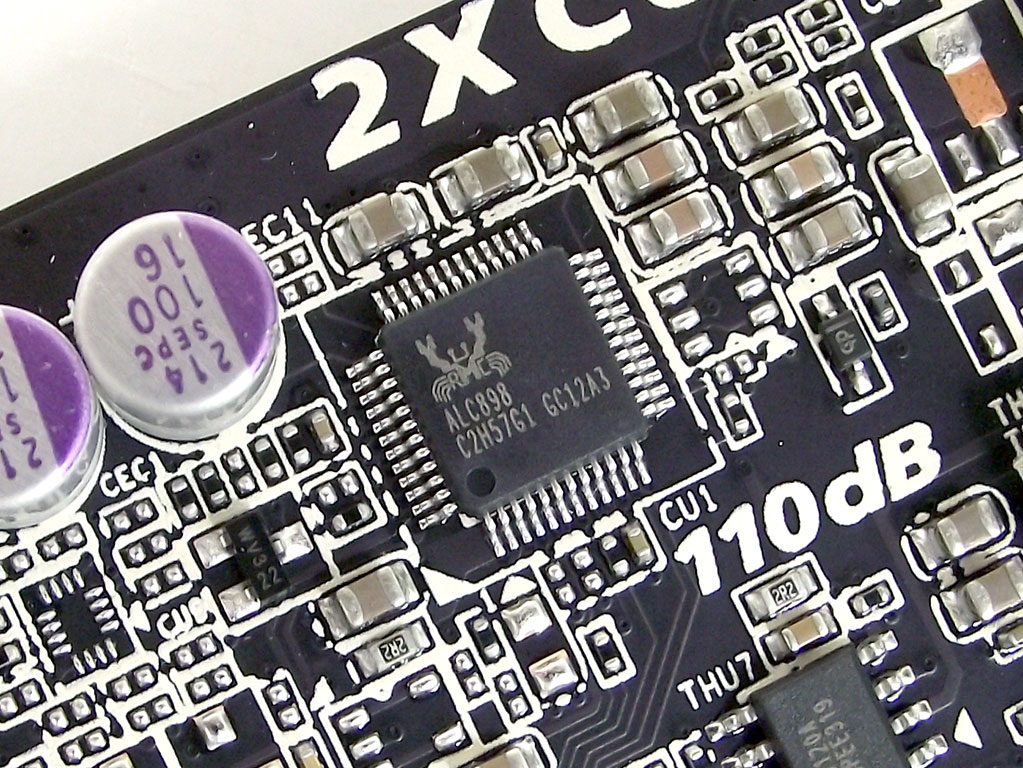
ASMedia provides an ASM1442 TMDS controller for the onboard video ports, while the audio is provided by a very common Realtek ALC898 - a higher-end chip that boasts some pretty decent audio capabilities when paired with good circuit design.
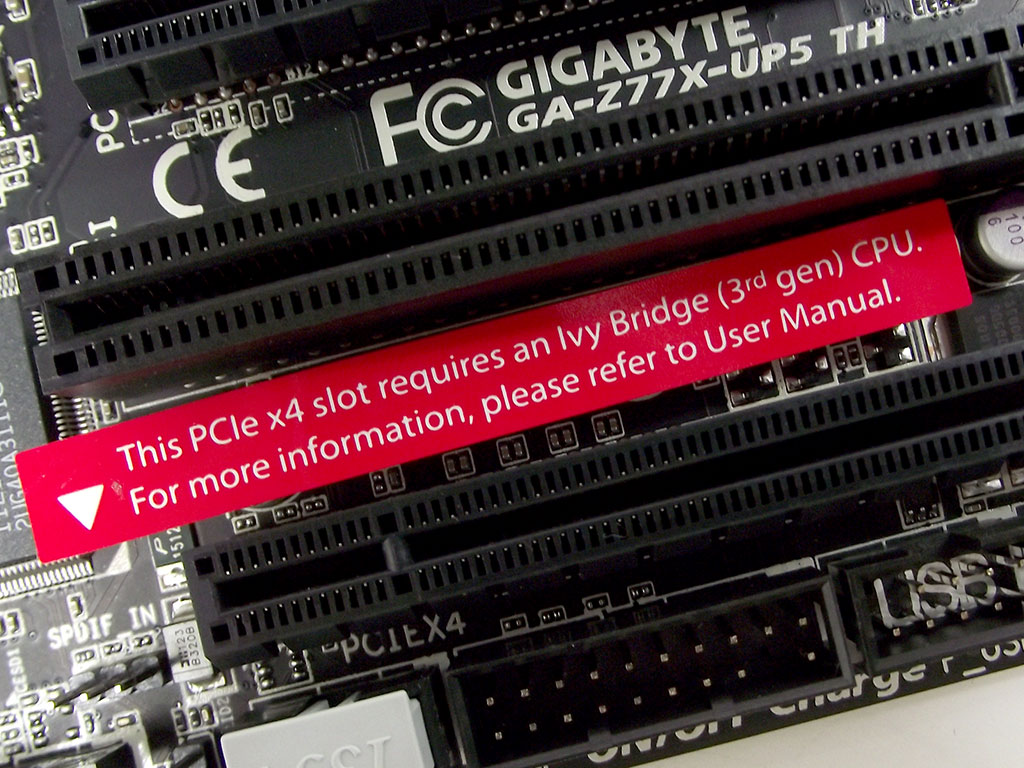
The PCIe configuration offered by the Gigabyte Z77X-UP5 TH is actually pretty simple with, as dictated by platform design, the default configuration of three x16 slots. This means that if you are using a SandyBridge CPU, the very bottom slot will not work, as indicated by the bright red warning label attached to the board just above that slot. With those three slots, some users may install up to three high-end cards. Gigabyte has, as such, equipped the Z77X-UP5 TH with a SATA-type power connector so that the PCIe slots can receive additional power as required.
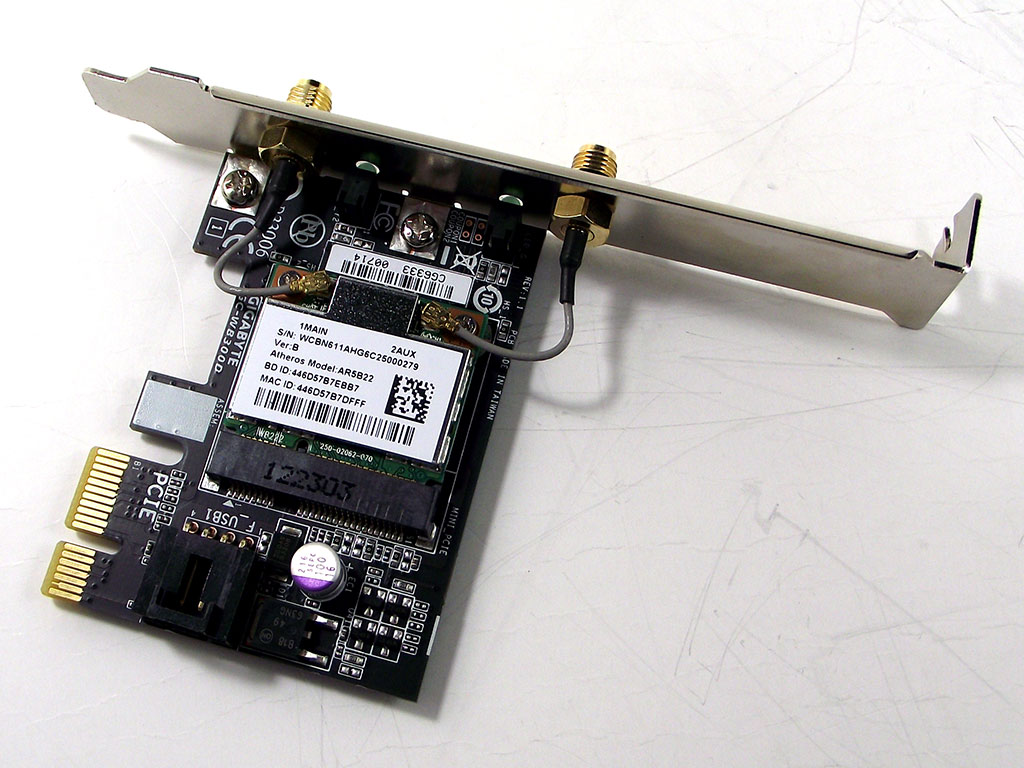
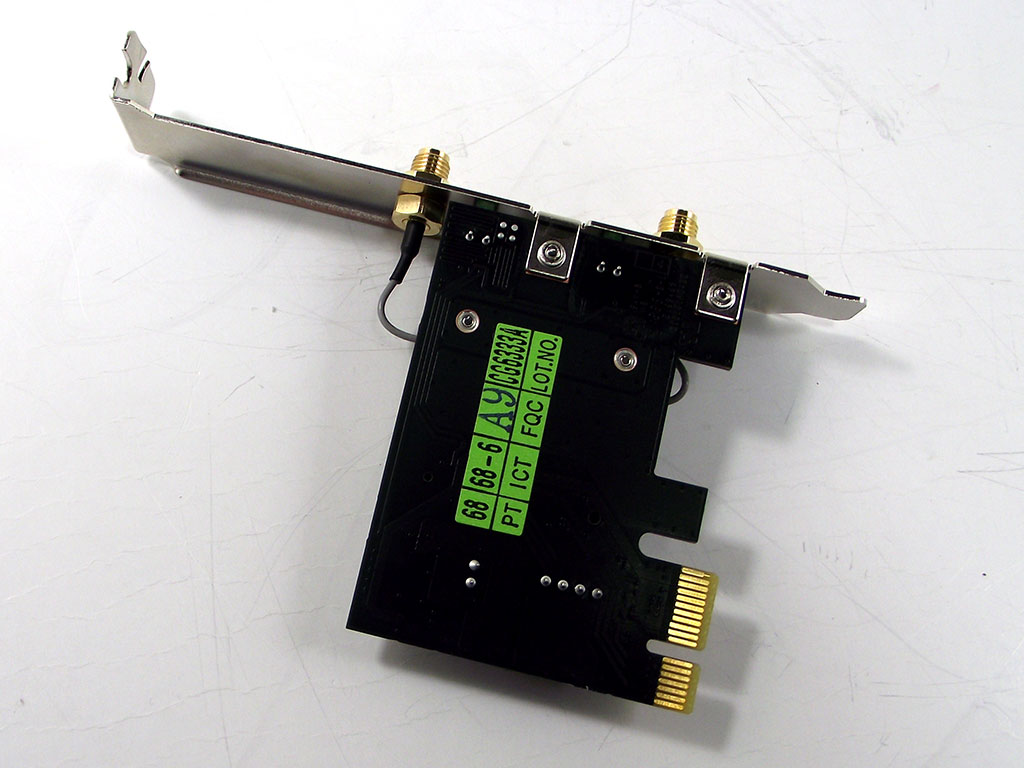
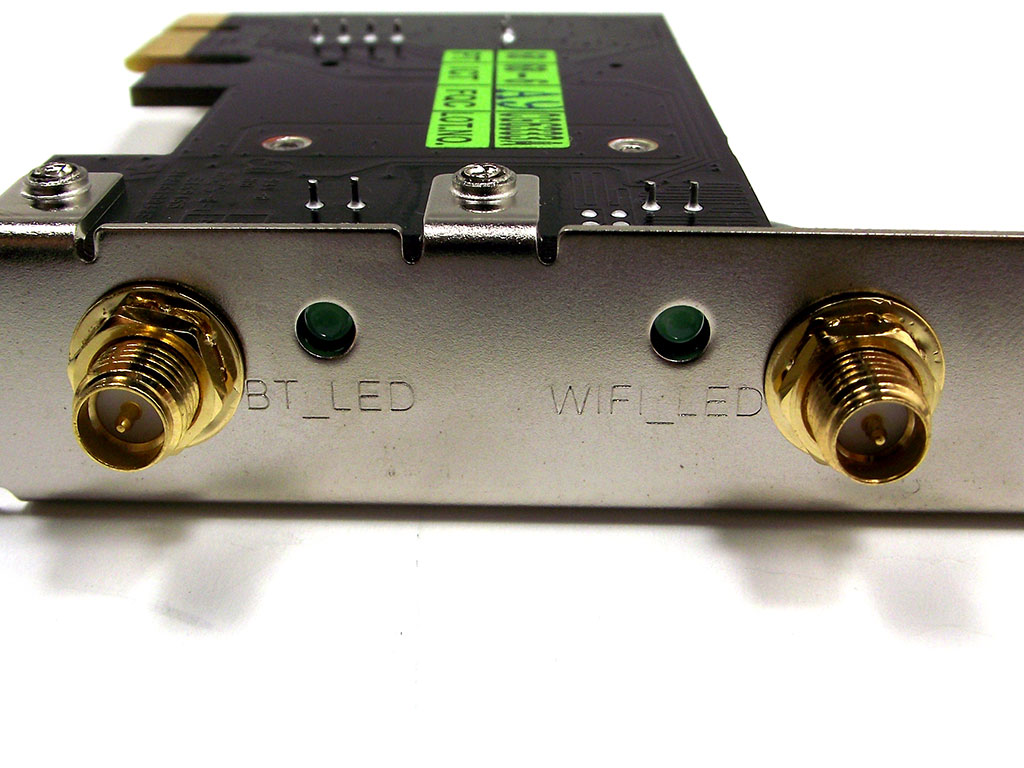
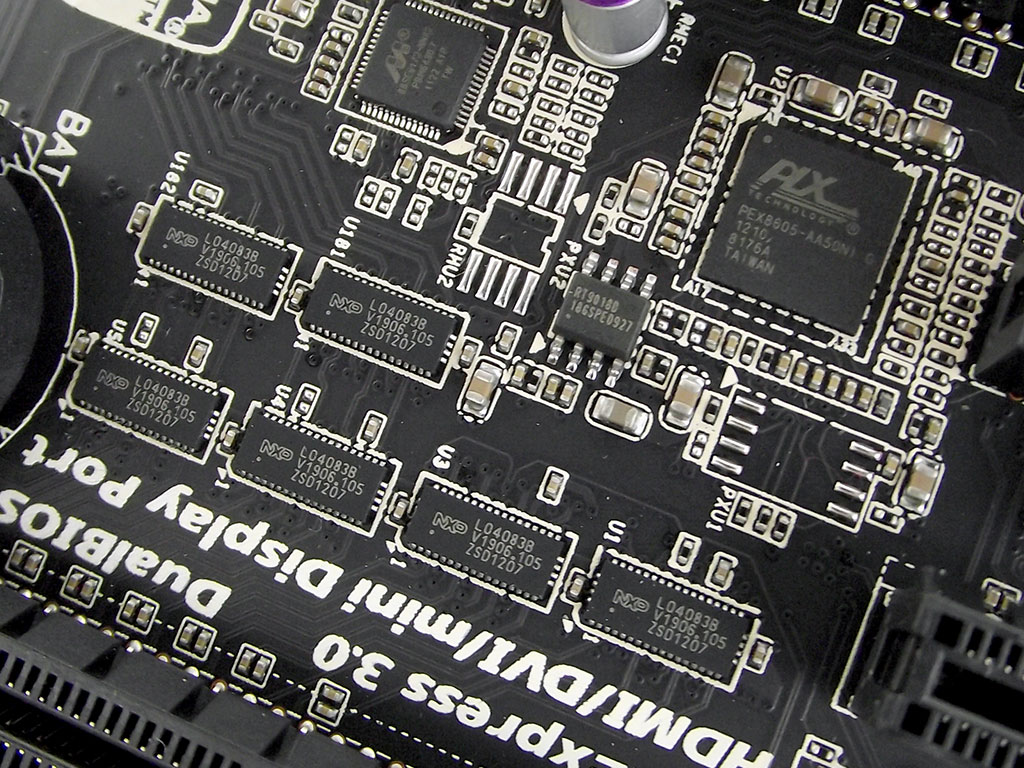
One added functionality this board offers over some others is the inclusion of a separate WiFi/Bluetooth PCIe card which can be used in any system with a PCIe x1 slot. The card included is an updated version to the one with the Gigabyte Z77X-UD5H WB, with a much smaller footprint, as well as slightly different functionality being dual-band. There are indicator lights for both the WiFi and the Bluetooth parts separately, each of which requires its own antenna.
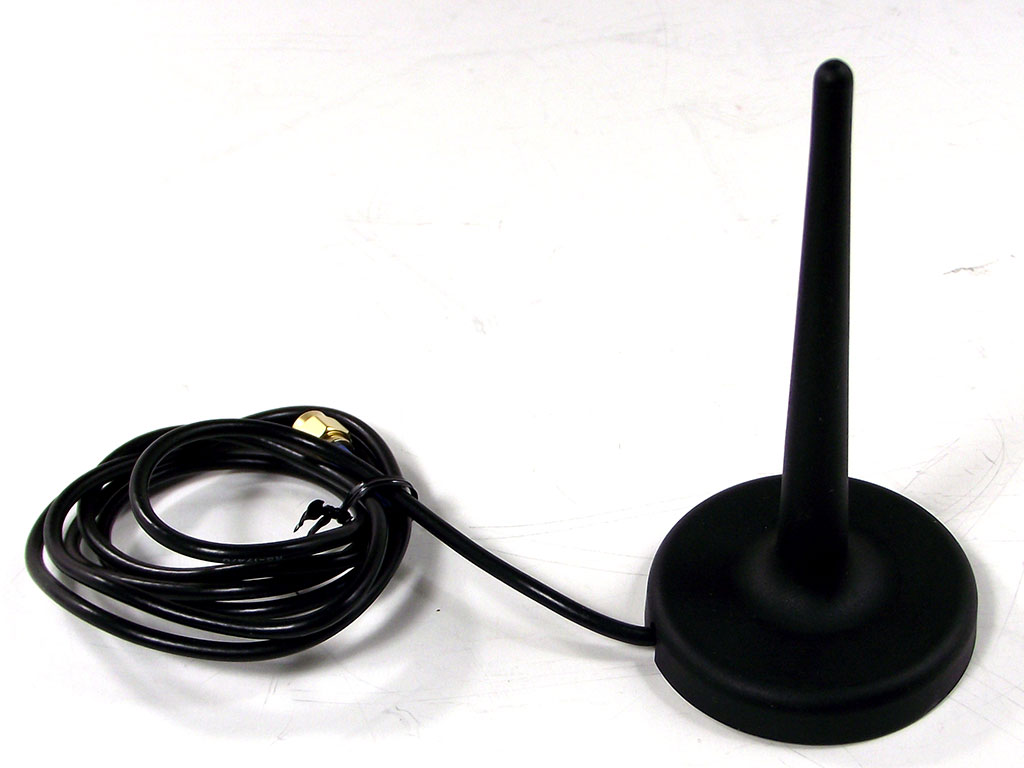
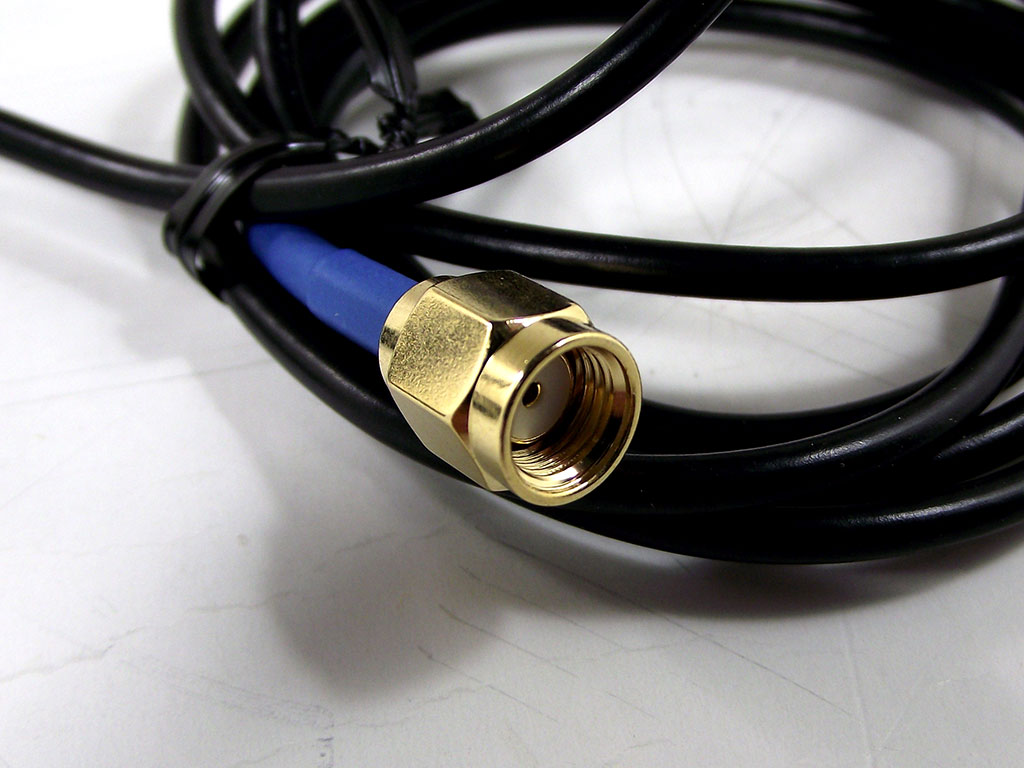
I, of course, found the required antennas in the box. Both attach to the card’s read using an easy-to-use screw-on connector. One thing I'd like to see changed here is for the bases of the antenna to be magnetic; these are just simply weighted.
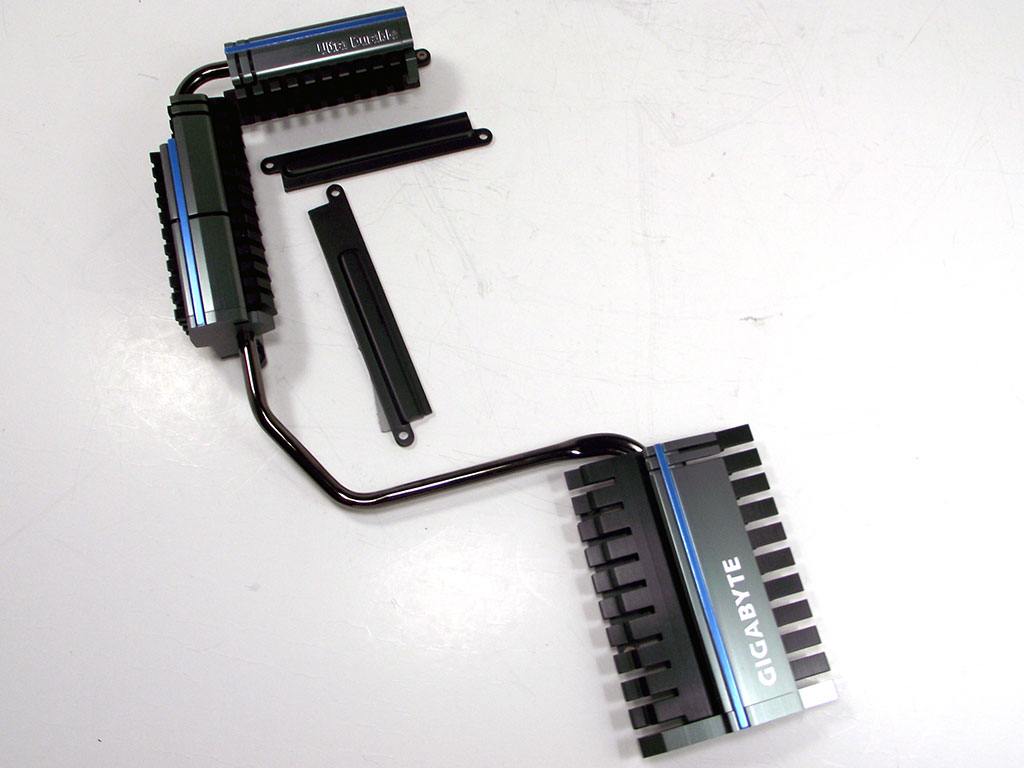
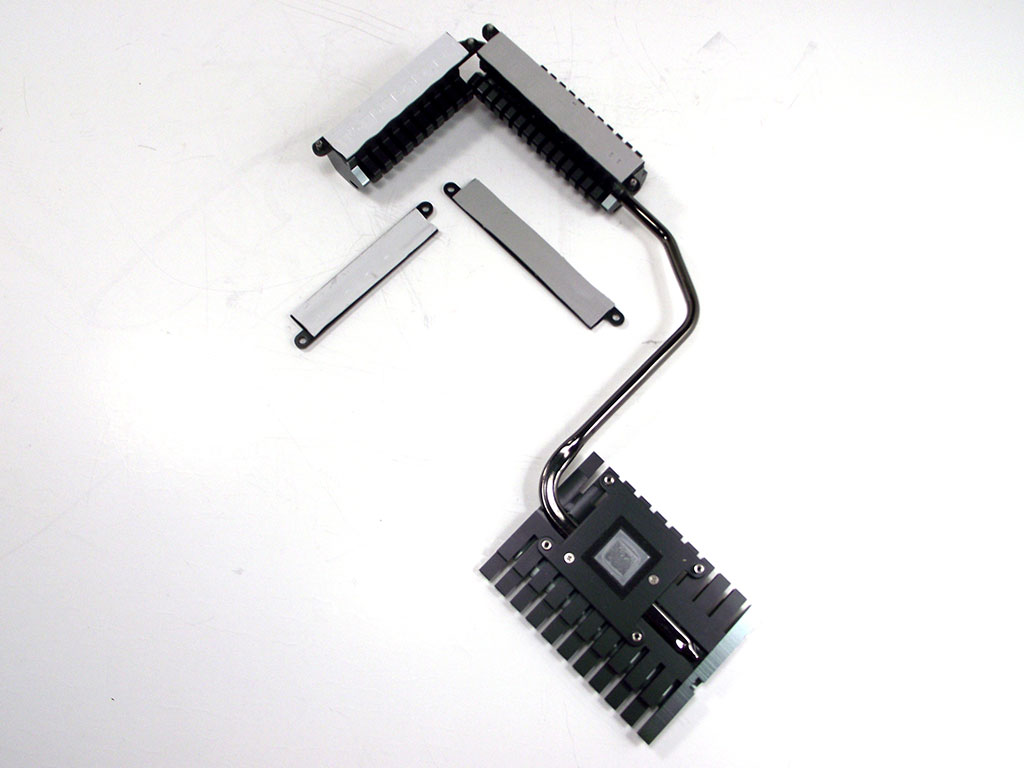
The last part I looked at was the cooler itself. Secured to the board using screws, it's quite easy to remove should you decide to fully watercool the board. This cooler is, on that note, more than adequate for low-airflow or silent builds, as is indicated on the front of the Z77X-UP5 TH's box. I did notice that the cooler made perfect contact with all critical surfaces, and used fairly high-quality thermal paste on the PCH rather than the pink gummy Honeywell stuff I've seen very often.
Gigabyte has certainly taken extra measures to make sure that this board offers more than its UD5H sister. But do those changes come at a price? Let's take a look.
Apr 12th, 2025 03:01 EDT
change timezone
Latest GPU Drivers
New Forum Posts
- 5080 and 5070/Ti cards available at MSRP in the UK (0)
- 9070XT or 7900XT or 7900XTX (189)
- RX 9070 availability (257)
- Can I remove this laptop's battery? Does it require it for the CMOS? (3)
- TPU's Nostalgic Hardware Club (20232)
- Need RTX 40 series (Ada Lovelace) to work in Windows 10 1507 LTSB (110)
- Post your cooling. (233)
- Legion Pro 7 16IRX9H is overheating (16)
- How to view my PC's ACPI settings? (0)
- Razer vBIOS gone wrong (2)
Popular Reviews
- The Last Of Us Part 2 Performance Benchmark Review - 30 GPUs Compared
- Thermaltake TR100 Review
- ASRock Z890 Taichi OCF Review
- Zotac GeForce RTX 5070 Ti Amp Extreme Review
- TerraMaster F8 SSD Plus Review - Compact and quiet
- Acer Predator GM9000 2 TB Review
- Sapphire Radeon RX 9070 XT Pulse Review
- Sapphire Radeon RX 9070 XT Nitro+ Review - Beating NVIDIA
- Upcoming Hardware Launches 2025 (Updated Apr 2025)
- PowerColor Radeon RX 9070 Hellhound Review
Controversial News Posts
- NVIDIA GeForce RTX 5060 Ti 16 GB SKU Likely Launching at $499, According to Supply Chain Leak (180)
- MSI Doesn't Plan Radeon RX 9000 Series GPUs, Skips AMD RDNA 4 Generation Entirely (146)
- Microsoft Introduces Copilot for Gaming (124)
- NVIDIA Reportedly Prepares GeForce RTX 5060 and RTX 5060 Ti Unveil Tomorrow (115)
- NVIDIA Sends MSRP Numbers to Partners: GeForce RTX 5060 Ti 8 GB at $379, RTX 5060 Ti 16 GB at $429 (114)
- Nintendo Confirms That Switch 2 Joy-Cons Will Not Utilize Hall Effect Stick Technology (104)
- Over 200,000 Sold Radeon RX 9070 and RX 9070 XT GPUs? AMD Says No Number was Given (100)
- Nintendo Switch 2 Launches June 5 at $449.99 with New Hardware and Games (99)