 0
0
Hexgears Gemini Dusk Keyboard Review
Software »Disassembly
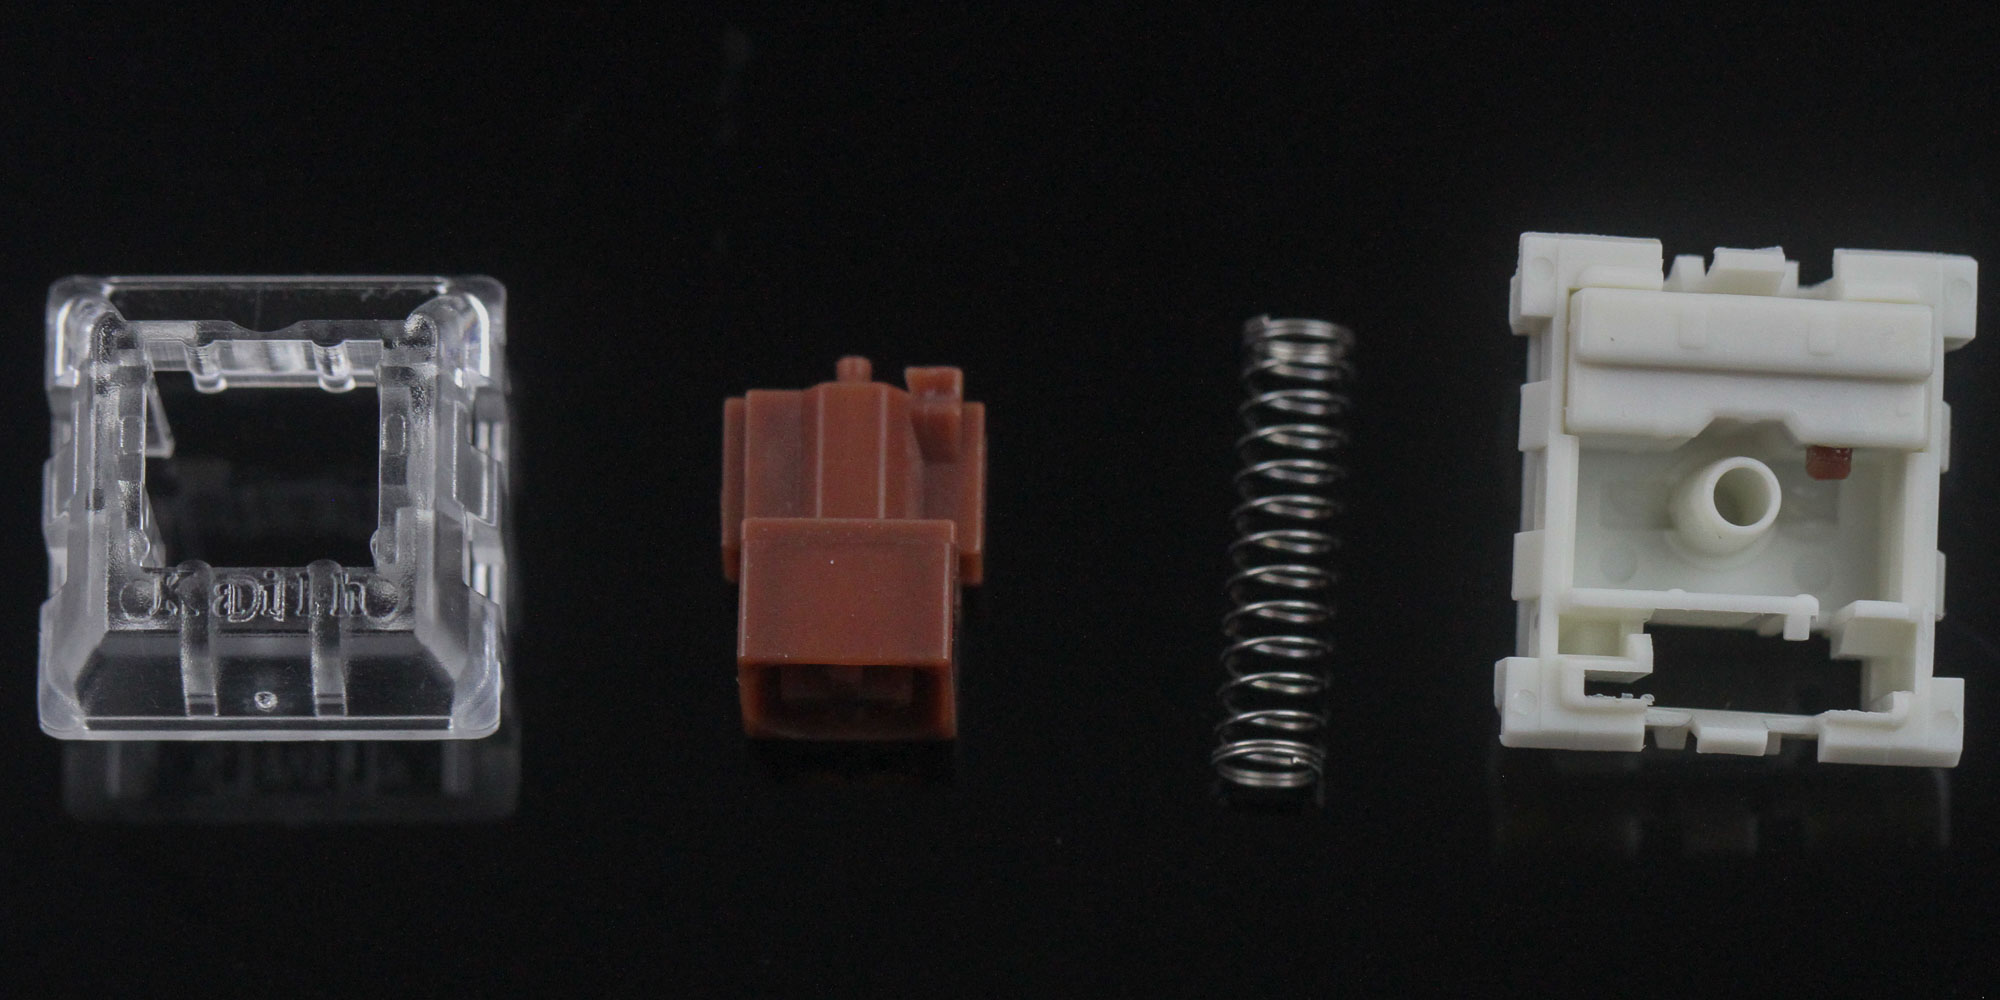
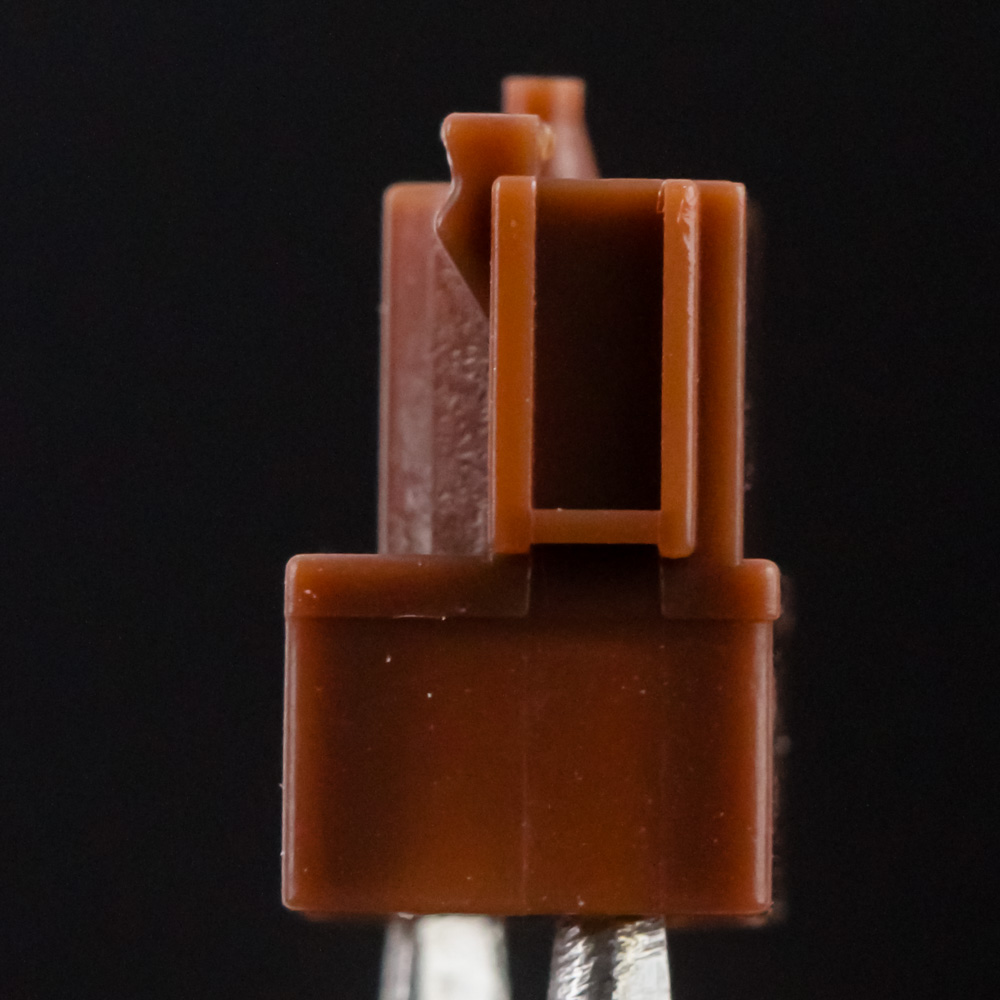


Given we have hot-swappable switches here, why not start by taking one apart? The Kailh BOX Brown is a tactile switch adopting the Cherry MX cross-point stem design with a clear top, brown stem, metal spring, and base housing that also houses the metal leaf contact. But there is more going on, and it is here where we see the BOX in the name come into play. A typical mechanical switch has the stem travel down and touch one side of the metal leaf, which is in turn pushed towards the other side. This metal contact then triggers the actuation of the keystroke on the PCB itself, and off it goes to your computer to be reflected as an action. With the BOX series, Kailh added an intermediate plastic nib called the Active Block that is lubed well, too. The plastic of the stem thus only touches this brown plastic nib, which pushes the moving metal plate onto the stationary metal plate for actuation. The tactile feedback is also with the plastic nib itself, reducing the contact with the metal leaf for longevity. What it also does is allow decoupling of the feedback mechanism from the actuation mechanism, though it is far more separate with clicky switches that employ a click bar on the other side of the housing.

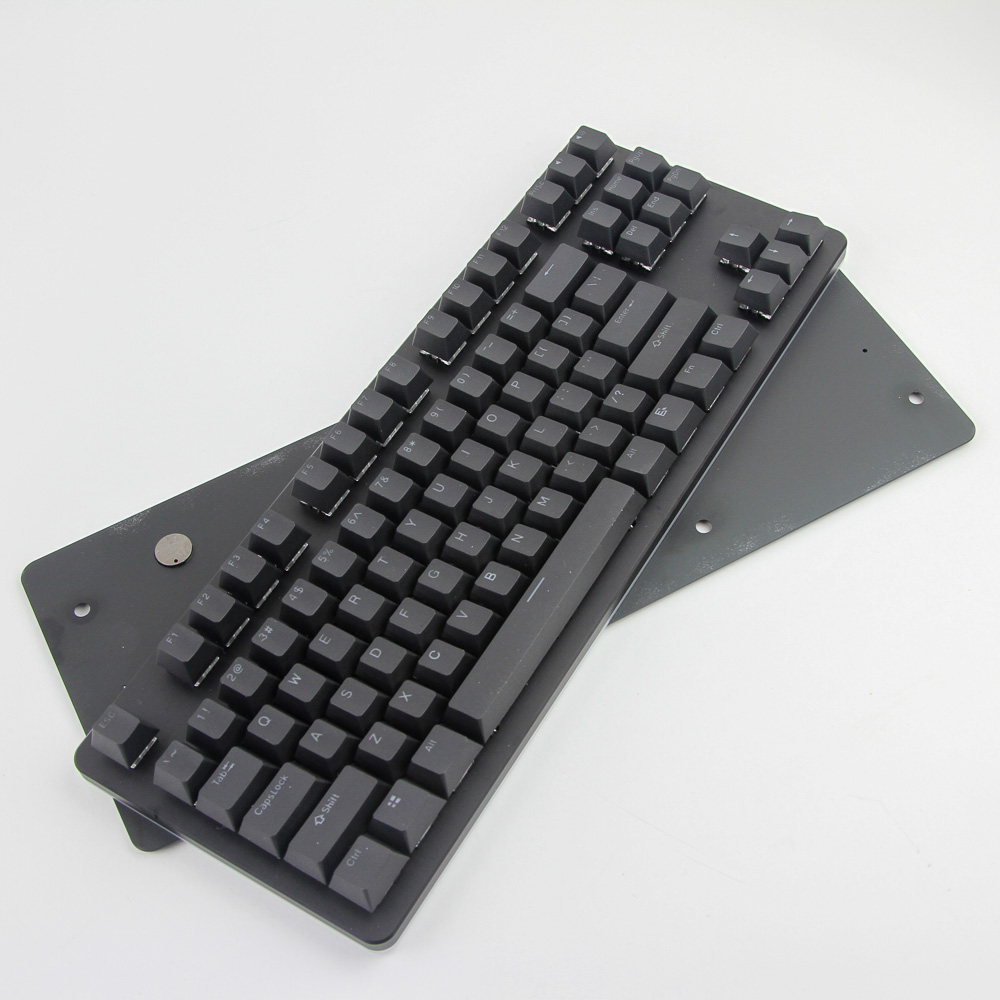

Disassembly of the Hexgears Gemini Dusk is on the simpler side of things owing to the use of eight screws on the back. You need a 3.0 mm Allen key, and taking them off shows the industrial design at play even more. The bottom "case" is just a plate, and CNC machined aluminium at that. It gets a black anodized layer, and the finish on the inside is not as complete as on the outside for practical reasons. You will still feel the same rougher, matte finish on both sides, with the top frame/plate piece in a similar state. This is not a complaint as much as just making sure readers are aware of it; design and material choice are done on purpose and feel quite good to me. We also see magnets on the bottom panel, which came in handy when the add-on foot was used.
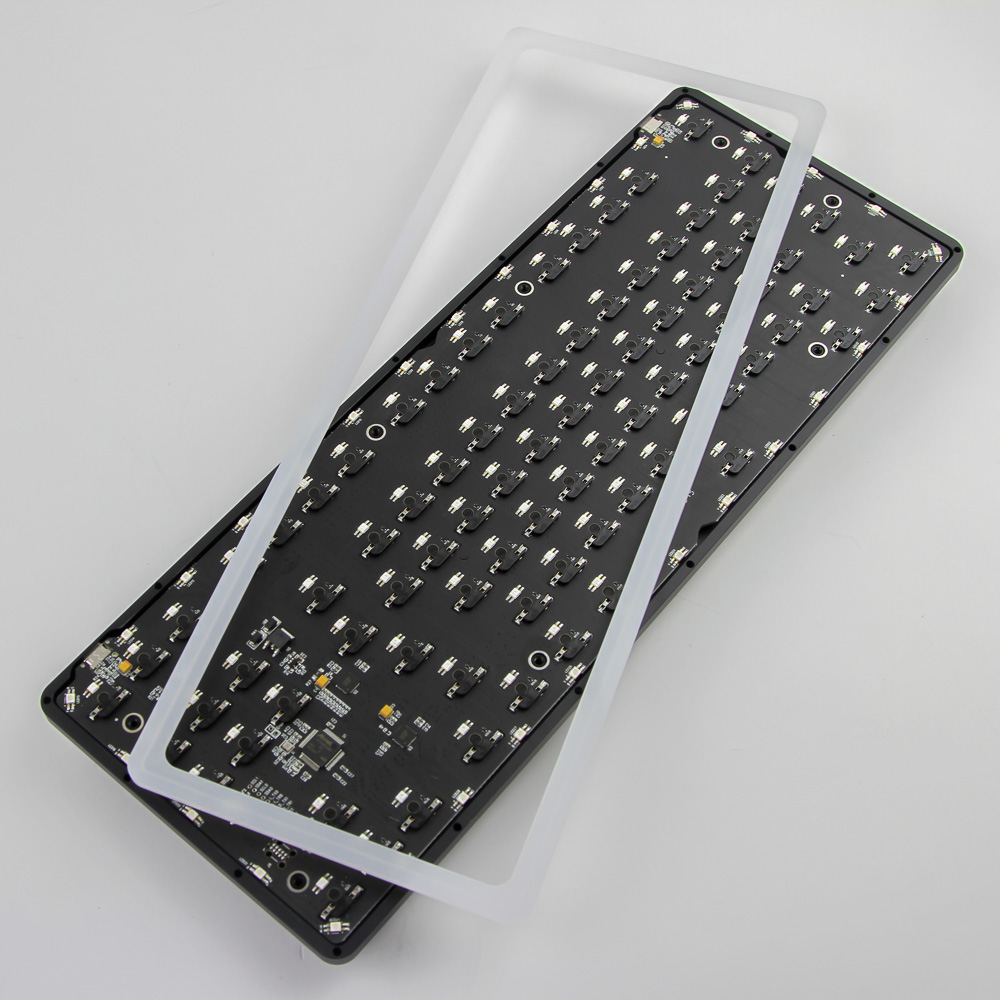

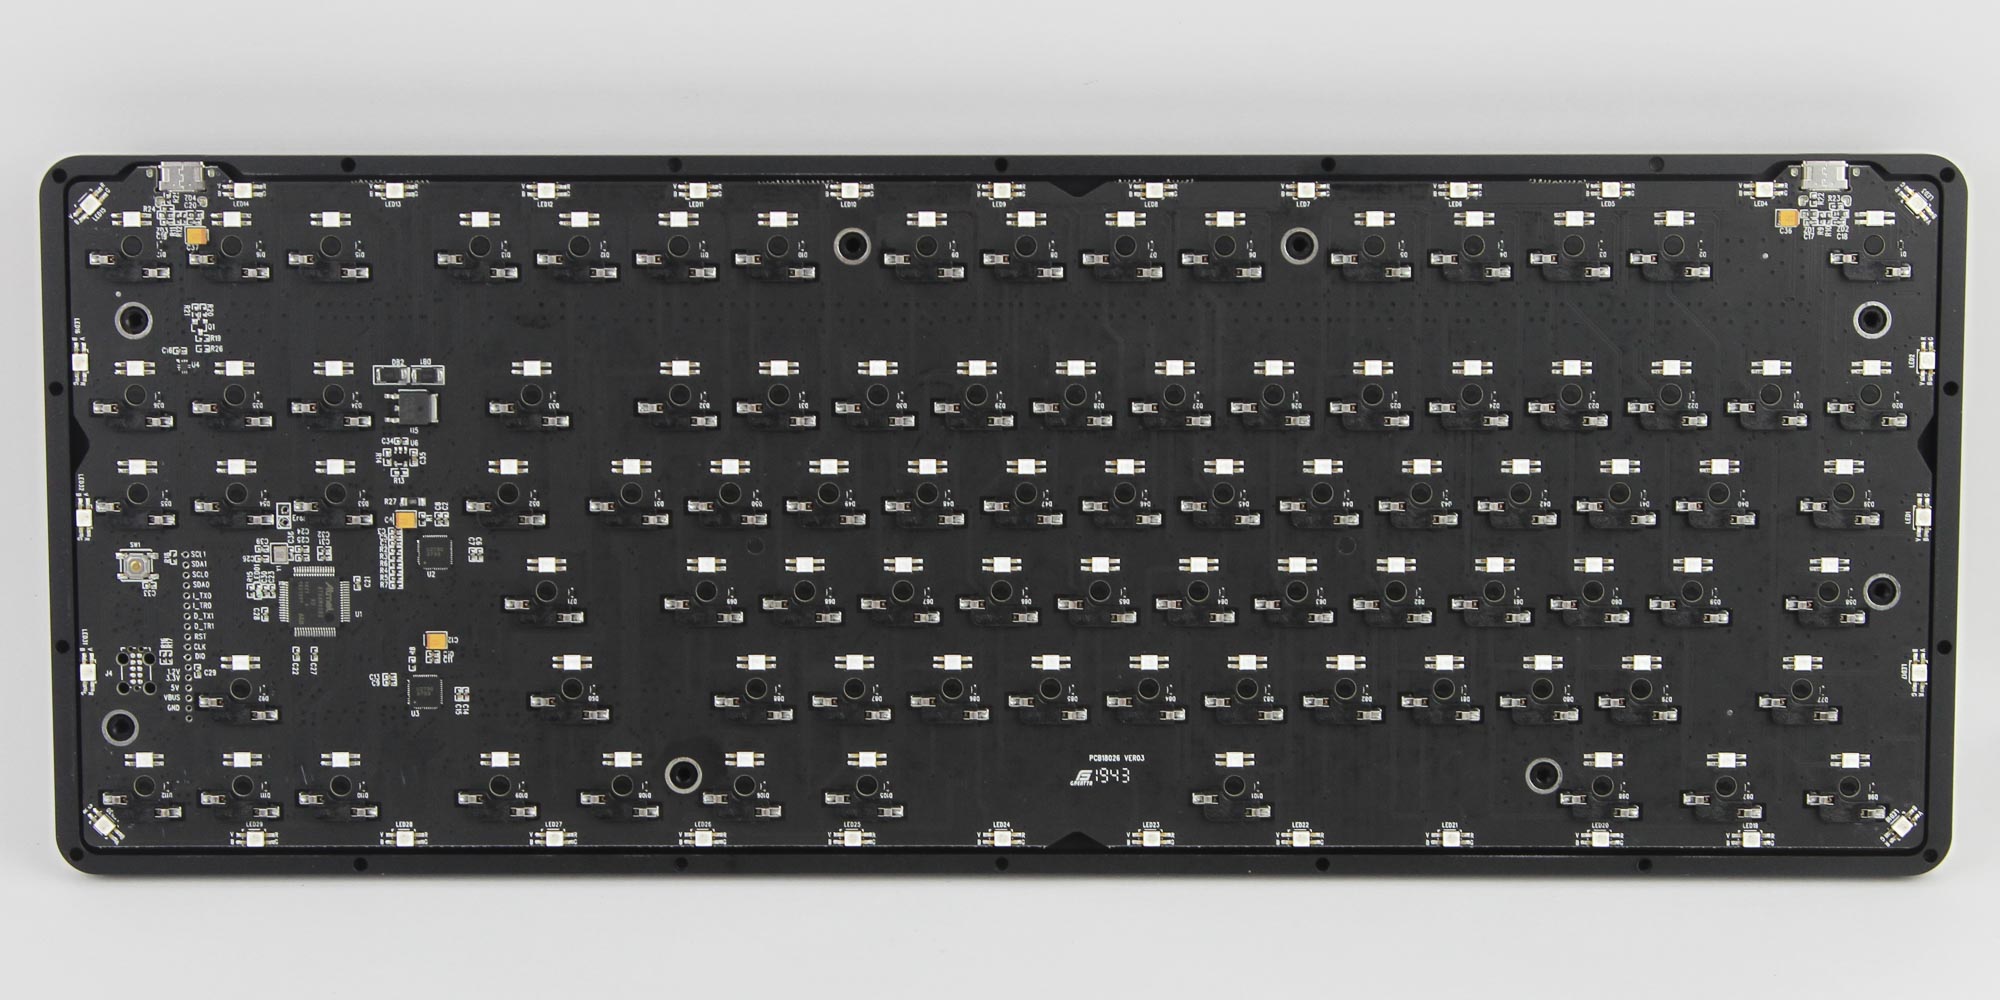
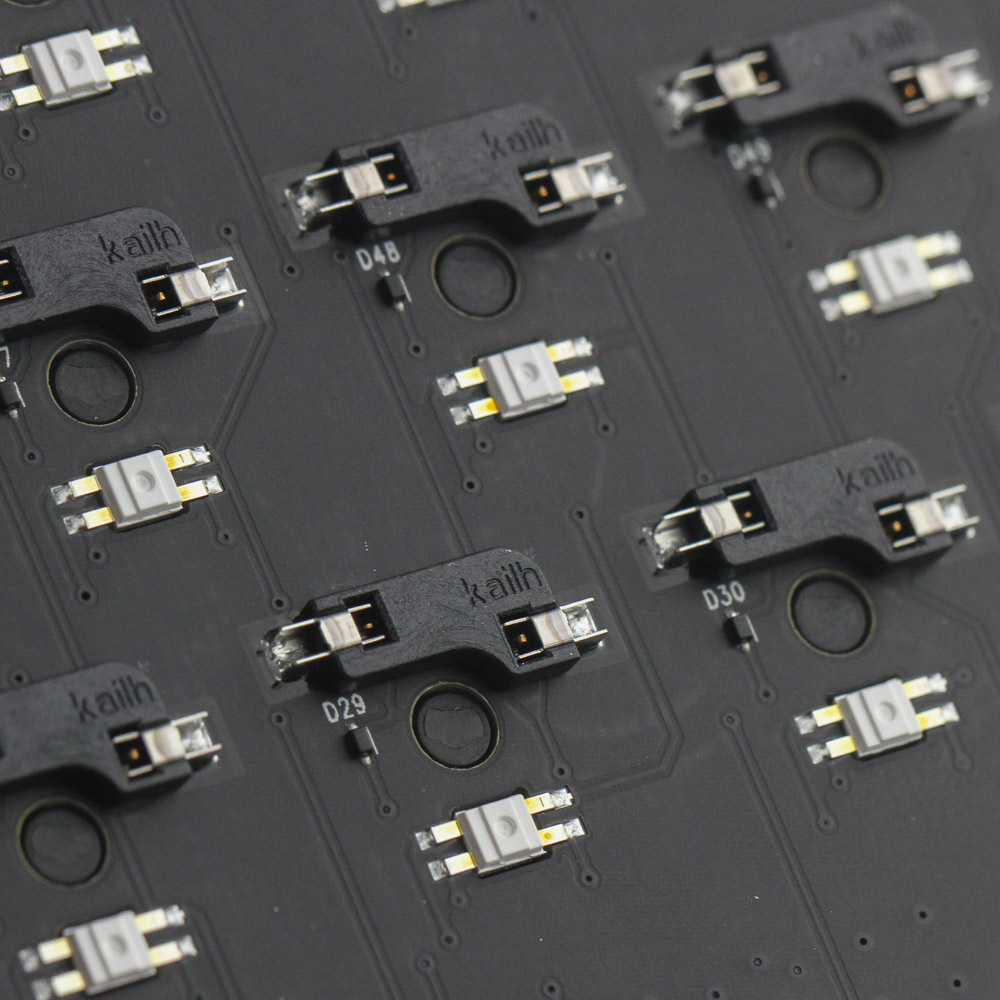
Removing the plastic diffuser trim that goes around the edges of the keyboard is easy enough since it is just held in place by push-pins slotting into their respective holes in the aluminium alloy frame. We also have 32 RGB LEDs around the edge on the PCB, including four oriented at a 45° angle to the corners for side lighting, rather than just having residual lighting from the LEDs for backlighting alone. The PCB is also black and melds in with the frame around it. You can separate the PCB from the frame which doubles as the plate by removing all the keycaps. There was no reason for me to do so here since accessing the hardware doesn't require any further disassembly.
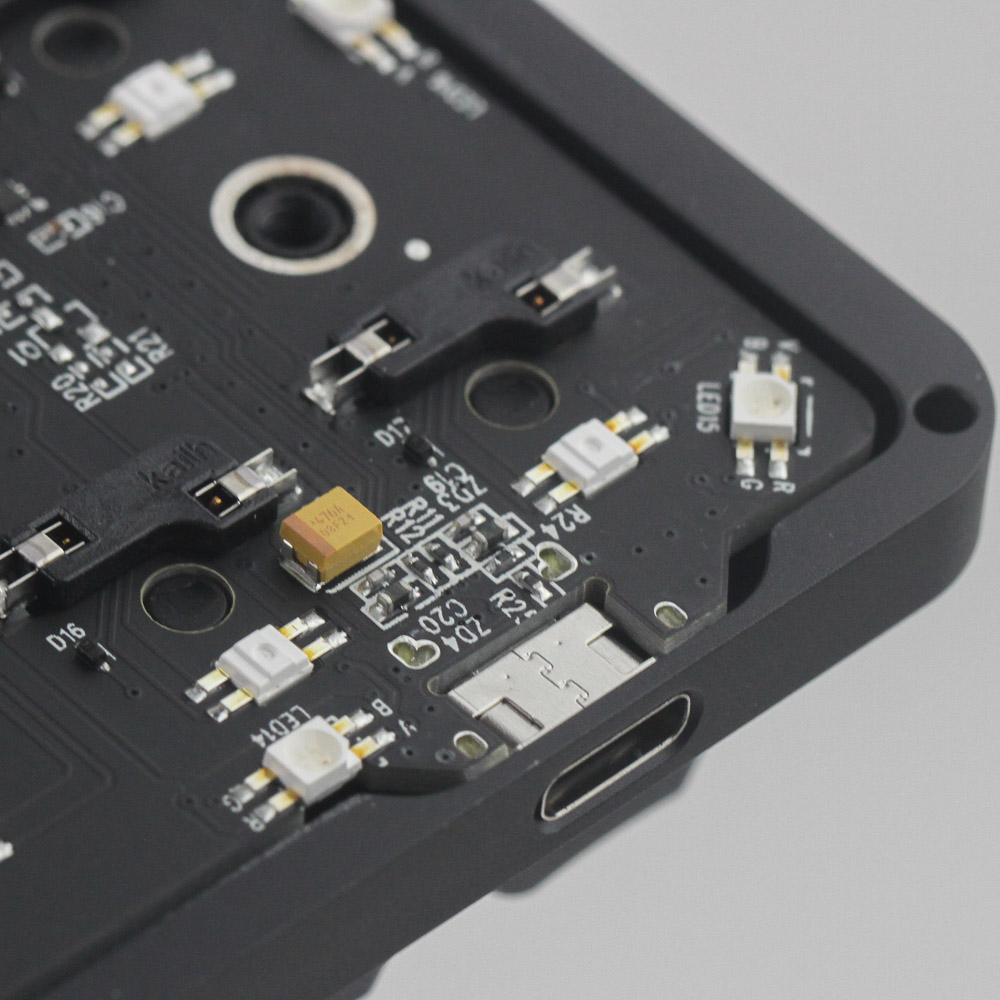
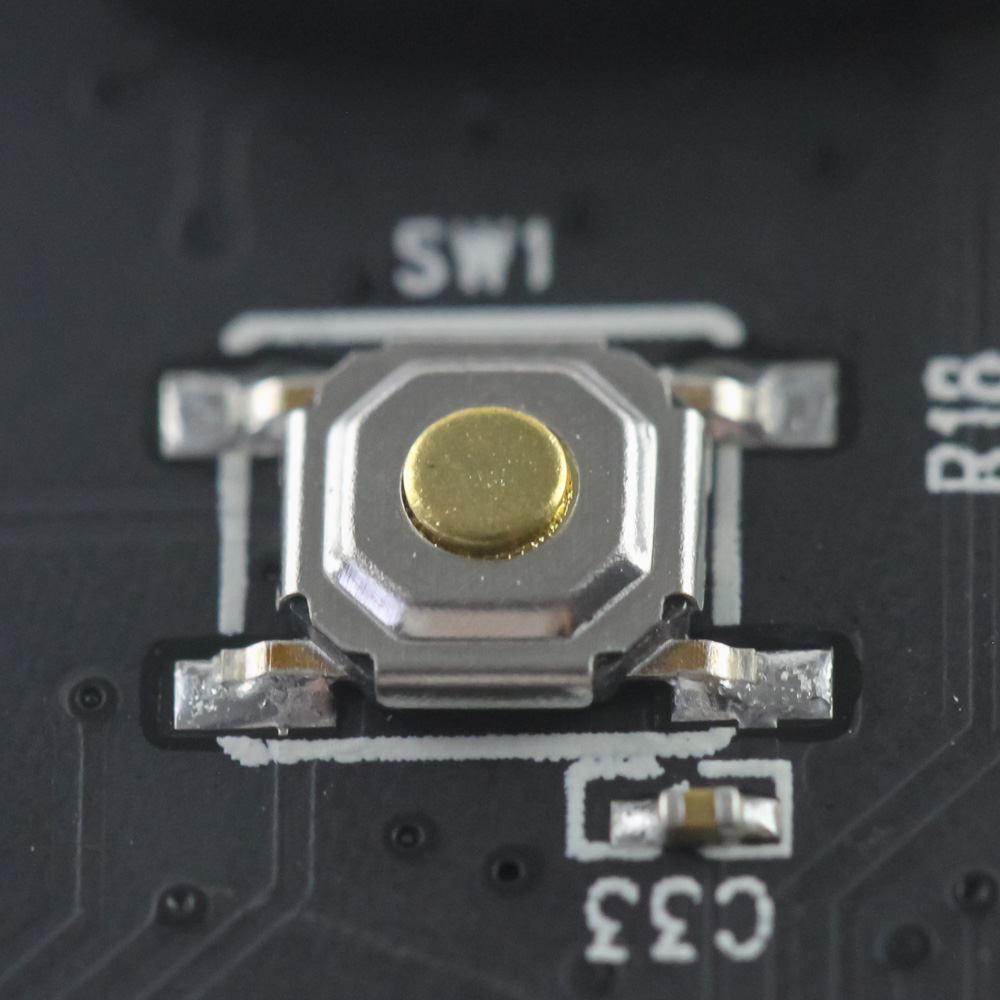
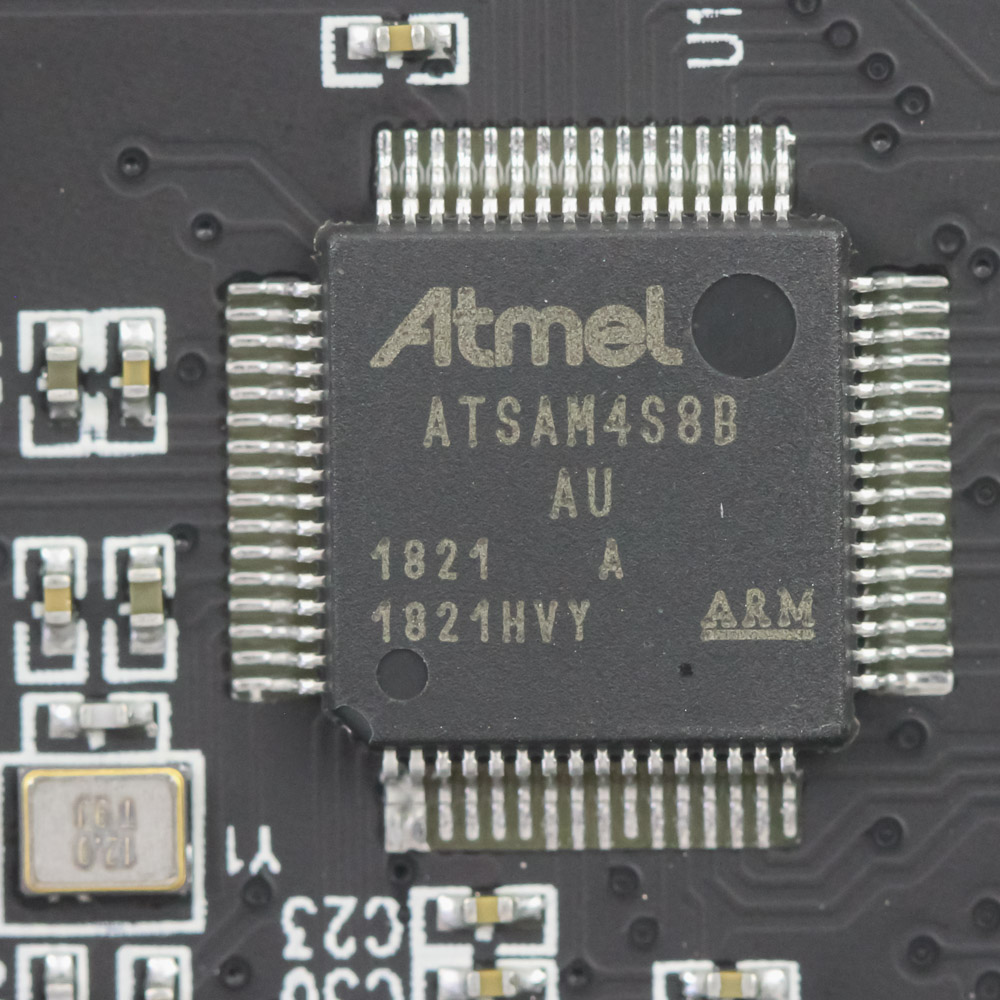
Solder quality is exceptional throughout, including for the two Type-C connectors feeding off the same USB control system. See that button on the left? There is a small hole in the bottom panel to access it, and you might well become good friends once you've read through the next page. It's not a reset button in the traditional sense, but, rather, a firmware flash button of sorts. Powering the keyboard is a Microschip Atmel ATSAM4S8B ARM Cortex-M4 USB microcontroller, which is a nice update from all the M3 architecture chips used in most keyboards. It has 512 KB of flash memory, 128 KB SRAM, and 16 KB ROM that all get put to good use with the programming options available. As is the norm, all the components are soldered onto a multi-layer PCB.
Before we move on, be advised that disassembly may void the warranty and that TechPowerUp is not liable for any damages incurred if you decide to go ahead and do so anyway.
Mar 4th, 2025 11:20 EST
change timezone
Latest GPU Drivers
New Forum Posts
- TPU's Rosetta Milestones and Daily Pie Thread (2228)
- WD Black or Gold for Gaming (10TB) (15)
- Just a rant about AMD and their so-called "foolproofness" (133)
- Oh boy here we go again...potential X3D woes (27)
- Microcenter GPU Stock status (18)
- Folding Pie and Milestones!! (9408)
- AMD Path Tracing Toyshop Demo (10)
- Will I benefit from changing the thermal pad? (1)
- Cryptocoin Value and Market Trend Discussion (1614)
- Windows 11 General Discussion (5780)
Popular Reviews
- AMD Radeon RX 9070 Series Technical Deep Dive
- NVIDIA GeForce RTX 5070 Founders Edition Review
- EIZO FlexScan EV4340X Review - A Multitasking Powerhouse
- ASUS GeForce RTX 5070 Ti TUF OC Review
- RAWM ES21M Review
- AMD Ryzen 7 9800X3D Review - The Best Gaming Processor
- be quiet! Pure Base 501 DX Review
- MSI GeForce RTX 5070 Ti Vanguard SOC Review
- MSI GeForce RTX 5070 Ti Ventus 3X OC Review
- ASUS ROG Harpe Ace Mini Review
Controversial News Posts
- NVIDIA GeForce RTX 50 Cards Spotted with Missing ROPs, NVIDIA Confirms the Issue, Multiple Vendors Affected (513)
- AMD Plans Aggressive Price Competition with Radeon RX 9000 Series (277)
- AMD Radeon RX 9070 and 9070 XT Listed On Amazon - One Buyer Snags a Unit (260)
- AMD Mentions Sub-$700 Pricing for Radeon RX 9070 GPU Series, Looks Like NV Minus $50 Again (248)
- NVIDIA Investigates GeForce RTX 50 Series "Blackwell" Black Screen and BSOD Issues (244)
- AMD RDNA 4 and Radeon RX 9070 Series Unveiled: $549 & $599 (234)
- AMD Radeon RX 9070 and 9070 XT Official Performance Metrics Leaked, +42% 4K Performance Over Radeon RX 7900 GRE (195)
- AMD Radeon RX 9070-series Pricing Leaks Courtesy of MicroCenter (158)