 15
15
Montech Fighter 400 Review
Assembly & Finished Looks »A Closer Look - Inside
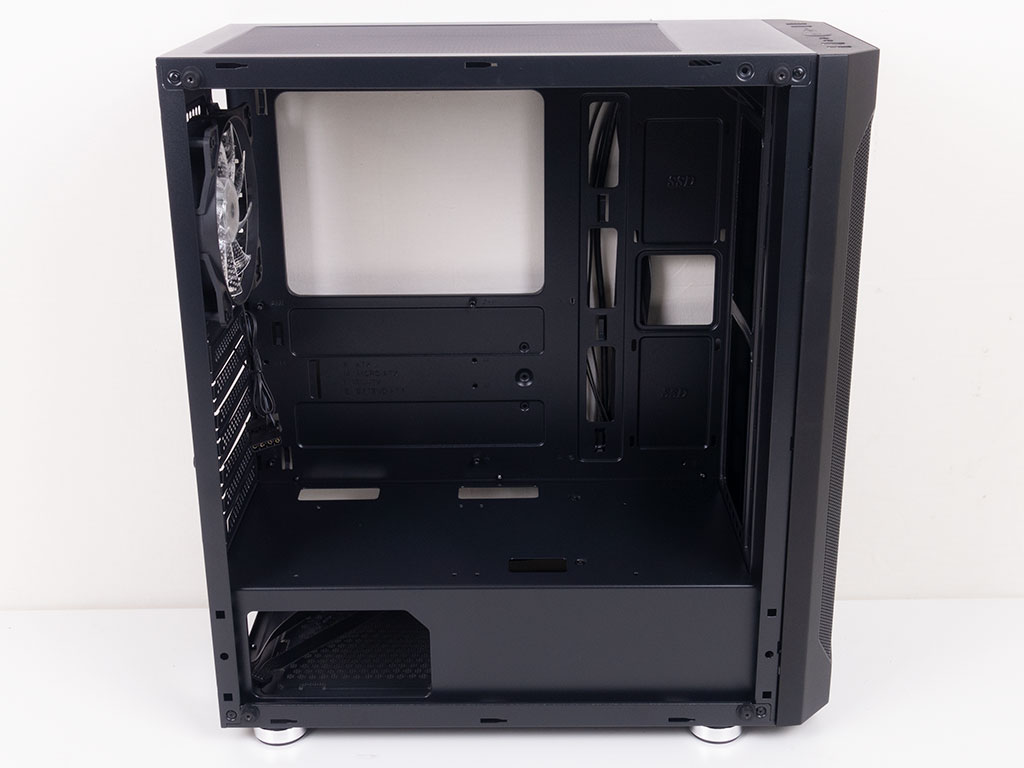
To access the interior, simply remove the thumb screws holding each panel in place. The metal shroud inside the case is certainly a nice touch given the retail price of the enclosure. Here, you may for some unknown reason install two 120 mm fans if you like. Montech even provides the screws, but as the shroud offers no openings, there is essentially no point. However, considering the low cost of the chassis, one cannot expect to get extras like additional SSD trays, so in reality, this is no real loss, either.

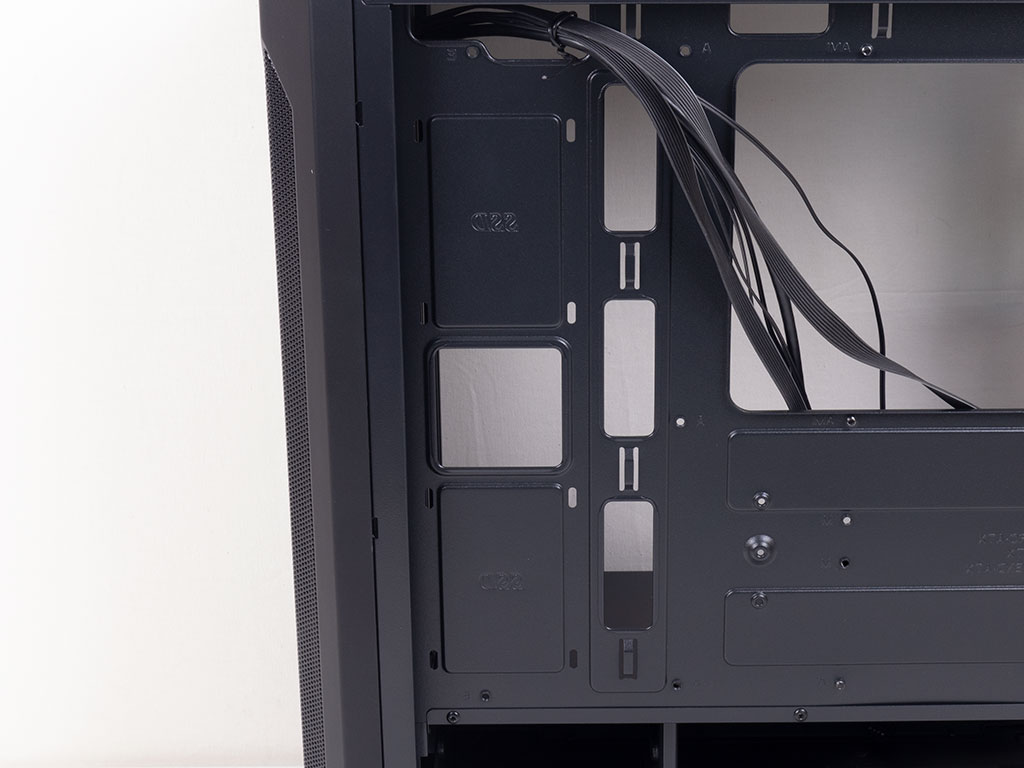
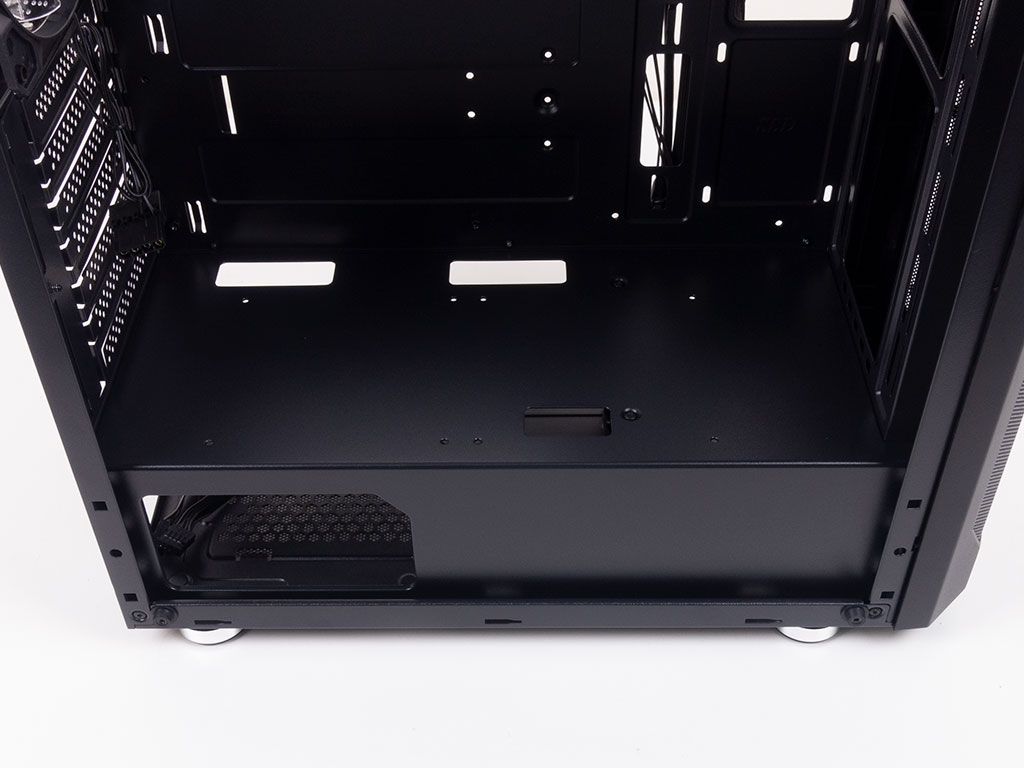
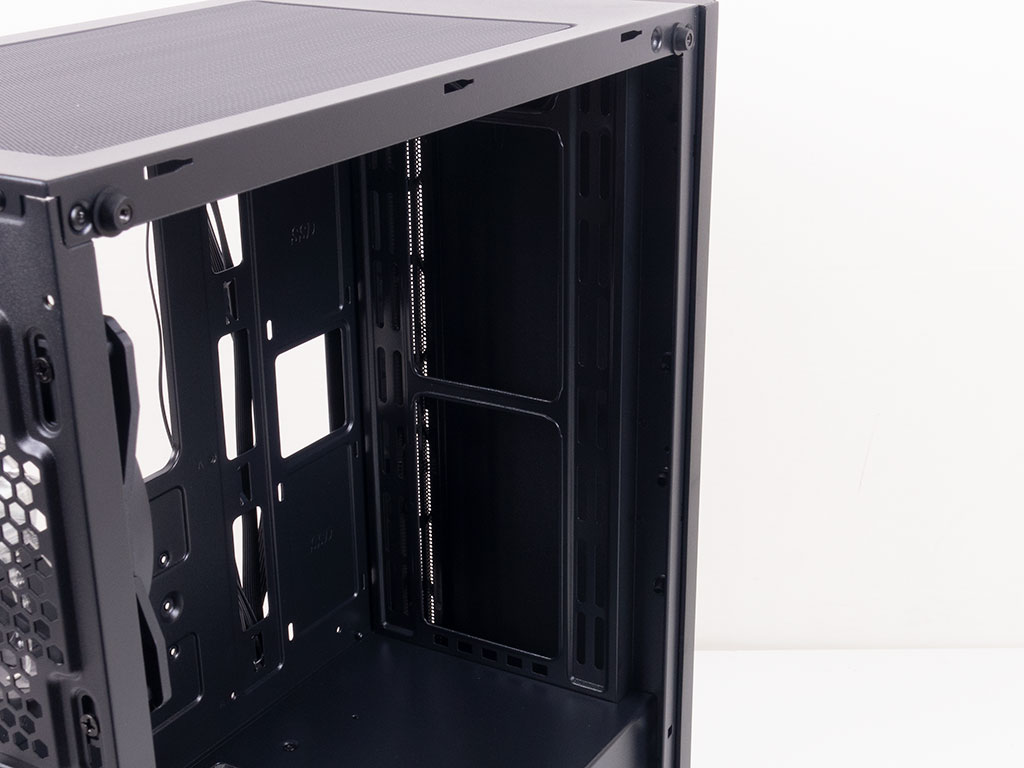
On the backside of the motherboard tray are some well-placed, large hooks for zip ties around the center, but I would have loved to see some more towards the front of the enclosure as well. None of the openings come with grommets, which may again be forgiven considering the price point of the Fighter 400. On the upside, all the cutouts are well placed and should be pretty useful for cable management. You may install two SSDs to show off on the motherboard tray, with a large opening between them for cable routing.
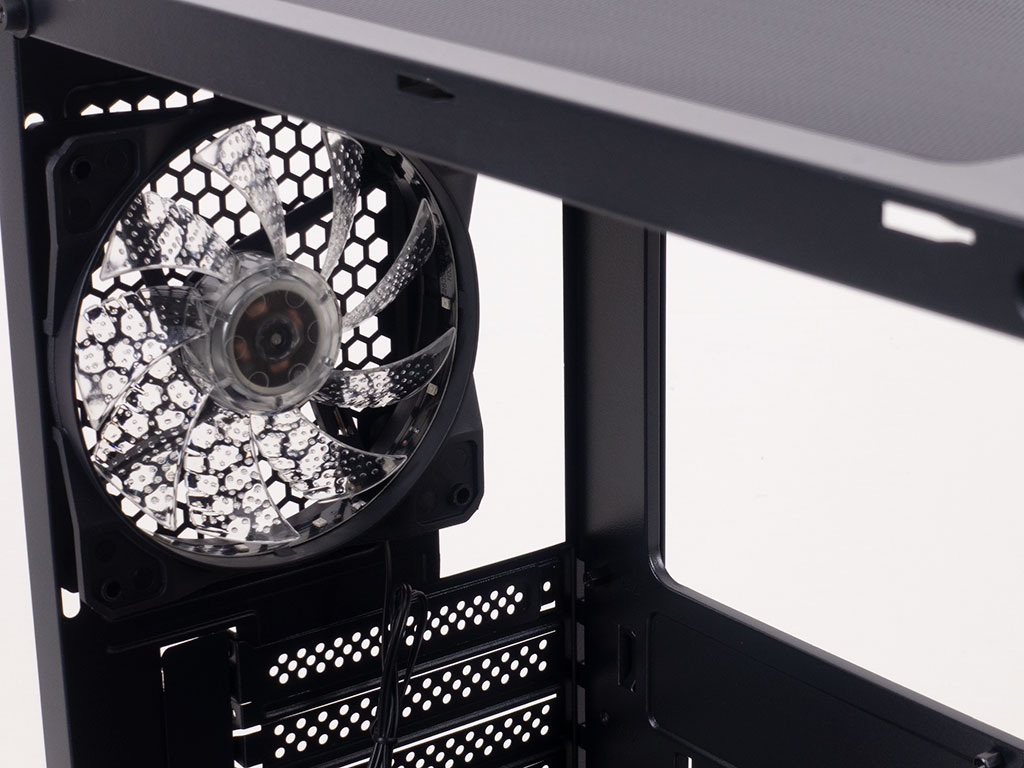
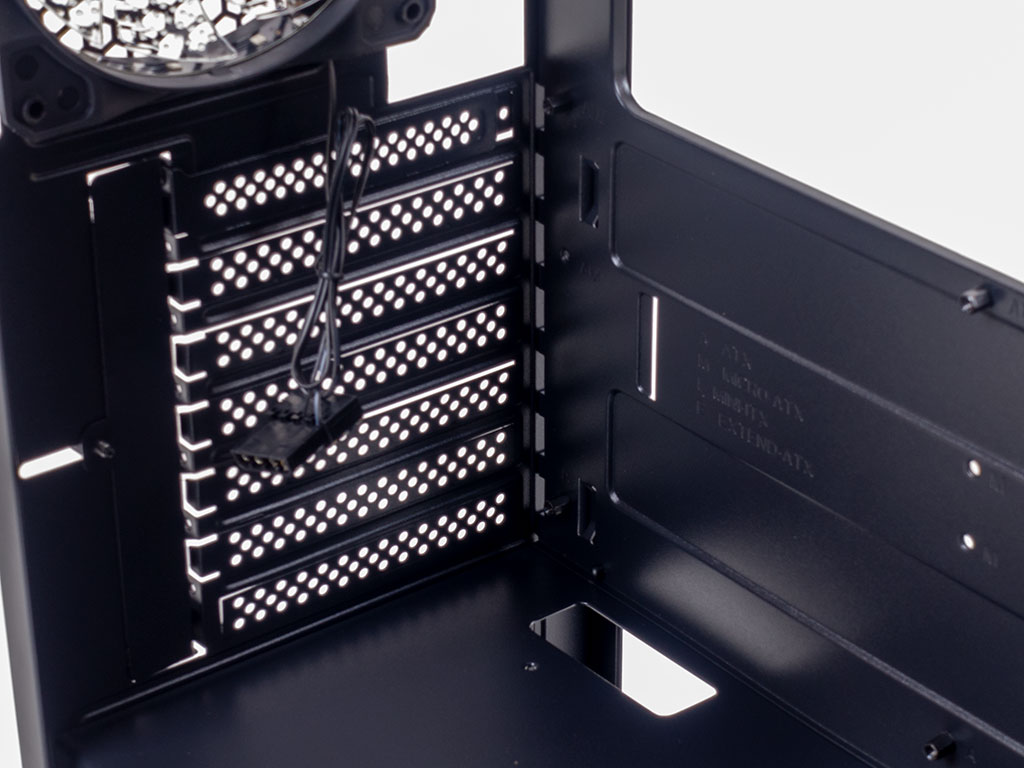
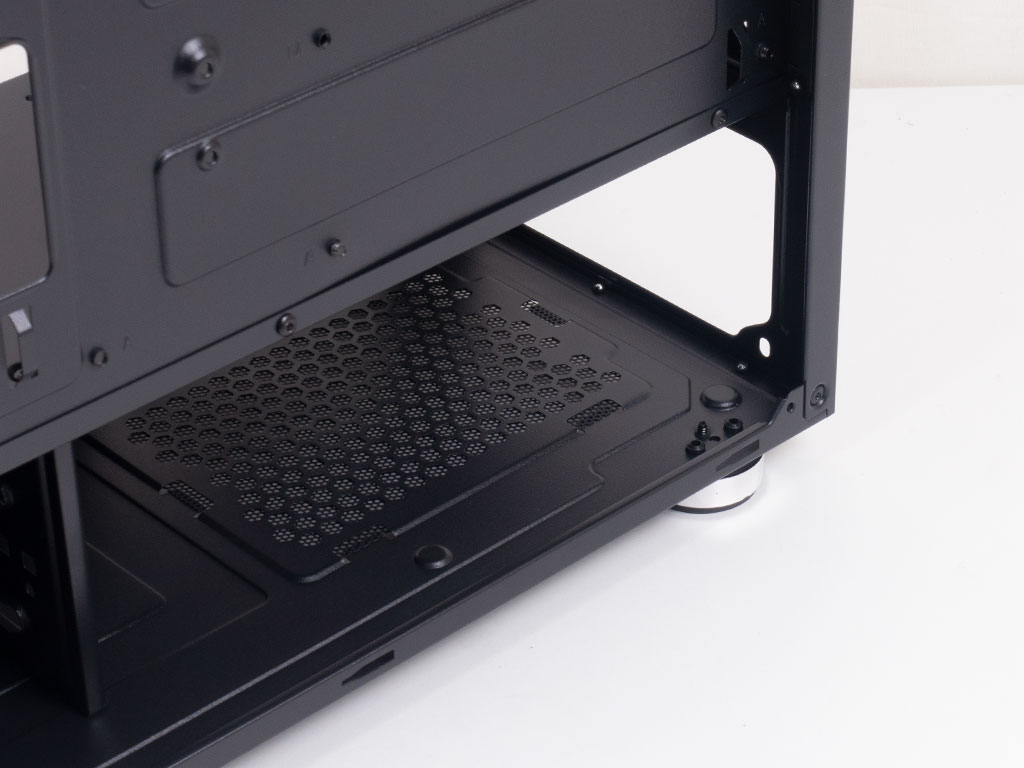
While the 120 mm exhaust fan in the rear is not quite the boring black OEM unit, it is not retail-grade either. While the dimples and LEDs are a nice touch, especially considering the window, the whole fan utilizes a Molex connector for power, which means it will run at full throttle no matter what the load of your system. Instead, it would have been nice to at least see a 3-pin split from the Molex for fan speed control, or, even better, having a better RGB fan that is powered by a single 3-pin header instead. I would have also preferred two basic black fans with 3-pin headers instead of one tricked-out variant. Below that are the seven expansion slots. Underneath the shroud, the PSU bay is quite basic, also lacking any kind of foam or rubber tips as an anti-vibrations measure. But let's be real for a second: odds are extremely high PSU vibrations won't be an issue anyways these days.
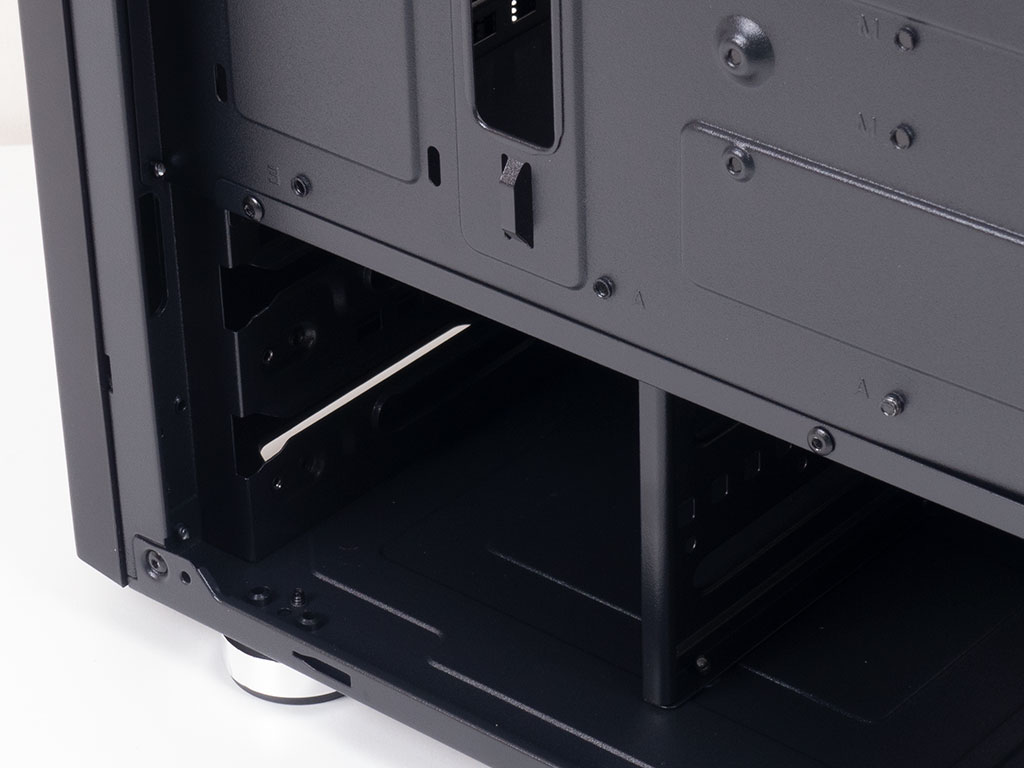
Underneath the shroud is a basic HDD cage for two 3.5" storage units. It takes screws on one side, while the other goes for rubber-ring-equipped screws that slide in. That part in the front of the case is a solid part of the chassis frame, which also explains why Montech did not provide an opening in the shroud for bigger cooling setups. Above that is all about air intake as you may secure additional fans to the frame. As an ATX-sized chassis, you may also fit three 120 mm fans across the entire height of the Fighter 400.
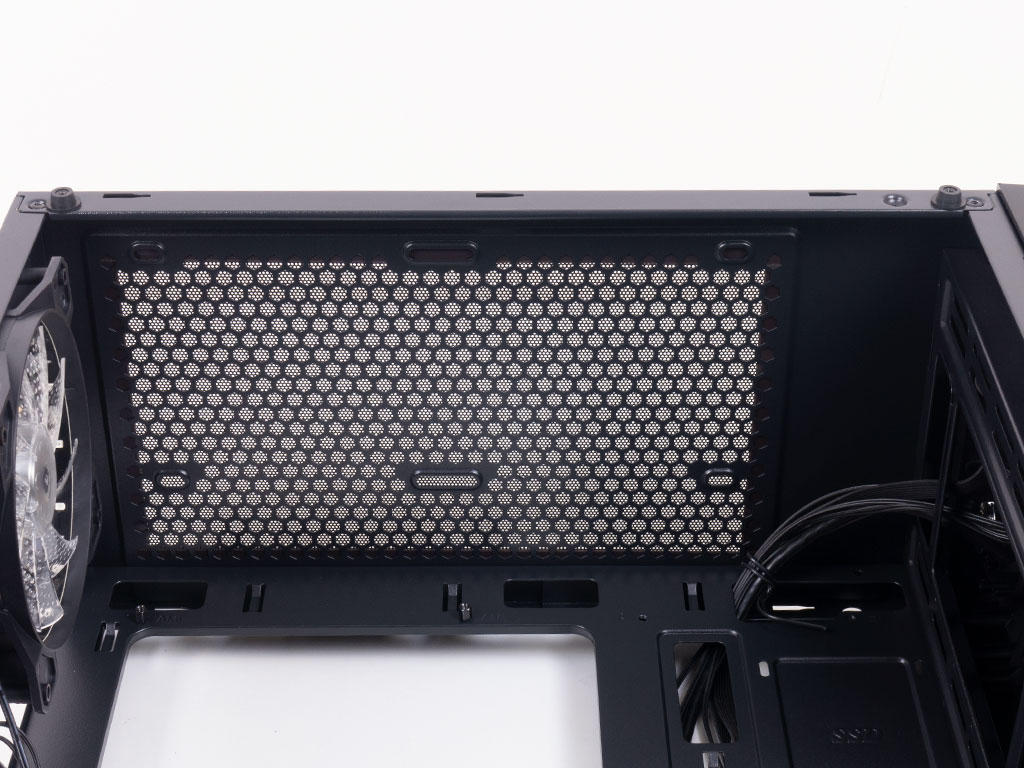
In the ceiling, you can clearly see the mounting possibilities for cooling and how far these are from the motherboard. If you look closely, you will see that the mounting holes align with the rear fans, which means there is just as much room between the heatsinks and the motherboard backplate.
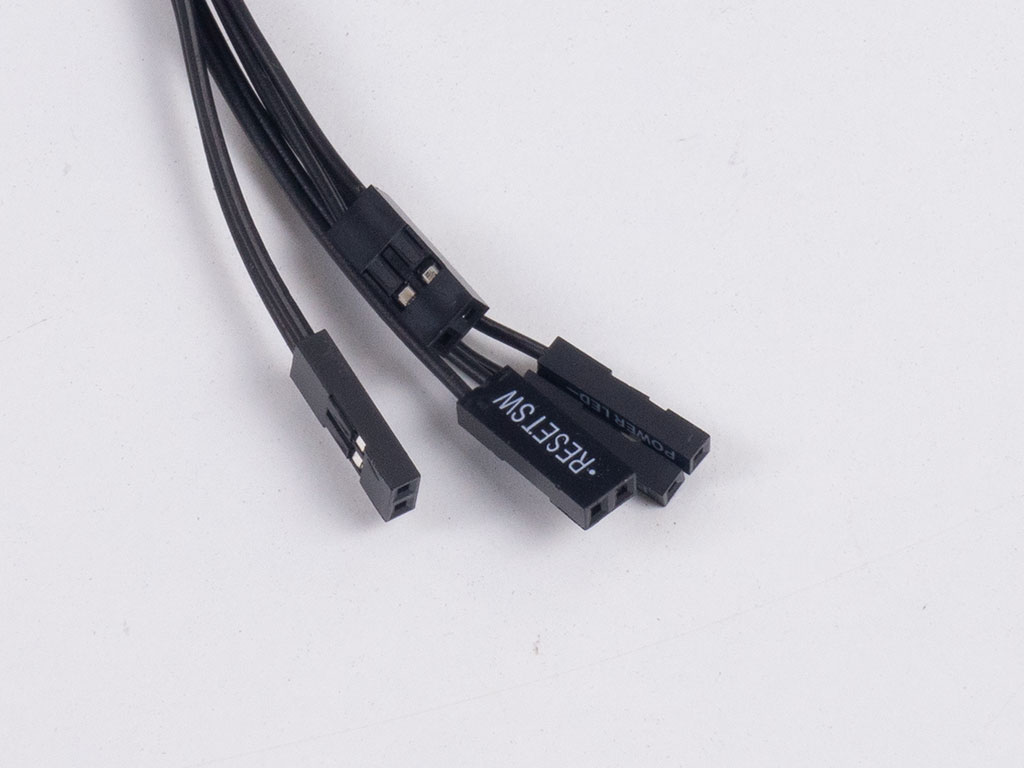
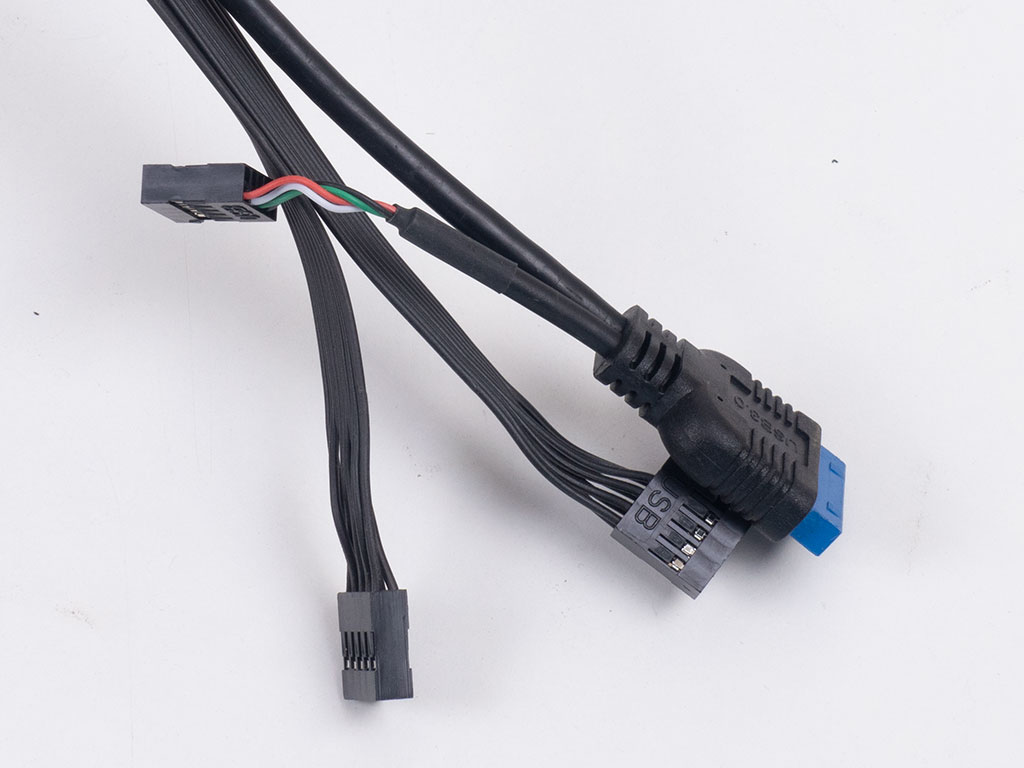
With the exception of the USB 3.0 lead, all the case and I/O cables within the Montech Fighter 400 are of the default variety. There is also a USB 2.0 header should your motherboard not offer a 20-pin 3.0 plug. All that makes me question the choice of I/O even more as Montech could have really just opted for two USB 3.0 ports and this type of combo cable. A nice touch is the completely black audio cable—most other implementations tend to sleeve colorful cables in a black tube.
Feb 27th, 2025 12:37 EST
change timezone
Latest GPU Drivers
New Forum Posts
- Free Games Thread (4489)
- WCG Daily Numbers (12779)
- Windows 11 General Discussion (5720)
- TPU's Rosetta Milestones and Daily Pie Thread (2224)
- Folding Pie and Milestones!! (9402)
- Original VBIOS "RX 590 GME" requested (4)
- Nuance Audio Glasses - Prescription glasses with "Over-The-Counter" hearing aids built in. (0)
- What local LLM-s you use? (80)
- AAF Optimus Modded Driver For Windows 10 & Windows 11 - Only for Realtek HDAUDIO Chips (338)
- GameTechBench GPU benchmark is already out! (281)
Popular Reviews
- Corsair Xeneon 34WQHD240-C Review - Pretty In White
- ASUS GeForce RTX 5070 Ti TUF OC Review
- Corsair Virtuoso MAX Wireless Review
- Montech HyperFlow Silent 360 Review
- Gigabyte X870 Aorus Elite WiFi 7 Review
- MSI GeForce RTX 5070 Ti Ventus 3X OC Review
- MSI GeForce RTX 5070 Ti Vanguard SOC Review
- AMD Ryzen 7 9800X3D Review - The Best Gaming Processor
- MSI GeForce RTX 5070 Ti Gaming Trio OC+ Review
- Montech TITAN PLA 1000 W Review
Controversial News Posts
- NVIDIA GeForce RTX 50 Cards Spotted with Missing ROPs, NVIDIA Confirms the Issue, Multiple Vendors Affected (497)
- AMD Radeon 9070 XT Rumored to Outpace RTX 5070 Ti by Almost 15% (304)
- AMD Plans Aggressive Price Competition with Radeon RX 9000 Series (274)
- AMD Radeon RX 9070 and 9070 XT Listed On Amazon - One Buyer Snags a Unit (253)
- NVIDIA Investigates GeForce RTX 50 Series "Blackwell" Black Screen and BSOD Issues (244)
- Edward Snowden Lashes Out at NVIDIA Over GeForce RTX 50 Pricing And Value (241)
- AMD Denies Radeon RX 9070 XT $899 USD Starting Price Point Rumors (239)
- AMD Mentions Sub-$700 Pricing for Radeon RX 9070 GPU Series, Looks Like NV Minus $50 Again (220)