 58
58
MSI Z87-GD65 GAMING (LGA 1150) Review
BIOS Walkthrough »Test System
| Test System | |
|---|---|
| CPU: | Intel 4770K 3.5 GHz, 8 MB Cache |
| Memory: | 16 GB DDR3 (4x 4 GB)GSkill TridentX F3-2666C11Q-16GTXD |
| Cooling: | CoolerMaster TPC 812 |
| Motherboard: | MSI Z87-GD65 GAMING Intel Z77 Express, BIOS v1.10 |
| Video Card: | 2x MSI GTX670 Power Edition OC 2 GB |
| Harddisk: | Corsair ForceGT 60 GB SATA 6 Gb/s SSD(OS) Corsair F60 60 GB SATA 3 Gb/s SSD(USB 3.0) Western Digital Caviar SE 16 WD5000AAKS 500GB SATA2 |
| Power Supply: | Seasonic SS-860XP2 |
| Case: | Lian Li T60 Test Bench |
| Software: | Windows 7 64-bit SP1, Nvidia 320.18 WHQL |
Initial Setup
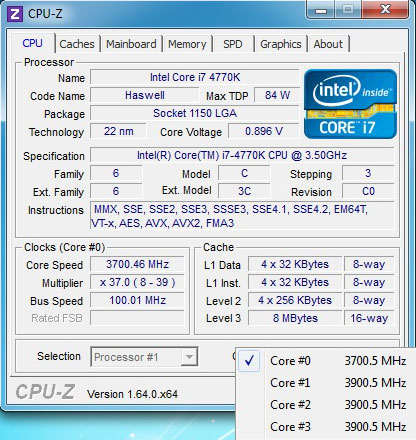
Initial setup with a boosted Turbo profile and without XMP enabled was pretty easy. The memory matched standard JEDEC timings. Everything worked well, but I noticed that the Turbo profile used an increased "39" multiplier for some workloads. This is par for the course with high-end boards of this nature and shouldn't be an issue with all CPUs, but it should help the MSI Z87-GD65 GAMING toe up a bit higher in the benchmark section. Not all brands offer features or condone functionality like this, but since it seems pretty obvious to me that this leads to some boards out-performing others in a way that some might call cheating, I don't really care that much. These boosted clocks have never caused obvious stability issues, and that's my primary concern. Anything that offers the end user guaranteed performance benefits is a worthwhile feature as long as it isn't something that will void warranties with other parts. Voiding your CPU warranty is nearly impossible since Intel now offers overclocking protection for all their common enthusiast CPUs, ensuring that all parts are safe. It would, however, be nice to see products that do implement a "natural" overclock to also include a coupon for this extra overclocking warranty, as it is only available through a separate online purchase, and not all retailers offer it for purchase yet. For more information on Intel's Performance Plan warranty, check their site, which can be found HERE
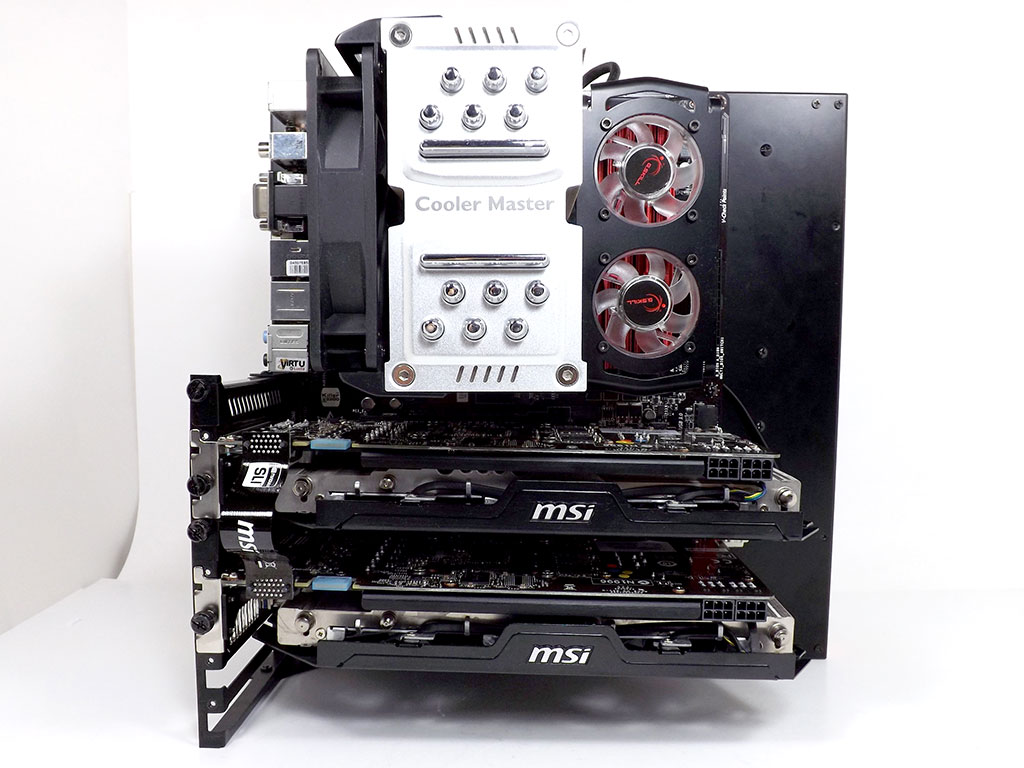
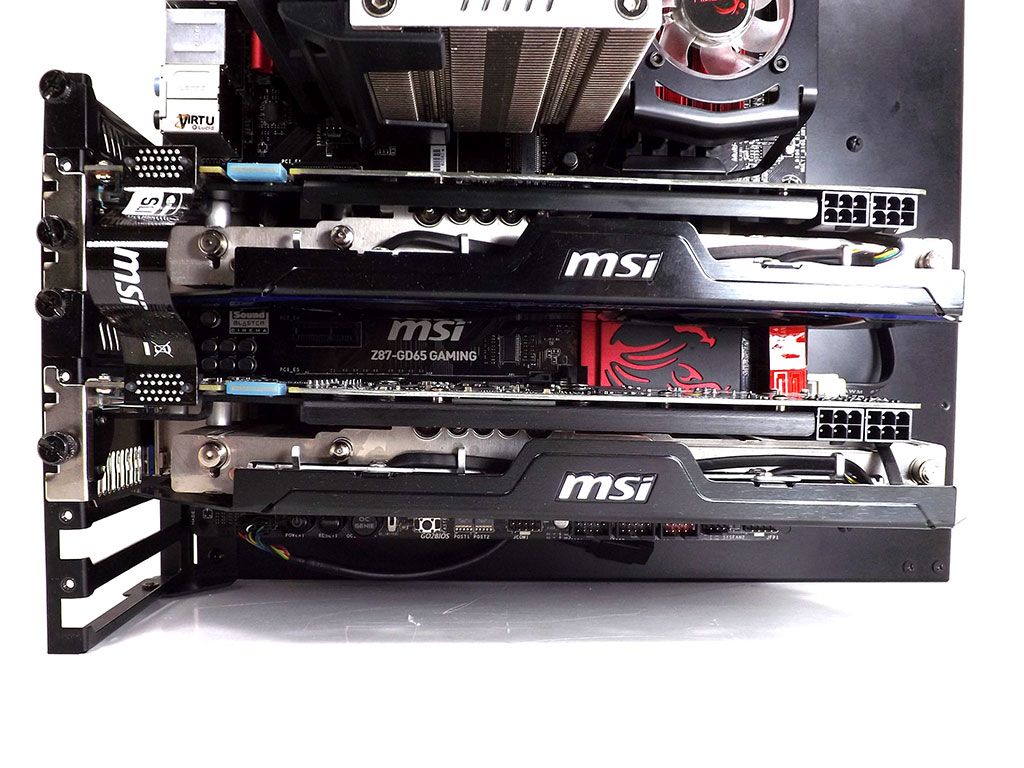
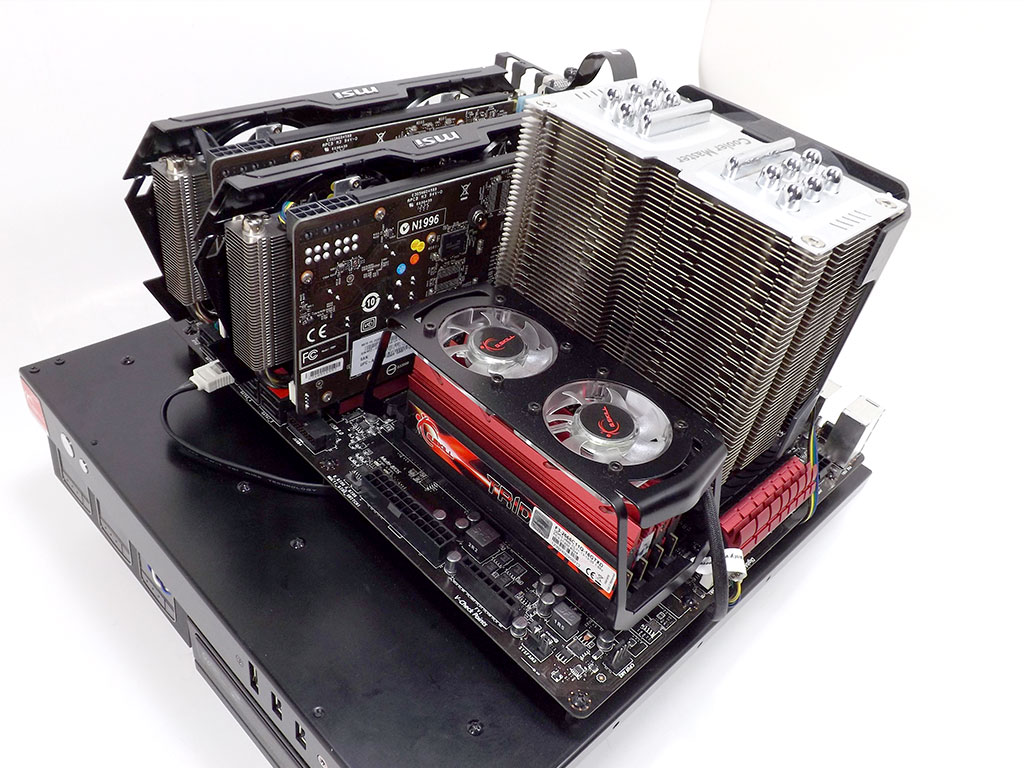
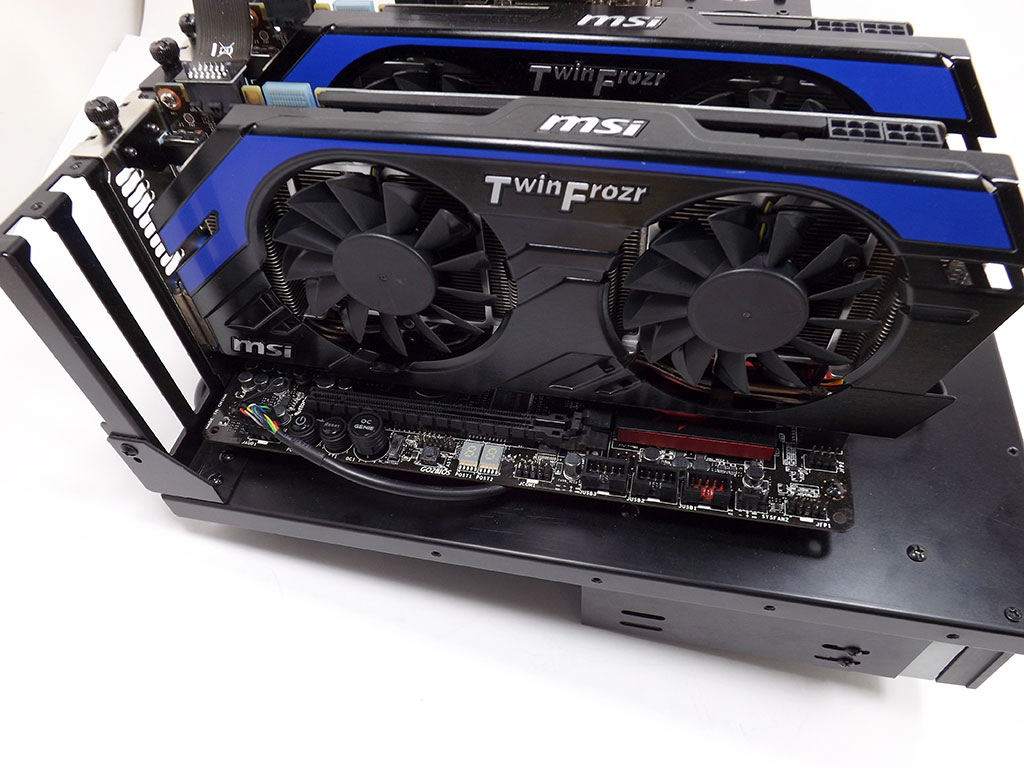
All set up on the motherboard tray of my test bench, the MSI Z87-GD65 GAMING is nearly swallowed up by all the hardware with all the supporting parts installed. Due to the proliferation of red and black hardware on the market today, there's definitely a plethora of parts available for you to build a thematically matching PC, and no matter what you decide to install, there's plenty of room to easily make it all fit. There's lots of room between installed dual VGAs for airflow as well, as that is part of MSI's dual-GPU optimization on all of their GAMING products.
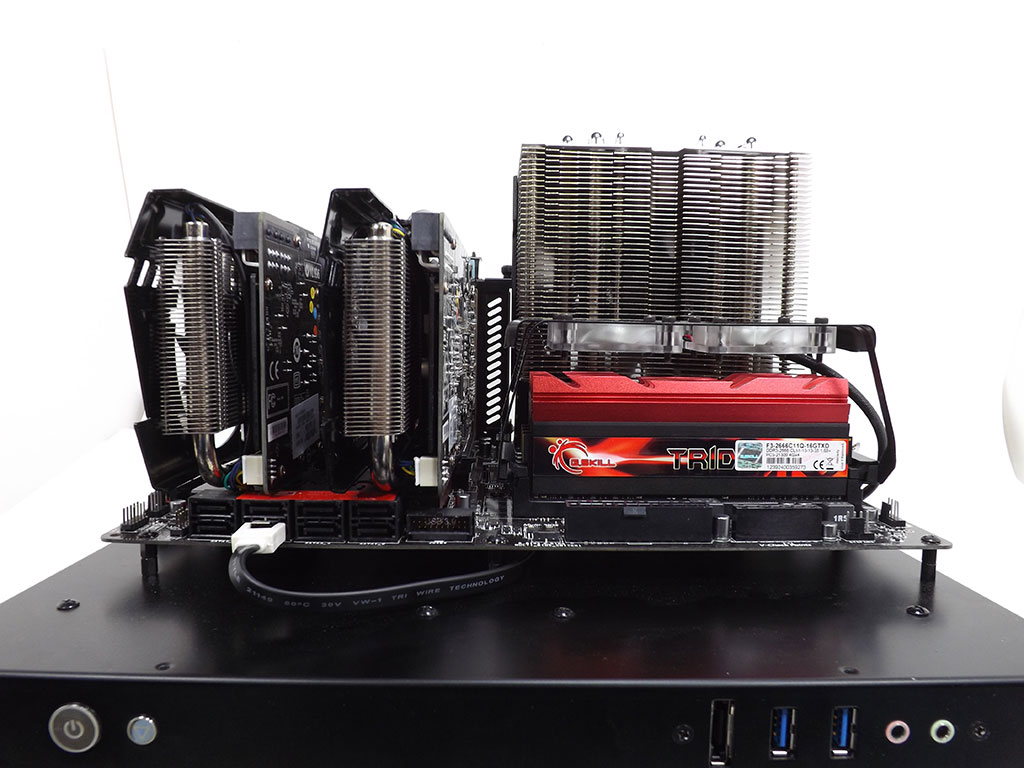
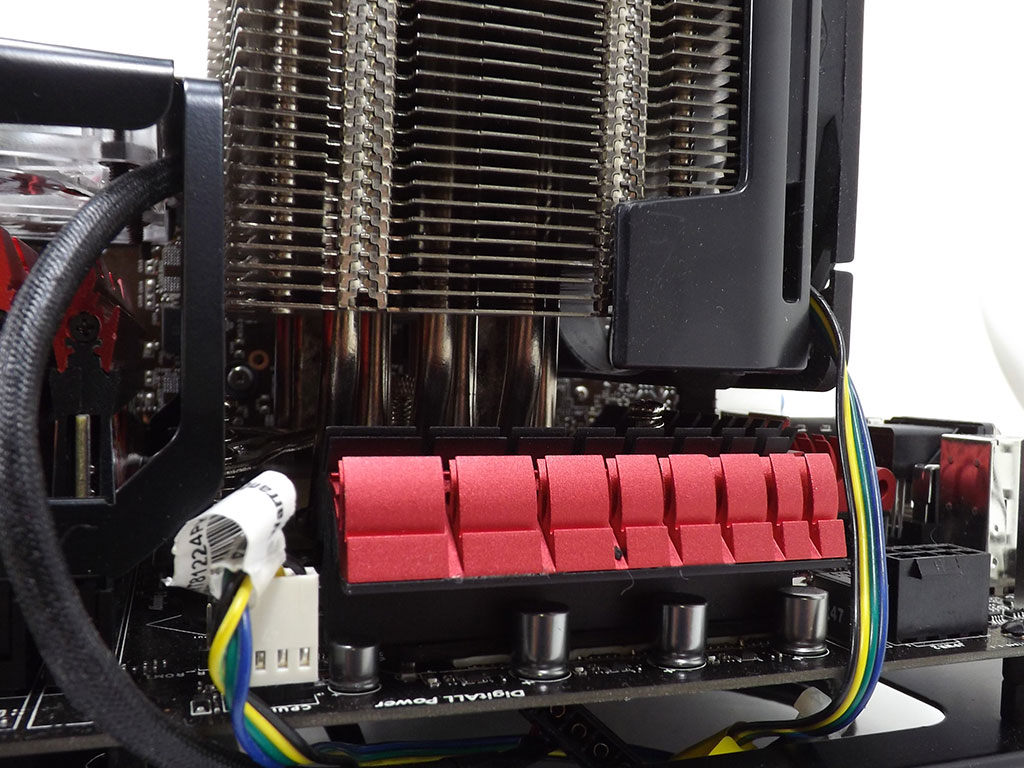
Since the top slot is only a PCIe x1 link, it doesn't take up a lot of space on the board, but it does allow for room between the uppermost VGA and large CPU tower coolers, like the CoolerMaster TPC812 I use now. There's also room to easily install a fan over your RAM. The MOSFET cooler sits low enough to the board's surface for it not to interfere with most CPU coolers, as shown in the second image above.
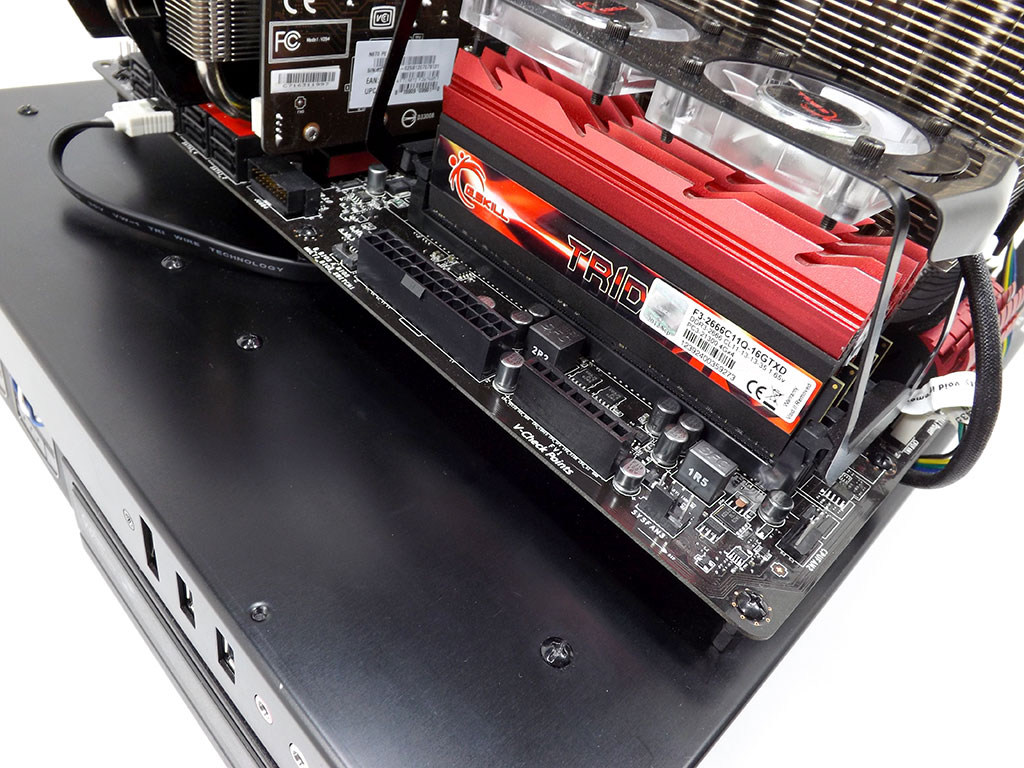
The 24-pin power plug and V-Check points that sit next to the RAM are easily accessible in my Lian Li test bench, making set-up for extreme clocking easy as well. Since the buttons that were here on the Z77-GD65 GAMING are now found on the board's bottom edge, the V-Check points are all you need to access from the top-right of the board, making sure that wires from your multi-meter aren't getting in the way of your fingers reaching those buttons.
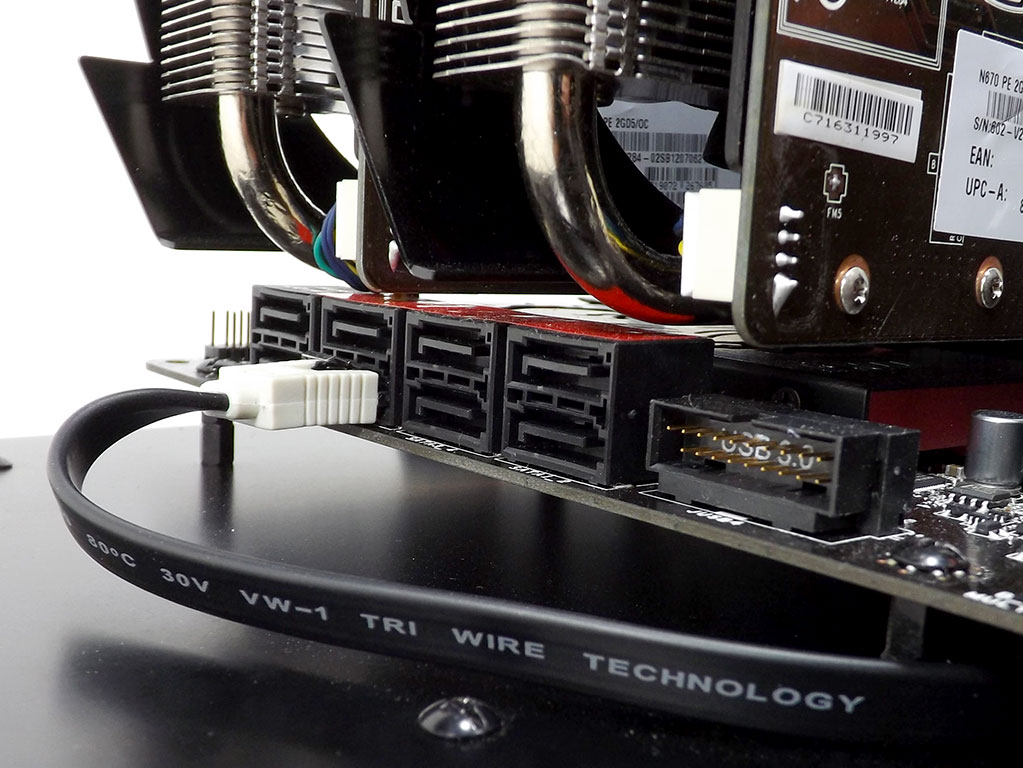
The SATA ports and USB 3.0 front-panel headers stand out from the side of the board, and sit far enough down the board's surface for cables from your drives and such not to interfere with VGAs installed into all the slots. The bottom edge with its buttons, switches, and the POST display is easily reached with dual VGAs installed, but you won't be able to access them should you decide to install a third dual-slot VGA into the MSI Z87-GD65 GAMING.
Power Consumption
We measure CPU power consumption since one of our first tasks is to truly verify system stability. I isolate the power coming through the 8-pin ATX connector using an in-line meter that provides voltage and current readings as well as total wattage passed through it. While this may not prove to isolate the CPU power draw in all instances, it does serve as a good indicator of board efficiency and effective VRM design. Total system power consumption is no longer reported as this figure can change depending on what VGA is installed. The sole board-only power measurements possible without physically modifying a motherboard are those taken via the 8-pin CPU connector, making it the only figure of value worth reporting.| Load Condition | CPU Voltage | Ring voltage | Idle Power | Load Power |
|---|---|---|---|---|
| Stock Clocks | 1.040 V | 1.020 V | 14W | 70W |
| Overclocked | 1.285 V | 1.150 V | 38W | 124W |
Power consumption with the MSI Z87-GD65 GAMING was a bit higher than I had expected at idle, but both the board and BIOS were very new at the time of testing, not having been released to the market. MSI has provided me with a couple other BIOS versions to try, and one of these will hopefully fix idle power consumption, but I did not have the opportunity to test them at the time this review was written. I don't have any other Z87/4770K results for a comparison at this time, but you can take a look at any of my other board reviews to get an idea of what these numbers truly represent in the grand scheme of things.
Mar 22nd, 2025 01:02 EDT
change timezone
Latest GPU Drivers
New Forum Posts
- What else can I do to diagnose an artifacting card? (22)
- Samsung 9100 PRO is on preorder (21)
- What are you playing? (23225)
- HalfLife2 RTX Demo Is out! (281)
- Do you prefer factory overclocked GPUs? (46)
- And so... I bought Arrow Lake (13700k to 265k), my thoughts. (62)
- The TPU UK Clubhouse (25910)
- Plex announces Plex Pass price increase and paywall for remote streaming (11)
- [LPC Project] - DARK KNIGHT II (10)
- RTX 5090 Won't Clock Up (MSI Afterburner) (4)
Popular Reviews
- ASRock Radeon RX 9070 XT Taichi OC Review - Excellent Cooling
- Assassin's Creed Shadows Performance Benchmark Review - 30 GPUs Compared
- be quiet! Pure Base 501 LX Review
- Sapphire Radeon RX 9070 XT Nitro+ Review - Beating NVIDIA
- ASUS ProArt X870E-Creator Wi-Fi Review
- MSI MAG B860 Tomahawk Wi-Fi Review
- ASUS GeForce RTX 5070 TUF OC Review
- AMD Ryzen 9 9950X3D Review - Great for Gaming and Productivity
- ASUS GeForce RTX 5090 Astral OC Review - Astronomical Premium
- Corsair SF750 750 W Review
Controversial News Posts
- NVIDIA GeForce RTX 50 Cards Spotted with Missing ROPs, NVIDIA Confirms the Issue, Multiple Vendors Affected (519)
- AMD RDNA 4 and Radeon RX 9070 Series Unveiled: $549 & $599 (260)
- AMD Mentions Sub-$700 Pricing for Radeon RX 9070 GPU Series, Looks Like NV Minus $50 Again (250)
- NVIDIA Investigates GeForce RTX 50 Series "Blackwell" Black Screen and BSOD Issues (244)
- AMD Radeon RX 9070 and 9070 XT Official Performance Metrics Leaked, +42% 4K Performance Over Radeon RX 7900 GRE (195)
- AMD Radeon RX 9070-series Pricing Leaks Courtesy of MicroCenter (158)
- MSI Doesn't Plan Radeon RX 9000 Series GPUs, Skips AMD RDNA 4 Generation Entirely (142)
- Microsoft Introduces Copilot for Gaming (123)