 5
5
Nanoxia Deep Silence 5 Rev. B Review
Value & Conclusion »Test System
| System Parts for Case Reviews | |
|---|---|
| Processor: | Intel Core i7-4770K @ 4.2 GHz (Haswell, 8192 KB Cache) |
| Motherboards: | ATX: Gigabyte GA-Z97X-Gaming 7 mATX: Gigabyte GA-Q87M-D2H mini-ITX: GA-H97N-WIFI Provided by: Gigabyte |
| Graphic Card: | Long: NVIDIA GeForce GTX 280 OEM Short: HIS Radeon 5350 HD |
| Memory: | Crucial Ballistix Tactical DIMM Kit 8GB @ DDR3-1600, CL8-8-8-24 Provided by: Crucial |
| HDD: | Western Digital 320 GB 7200 RPM |
| SSD: | Crucial MX100 256GB SATA 6Gbps Provided by: Crucial |
| Power Supply: | Seasonic Platinum Series 660W ATX 2.3 Provided by: Seasonic |
| Cooling: | Air Cooling Mini-ITX: Thermalright AXP-100R Air Cooling mATX: Thermalright Macho 90 Air Cooling ATX: Thermalright Macho 120 Provided by: PC-COOLING.de |
Assembly
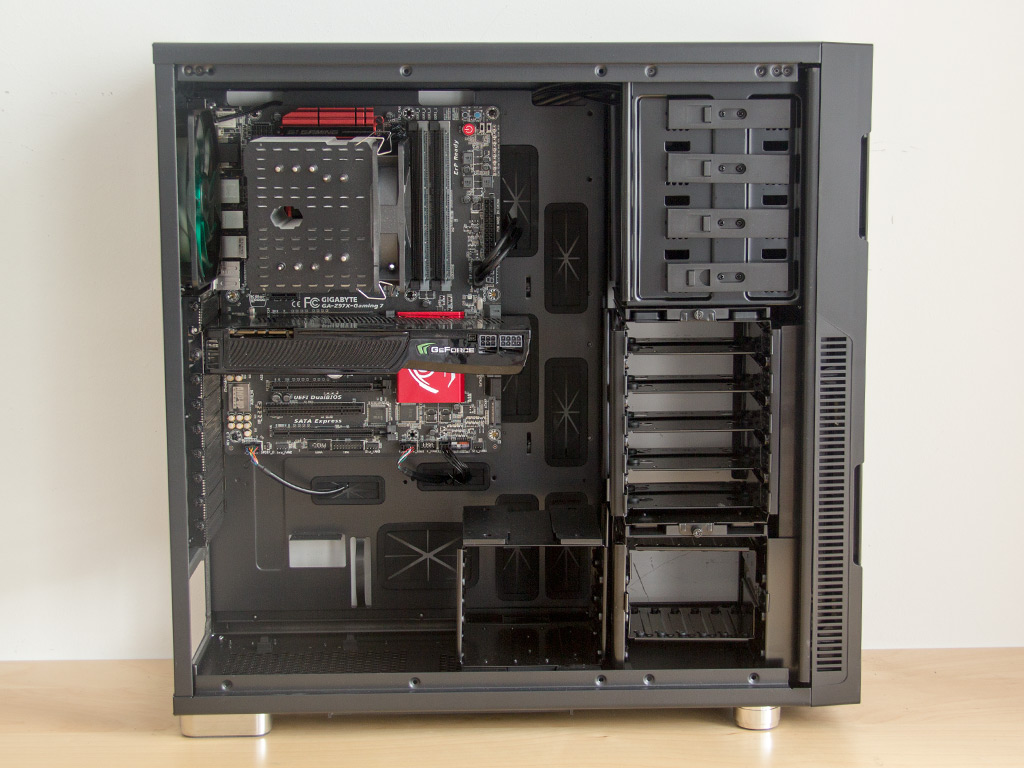
Installing a motherboard into the Deep Silence 5 Rev. B is done with the supplied spacers and screws. The cooler and a large graphics card fit into the chassis with plenty of room to the right and down below. You should be able to keep the chassis very clean because it is large and comes with a ton of grommet-equipped holes.
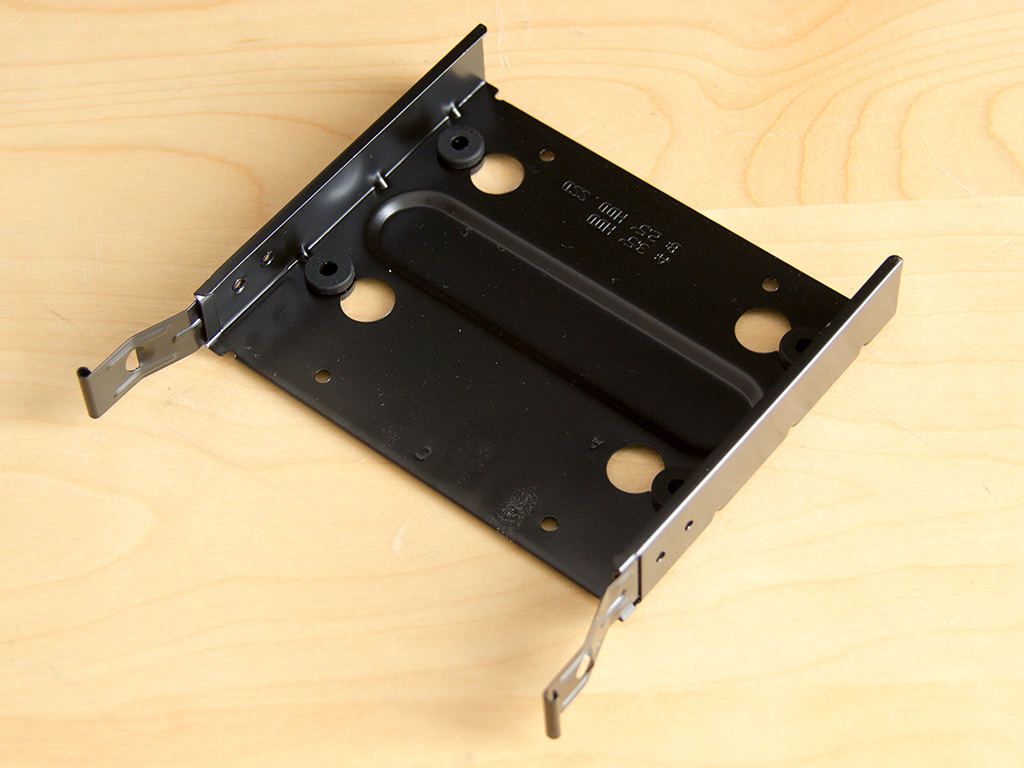
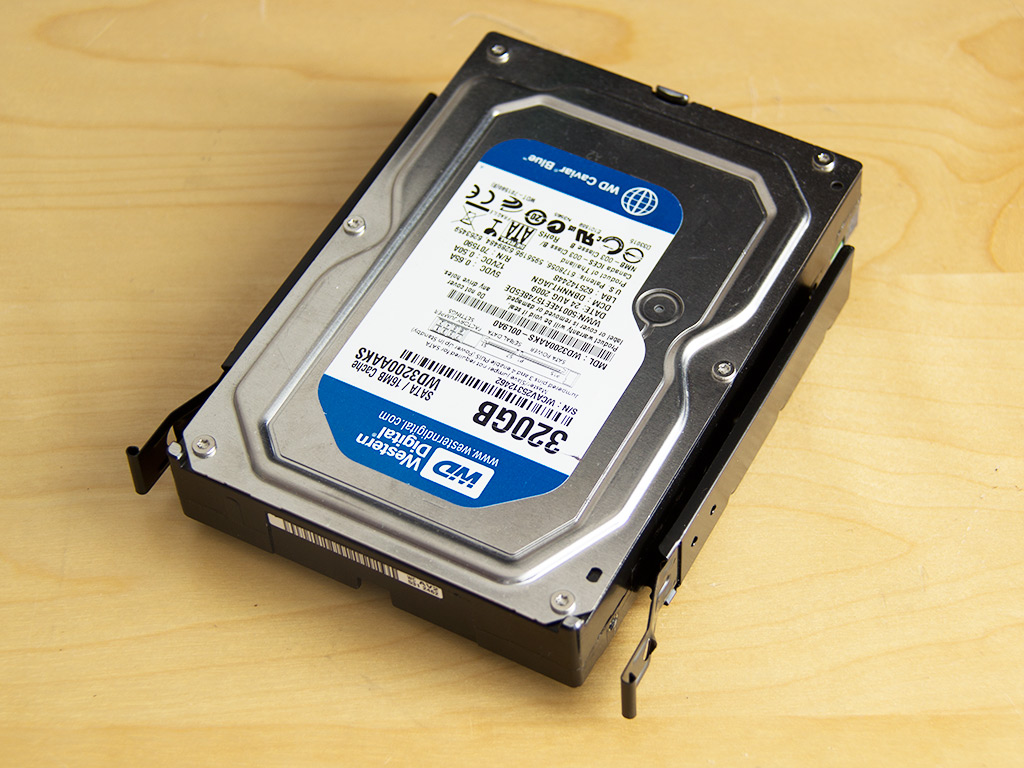
Each 3.5" hard drive needs to be placed onto one of the metal hard-drive trays. You will have to use tools to attach these to the trays—regardless of whether you go for 2.5" or 3.5" drives.
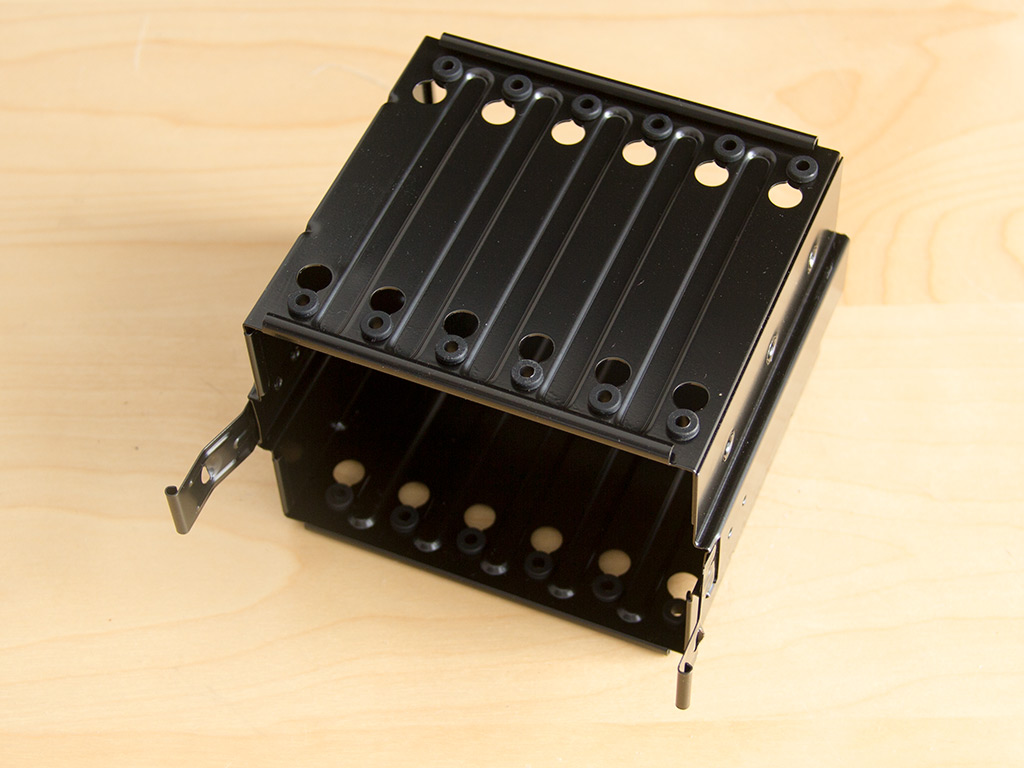
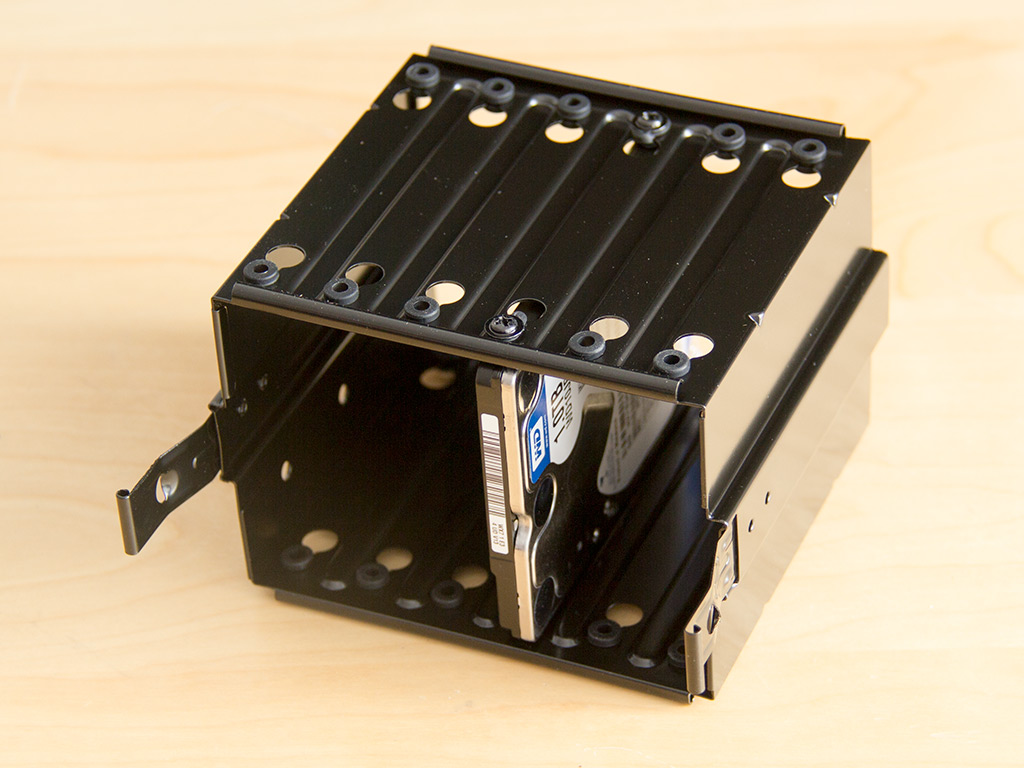
The SSD cage can hold a total of six drives vertically, inside a space where one would usually only be able to fit three. Each mounting position also comes with rubber anti-vibration measures. You will have to use the supplied screws to secure drives inside this cage.
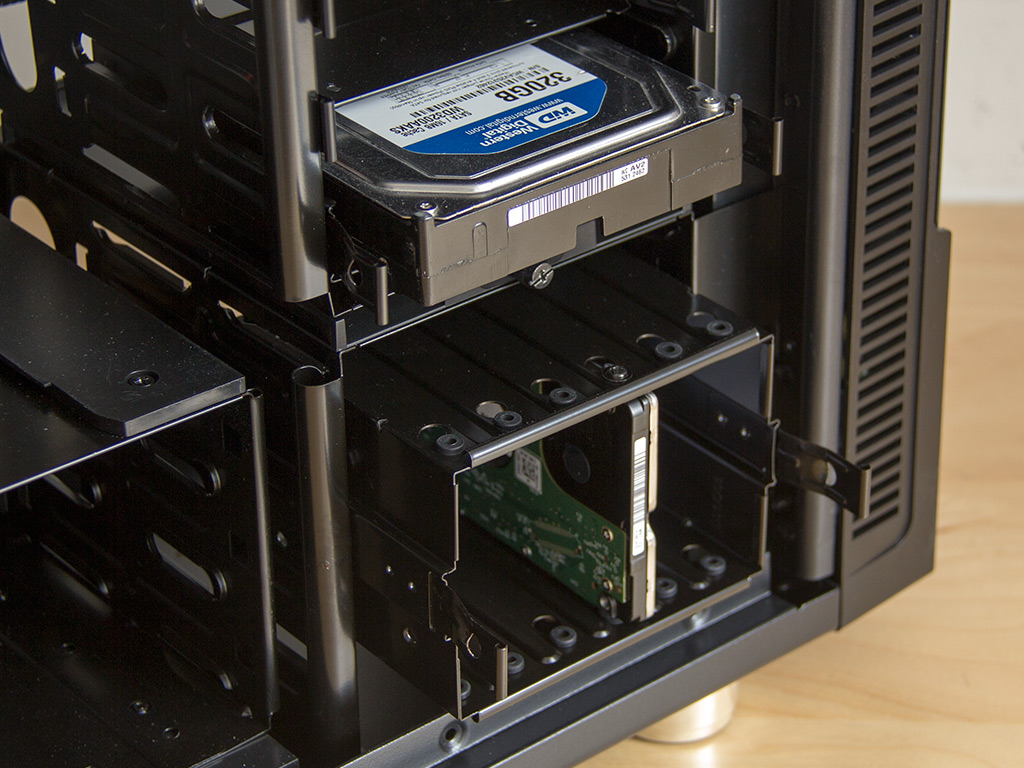
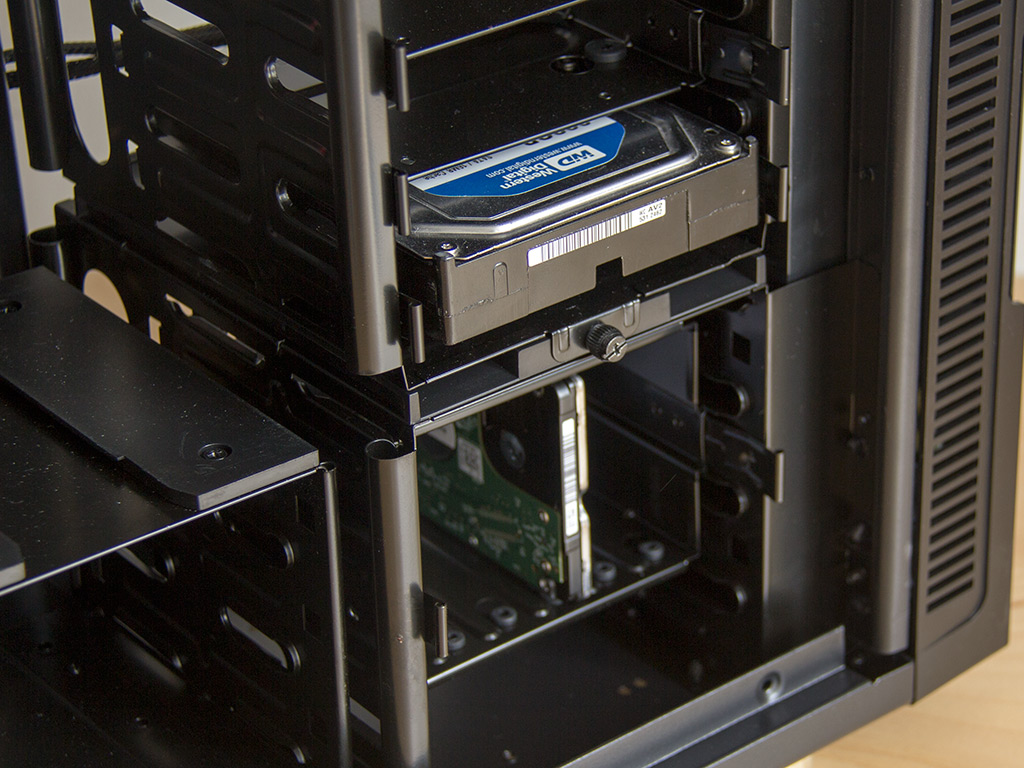
Once either or both of these are filled, slide the tray into the chassis until it snaps down firmly.
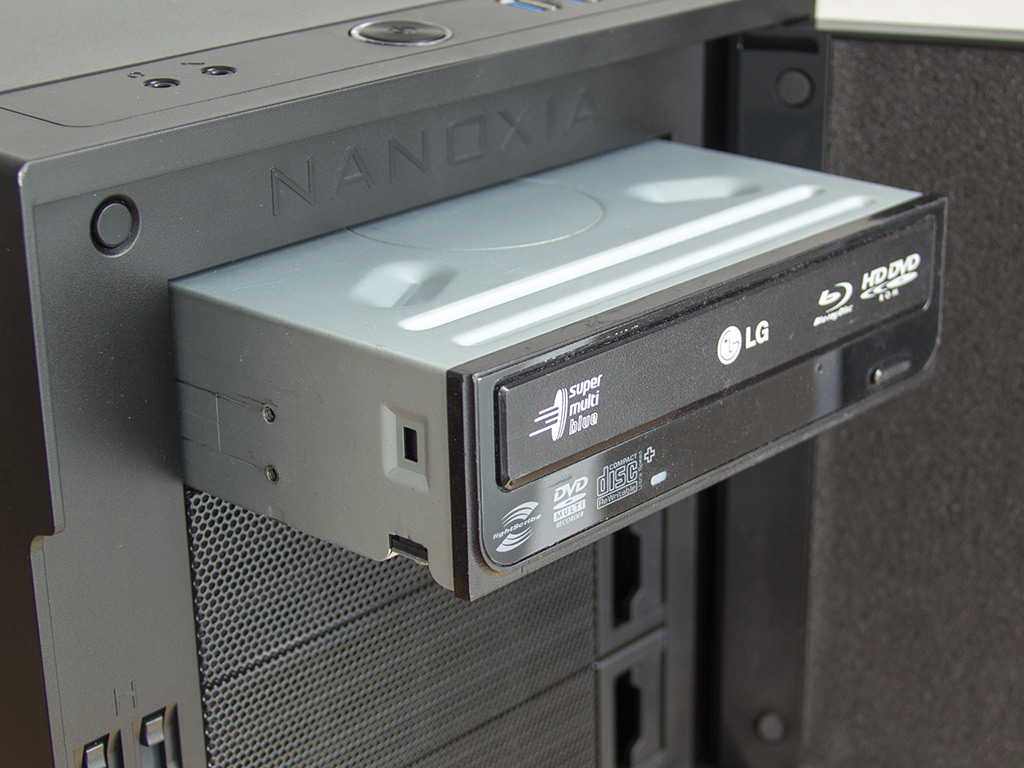

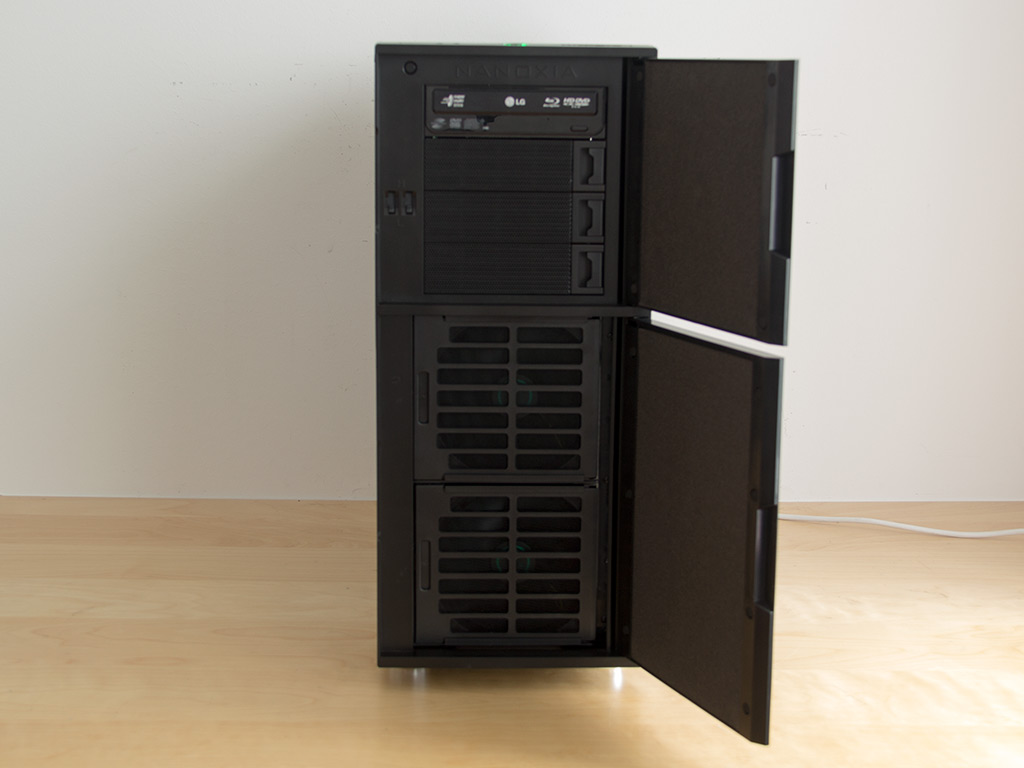
Installing an optical drive is quite simple and does not require any screws or tools. Simply remove the cover of your choice, slide the drive into place, and use the locks on each side to secure it in place. These hold quite well; rest assured that your optical drive will not move around. While these locks do hold the drive in place, there is a tiny bit of wiggle room. Perfectionists may want to secure the drive with a single screw to kill any vibrations as it operates.
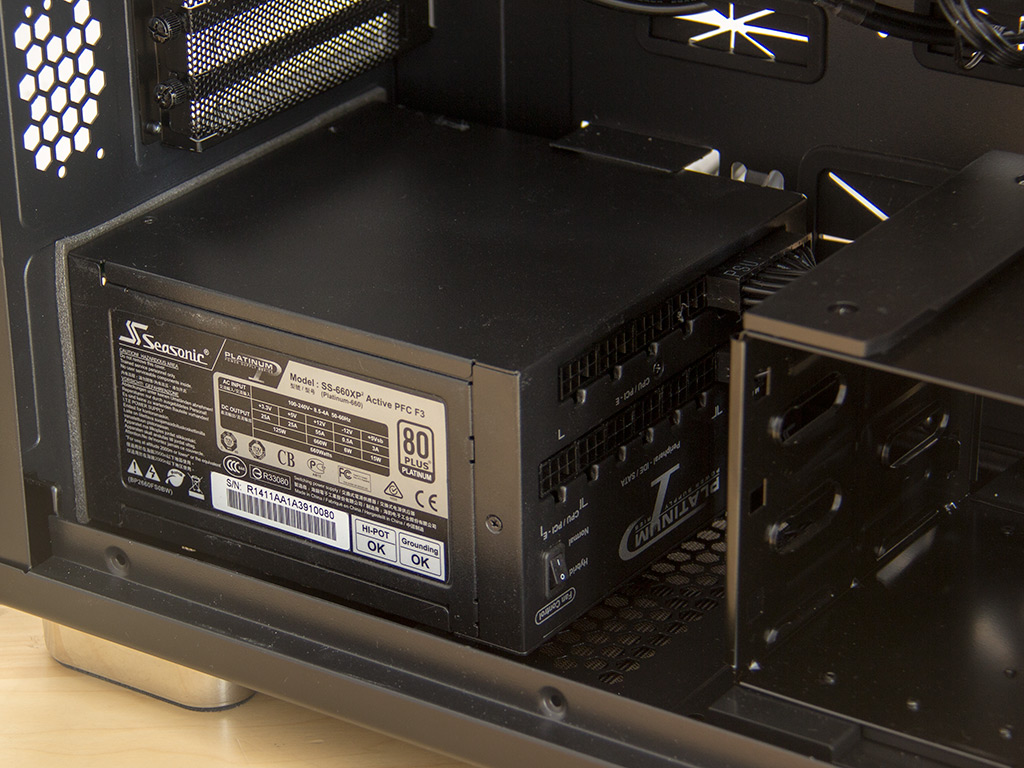
You will still need to use traditional screws to secure the PSU. There is plenty of space, so you could, for example, install a long unit and use the near-by HDD cage. However, very large PSUs will require the space that additional cage occupies.
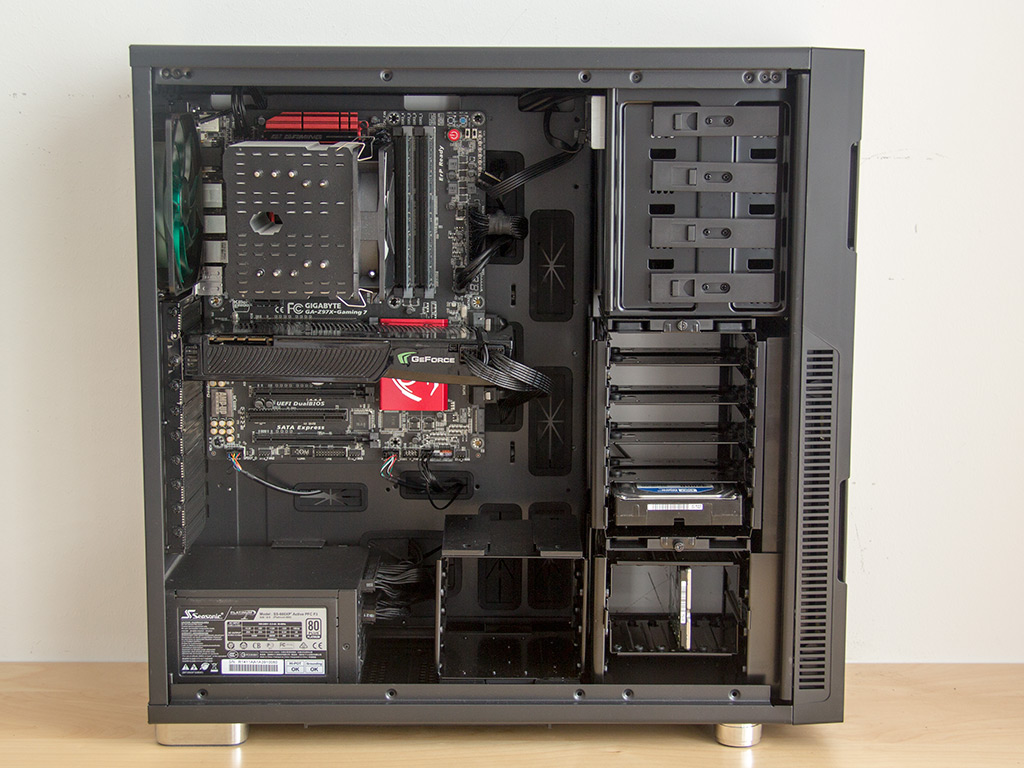
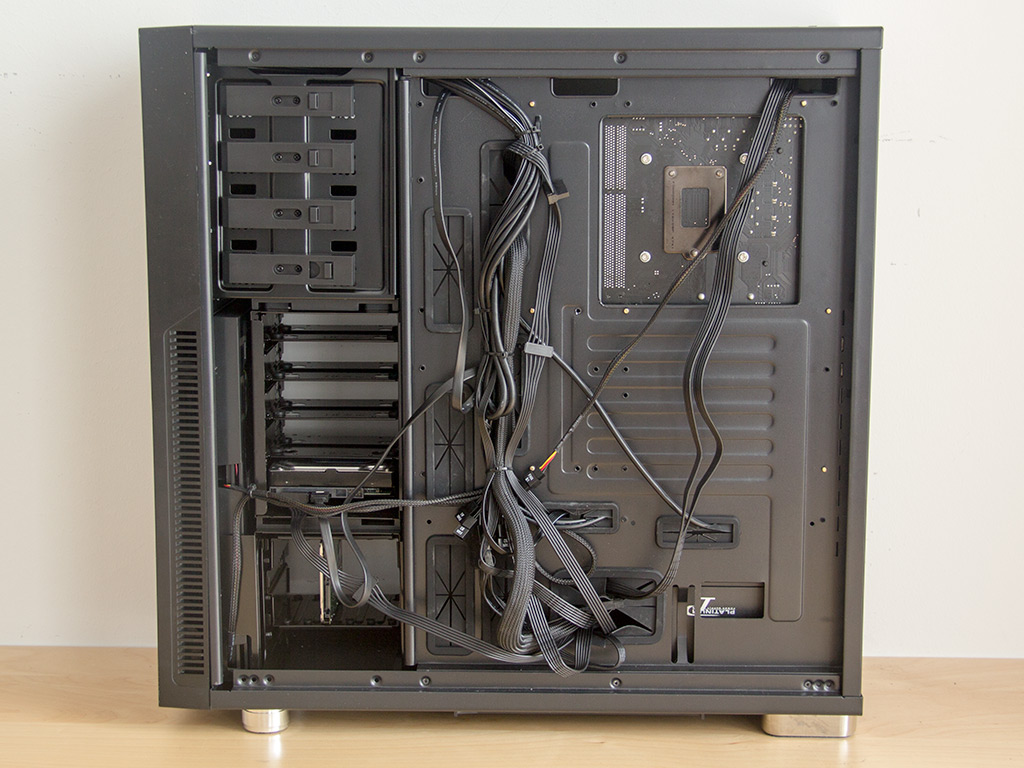
With all the hardware installed, the Nanoxia Deep Silence 5 Rev. B makes a very clean impression. All the cable mess is hidden behind the motherboard tray. As there are a limited number of hooks for zip ties, you will have to bunch cables together a bit.
Finished Looks
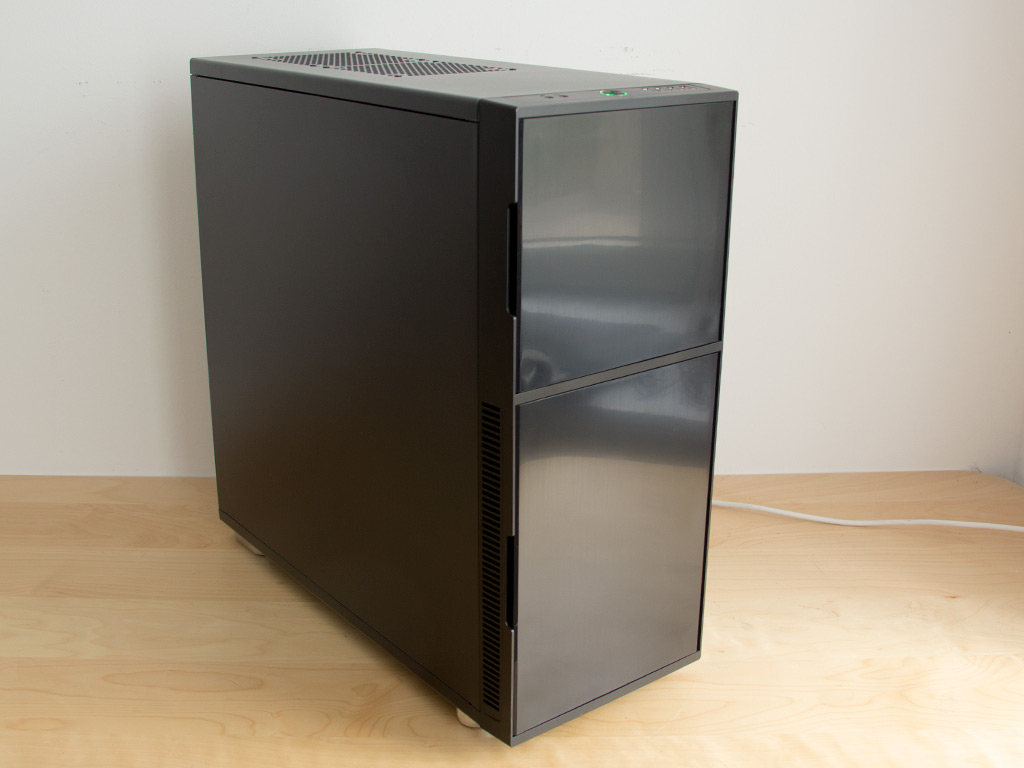

Once the side panels have been put back and the power button has been pushed, the Deep Silence 5 Rev. B does a great job of encapsulating noise. There are no fans with fancy LEDs or other gimmicks as all major panels are completely solid. You may also use an optical drive of any color as the door will hide it nicely.
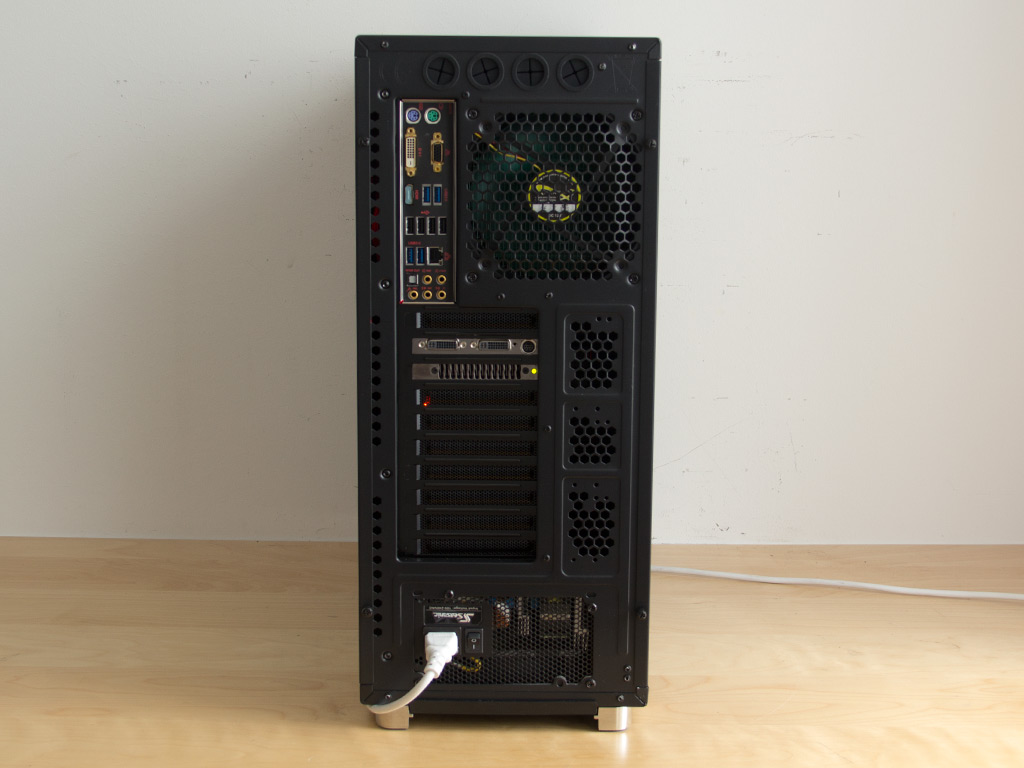
The only visual cue that it has been turned on is its green LED, shining through as a green ring of light around the power button. Turning the chassis around, everything is readily accessible, being where you would expect it to be.
Jun 30th, 2025 22:38 CDT
change timezone
Latest GPU Drivers
New Forum Posts
- GravityMark v1.89 GPU Benchmark (303)
- Post your Cinebench 2024 score (658)
- GPU PerfCap Reason PWR (8)
- Laptop overclocking adventures (1238)
- [INTEL]-How To Update Your Microcode for Intel HX 13/14th Gen. CPUs Laptops/Mobile Easily. (172)
- Will you buy a RTX 5090? (584)
- The TPU UK Clubhouse (26530)
- Optane and "enable write caching " (27)
- Question about Intel Optane SSDs (87)
- Do you use Linux? (664)
Popular Reviews
- ASUS ROG Crosshair X870E Extreme Review
- Sapphire Radeon RX 9060 XT Pulse OC 16 GB Review - Samsung Memory Tested
- AVerMedia CamStream 4K Review
- Lexar NQ780 4 TB Review
- AMD Ryzen 7 9800X3D Review - The Best Gaming Processor
- Upcoming Hardware Launches 2025 (Updated May 2025)
- Sapphire Radeon RX 9070 XT Nitro+ Review - Beating NVIDIA
- AMD Ryzen 9 9950X3D Review - Great for Gaming and Productivity
- NVIDIA GeForce RTX 5060 8 GB Review
- ASRock Phantom Gaming Z890 Riptide Wi-Fi Review
TPU on YouTube
Controversial News Posts
- Intel's Core Ultra 7 265K and 265KF CPUs Dip Below $250 (288)
- NVIDIA Grabs Market Share, AMD Loses Ground, and Intel Disappears in Latest dGPU Update (204)
- Some Intel Nova Lake CPUs Rumored to Challenge AMD's 3D V-Cache in Desktop Gaming (140)
- NVIDIA Launches GeForce RTX 5050 for Desktops and Laptops, Starts at $249 (105)
- Microsoft Partners with AMD for Next-gen Xbox Hardware (105)
- Intel "Nova Lake‑S" Series: Seven SKUs, Up to 52 Cores and 150 W TDP (100)
- NVIDIA GeForce RTX 5080 SUPER Could Feature 24 GB Memory, Increased Power Limits (94)
- Reviewers Bemused by Restrictive Sampling of RX 9060 XT 8 GB Cards (88)