 4
4
NlZ Plum x87 35g Keyboard Review - A Budget Topre with Modern Features
Software »Disassembly

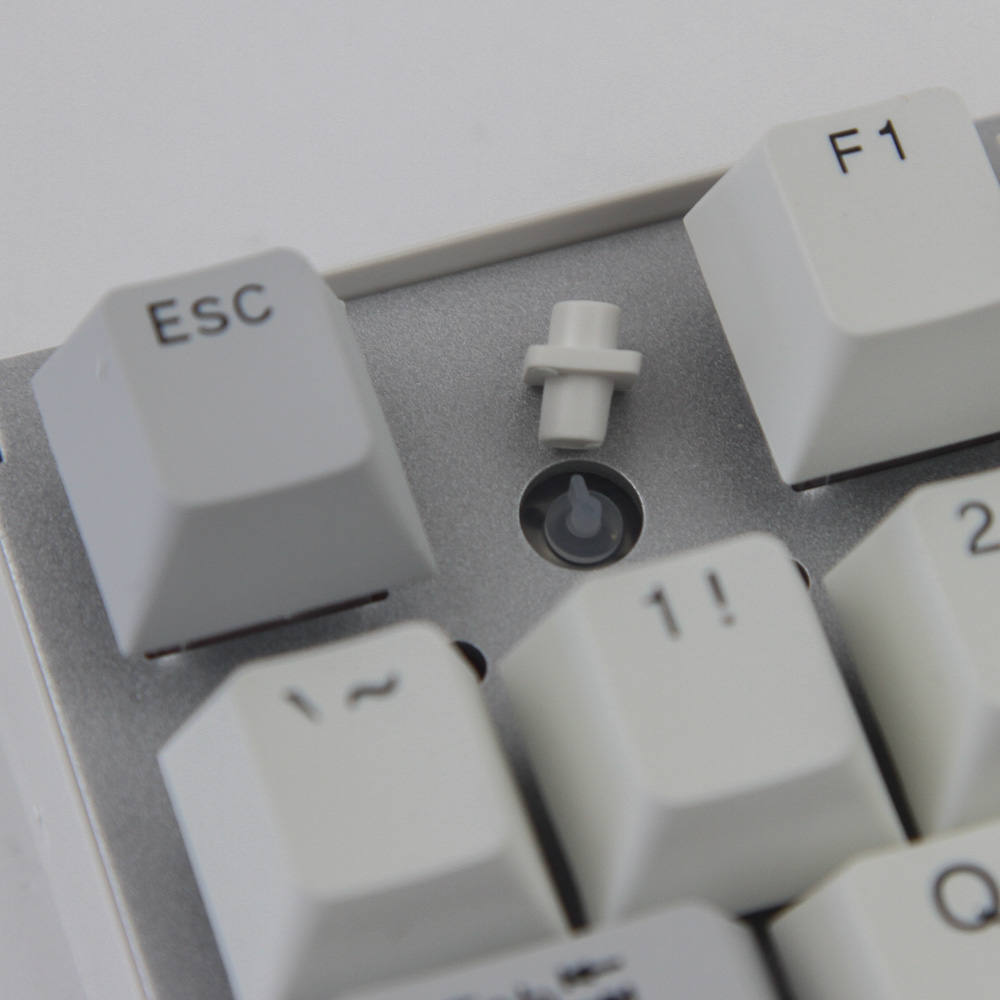
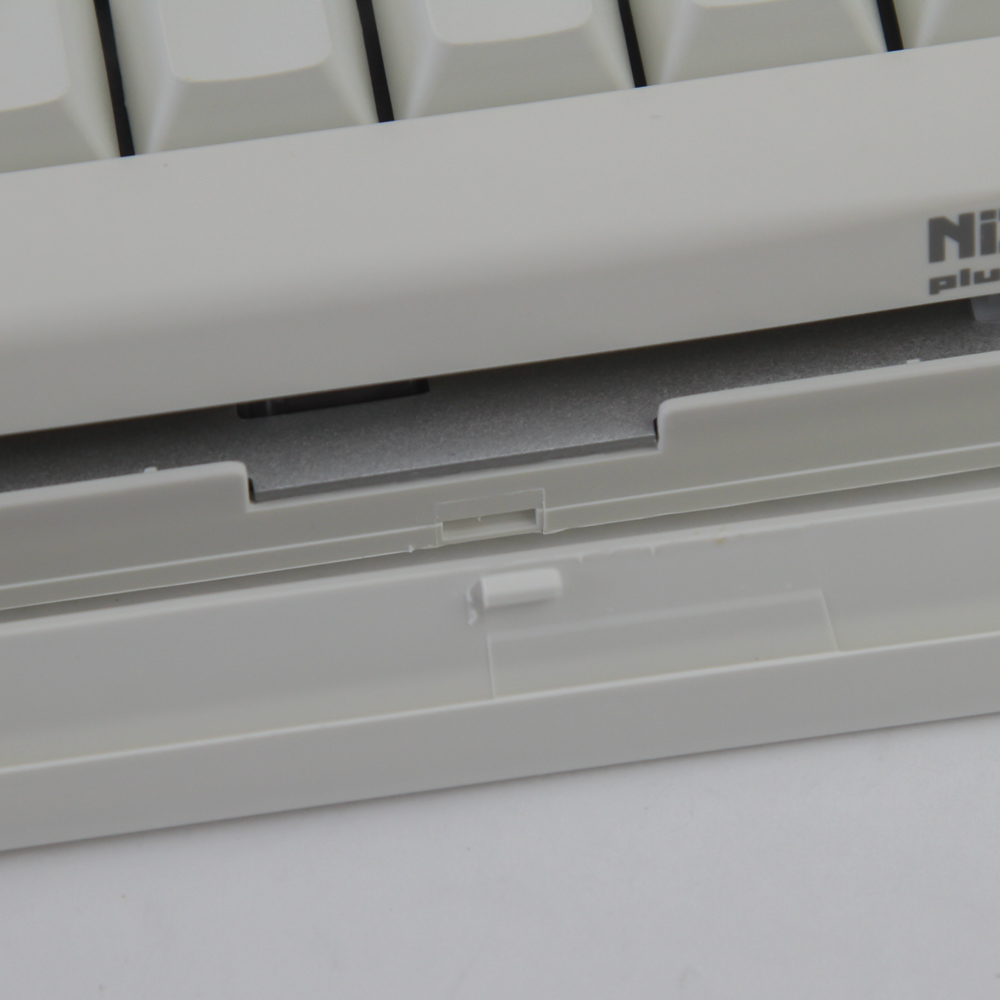
Having done this before with the NovaTouch TKL, I have to say I was not looking forward to disassembling the NIZ Plum x87. But for the sake of science, we go on! This is a typical two-piece plastic construction keyboard in that you need to pry apart the two case panels using a thin, flat object. You may well scratch the case here and even break off some of the interlocking tabs, so only do this if there is no alternative for whatever reason. The top panel comes off first, and with it the power button casing, which reveals the actual button underneath with a rubber seal on top to dampen the noise. In fact, there is actually a large, relatively thick O-ring seal all around the PCB that keeps it in place on the bottom panel, and you need to loosen the raised lips all around the bottom piece to remove the PCB. This is another contributor to the solid, quiet operation of the keyboard.
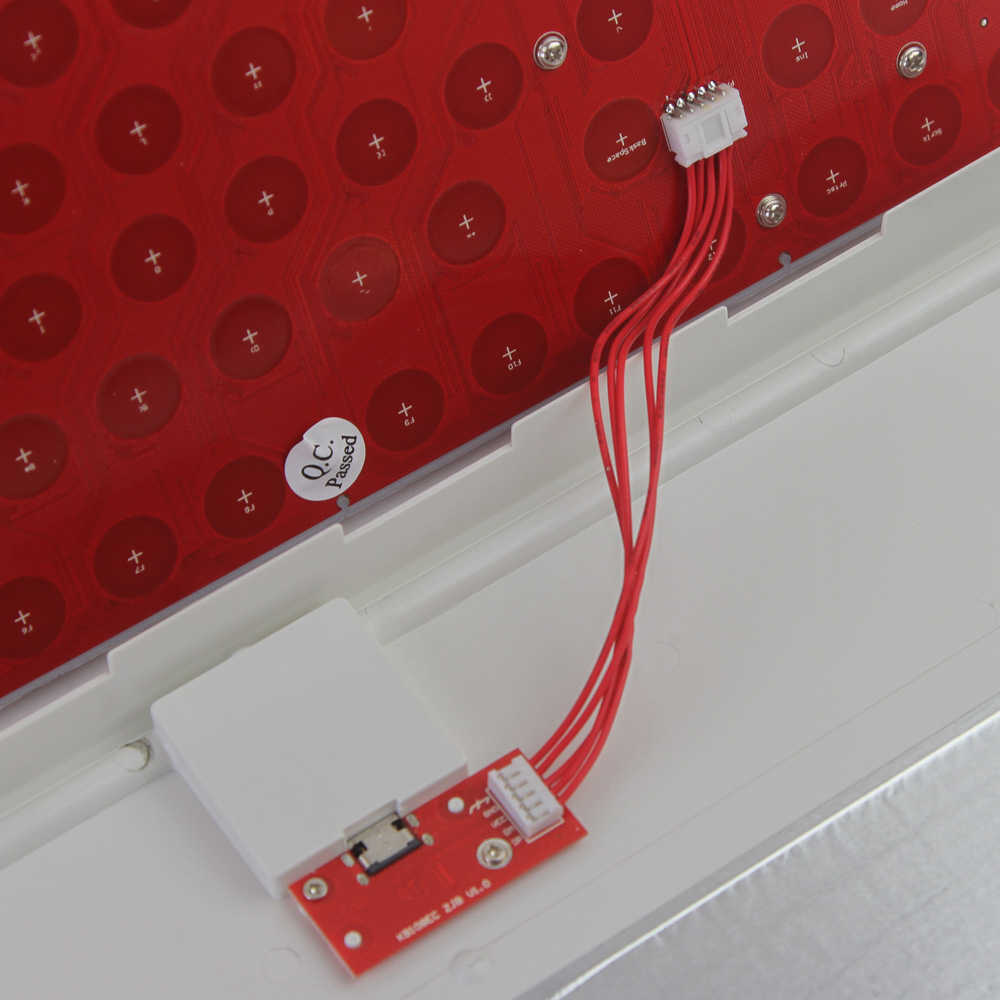
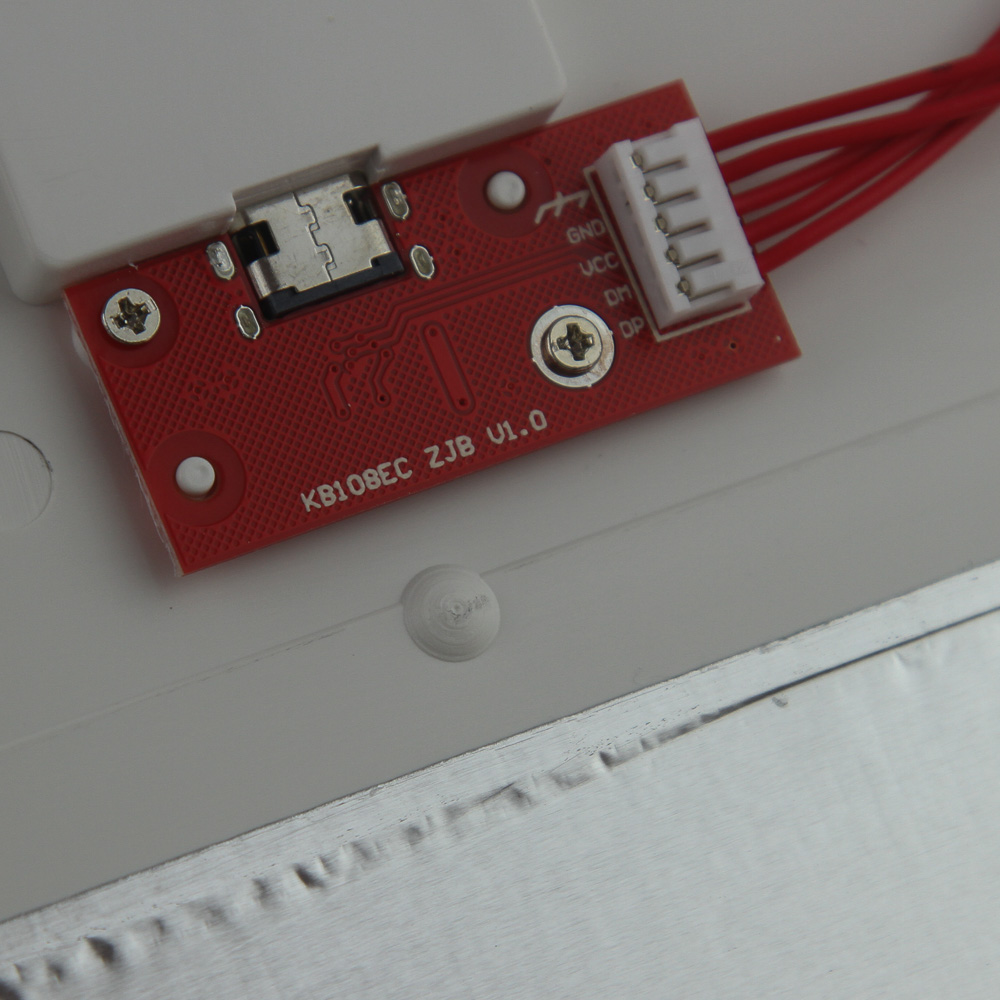
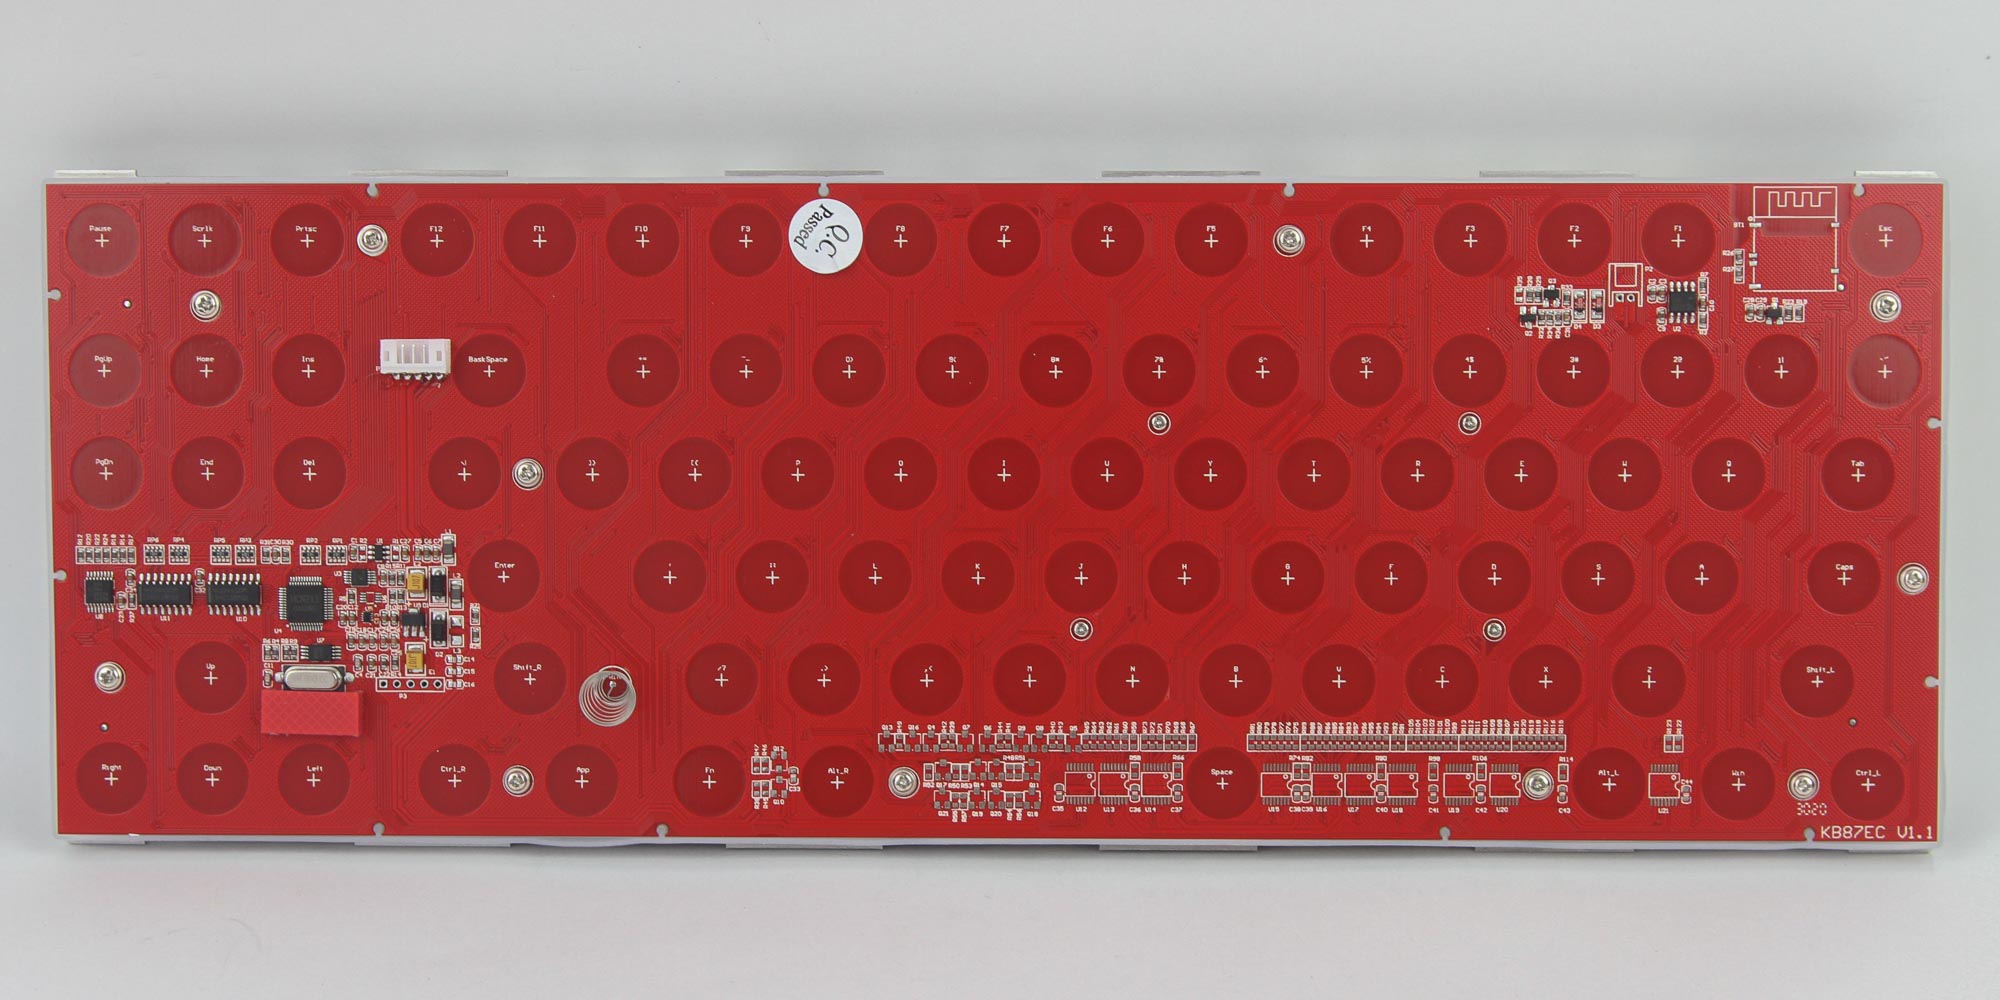
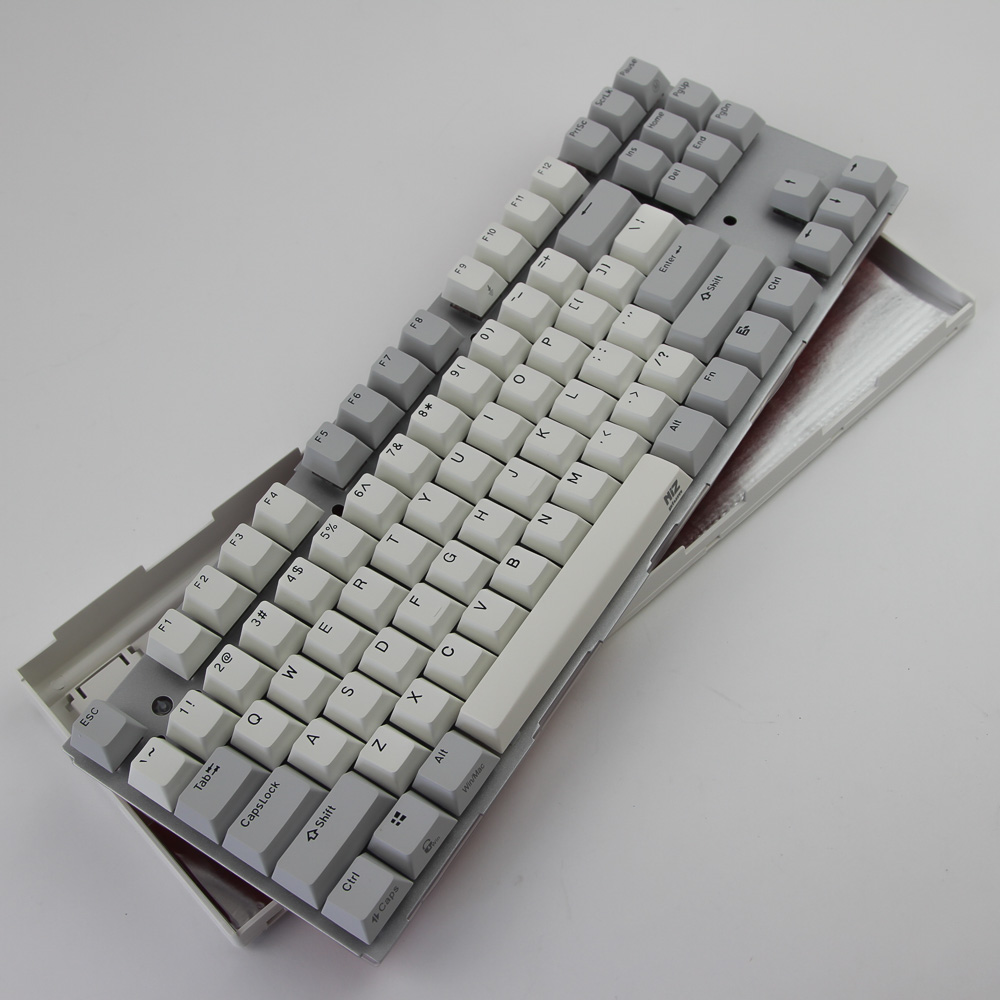
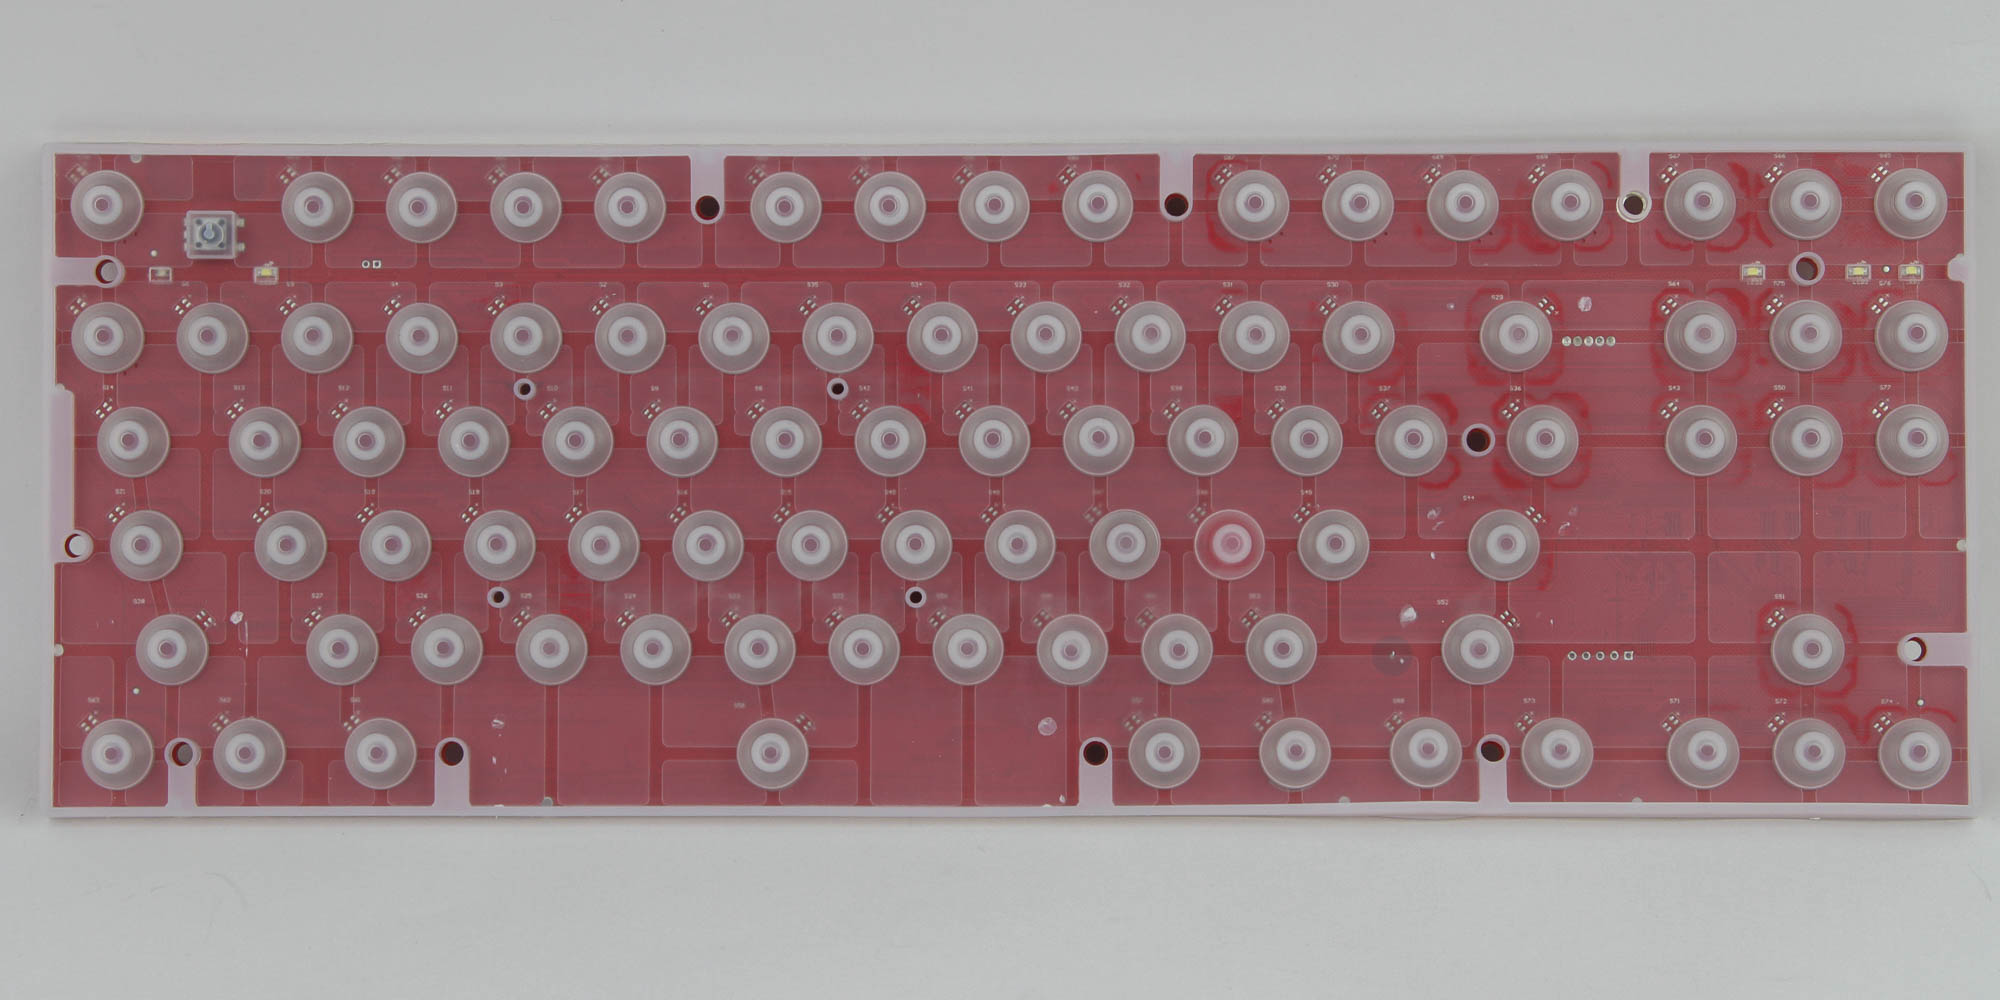
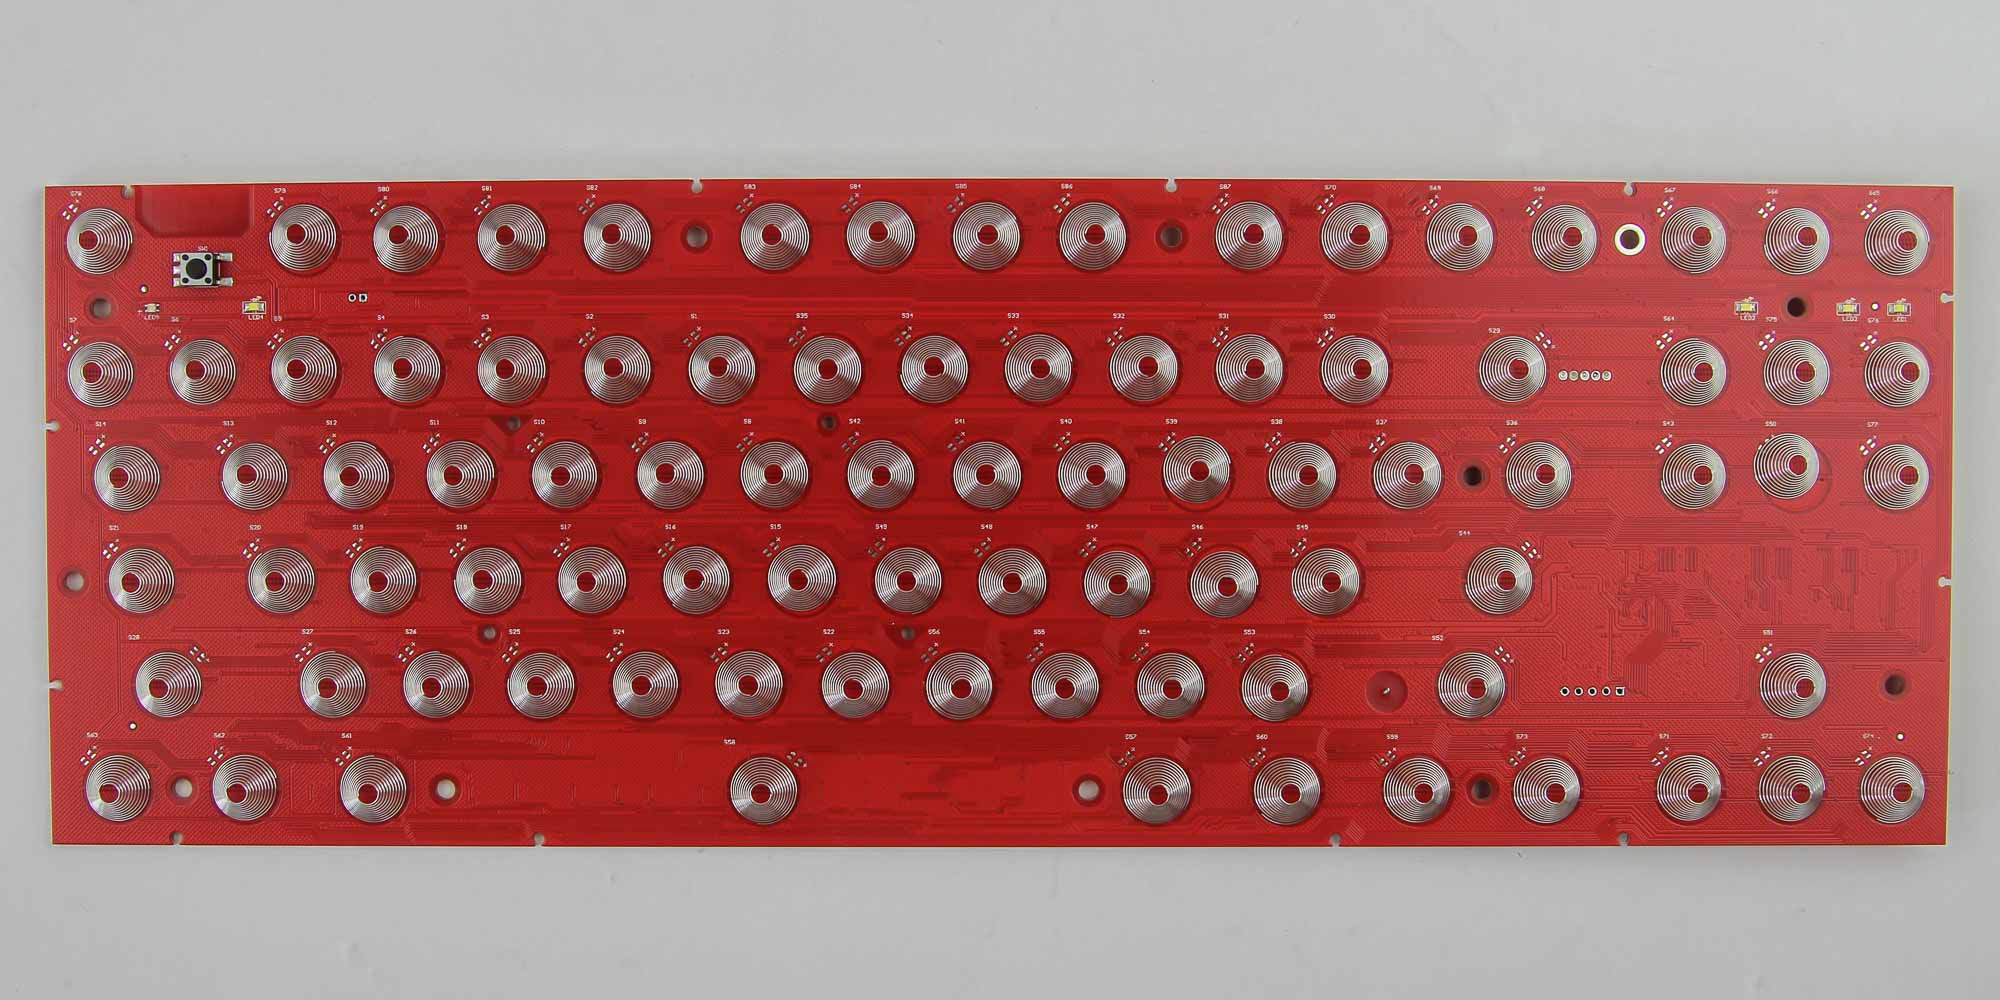
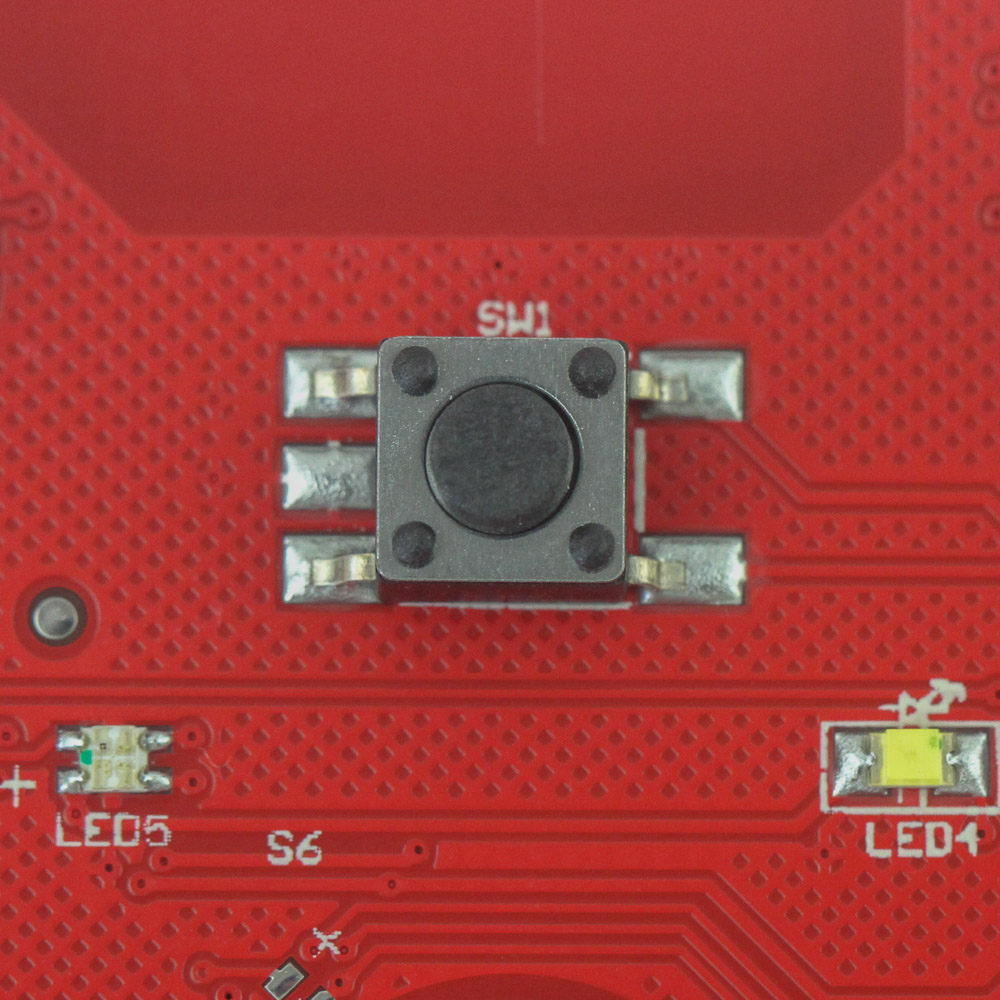
A daughter PCB on the bottom case panel houses the USB Type-C port, which is connected to the primary PCB via an internal cable. Disconnect it and you can separate the two completely. We see a metal foil and the associated contact spring on the PCB here. If you are familiar with the typical electrocapacitive Topre switch, then the PCB design here is familiar to you. There are no soldered switches, and the contact spring with the foil is part of the mechanism. On this non-backlit keyboard, we don't even have any LEDs aside from the indicator LEDs we saw before, and even those are on the other side of the PCB. It is a matte red in color with a QC pass sticker over one of the screws that holds this ensemble together, and has a circular pad for each switch.
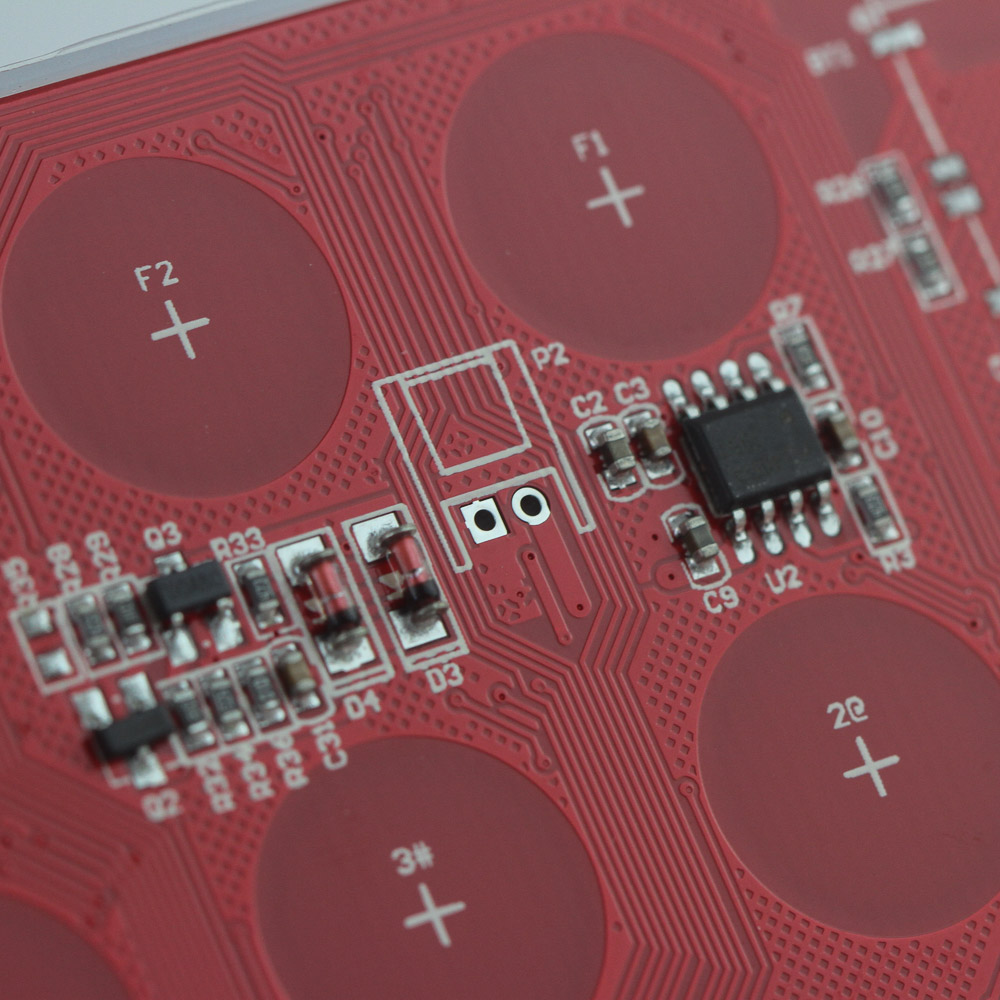
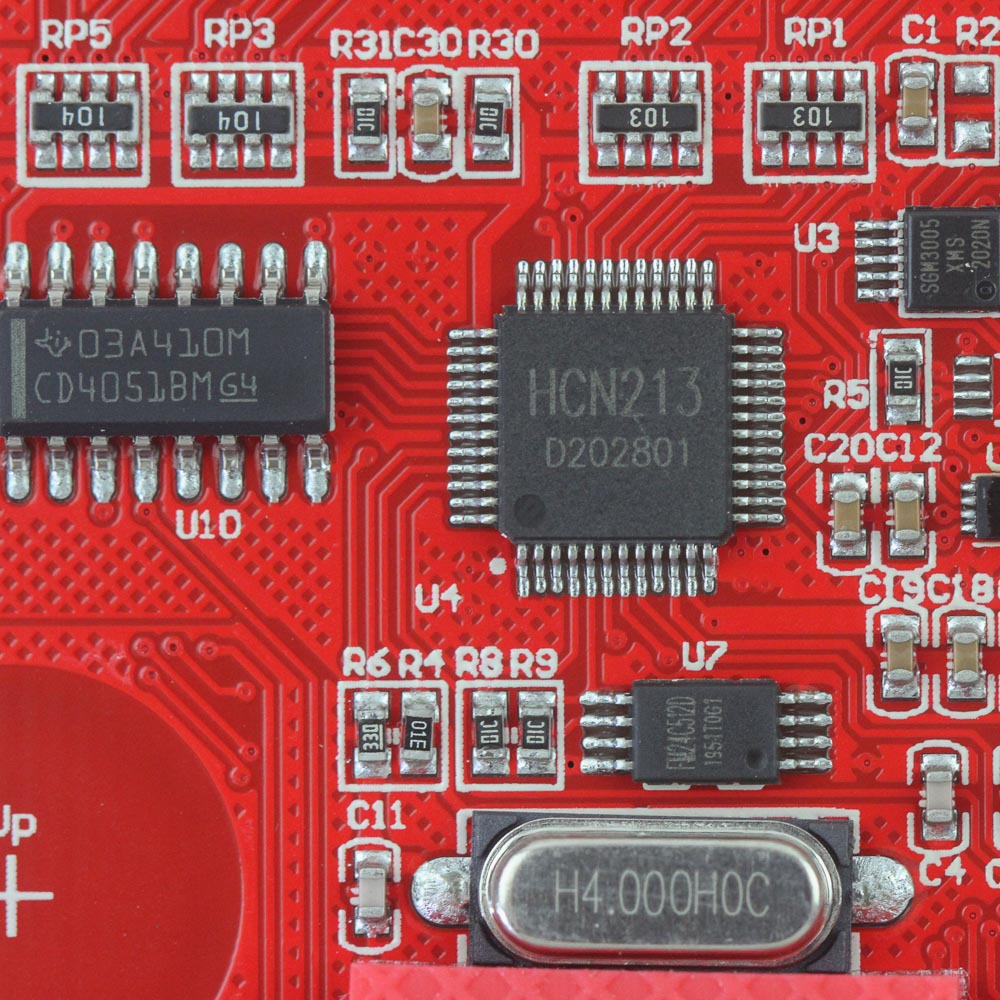
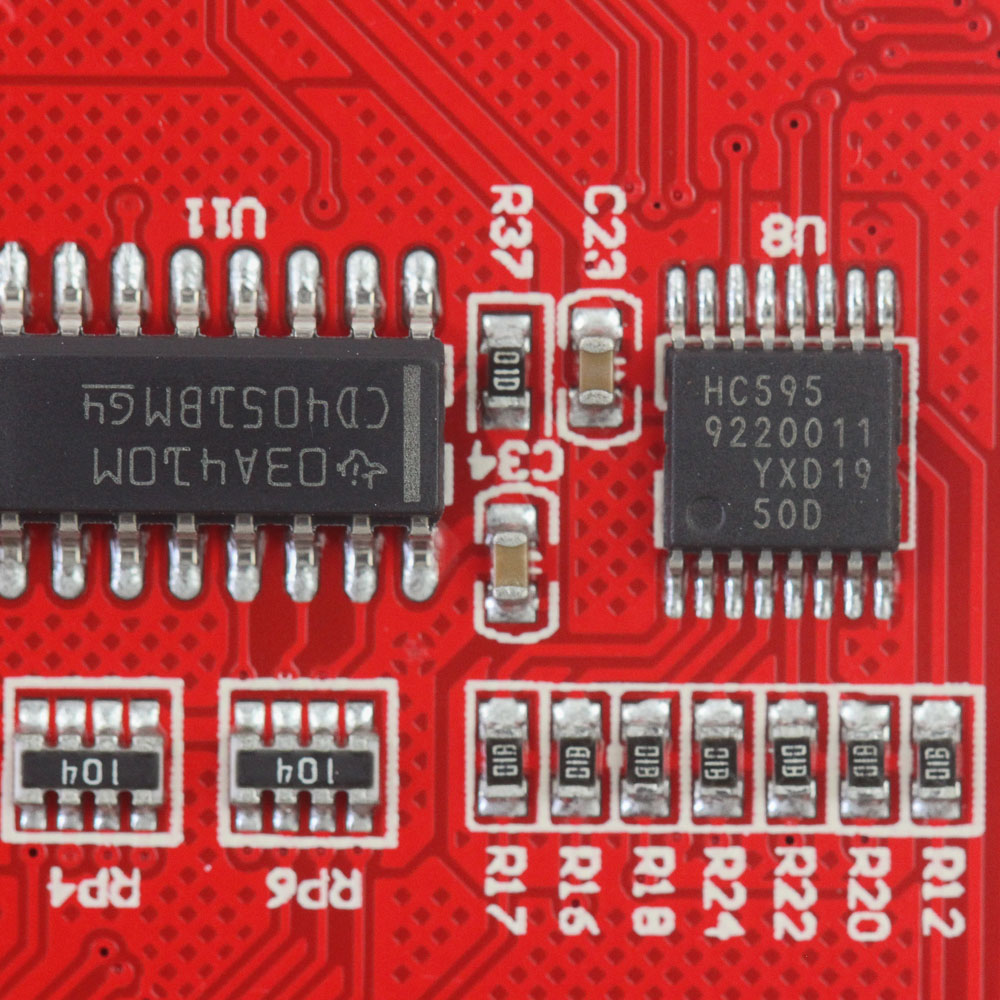
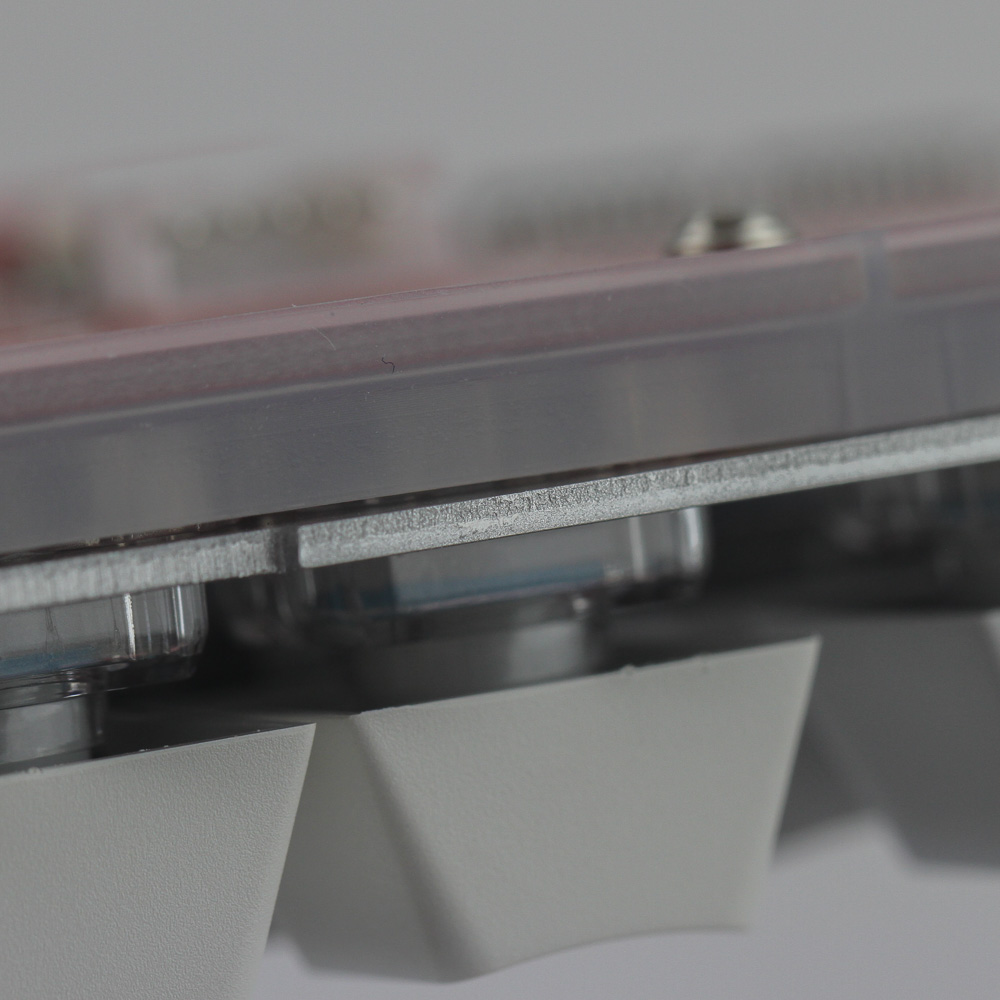
There are not many components here, but those present are also soldered very well. In fact, I was unable to identify the components much to my chagrin. I recognize the TI logo, but not much else. The good thing is that this is a fairly simple keyboard as far as its operation goes, so it does not need the latest and greatest. The O-ring seal obscures the PCB when looking at it from the side, but we do get a better look at the steel plate here that adds structural integrity and also acts as a frame to hold the switch tops.
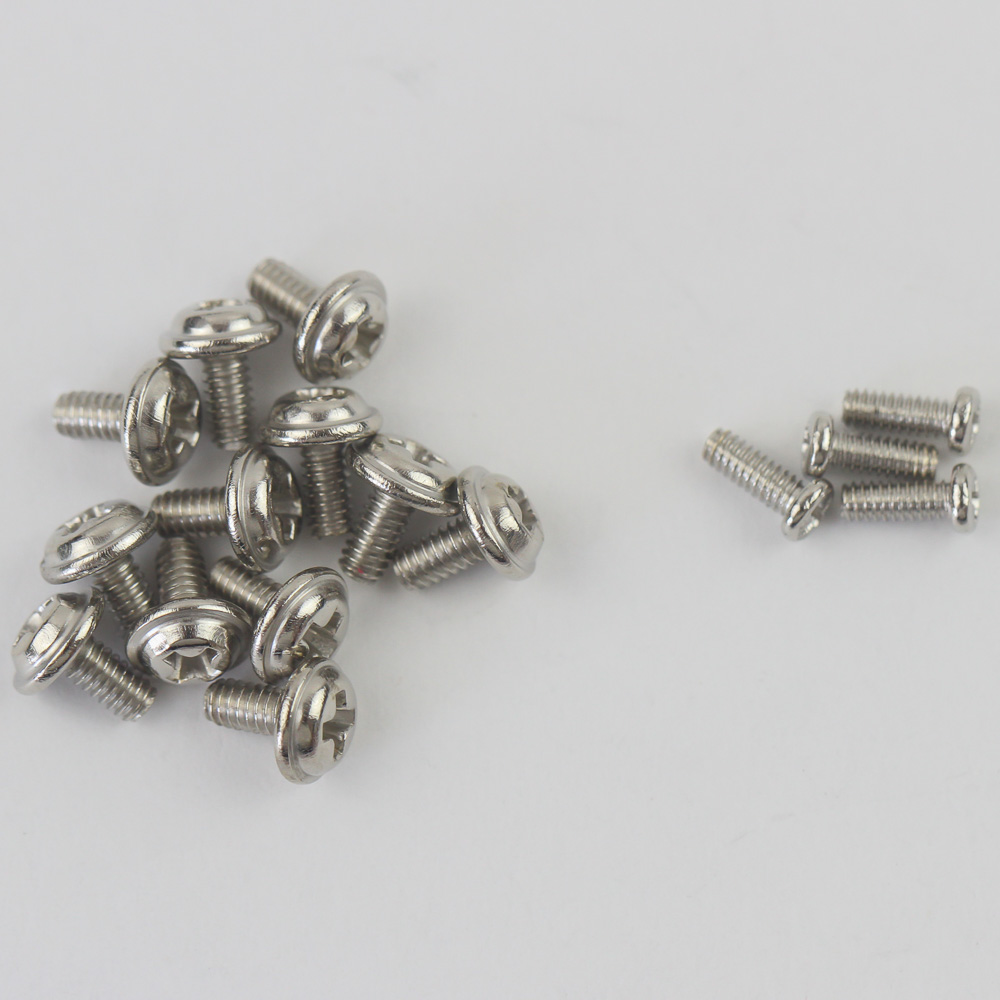
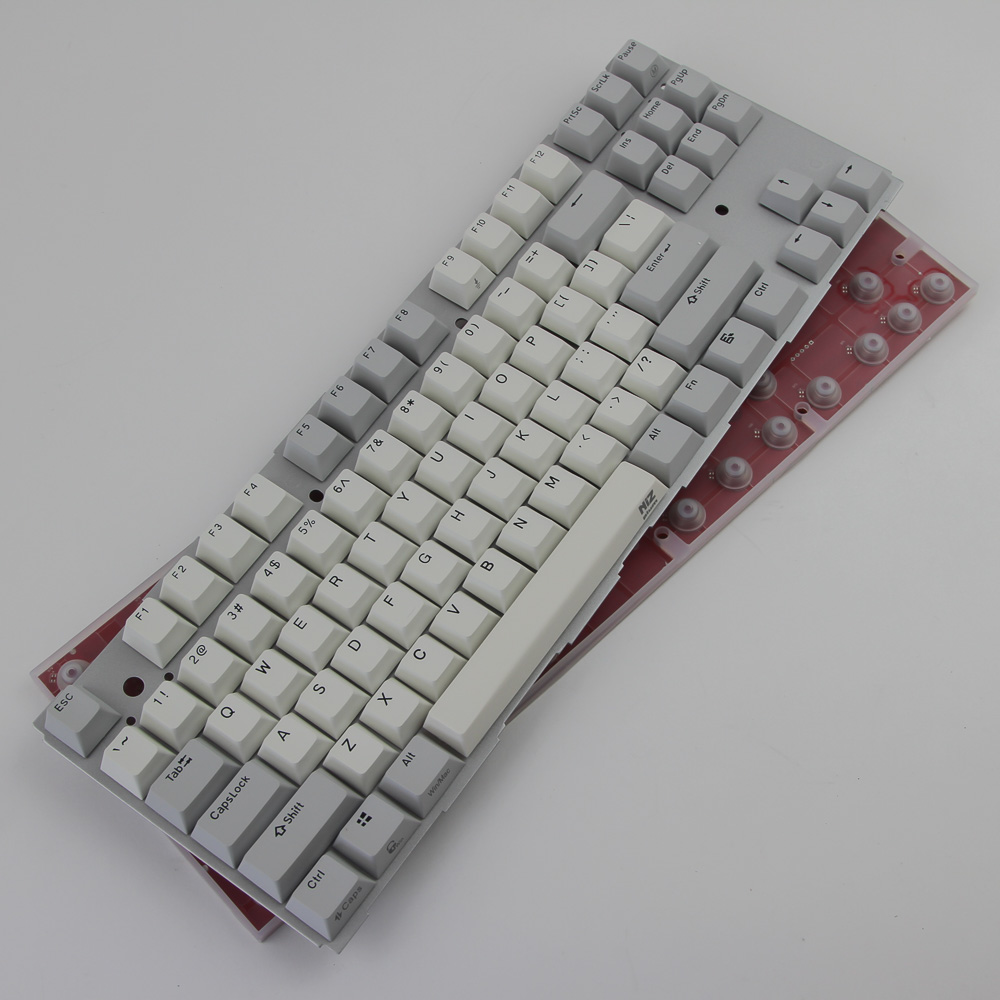
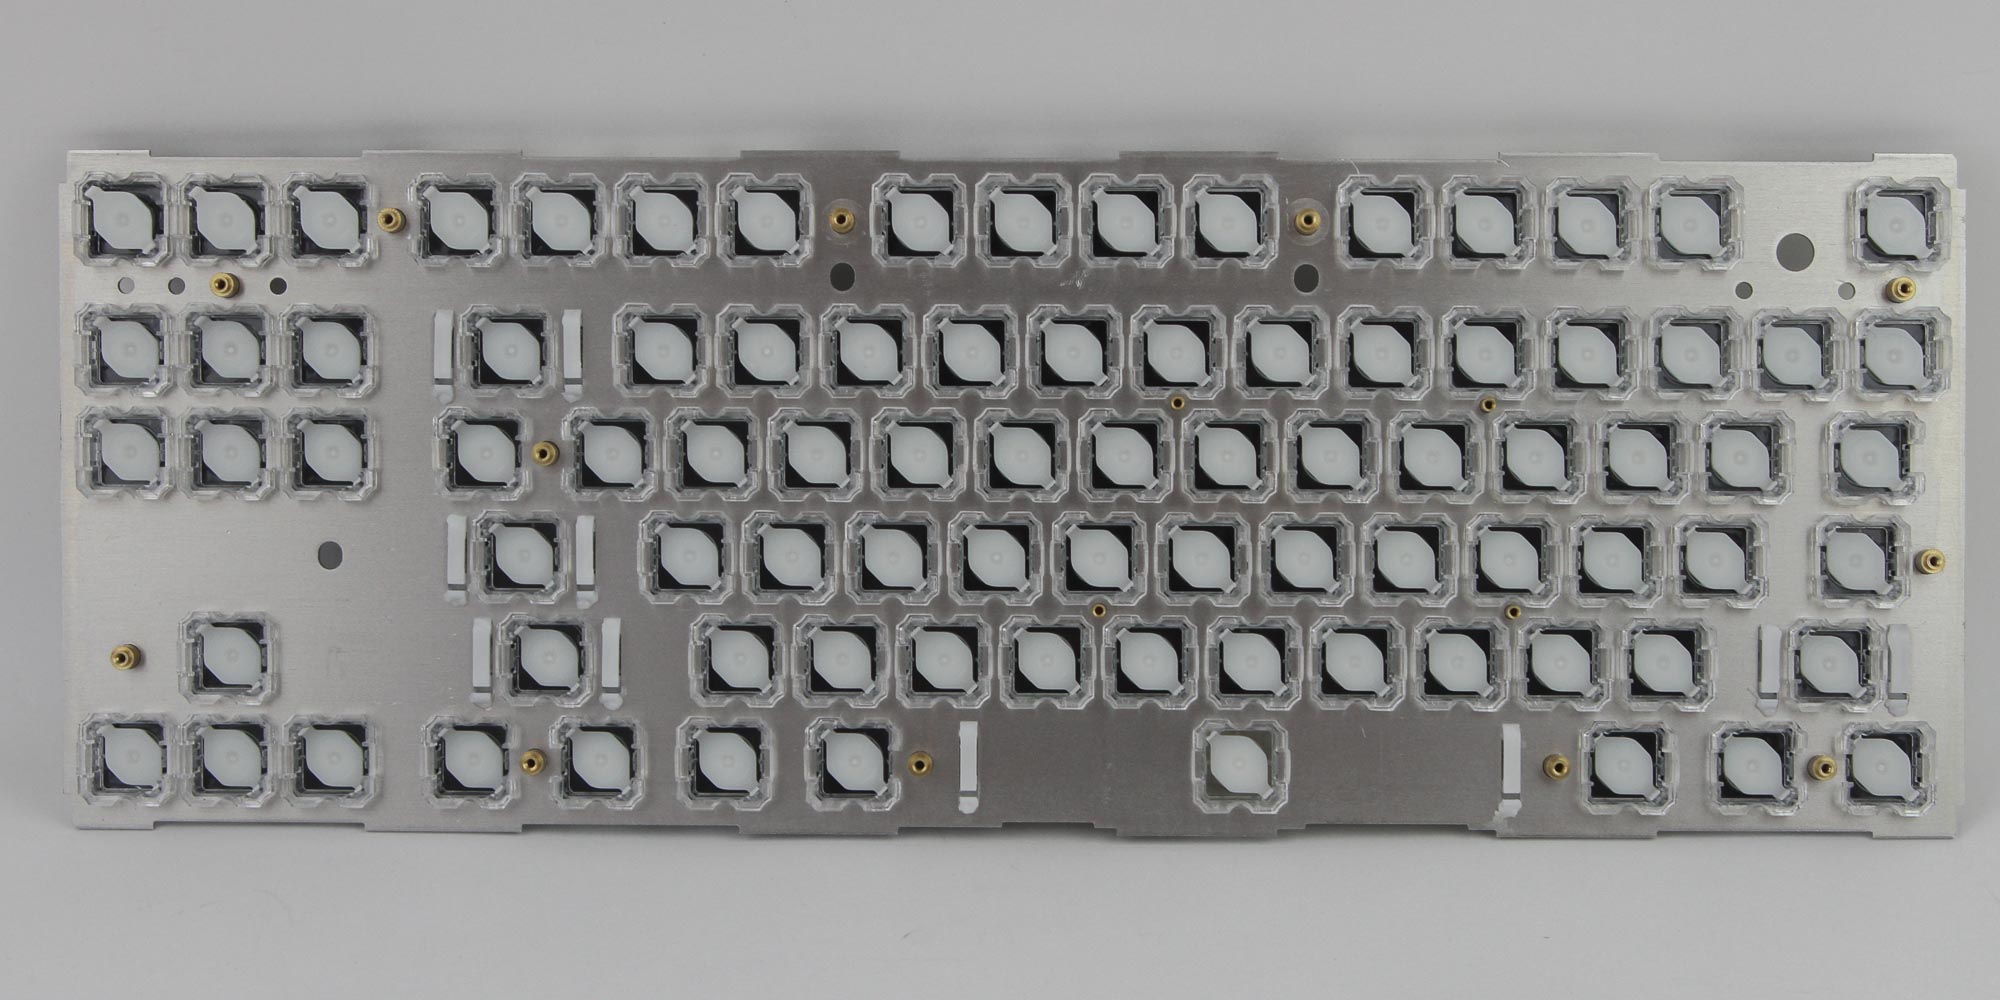
Here's the point of no-return, although I will say that squeezing the PCB back into place with the O-ring seal all around isn't the easiest thing in the world, either. Twelve larger and four smaller Phillips head screws have to be removed to separate the PCB from the steel plate, which now gives us a better look at the latter. If you remove the keycaps, the tops of the switches come off as well, but I left them on to avoid making the situation worse with loose components all over the place. There are brass threads on here, where the sixteen screws go in.
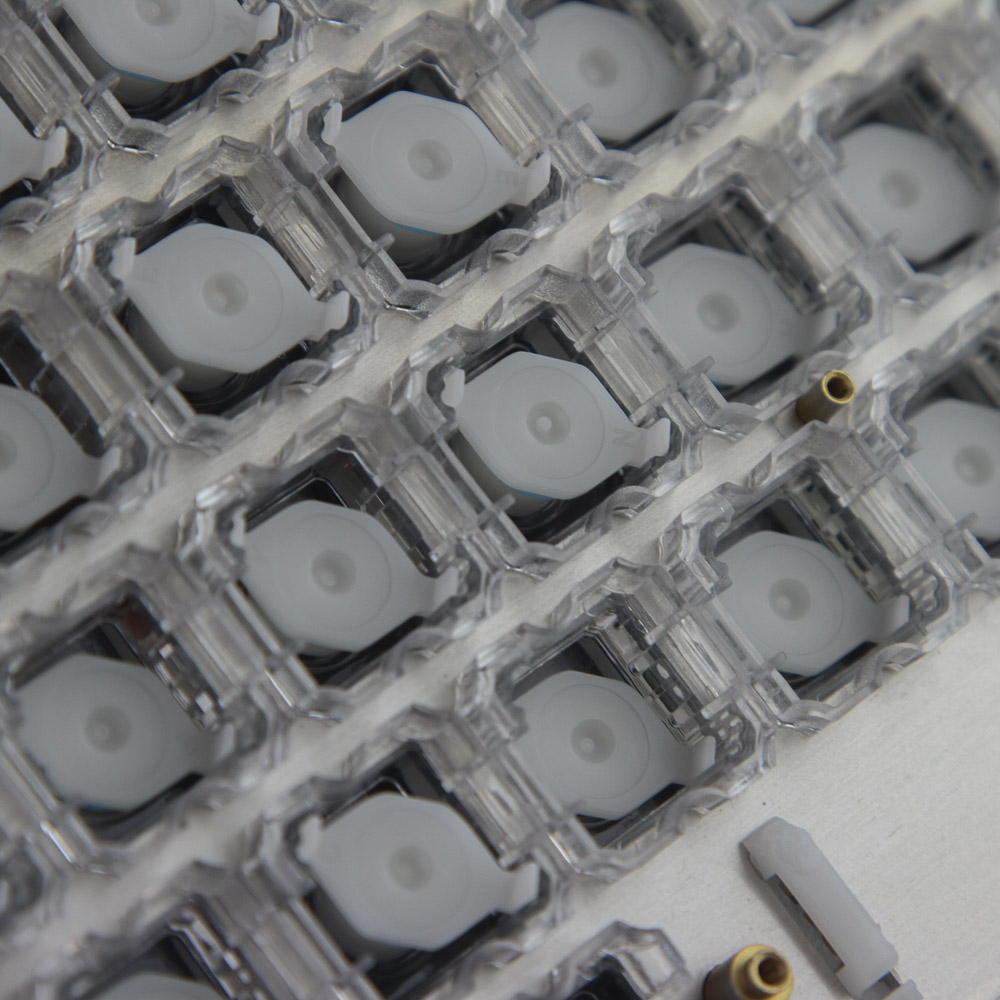

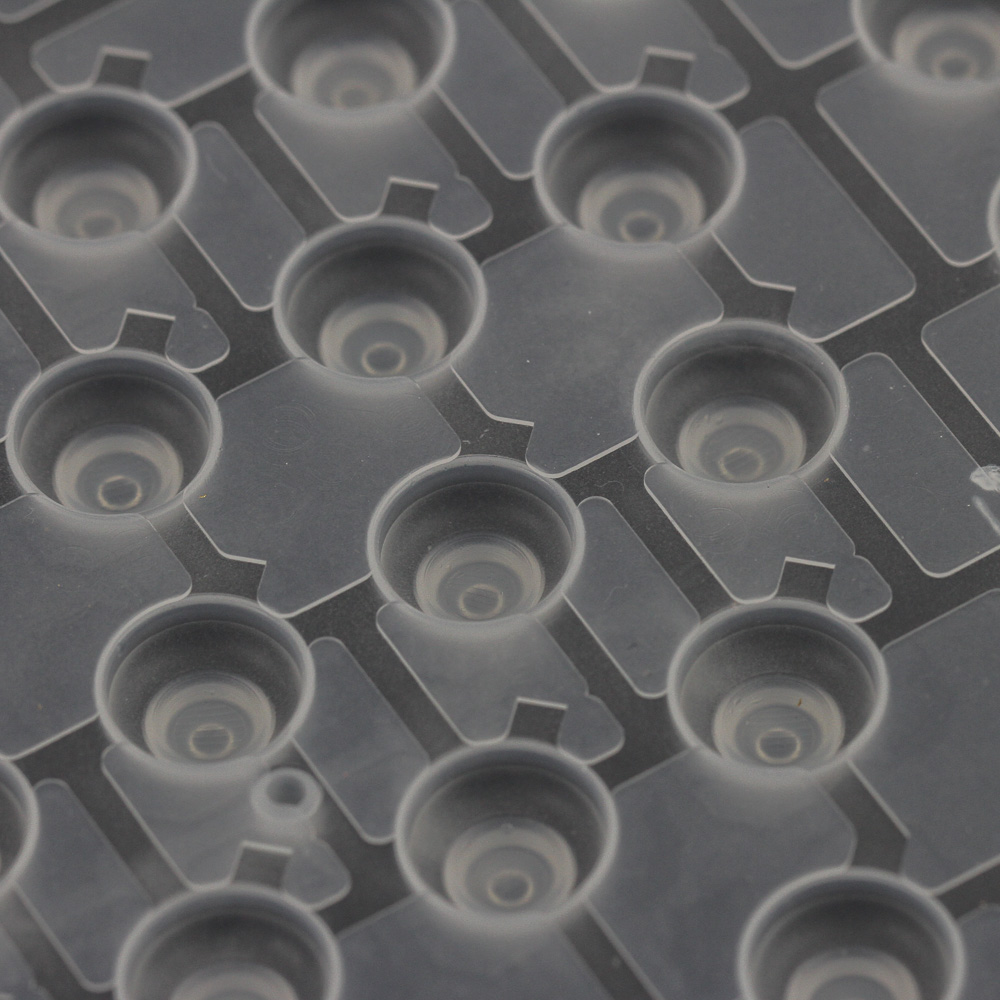
I have pressed in on some of the keycaps here to show how the stems travel inward to actuate the switch mechanism on the PCB. This is done with rubber domes, which is where some people justify their stance on these switches ultimately being membrane switches. The O-ring seal is part of a larger rubber layer that has molds go over the springs associated with each switch. This is the final piece of the puzzle and why the NIZ Plum is a quiet keyboard in operation. Peel off the rubber layer carefully lest you cause all the loose springs to jump around and you potentially lose them forever.
Perhaps it was previous experience with these keyboards, but I only had a few springs either remain in the rubber molds or get tangled with neighbors, and it hardly took any time to place them back on their contact pads. The only non-EC switch here is for the power button, which is a more typical micro-switch that is also more tactile.
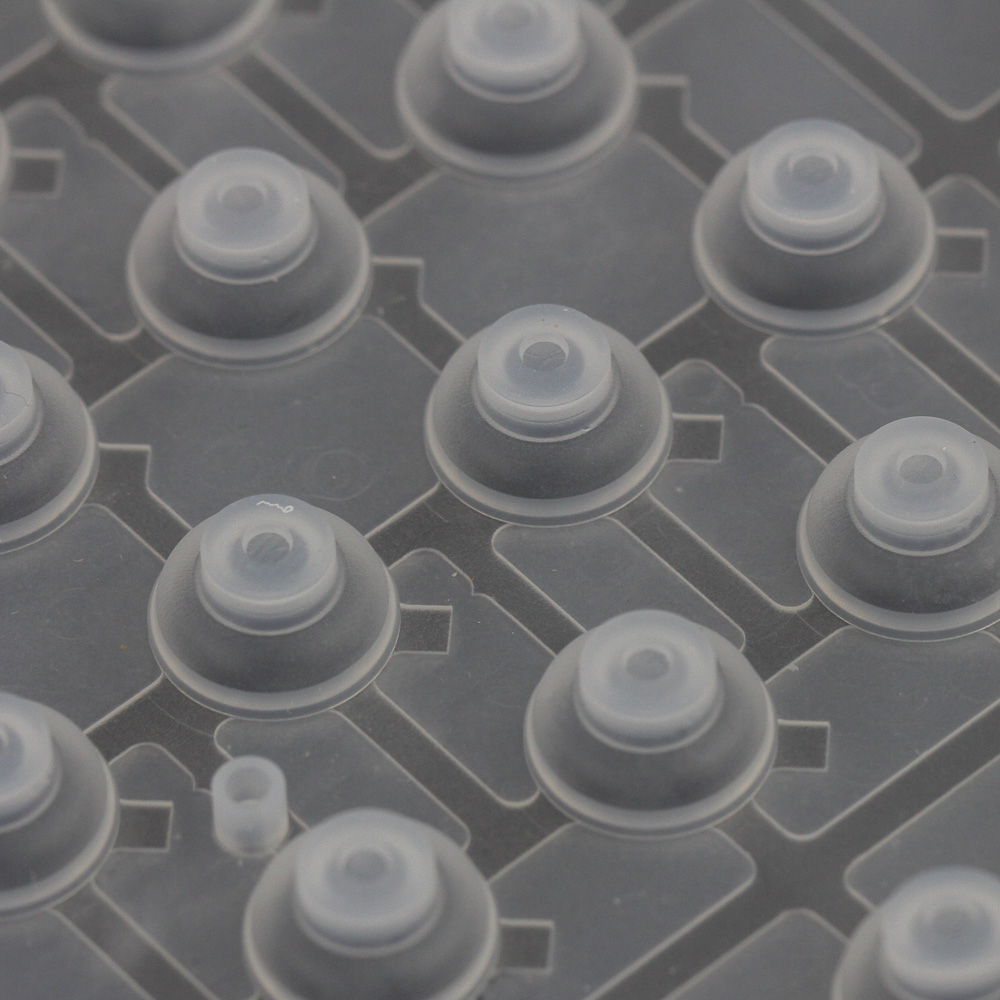
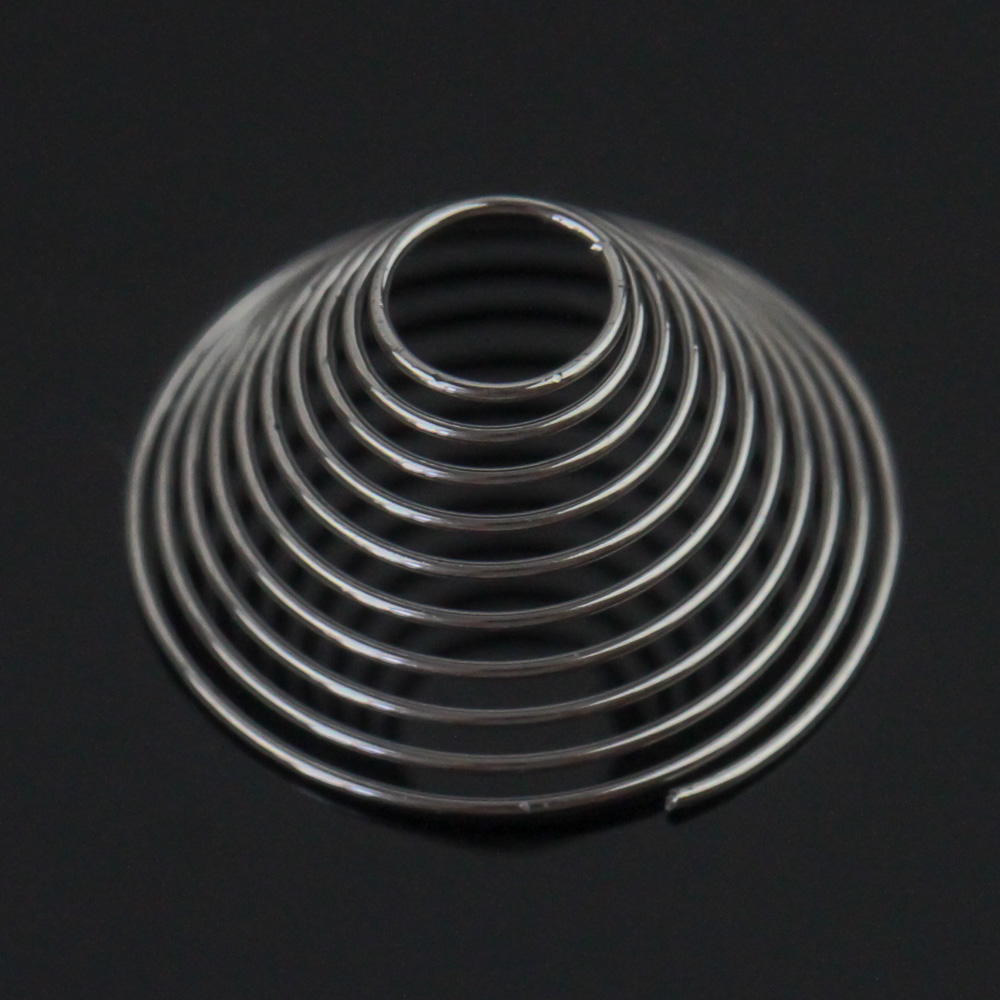
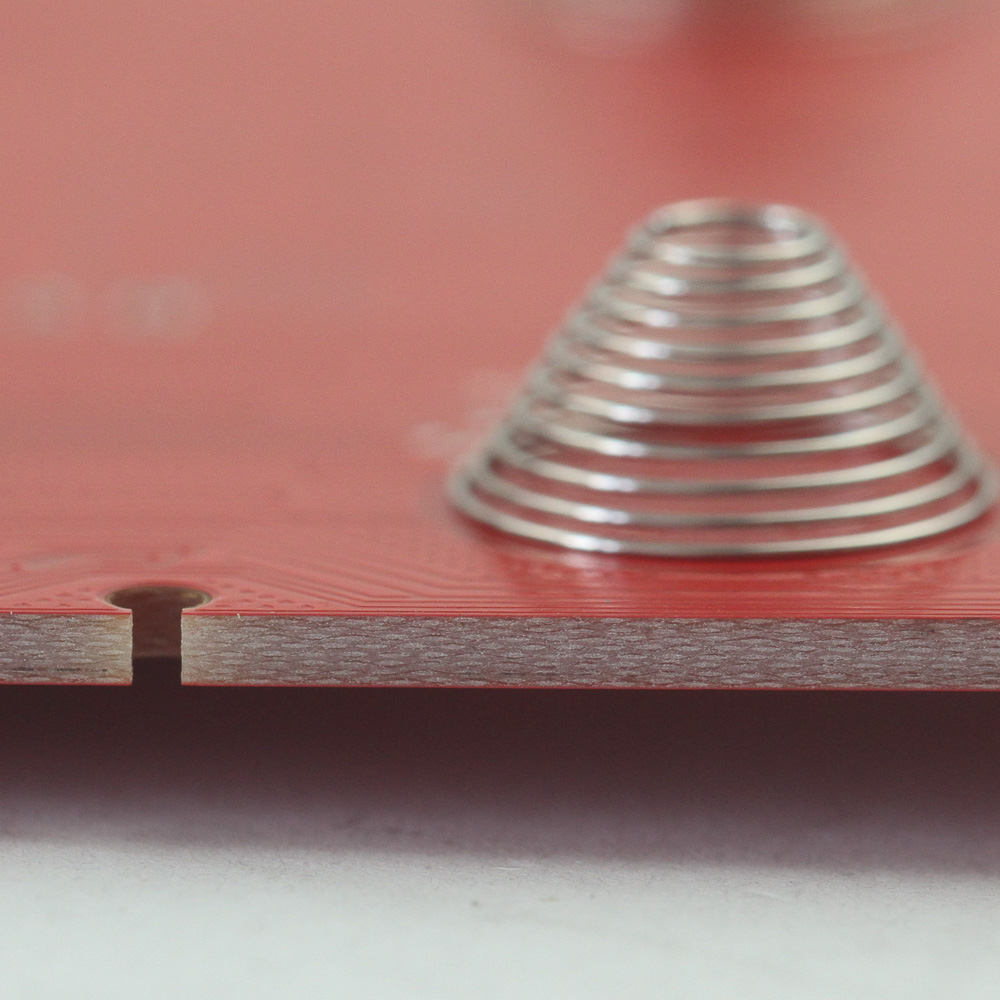
The molds have to be near-perfect with minimal tolerance, which really makes or breaks these EC switches. The springs themselves are conical in shape for a better fit, and also allow for the fairly unique force-travel characteristic such that they provide resistance up to where they will just collapse to bottom out. We also finally get a side view of the PCB here, which of course has multiple layers as that is the norm these days.
Before we move on, be advised that disassembly may void the warranty and that TechPowerUp is not liable for any damages incurred if you decide to go ahead and do so anyway.
Feb 20th, 2025 04:57 EST
change timezone
Latest GPU Drivers
New Forum Posts
- It's happening again, melting 12v high pwr connectors (805)
- Get ready to open your wallets people (27)
- What Router Are You Using For Your Computer (60)
- 3D Printer Club (421)
- 5800X3D Undervolting ? (17)
- "Is the RX 6800 hotspot value normal ? (13)
- Lowering idle power on Zen 4? (95)
- Your PC ATM (35244)
- Should I make a thermal maintenance on my GPU? (59)
- TPU's Nostalgic Hardware Club (19967)
Popular Reviews
- MSI GeForce RTX 5070 Ti Ventus 3X OC Review - MSRP Promised
- Gigabyte GeForce RTX 5090 Gaming OC Review
- Galax GeForce RTX 5070 Ti 1-Click OC White Review
- Ducky One X Inductive Keyboard Review
- AVerMedia X'Tra Go GC515 Review
- AMD Ryzen 7 9800X3D Review - The Best Gaming Processor
- WD Black SN7100 2 TB Review - The New Best SSD
- MSI MAG Z890 Tomahawk Wi-Fi Review
- NVIDIA GeForce RTX 5080 Founders Edition Review
- Kingdom Come Deliverance II Performance Benchmark Review - 35 GPUs Tested
Controversial News Posts
- AMD Radeon 9070 XT Rumored to Outpace RTX 5070 Ti by Almost 15% (302)
- AMD is Taking Time with Radeon RX 9000 to Optimize Software and FSR 4 (256)
- AMD Plans Aggressive Price Competition with Radeon RX 9000 Series (246)
- AMD Radeon RX 9070 and 9070 XT Listed On Amazon - One Buyer Snags a Unit (242)
- Edward Snowden Lashes Out at NVIDIA Over GeForce RTX 50 Pricing And Value (241)
- AMD Denies Radeon RX 9070 XT $899 USD Starting Price Point Rumors (239)
- New Leak Reveals NVIDIA RTX 5080 Is Slower Than RTX 4090 (215)
- AMD's Radeon RX 9070 Launch Faces Pricing Hurdles (175)