 21
21
NZXT H7 Flow (2024) Review
Thermal Stress Test »Assembly

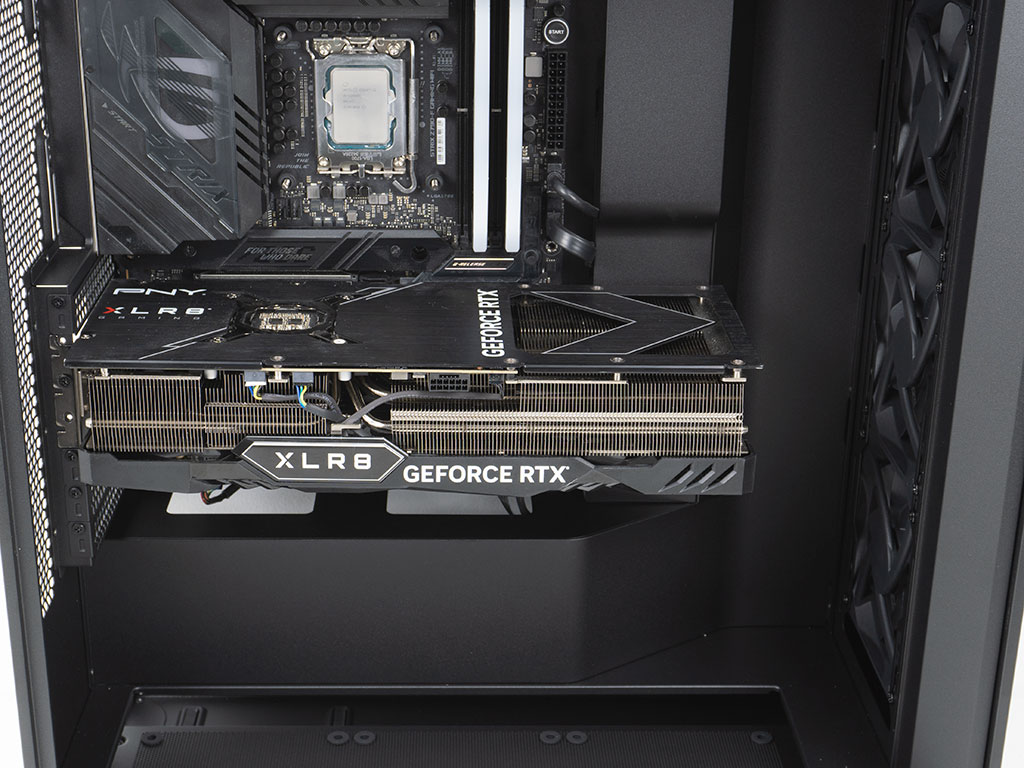
Installing the motherboard, it beautifully sinks into the case, but unfortunately those large openings are a bit of a distraction. While this may blend into the background on the black variant of the NZXT H7 Flow, it will be harder to manage for the white version. Installing a GPU also fits perfectly, with tons of room in the front for those bigger liquid cooling setups.
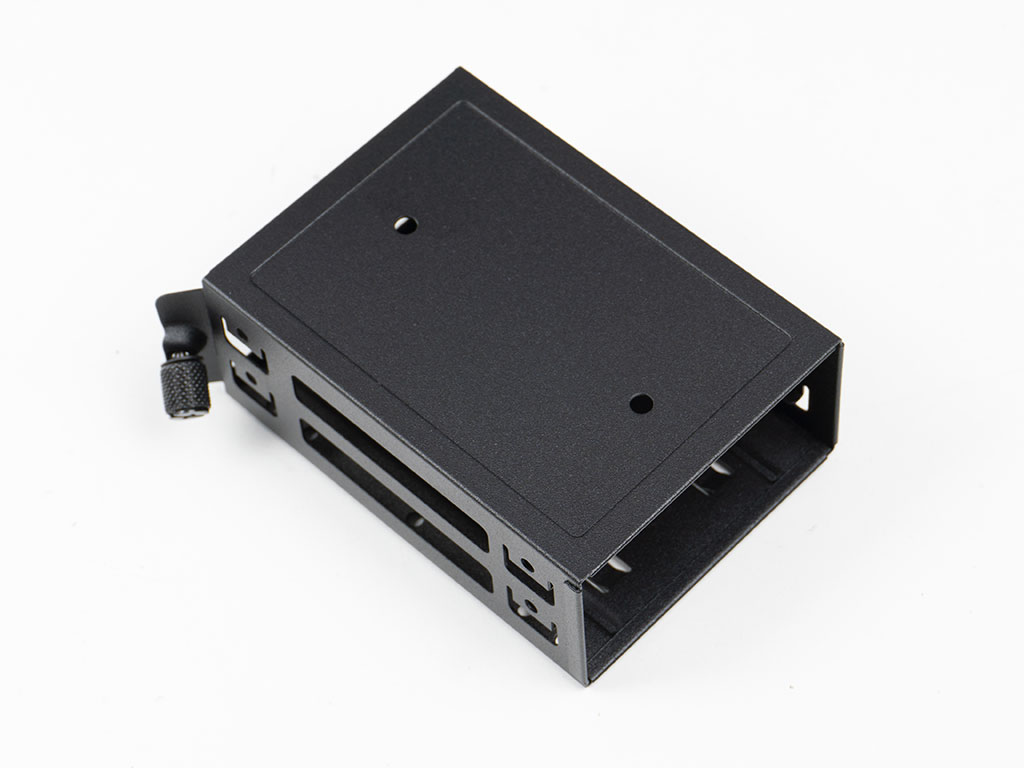


Adding an SSD using the compact cage is a breeze as you can simply screw it in outside the confines of the chassis and then slide it back into place using the captive thumbscrew to pin it down.


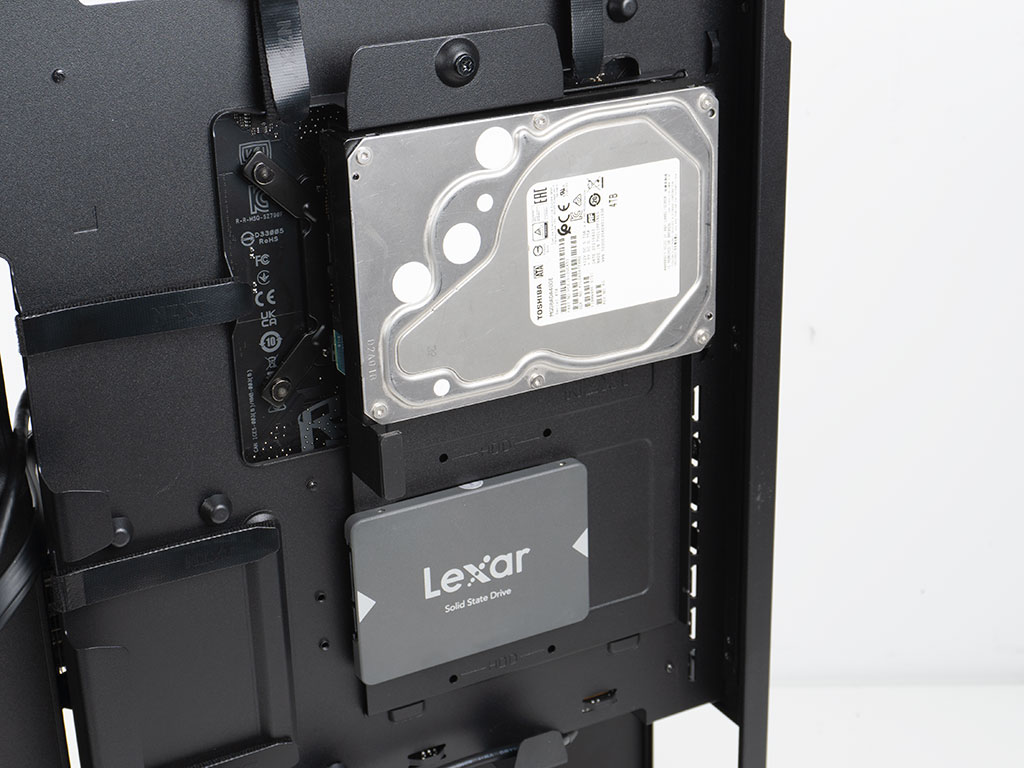
The bigger mounting plate requires a screw drive, but that screw also feels captive. The drives are installed using screws as well, with the connectors facing towards the front of the enclosure. This should make it easy to ensure both data and power wiring can utilize the embedded Velcro straps.

Installing the PSU, there is realistically no limit on how big your choice can be, even if NZXT has to put a number on it. It is secured with four screws through the back of the chassis and there is a ton of room for loose wires. This is the only place we are missing a few hooks for zip ties, to contain such wires on the floor of the chassis.


Unsurprisingly the 360 mm AIO fits beautifully as well, with lots of room in the front, so that you could pair it with a radiator in the front of the case as well. On top of that, the rear fan or AIO mounting location is not compromised either. Thanks to the vertical space, all the ports of on the motherboard are perfectly accessible as well. As you can see from this angle, thanks to the embedded board, there are barely any wires visible.


The finished assembly looks great thanks to the rounded corners and hidden openings, paired with the embedded motherboard tray. As expected only the openings at the bottom edge of the board are a little bit of an eyesore. In the back of the NZXT H7 Flow, we were successful in our quest to avoid the use of any Zip ties. This means that everything in your system will remain easily accessible. Since NZXT also included metal tabs along major cable to place cables on - for example right above the PSU, you can easily ensure that wiring visibility on the interior is minimized.
Finished Looks


Turning the system on, there aren't any big visuals from the NZXT H7 Flow to let you know that the system is powered up except for the white LED ring around the power button. Naturally, with the RGB variant you will also have the glow of the fans in the front of the chassis.


Looking at the front, you can actually see through the entire case all the way out the back. This bodes well for airflow. Thanks to the clear, tintless glass panel, all your components are clearly visible even without additional illumination from the fans. In the back, everything is easily accessible as well. Thanks to the pair of hooks you can make sure your external wires are managed as well. Ideally, NZXT could have included two Velcro strips for this purpose so you would not have to resort to one-time use Zip ties.
Feb 21st, 2025 13:28 EST
change timezone
Latest GPU Drivers
New Forum Posts
- It's happening again, melting 12v high pwr connectors (845)
- [PCGamer] Former Sony exec finally says the quiet part out loud: putting PlayStation games on PC is 'almost like printing money' (36)
- RTX5000 Series Owners Club (121)
- 2022-X58/1366 PIN Motherboards NVME M.2 SSD BIOS MOD Collection (885)
- As we live the age of game remakes, which game you would like to see to have a remake? (301)
- Windows 11 General Discussion (5680)
- TPU's Nostalgic Hardware Club (19971)
- Dune: Awakening benchmark - post your results (7)
- B580 tanks performance with low end CPUs (160)
- [GPU-Z] Asus ROG Astral RTX 5090 OC Bios reading not supported (3)
Popular Reviews
- MSI GeForce RTX 5070 Ti Ventus 3X OC Review
- Gigabyte GeForce RTX 5090 Gaming OC Review
- Galax GeForce RTX 5070 Ti 1-Click OC White Review
- ASUS GeForce RTX 5070 Ti TUF OC Review
- Ducky One X Inductive Keyboard Review
- MSI GeForce RTX 5070 Ti Vanguard SOC Review
- MSI GeForce RTX 5070 Ti Gaming Trio OC+ Review
- AMD Ryzen 7 9800X3D Review - The Best Gaming Processor
- MSI MAG Z890 Tomahawk Wi-Fi Review
- NVIDIA GeForce RTX 5080 Founders Edition Review
Controversial News Posts
- AMD Radeon 9070 XT Rumored to Outpace RTX 5070 Ti by Almost 15% (302)
- AMD Plans Aggressive Price Competition with Radeon RX 9000 Series (268)
- AMD is Taking Time with Radeon RX 9000 to Optimize Software and FSR 4 (256)
- AMD Radeon RX 9070 and 9070 XT Listed On Amazon - One Buyer Snags a Unit (247)
- Edward Snowden Lashes Out at NVIDIA Over GeForce RTX 50 Pricing And Value (241)
- AMD Denies Radeon RX 9070 XT $899 USD Starting Price Point Rumors (239)
- New Leak Reveals NVIDIA RTX 5080 Is Slower Than RTX 4090 (215)
- NVIDIA GeForce RTX 5090 Spotted with Missing ROPs, Performance Loss Confirmed, Multiple Vendors Affected (170)