 28
28
SilverStone ALTA G1M Review
Thermal Stress Test »Review System
| System Parts for Case Reviews | |
|---|---|
| Processor: | ATX: Intel Core i5-11600K mATX/ITX: Intel Core i5-10600K Provided by: Intel |
| Motherboards: | ATX: Gigabyte Z590 AORUS PRO AX ITX: Gigabyte Z590I Vision D Provided by: Gigabyte mATX: ASRock B560M Steel Legend Provided by: ASRock |
| Graphics Card: | Palit GeForce RTX 2080 Gaming Pro OC Provided by: Palit ZOTAC GAMING GeForce RTX 3060 Ti Twin Edge OC Provided by: Zotac |
| Memory: | 16 GB XPG SPECTRIX D50 3200 MHz 16 GB XPG SPECTRIX D60G DDR4 3000 MHz 16 GB XPG GAMMIX D20 DDR4 3200 MHz Provided by: ADATA |
| HDD: | Toshiba MG08ADA400E 7200 RPM SATA III Provided by: Toshiba |
| SSD: | ATX:XPG SPECTRIX S20G 500 GB mATX: XPG GAMMIX S50 Lite 1 TB ITX: ADATA Falcon 512 GB ADATA Ultimate SU800 512 GB ADATA Ultimate SU720 500 GB Provided by: ADATA |
| Power Supply: | ATX: Fractal Design ION+ 650W 80 Plus Gold SFX: Fractal Design ION SFX-L 650W 80 Plus Gold Provided by: Fractal Design |
| Cooling: | be quiet! Pure Loop 120/240/280/360 Provided by: be quiet! |
Assembly
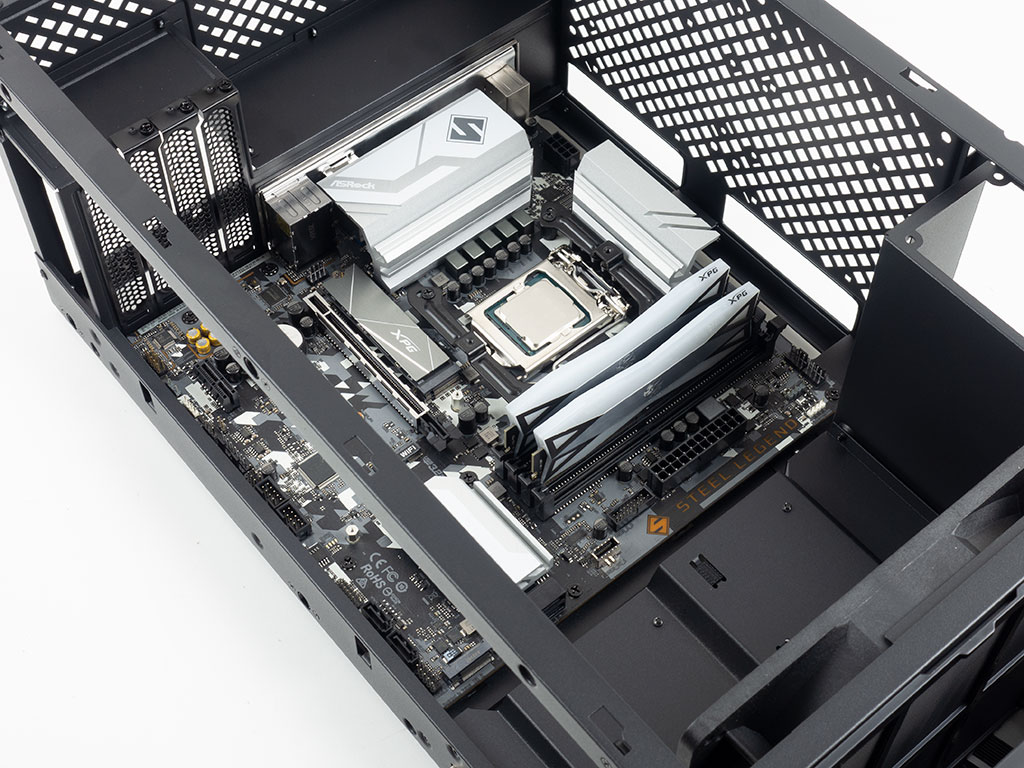
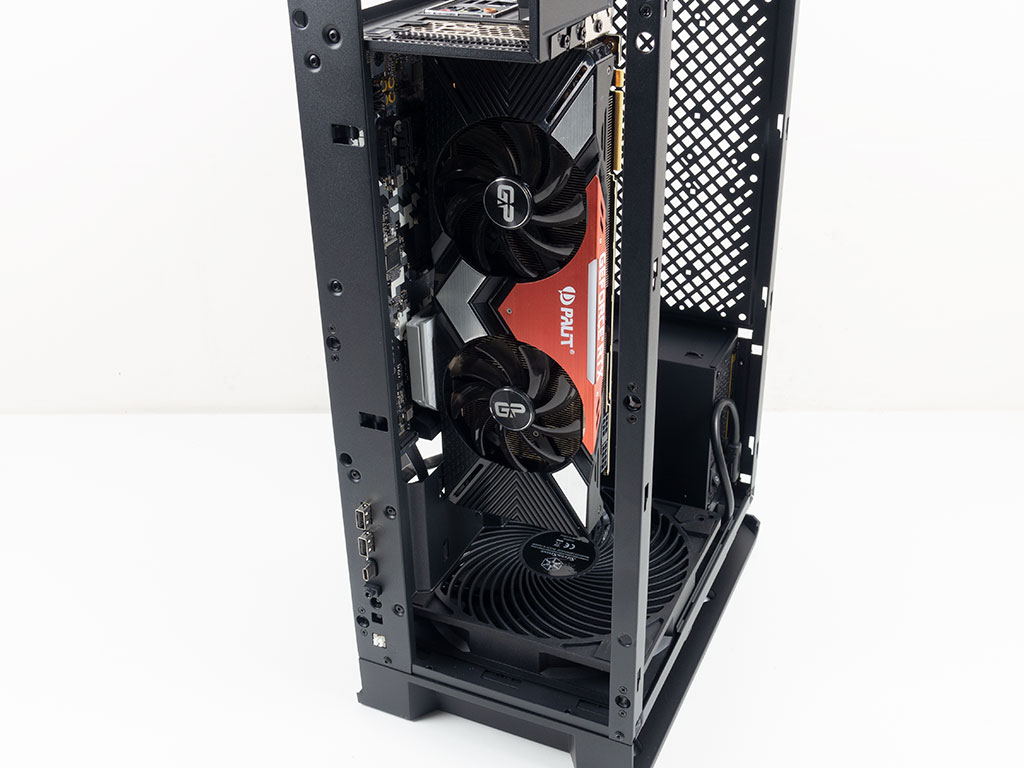
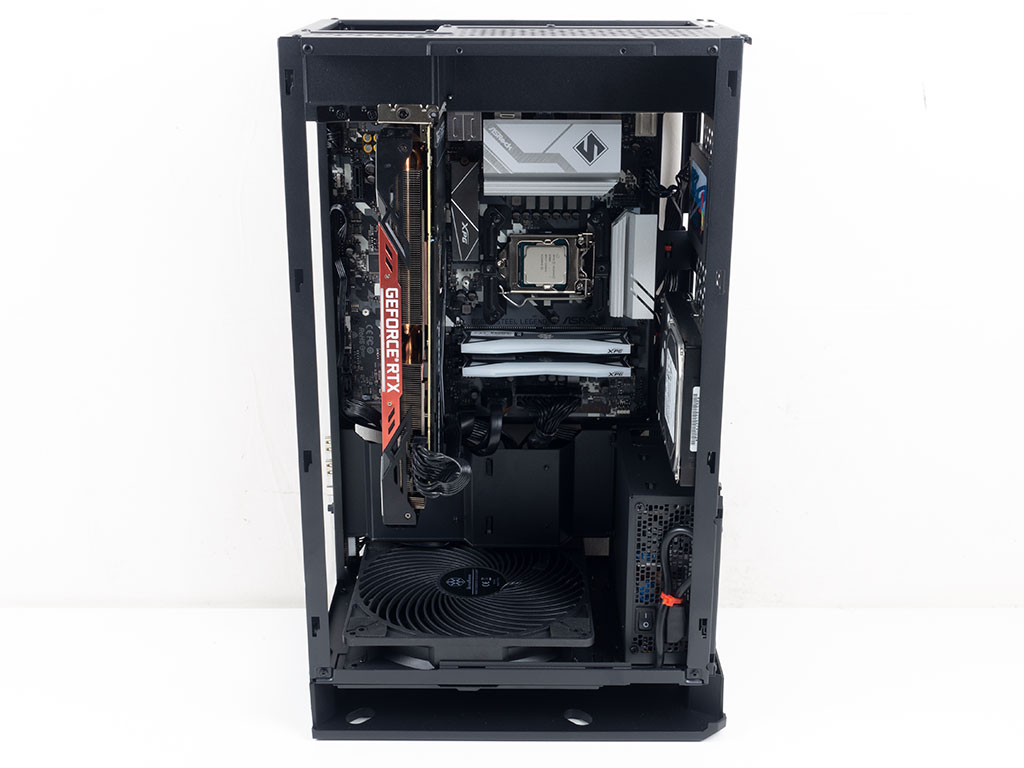
Installing the motherboard is a breeze thanks to access on all sides. SilverStone designed the Alta G1M such that the board fits like a glove as well, making its unique cable-management possibilities a welcome sight. Our Palit GeForce RTX 2080 Ti fit just fine inside the chassis with lots of room to spare. You should really have no issues adding any GPU on the market to your system when using this chassis.
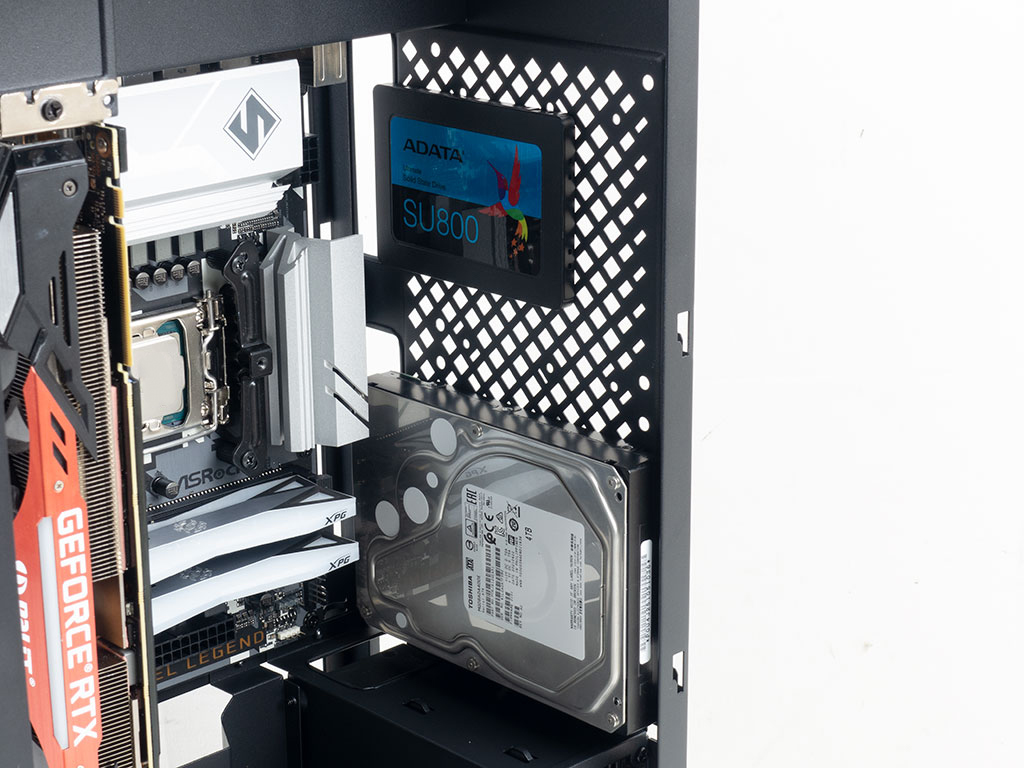
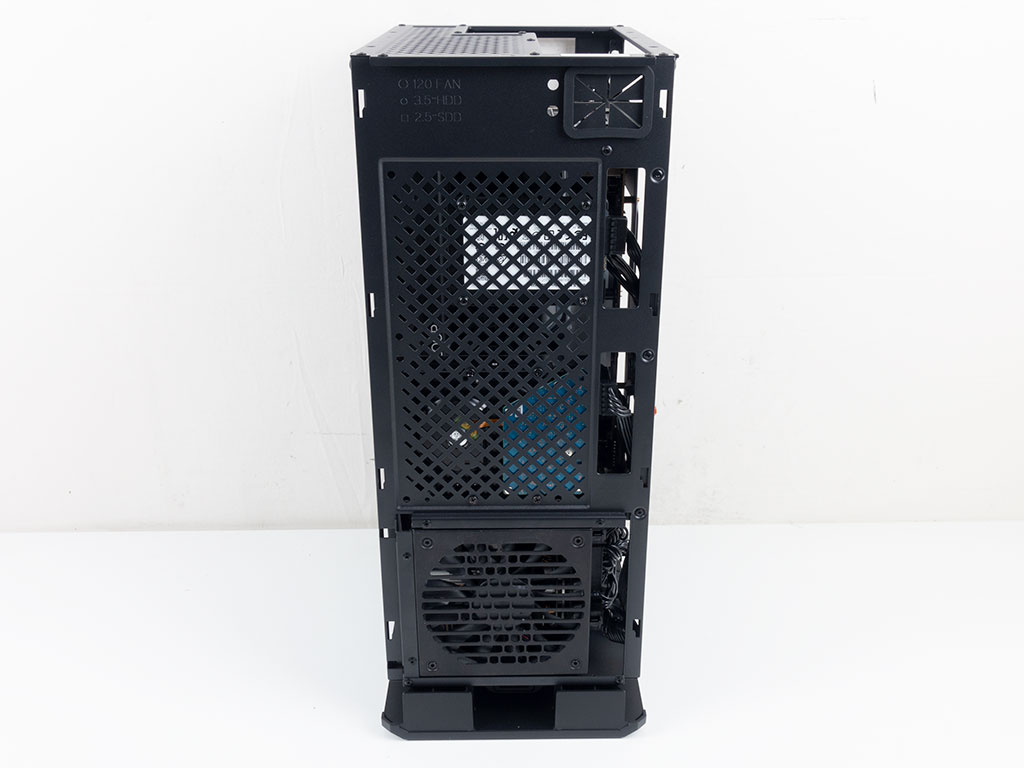
While there are two locations to add hard drives, the rear and side, we opted for the rear by simply screwing them into place in their appropriate locations. There are openings that line up with the connectors of these storage devices, so you should come across no issues when connecting them, or even swapping drives with a fully assembled system.
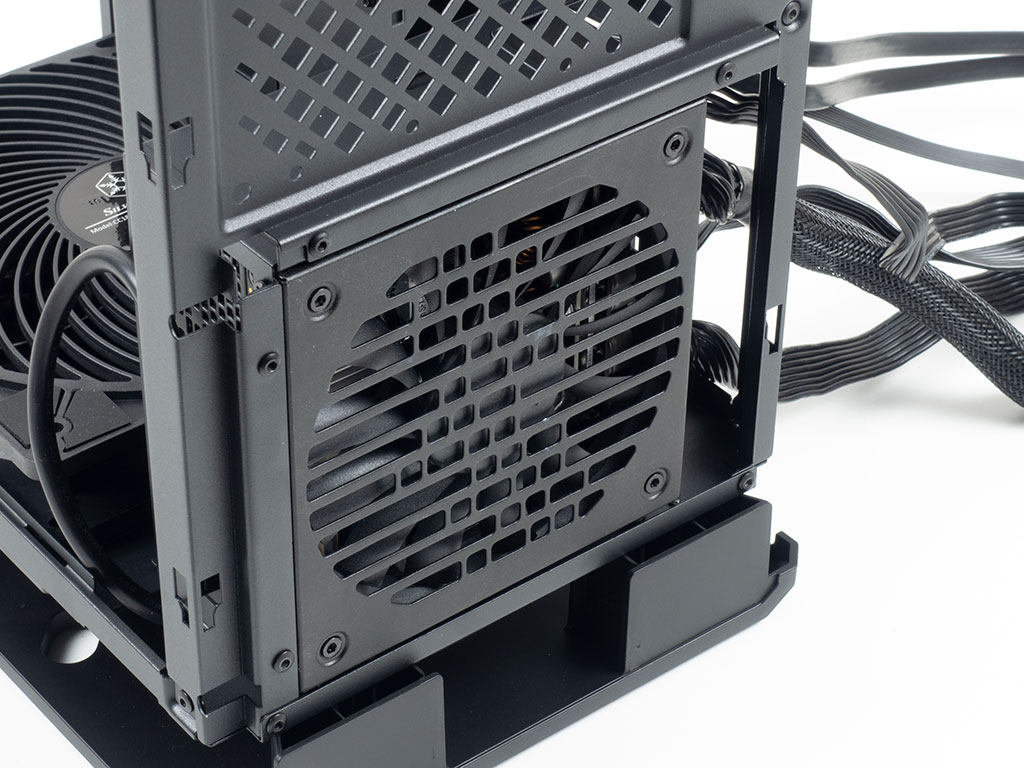
PSU installation offers similar flexibility, as it has its own dedicated, fully accessible bay. Even with our SFX-L unit, there is still a bit of room for cable management at the end.
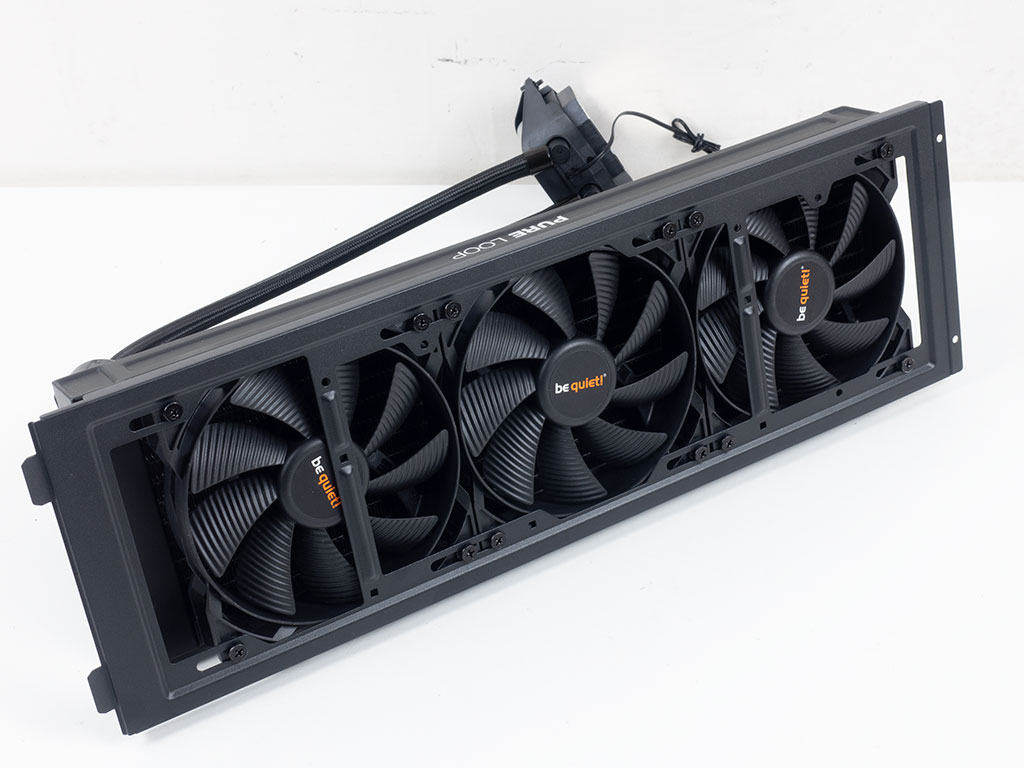

With those components installed, which was extremely easy with the the Alta G1M, it was time to attempt placing the 360 mm AIO. You may prepare it outside the chassis by screwing it to the mounting plate. Then simply clip the contraption into the bottom edge of the case and flip it up. All we had to do was make sure there was enough clearance on the bottom for the Air Penetrator fan, which had the whole cooling element fit perfectly after adjusting its height slightly on the frame.
With everything assembled and a few zip ties later, the whole result looks really clean. You will easily be able to access all major parts of the system—from the GPU to PSU and any hard drives—without having to take much apart. Even if you want to get to the NVMe drive or memory, all you have to do is remove the two screws holding the AIO in place.
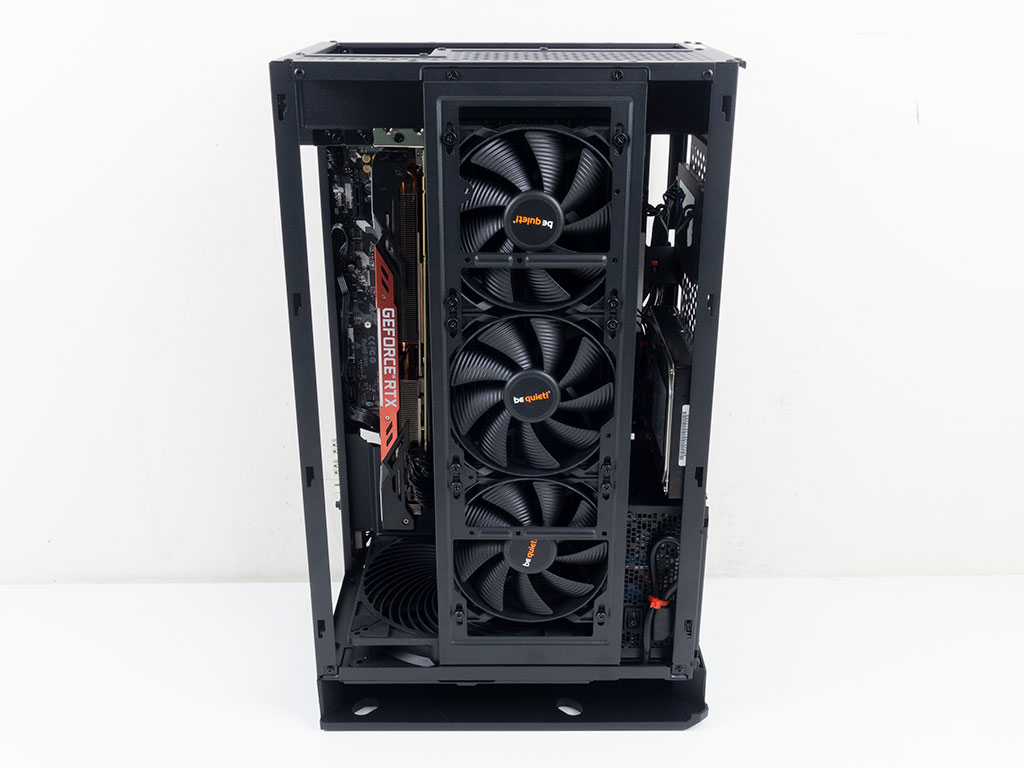
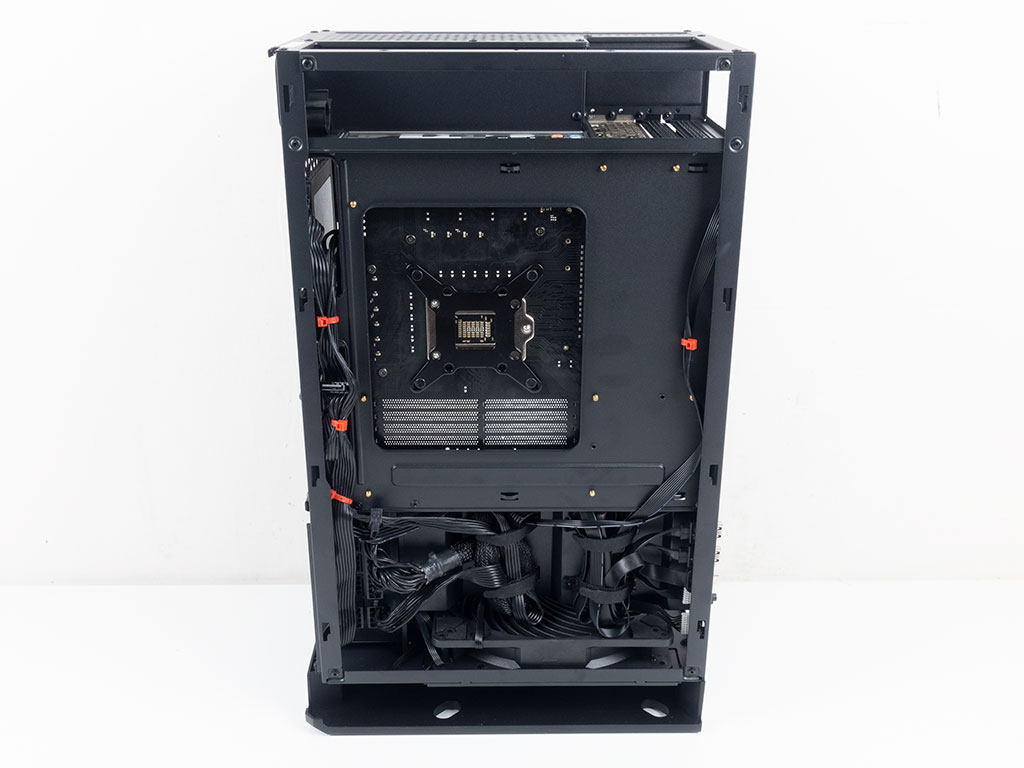
We opted to have the fans pull air into the case and through the radiator, but there is no reason you could not do it the other way around. On the motherboard side, you can clearly see where the four Velcro strips came in quite handy for holding all the excess cables in place and out of the way.
Finished Looks

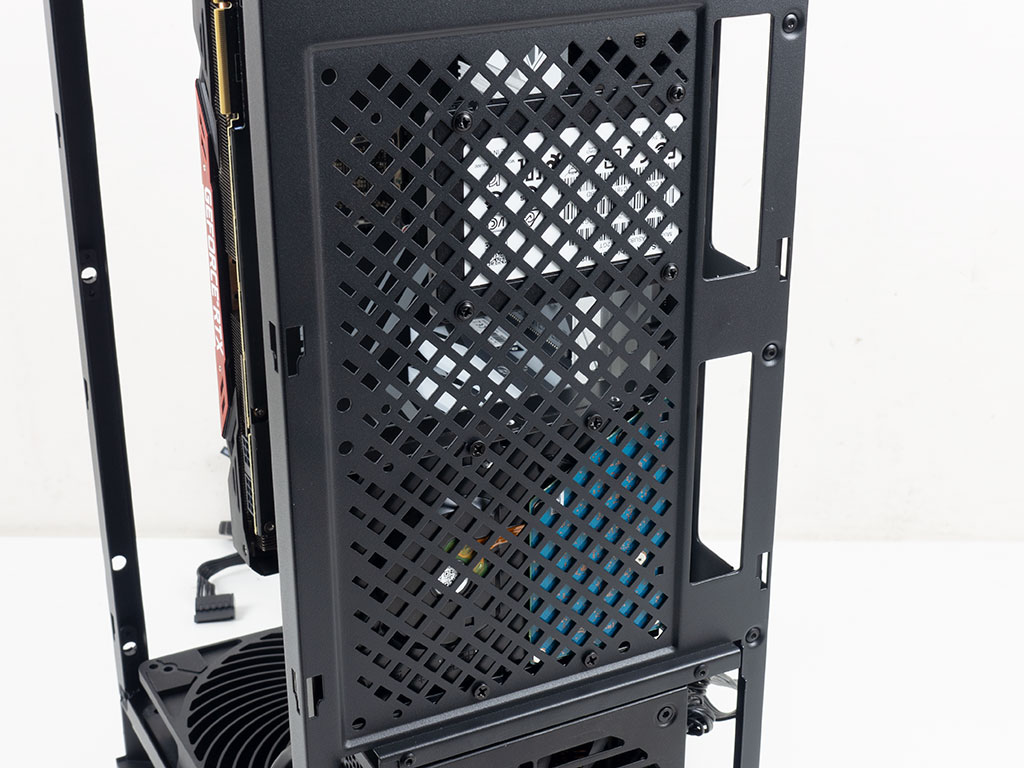
With all the panels back on the SilverStone Alta G1M, the only thing left to do was to connect everything. This is easily done by routing the cables through the opening in the back and then placing the magnetic cover over these to finish things off.
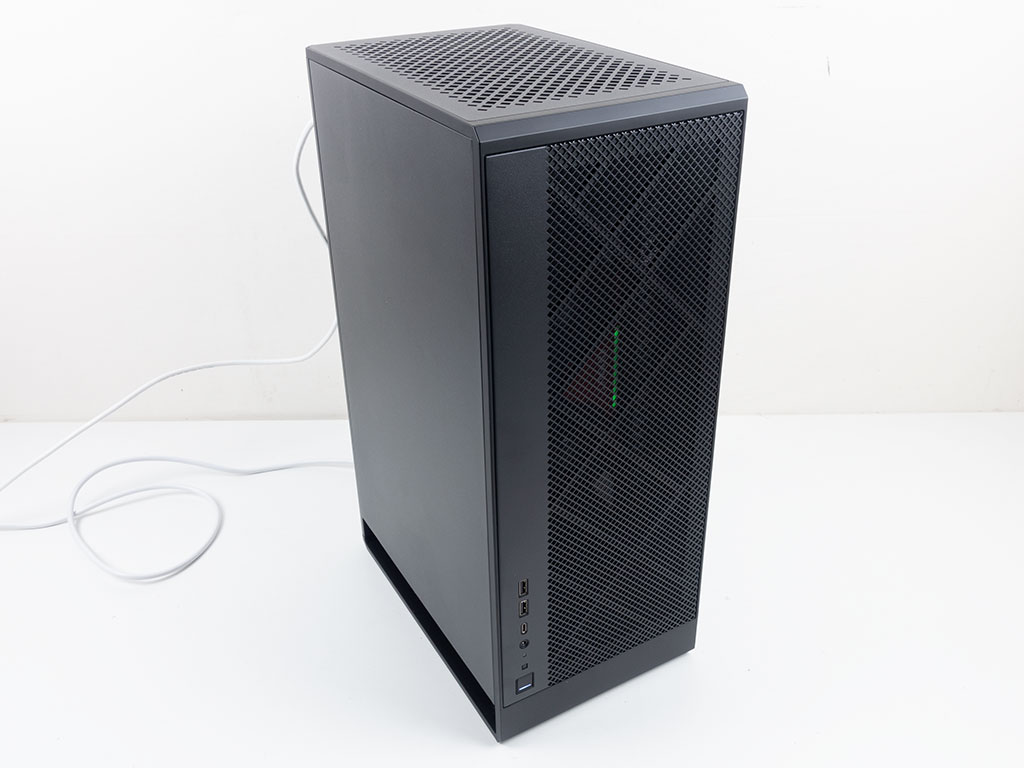
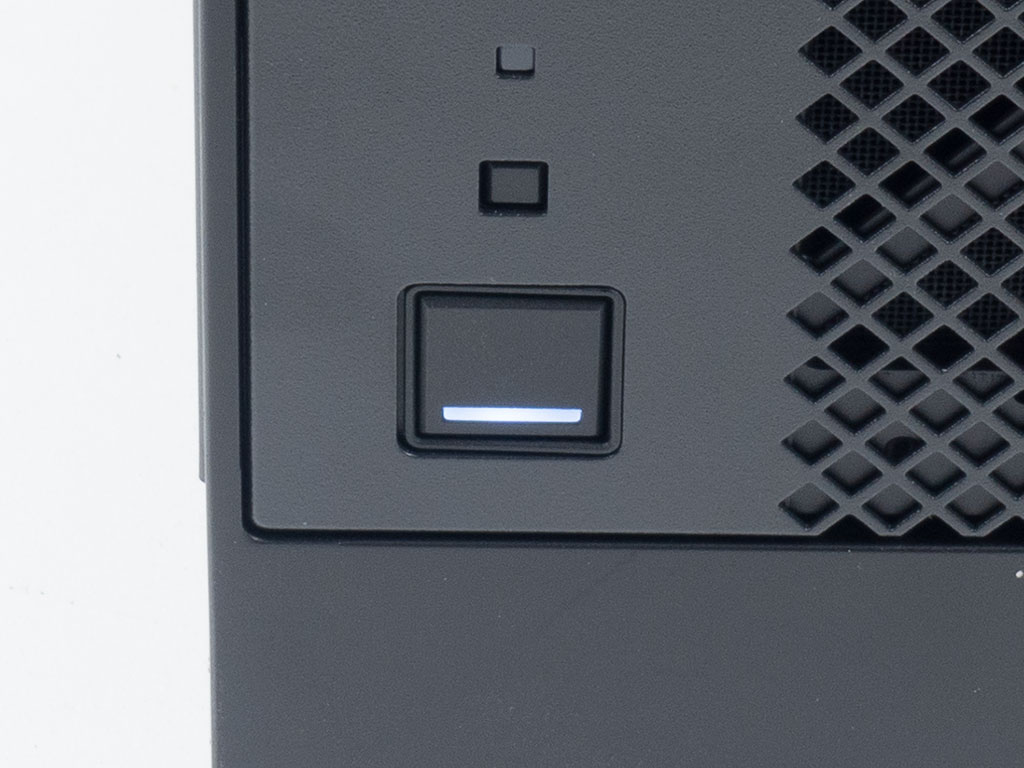
Once turned on, the Air Penetrator fan is nice and quiet, with a white LED in the power button letting you know the whole system is turned on as well.
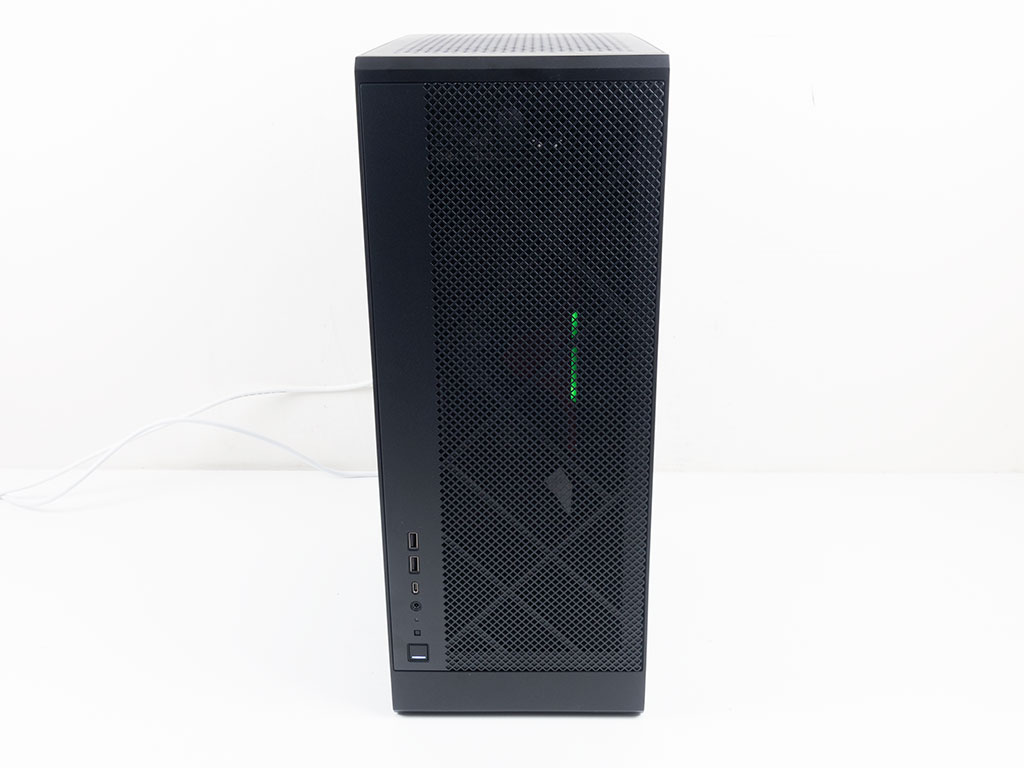
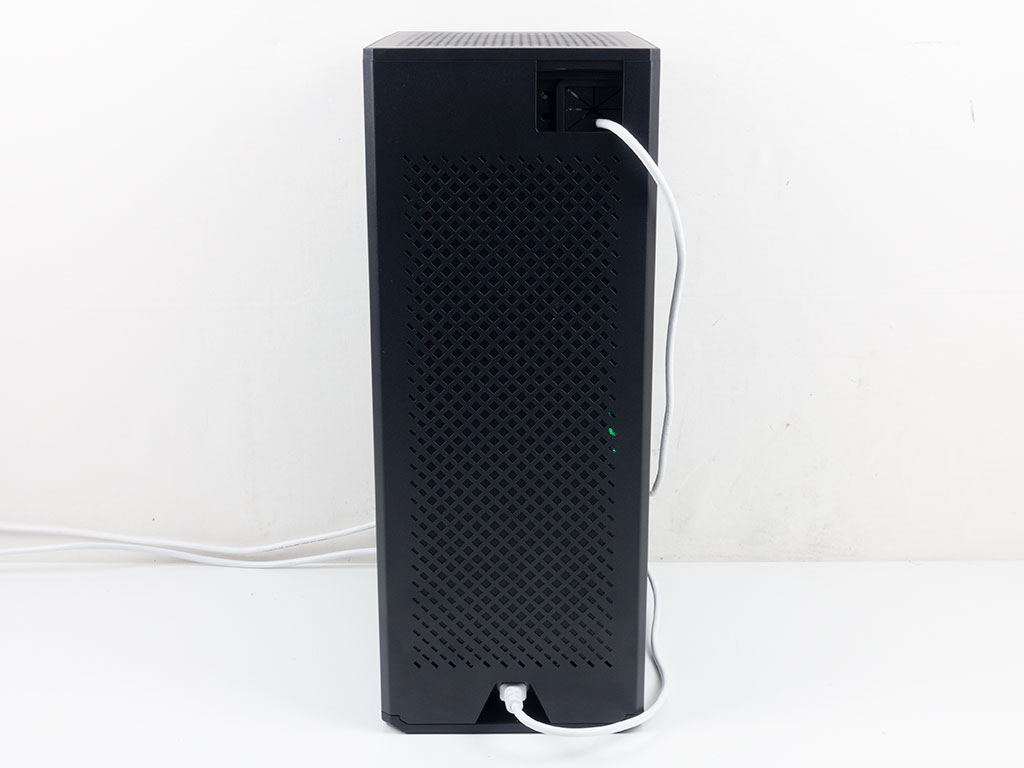
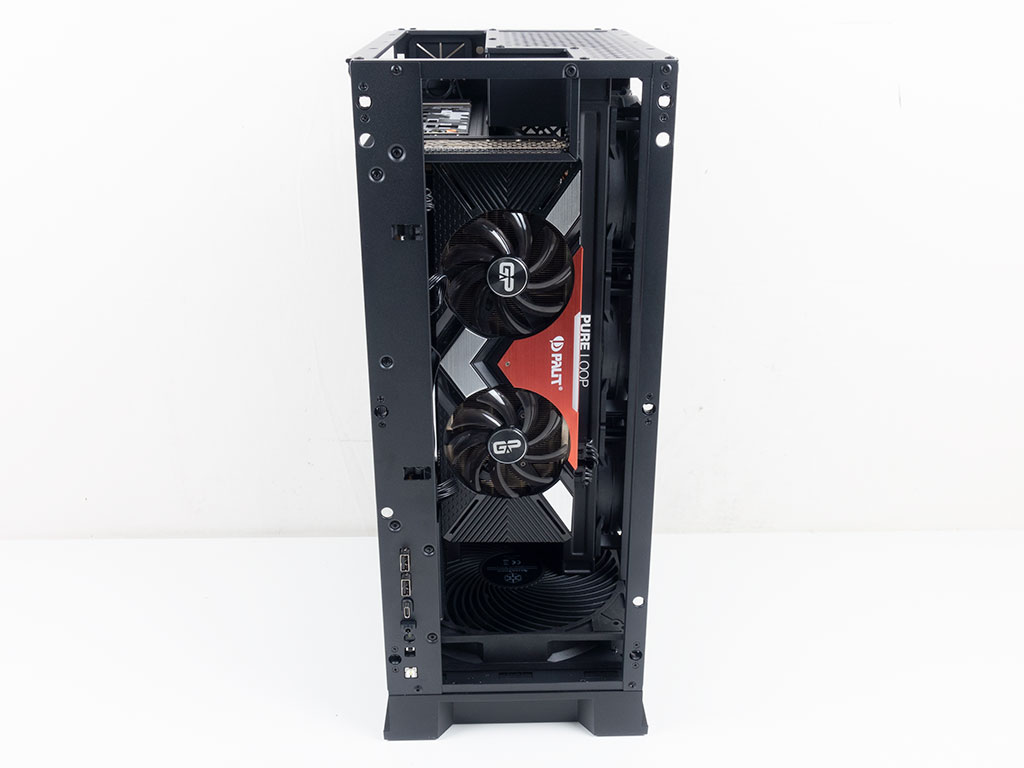
Looking at the front, you can clearly see the RGB element of the GPU, which bodes well for airflow. On the vented side, there are no visible parts, but if your cooling setup does have LED fans, you should also see its glow here quite prominently. Looking at the rear, things look really clean thanks to the hidden cables and solid panel.
Feb 5th, 2025 17:56 EST
change timezone
Latest GPU Drivers
New Forum Posts
- TECHPOWERUP HWBOT Contest with Cash Prizes (70)
- Hello everyone, what HDMI cable do you recommend to connect a PC(5090 GPU) with a 120HZ TV? (23)
- I find the lack of Battle Mage owners threads disturbing. My Onix Odyssey B580 arrived. (31)
- Samsung s90d 55 (0)
- Current Sales, Bundles, Giveaways (10307)
- Wow YouTube is a Hog (65)
- Post the idle temperature of your CPU (135)
- S20+ boot looping (0)
- [Testers-Needed] Converting Any Realtek Ethernet to Intel Killer Ethernet chip (81)
- What are you playing? (22774)
Popular Reviews
- Spider-Man 2 Performance Benchmark Review - 35 GPUs Tested
- Corsair Frame 4000D Review
- Kingdom Come Deliverance II Performance Benchmark Review - 35 GPUs Tested
- NVIDIA GeForce RTX 5080 Founders Edition Review
- Gigabyte GeForce RTX 5080 Gaming OC Review
- MSI GeForce RTX 5080 Vanguard SOC Review
- AMD Ryzen 7 9800X3D Review - The Best Gaming Processor
- ASUS GeForce RTX 5080 Astral OC Review
- NVIDIA DLSS 4 Transformer Review - Better Image Quality for Everyone
- Cooler Master X Silent Edge Platinum 850 W Review - Fully Passive PSU
Controversial News Posts
- NVIDIA 2025 International CES Keynote: Liveblog (470)
- AMD Debuts Radeon RX 9070 XT and RX 9070 Powered by RDNA 4, and FSR 4 (349)
- AMD Radeon 9070 XT Rumored to Outpace RTX 5070 Ti by Almost 15% (285)
- AMD is Taking Time with Radeon RX 9000 to Optimize Software and FSR 4 (256)
- AMD Denies Radeon RX 9070 XT $899 USD Starting Price Point Rumors (239)
- Edward Snowden Lashes Out at NVIDIA Over GeForce RTX 50 Pricing And Value (235)
- AMD Radeon RX 9070 XT & RX 9070 Custom Models In Stock at European Stores (226)
- New Leak Reveals NVIDIA RTX 5080 Is Slower Than RTX 4090 (215)