Feb 25th, 2025 02:51 EST
change timezone
Latest GPU Drivers
New Forum Posts
- RTX 5070 TI MSI - high idle power draw? (2)
- Nvidia's GPU market share hits 90% in Q4 2024 (gets closer to full monopoly) (572)
- What local LLM-s you use? (64)
- [Intel AX1xx/AX2xx/AX4xx/AX16xx/BE2xx/BE17xx] Intel Modded Wi-Fi Driver with Intel® Killer™ Features (279)
- The TPU UK Clubhouse (25778)
- AMD RX 7000 series GPU Owners' Club (1300)
- TPU's Nostalgic Hardware Club (19998)
- Retired AM4 Workstation Case Swap - 1st Post (2)
- Testing max ram overclock pn Ryzen 1700 (75)
- AIO - 120mm cpu cooler? (31)
Popular Reviews
- ASUS GeForce RTX 5070 Ti TUF OC Review
- MSI GeForce RTX 5070 Ti Vanguard SOC Review
- MSI GeForce RTX 5070 Ti Ventus 3X OC Review
- MSI GeForce RTX 5070 Ti Gaming Trio OC+ Review
- Corsair Virtuoso MAX Wireless Review
- Corsair Xeneon 34WQHD240-C Review - Pretty In White
- darkFlash DY470 Review
- Palit GeForce RTX 5070 Ti GameRock OC Review
- AMD Ryzen 7 9800X3D Review - The Best Gaming Processor
- Gigabyte GeForce RTX 5090 Gaming OC Review
Controversial News Posts
- NVIDIA GeForce RTX 5090 Spotted with Missing ROPs, NVIDIA Confirms the Issue, Multiple Vendors Affected, RTX 5070 Ti, Too (467)
- AMD Radeon 9070 XT Rumored to Outpace RTX 5070 Ti by Almost 15% (304)
- AMD Plans Aggressive Price Competition with Radeon RX 9000 Series (272)
- AMD Radeon RX 9070 and 9070 XT Listed On Amazon - One Buyer Snags a Unit (247)
- Edward Snowden Lashes Out at NVIDIA Over GeForce RTX 50 Pricing And Value (241)
- AMD Denies Radeon RX 9070 XT $899 USD Starting Price Point Rumors (239)
- NVIDIA Investigates GeForce RTX 50 Series "Blackwell" Black Screen and BSOD Issues (239)
- AMD Radeon RX 9070 XT Launch Allegedly Set for March 6 (152)
 14
14
SilverStone SETA Q1 Review
Thermal Stress Test »Review System
| System Parts for Case Reviews | |
|---|---|
| Processor: | ATX: Intel Core i5-11600K mATX/ITX: Intel Core i5-10600K Provided by: Intel |
| Motherboards: | ATX: Gigabyte Z590 AORUS PRO AX ITX: Gigabyte Z590I Vision D Provided by: Gigabyte mATX: ASRock B560M Steel Legend Provided by: ASRock |
| Graphics Card: | Palit GeForce RTX 2080 Gaming Pro OC Provided by: Palit ZOTAC GAMING GeForce RTX 3060 Ti Twin Edge OC Provided by: Zotac |
| Memory: | 16 GB XPG SPECTRIX D50 3200 MHz 16 GB XPG SPECTRIX D60G DDR4 3000 MHz 16 GB XPG GAMMIX D20 DDR4 3200 MHz Provided by: ADATA |
| HDD: | Toshiba MG08ADA400E 7200 RPM SATA III Provided by: Toshiba |
| SSD: | ATX:XPG SPECTRIX S20G 500 GB mATX: XPG GAMMIX S50 Lite 1 TB ITX: ADATA Falcon 512 GB ADATA Ultimate SU800 512 GB ADATA Ultimate SU720 500 GB Provided by: ADATA |
| Power Supply: | ATX: Fractal Design ION+ 650W 80 Plus Gold SFX: Fractal Design ION SFX-L 650W 80 Plus Gold Provided by: Fractal Design |
| Cooling: | be quiet! Pure Loop 120/240/280/360 Provided by: be quiet! |
Assembly
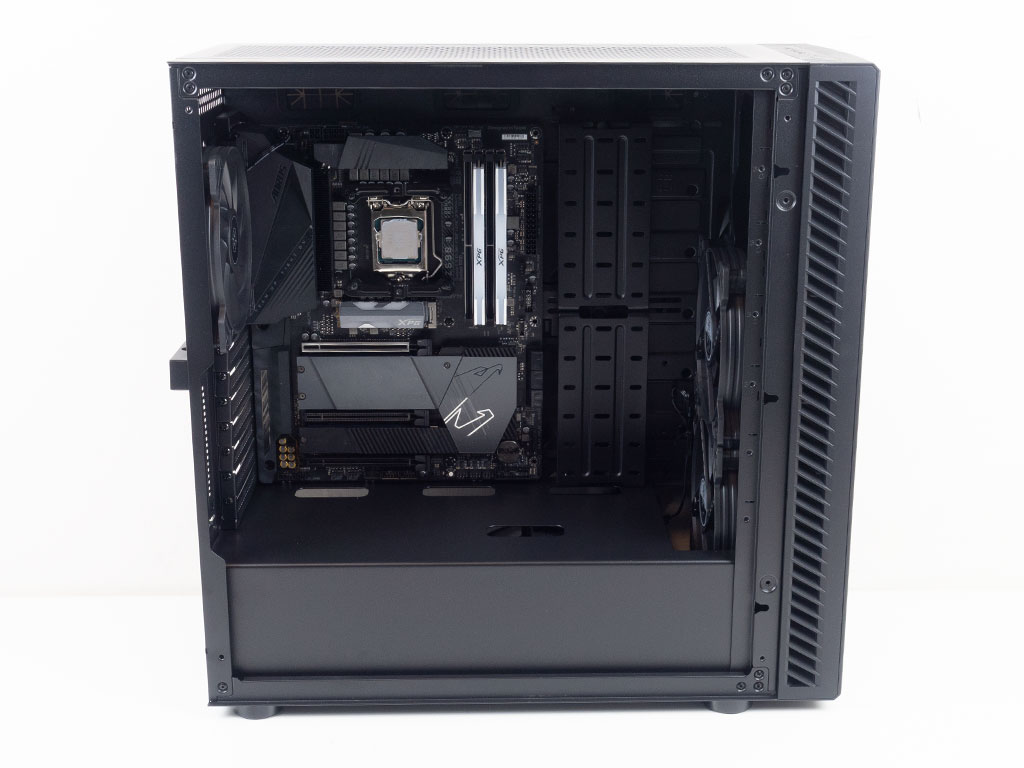
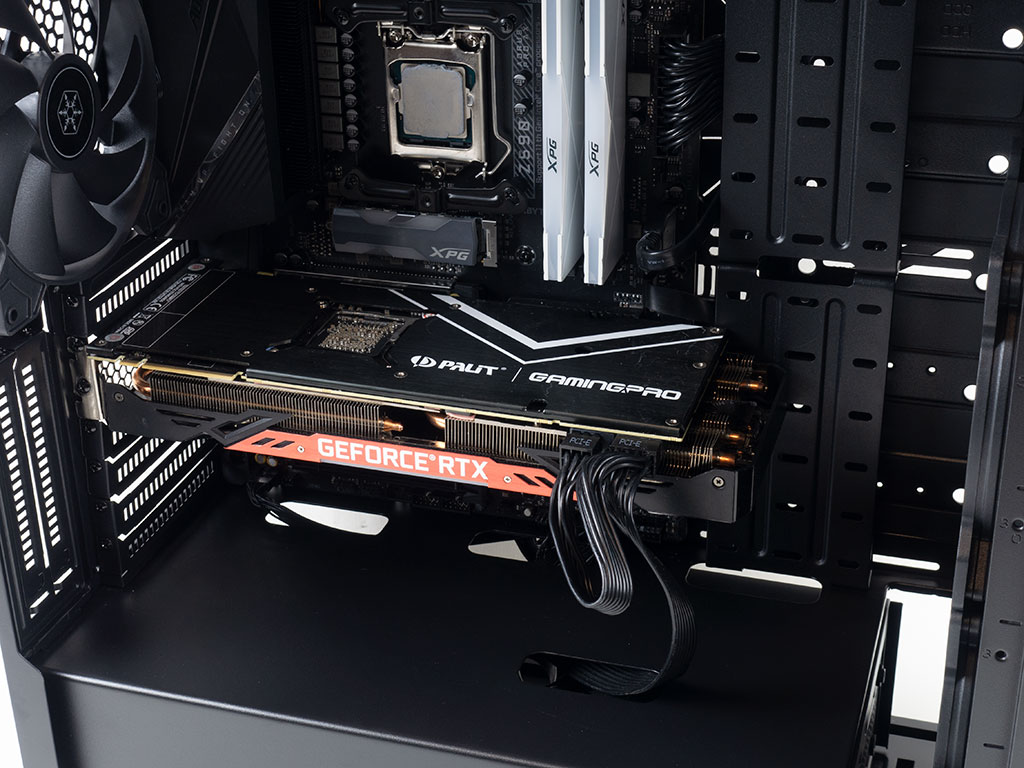
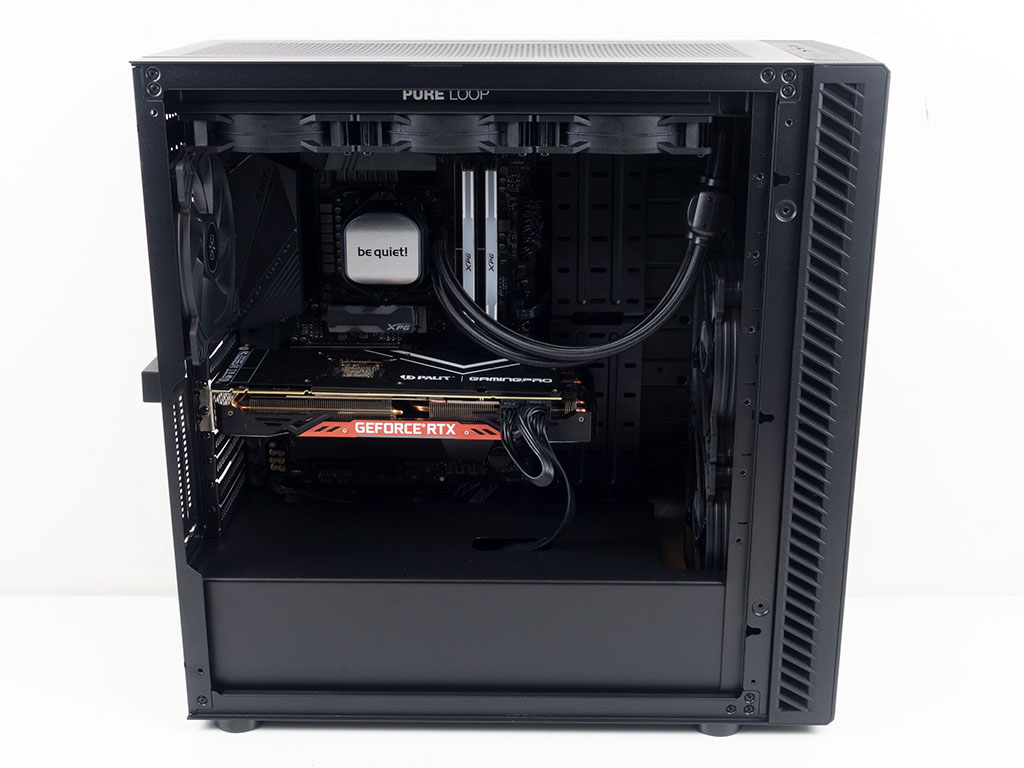
Installing the motherboard is done by traditional means using screws and spacers. Several of the spacers have edges to hold the motherboard in position as you screw it down. There is plenty of space above the top and forward-facing edge of the board, while the openings in the shroud are in useful positions to keep the visible cable mess to a minimum. With ATX boards, you will have to move the covers over a little bit to give you the room you need to route cables through the grommet-covered holes to the side of the motherboard. The SilverStone SETA Q1 should have no problem fitting any GPU you can throw at it with the fans in the front since there is ample room even with the Palit GeForce RTX 2080 Ti.
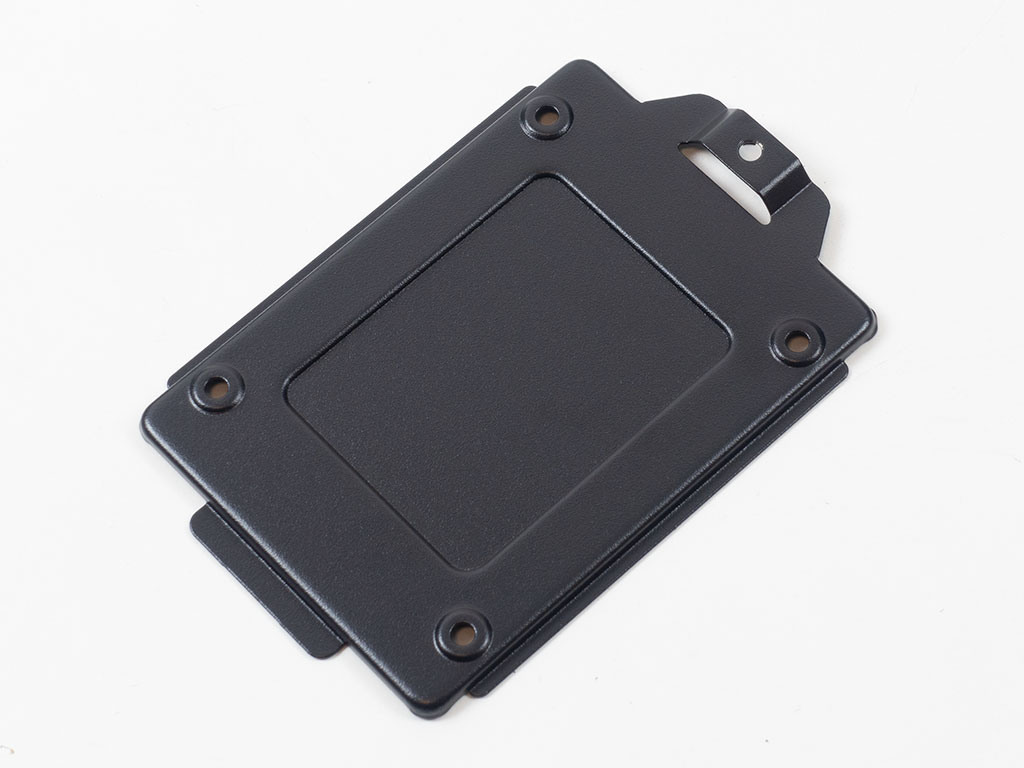
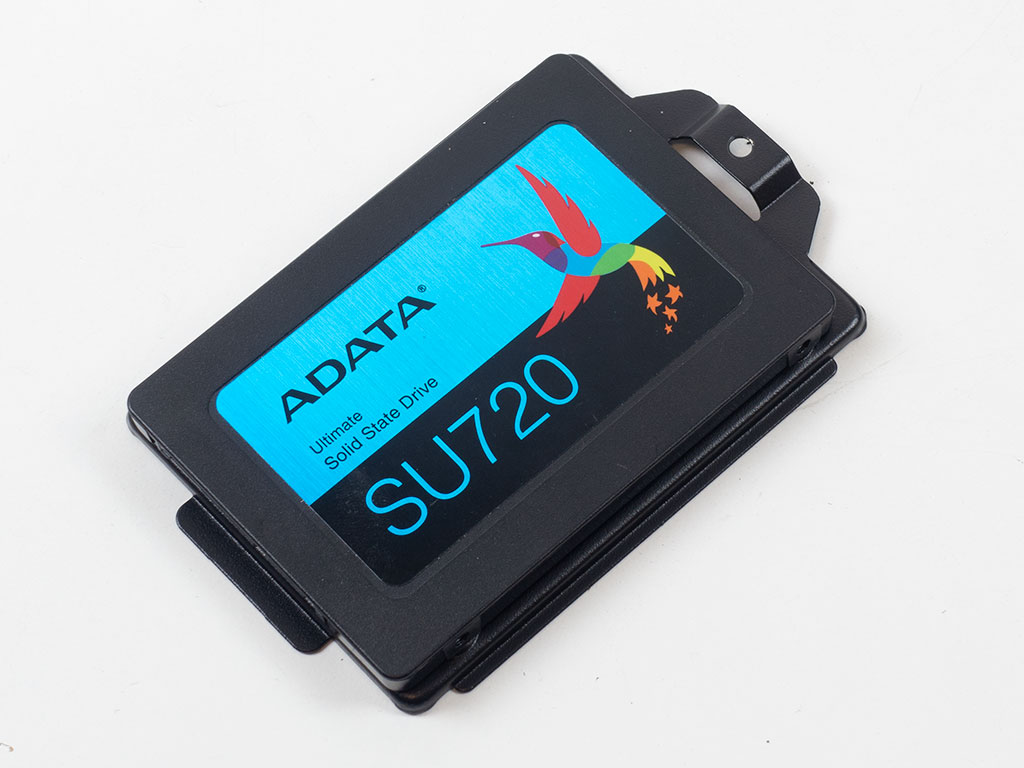
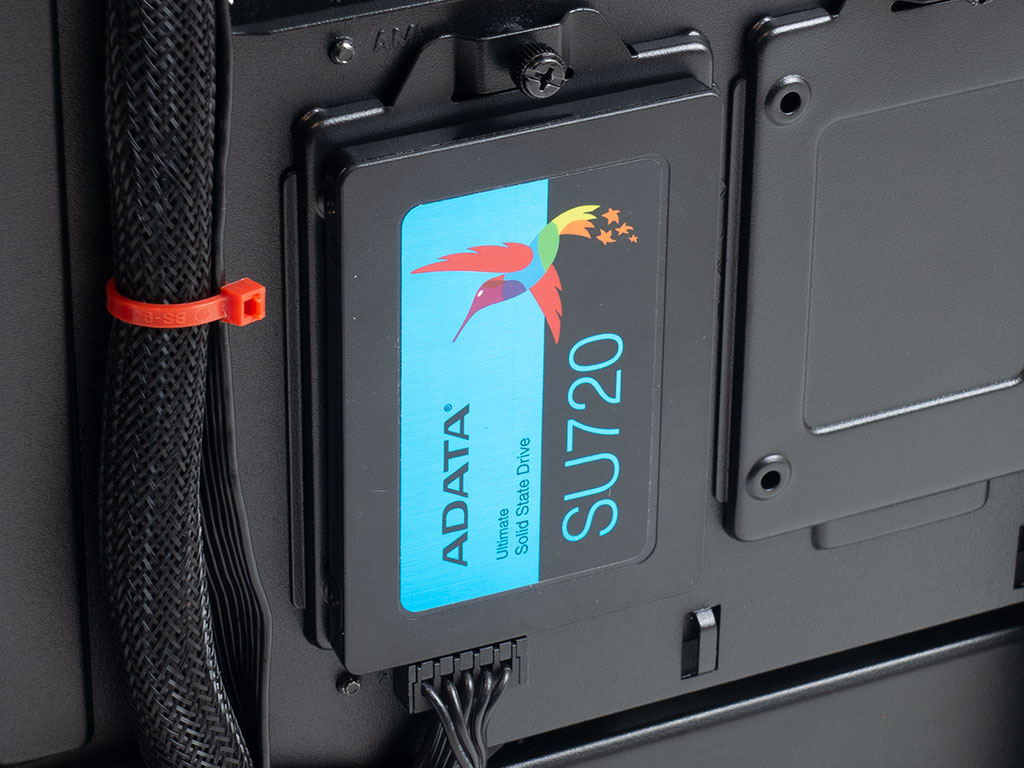
Adding an SSD to the build is done by detaching the plate, installing the drive, and putting it back by securing the whole thing with a thumb screw. When installing a drive on the internal cover, the steps are essentially the same.
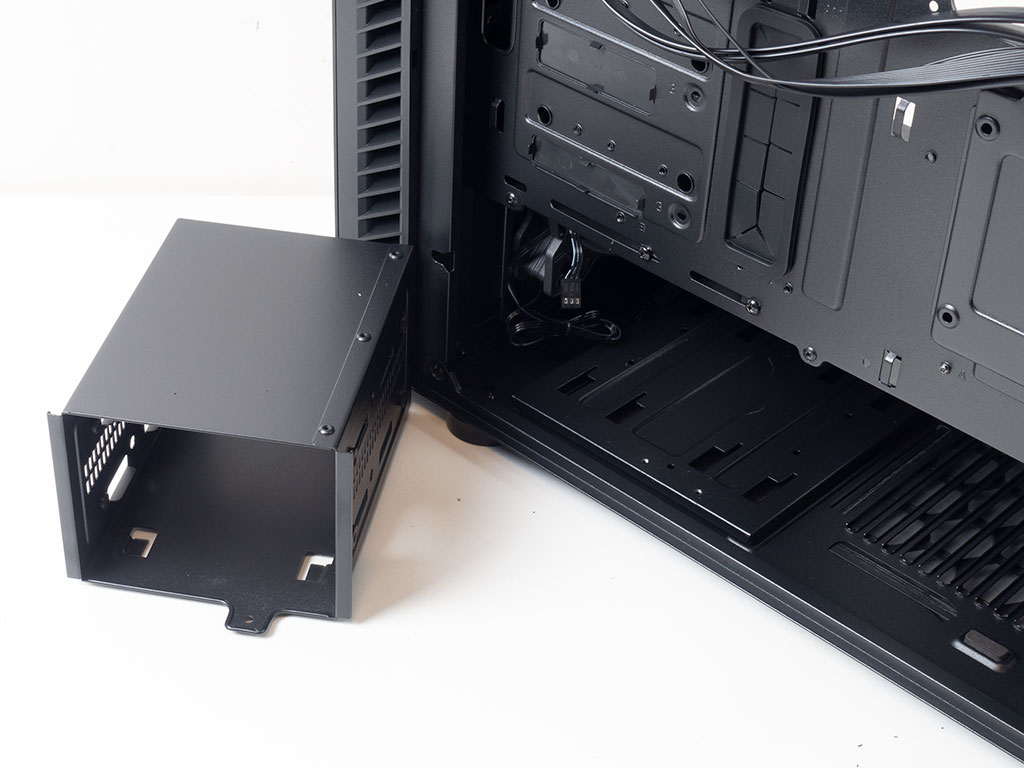
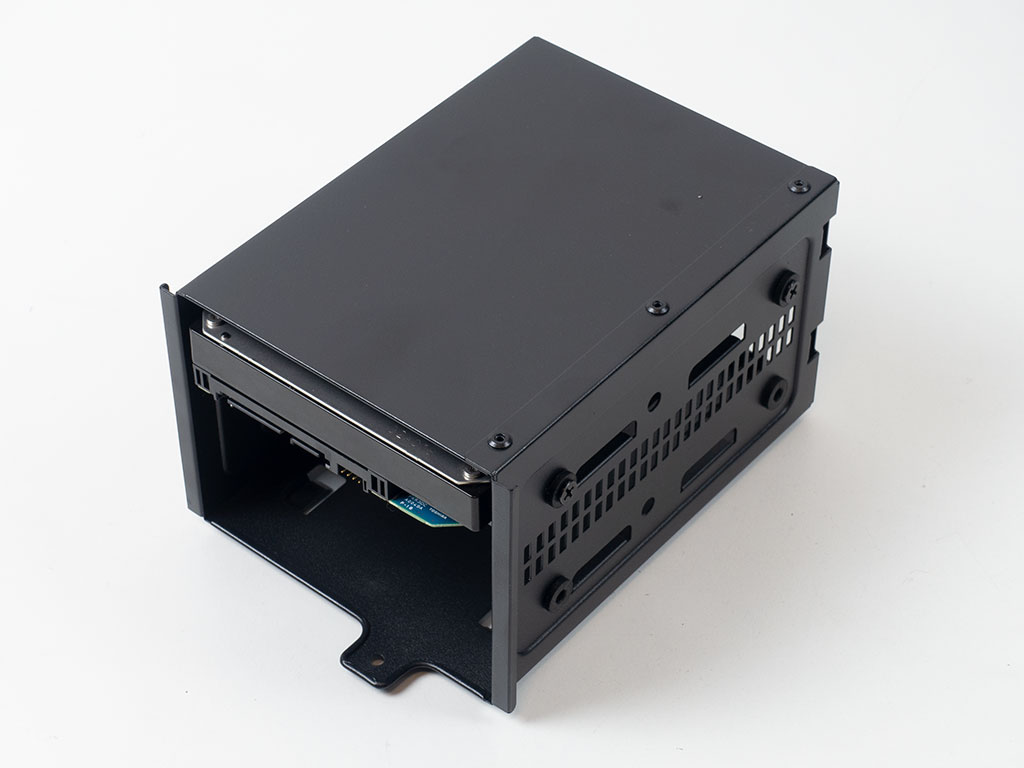
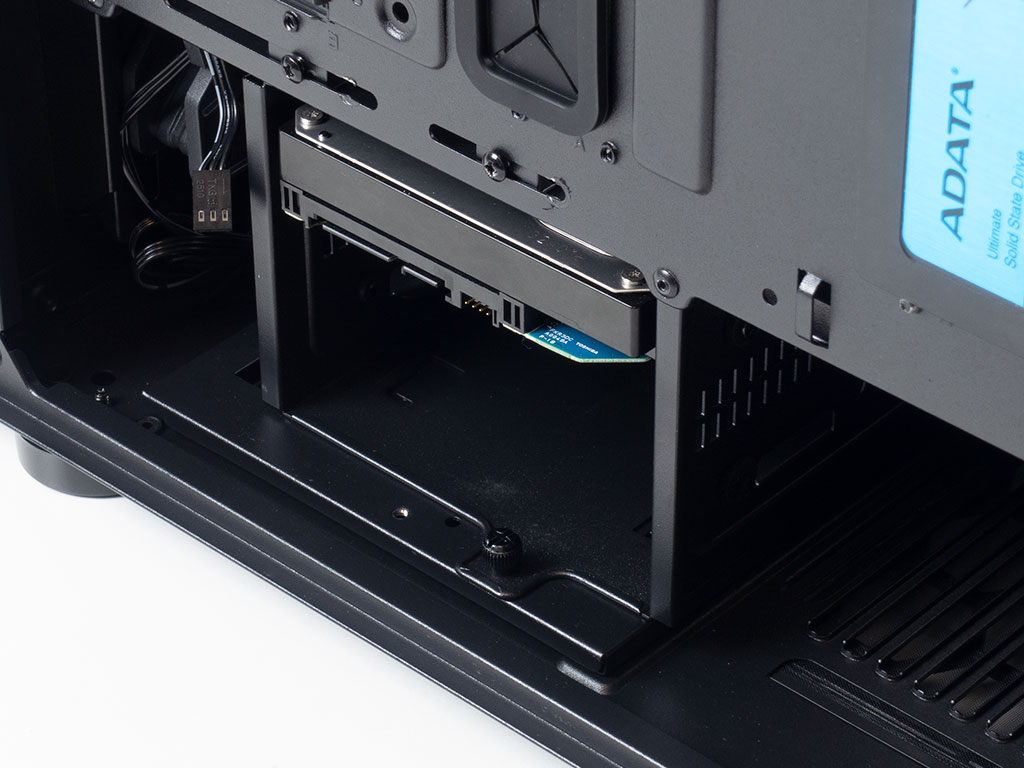
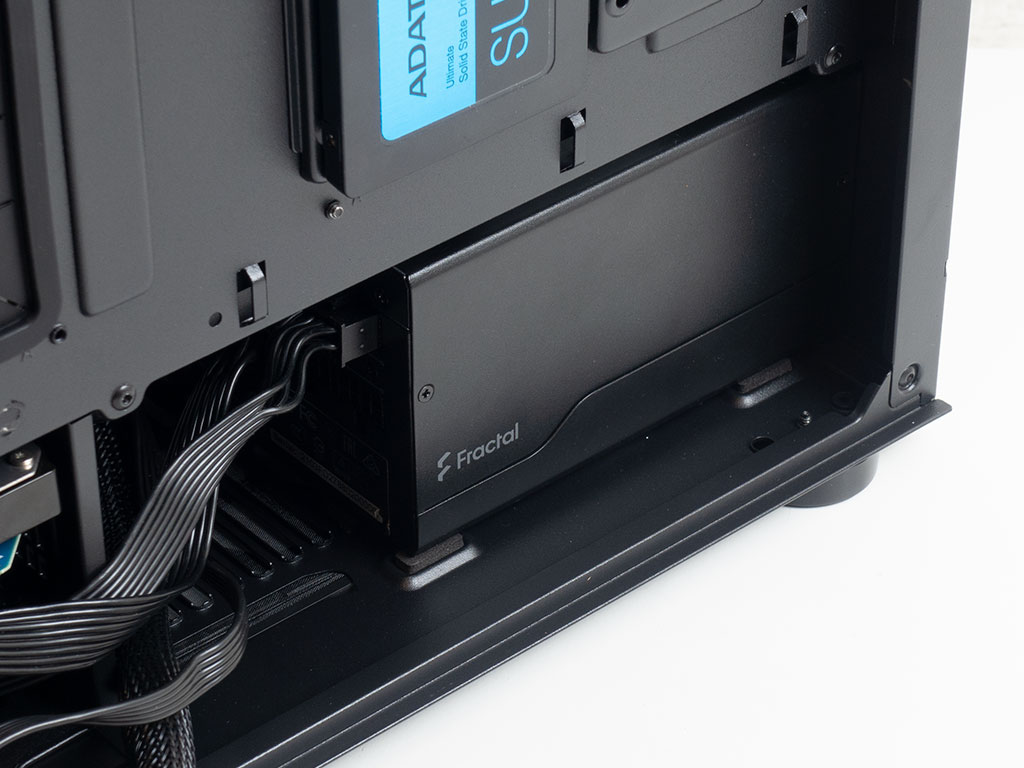
To add a 3.5" drive, first detach the cage and pull it out from underneath the shroud. This also reveals two possible placement positions for the cage should you need the additional room for your PSU. Each drive rests on screws with rubber rings, which hold it in place securely. Once filled, you may simply slide the whole cage back into place and secure it with a thumb screw.
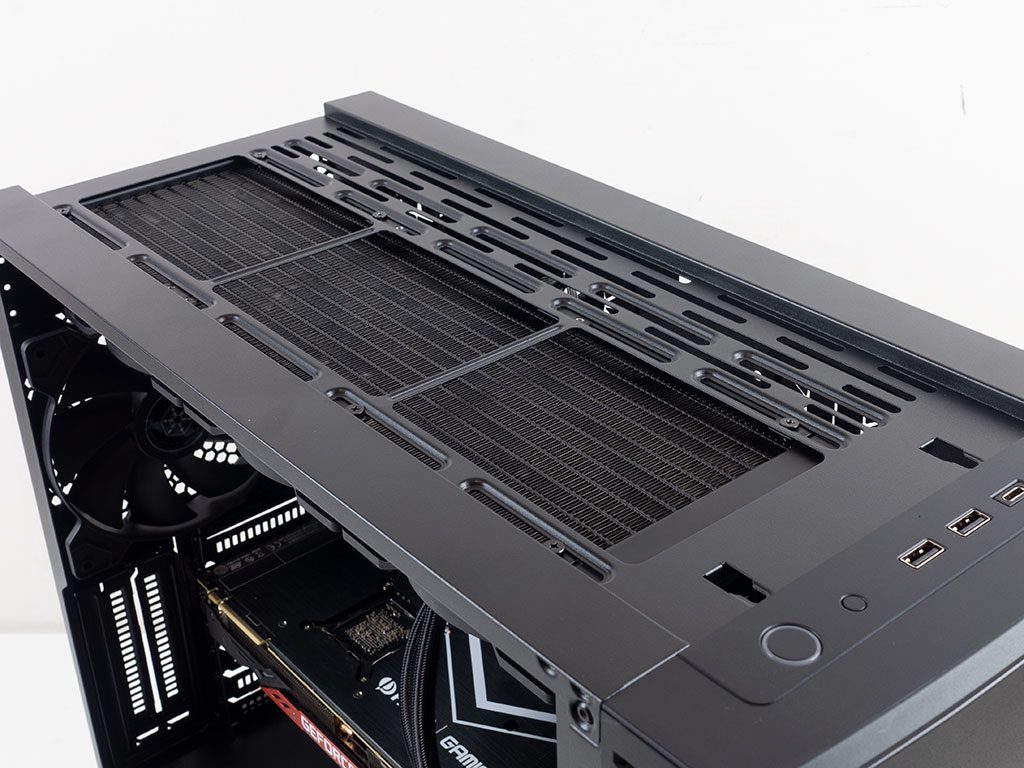
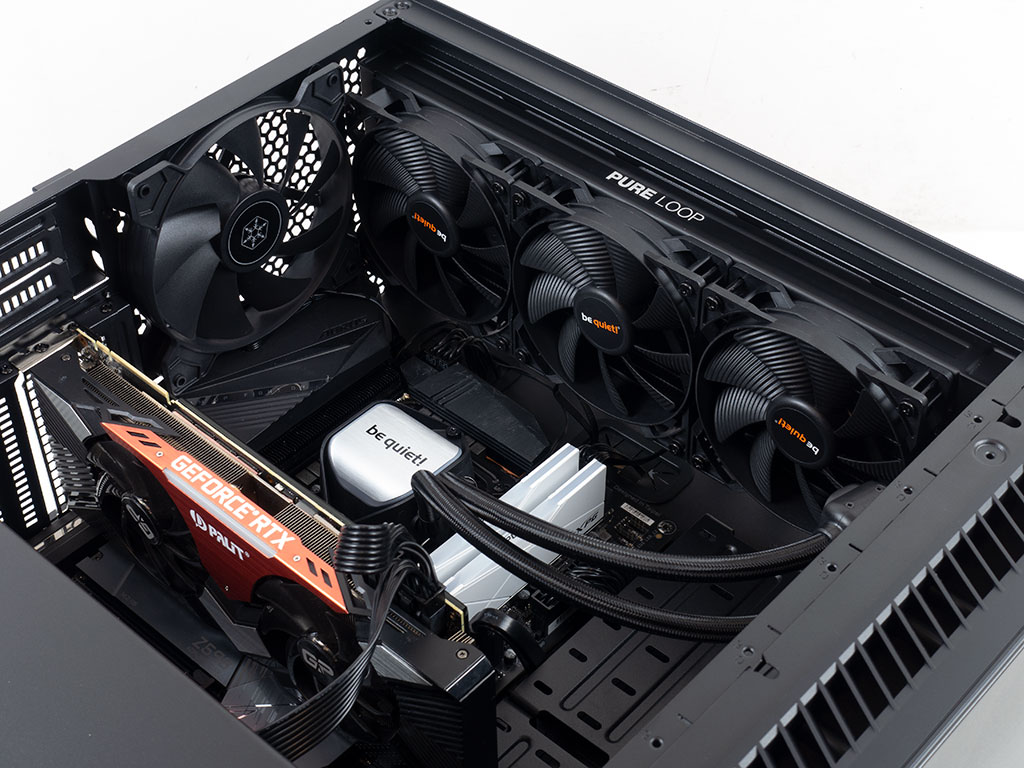
You may install an AIO of up to 360 mm into the front and top of the case, but since it comes with two 140 mm fans pre-installed in the front, we opted for the ceiling instead. Thanks to the offset mounting holes, there is lots of space between the motherboard and AIO—you won't have to worry about any hardware colliding with it. The whole AIO even slots in above the rear fan, maximizing the whole area for cooling.
Lastly, installing the PSU is pretty straightforward. There is lots of room to get it in and out of the shroud even with cables routed through to connect things like the front audio or fans. As you can see, you could throw all but the most extreme power supplies at the SETA Q1, and it should fit just fine.
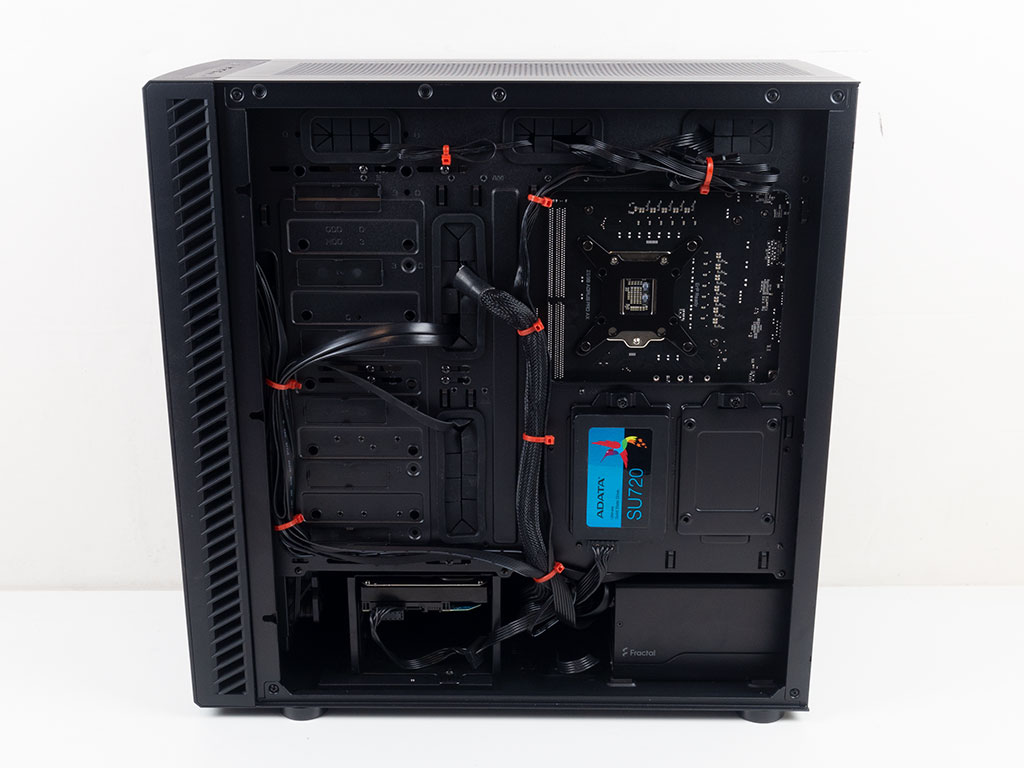
With everything installed, the interior and backside of the SilverStone SETA Q1 make an excellent and clean impression. Thanks to the slew of hooks for zip ties and well-placed, grommet-covered openings, you should easily be able to keep things nice and tidy. The special steel covers in the interior of the case also help a little bit. If using an SSI form factor motherboard, you will still have horizontal openings, which are currently covered to wire cables through, thus making the Q1 uniquely capable of tidy setups even in that scenario.
Finished Looks

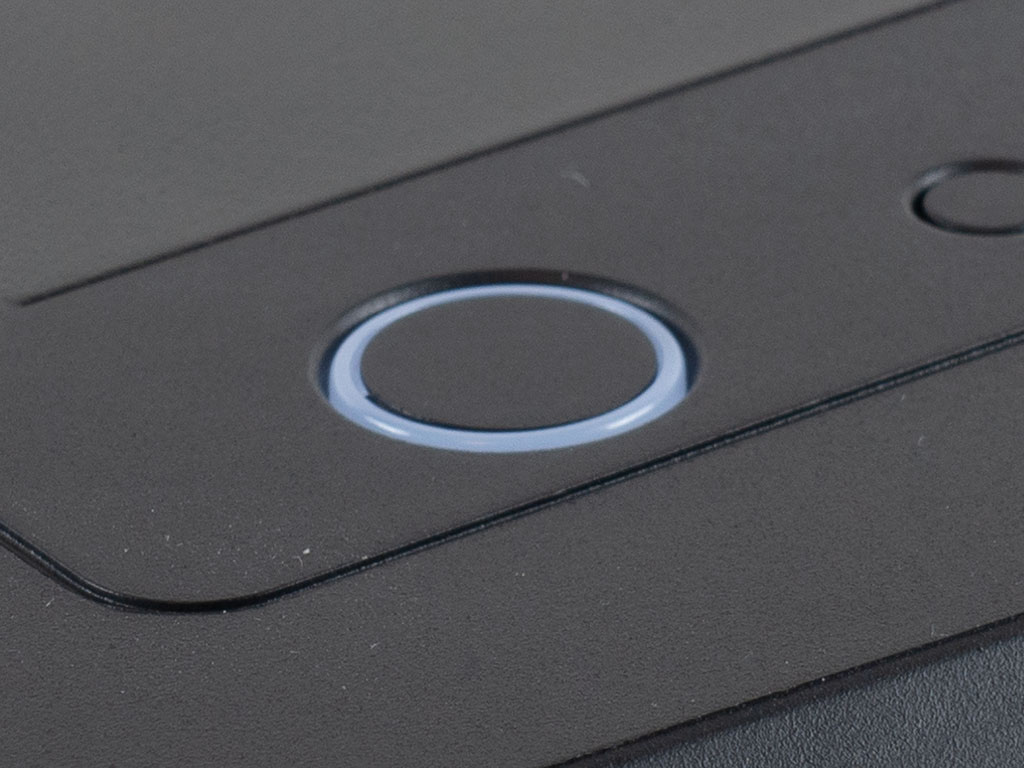
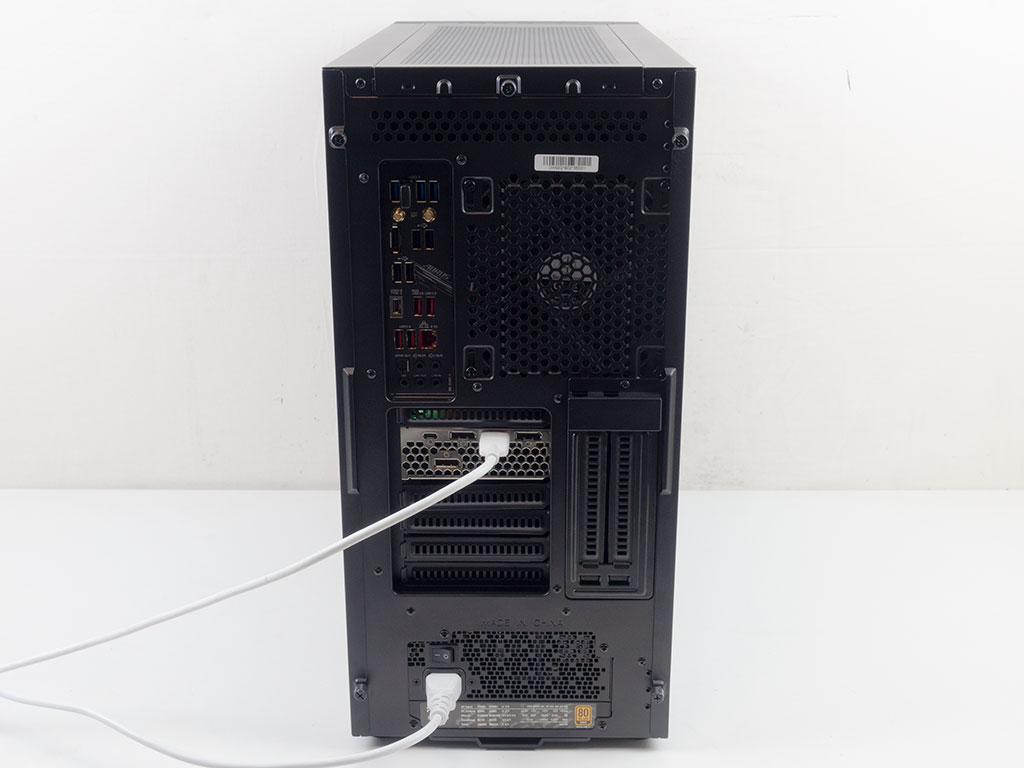
With the system turned on, there is not a lot to be seen, which is exactly the point here. The SilverStone SETA Q1 only has a white power LED ring around the power button to give you a visual clue that the system is up and running. In the rear, everything is where you would expect it for a bulky, spacious mid-tower enclosure.
Feb 25th, 2025 02:51 EST
change timezone
Latest GPU Drivers
New Forum Posts
- RTX 5070 TI MSI - high idle power draw? (2)
- Nvidia's GPU market share hits 90% in Q4 2024 (gets closer to full monopoly) (572)
- What local LLM-s you use? (64)
- [Intel AX1xx/AX2xx/AX4xx/AX16xx/BE2xx/BE17xx] Intel Modded Wi-Fi Driver with Intel® Killer™ Features (279)
- The TPU UK Clubhouse (25778)
- AMD RX 7000 series GPU Owners' Club (1300)
- TPU's Nostalgic Hardware Club (19998)
- Retired AM4 Workstation Case Swap - 1st Post (2)
- Testing max ram overclock pn Ryzen 1700 (75)
- AIO - 120mm cpu cooler? (31)
Popular Reviews
- ASUS GeForce RTX 5070 Ti TUF OC Review
- MSI GeForce RTX 5070 Ti Vanguard SOC Review
- MSI GeForce RTX 5070 Ti Ventus 3X OC Review
- MSI GeForce RTX 5070 Ti Gaming Trio OC+ Review
- Corsair Virtuoso MAX Wireless Review
- Corsair Xeneon 34WQHD240-C Review - Pretty In White
- darkFlash DY470 Review
- Palit GeForce RTX 5070 Ti GameRock OC Review
- AMD Ryzen 7 9800X3D Review - The Best Gaming Processor
- Gigabyte GeForce RTX 5090 Gaming OC Review
Controversial News Posts
- NVIDIA GeForce RTX 5090 Spotted with Missing ROPs, NVIDIA Confirms the Issue, Multiple Vendors Affected, RTX 5070 Ti, Too (467)
- AMD Radeon 9070 XT Rumored to Outpace RTX 5070 Ti by Almost 15% (304)
- AMD Plans Aggressive Price Competition with Radeon RX 9000 Series (272)
- AMD Radeon RX 9070 and 9070 XT Listed On Amazon - One Buyer Snags a Unit (247)
- Edward Snowden Lashes Out at NVIDIA Over GeForce RTX 50 Pricing And Value (241)
- AMD Denies Radeon RX 9070 XT $899 USD Starting Price Point Rumors (239)
- NVIDIA Investigates GeForce RTX 50 Series "Blackwell" Black Screen and BSOD Issues (239)
- AMD Radeon RX 9070 XT Launch Allegedly Set for March 6 (152)