 7
7
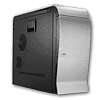
Spire Pininfarina Review
Installation & Finished Look »A Closer Look
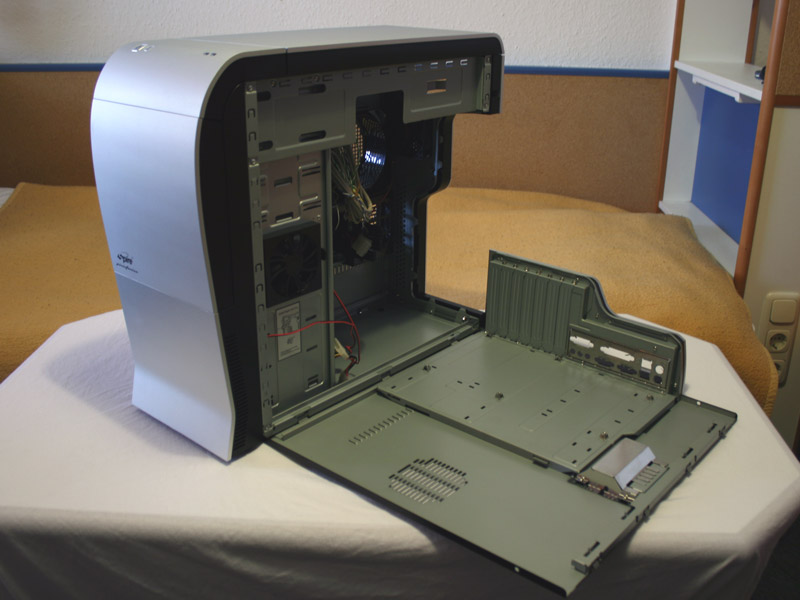
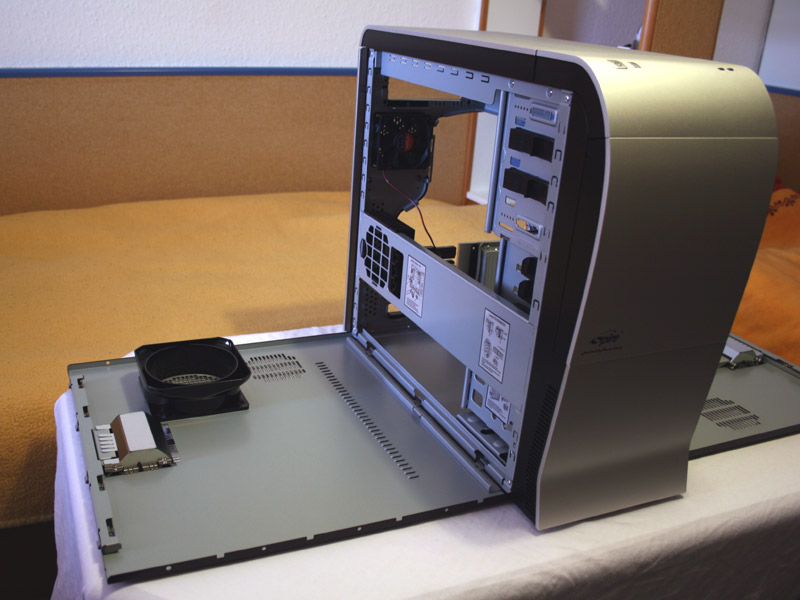
An inmportant feature of this case is the fact that you can access all the parts, while all cables are still connected. To achieve this, both sides can be flipped down. The right door also holds the mainboard and addon cards installed, just like a mainboard tray. It also has an airvent for the side fan, which blows across the external 3.5 inch bays.

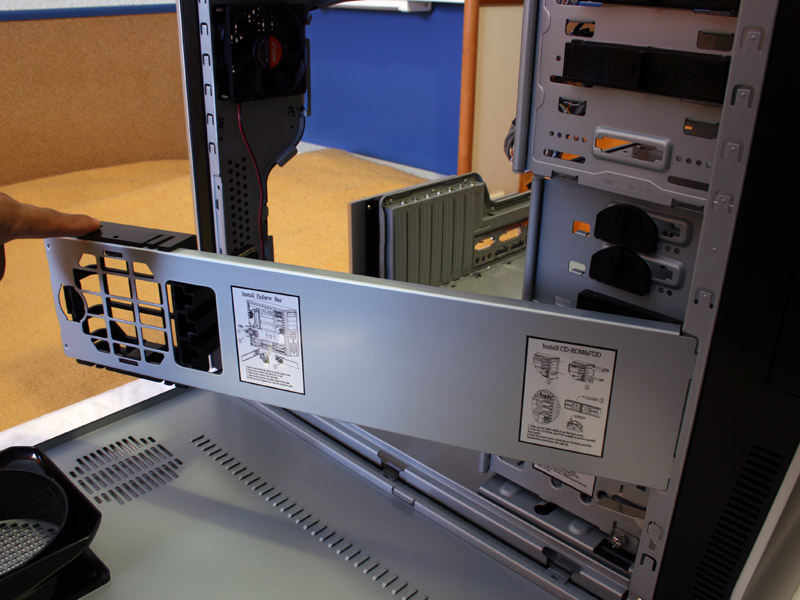
The left butterfly door has a large, 120 mm air duct which can be extended about 2 cm into the case. Judging from the fairly compact interior, you may just want to remove the duct and install a normal 12 cm fan instead. There is a fan bar, which also doubles as a securing device for PCI/graphic cards. It can also hold a 8 cm fan, which is not included.

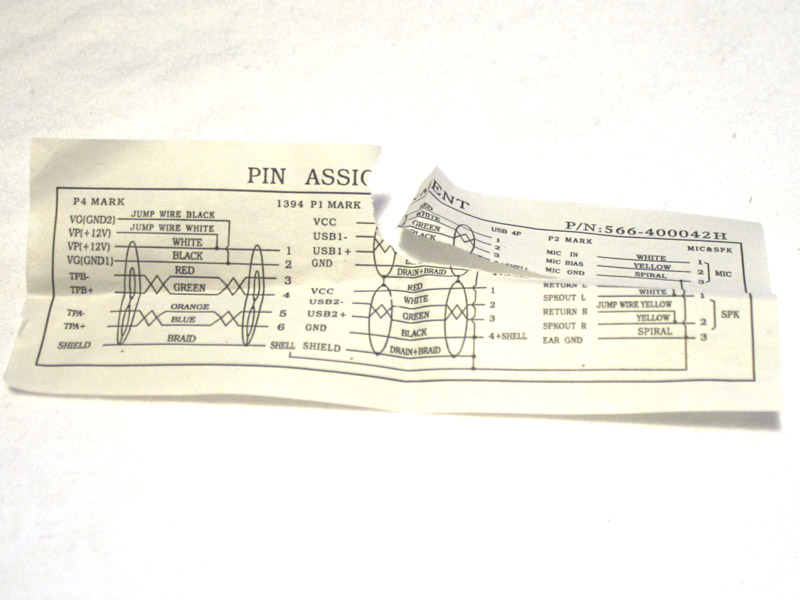
You may wonder why there was no mention of screws during the "Contents" section of this review. Spire has these neatly packed into a plastic tray at the bottom of the case. You will also find four pairs of rails, which are meant for hard drives in this drawer. A small connection sheet is supposed to aid you when installing the front input connectors. This diagram is not user friendly at all and it would have been better to see this as part of a nice instruction manual or user guide.

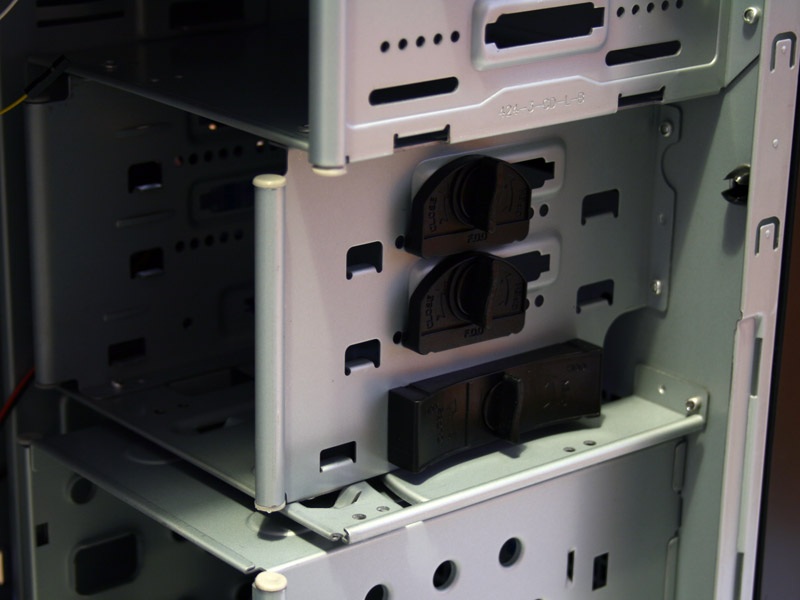
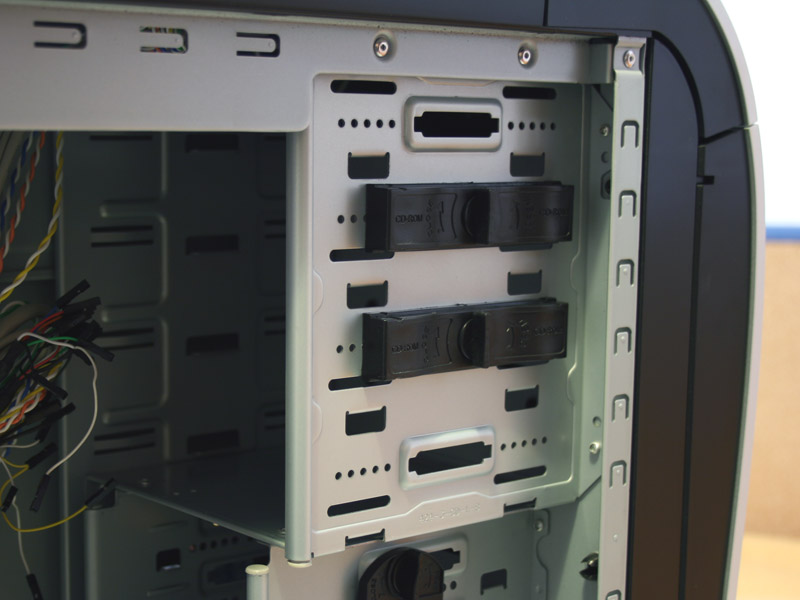
The bottom of the front houses the hard drive cage, which can hold up to four hard drives. The middle is reserved for the two external drive bays, while the top can hold up to four 5.25 inch devices. While the topmost cannot be accessed from the outside, only two of the three have screwless plastic locks, so you will end up grabbing a screw driver if you are filling the bottom 5.25 inch bay.

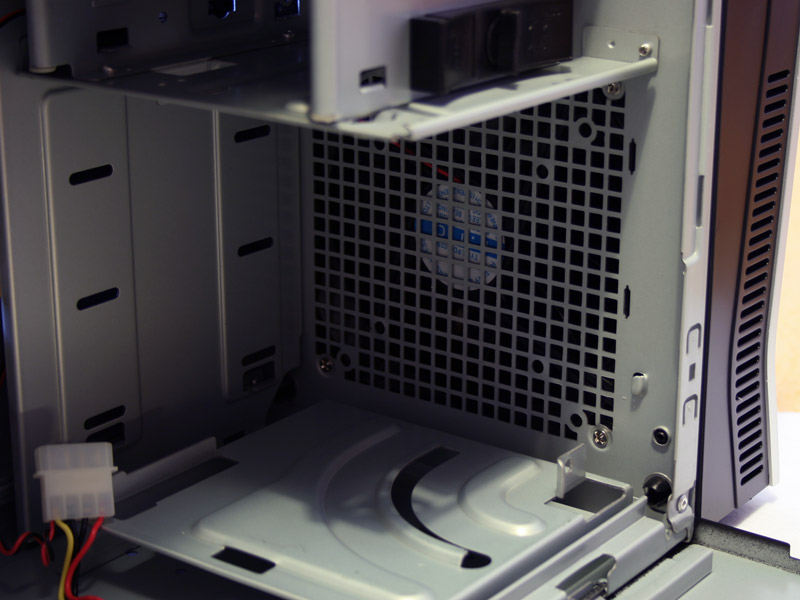
To remove the hard drive cage, you need to unscrew the single and only thumb screw inside this case. Then turn it 90 degrees while pulling it out. Behind the cage the fan, which is mounted on the outside of the case can be seen through the honeycomb grill.

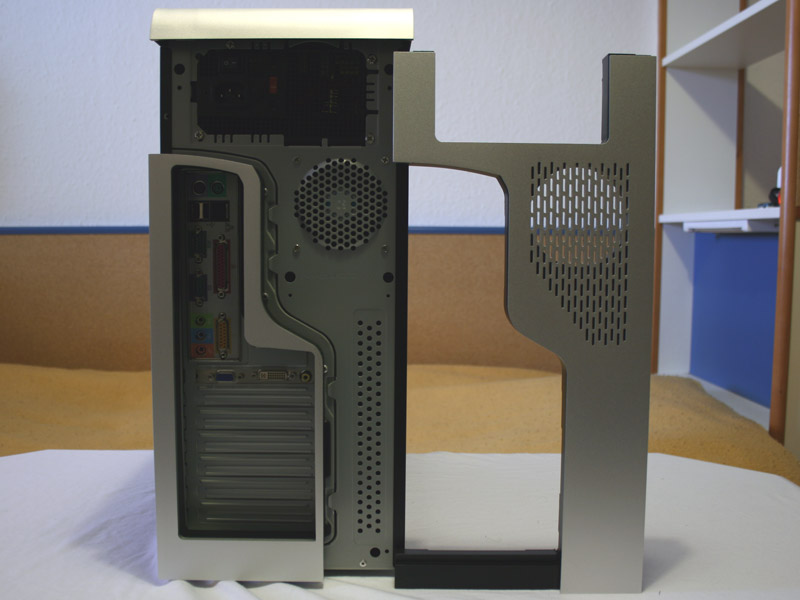
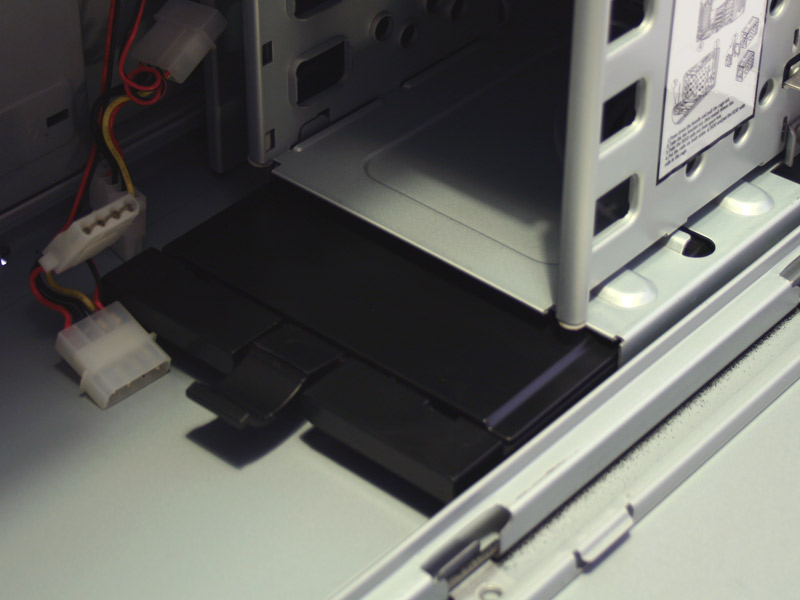
Even though you can install the 5.25 inch drives by sliding them in through the front, the metal cover which you need to break out to free the bay cannot be removed without taking off the entire front. This is simply done by firmly pulling on the bottom of it. You will not be able to install the power supply with the rear cover on. To remove this, you will have to open the right butterfly panel first. It can then be pulled off as well.

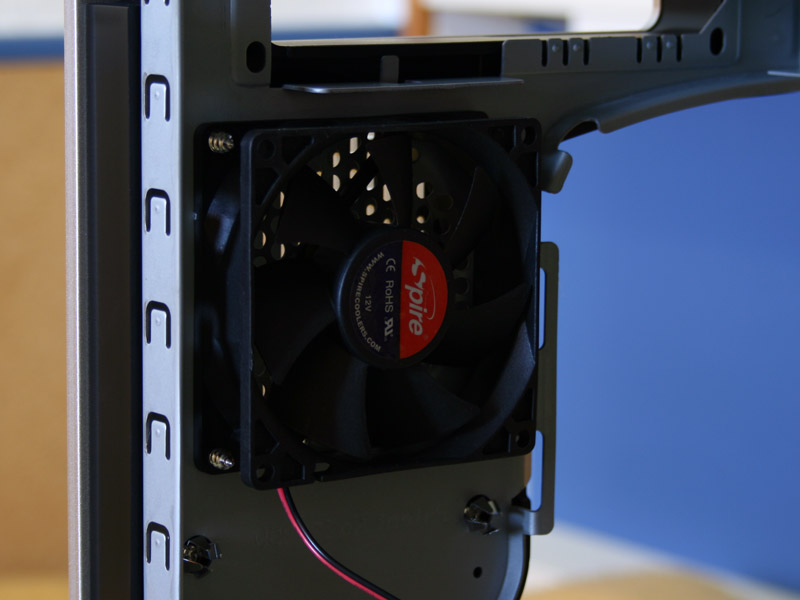
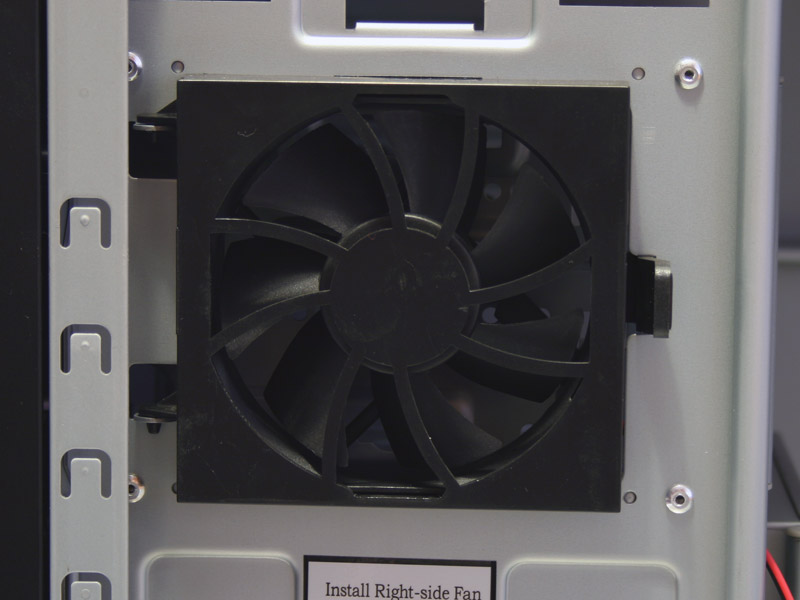
The front fan is actually a 140 mm one, which usually means less noise and slower fan, while still pushing a lot of air. The rear fan is just 80 mm, as there is no room for a larger one. There is another thin, 8 cm fan on the side. It blows directly over the external 3.5 inch bays. Unless you use these for hard drives, there is no need for active cooling, so you may want to leave this one unplugged to reduce the overall noise level.
Jan 30th, 2025 01:50 EST
change timezone
Latest GPU Drivers
New Forum Posts
- i have beeping issues in my graphics card (1 long beep and 3 short beep) (63)
- What are you playing? (22698)
- Testing max ram overclock pn Ryzen 1700 (28)
- Possible to use NVCleanstall but also use Nvidia App? (16)
- RTX 5080 - premature review - it sucks (78)
- Thermal paste instead of thermal putty/pads (4)
- B650 Arous Elite AX rev1.0 red DRAM light (8)
- Corsair Frame 4000D (3)
- HP Rx 460 Freezing, not booting all of a sudden after normal use. (8)
- HP Omen 30L is not working! (1)
Popular Reviews
- NVIDIA GeForce RTX 5080 Founders Edition Review
- NVIDIA DLSS 4 Transformer Review - Better Image Quality for Everyone
- ASUS GeForce RTX 5090 Astral OC Review - Astronomical Premium
- NVIDIA GeForce RTX 5090 Founders Edition Review - The New Flagship
- MSI GeForce RTX 5090 Suprim SOC Review
- Galax GeForce RTX 5080 1-Click OC Review
- MSI GeForce RTX 5090 Suprim Liquid SOC Review
- KLEVV URBANE V DDR5-7600 32 GB CL36 Review
- Palit GeForce RTX 5090 GameRock Review
- NVIDIA GeForce RTX 5090 PCI-Express Scaling
Controversial News Posts
- NVIDIA 2025 International CES Keynote: Liveblog (470)
- AMD Debuts Radeon RX 9070 XT and RX 9070 Powered by RDNA 4, and FSR 4 (349)
- AMD is Taking Time with Radeon RX 9000 to Optimize Software and FSR 4 (245)
- AMD Radeon RX 9070 XT & RX 9070 Custom Models In Stock at European Stores (226)
- AMD Denies Radeon RX 9070 XT $899 USD Starting Price Point Rumors (218)
- NVIDIA GeForce RTX 5090 Features 575 W TDP, RTX 5080 Carries 360 W TDP (217)
- New Leak Reveals NVIDIA RTX 5080 Is Slower Than RTX 4090 (208)
- AMD's Radeon RX 9070 Launch Faces Pricing Hurdles (175)