 11
11
Thermaltake Bach VX Review
Value & Conclusion »Installation
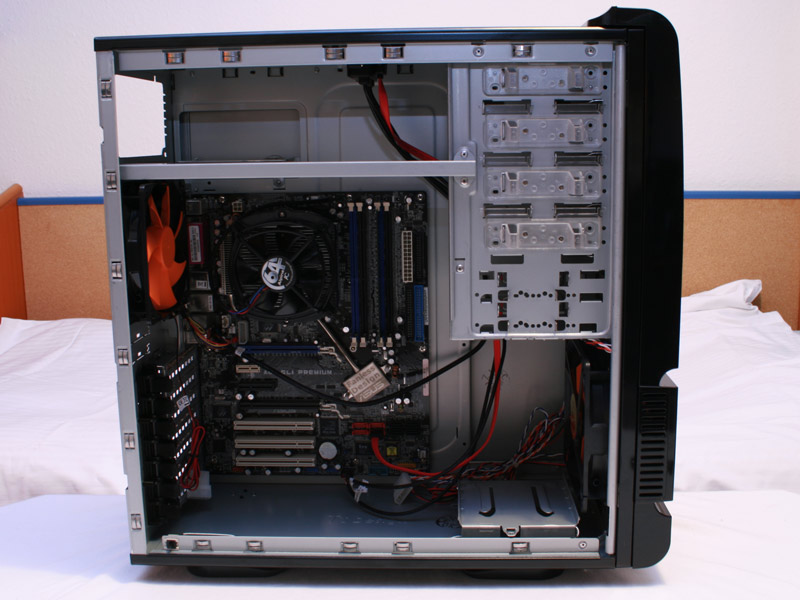
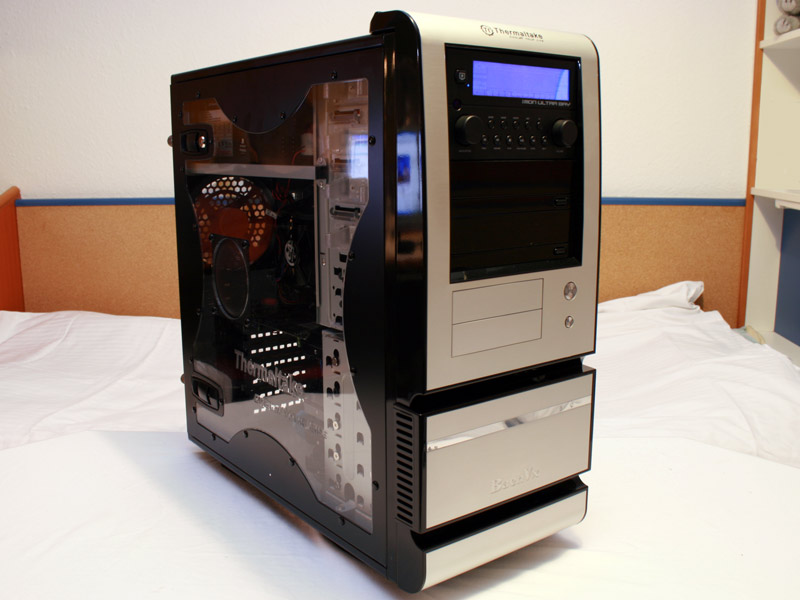
There is a lot of space around the mainboard as long as there is no power supply installed, which makes installing and routing cables quite easy. The removable hard drive cage is great, as you can make any excessive cables disappear right behind it. There is a small problem with the crossbar used. While it acts as a very effective stabilizer to the overall construction, it also makes it impossible to install a PSU after installing all the other components. I found out the hard way, as there is less than half a cm missing in height to be able to install a PSU above the crossbar. The power supply needs to be installed first, taking away precious space and adding cable clutter to the case. Installing the graphics card is quick and painless. Just insert the card, press the lever down until it clicks and you are done.
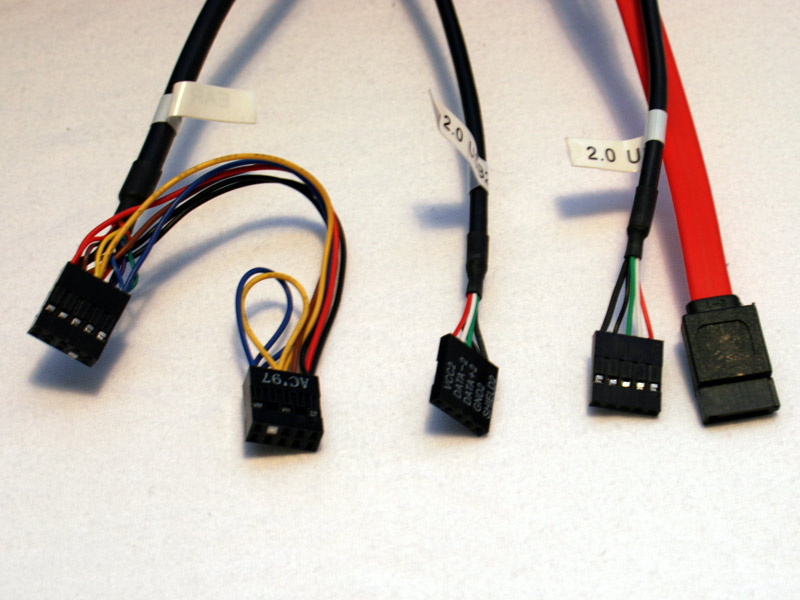
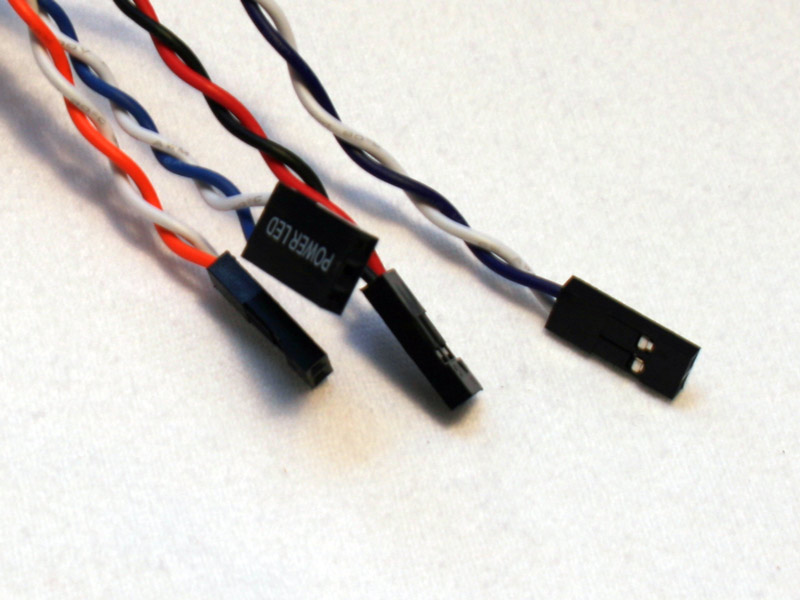
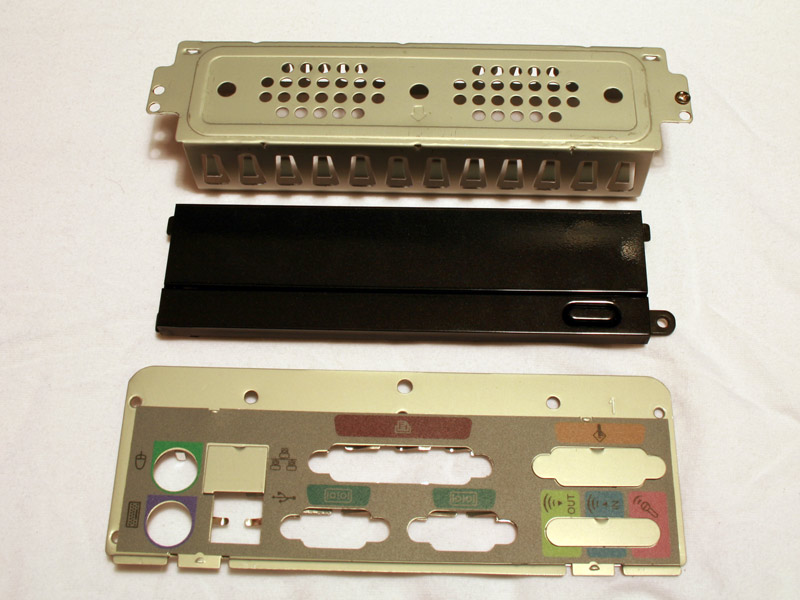
The mainboard connectors are kept completely standard. The only notable differences are two single USB 2.0 cables, instead of one "double" plug. This gives the user a bit more flexibility without adding the usual confusion of cable arrangement.
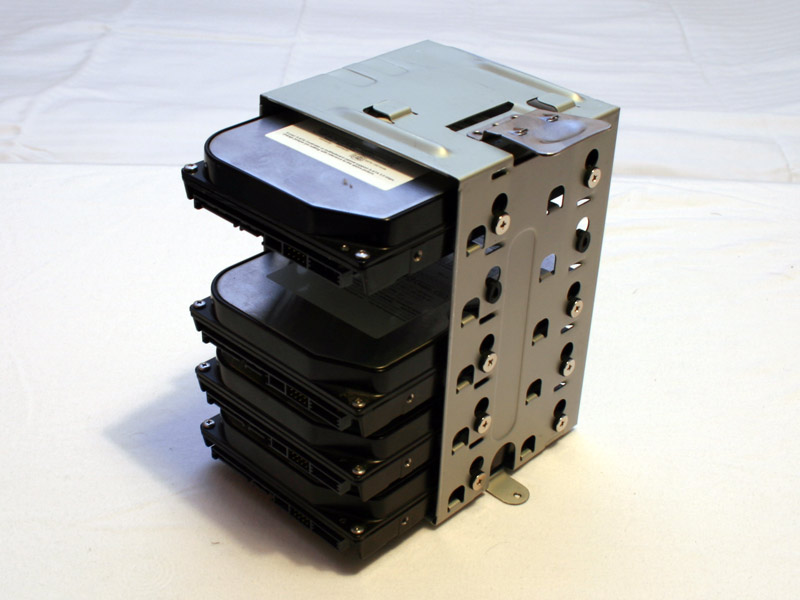
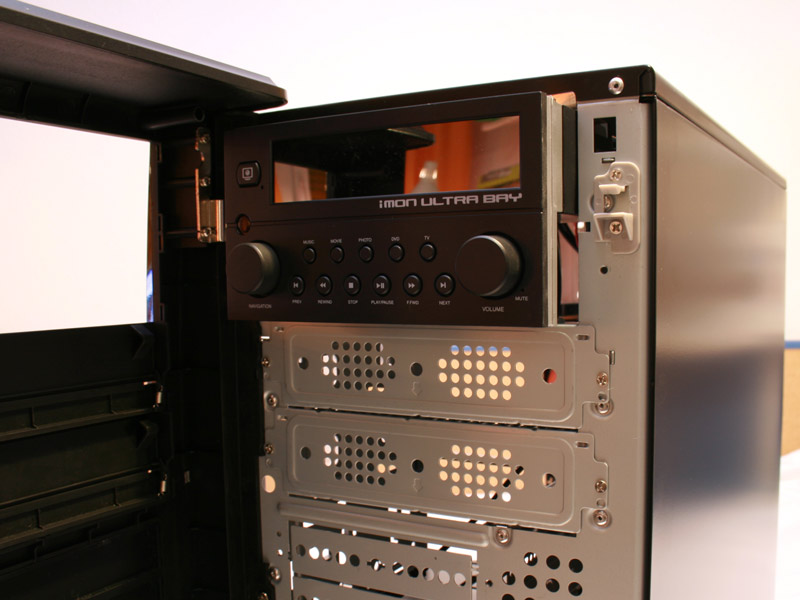
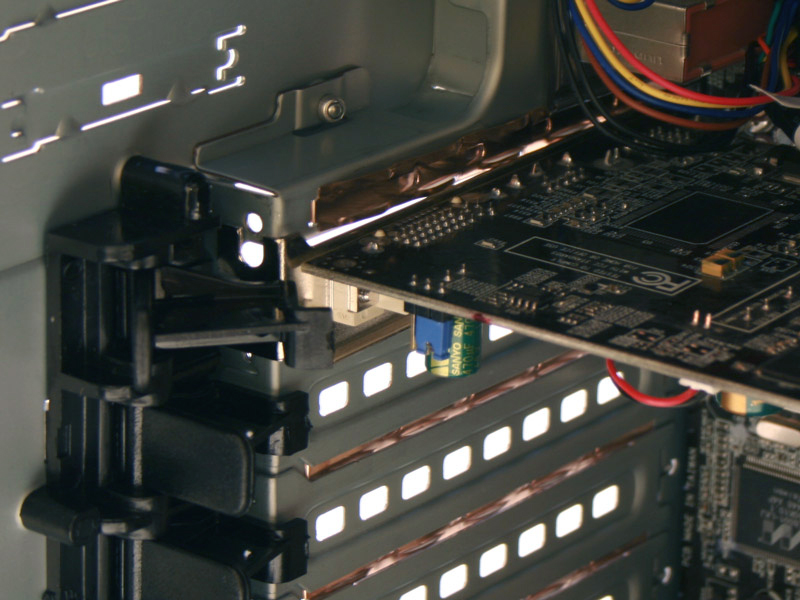
Installing the hard drives is done by screwing in special, longer screws. Thermaltake included enough screws to fill all five slots with hard drives. After installing four drives, there were exactly four screws left. While an optical drive will certainly fit inside the front without any problems, I chose to install the Soundgraph Ultrabay instead. The device is quite different than any optical drive and may cause problems during installation with the screw-less design. There were absolutely no problems installing the device when using the mechanisms in place. The Ultrabay did have a tiny bit of play, but this is due to the hollow construction. Thermaltake has made sure that these devices can be secured as well, by adding traditional screw holes, which can be used alongside the plastic brackets.
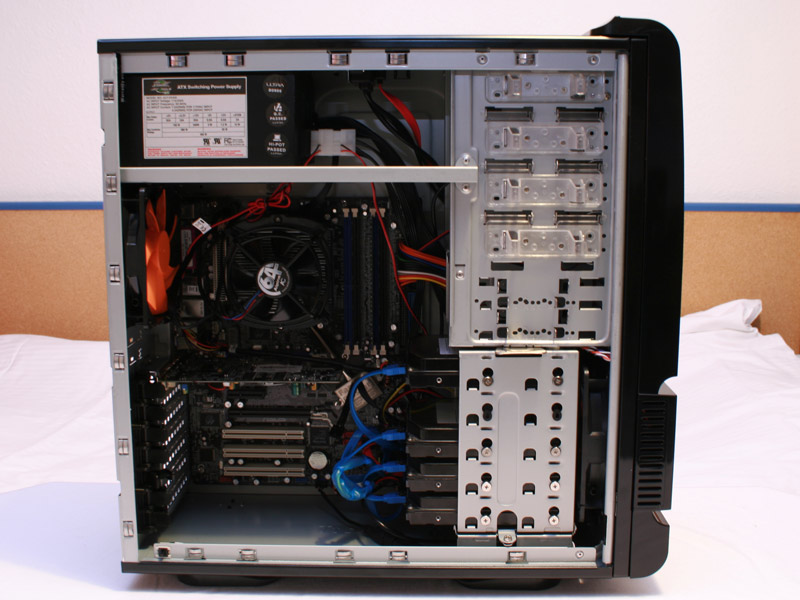
After the installation, the front was closed and secured. The round shape with the black drive bays looks great. After all the cables were connected, the inside looked very clean. I did not spend a lot of time on cable management but with the use of a modular power supply the result was great. There only downside is the lack of space for large video cards. A Radeon X1900 or Geforce 8800 will force you to sacrifice the top hard drive bay.
During installation I did not have to break out a single part. Everything was secured by screws and can be replaced at any time. This does not only reduce the chance of injury during installation, but increases the reselling value of the case as well.
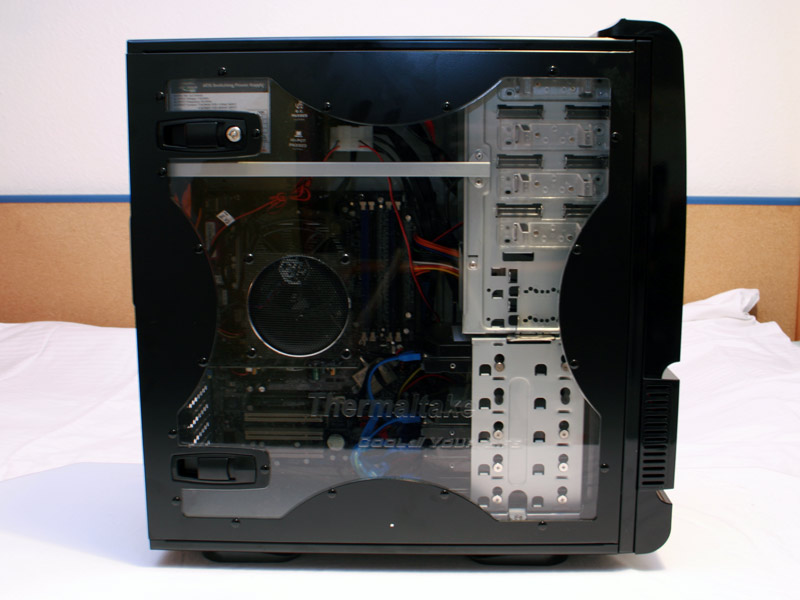
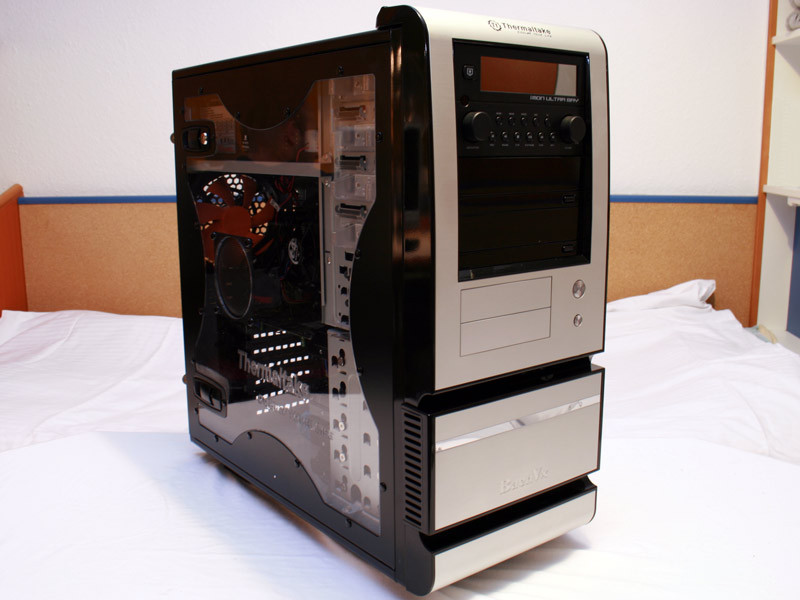
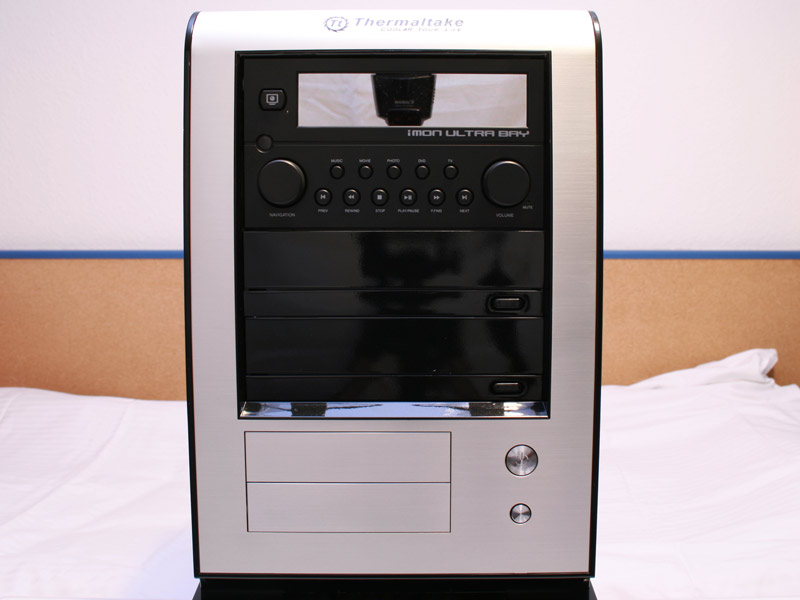
Before turning the computer on, the side was put back into place and secured by latch and thumb screws. The overall look, while turned off was simply beautiful - nothing ordinary here.
Impressions
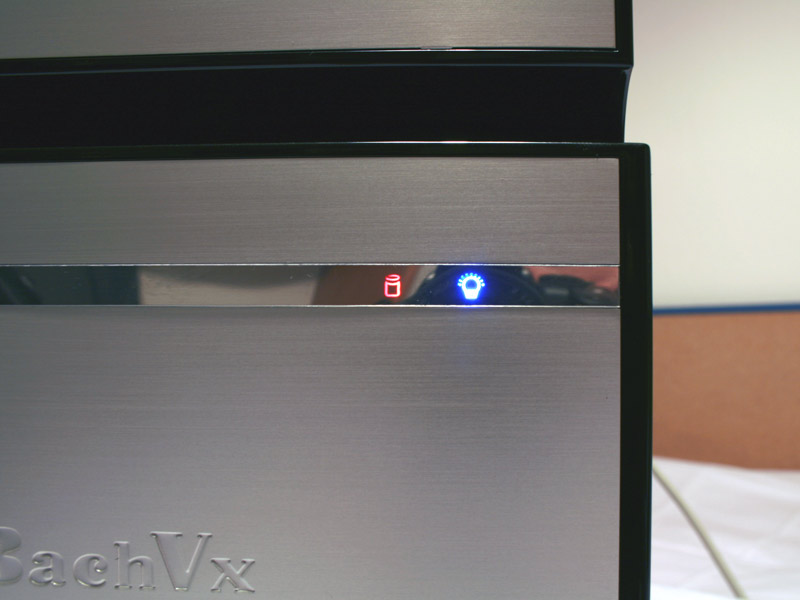
The power cable was connected and the computer turned on. The fans are very quiet and the blue Ultrabay looks gorgeous inside this case. You can be sure, no matter what front panel device you use, it will fit perfectly. The red LED is to indicate a running system, while the red LED flashes with HDD accesses.
Mar 4th, 2025 11:48 EST
change timezone
Latest GPU Drivers
New Forum Posts
- Easy to open wired mice (10)
- WD Black or Gold for Gaming (10TB) (17)
- Extending wifi from a lousy router (27)
- Will I benefit from changing the thermal pad? (4)
- Have you got pie today? (16617)
- WCG Daily Numbers (12784)
- TPU's Rosetta Milestones and Daily Pie Thread (2228)
- Just a rant about AMD and their so-called "foolproofness" (133)
- Oh boy here we go again...potential X3D woes (27)
- Microcenter GPU Stock status (18)
Popular Reviews
- AMD Radeon RX 9070 Series Technical Deep Dive
- NVIDIA GeForce RTX 5070 Founders Edition Review
- EIZO FlexScan EV4340X Review - A Multitasking Powerhouse
- ASUS GeForce RTX 5070 Ti TUF OC Review
- RAWM ES21M Review
- AMD Ryzen 7 9800X3D Review - The Best Gaming Processor
- be quiet! Pure Base 501 DX Review
- MSI GeForce RTX 5070 Ti Vanguard SOC Review
- MSI GeForce RTX 5070 Ti Ventus 3X OC Review
- ASUS ROG Harpe Ace Mini Review
Controversial News Posts
- NVIDIA GeForce RTX 50 Cards Spotted with Missing ROPs, NVIDIA Confirms the Issue, Multiple Vendors Affected (513)
- AMD Plans Aggressive Price Competition with Radeon RX 9000 Series (277)
- AMD Radeon RX 9070 and 9070 XT Listed On Amazon - One Buyer Snags a Unit (260)
- AMD Mentions Sub-$700 Pricing for Radeon RX 9070 GPU Series, Looks Like NV Minus $50 Again (248)
- NVIDIA Investigates GeForce RTX 50 Series "Blackwell" Black Screen and BSOD Issues (244)
- AMD RDNA 4 and Radeon RX 9070 Series Unveiled: $549 & $599 (234)
- AMD Radeon RX 9070 and 9070 XT Official Performance Metrics Leaked, +42% 4K Performance Over Radeon RX 7900 GRE (195)
- AMD Radeon RX 9070-series Pricing Leaks Courtesy of MicroCenter (158)