 15
15
Thermaltake BlacX HDD Docking Station Review
Testing »Installation
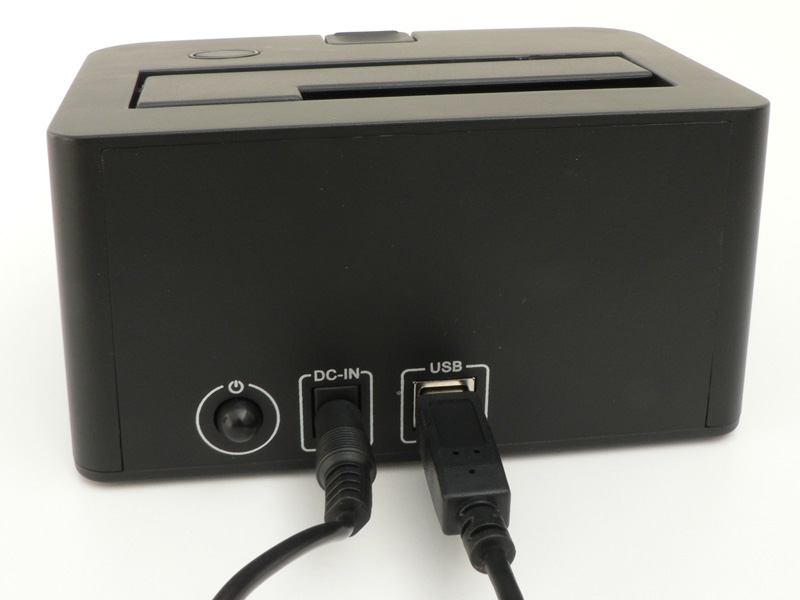
To use the Thermaltake BlacX HDD Docking station, simply plug in the two cables to their respective jacks on the rear of the unit. The other end of the USB cable should be connected to an available USB port on your PC, and the power adapter should be plugged in to a standard electrical outlet.


The drive being used with the BlacX should be a bare drive with no extra screws, brackets or adapters attached. In this case, a 60GB Seagate 2.5" Momentus 5400.2 laptop hard drive will be used. Turn the drive so that the connectors are on the bottom and the label is in the front, and then slide the drive down into the appropriate space in the top flap of the BlacX. For a 2.5" drive, as long as the drive is held against the back wall, the connections should line up. With a 3.5" drive, there will be far less play in the opening and less wiggle-room for the drive. Using only as much force as needed, press the drive down until the connections click into place. There should not be a lot of force used: if in doubt, pull the drive out and double-check the alignment.
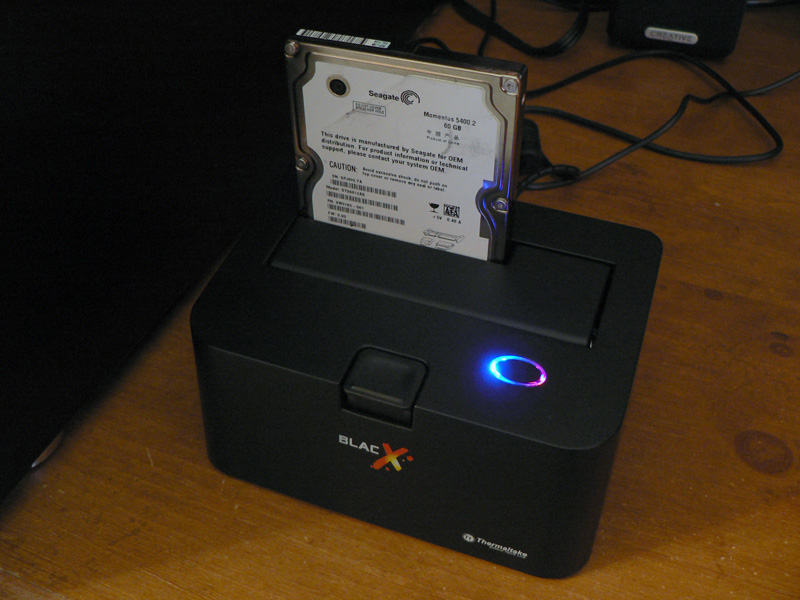
Here the BlacX is connected to a PC and the drive is being formatted. The oval glows blue to show the unit is powered on, and the red light shows HDD activity.
Mar 10th, 2025 18:56 EDT
change timezone
Latest GPU Drivers
New Forum Posts
- Biostar RX 6700 XT OC BIOS (6)
- Nvidia's GPU market share hits 90% in Q4 2024 (gets closer to full monopoly) (774)
- What's your latest tech purchase? (23278)
- Wherein lies the difference (2)
- USB hard disk box capacity limits (14)
- AMD RX 7000 series GPU Owners' Club (1306)
- RX 9000 series GPU Owners Club (41)
- Gaming PC instabiliity (22)
- Msi 5090 DOA? (30)
- RX 9070 availability (170)
Popular Reviews
- Sapphire Radeon RX 9070 XT Nitro+ Review - Beating NVIDIA
- XFX Radeon RX 9070 XT Mercury OC Magnetic Air Review
- ASUS Radeon RX 9070 TUF OC Review
- MSI MAG B850 Tomahawk Max Wi-Fi Review
- NVIDIA GeForce RTX 5080 Founders Edition Review
- NVIDIA GeForce RTX 5070 Founders Edition Review
- Corsair Vengeance RGB CUDIMM DDR5-8800 48 GB CL42 Review
- AMD Ryzen 7 9800X3D Review - The Best Gaming Processor
- ASUS GeForce RTX 5070 Ti TUF OC Review
- MSI GeForce RTX 5070 Ti Gaming Trio OC+ Review
Controversial News Posts
- NVIDIA GeForce RTX 50 Cards Spotted with Missing ROPs, NVIDIA Confirms the Issue, Multiple Vendors Affected (513)
- AMD Plans Aggressive Price Competition with Radeon RX 9000 Series (277)
- AMD Radeon RX 9070 and 9070 XT Listed On Amazon - One Buyer Snags a Unit (261)
- AMD RDNA 4 and Radeon RX 9070 Series Unveiled: $549 & $599 (260)
- AMD Mentions Sub-$700 Pricing for Radeon RX 9070 GPU Series, Looks Like NV Minus $50 Again (248)
- NVIDIA Investigates GeForce RTX 50 Series "Blackwell" Black Screen and BSOD Issues (244)
- AMD Radeon RX 9070 and 9070 XT Official Performance Metrics Leaked, +42% 4K Performance Over Radeon RX 7900 GRE (195)
- AMD Radeon RX 9070-series Pricing Leaks Courtesy of MicroCenter (158)