 12
12
XMG NEO 15 E22 Laptop (i7-12700H/RTX 3080 Ti) + OASIS External Liquid Cooling System Review - Cool, Quiet, Fast
XMG OASIS Performance »XMG OASIS Setup

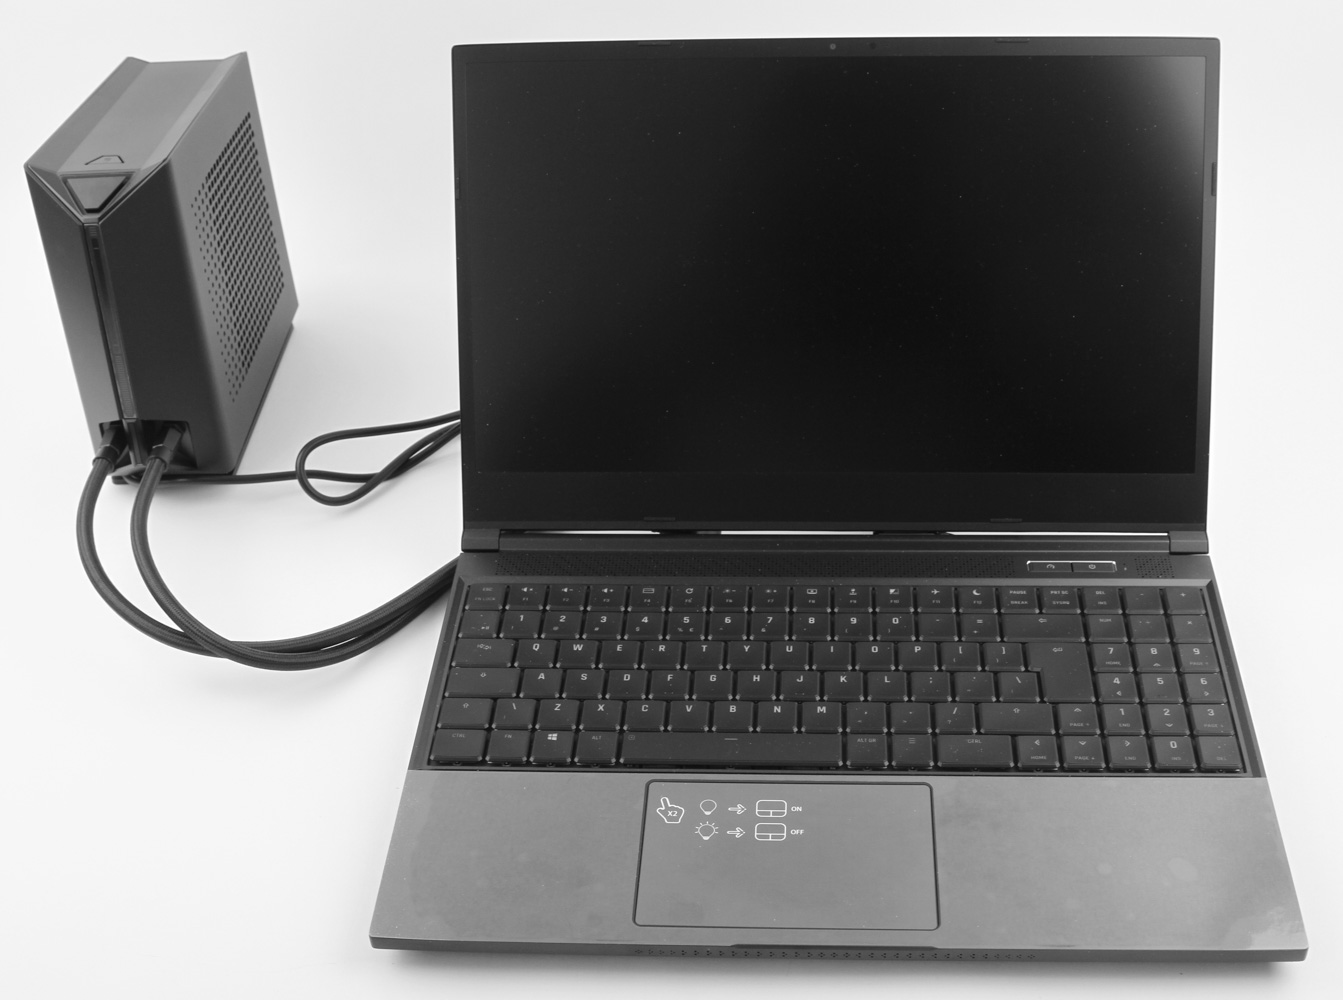
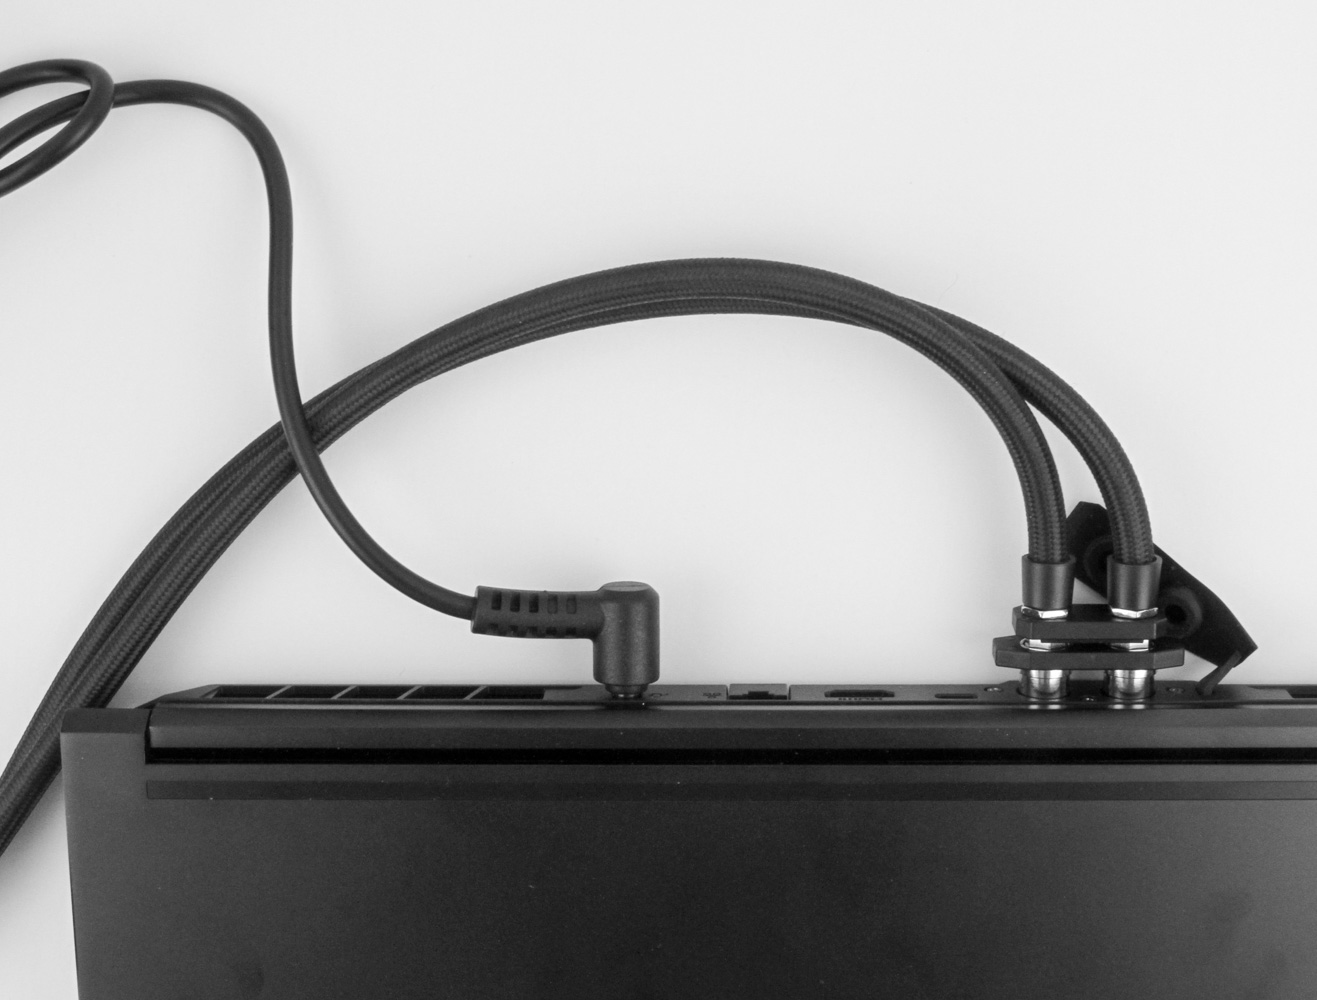
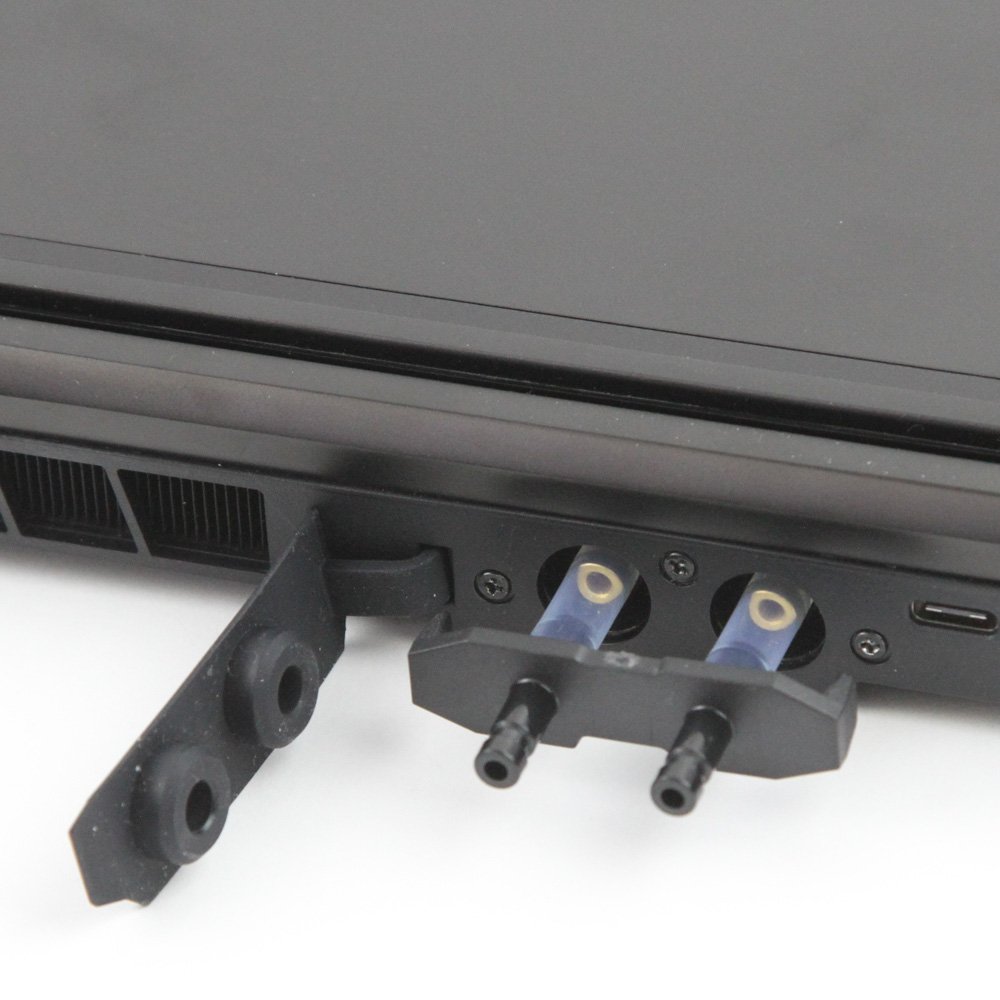
Connecting the XMG OASIS to the NEO 15 (E22) and all upcoming compatible laptops is trivial once the tubing is screwed in place, as the brass connectors are pushed into the female ends on the laptop until they lock in place. To release them, just pull back on the black bar. Consider using the cover plugs provided for the Type-C and HDMI ports if those aren't used. With that done, connect the power supply to the OASIS and run the pass-through power cable to the laptop. Seen above is also the drainage adapter on the laptop side; it was less effective here since the short tubing pieces just got stuck on there and required needle-nosed pliers to extract. Even if they did not, I'd still have to blow through one side to release the tiny amount of coolant inside I do not want to travel around with. So setup and disassembly are irksome if traveling with the laptop, which makes the OASIS more amenable for stationary desk use.
At this point, I would have said just fill the reservoir with the coolant of your choice, but XMG's choice of PC/ABS for the tubing connectors on the OASIS makes most PC DIY coolant incompatible. Indeed, the review sample shipped with 1 liter of EK-Cryofuel that had some disastrous results with snapped and broken connectors for some of my media colleagues, and XMG was quick to alert everyone to use distilled water instead. This is a gamble in itself considering the mixed metals in the loop, but careful and timely replacement of the coolant will help prevent galvanic corrosion-related issues in this otherwise simple, small loop. I did encourage XMG to perform longer-term tests with different coolants, but the safer approach is to replace the PC/ABS connectors with something like POM instead.
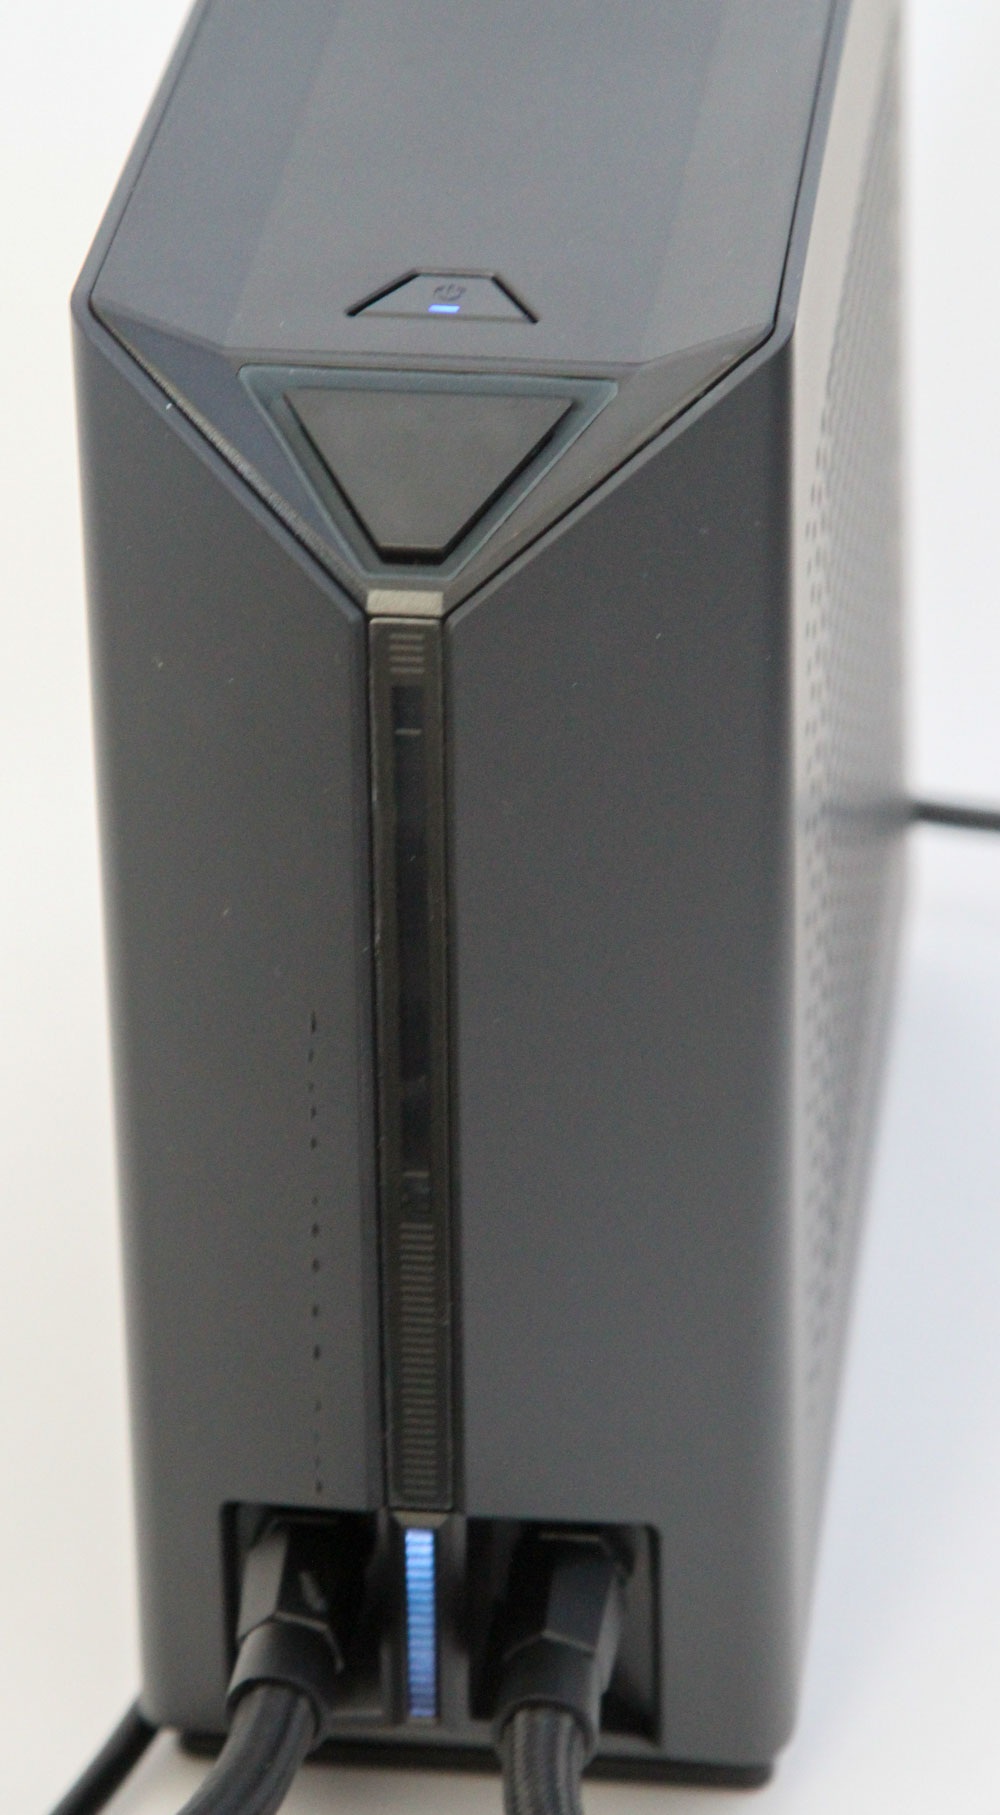
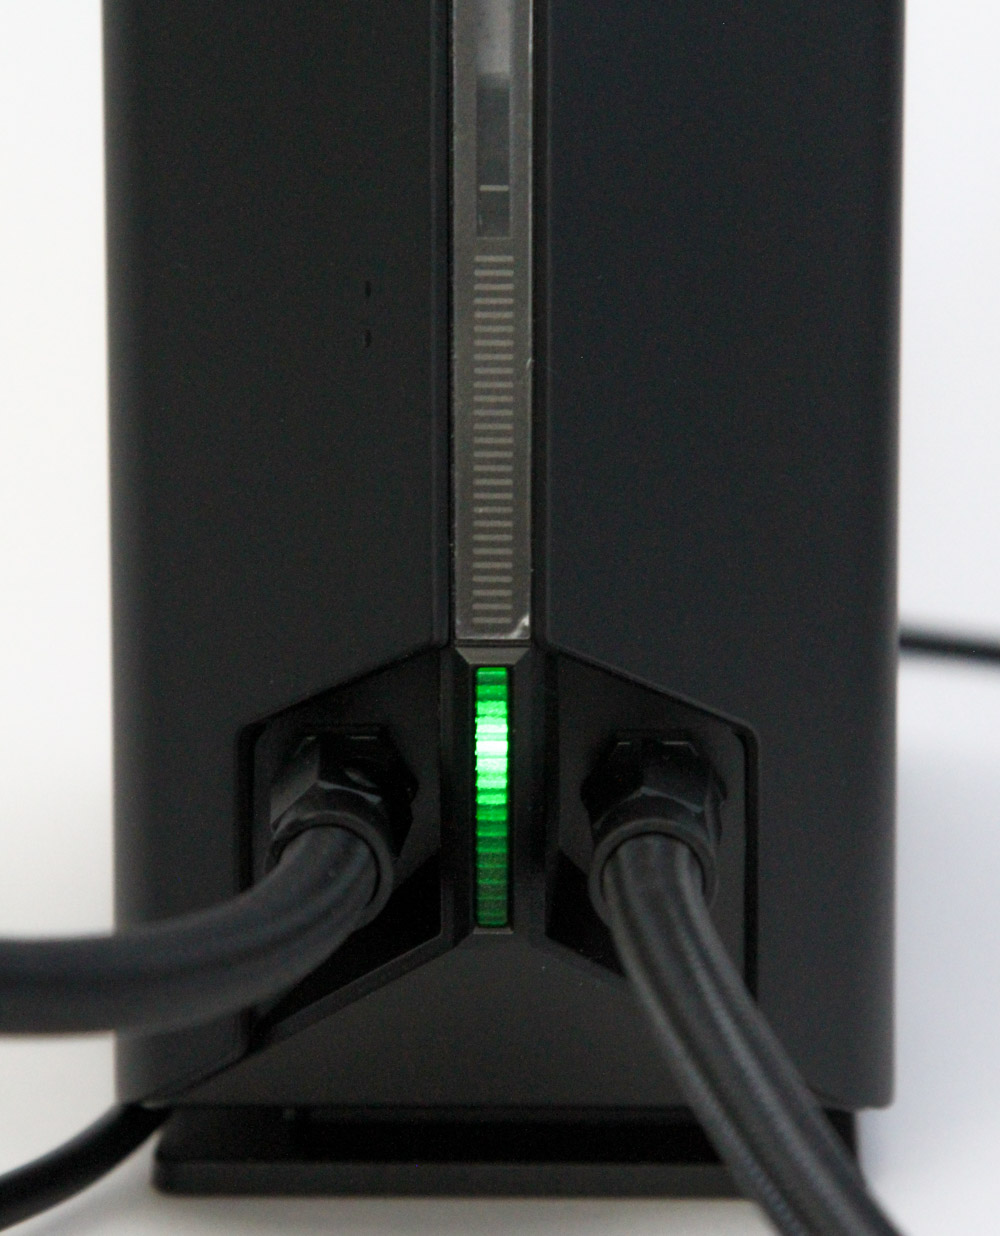

You are now presumably good to go—power on the Oasis, which starts the pump and pushes the coolant in the reservoir into the tubing and heatpipe. 230 ml of coolant is needed at most, and minimum and maximum level indicators on the reservoir show you where you are when refilling the coolant. The reservoir is tall enough for air to more than likely exit through the fill/pressure relief port, and the pump is below the reservoir to minimize air circulation in the loop. I was also impressed by how quietly the OASIS ran upon start-up before my eyes were distracted by the LEDs on both the power button and below the reservoir window. It's now time to head back to XMG Control Center for the OASIS menu walking us through the setup and what those LEDs indicate.
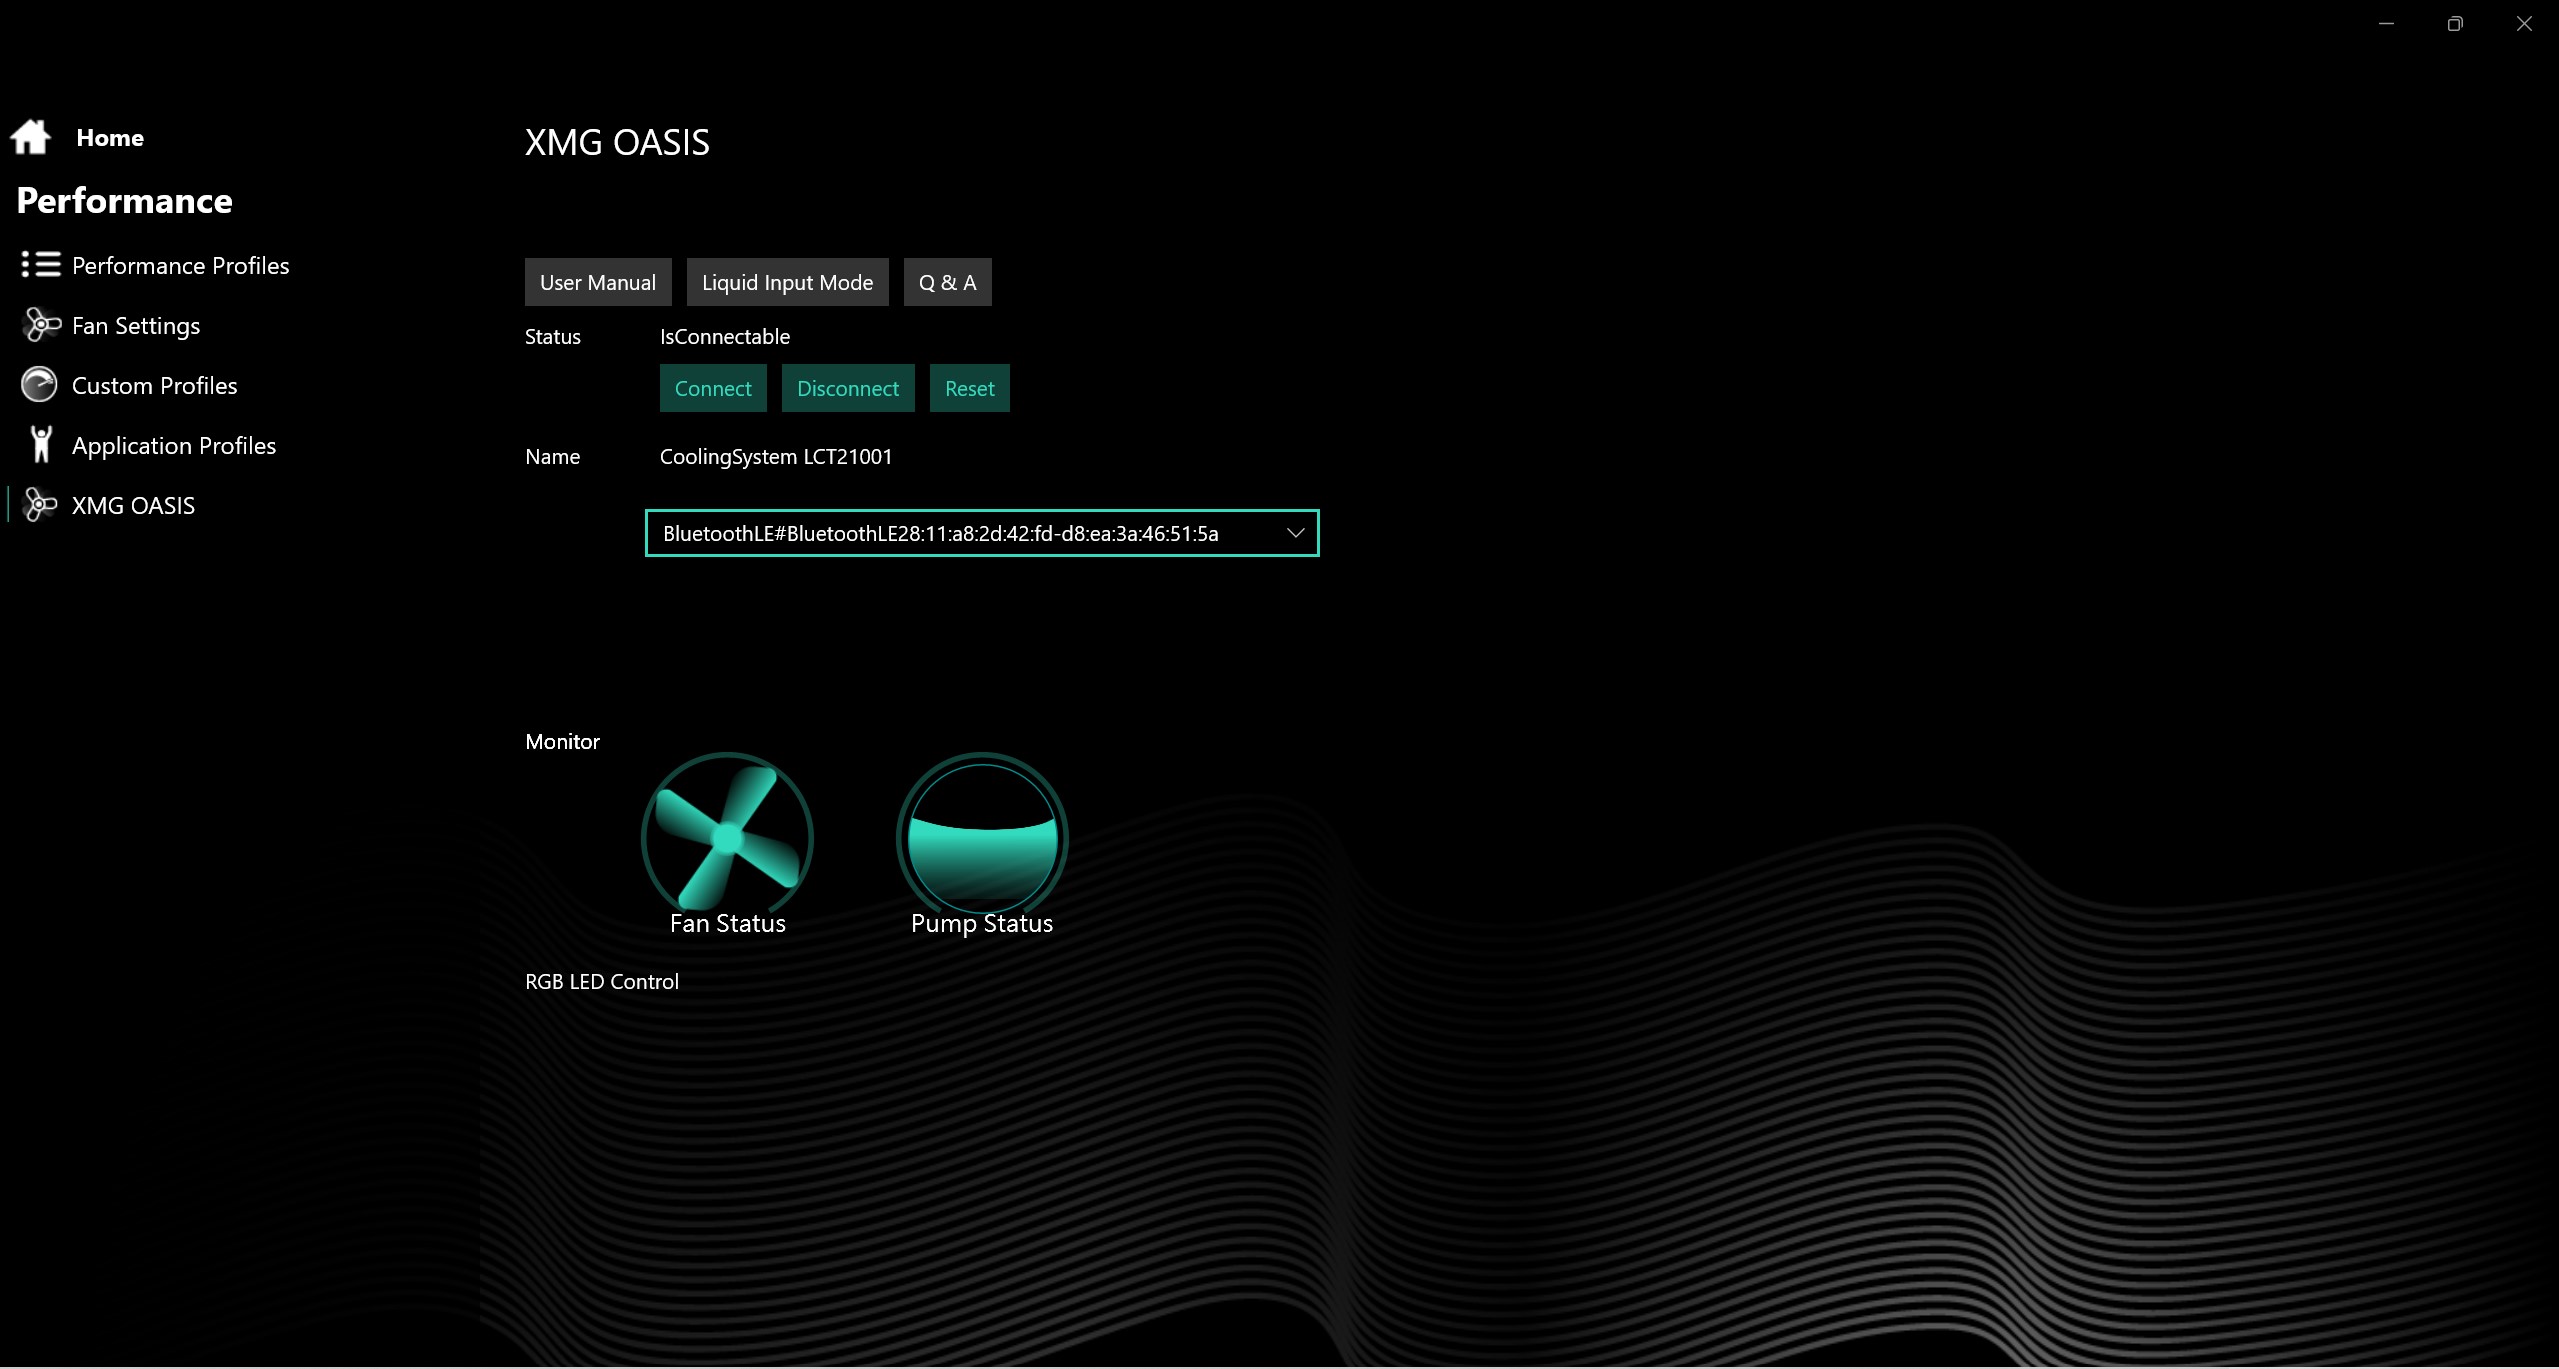

The OASIS wirelessly connects to the laptop via Bluetooth LE, which is an interesting choice to say the least. A stop fail-safe is built in, and we see different options here, including a link to the user manual and Q&A, as well as a useful button to initiate liquid input mode to fill the reservoir without the system freaking out. Fan and pump status are also visualized, which we saw were both connected to a single control board inside the OASIS. The fan can be set to different profiles, although the pump is one speed only, so there will always be idle operating noise from the OASIS, which is likely higher than the laptop at idle. You can also customize the LEDs here—I simply left them in their default state.
Jun 30th, 2025 22:42 CDT
change timezone
Latest GPU Drivers
New Forum Posts
- GravityMark v1.89 GPU Benchmark (303)
- Post your Cinebench 2024 score (658)
- GPU PerfCap Reason PWR (8)
- Laptop overclocking adventures (1238)
- [INTEL]-How To Update Your Microcode for Intel HX 13/14th Gen. CPUs Laptops/Mobile Easily. (172)
- Will you buy a RTX 5090? (584)
- The TPU UK Clubhouse (26530)
- Optane and "enable write caching " (27)
- Question about Intel Optane SSDs (87)
- Do you use Linux? (664)
Popular Reviews
- ASUS ROG Crosshair X870E Extreme Review
- Sapphire Radeon RX 9060 XT Pulse OC 16 GB Review - Samsung Memory Tested
- AVerMedia CamStream 4K Review
- Lexar NQ780 4 TB Review
- AMD Ryzen 7 9800X3D Review - The Best Gaming Processor
- Upcoming Hardware Launches 2025 (Updated May 2025)
- Sapphire Radeon RX 9070 XT Nitro+ Review - Beating NVIDIA
- AMD Ryzen 9 9950X3D Review - Great for Gaming and Productivity
- NVIDIA GeForce RTX 5060 8 GB Review
- ASRock Phantom Gaming Z890 Riptide Wi-Fi Review
TPU on YouTube
Controversial News Posts
- Intel's Core Ultra 7 265K and 265KF CPUs Dip Below $250 (288)
- NVIDIA Grabs Market Share, AMD Loses Ground, and Intel Disappears in Latest dGPU Update (204)
- Some Intel Nova Lake CPUs Rumored to Challenge AMD's 3D V-Cache in Desktop Gaming (140)
- NVIDIA Launches GeForce RTX 5050 for Desktops and Laptops, Starts at $249 (105)
- Microsoft Partners with AMD for Next-gen Xbox Hardware (105)
- Intel "Nova Lake‑S" Series: Seven SKUs, Up to 52 Cores and 150 W TDP (100)
- NVIDIA GeForce RTX 5080 SUPER Could Feature 24 GB Memory, Increased Power Limits (94)
- Reviewers Bemused by Restrictive Sampling of RX 9060 XT 8 GB Cards (88)