 51
51
Acer Predator XB271HU bmiprz 144-165 Hz Review
Picture Quality »Controls & OSD

To navigate the on-screen display (OSD), Acer equipped the Predator XB271HU with a set of five unmarked front-facing buttons. These are easily the weakest aspect of an otherwise impressive monitor. These buttons feel cheap to the touch. I couldn't shake the feeling that they could get stuck at any moment, although that never happened. They are uncomfortable and clunky to use and make navigating the OSD much more difficult than it needs to be. I was unable to get accustomed to their placement and logic even after a couple days of actively using them. Why couldn't we just get a simple rear-facing, four-way joystick, Acer?
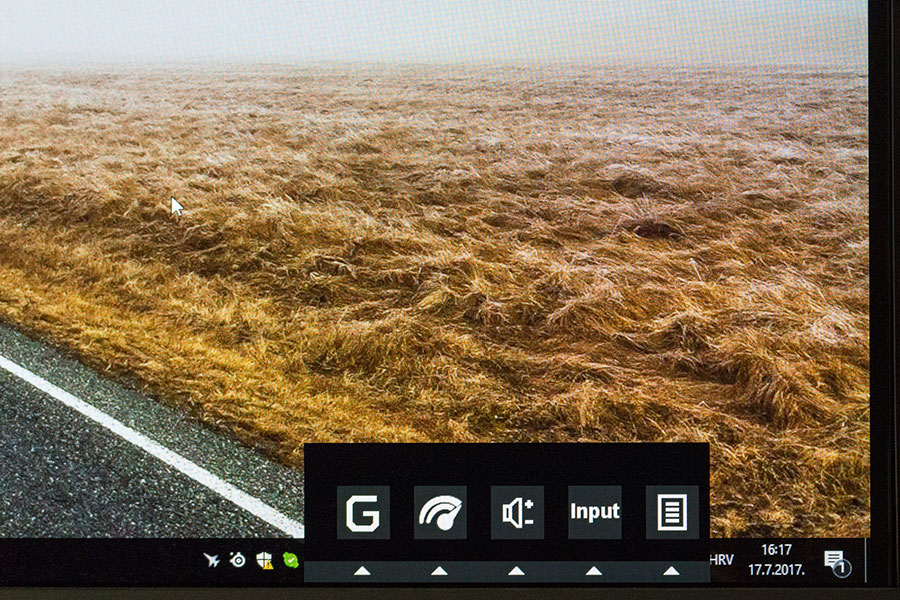
The exact function of each of these buttons changes depending on where you are in the OSD. In order to find out what a certain button does, you'll have to look at what's drawn on the screen directly above it. This works just fine when you press any of the buttons once, which opens a quick menu with just five options (Game Mode, OverDrive, Speaker Volume, Input Selection, and Function Menu). Five buttons, five options - no problem. Oddly enough, the quick menu doesn't offer a button that would give us instant access to various picture presets. At the same time, we get the OverDrive button for access to an option we'll set once and never think about again? Strange stuff is happening here, friends…

Once you dive into the Function Menu, the OSD suddenly becomes slightly wider than the five navigation buttons, which has it "spill" into the final, sixth front-facing button used to turn the monitor off. As you can imagine, that will cause you to constantly turn the monitor off accidentally, and frantically curse every time it happens.
The first menu is called "Picture". Here, we can adjust both brightness and contrast and dive into the Acer eColor Management option, which is just a sub-menu with a couple factory preset picture profiles (User, ECO, Standard, Graphics, and Movie). The Blue Light option reduces the amount of, wouldn't you know it, blue light down to a specific value (50%, 60%, 70%, or 80%), which adjusts the brightness at the same time. Removal of blue light reduces eye strain, especially when the monitor is being used at night and when your eyes are already tired. Of course, the picture also becomes yellowish (warmer), so this isn't something you should keep active all the time if color accuracy is what you're generally after. Dark Boost basically makes the blacks less black and pushes them towards grays. The idea is to make enemies hiding in dark corners easier to spot. A bit strange is that this option isn't a part of the gaming-related settings as it definitely shouldn't be used by anyone except those looking for every competitive edge they can get, willing to sacrifice picture quality in the process. Setting it to one of three available levels actually crushes all the finer details in darker scenes and basically replaces the blacks with grays. Finally, there's Adaptive Contrast, adjustable in a grand total of 100 steps. It tries to increase the screen's dynamic contrast in order to expose details you might otherwise miss. I found the overall picture quality as well as the interpretation of its finer details to be the best when Adaptive Contrast is kept off. Your mileage may vary depending on what sort of a picture you generally prefer.

The Color menu lets you change the gamma (1.8 or 2.2), adjust the color temperature (User, Cool, Warm, or Blue Light - I suggest you stick with User), and turn on sRGB Mode. Keep the latter off as it switches the color temperature to Warm, sets the brightness to 80, and locks you out of adjusting any other setting - and for no particular benefit because you can get better picture quality by adjusting all of those on your own.
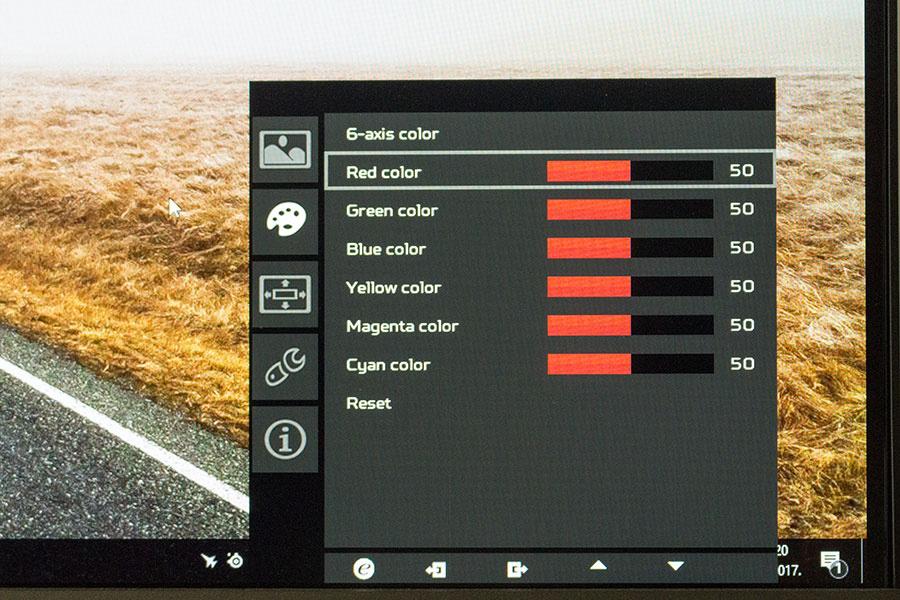
The 6-axis color option is an interesting one. Here, you can adjust the chroma of red, green, blue, cyan, yellow, and magenta in a range that spans from 0-100 for all of those colors. By doing so, you can significantly alter the screen's color performance, bend it more to your liking. If you overdo it, simply select "Reset" at the bottom of the menu to have the colors go back to their stock value of 50. Should you plan on calibrating the monitor, leave these colors at their default values.

The OSD menu is where you can change the language and transparency of the OSD, make the monitor display the current refresh rate in the upper-right corner of the screen, and turn on Acer's so-called "Game Mode". If you play a shooter that doesn't have a crosshair and miss it, you can use one of three (ugly) crosshair designs made by Acer by activating the Aim Point option.
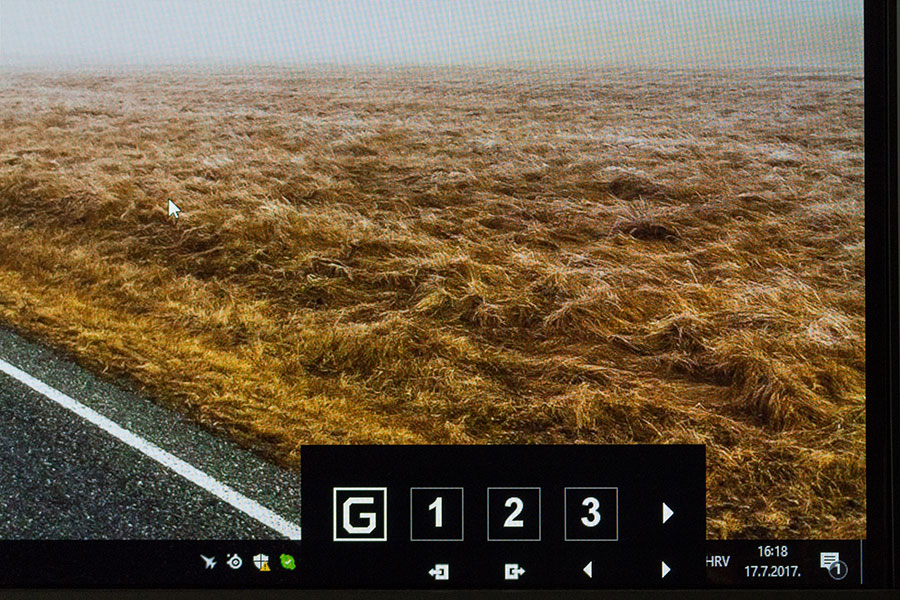
Game Mode is a weird and misleading name for a function that actually enables you to switch between three different user-defined picture profiles. When Game Mode is off, the monitor uses whatever you adjusted the settings to or one of the factory picture profiles, if you decided to use those. After turning Game Mode on, you can save your OSD settings to one of three available profiles you can then quickly switch between by using the quick menu. Unfortunately, not everything gets saved. For example, I was unable to have two profiles with the Refresh Rate Num option set to on in one and off in the other. The Refresh Rate Num option completely ignored the profiles and simply remained in whatever state I had set it to last. I refrained from using Game Mode because of such inconsistencies. It's important to keep in mind that you don't have to use it in order to get the best gaming performance out of the Predator XB271HU.
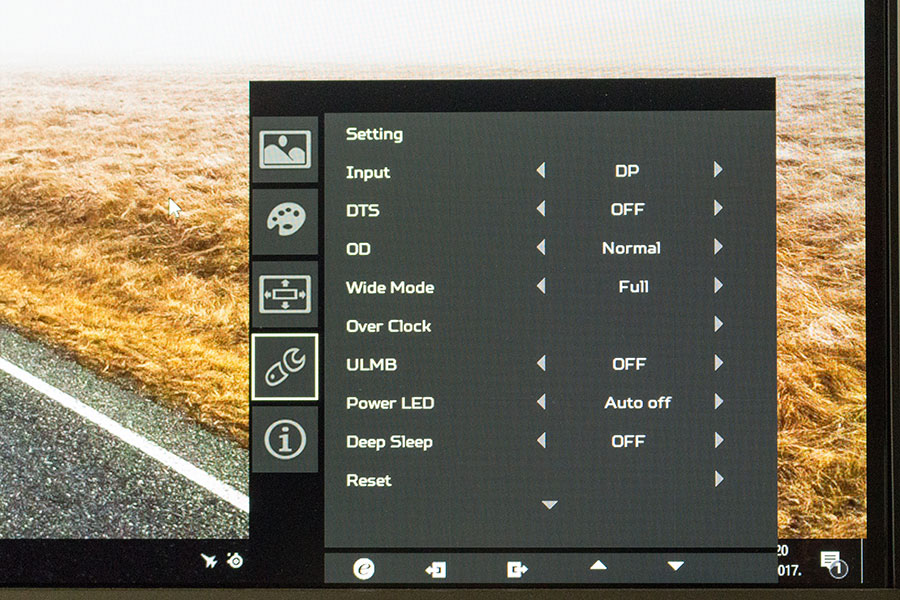

There are several interesting customization options in the Setting menu. Here, you can turn off that annoying blue LED that's sitting next to the power button. You can also make the built-in USB 3.0 ports remain active after the monitor goes to sleep and will have to visit this menu to adjust the OverDrive function (Off, Normal, or Extreme), activate ULMB (Ultra Low Motion Blur) - more about that in the Gaming Performance section of this review - and select the picture's scale (Full, Aspect, or 1:1). Remember that it doesn't matter whether you pick Full, Aspect, or 1:1 here if you are running the monitor at its native resolution.
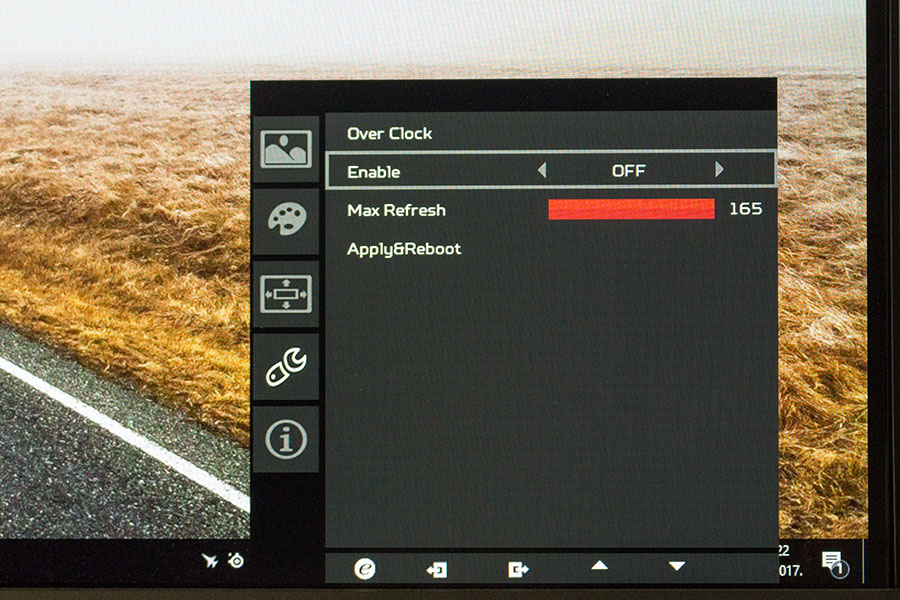
The Setting menu is also where you'll be able to overclock the panel from its factory-set 144 Hz to 165 Hz. This is something you might be interested in if your PC is powerful enough to dish out over 144 FPS in those games you're playing. If that isn't the case, it's best to leave the option off.
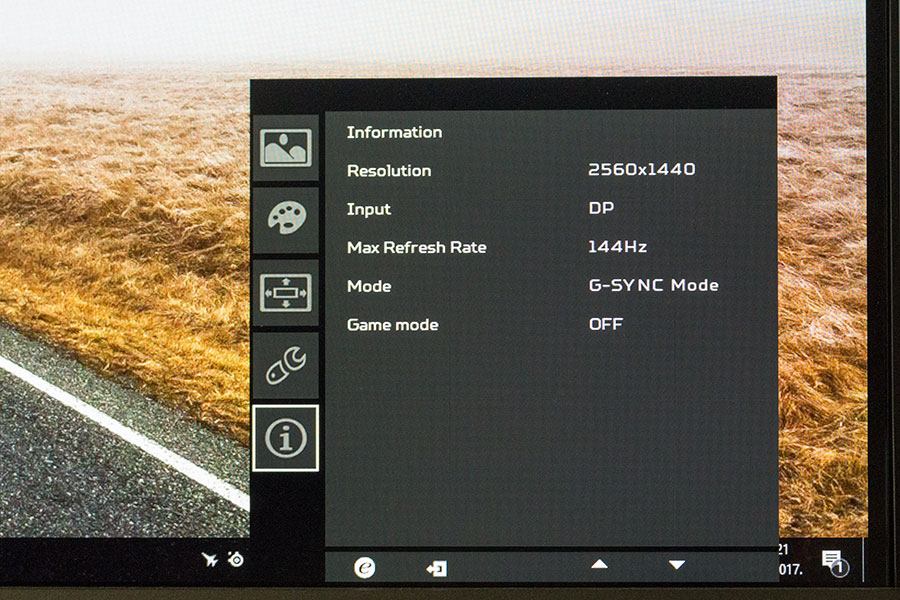
The final menu is simply called "Information". Here, you can find out what resolution and refresh rate the screen is currently set to, which input you're using, if G-Sync is on or off (if it's off, the Mode option will say "Normal"), and if Game Mode is currently activated or not.
Jul 2nd, 2025 23:39 CDT
change timezone
Latest GPU Drivers
New Forum Posts
- NVIDIA App (36)
- Will you buy a RTX 5090? (588)
- AMD RX 7000 series GPU Owners' Club (1327)
- What's your latest tech purchase? (24189)
- RDNA 4 Fine Wine? (HUB Vid) (41)
- GravityMark v1.89 GPU Benchmark (308)
- Good time in the year to buy a new PC (5)
- The Official Thermal Interface Material thread (1767)
- What Windows is overall the best to you and why? (262)
- Nvidia drivers (6)
Popular Reviews
- ASUS ROG Crosshair X870E Extreme Review
- Crucial T710 2 TB Review - Record-Breaking Gen 5
- Sapphire Radeon RX 9060 XT Pulse OC 16 GB Review - An Excellent Choice
- PowerColor ALPHYN AM10 Review
- Upcoming Hardware Launches 2025 (Updated May 2025)
- AMD Ryzen 7 9800X3D Review - The Best Gaming Processor
- AVerMedia CamStream 4K Review
- Sapphire Radeon RX 9070 XT Nitro+ Review - Beating NVIDIA
- NVIDIA GeForce RTX 5060 8 GB Review
- AMD Ryzen 9 9950X3D Review - Great for Gaming and Productivity
TPU on YouTube
Controversial News Posts
- Intel's Core Ultra 7 265K and 265KF CPUs Dip Below $250 (288)
- NVIDIA Grabs Market Share, AMD Loses Ground, and Intel Disappears in Latest dGPU Update (212)
- Some Intel Nova Lake CPUs Rumored to Challenge AMD's 3D V-Cache in Desktop Gaming (140)
- NVIDIA GeForce RTX 5080 SUPER Could Feature 24 GB Memory, Increased Power Limits (114)
- NVIDIA Launches GeForce RTX 5050 for Desktops and Laptops, Starts at $249 (105)
- Microsoft Partners with AMD for Next-gen Xbox Hardware (105)
- Intel "Nova Lake‑S" Series: Seven SKUs, Up to 52 Cores and 150 W TDP (100)
- NVIDIA DLSS Transformer Cuts VRAM Usage by 20% (96)