 0
0
Aerocool GT-S Black Edition Review
Value & Conclusion »Assembly

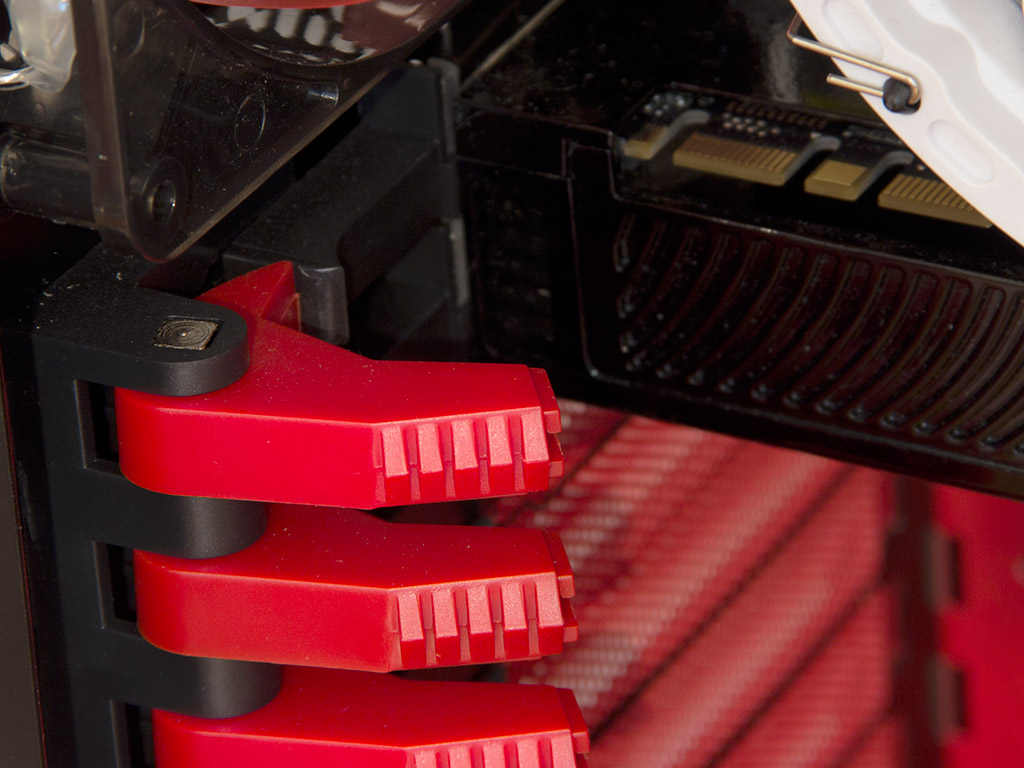
Installing the motherboard is done by traditional means, with the use of the included spacers. There is a lot of space around the motherboard, especially above it. You should then be able to install a thick radiator there without any problems. The plastic locking mechanism for the motherboard-expansion slots does require quite a bit of though love to snap back into place with a graphics card installed, but it holds things in place nicely.

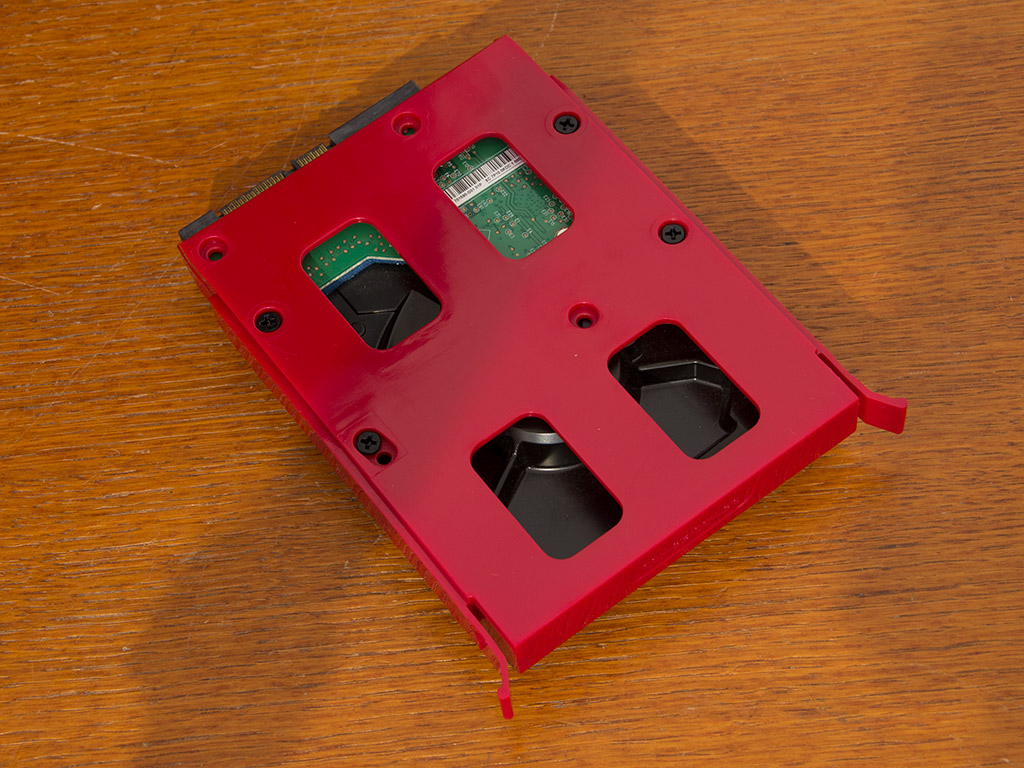
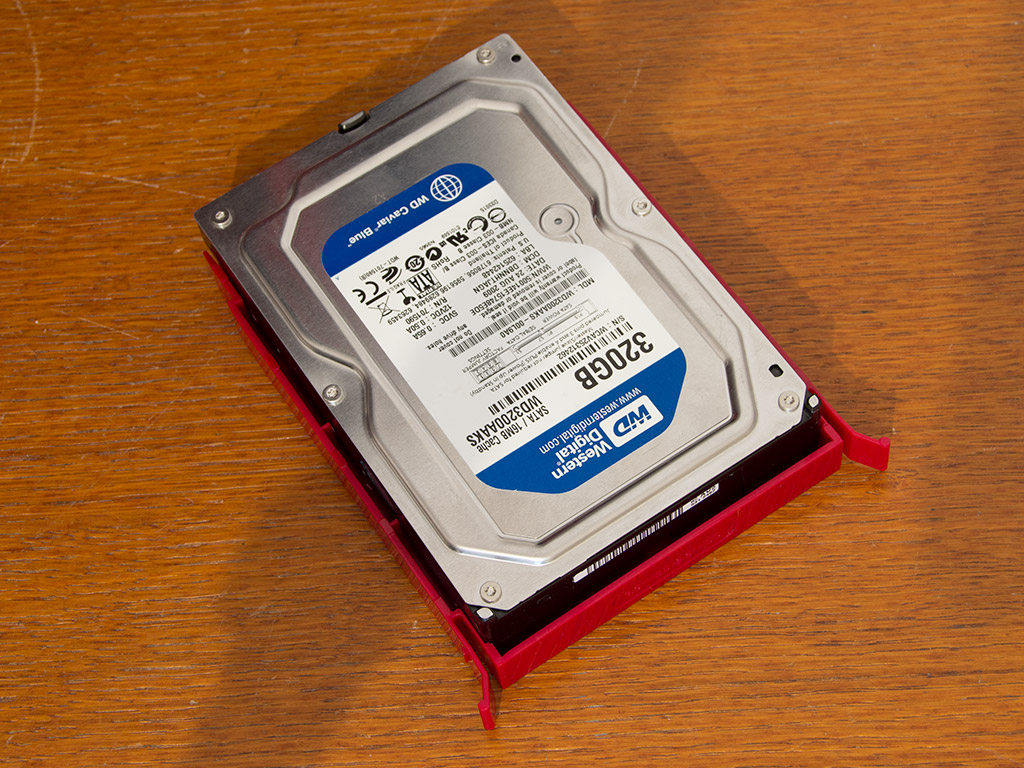
To install a hard drive within the GT-S Black Edition, simply pick the tray of your choice and install the 2.5" or 3.5" drive with the use of the included screws. It would have been nice to see a screw-less version, but this implementation does work well.
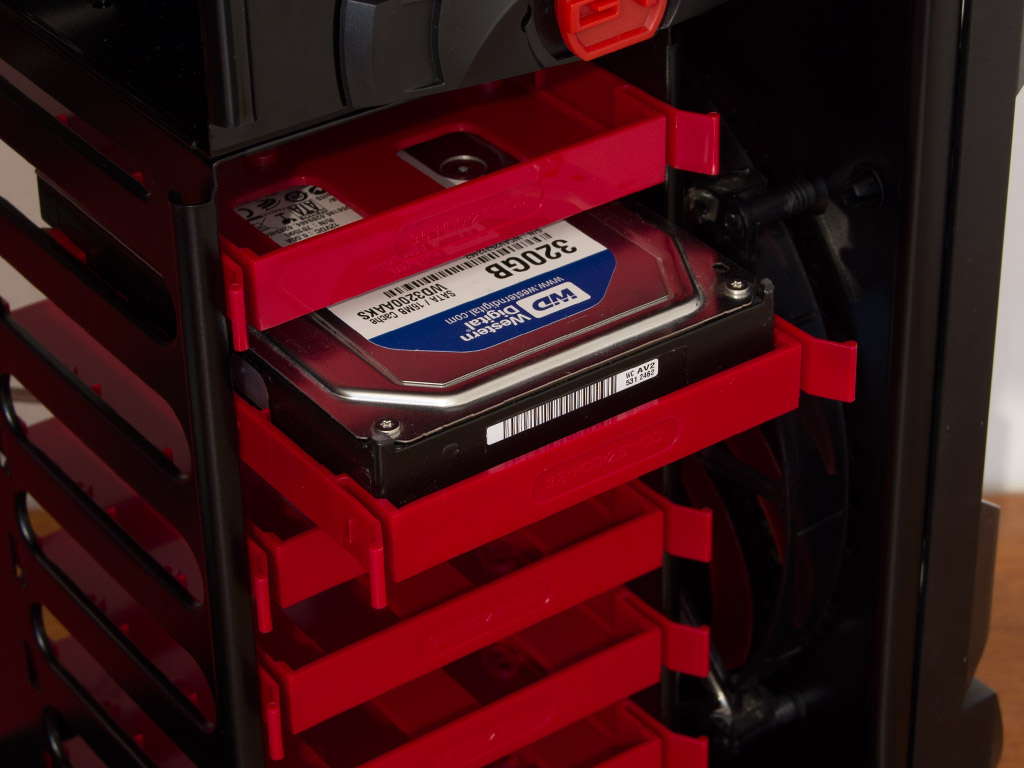
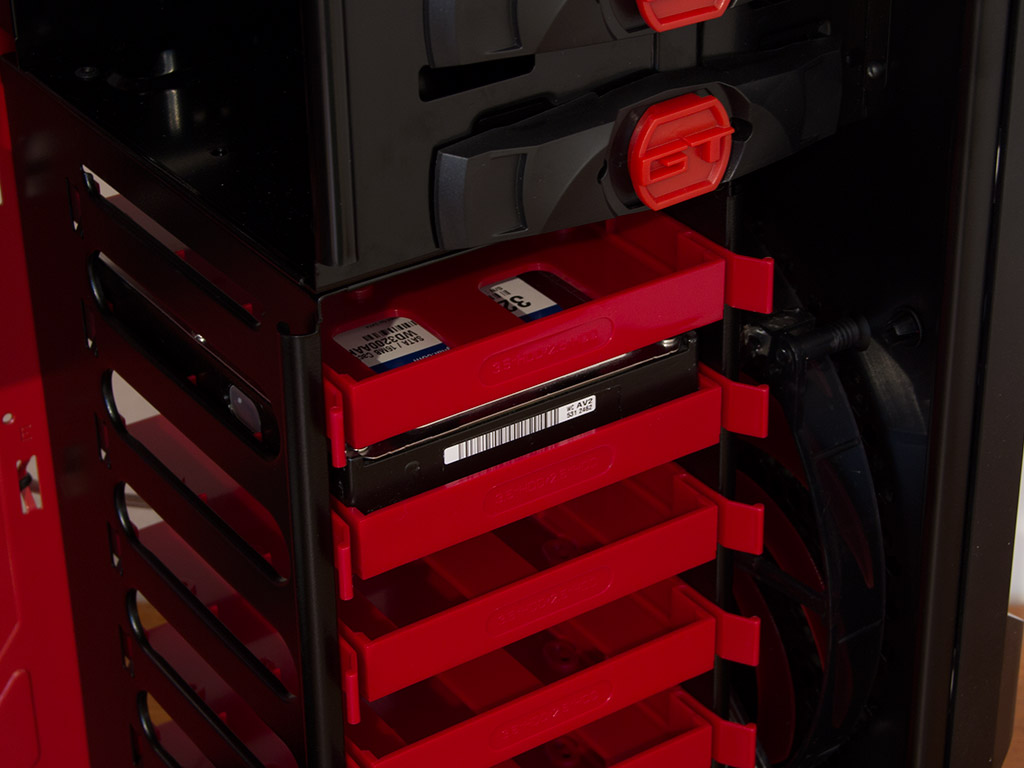
Put away the screwdriver after filling up those trays. Simply slide the full tray into the bay of your choice until it snaps into place. You should now not have to worry about it coming loose on its own.
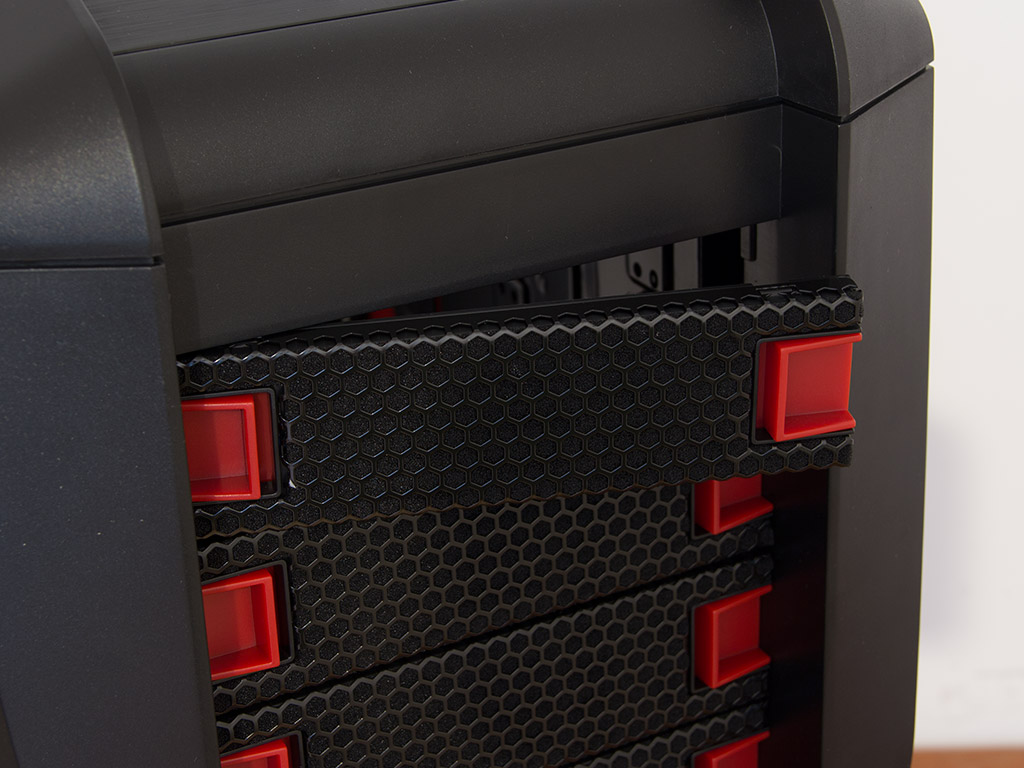
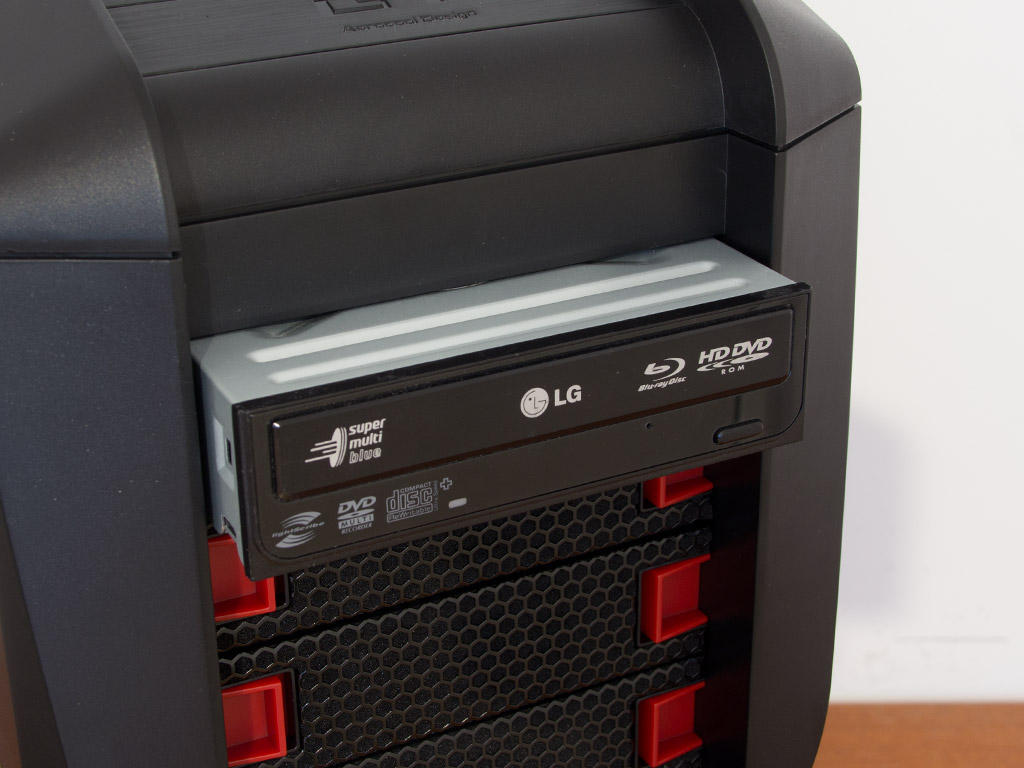

Installing an optical drive isn't supposed to take any tools. Just pop the bay cover of your choice out and slide the drive into place. Once positioned properly, push the red plastic buttons down and slide them over to pin the drive down. This is a great idea and Aerocool is not the first company to offer such a locking system, but its GT-S Black Edition implementation does not work at all. Pressing on the front bezel of the drive pops the locks open, leaving the drive to dangle around loosely within the bay. The locks taking up all mounting holes of the drive bay also forces you to detach them completely only to revert to traditional screws. Sorry, Aerocool, but this particular iteration is an epic fail. Next time, just include red or black thumbscrews instead.
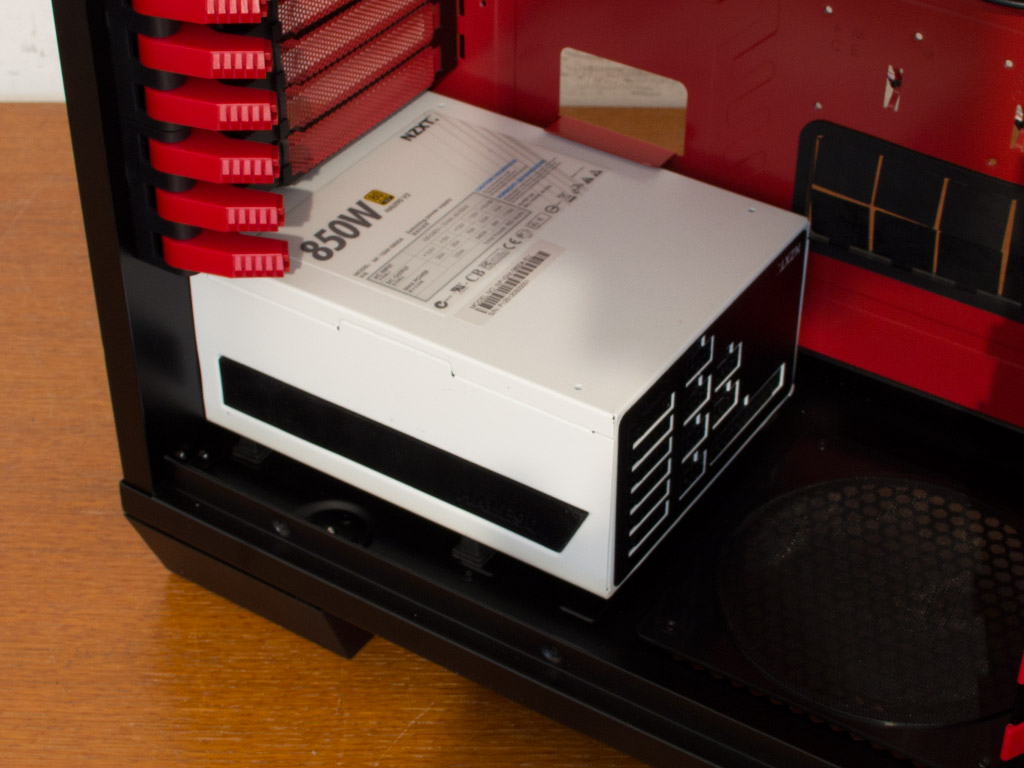
Adding a PSU to the chassis requires the use of a screwdriver since you have to attach the unit using traditional screws. But the GT-S Black Edition's large size should allow you to install any one large power supply.
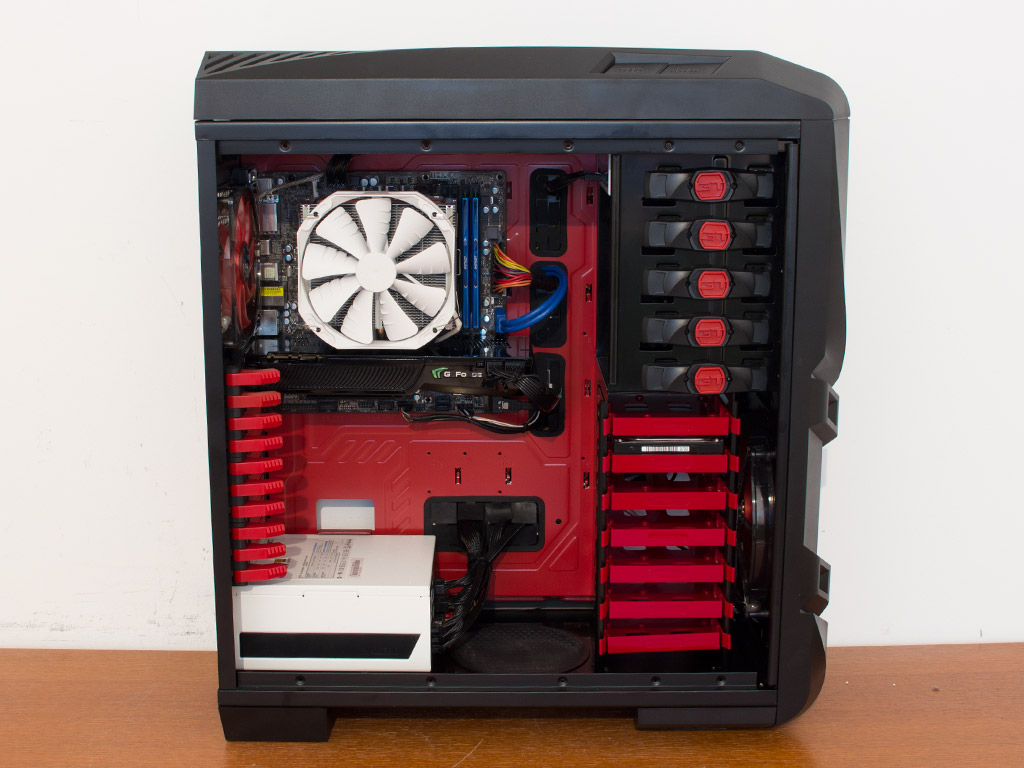
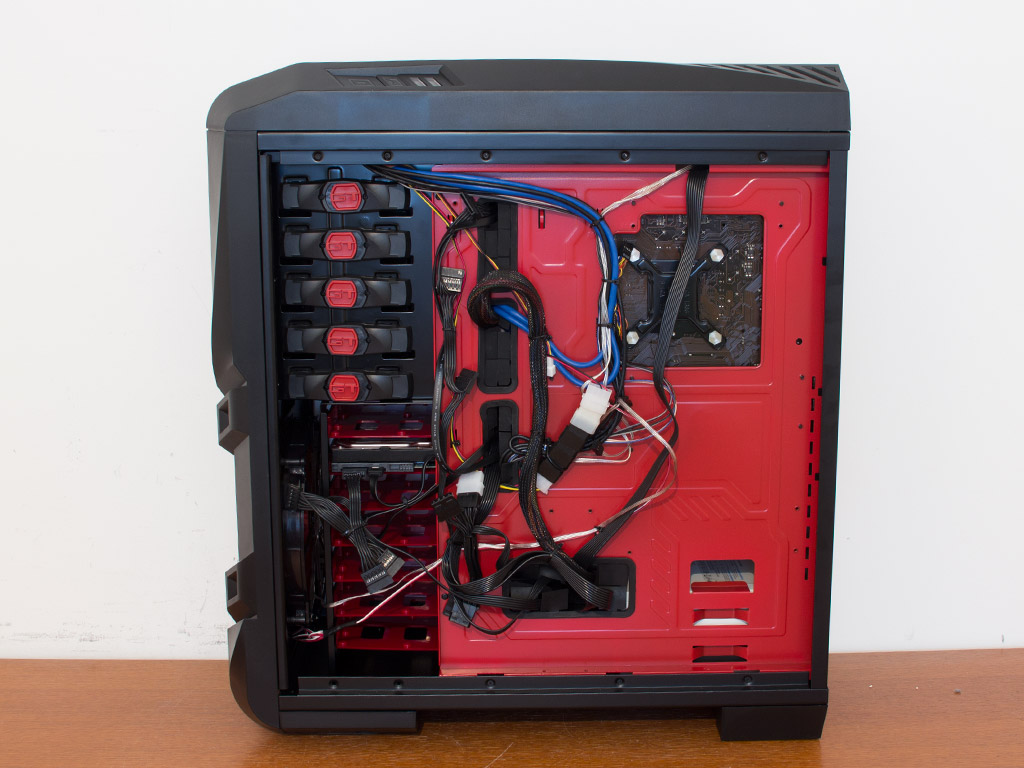
With everything in place, the GT-S Black Edition looks very clean, but its colorful cables are a slight eye sore. The numerous cable hooks on the backside of the motherboard tray made keeping things tidy a breeze, and every ugly lead was successfully routed to be held in place securely and out of sight.
Finished Looks
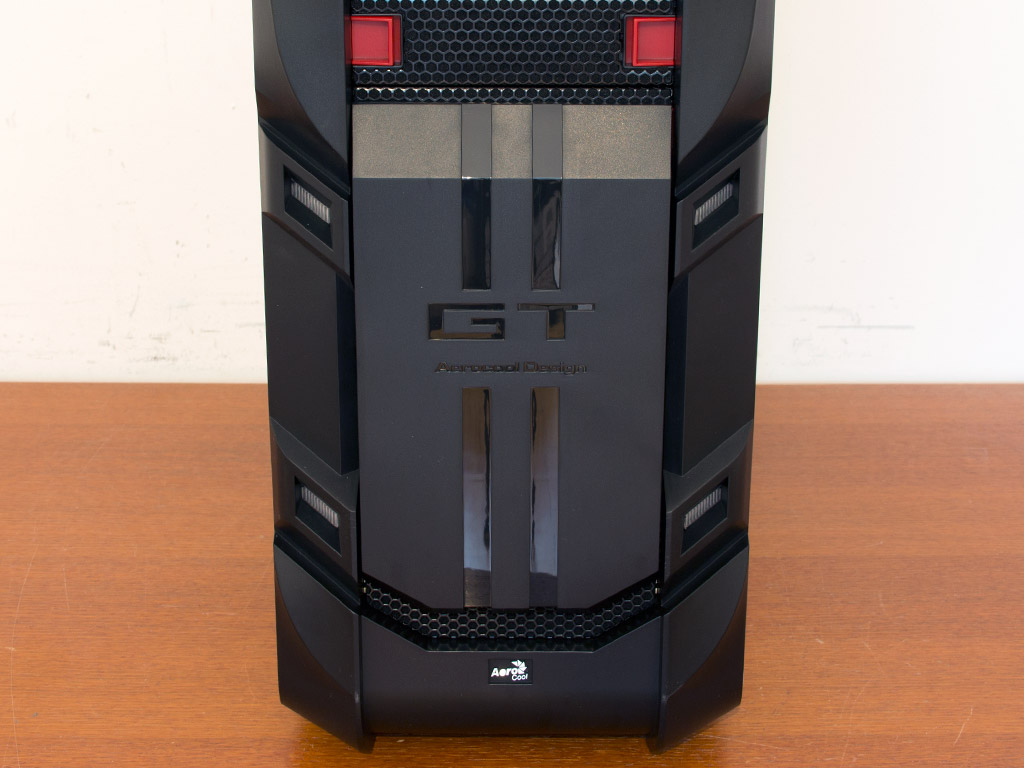

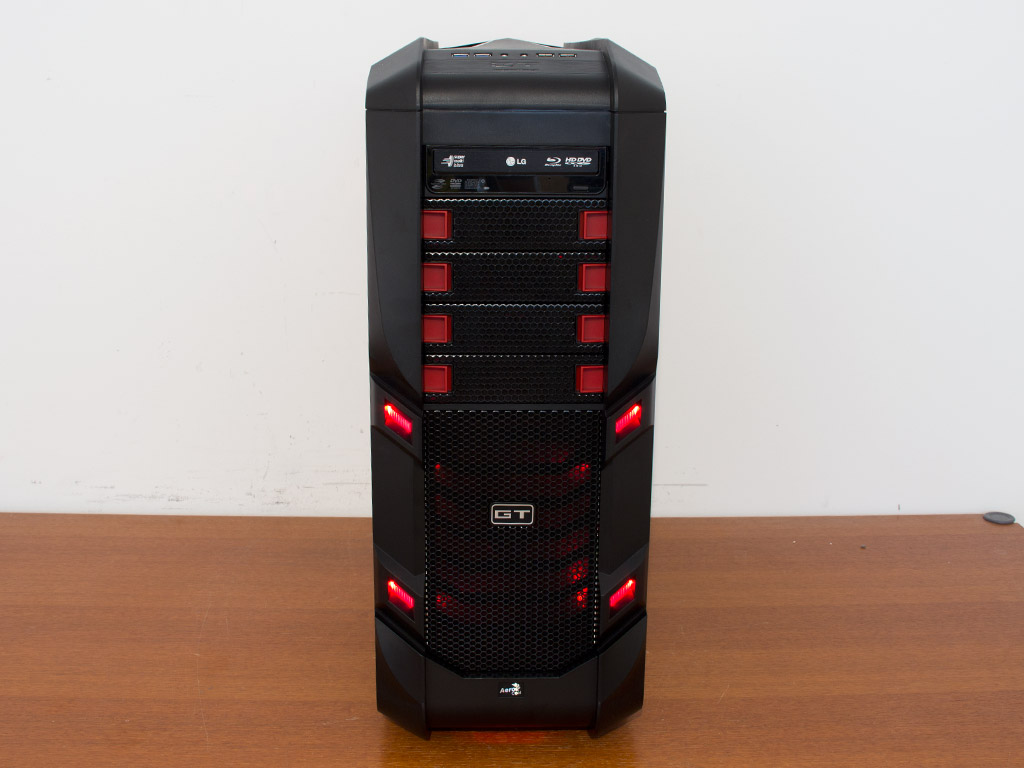
Before turning on the system, the front cover was applied. As mentioned before, it uses magnets to hold in place. You may place it anywhere on the metal mesh area of the front—it could cover the front drive bays or the lower air vent. While a nice little visual addition that gives the chassis race stripes, you do not want to cover up the front intake fan with a solid panel. Those users utilizing the optical drive bay will even end up leaving the cover off out of pure laziness. Once turned on, all three fans and the four embedded LEDs in the front light up red, which makes the chassis look pretty snazzy.

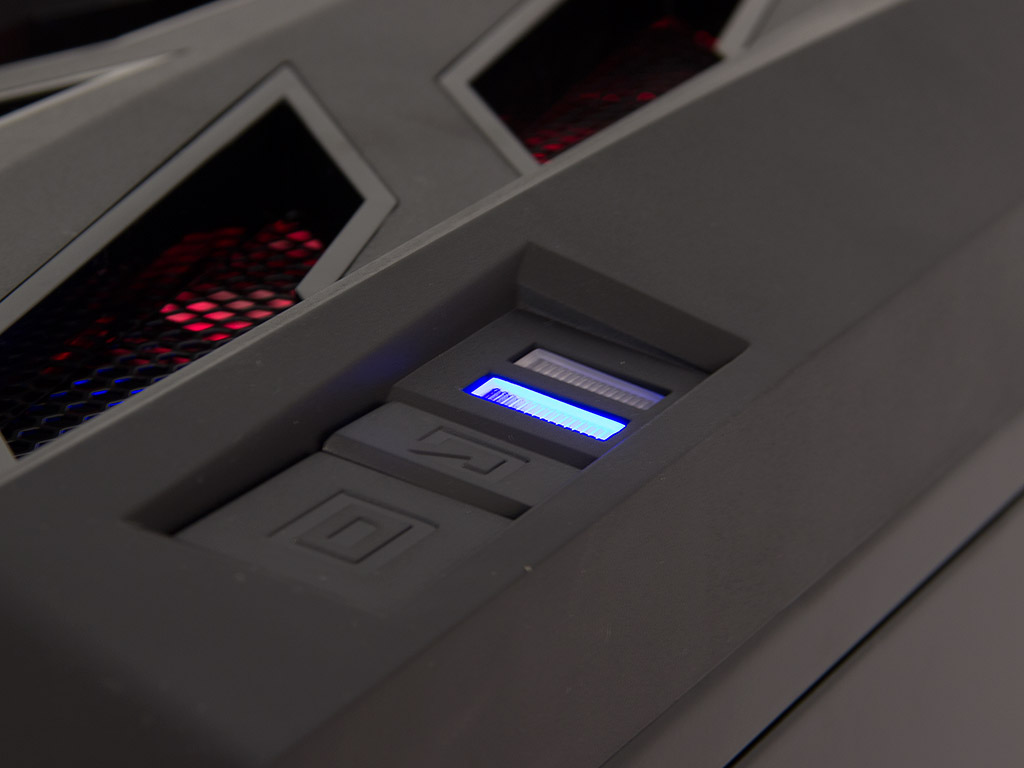
The use of LED-equipped fans in the rear and top of the chassis is great, as it floods the interior of the chassis with red light. But Aerocool unfortunately installed a blue power LED into the GT-S Black Edition, with the hard-drive LED in red. I would have liked a red power LED because it would have kept all lighting elements across the chassis uniform.
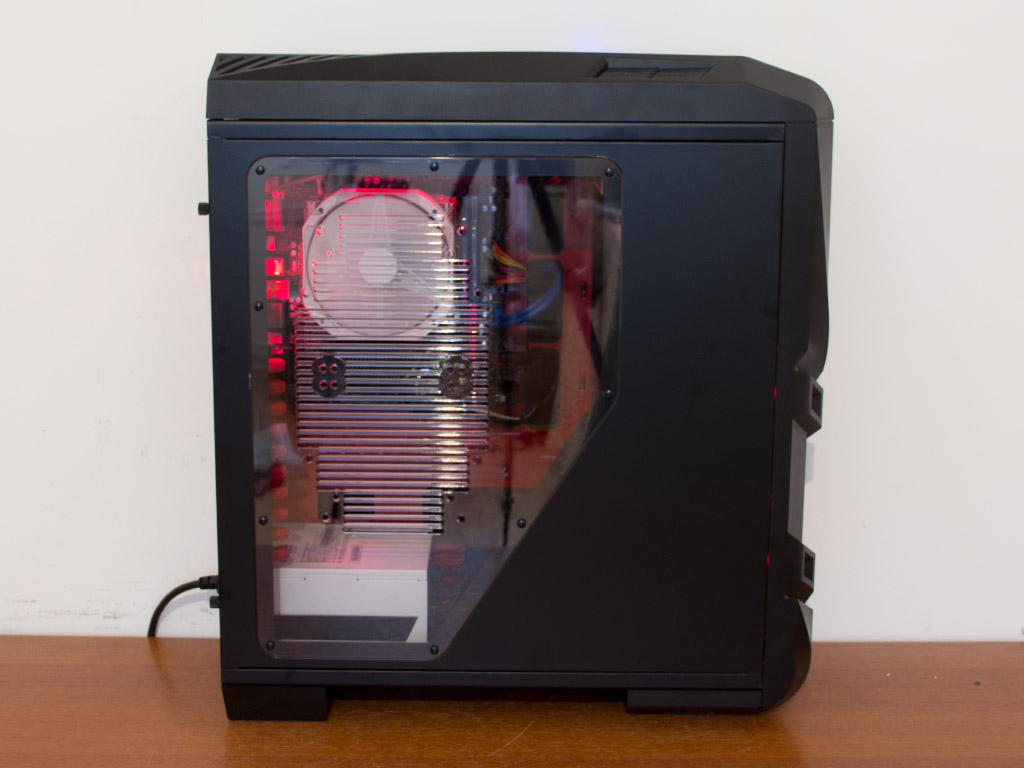

Turning the case around, one can see the full motherboard, all expansion cards, CPU cooler, and the power supply clearly. There are two vents on the window for additional cooling units there, which could prove helpful in keeping your graphics card cool, for example, or when using water-cooling, as that would push air across the motherboard instead of a traditional heatsink and fan combo.
Jan 12th, 2025 08:58 EST
change timezone
Latest GPU Drivers
New Forum Posts
- Windows 11 24h2 has worse latency than Windows 10 22h2! (2)
- What are you playing? (22568)
- Where I can buy the Samsung 35E 18650 3500mAh 8A -Protected Button Top Batteries. (79)
- The TPU UK Clubhouse (25584)
- Testing max ram overclock pn Ryzen 1700 (3)
- RX 7700 XT with "low" FPS (28)
- Technical Issues - TPU Main Site & Forum (2024) (528)
- Increased VRAM usage with Resizable BAR enabled in Cyberpunk 2077 (0)
- i7-7700k upgrade to 5700X3D worth it? (83)
- Possible to use NVCleanstall but also use Nvidia App? (7)
Popular Reviews
- LAMZU Maya X Review
- AMD Ryzen 7 9800X3D Review - The Best Gaming Processor
- ASUS ROG Strix B850-F Gaming WiFi Review
- HEDDphone TWO GT Air Motion Transformer Headphones Review
- Royal Kludge S85 TKL Wireless Mechanical Keyboard Review
- Call of Duty: Black Ops 6 Performance Benchmark Review - AMD FTW
- GPU Test System Update for 2025
- Gamdias AURA GL360 V2 Review
- Upcoming Hardware Launches 2024 (Updated Nov 2024)
- Intel Arc B580 Review - Excellent Value
Controversial News Posts
- NVIDIA 2025 International CES Keynote: Liveblog (456)
- AMD Debuts Radeon RX 9070 XT and RX 9070 Powered by RDNA 4, and FSR 4 (348)
- NVIDIA GeForce RTX 5090 Features 575 W TDP, RTX 5080 Carries 360 W TDP (212)
- AMD Radeon RX 9070 XT Alleged Benchmark Leaks, Underwhelming Performance (204)
- Potential RTX 5090 and RTX 5080 Pricing in China Leaks (173)
- 32 GB NVIDIA RTX 5090 To Lead the Charge As 5060 Ti Gets 16 GB Upgrade and 5060 Still Stuck With Last-Gen VRAM Spec (173)
- AMD Radeon RX 9070 XT Boosts up to 3.10 GHz, Board Power Can Reach up to 330W (167)
- NVIDIA GeForce RTX 5070 Ti Leak Tips More VRAM, Cores, and Power Draw (161)