 6
6
Alphacool Core 1 LT CPU Water Block Review
Installation & Lighting »Closer Examination
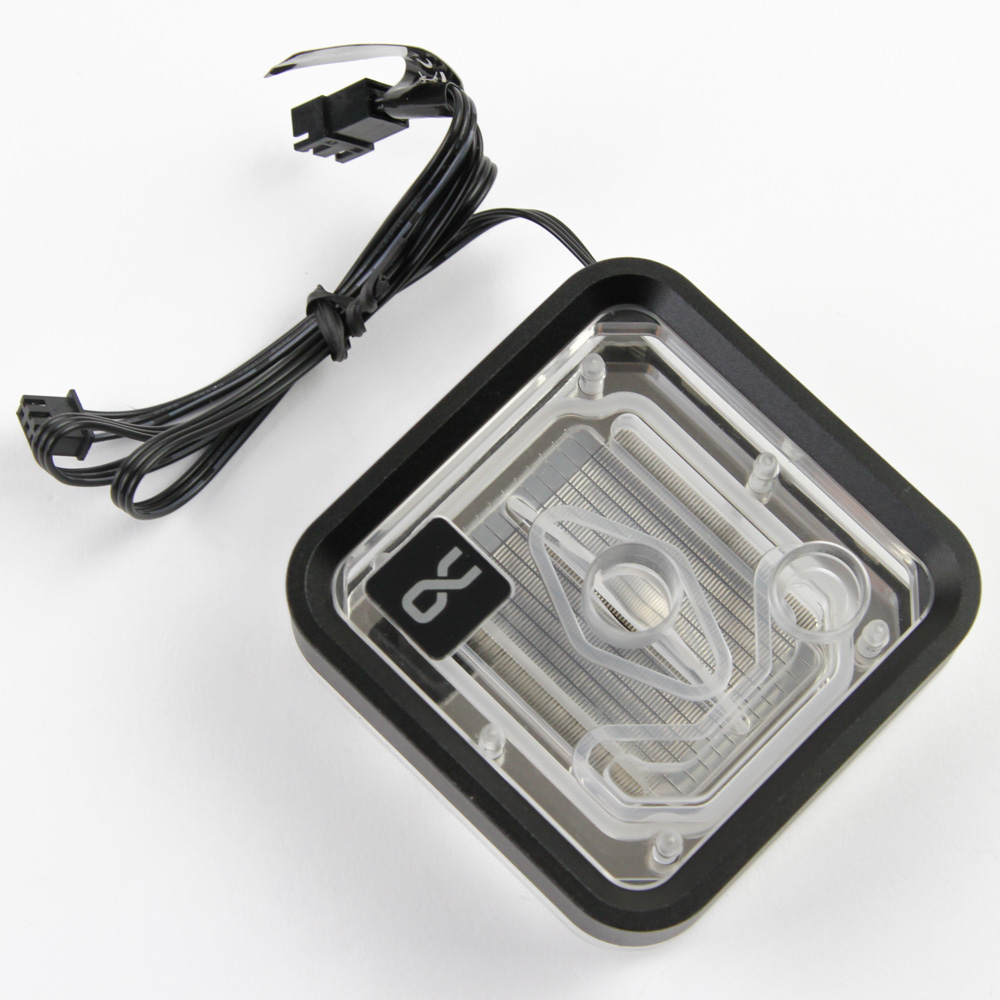

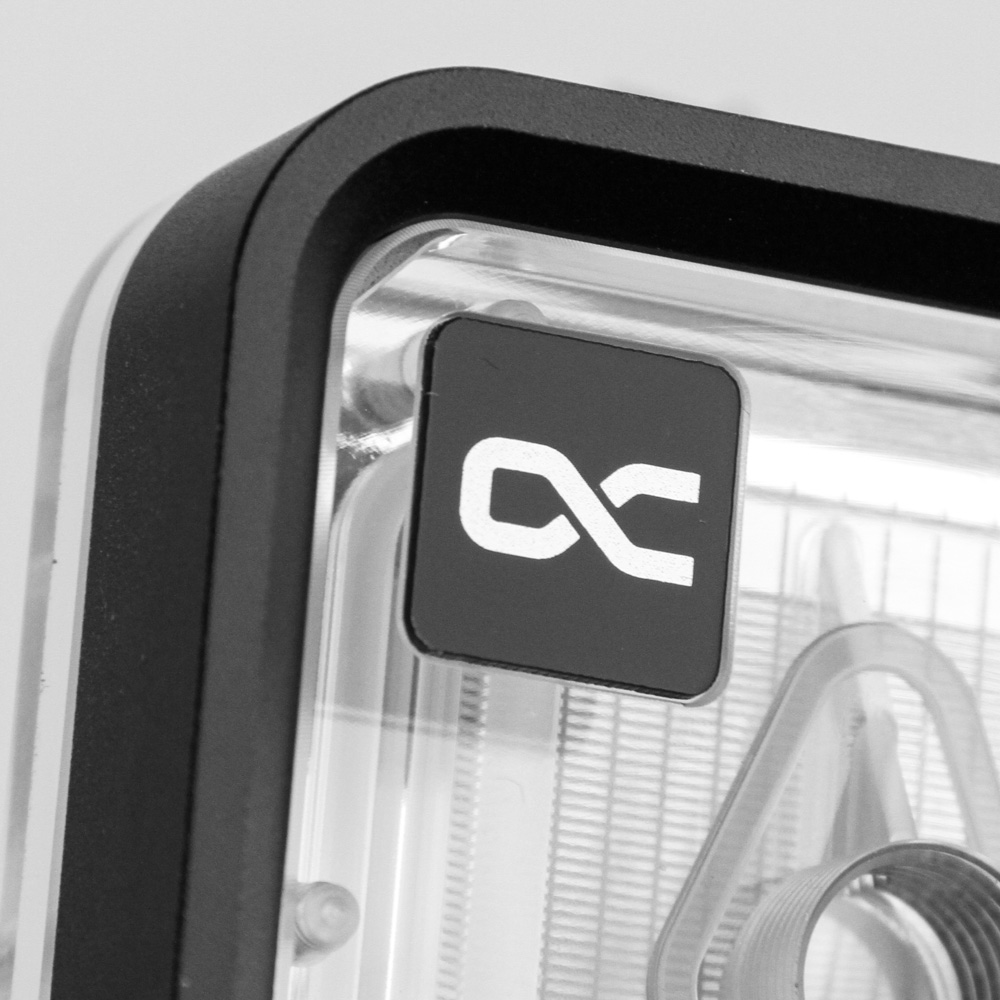
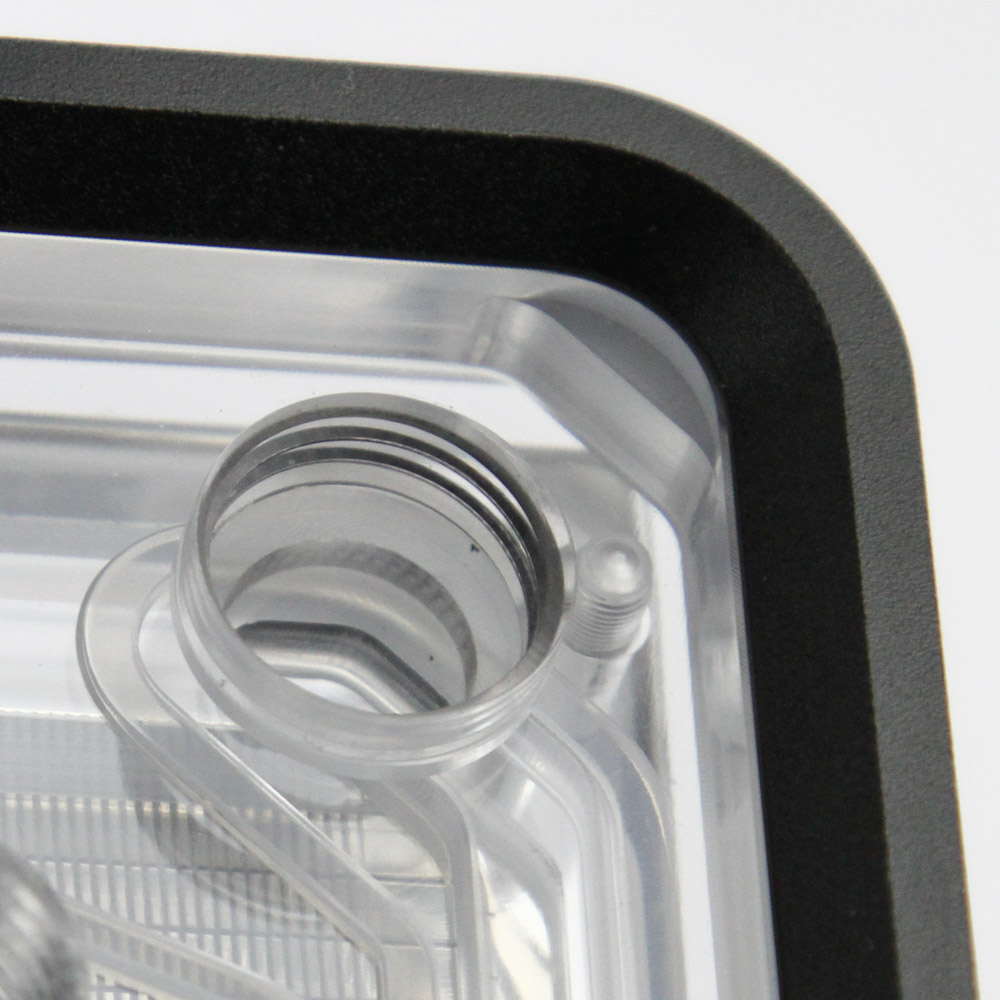
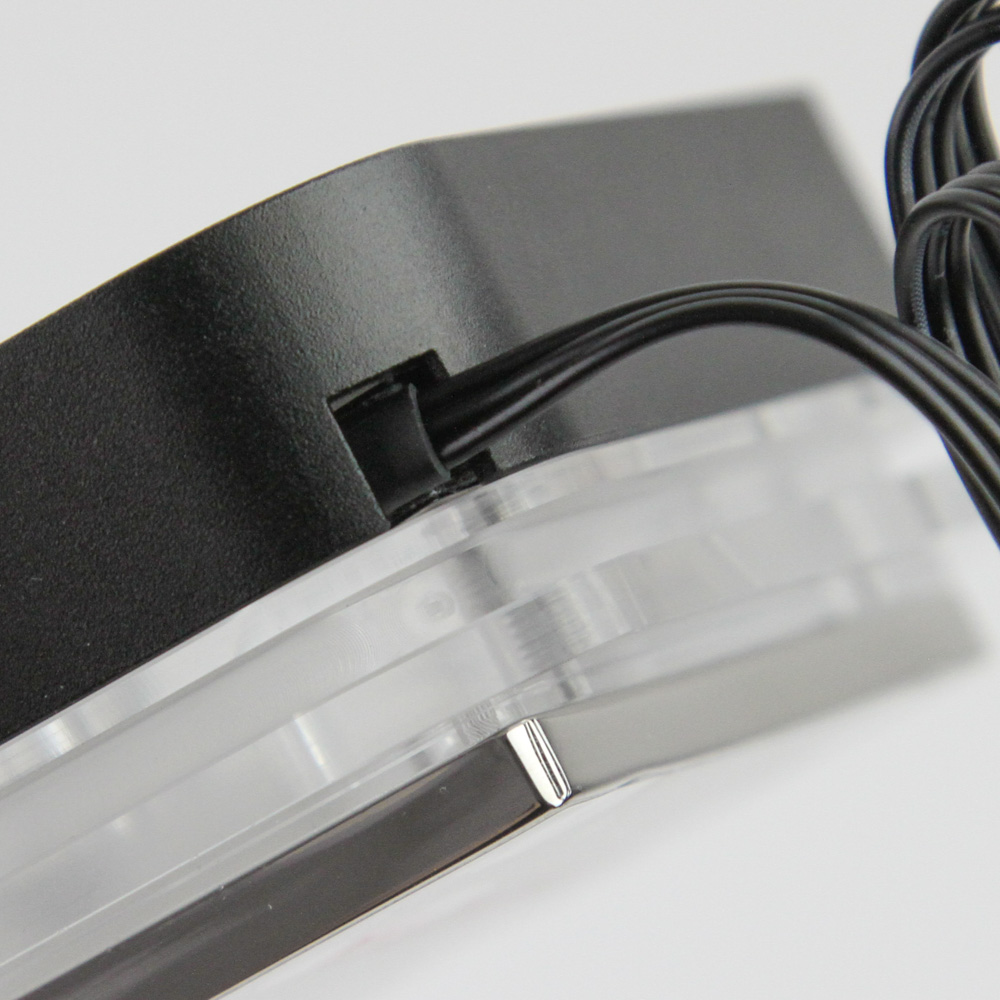
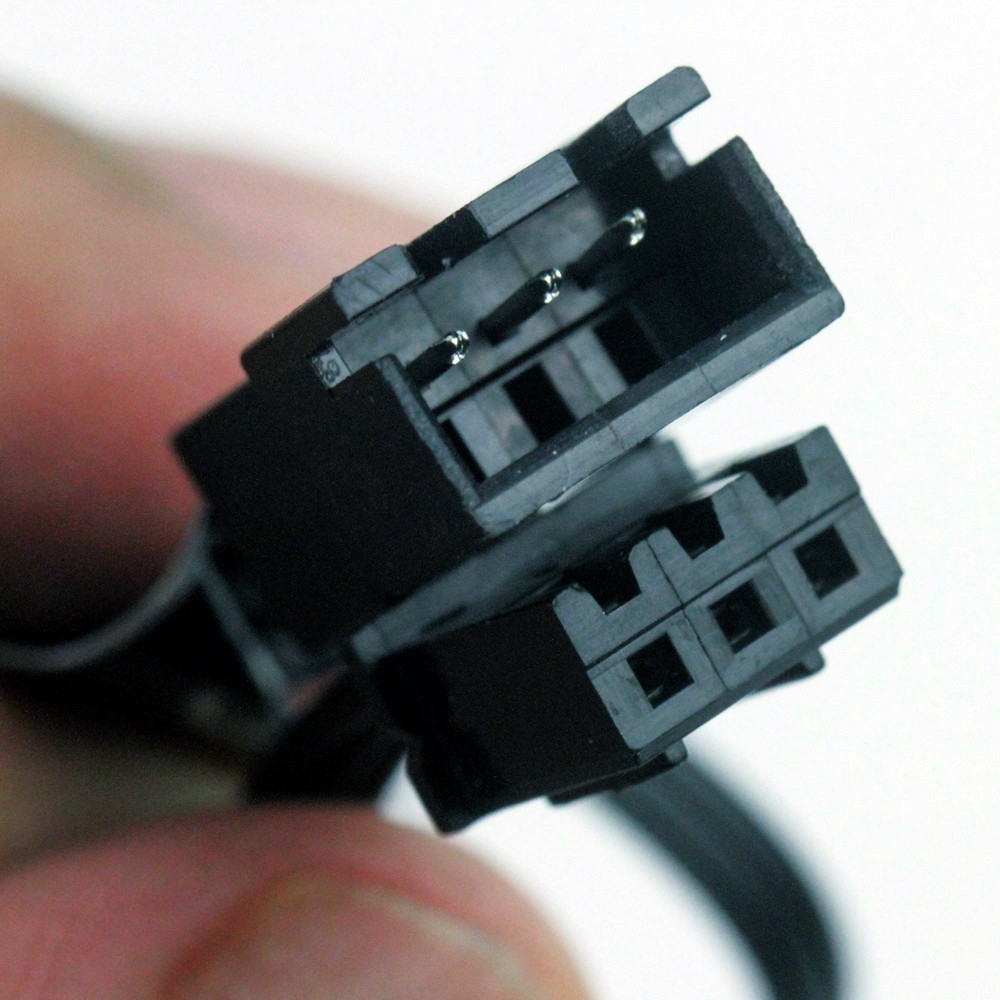
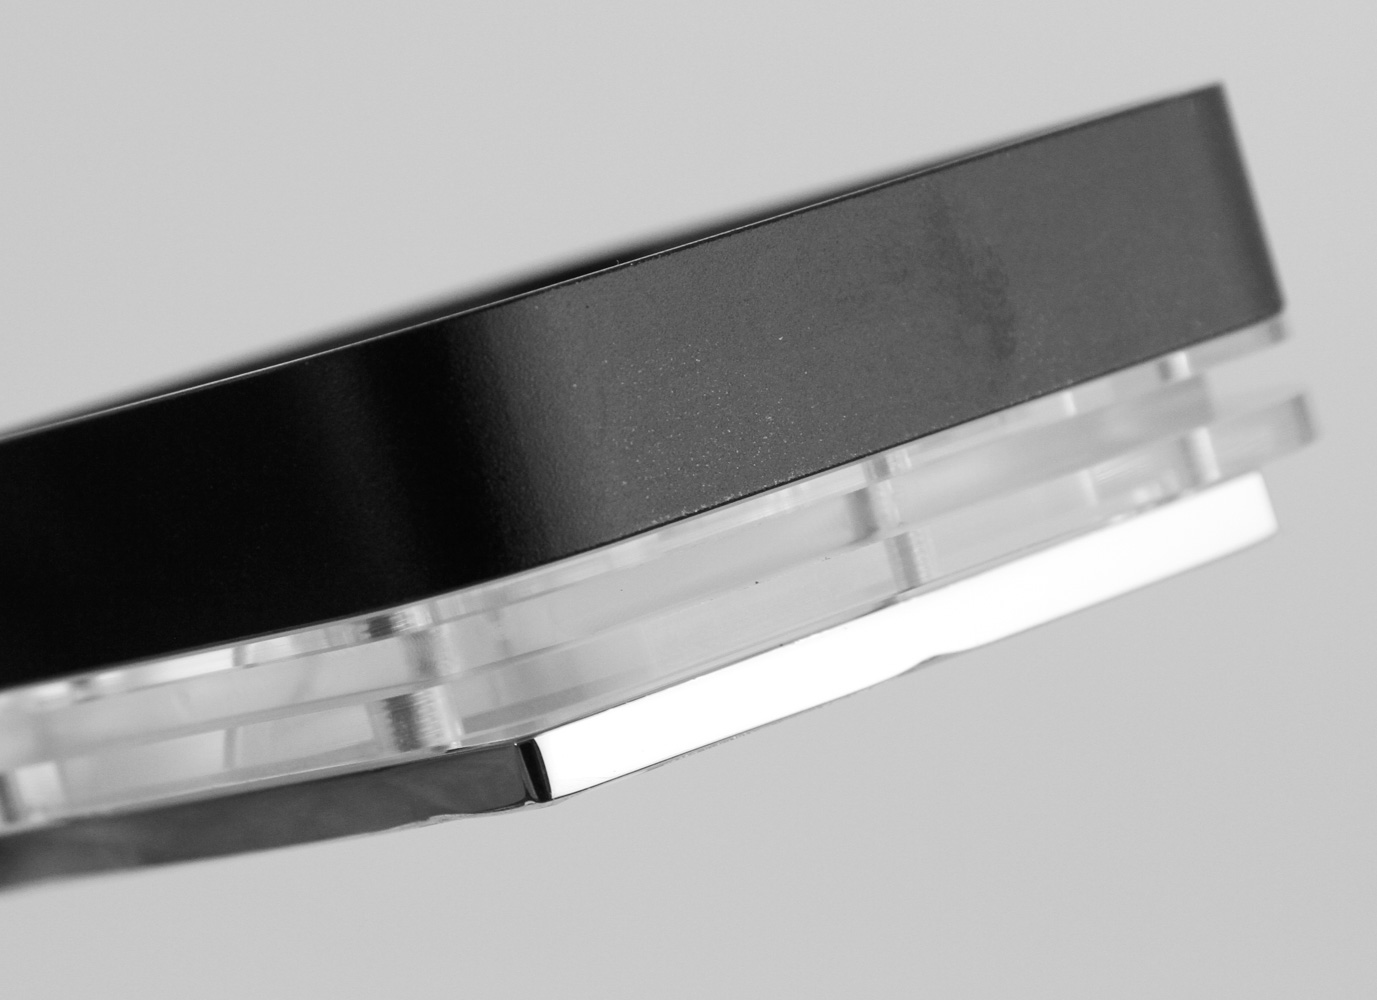
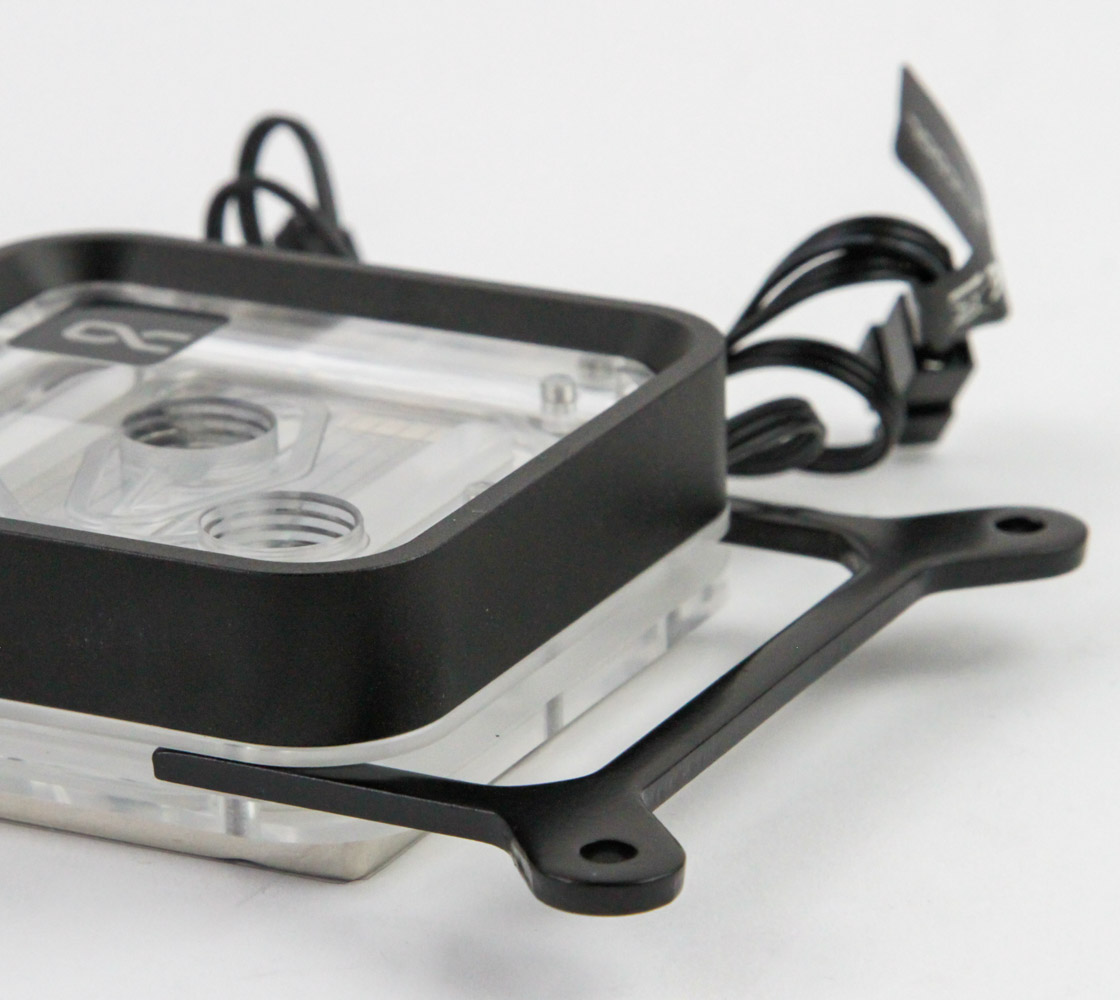
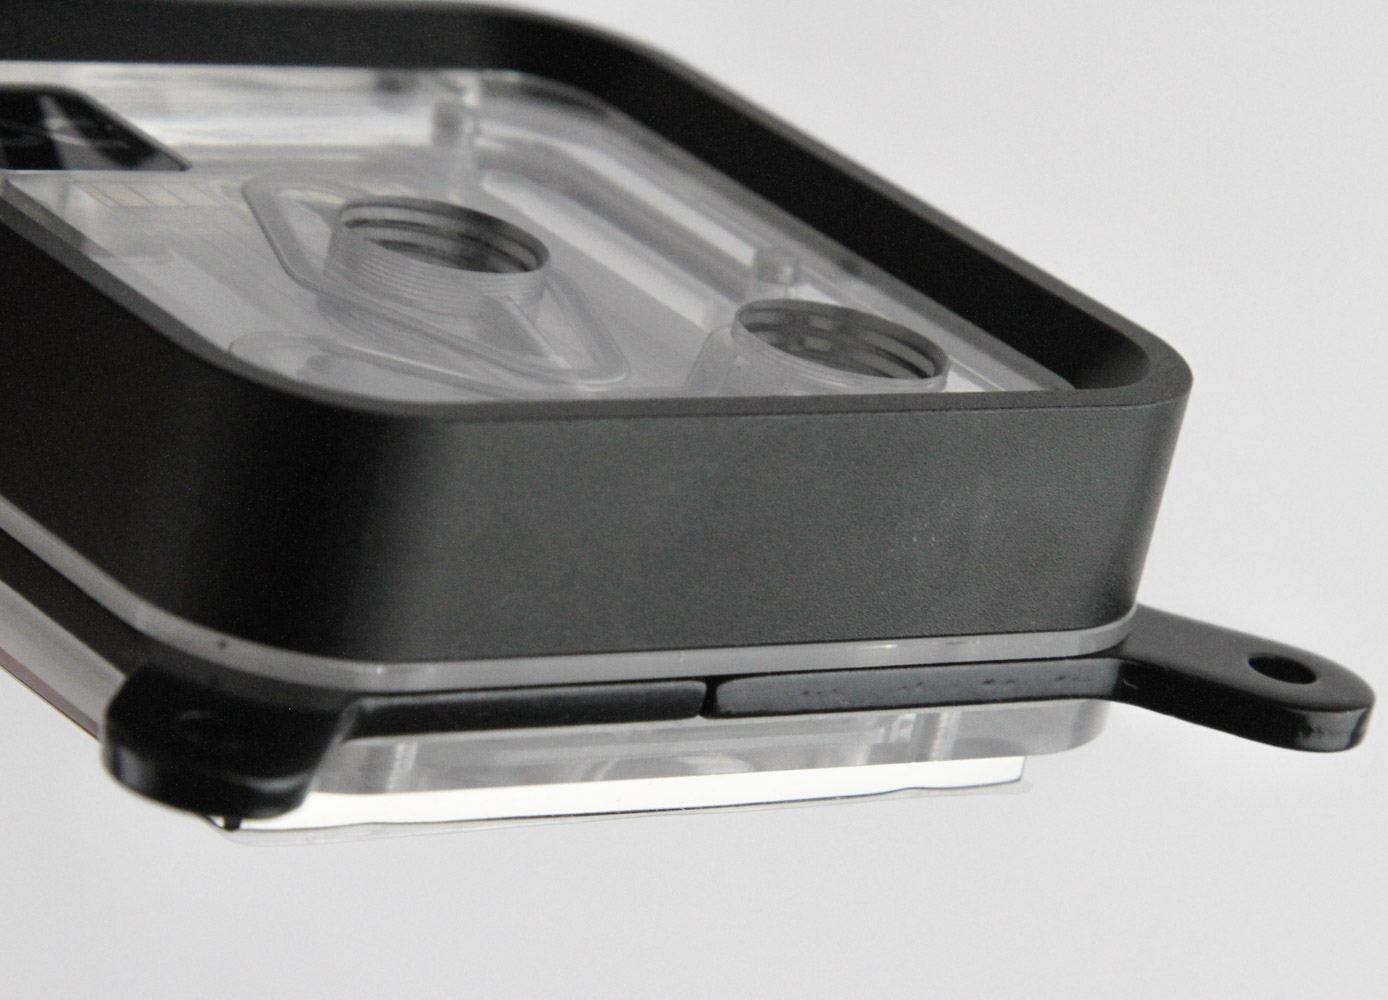
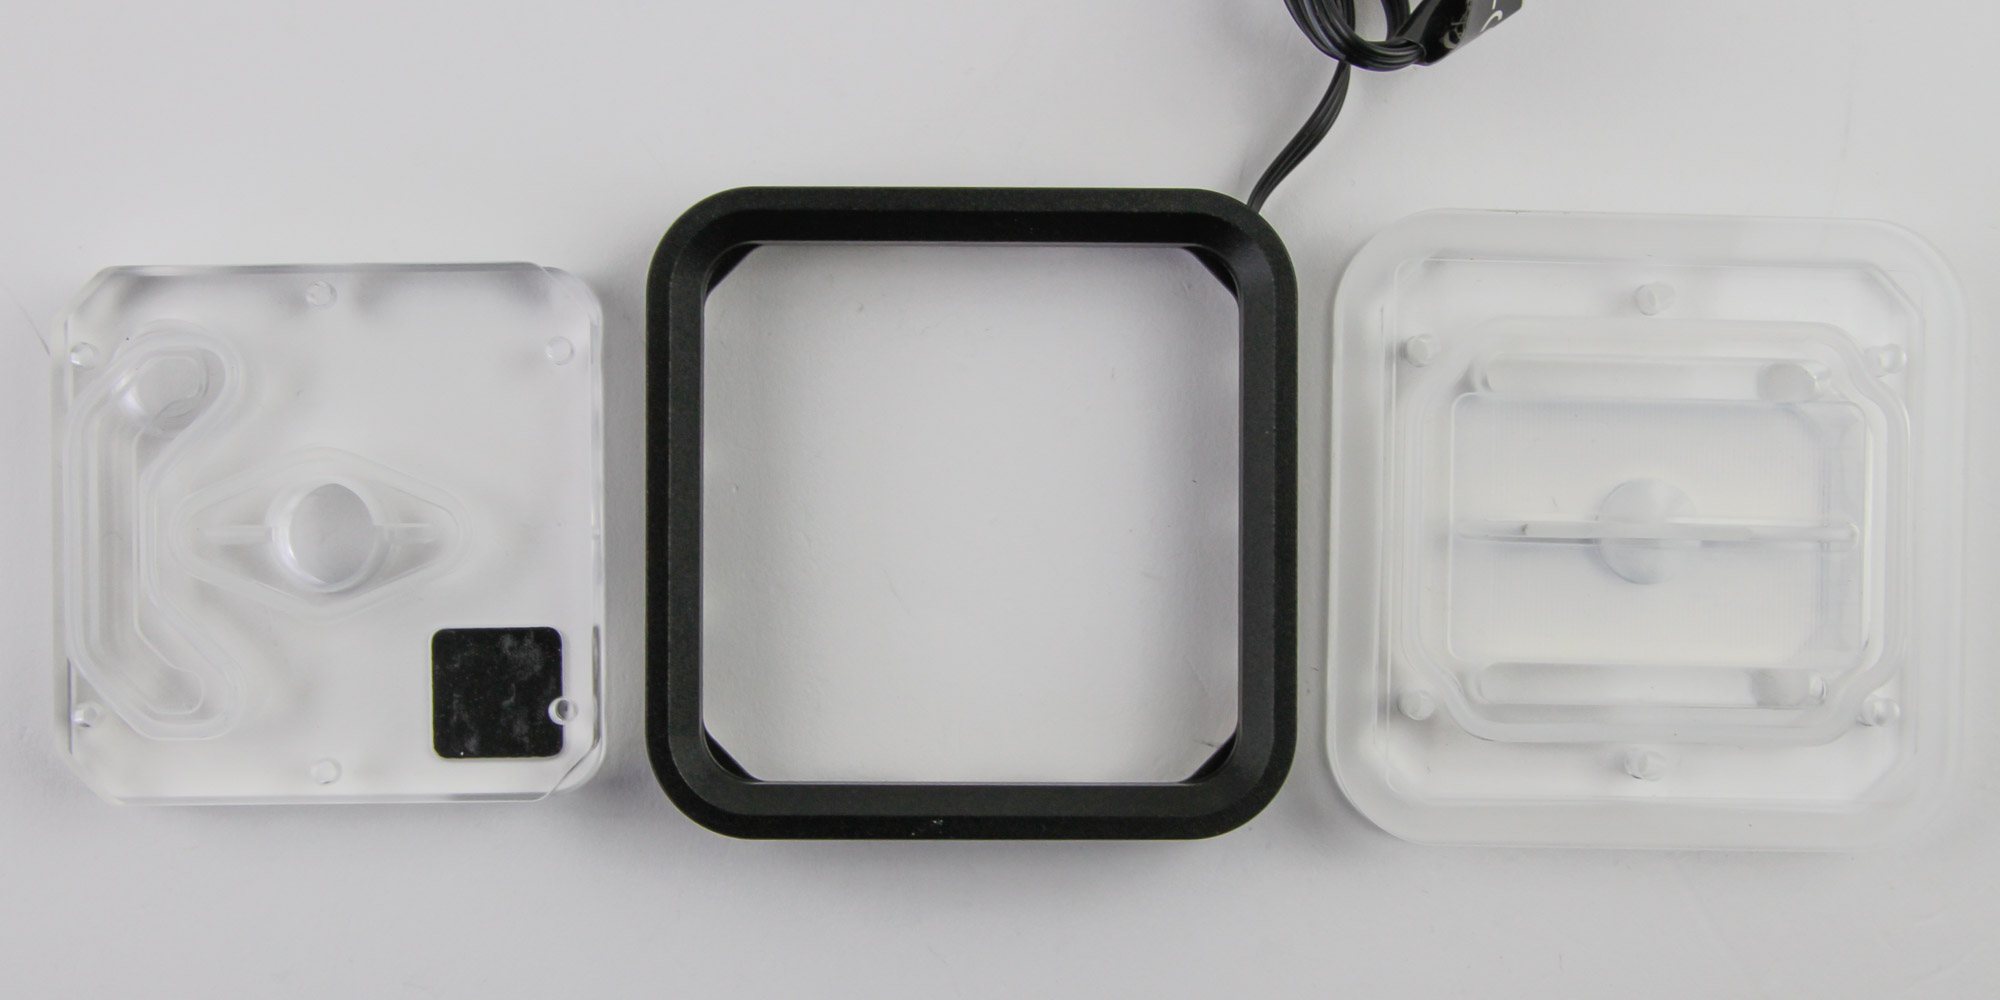
I have the Alphacool Core 1 LT in its Aurora Acrylic finish here, although the Black version will be mostly similar outside the top being opaque acetal in, well, black and not having any LEDs or associated cable either. This looks very similar to the Core 1 CPU block we saw before, and yet I suspect the LT version will be more popular for those who simply prefer a clear acrylic top allowing a closer look at the cooling engine, as well as those who want their blocks to be lit up further. The adoption of plastic over metal tops results in a hefty weight savings here, with the Core 1 LT weighing ~250 g (as opposed to over 500 g for the Core 1) while still occupying the same 72 x 71 x 26.5 mm footprint. These blocks are squarish in form factor owing to the absence of HEDT platform compatibility and all the corners are rounded off for a more uniform look too. I also like that the acrylic top is inset into the black metal surround, thus creating a beveled edge all around for contrast. An Alphacool logo is placed in the top left corner with the two BSP G1/4" ports biased towards the middle (recommended inlet port) and bottom right corner (recommended outlet port). The ports are threaded nicely in the acrylic, although do note that they are close enough to each other to where larger fittings such as quick disconnects may not directly fit anymore. There is an attached cable jutting out a corner which ends in a male JST connector and this is where the provided adapter cable comes in to allow you to directly control the LEDs from your motherboard.
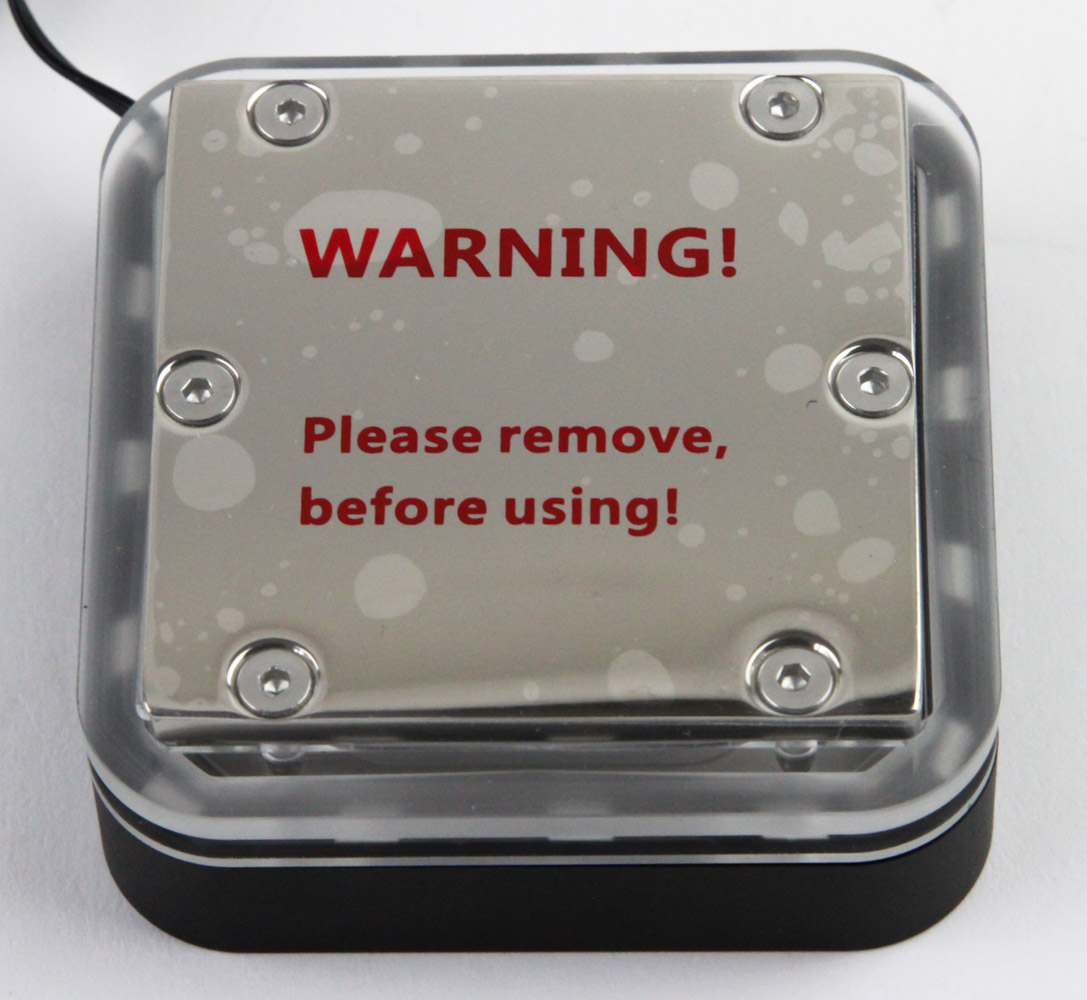
Turning the block around reveals a plastic warning sticker placed over the cold plate. Remove this to reveal a shiny polish applied to the nickel-plated copper cold plate which is quite reflective as seen above. I did not notice any blemishes on either block and the cold plate itself appears to be lightly convex as usual.
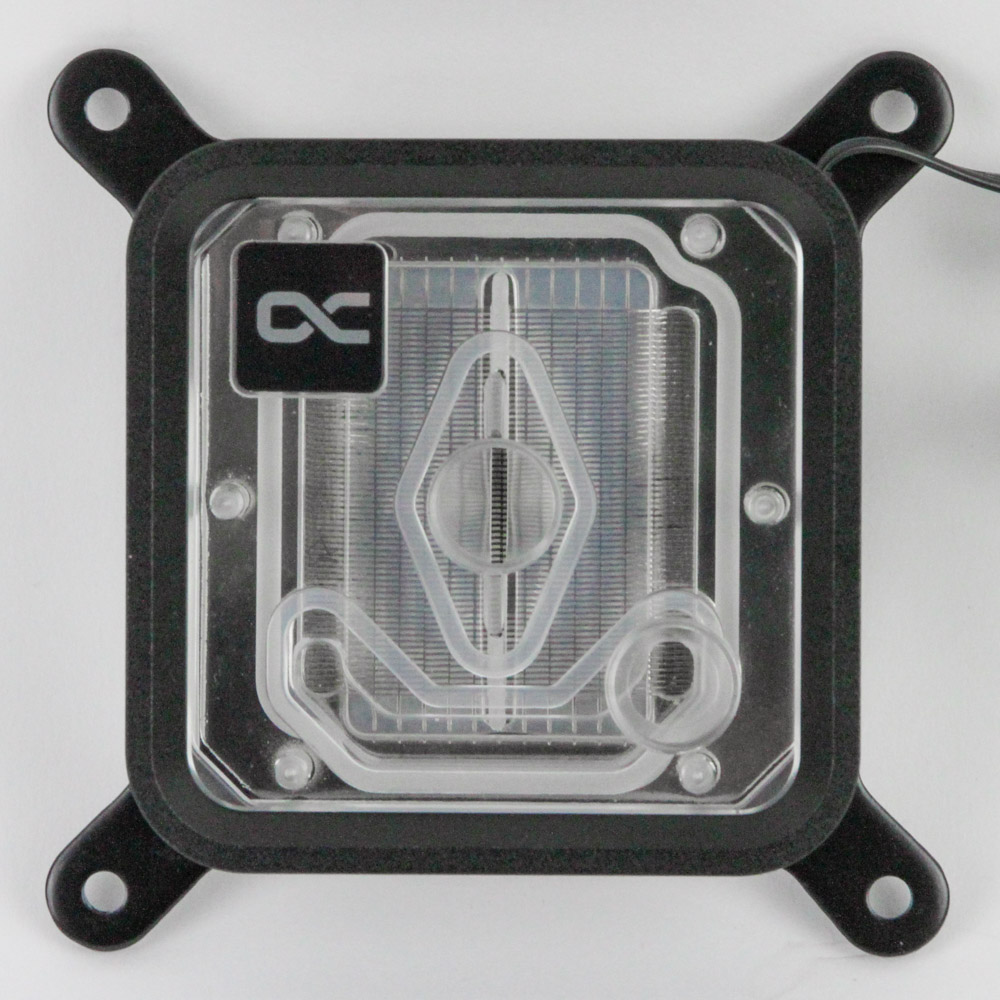
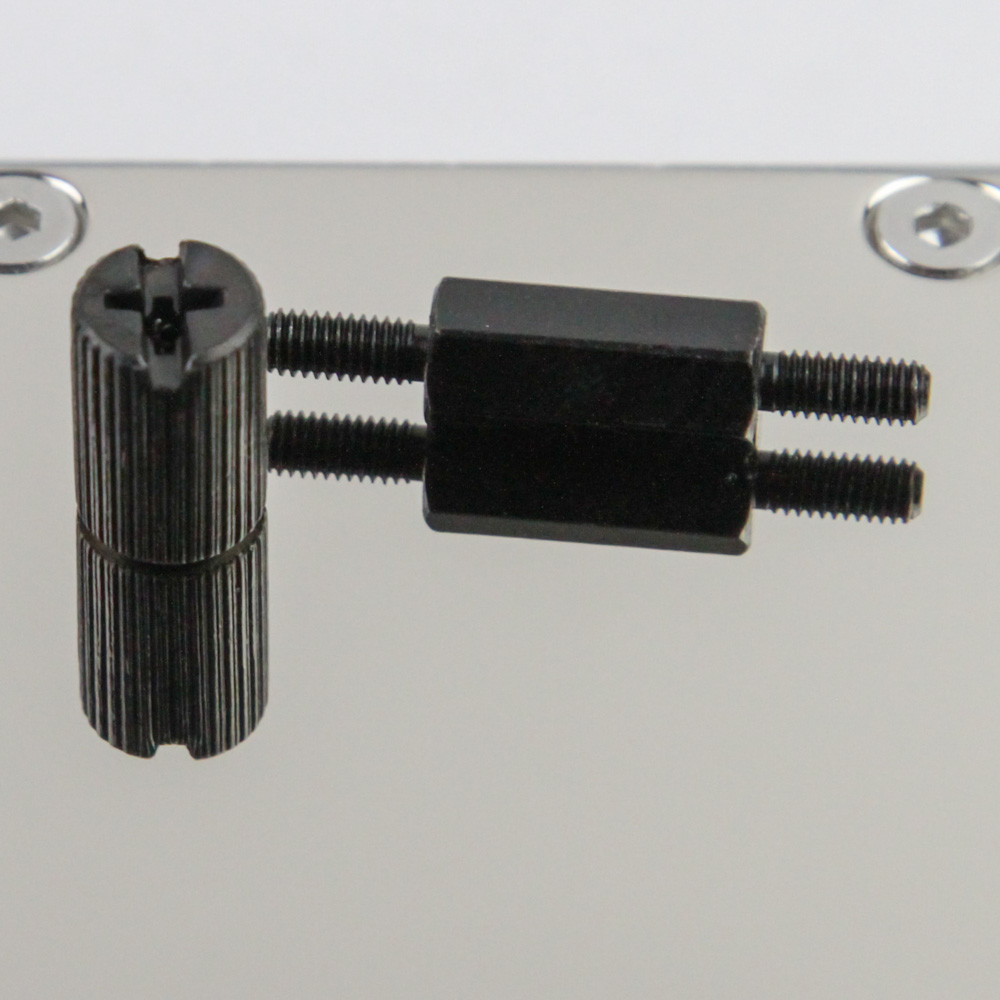
There's a cutout in the bottom section of the acrylic housing to accommodate channels the mounting brackets slot into. Given the square nature of the block, the mounting brackets fit vertically or horizontally, as seen above. Using the brackets is as simple as placing one piece in first and then orienting the other piece to lock in place from the opposite end. I have the Intel bracket for LGA 1200/1700 shown here.

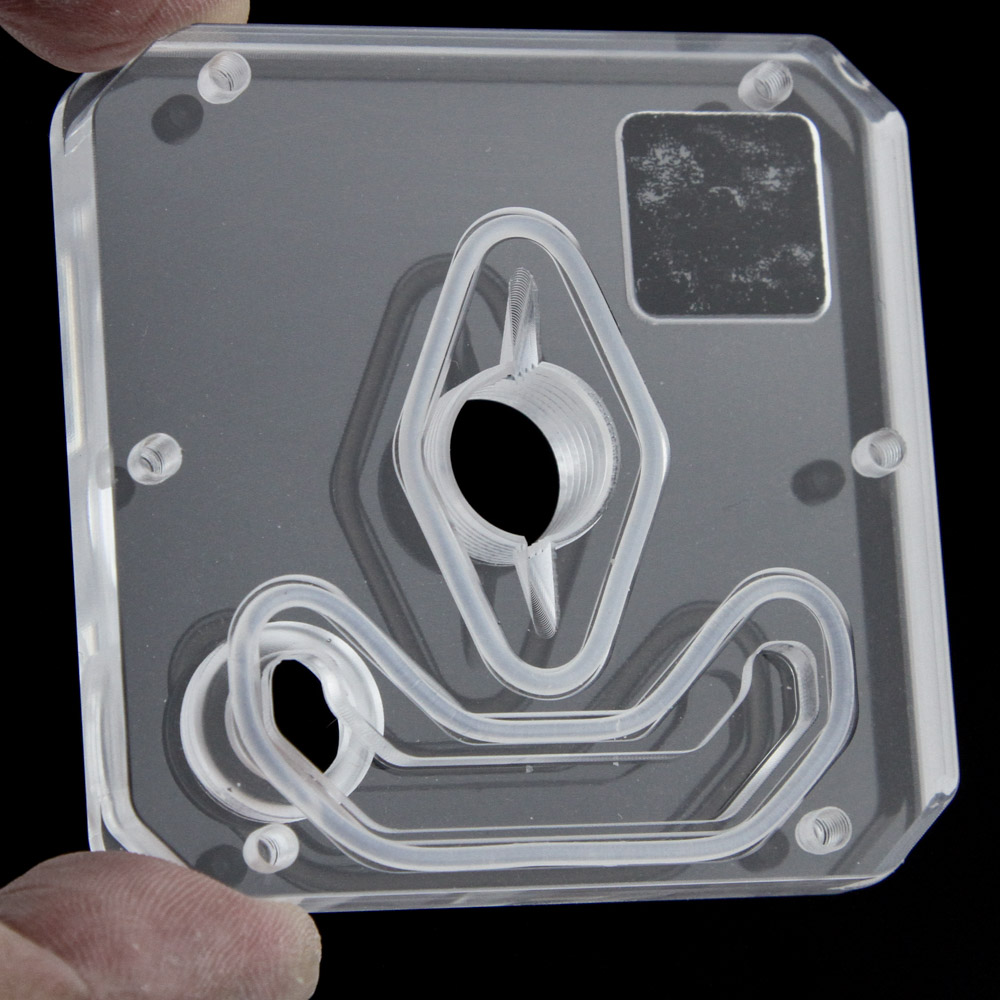
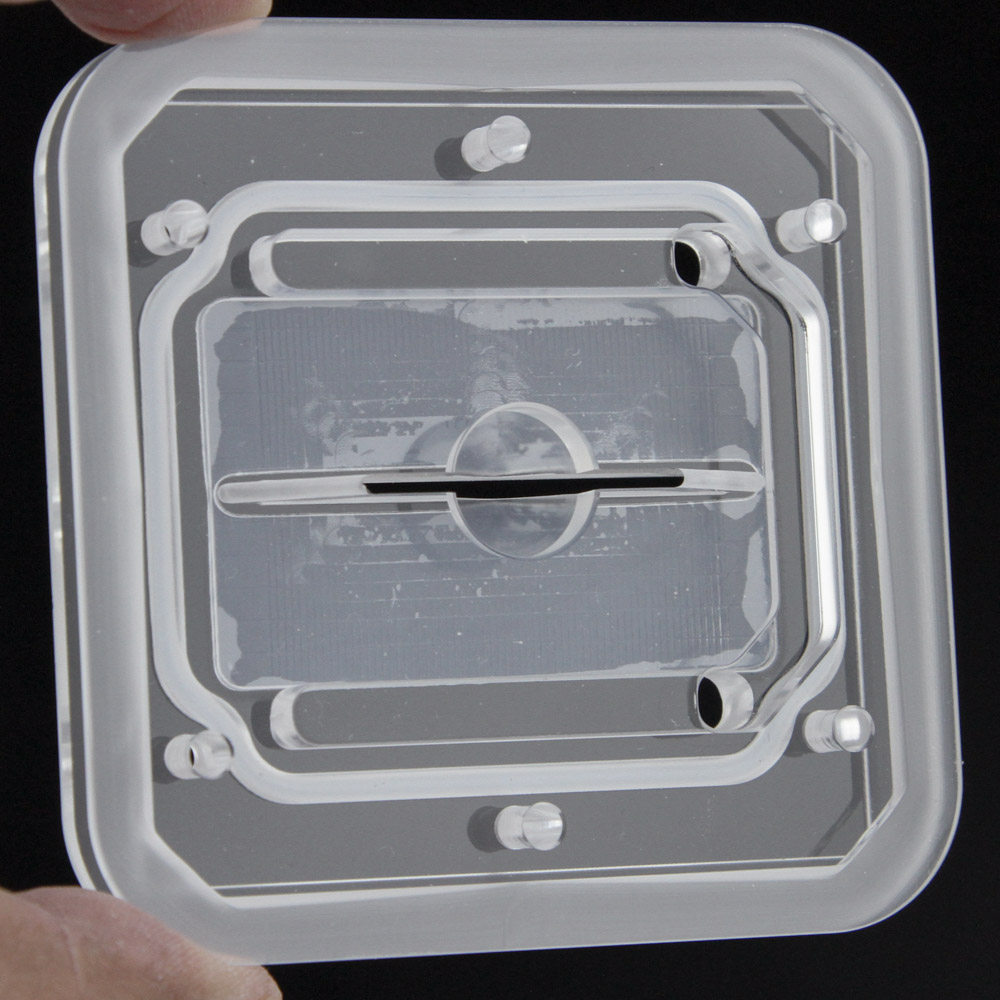
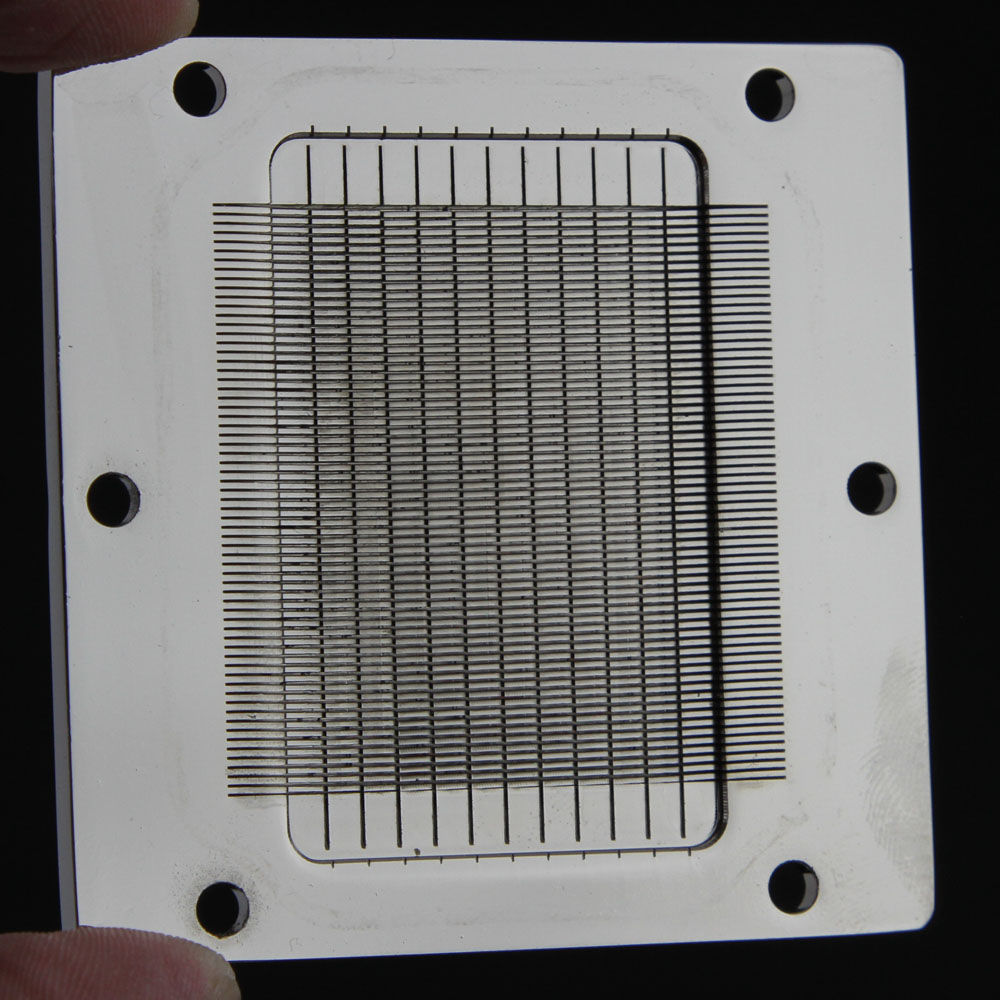
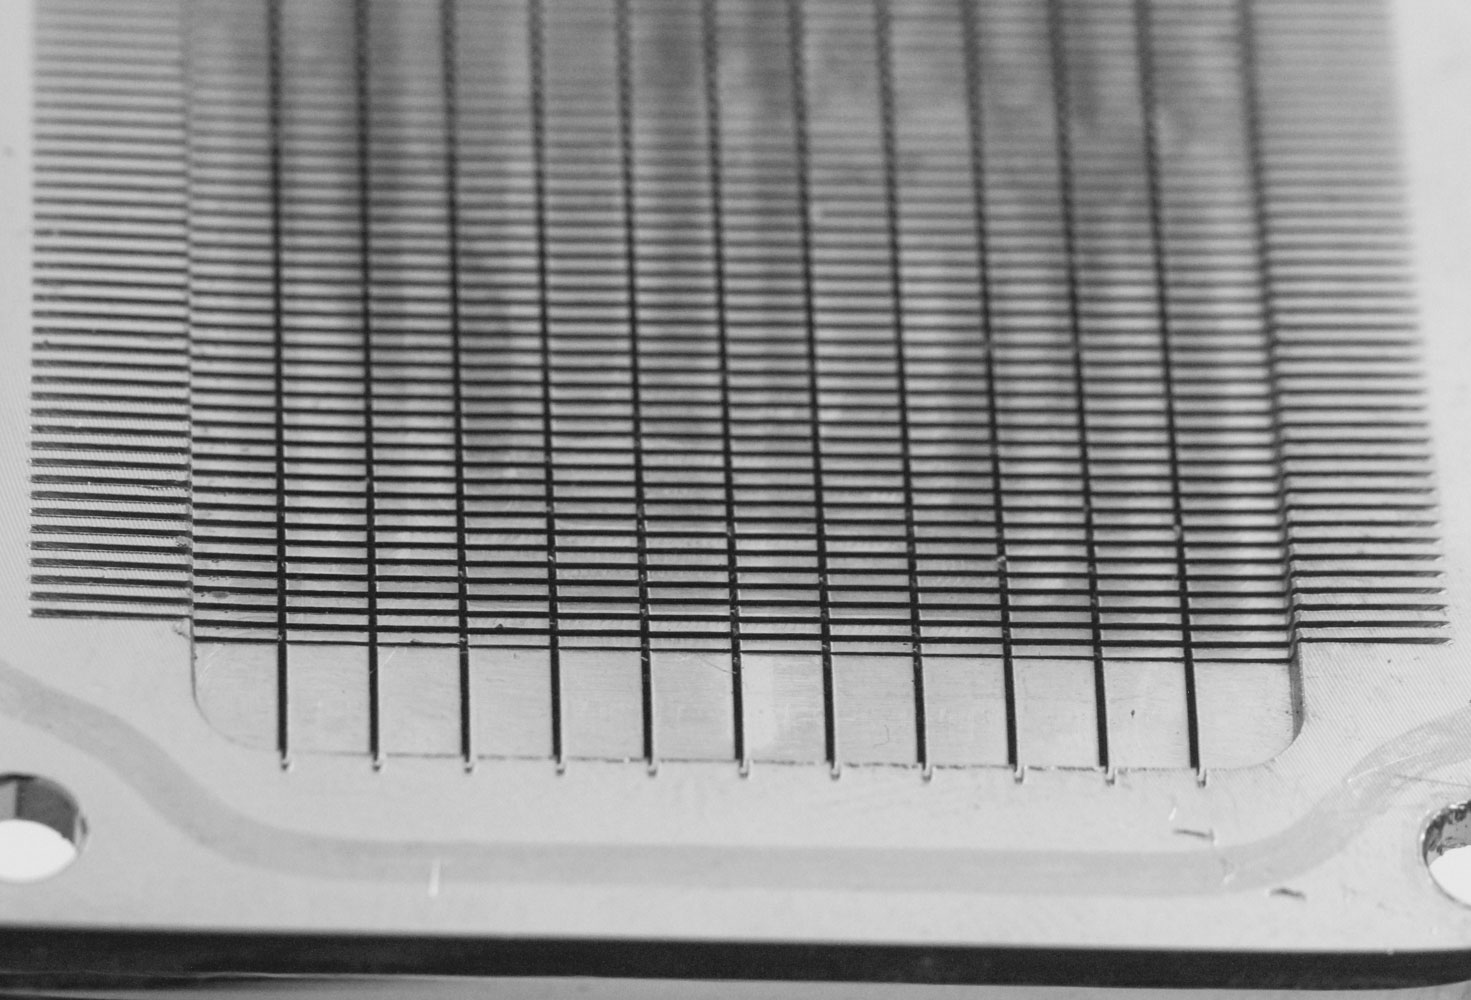
Disassembly was done after all testing was completed, and this happens from the cold plate side with six screws to remove. At this point the cold plate can be pulled off to reveal a different (from the norm) jet plate design that Alphacool calls its 3D-Jetplate, citing also that it's used in industrial applications. There are multiple pieces which come off here, including a flexible silicone insert and two sturdy acrylic pieces that mate together in the top as seen above. I don't recommend taking the block apart, since those O-rings have a tendency to come out of their grooves and putting them back in can be frustrating. Regardless, the cooling engine is the same design as used successfully before in the Core 1, down to the use of the nozzle for coolant entry from the inlet port that then spreads out in three dimensions before being curtailed back into a controlled flow down the center of the cold plate. The fins are machined in both directions in the 4 mm-thick cold plate and are 400 µm thick with a 400 µm spacing between them. It's hard to measure the height of the fins since they are placed in an inset, but they occupy a heat transfer area spanning 39 x 39 mm (39 x 47 mm if you also count the outer grooves).
Jul 2nd, 2025 23:12 CDT
change timezone
Latest GPU Drivers
New Forum Posts
- AMD RX 7000 series GPU Owners' Club (1327)
- Will you buy a RTX 5090? (587)
- What's your latest tech purchase? (24189)
- RDNA 4 Fine Wine? (HUB Vid) (41)
- GravityMark v1.89 GPU Benchmark (308)
- Good time in the year to buy a new PC (5)
- The Official Thermal Interface Material thread (1767)
- What Windows is overall the best to you and why? (262)
- Nvidia drivers (6)
- How do you view TPU & the internet in general? (With poll) (54)
Popular Reviews
- ASUS ROG Crosshair X870E Extreme Review
- Crucial T710 2 TB Review - Record-Breaking Gen 5
- Sapphire Radeon RX 9060 XT Pulse OC 16 GB Review - An Excellent Choice
- PowerColor ALPHYN AM10 Review
- Upcoming Hardware Launches 2025 (Updated May 2025)
- AMD Ryzen 7 9800X3D Review - The Best Gaming Processor
- AVerMedia CamStream 4K Review
- Sapphire Radeon RX 9070 XT Nitro+ Review - Beating NVIDIA
- NVIDIA GeForce RTX 5060 8 GB Review
- AMD Ryzen 9 9950X3D Review - Great for Gaming and Productivity
TPU on YouTube
Controversial News Posts
- Intel's Core Ultra 7 265K and 265KF CPUs Dip Below $250 (288)
- NVIDIA Grabs Market Share, AMD Loses Ground, and Intel Disappears in Latest dGPU Update (212)
- Some Intel Nova Lake CPUs Rumored to Challenge AMD's 3D V-Cache in Desktop Gaming (140)
- NVIDIA GeForce RTX 5080 SUPER Could Feature 24 GB Memory, Increased Power Limits (114)
- NVIDIA Launches GeForce RTX 5050 for Desktops and Laptops, Starts at $249 (105)
- Microsoft Partners with AMD for Next-gen Xbox Hardware (105)
- Intel "Nova Lake‑S" Series: Seven SKUs, Up to 52 Cores and 150 W TDP (100)
- NVIDIA DLSS Transformer Cuts VRAM Usage by 20% (96)