 26
26
ASRock 4X4 BOX-4800U Barebones Mini PC (Ryzen 4800U + RX Vega 8 IGP) Review - Desktop Performance in a Tiny Package
Test Systems »A look Inside


Taking the ASRock 4X4 BOX-4800U apart is very quick and easy. First, remove the four screws on the bottom, which will allow you lift the bottom plate off and install your system memory, M.2 SSD, and SATA HDD/SSD, and so on.


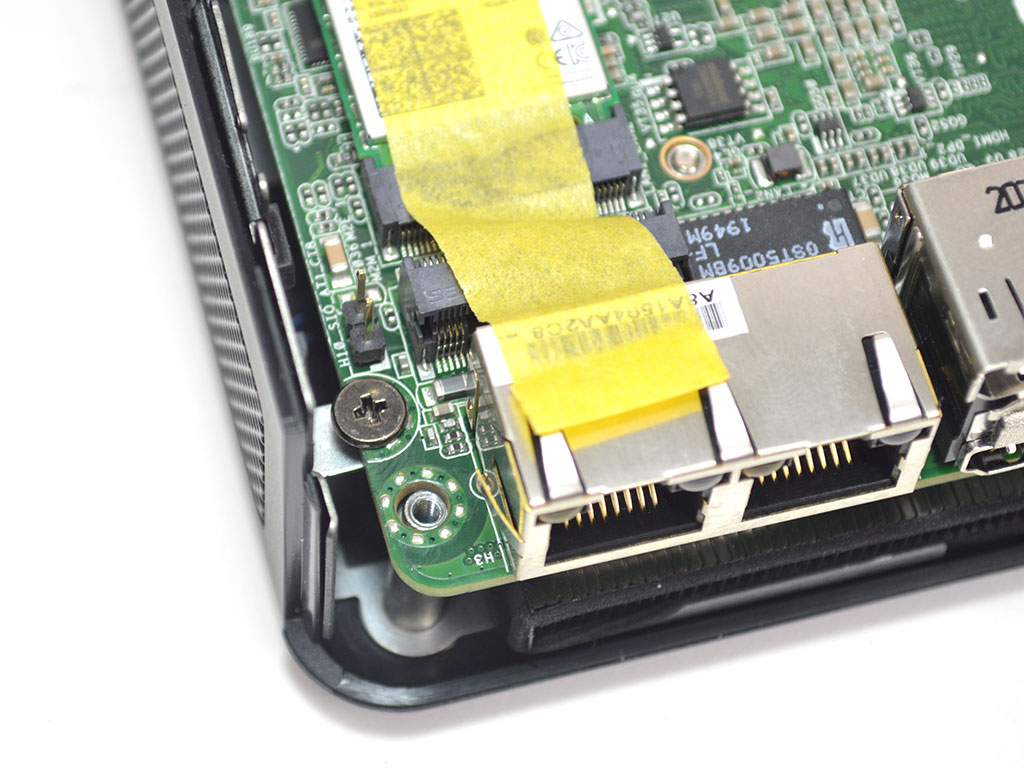
The internal layout is straightforward enough, and while further disassembly is not necessary for most, it's still useful to know how it is done. You will want to pay attention here if you need to deep clean the heatsink and fan down the road to improve temperatures. Before the motherboard can be removed, remove the front fascia. A couple of plastic clips hold it in place, and it should come out rather easily. With that out of the way, it's time to remove the screws securing the motherboard to the chassis.
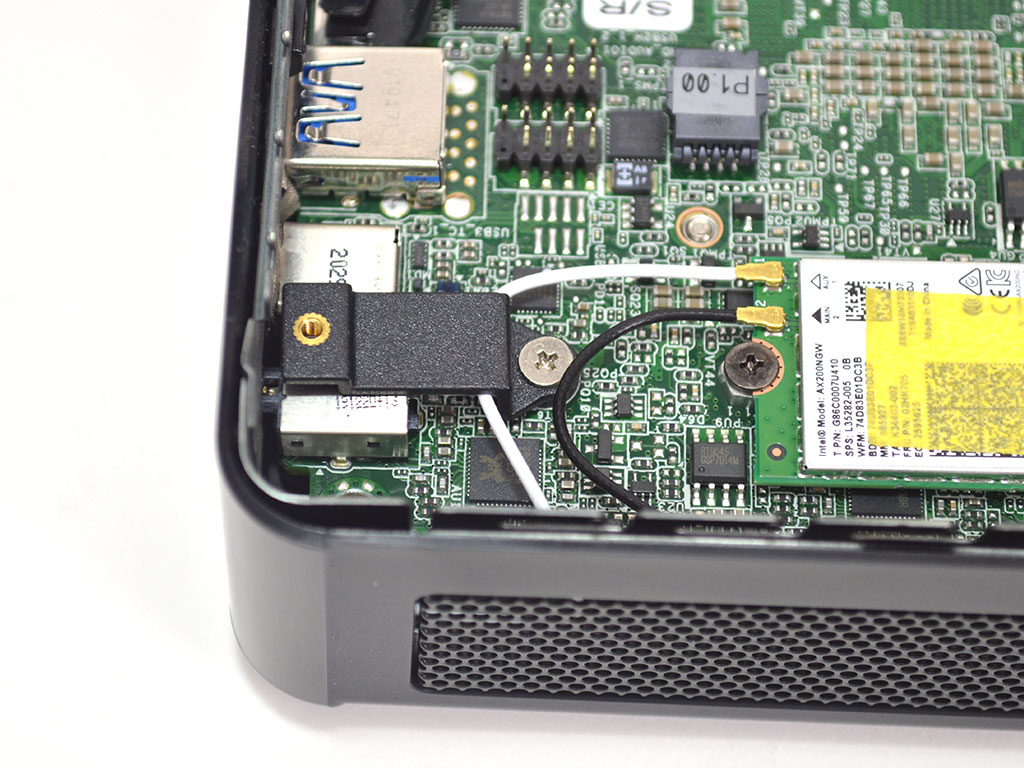
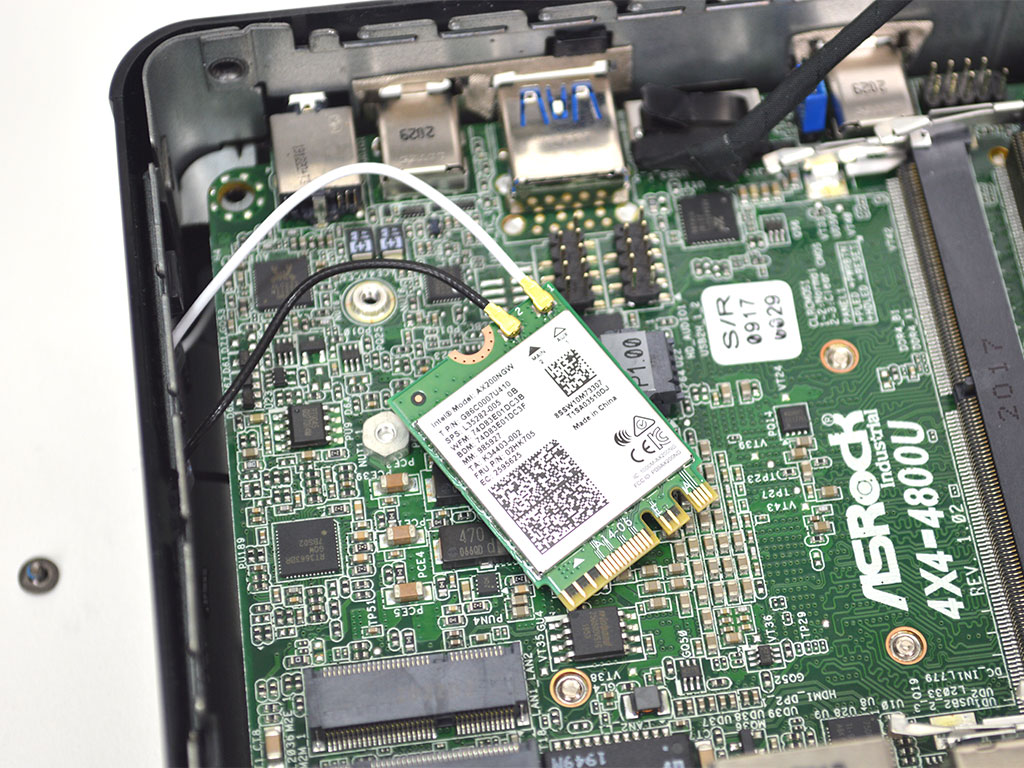

Next, remove the screw holding the M.2 bracket in place so it can be lifted out. This will remove any tension on the WiFi antenna wires, meaning you can remove the screw holding it in place as well. With the Intel WiFi 6 AX200NGW card removed, you can simply set it aside. At this point, the motherboard can be removed from the chassis.
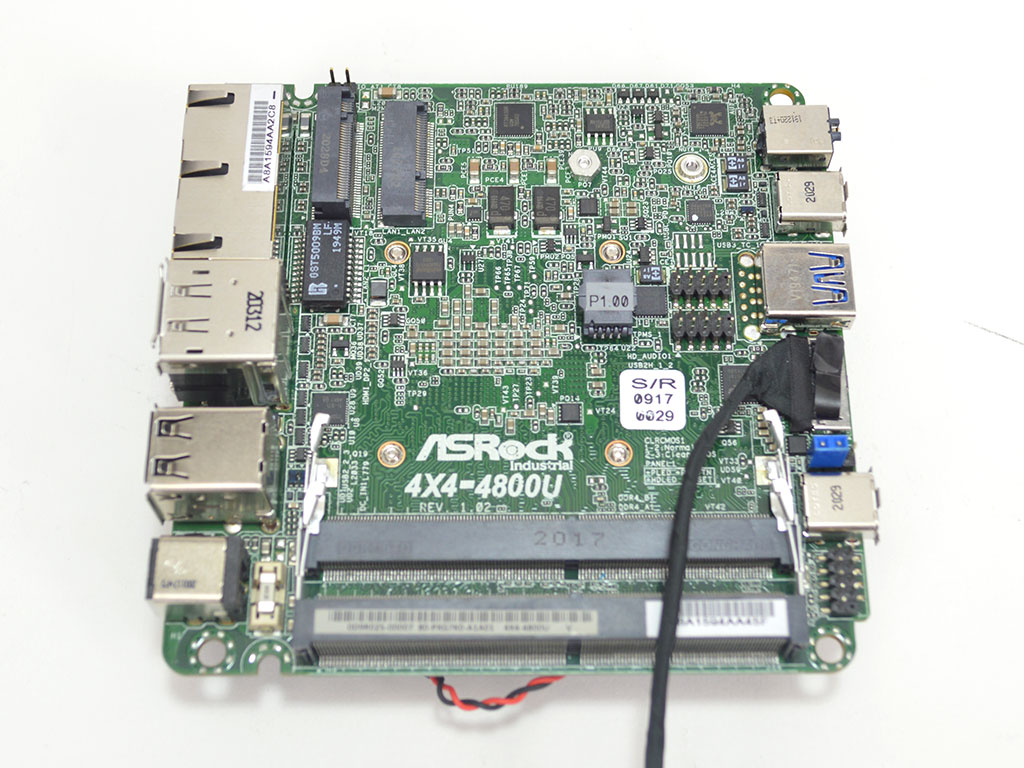
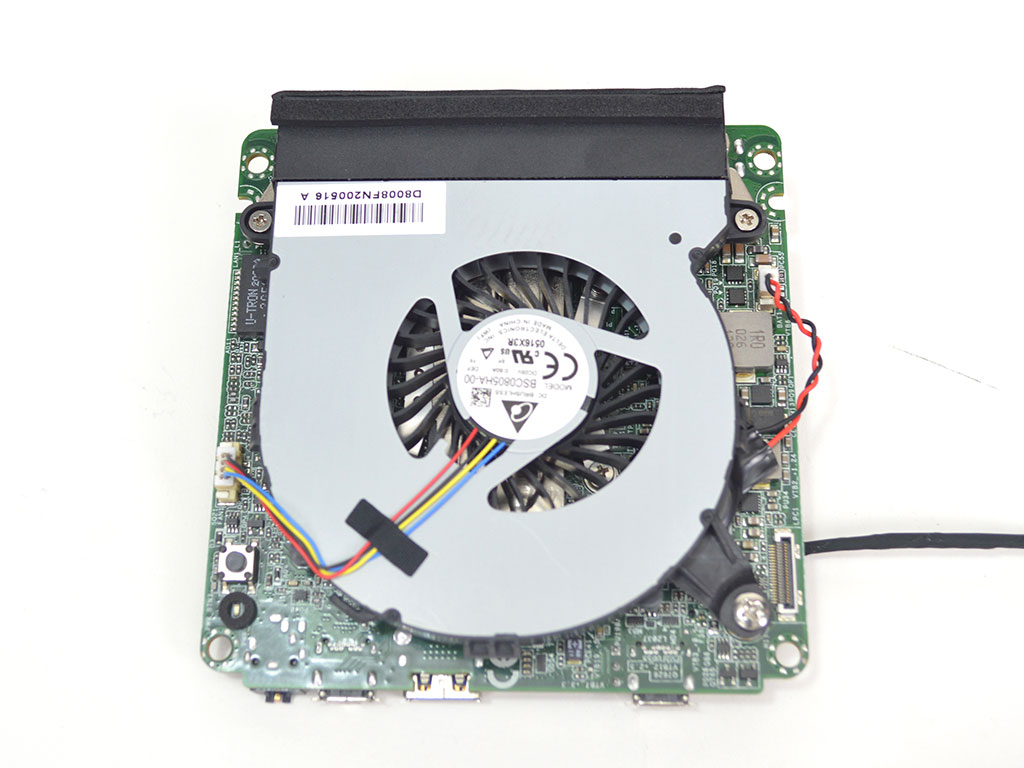

Looking at the bare motherboard, the bottom of the board is where the two DDR4 SODIMM slots are located. At the top, you have your M.2 slot for either SATA or NVMe SSDs and a second slot for the WiFi add-on card. Meanwhile, the heatsink and fan are a bit beefier than I expected. The heatsink, while small, does make use of two heatpipes, and the fan used to cool it is from Delta Electronics and has model number BSC0805HA-00. Just be careful if you remove the fan for cleaning as the CMOS battery is attached to its underside.
Mar 28th, 2025 08:16 EDT
change timezone
Latest GPU Drivers
New Forum Posts
- Upgrade from a AMD AM3+ to AM4 or AM5 chipset MB running W10? (1)
- AMD RX 9070 XT & RX 9070 non-XT thread (OC, undervolt, benchmarks, ...) (66)
- Post your CrystalDiskMark speeds (616)
- Will you buy a RTX 5090? (455)
- Technical Issues - TPU Main Site & Forum (2025) (81)
- Should you physically remove secondary NVMe drives when performing a clean Windows install? (40)
- Future-proofing my OLED (33)
- RTX 3050 with GA107 GPU incomplete information and sensor issue. (0)
- Post your Monster Hunter Wilds benchmark scores (151)
- Compatibility With Alphacool Core RX 9070 XT Taichi GPU WaterBlock ?? (0)
Popular Reviews
- Sapphire Radeon RX 9070 XT Pulse Review
- Samsung 9100 Pro 2 TB Review - The Best Gen 5 SSD
- Assassin's Creed Shadows Performance Benchmark Review - 30 GPUs Compared
- Pulsar Feinmann F01 Review
- ASRock Phantom Gaming B860I Lightning Wi-Fi Review
- be quiet! Pure Rock Pro 3 Black Review
- Sapphire Radeon RX 9070 XT Nitro+ Review - Beating NVIDIA
- ASRock Radeon RX 9070 XT Taichi OC Review - Excellent Cooling
- AMD Ryzen 7 9800X3D Review - The Best Gaming Processor
- ASUS ProArt X870E-Creator Wi-Fi Review
Controversial News Posts
- AMD RDNA 4 and Radeon RX 9070 Series Unveiled: $549 & $599 (260)
- MSI Doesn't Plan Radeon RX 9000 Series GPUs, Skips AMD RDNA 4 Generation Entirely (142)
- Microsoft Introduces Copilot for Gaming (123)
- AMD Radeon RX 9070 XT Reportedly Outperforms RTX 5080 Through Undervolting (118)
- NVIDIA Reportedly Prepares GeForce RTX 5060 and RTX 5060 Ti Unveil Tomorrow (115)
- Over 200,000 Sold Radeon RX 9070 and RX 9070 XT GPUs? AMD Says No Number was Given (100)
- NVIDIA GeForce RTX 5050, RTX 5060, and RTX 5060 Ti Specifications Leak (96)
- Retailers Anticipate Increased Radeon RX 9070 Series Prices, After Initial Shipments of "MSRP" Models (90)