 39
39
ASUS ProArt X870E-Creator Wi-Fi Review
Component Analysis »Board Layout
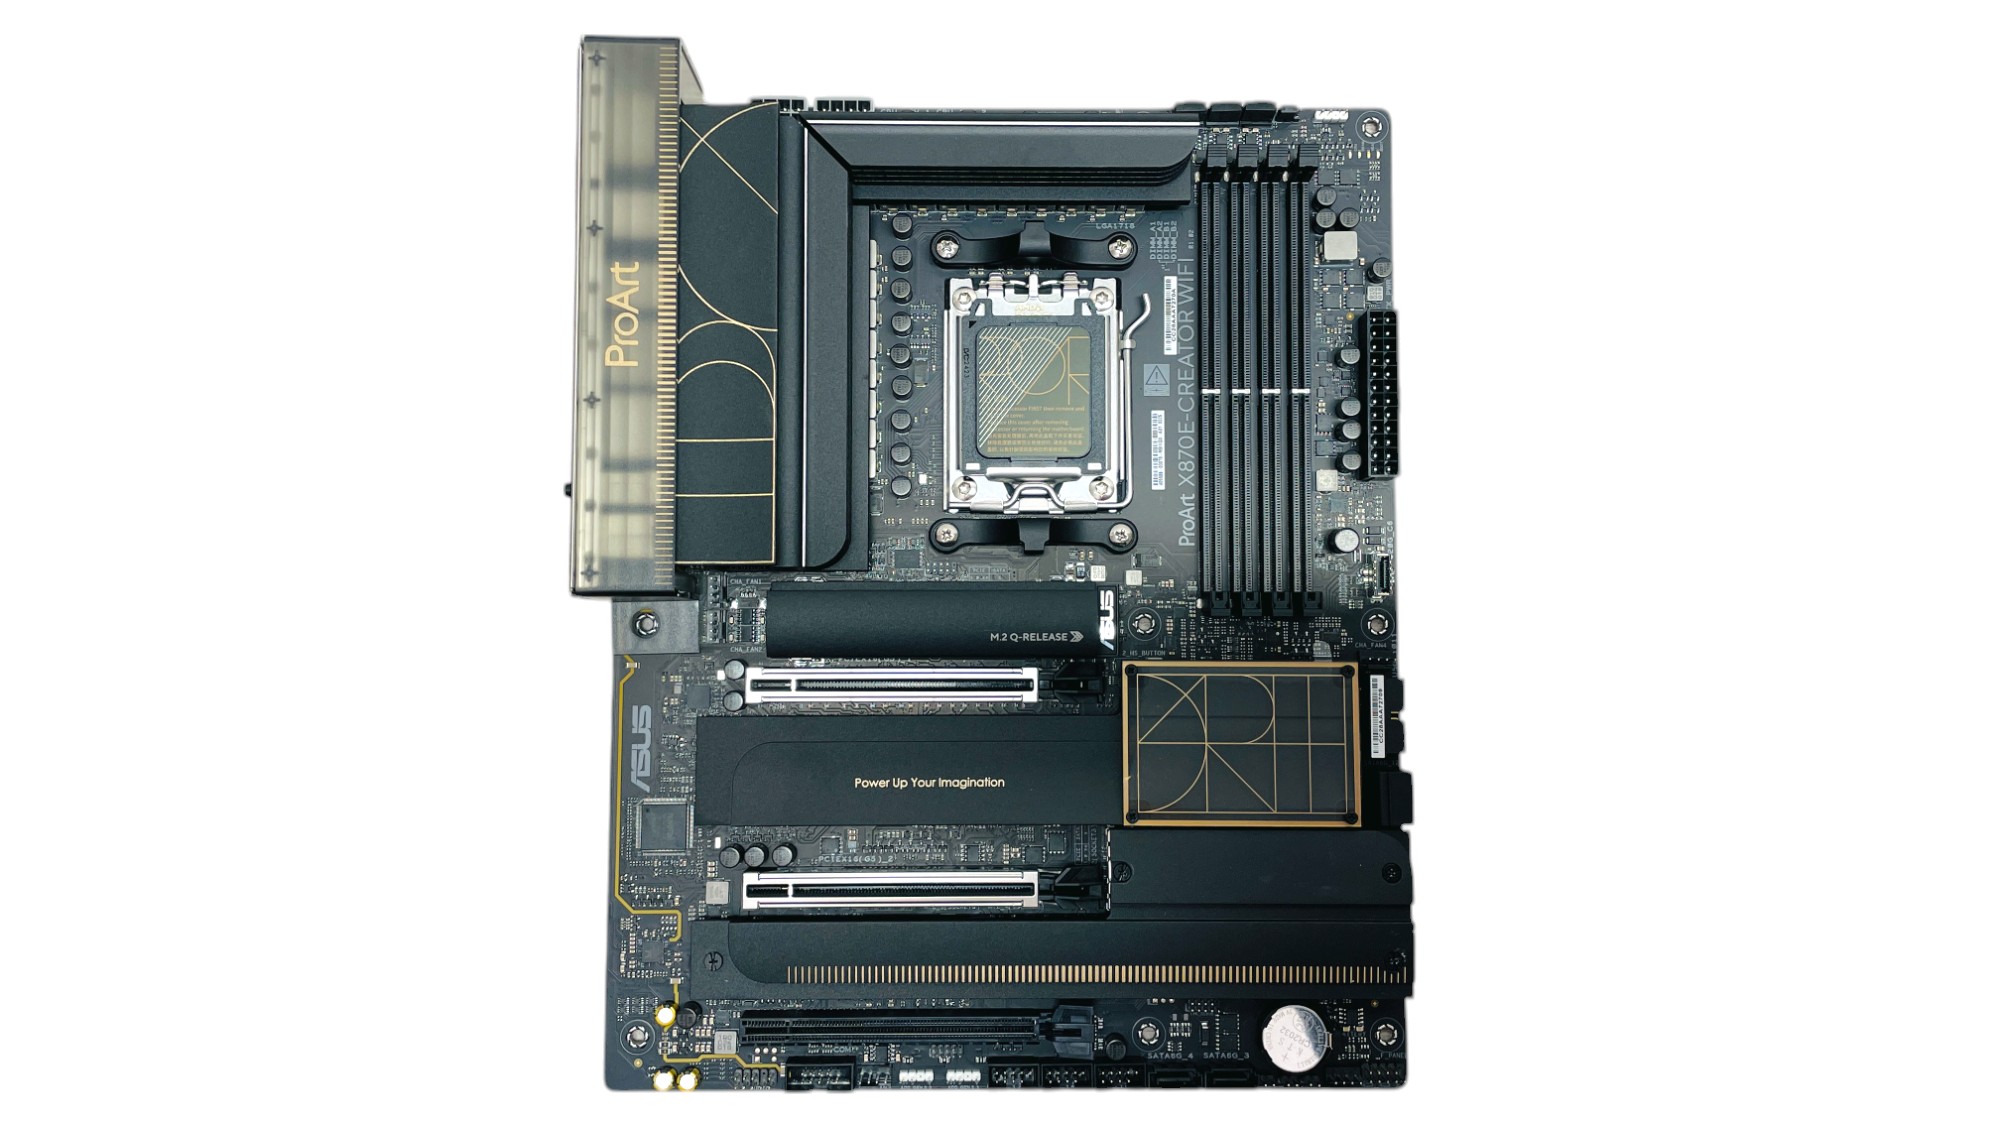
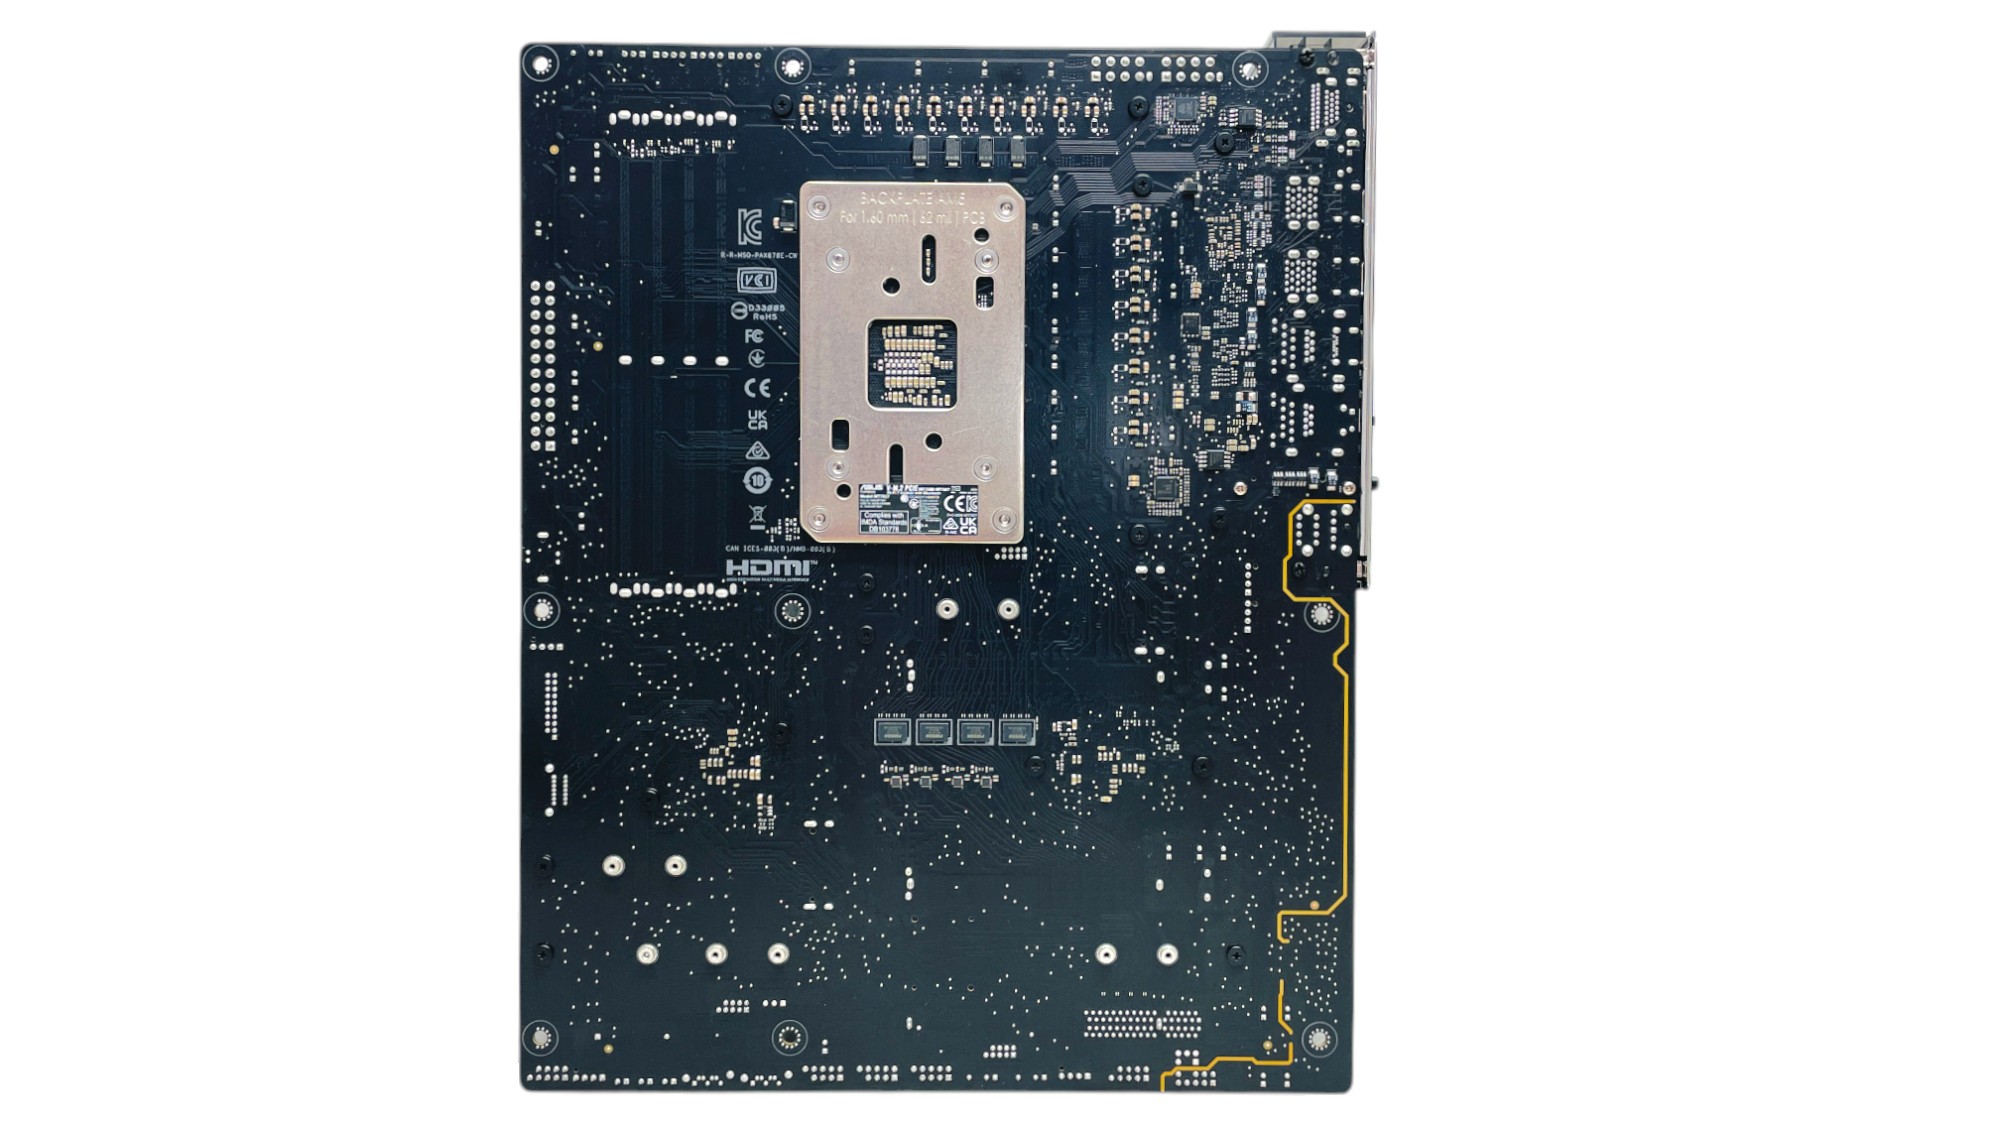
In person the ASUS ProArt X870E-Creator Wi-Fi is striking, with clean lines and an attractive texture to its heatsinks. Of course, you may want to match it with a ProArt graphics card, case and of course AIO liquid cooler, to keep the theme going. We see what you did there ASUS. Still, it's a refreshing change from the gamer-focused designs we're used to, and we can't help but wonder what a Mini-ITX version would look like, although that probably wouldn't fit the creator theme. The rear of the PCB lacks any additional cooling, but the topside heatsinks are large enough and have more vacant space around them than other boards at this price, as ASUS has done away with many features gamers and overclockers might have used.
The PCB is fairly busy thanks to the board offering four M.2 ports, USB4 and three x16 PCIe slots. Being X870E it also has two chipsets to fit in. The PCIe Slot Q-Release features means there are no extensions from the primary slot for buttons to release your graphics card, and you just lift the card up from the PCIe slot end to remove it.
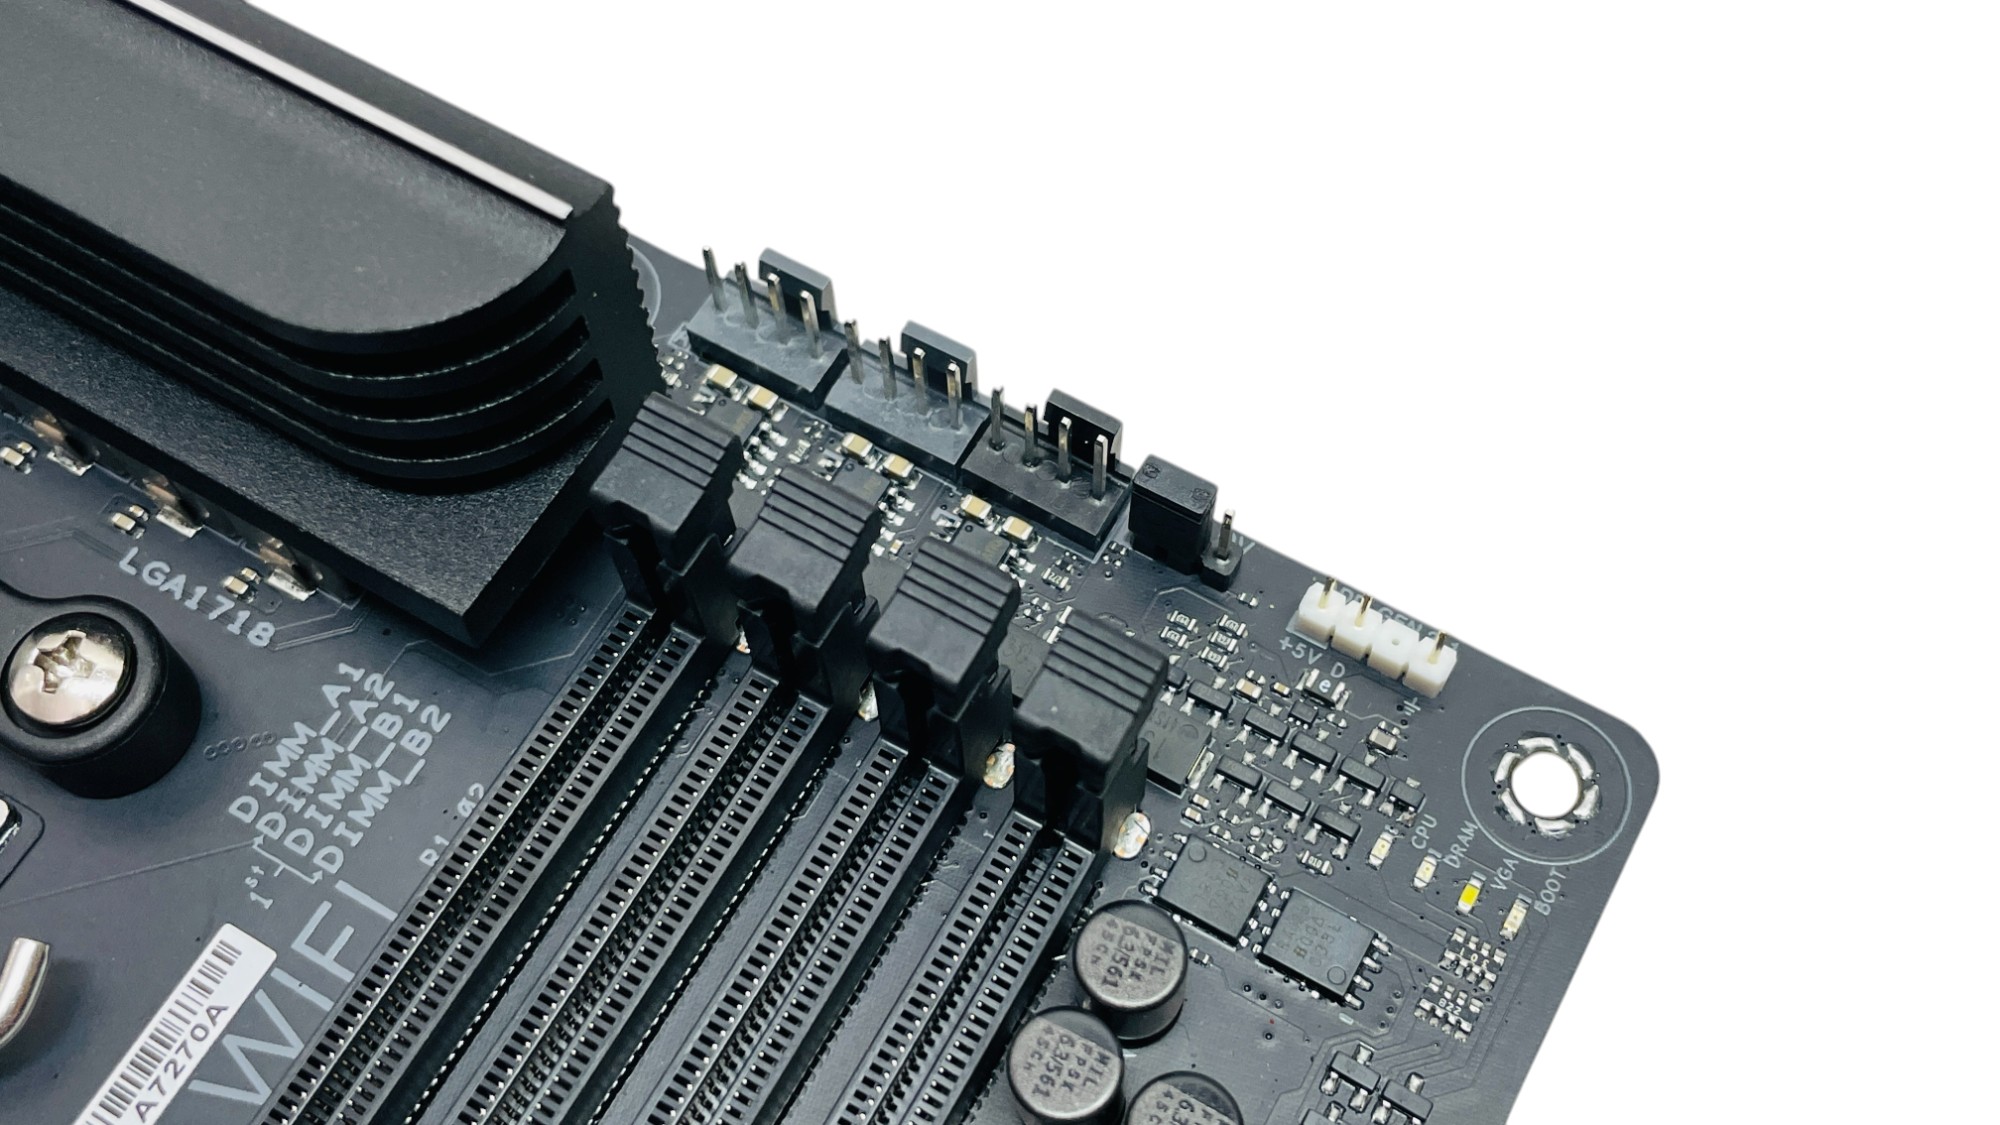
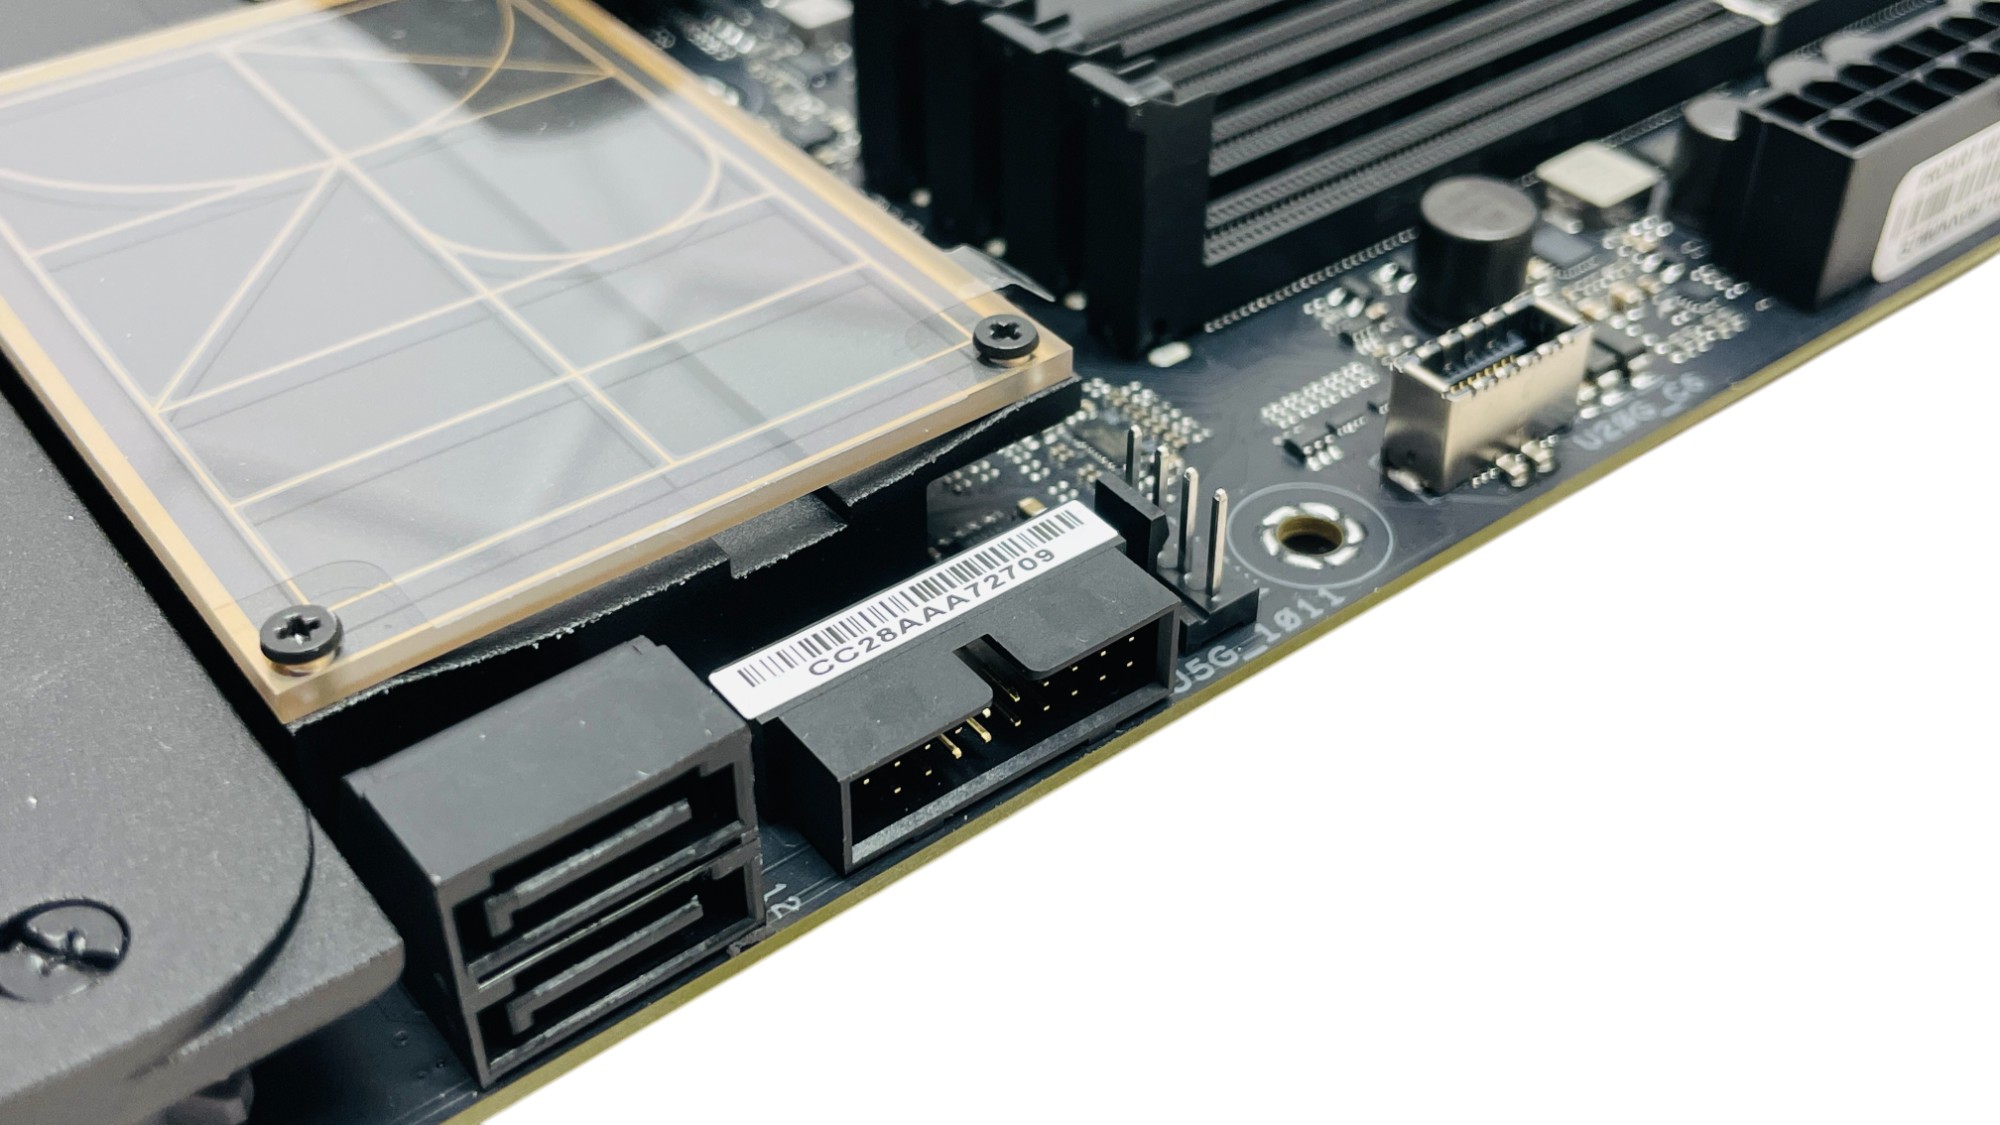
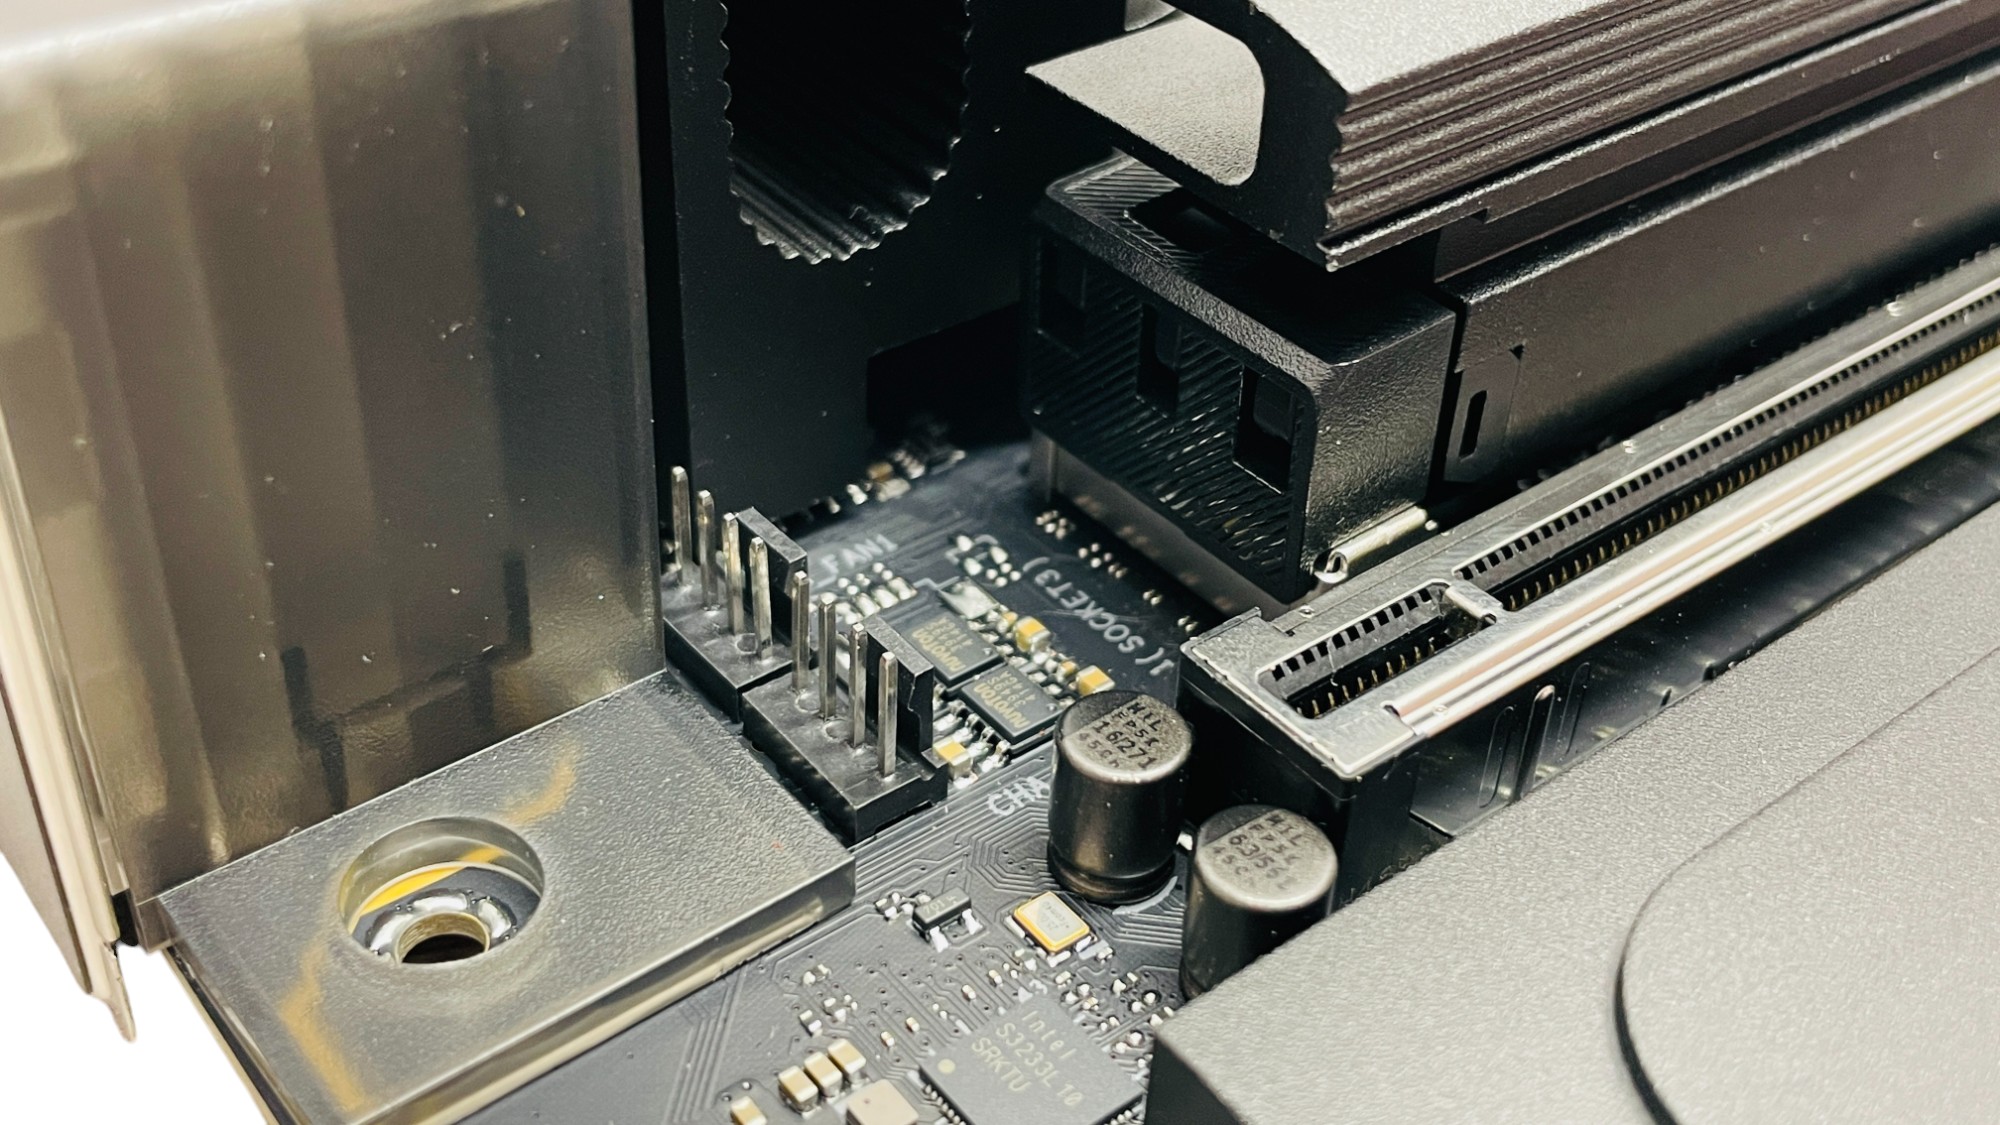
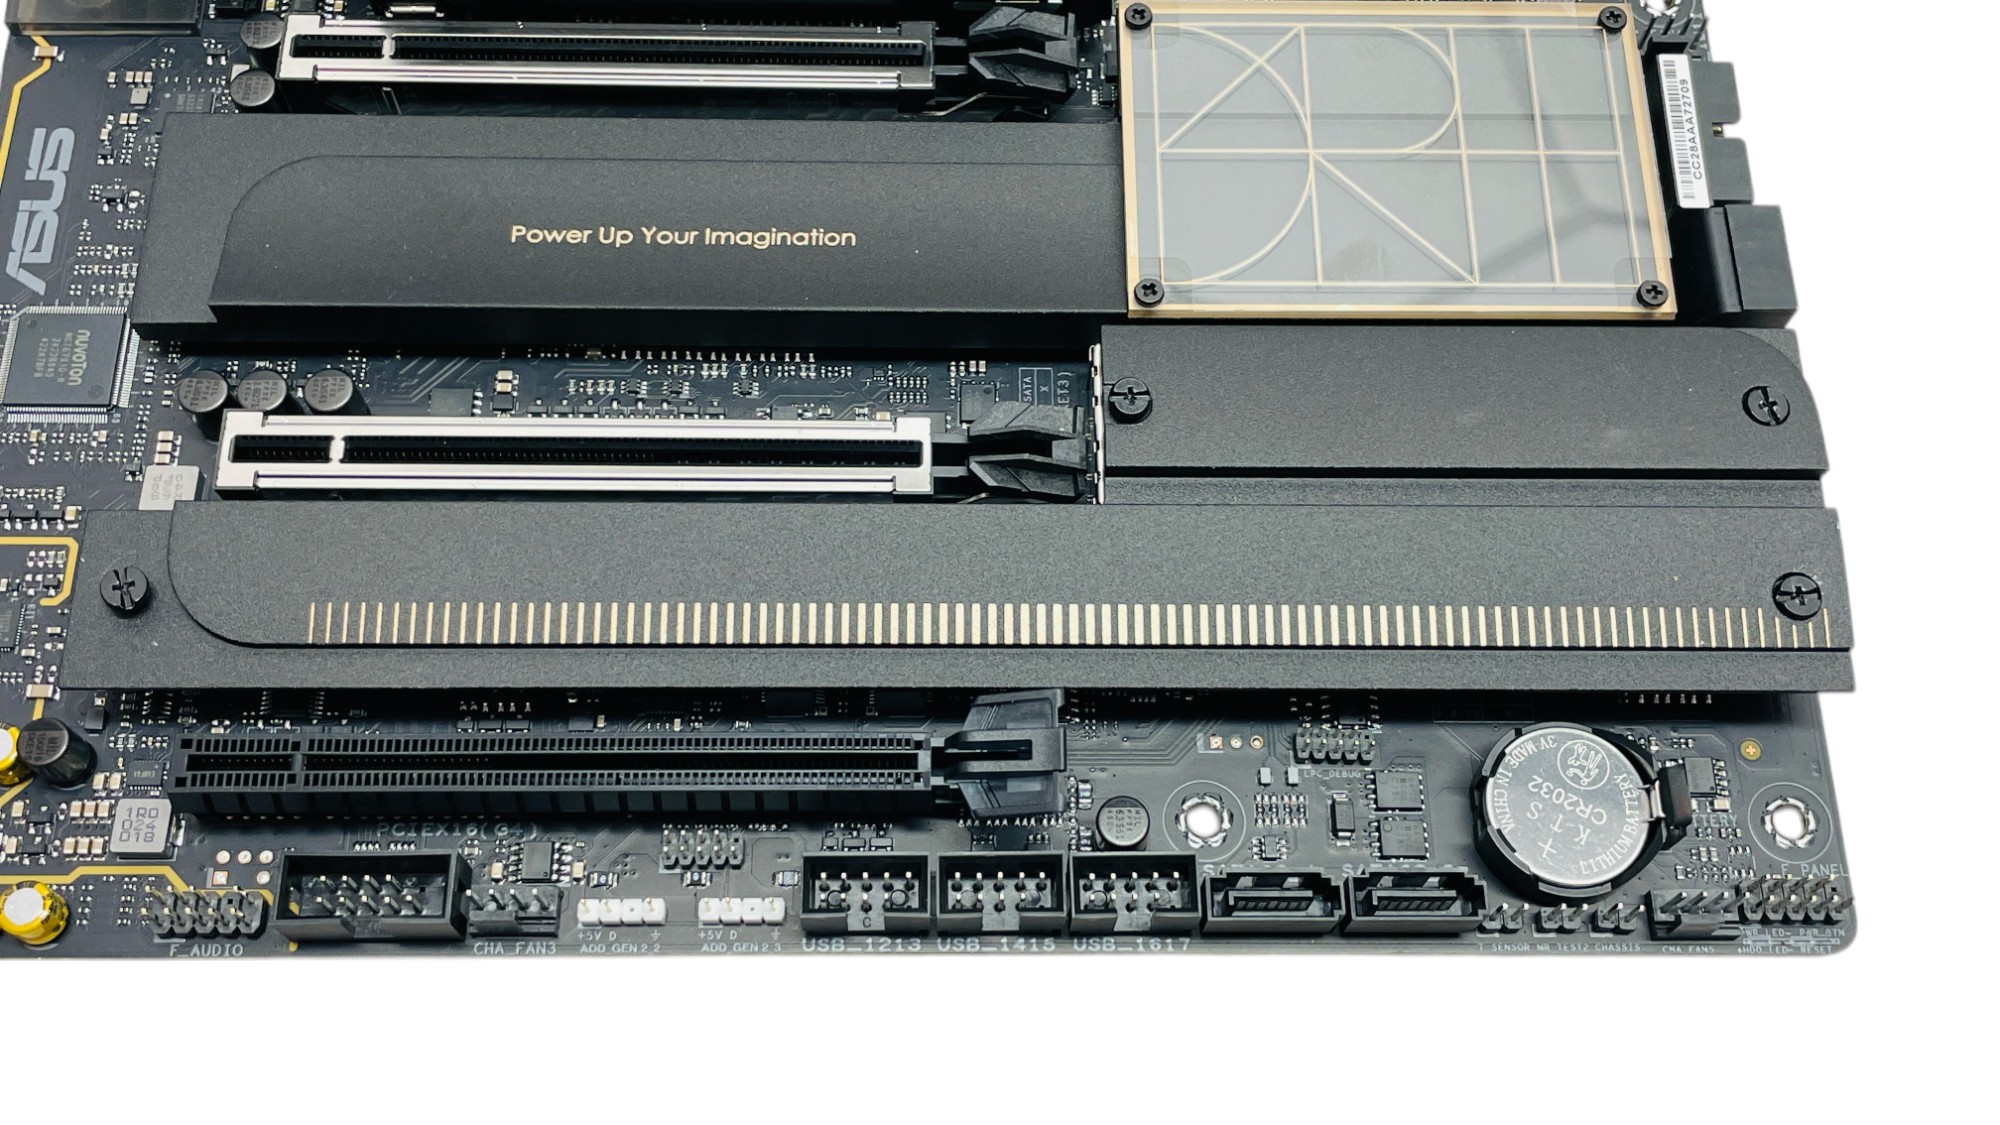
There are eight fan headers in total and each is rated at 1 A/12 W, with a good spread over the PCB to cater for fans in all places. Three is the minimum we'd like to see at the top of the PCB to power AIO cooler pumps and fans as well as case fans. You also get a 3-pin ARGB header here too, but ASUS has seen fit to do away with enthusiast features such as power and reset buttons and LED POST code displays, so the rest of this area is quite bare. The Type-C front panel header is full USB 3.2 Gen 2x2 and also offers 30 W power delivery too. Thankfully the two SATA ports you see are only half of what you get, and we guess that with Thunderbolt 4 compatible Type-C ports, additional storage would probably be using that route or a NAS rather than directly connected to the motherboard.
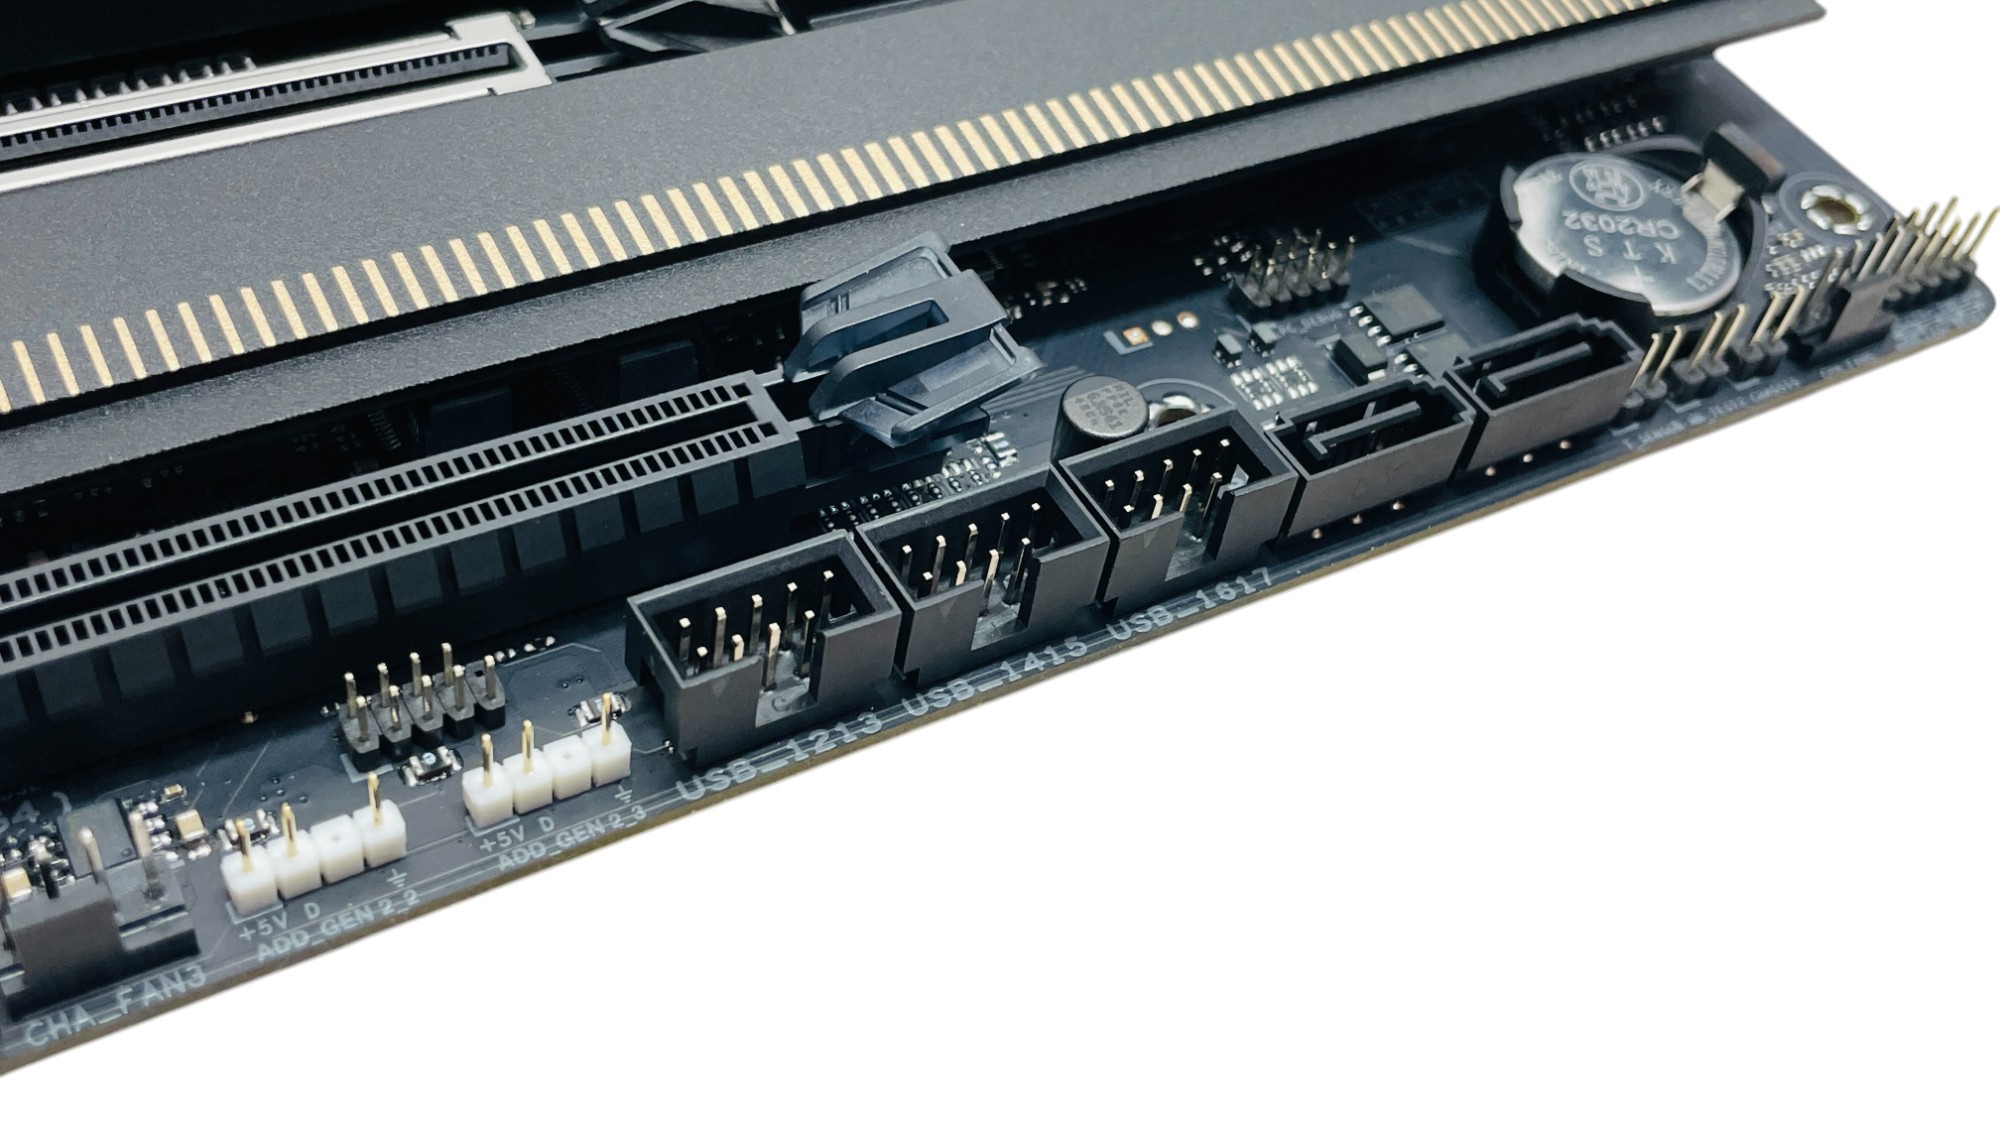
You get two additional 3-pin ARGB connectors at the base of the PCB along with three USB 2.0 headers, two more fan headers, the other two SATA ports and also a thermal probe header. The final two fan headers are located next to the top M.2 port, which could be handy for powering rear case fans or even a fan-cooled M.2 heatsink if you're going to be hammering a PCIe Gen 5 SSD long term.
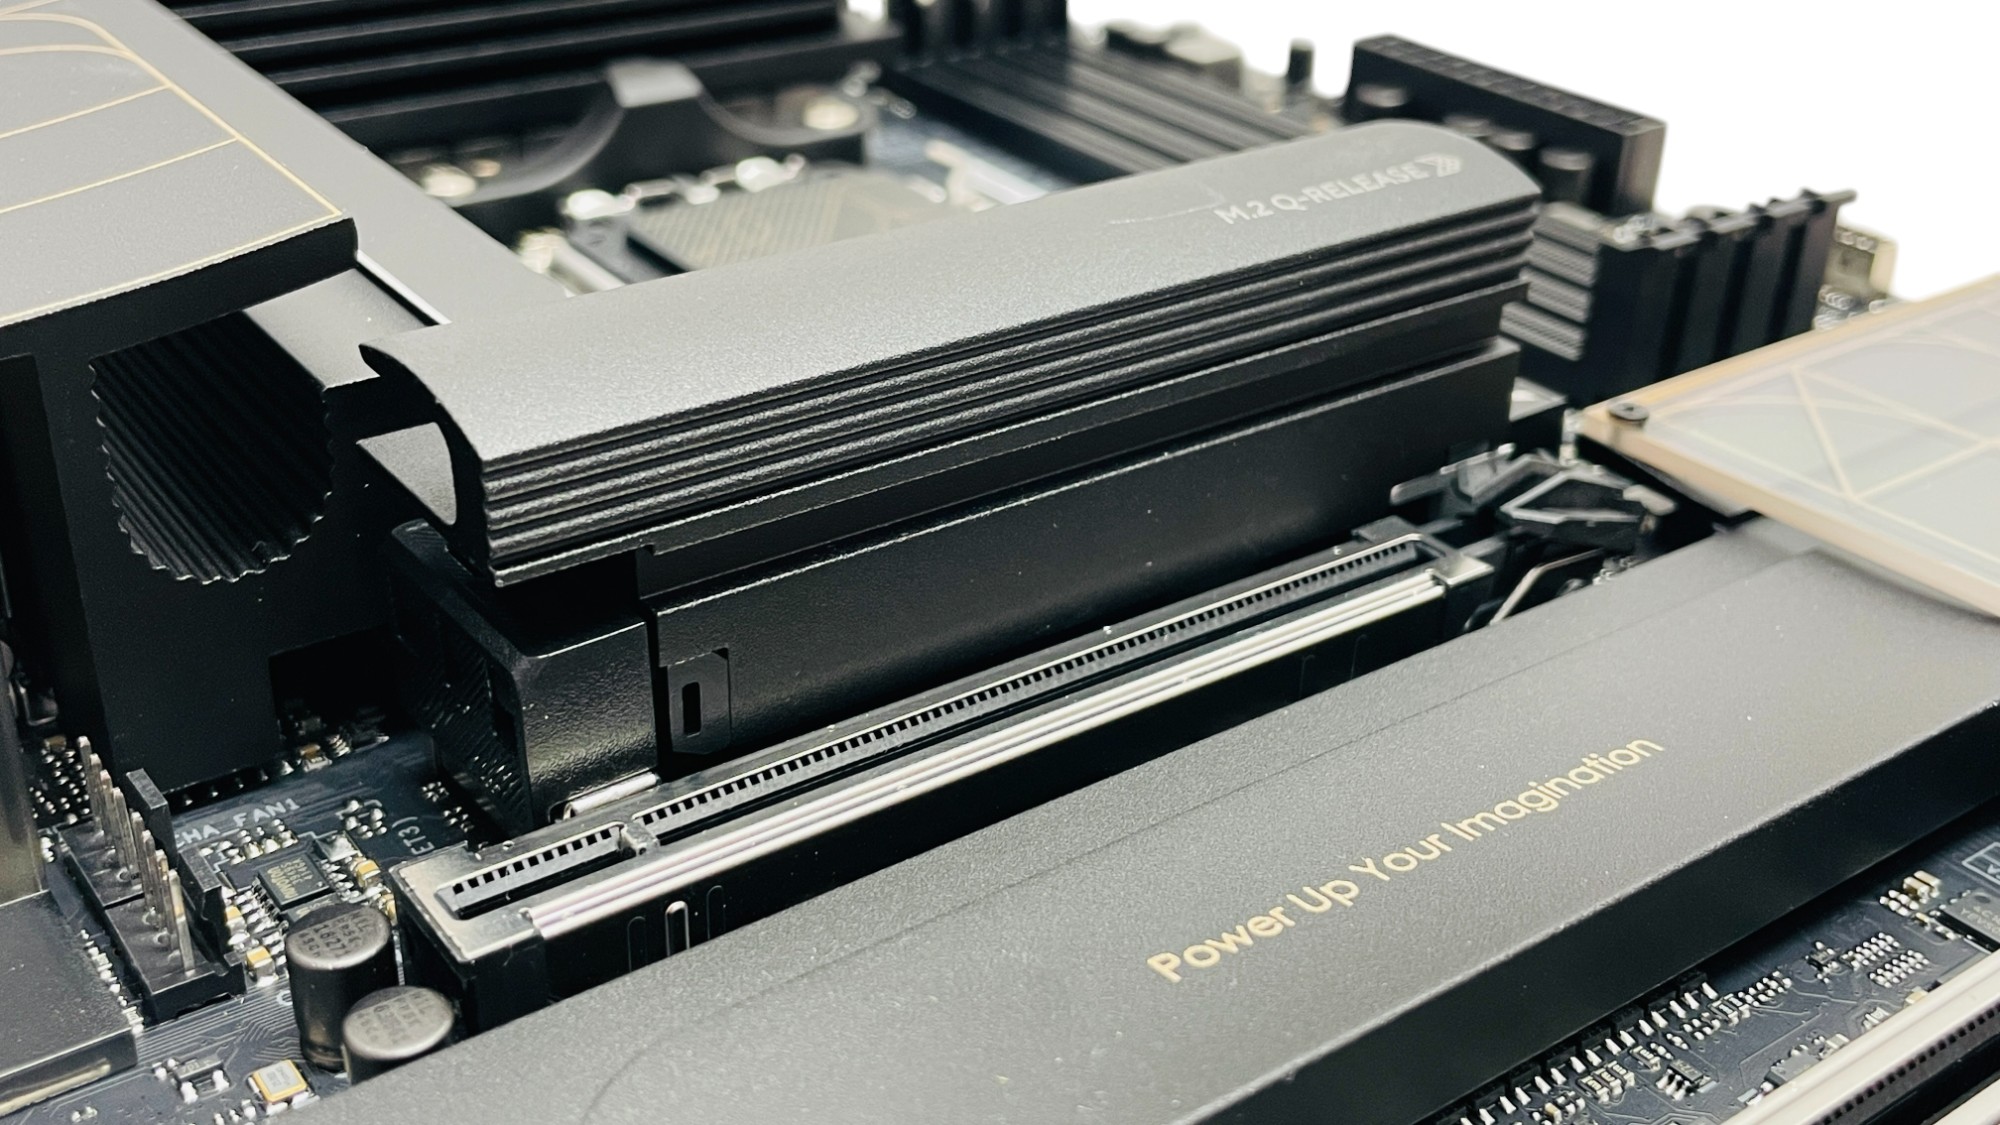
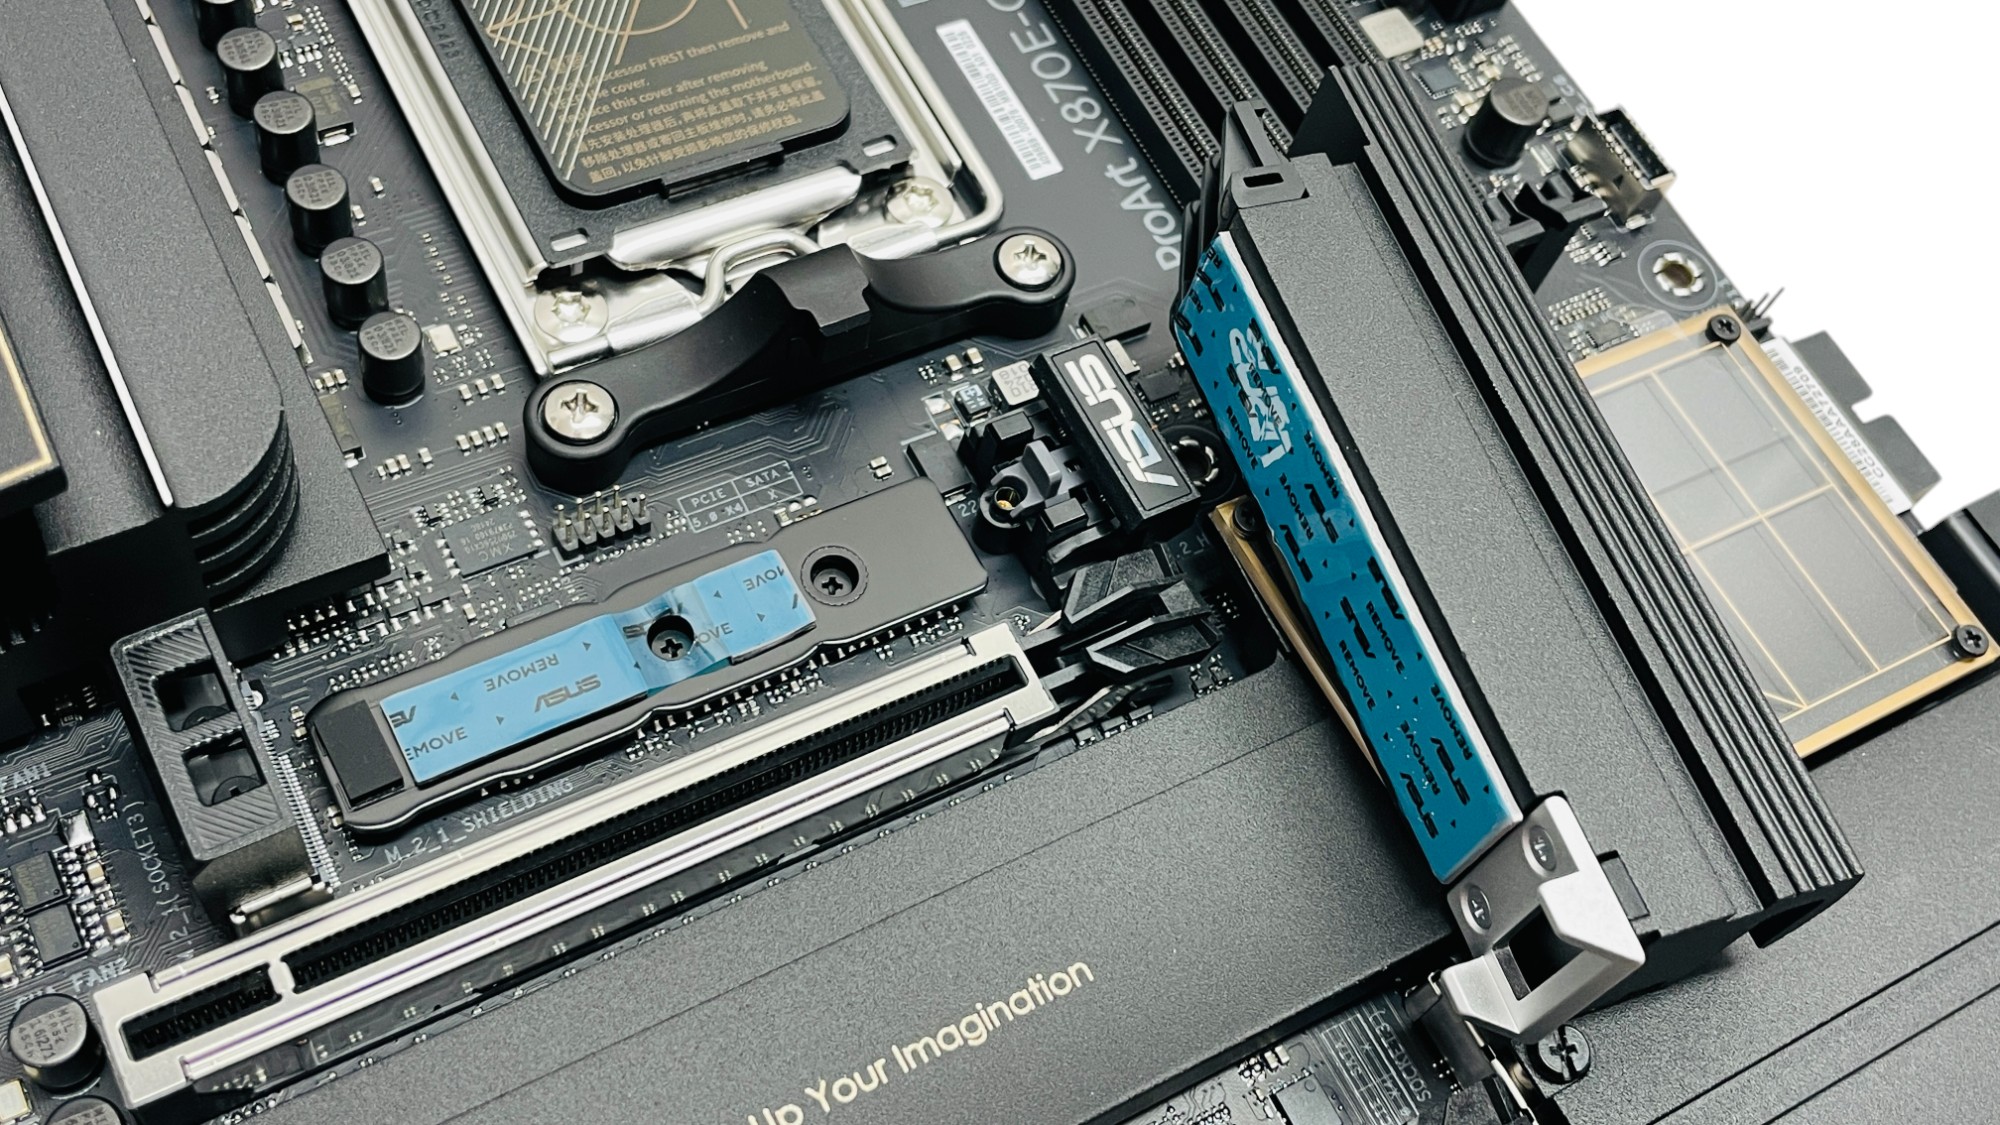
The upper M.2 slot supports PCIe Gen 5 SSDs and has M.2 Q-Release, which features large clips at either end of the sizeable heatsink to secure it. This works really well and is quick and simple to use, with a tool-free clip securing the SSD too. One downside with this particular board is that the underside cooling thermal pad does not extend the full length of the SSD and completely misses one of the chips on the underside of our PCIe Gen 5 SSD. We'll see the impact of that later.
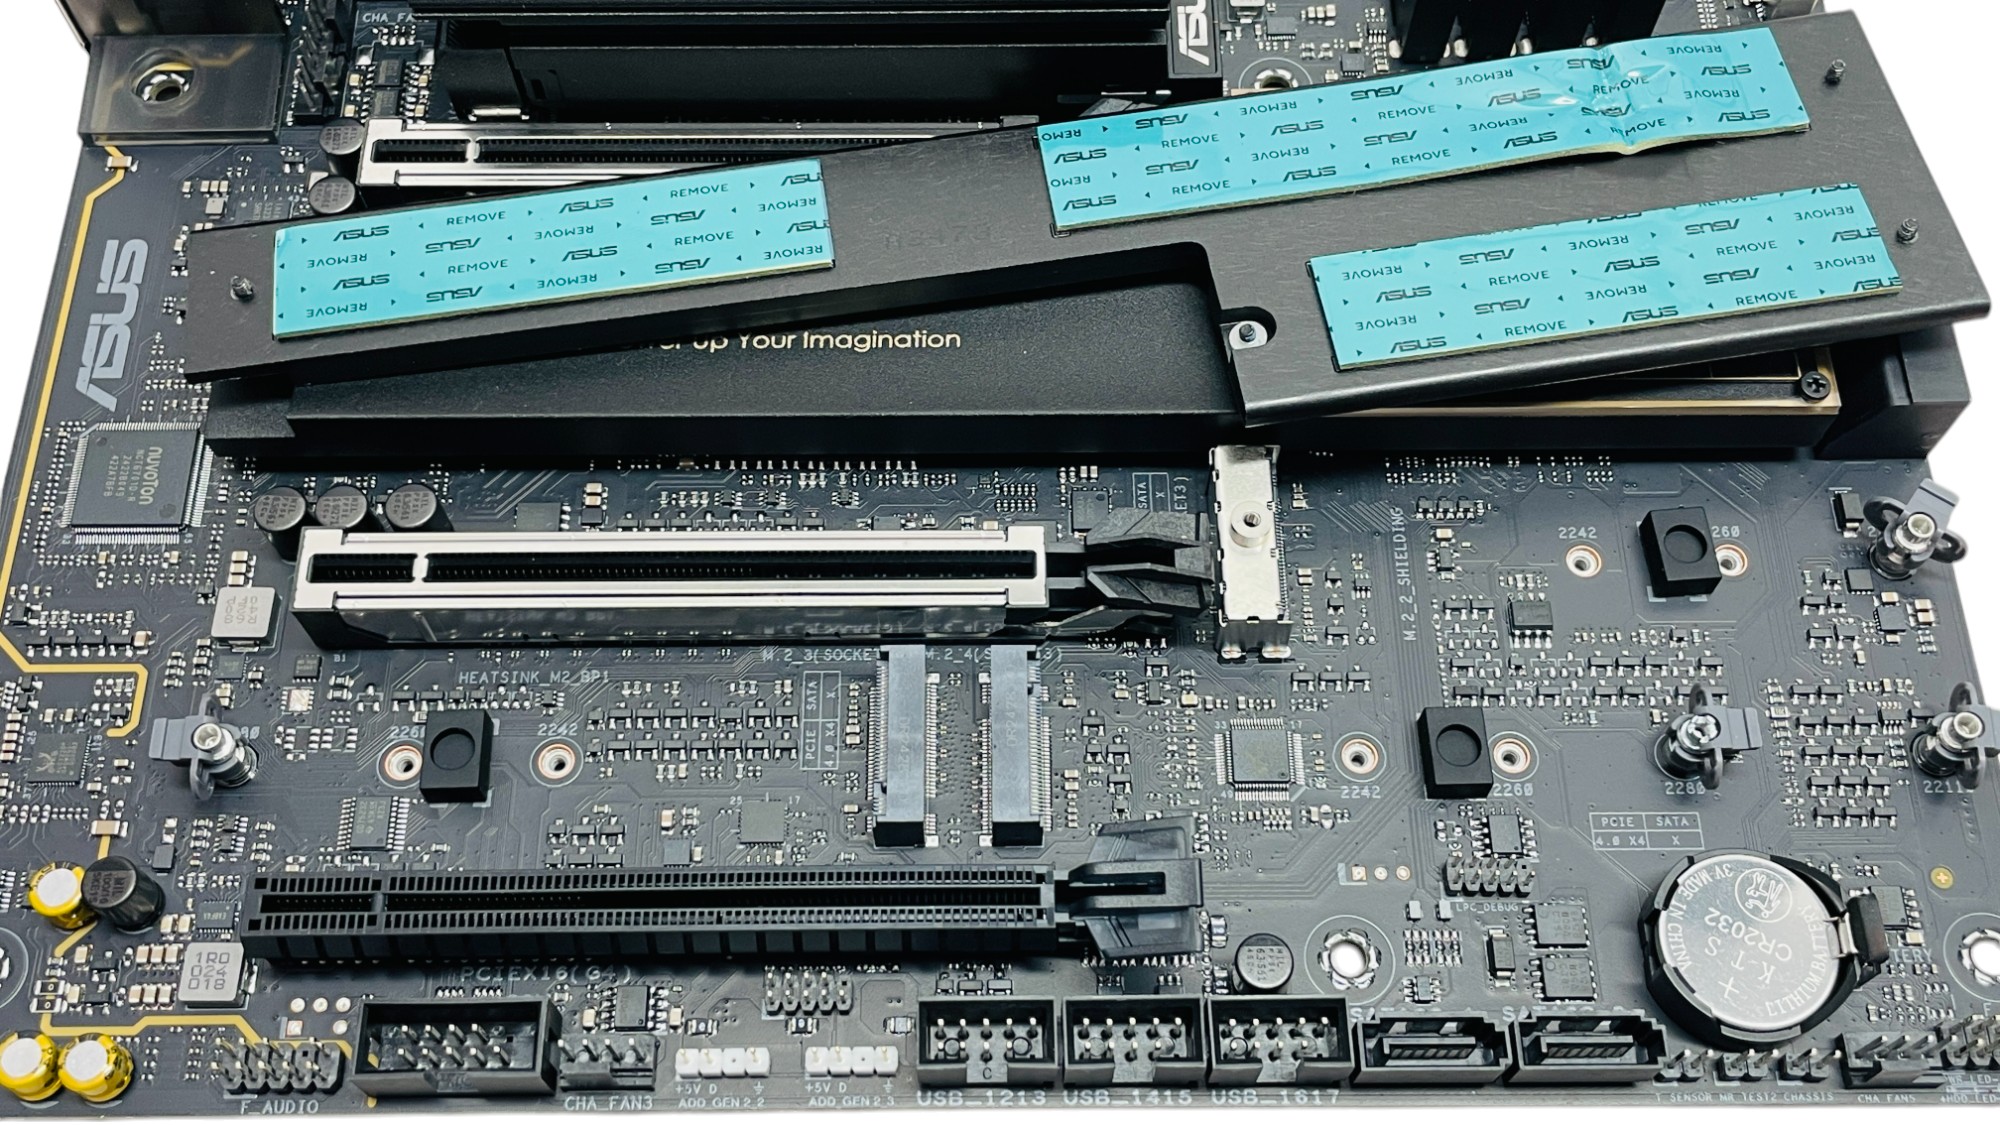
The other three M.2 ports are located under a single large heatsink. This isn't tool free and none of the ports are cooled on both sides. This might not impact the lower slots which are back to back as they are PCIe Gen 4-limited, but the one above is PCIe Gen 5. At this price it would have been nice to see better cooling here, or even just a separate heatsink, because as it is, you can't remove it with most GPUs installed, meaning you only have direct access to one M.2 port without removing other components. Using the second PCIe Gen 5 M.2 port will see the first and second PCIe x16 slots drop to x8 and x4 respectively due to shared bandwidth, so you probably won't be using it anyway, but there's every chance you might be using some higher-capacity PCIe Gen 4 SSDs in the lower slots. Probably not a huge issue if you plan on making infrequent upgrades.

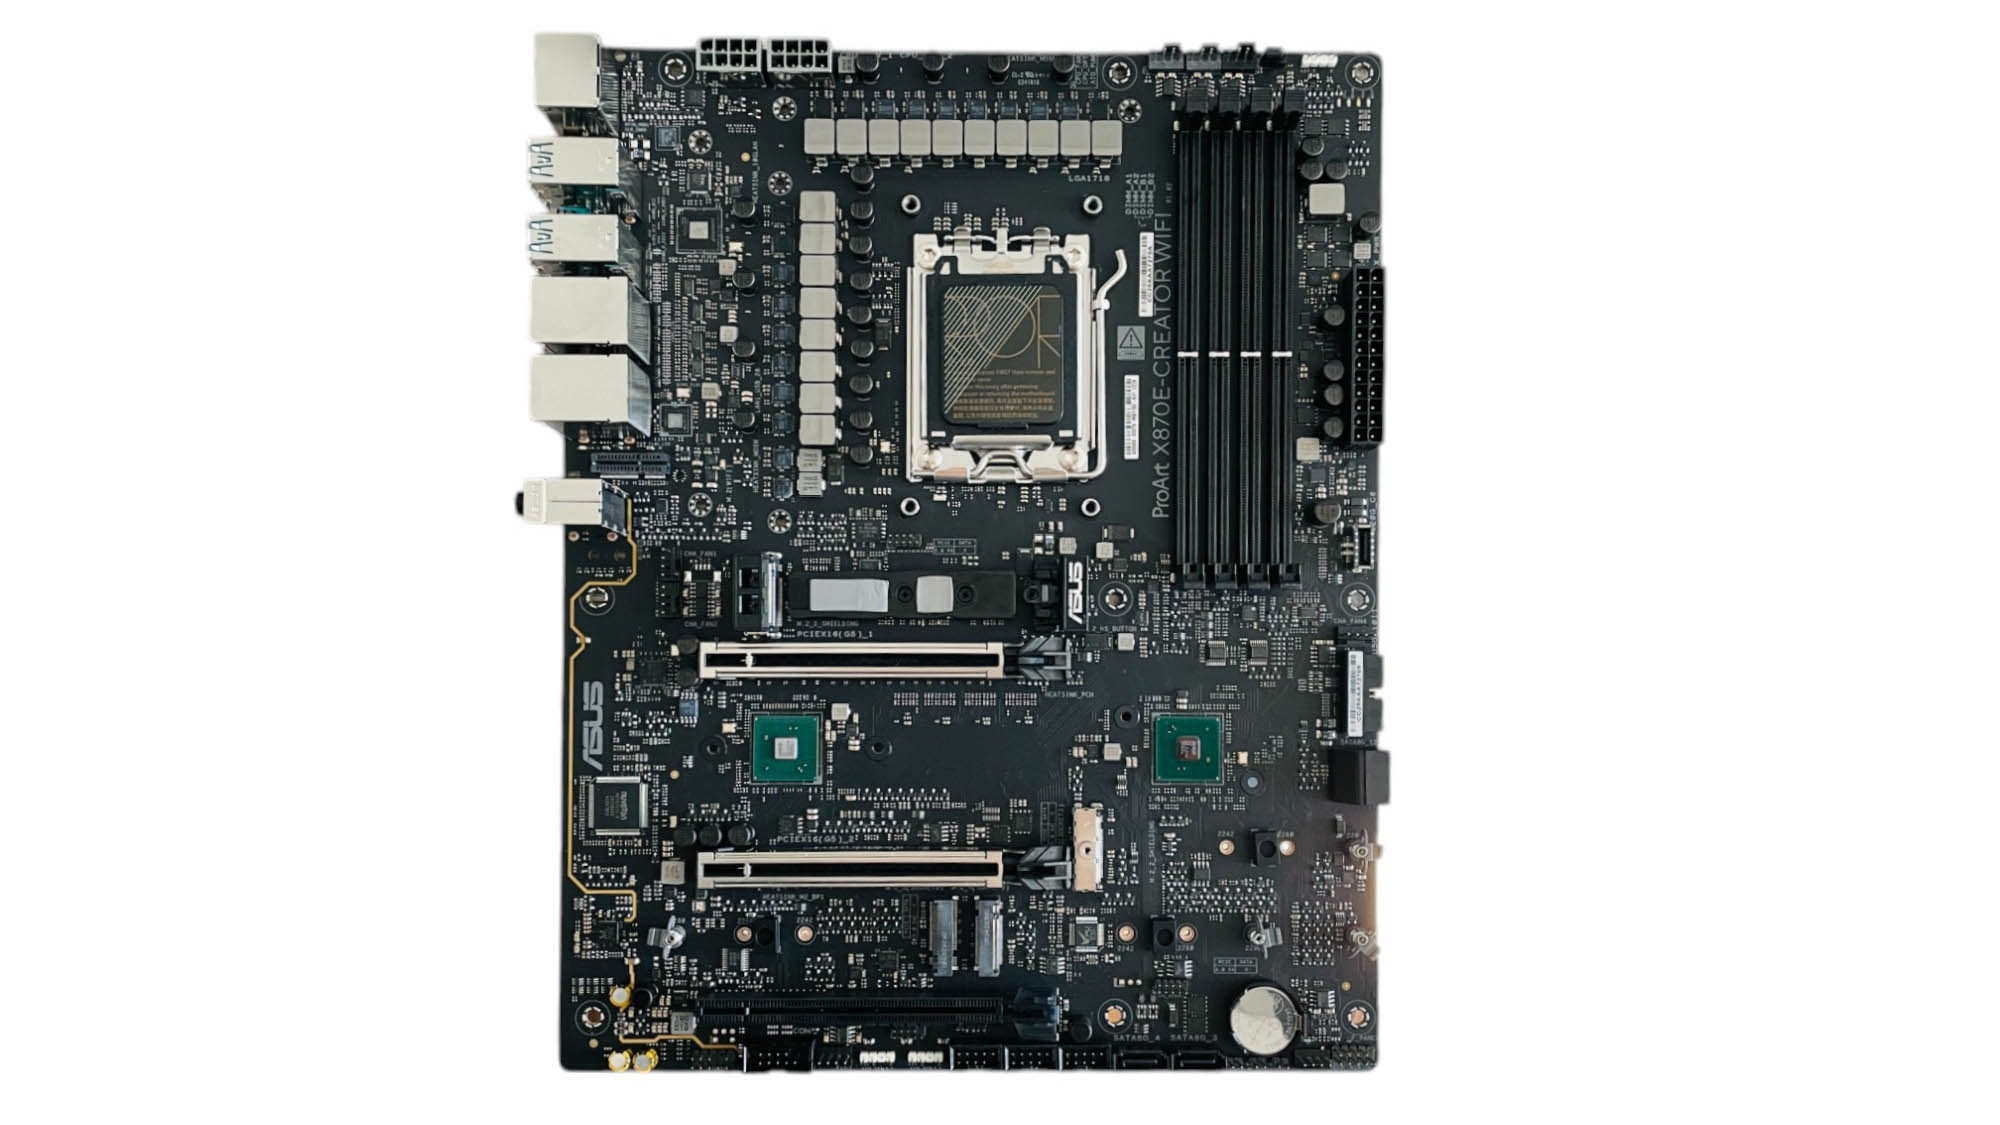
The rear I/O panel has a reasonable eight Type-A USB powers and all of these except one are USB 3.2 Gen 2 10 Gbps with the single lone USB 2.0 port being used for USB BIOS Flashback. There are three Type-C ports, one being USB 3.2 Gen 2x2 20 Gbps and the other two being USB4. As we mentioned at the start, if you want to use your graphics card to send a video signal through one of these ports to the Thunderbolt monitor, you'll need to use the included DisplayPort cable to hook it up to the DP In port. You get a Marvell AQtion 10 Gbps Ethernet port as well as 2.5 Gbps courtesy of Intel. It's worth mentioning there's a CMOS clear button here too as it's so small it's easy to miss. Another break from the norm is the lack of an optical output for the Realtek ALC1220 audio. Instead, you get Mic and Line-in ports as well as a line-out. The Intel Wi-Fi 7 module supports Q-Antenna, which is screw-less with the two antenna heads just plugging into their respective slots.
Mar 23rd, 2025 00:11 EDT
change timezone
Latest GPU Drivers
New Forum Posts
- What is the lifespan of a gaming PC motherboard? (2)
- Microcenter GPU Stock status (47)
- Rtx 5070 Ti blackout and reboot after driver installation (5)
- Entry level 4K gaming RIG for cRPG and h'n's games - Ryzen 5 5600 + RX 7600? (17)
- Anyone with true HDDs still around here? (327)
- Close call... 5090 Burnt Cable (43)
- Samsung 9100 PRO is on preorder (23)
- A slightly strange problem with a GPU (4)
- TechPowerUp Screenshot Thread (MASSIVE 56K WARNING) (4260)
- The TPU UK Clubhouse (25912)
Popular Reviews
- Assassin's Creed Shadows Performance Benchmark Review - 30 GPUs Compared
- ASRock Radeon RX 9070 XT Taichi OC Review - Excellent Cooling
- ASUS ProArt X870E-Creator Wi-Fi Review
- MSI MAG B860 Tomahawk Wi-Fi Review
- ASUS GeForce RTX 5070 TUF OC Review
- Sapphire Radeon RX 9070 XT Nitro+ Review - Beating NVIDIA
- AMD Ryzen 9 9950X3D Review - Great for Gaming and Productivity
- be quiet! Pure Base 501 LX Review
- Quick Look: Jelly Key Mystic Snake Artisan Keycaps
- ASUS Radeon RX 9070 TUF OC Review
Controversial News Posts
- NVIDIA GeForce RTX 50 Cards Spotted with Missing ROPs, NVIDIA Confirms the Issue, Multiple Vendors Affected (519)
- AMD RDNA 4 and Radeon RX 9070 Series Unveiled: $549 & $599 (260)
- AMD Mentions Sub-$700 Pricing for Radeon RX 9070 GPU Series, Looks Like NV Minus $50 Again (250)
- AMD Radeon RX 9070 and 9070 XT Official Performance Metrics Leaked, +42% 4K Performance Over Radeon RX 7900 GRE (195)
- AMD Radeon RX 9070-series Pricing Leaks Courtesy of MicroCenter (158)
- MSI Doesn't Plan Radeon RX 9000 Series GPUs, Skips AMD RDNA 4 Generation Entirely (142)
- Microsoft Introduces Copilot for Gaming (123)
- AMD Radeon RX 9070 XT Reportedly Outperforms RTX 5080 Through Undervolting (118)