 19
19
ASUS Z97-A (Intel LGA 1150) Review
BIOS Walkthrough »Test System
| Test System | |
|---|---|
| CPU: | Intel 4770K 3.5 GHz, 8 MB Cache |
| Memory: | 16 GB DDR3 (4x 4 GB) Avexir Blitz 1.1 TechPowerUp! Edition |
| Cooling: | CoolerMaster TPC812 |
| Motherboard: | ASUS Z97-A Intel Z97 Express, BIOS 1008 |
| Video Card: | MSI GTX780 GAMING 3 GB |
| Harddisk: | 2x Crucial 128 GB SATA 6 Gb/s SSD (OS & DATA) |
| Power Supply: | Thermaltake TruePower Platinum 1250W |
| Case: | Lian-Li T60 Testbench |
| Software: | Windows 8 64-bit, Nvidia 335.63 WHQL |
Initial Setup

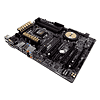
Getting the ASUS Z97-A up and running was surprisingly easy. With value-oriented products, you just expect to run into an issue or another, whether due to slot layout or a BIOS problem, but I didn't run into anything that seemed amiss with the Z97-A. All cable connectors and switches are intelligently placed, so a basic configuration of parts isn't going to interfere with anything.

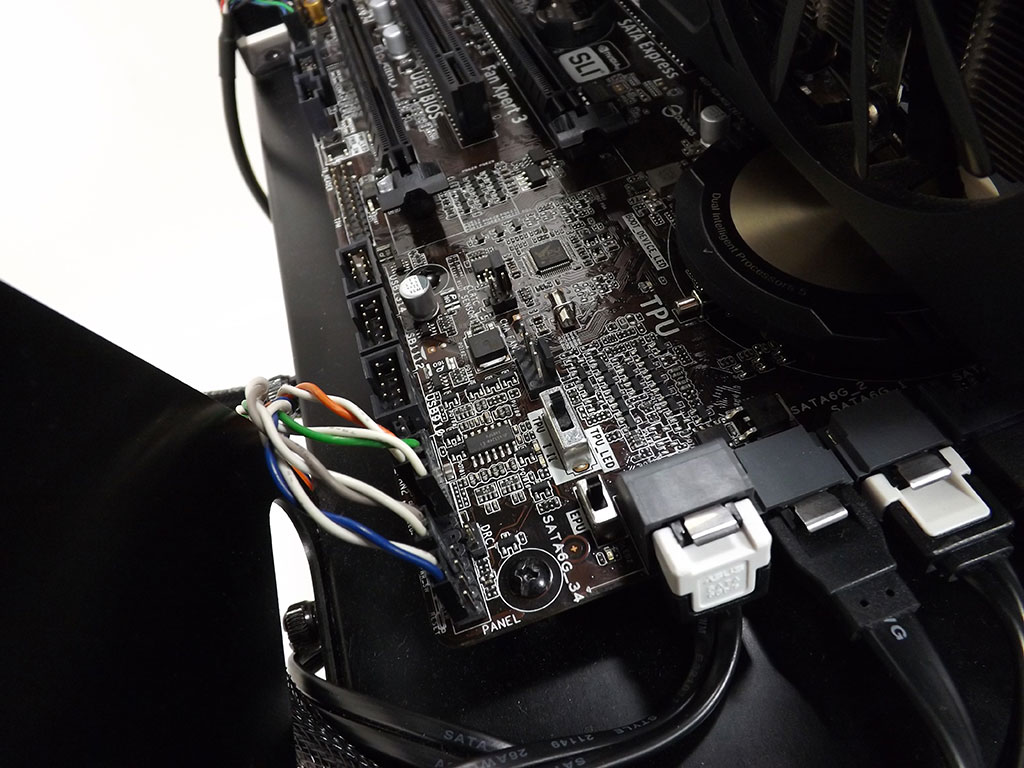
Even the front USB 3.0 plug has been placed well, and the clearance between DIMM slots and the uppermost PCIe slot is spot on. Even large coolers will easily fit, the small VRM heatsinks a good ways away from my large CoolerMaster TPC812.
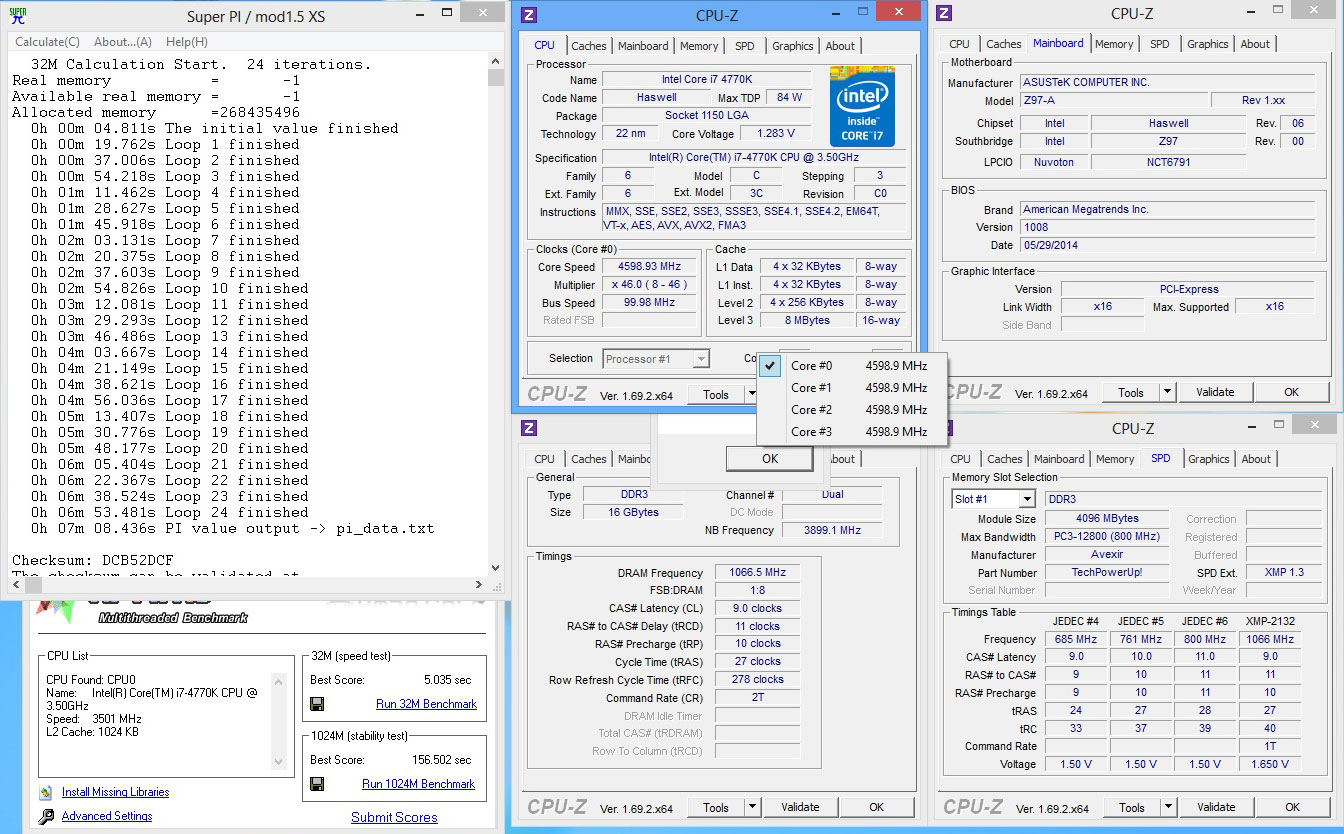
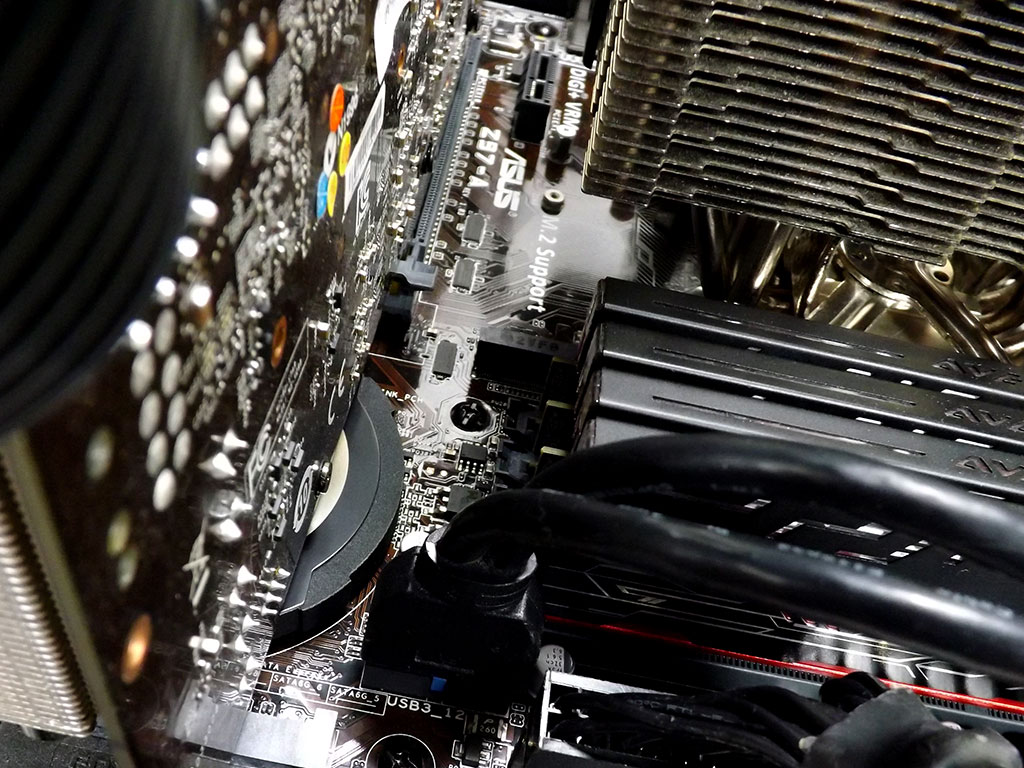
Stock operation and overclocking worked well, thanks to ASUS' well-developed BIOS. It has been several months since the Intel Z79 launch, so most BIOS issues common to new platforms have been dealt with. The usual screenshot with some overclocking results is shown above.
Power Consumption
We measure CPU power consumption since one of our first tasks is to truly verify system stability. I isolate the power coming through the 8-pin ATX connector with an in-line meter that provides voltage and current readings, and total wattage passed through. While this may not prove to isolate the CPU power draw in all instances, it does serve as a good indicator of board efficiency and effective VRM design. Total system power consumption is no longer reported as this figure can change depending on what VGA is installed. The sole board-only power measurements possible without physically modifying a motherboard are those taken via the 8-pin CPU connector, making it the only figure of value worth reporting. I use wPrime with eight threads selected in its options since it provides a consistently high workload throughout the full length of the test and runs long enough for the VRM and CPU to produce a fair bit of heat. Most average workloads will draw far less than that, although distributed computing applications are quite similar. This is not supposed to test stability since I use several other applications to do so, but merely to provide repeatable power draw numbers anyone can replicate. The meter used is an off-the-shelf Zalman unit that has been on the market for some time. It provides results similar to a FLUKE 337 clamp meter in my test environment.| Load Condition | CPU Voltage | Ring voltage | Idle Power | Load Power |
|---|---|---|---|---|
| Stock Clocks | 1.1520 V | 0.824 V | 05W | 68W |
| Overclocked | 1.287 V | 1.152 V | 32W | 129W |
The ASUS Z97-A's power delivery design performed really well, with stock performance generating very good numbers because of a relaxed Turbo profile. It also performed decently while overclocked, matching the voltages my CPU test with the Z87 platform required. It really seems as though the board is optimized for efficiency at stock, but once you change a few settings, there is substantially more performance to be had as required.
May 4th, 2025 11:58 EDT
change timezone
Latest GPU Drivers
New Forum Posts
- Are the 8 GB cards worth it? (821)
- Best USB 3 hub chipsets (5)
- Request for advice [Big Build] (43)
- PSU chirping sound (7)
- Windows 11 General Discussion (6016)
- Dream Monitor Ideas (168)
- Last game you purchased? (800)
- Free Games Thread (4659)
- 5070 Ti power limit questions (79)
- Half Life 3 soon ? (4)
Popular Reviews
- Clair Obscur: Expedition 33 Performance Benchmark Review - 33 GPUs Tested
- ASUS ROG Maximus Z890 Hero Review
- ASUS Radeon RX 9070 XT TUF OC Review
- Montech HS02 PRO Review
- NVIDIA GeForce RTX 5060 Ti 8 GB Review - So Many Compromises
- ASUS GeForce RTX 5090 Astral Liquid OC Review - The Most Expensive GPU I've Ever Tested
- Seasonic Vertex GX 850 W Review
- Upcoming Hardware Launches 2025 (Updated Apr 2025)
- ASRock Radeon RX 9070 XT Taichi OC Review - Excellent Cooling
- Team Group GC Pro 2 TB Review
Controversial News Posts
- AMD Radeon RX 9060 XT to Roll Out 8 GB GDDR6 Edition, Despite Rumors (129)
- NVIDIA Sends MSRP Numbers to Partners: GeForce RTX 5060 Ti 8 GB at $379, RTX 5060 Ti 16 GB at $429 (128)
- NVIDIA Launches GeForce RTX 5060 Series, Beginning with RTX 5060 Ti This Week (115)
- Nintendo Confirms That Switch 2 Joy-Cons Will Not Utilize Hall Effect Stick Technology (105)
- NVIDIA PhysX and Flow Made Fully Open-Source (95)
- Sony Increases the PS5 Pricing in EMEA and ANZ by Around 25 Percent (84)
- Parts of NVIDIA GeForce RTX 50 Series GPU PCB Reach Over 100°C: Report (78)
- Intel "Bartlett Lake-S" Gaming CPU is Possible, More Hints Appear for a 12 P-Core SKU (77)