 10
10
Chieftec Stallion 3 Review
Assembly & Finished Looks »A Closer Look - Inside
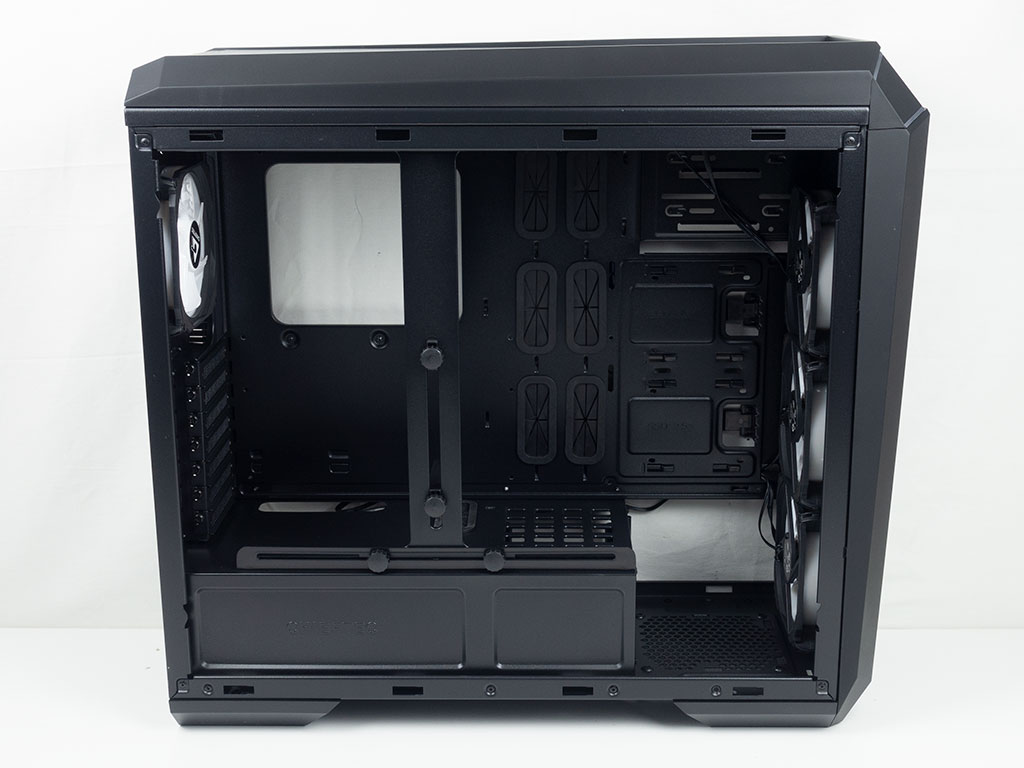
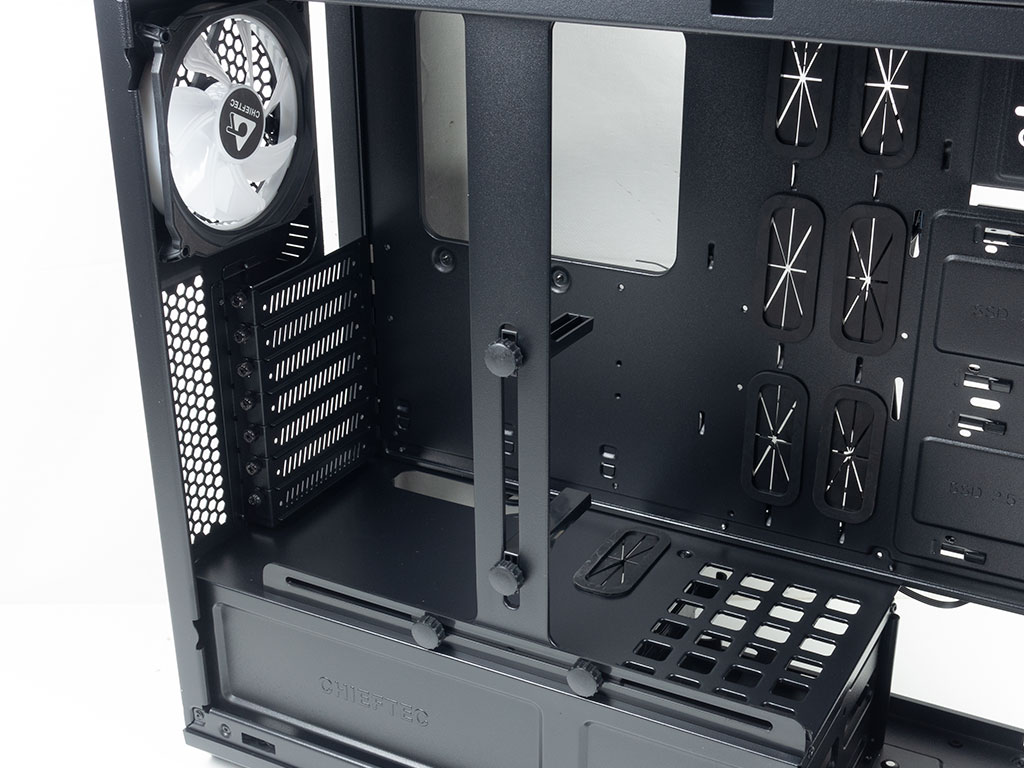
To gain access to the interior of the Stallion 3, simply remove the big thumb screws holding each panel in place. Chieftec has embedded a GPU support bracket system that provides structural support for up to two GPUs. Each of the shelves are held in place by large thumb screws, and Chieftec employs a mix of steel and plastic for this feature element. While this is nice, it is a bit bulky in general. As such, this will block the visibility of some hardware or ARGB components. The metal shroud does not extend all the way towards the front, which provides the unique opportunity for that floor fan placement which is not actually mentioned in the specification table.
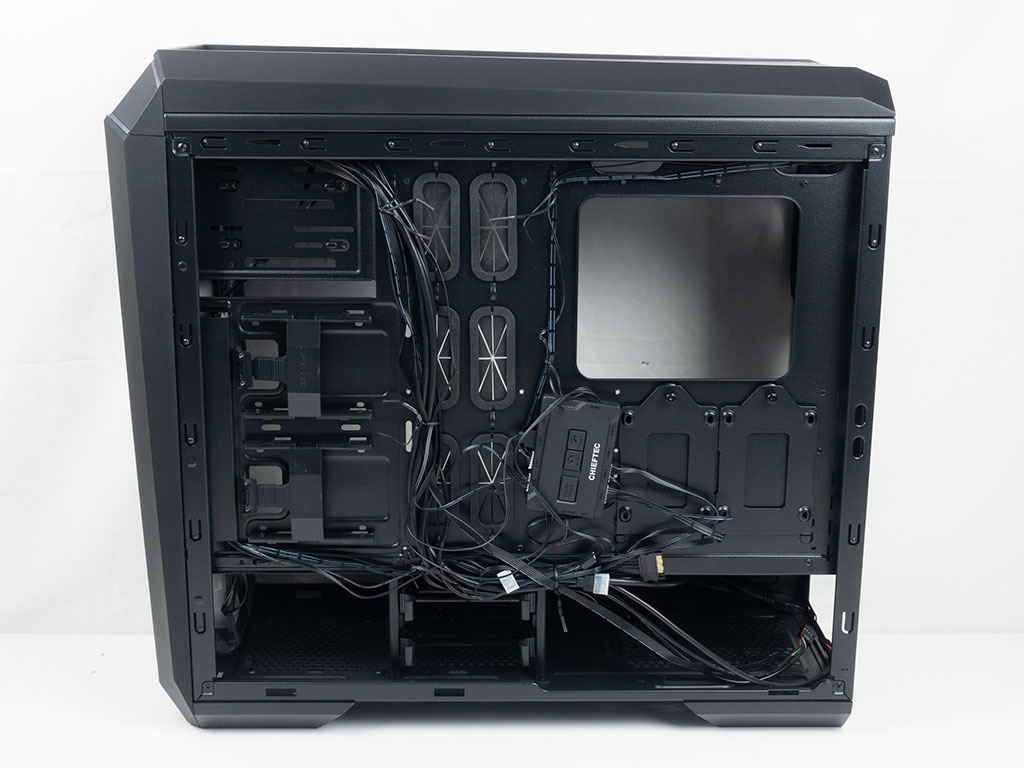
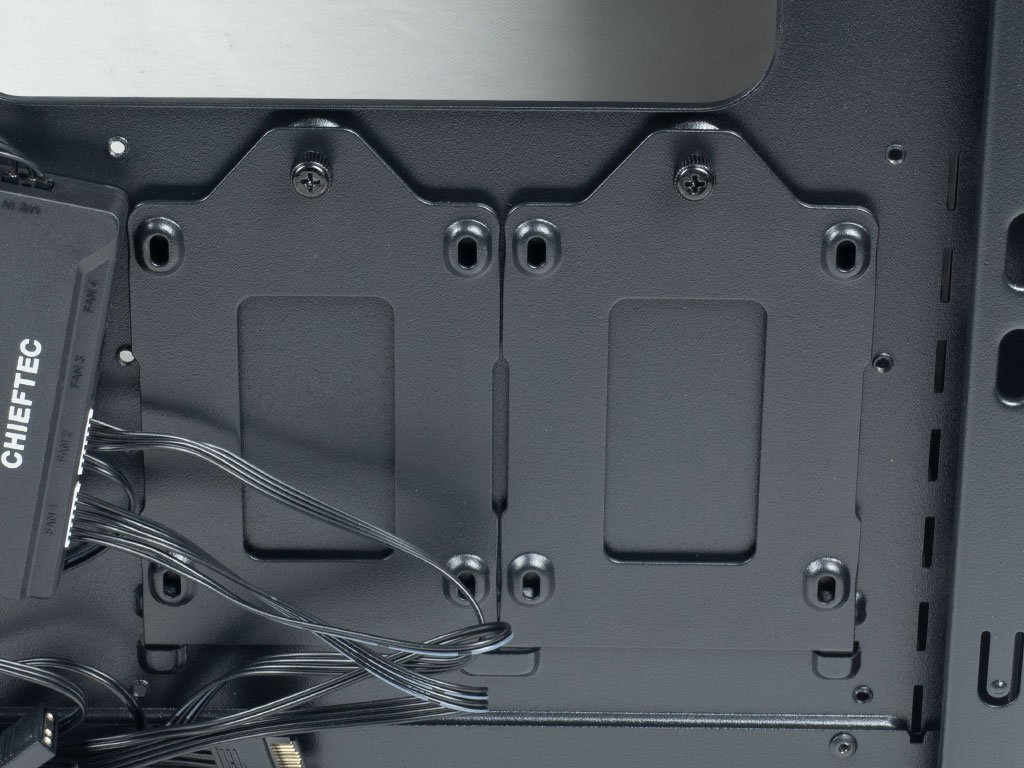
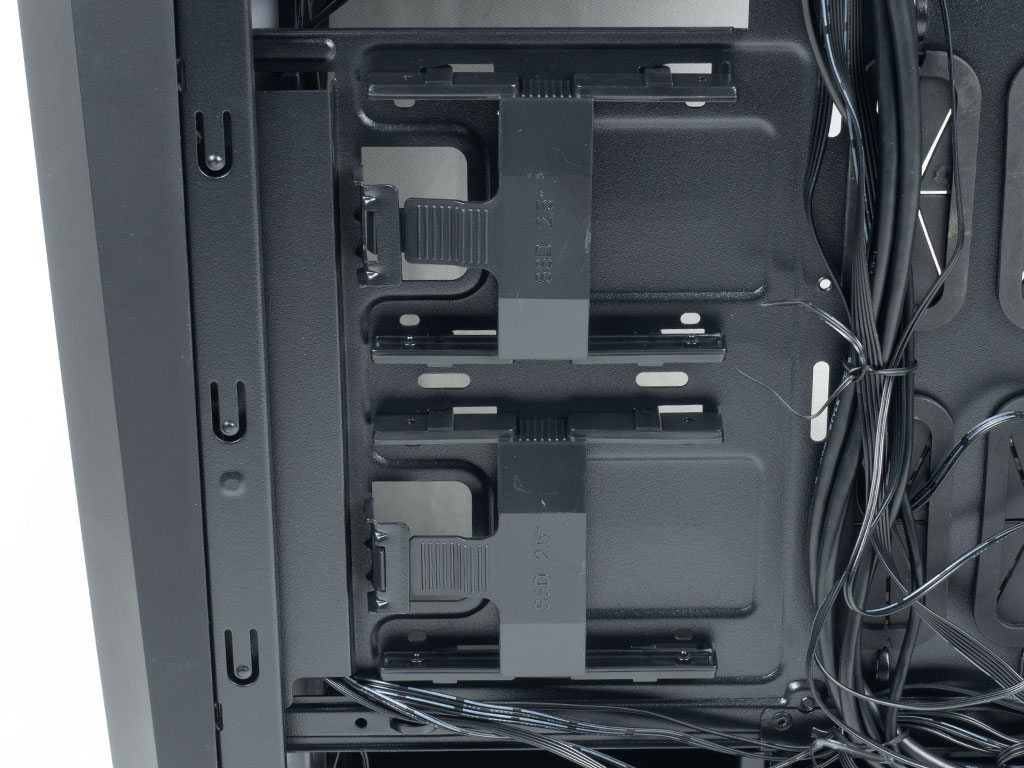
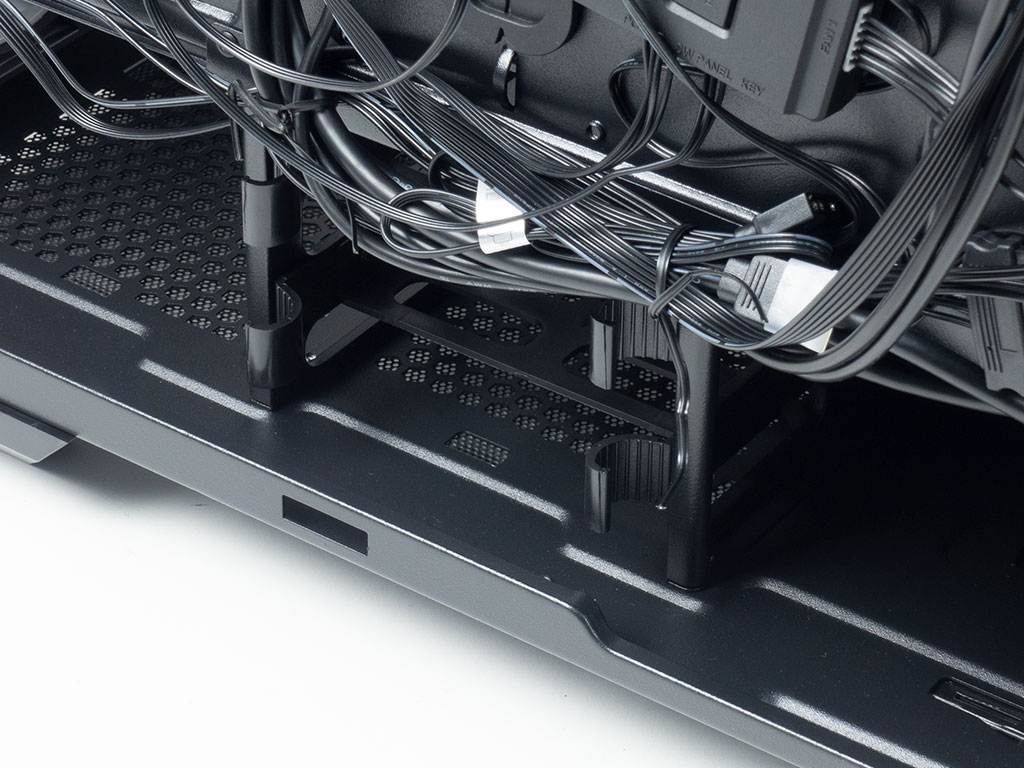
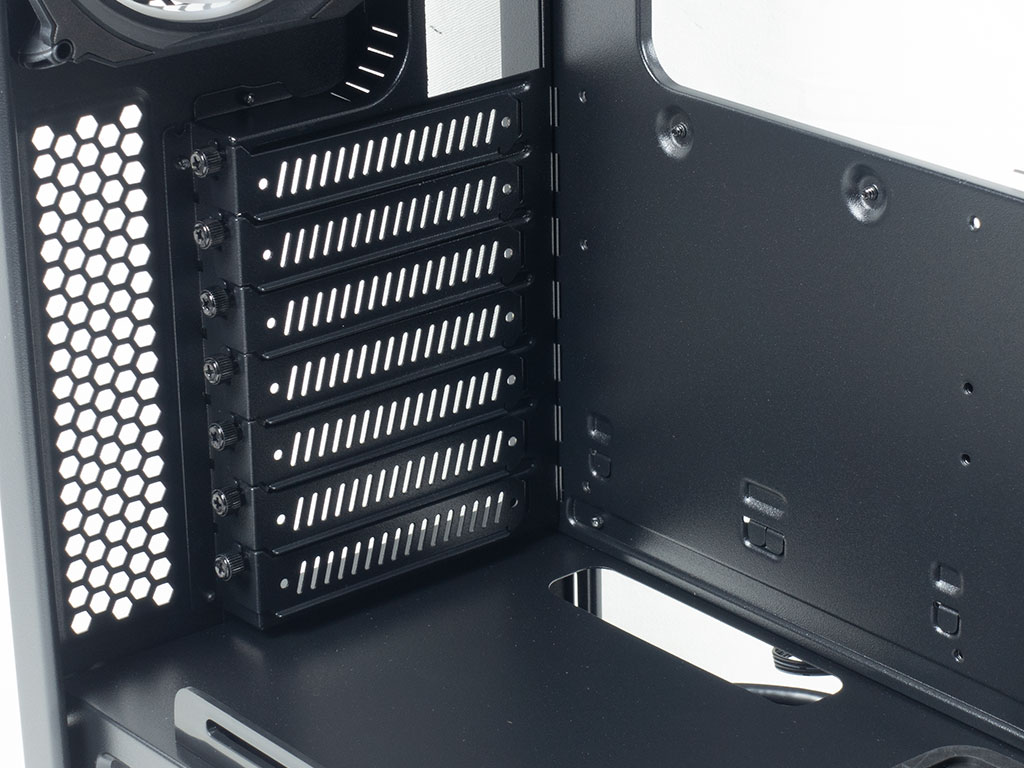
On the backside, you will find a traditional layout with two rows of grommet covered openings. However, should you employ an E-ATX motherboard, both of these rows will be blocked, which will make cable management considerably more difficult. Besides that, there is quite the cable mess due to the four fans being pre-wired to the magnetically attached controller, which in turn is not at the best location possible. You will find two individual, steel trays to attach SSDs with two more plastic, tool-less clips towards the front of the chassis.

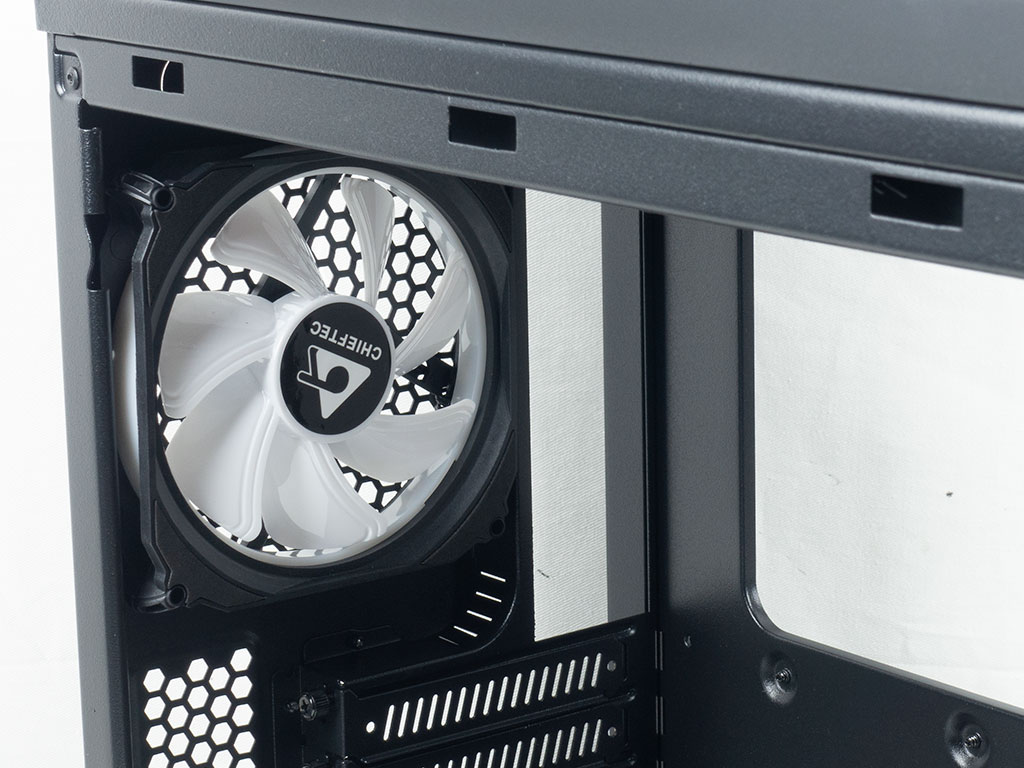
That controller, which is also the one you would receive if you were to buy the Tornado 3-fan pack, utilizes proprietary fan wiring, so you will be limited to these or other Chieftec fans. If you opt to swap these out with generic ones, you will also loose the ability to control the fan speed and ARGB through the case IO panel.
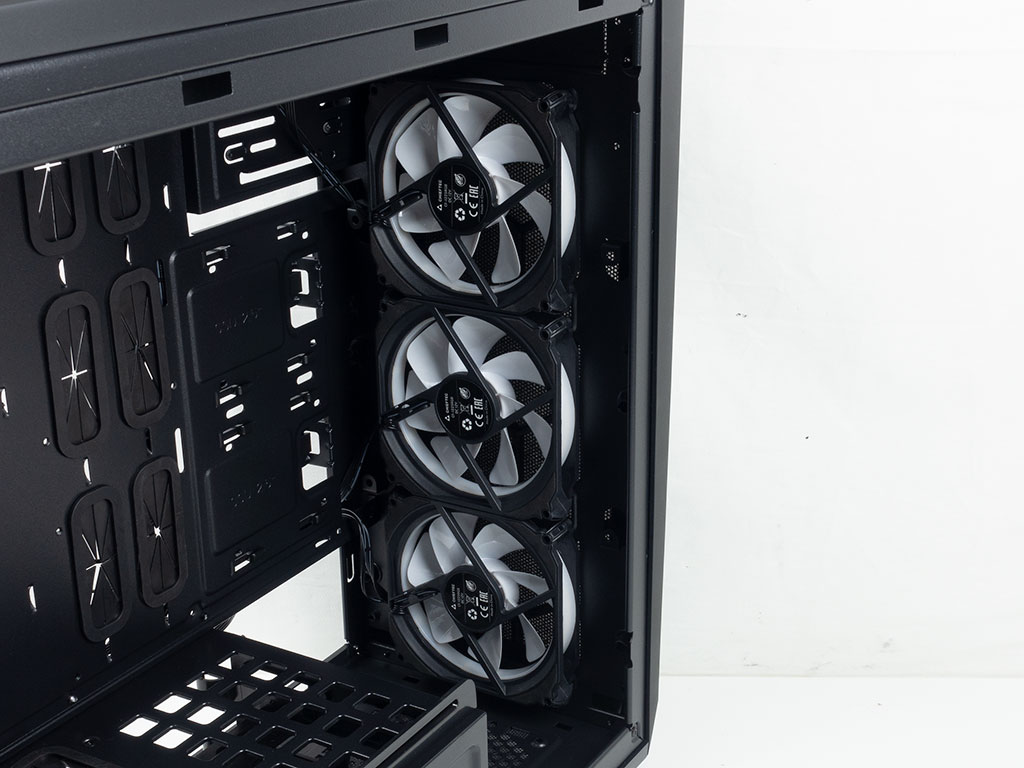
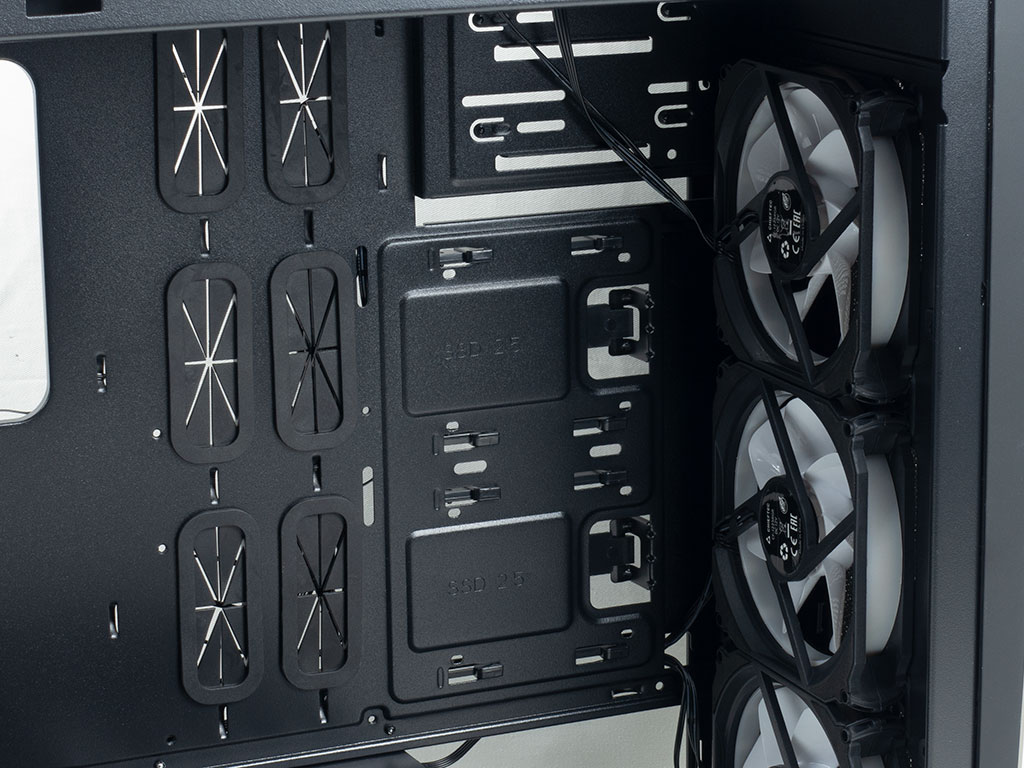
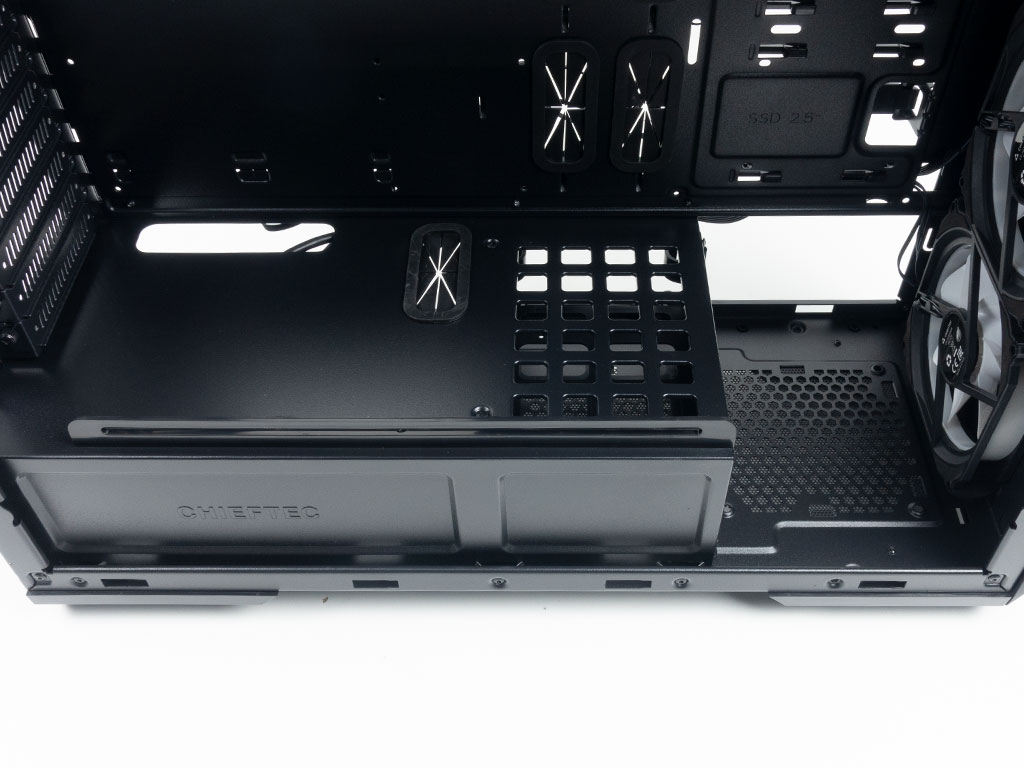
Under the shroud towards the front, you will find two 3.5" hard drive trays. The cage that holds these may not be moved, but there is still plenty of room for long PSUs. Above that, you will find the three Tornado intake fans. If you look closely, the body of the Stallion 3 offers two additional SSD mounting locations on the motherboard tray itself. However, Chieftec does not include these in the specification table either.
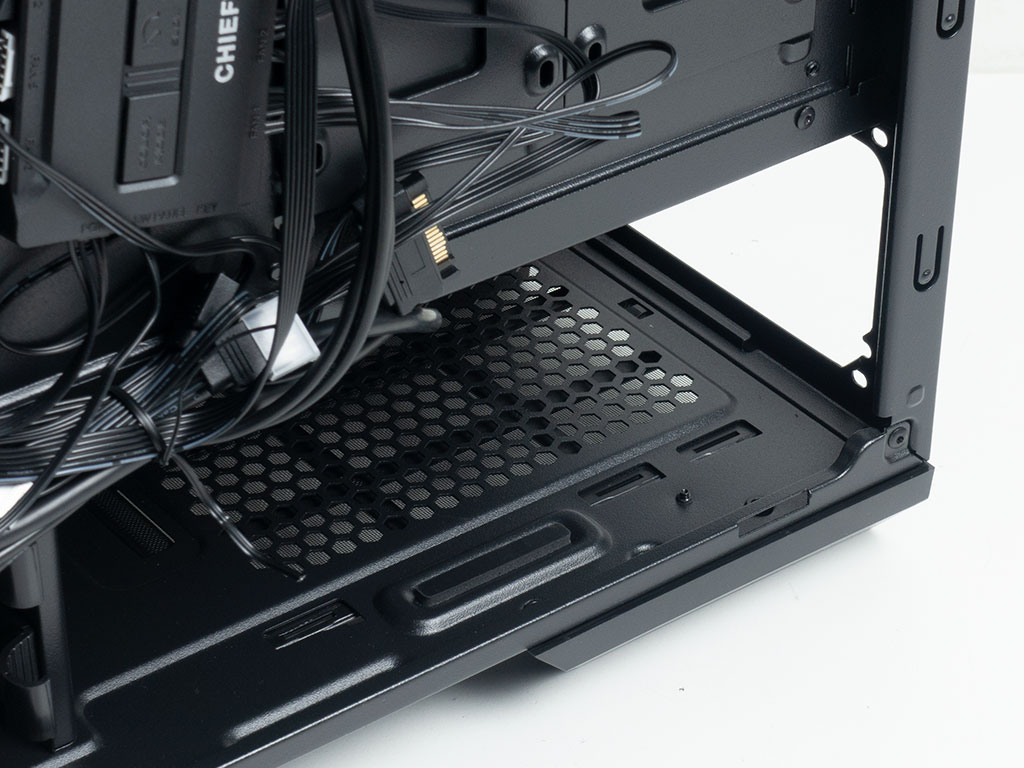
In the rear, the PSU bay comes equipped with two foam pads on which the unit will rest. Above that the seven expansion slots utilize proper metal thumb screws, which is nice to see. At the very top, there is that rear pre-installed Tornado fan, as expected.
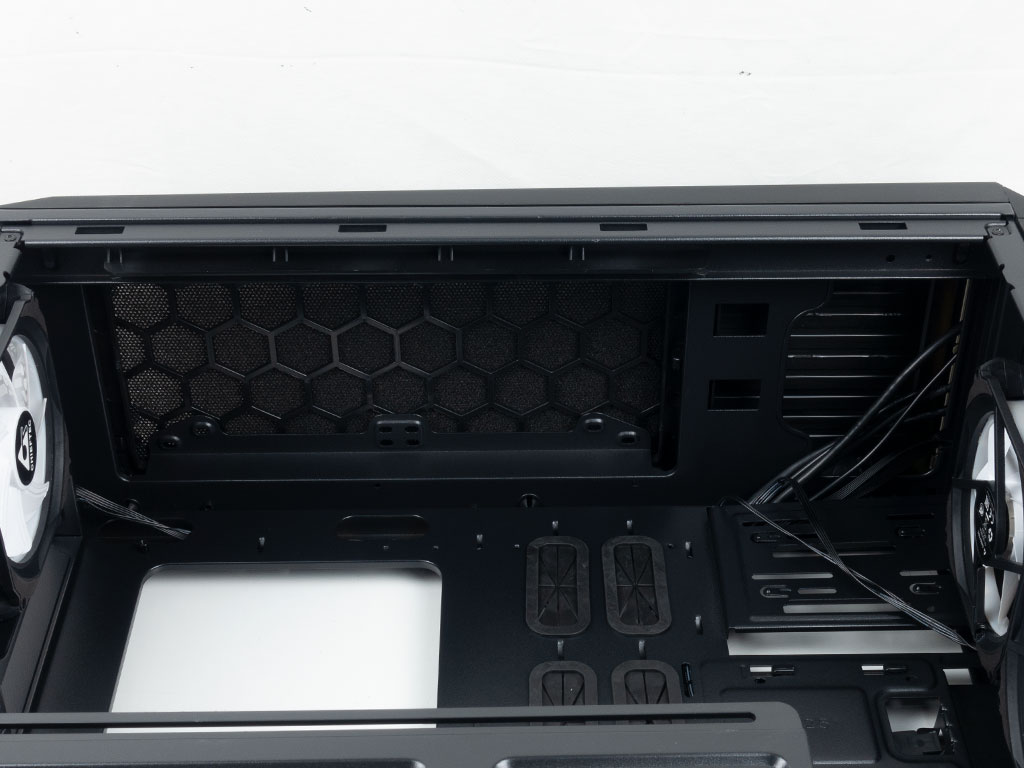
Looking at the ceiling, you can see that the reason for the limited fan/AIO support is purely tooling based and could have been avoided as the metal frame element has simply not been modernized to make use of this space.
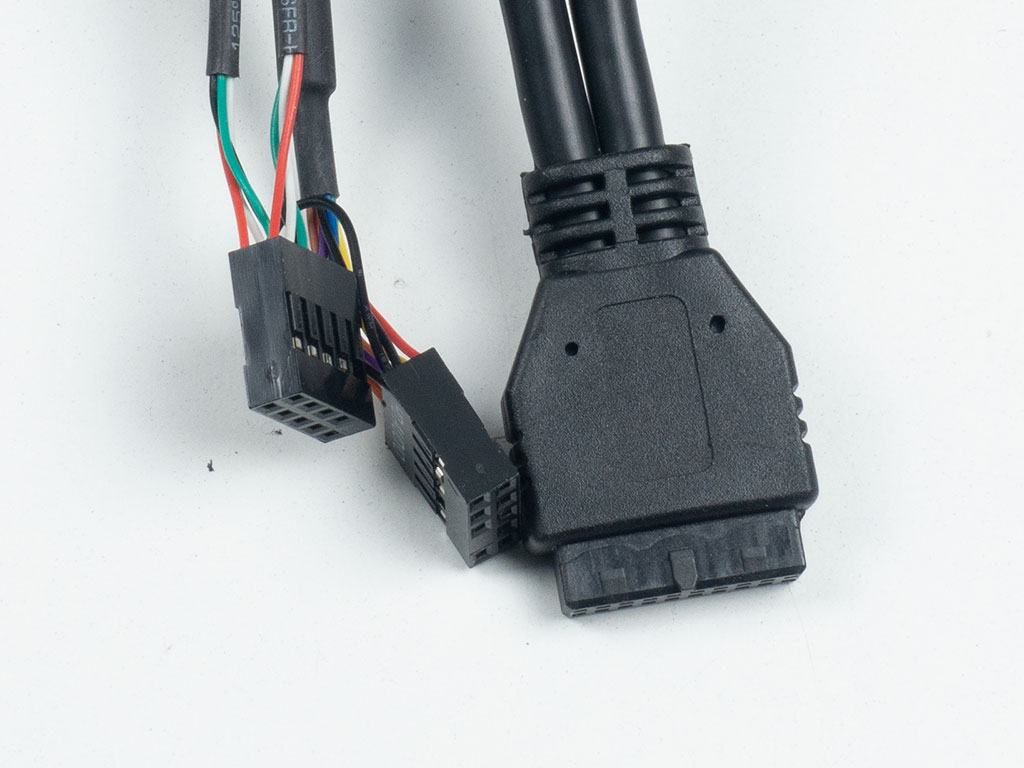
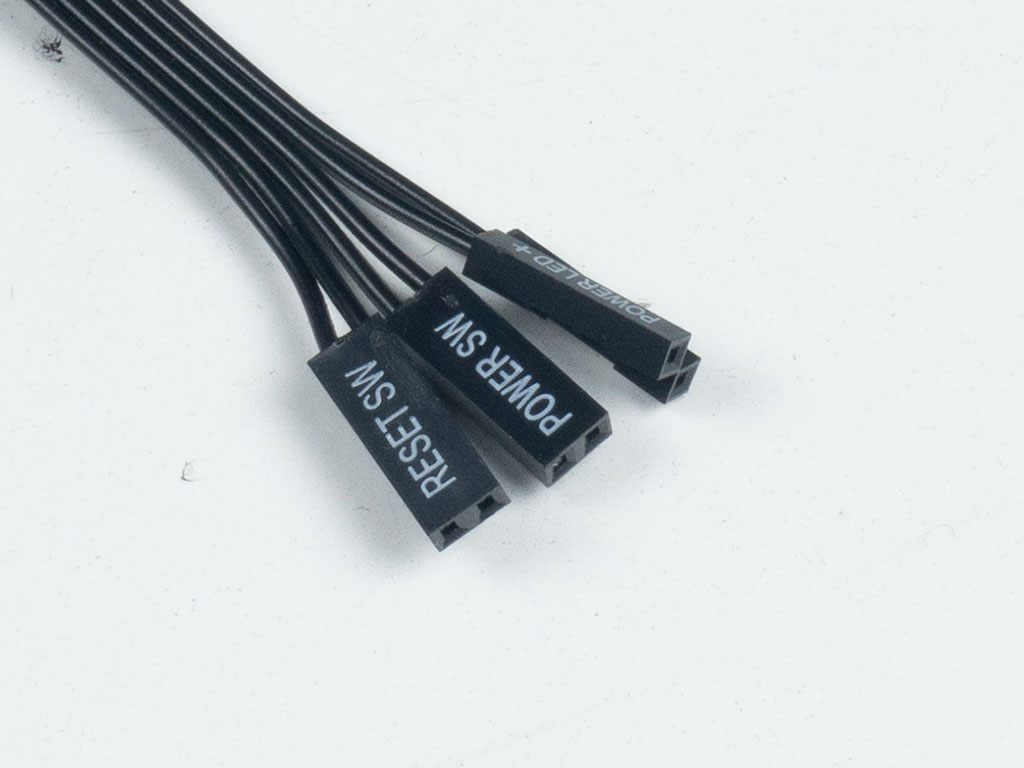
All the wiring in regards to the IO and case power/reset buttons is of default variety and all of the usual black color. The Chieftec Stallion 3 provides a power LED, but lacks an storage activity one.
Mar 3rd, 2025 23:36 EST
change timezone
Latest GPU Drivers
New Forum Posts
- The future of RDNA on Desktop. (14)
- Cooling problems persist on LGA1700 (25)
- Cryptocoin Value and Market Trend Discussion (1613)
- It's happening again, melting 12v high pwr connectors (993)
- GameTechBench GPU benchmark is already out! (291)
- *Severe micro stutters* cyberpunk 2077 Please help (16)
- Easy to open wired mice (0)
- Was pentium 4 an over engineered CPU? (93)
- Will you buy a RTX 5090? (425)
- TPU's Nostalgic Hardware Club (20036)
Popular Reviews
- AMD Radeon RX 9070 Series Technical Deep Dive
- ASUS GeForce RTX 5070 Ti TUF OC Review
- be quiet! Pure Base 501 DX Review
- AMD Ryzen 7 9800X3D Review - The Best Gaming Processor
- MSI GeForce RTX 5070 Ti Vanguard SOC Review
- RAWM ES21M Review
- ASUS ROG Harpe Ace Mini Review
- MSI GeForce RTX 5070 Ti Ventus 3X OC Review
- EIZO FlexScan EV4340X Review - A Multitasking Powerhouse
- Gigabyte X870 Aorus Elite WiFi 7 Review
Controversial News Posts
- NVIDIA GeForce RTX 50 Cards Spotted with Missing ROPs, NVIDIA Confirms the Issue, Multiple Vendors Affected (513)
- AMD Plans Aggressive Price Competition with Radeon RX 9000 Series (274)
- AMD Radeon RX 9070 and 9070 XT Listed On Amazon - One Buyer Snags a Unit (260)
- AMD Mentions Sub-$700 Pricing for Radeon RX 9070 GPU Series, Looks Like NV Minus $50 Again (248)
- NVIDIA Investigates GeForce RTX 50 Series "Blackwell" Black Screen and BSOD Issues (244)
- AMD RDNA 4 and Radeon RX 9070 Series Unveiled: $549 & $599 (229)
- AMD Radeon RX 9070 and 9070 XT Official Performance Metrics Leaked, +42% 4K Performance Over Radeon RX 7900 GRE (195)
- AMD Radeon RX 9070-series Pricing Leaks Courtesy of MicroCenter (158)