 11
11
Cooler Master Centurion 590 Review
Finished Looks »Assembly

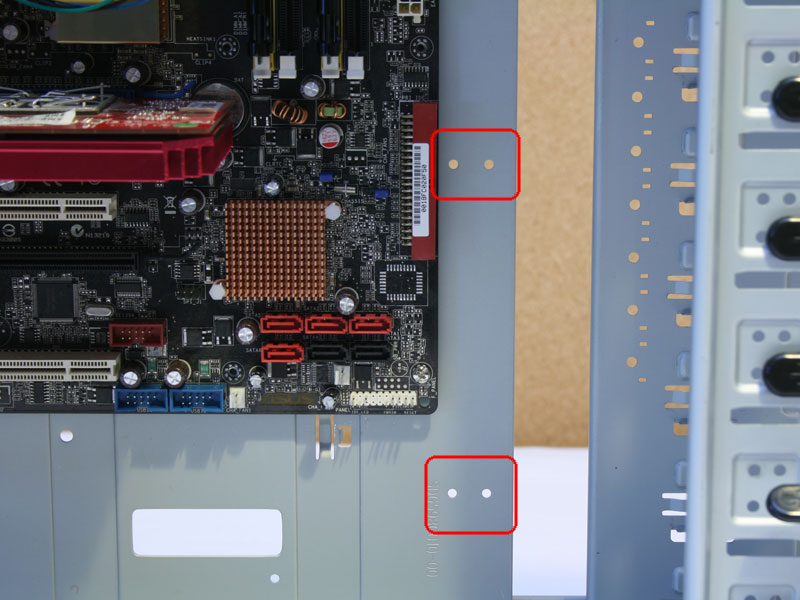
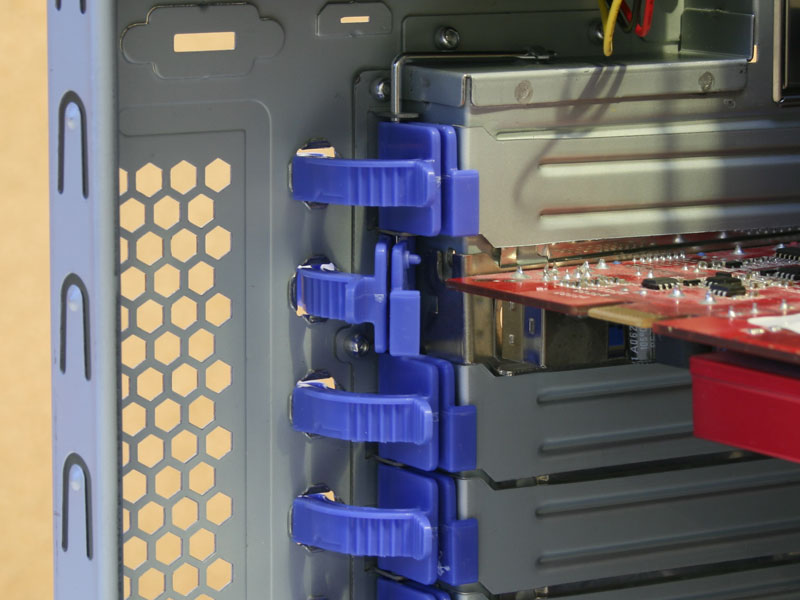
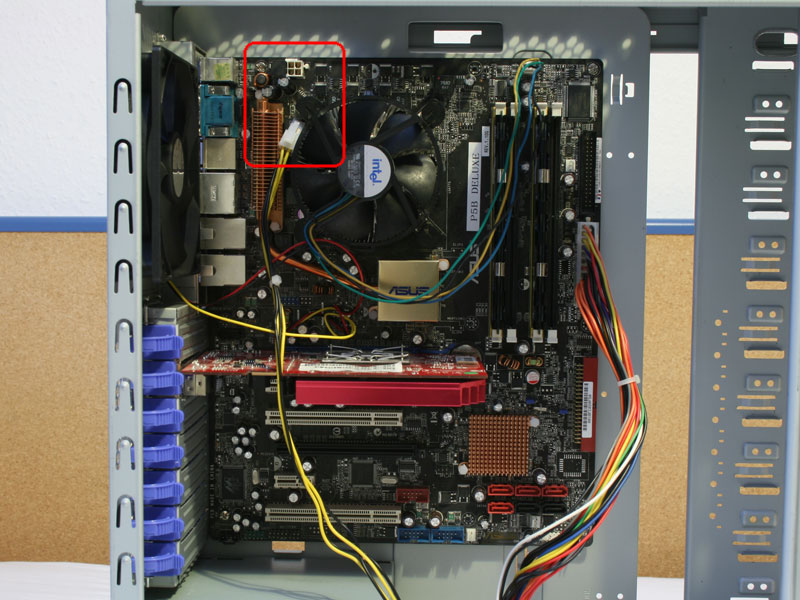
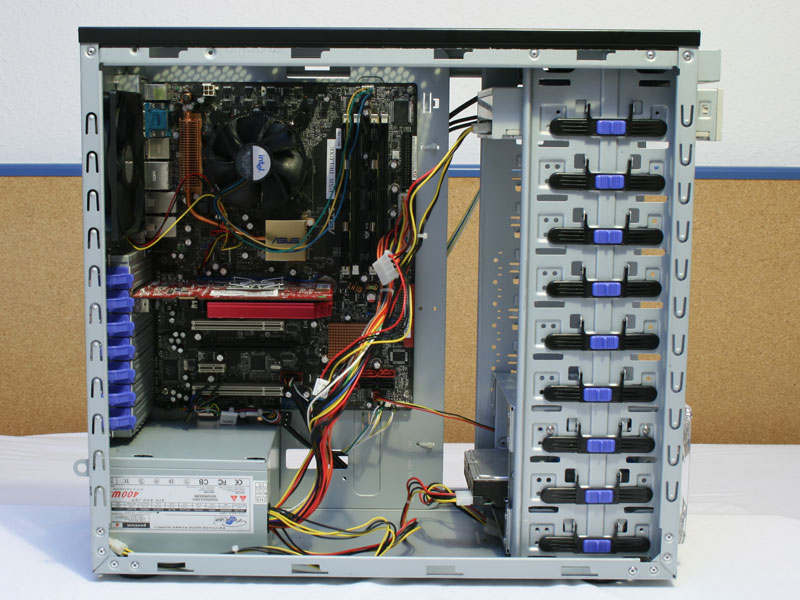
Installing the mainboard is done just like any other standard case. First the stand-offs need to be screwed into the appropriate locations, then the board is placed on them and fixed with screws. Another nice little surprise are holes in the mainboard tray, to the right of the mainboard. These do not seem to have any specific function at first sight, but once the motherboard is in place, it becomes apparent that these are to be used with the included zip ties. The plastic locks on each expansion slot work well with small cards, but will most likely not manage to hold something as large as a Radeon HD3870 X2 or GeForce 9800 GX2. The locks cannot be simply removed either, but you should be able to squeeze a screw past the entire construction instead.
Using the afore mentioned holes, I managed to route the I/O cables down the back of the mainboard, out of sight. This makes for a very easy way to keep the insides clean.
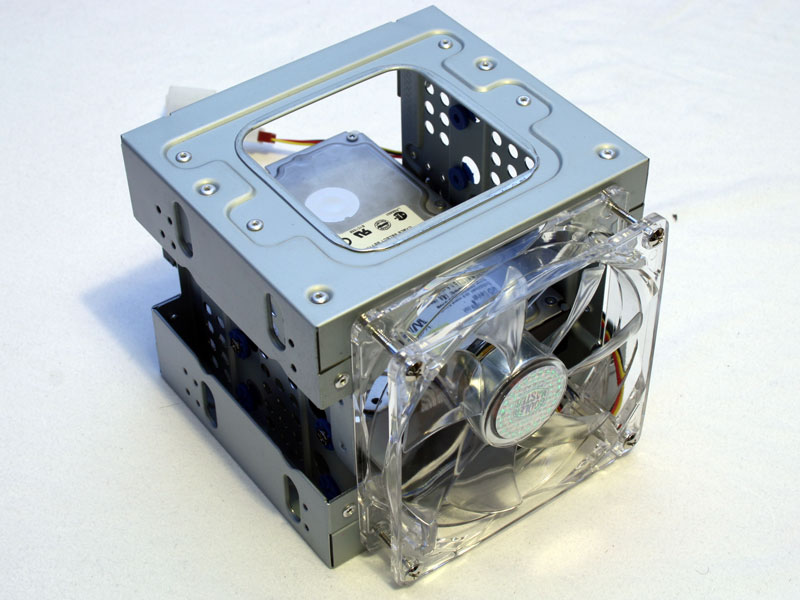
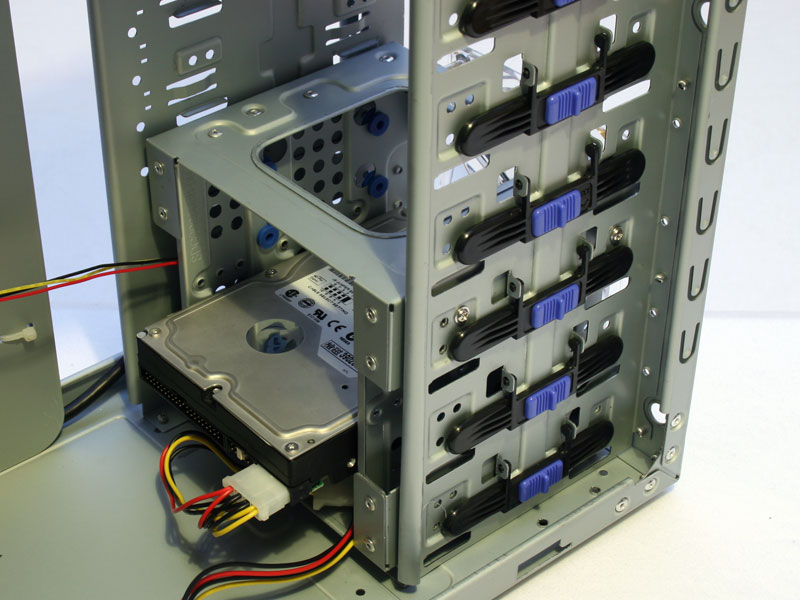
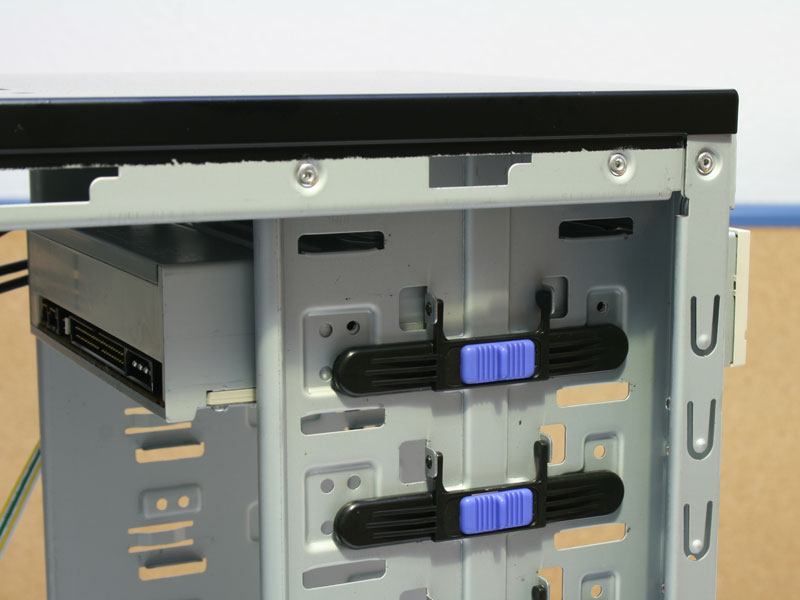
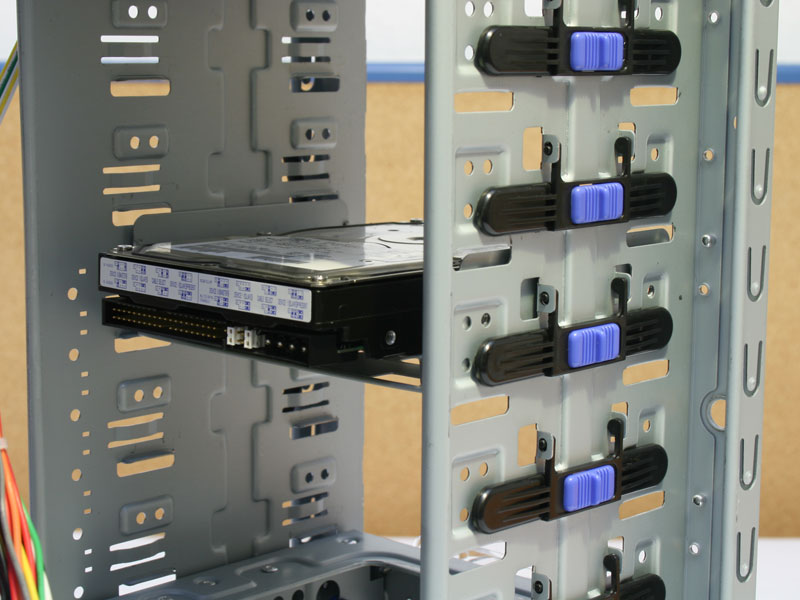
Installing the hard drives can be easily done outside the case. The cage can take a total of four drives and has rubber spacers to stop vibration from the drives from being amplified by the chassis itself. Once the hard drives are in place, slide the entire cage back into the preferred location. I suggest the bottom, as it won't interfere with any graphic cards. It can then be secured in place by the black and violet locks. These hold well, but once again do allow for some play. You need to place screws on the other side of the drive bays anyways, which then should hold everything securely in combination with the plastic mechanism. Optical drives are installed by sliding them into place and locking them down. A single screw on the other side should suffice for transportation.
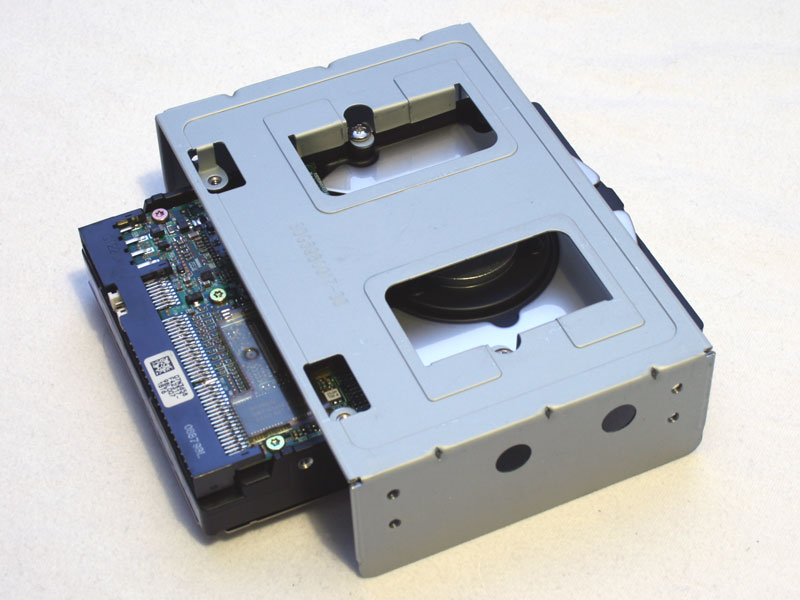
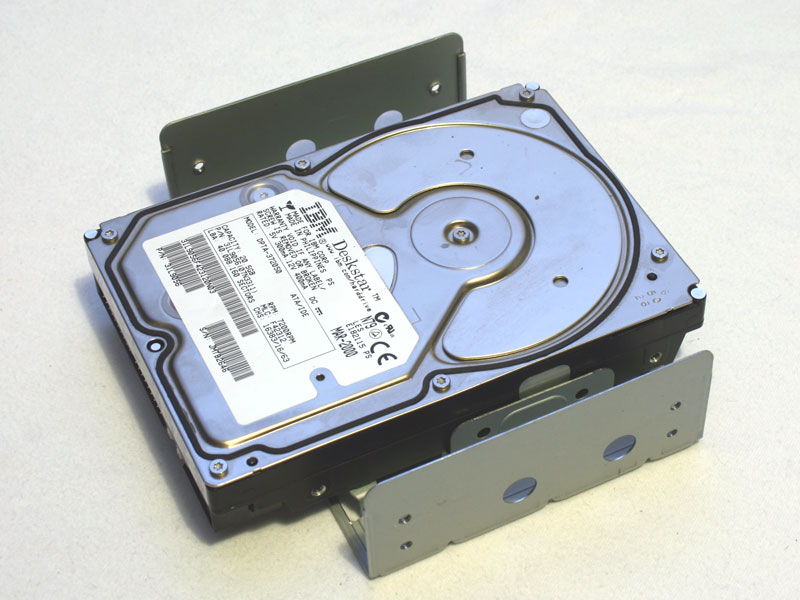
The 3.5 inch bay adapter can be used for a card reader or floppy drive, but also for a hard drive. Such a unit is secured by screws on the underside of the drive. The entire contraption is then pushed into the desired slot and locked into place just like an optical drive.
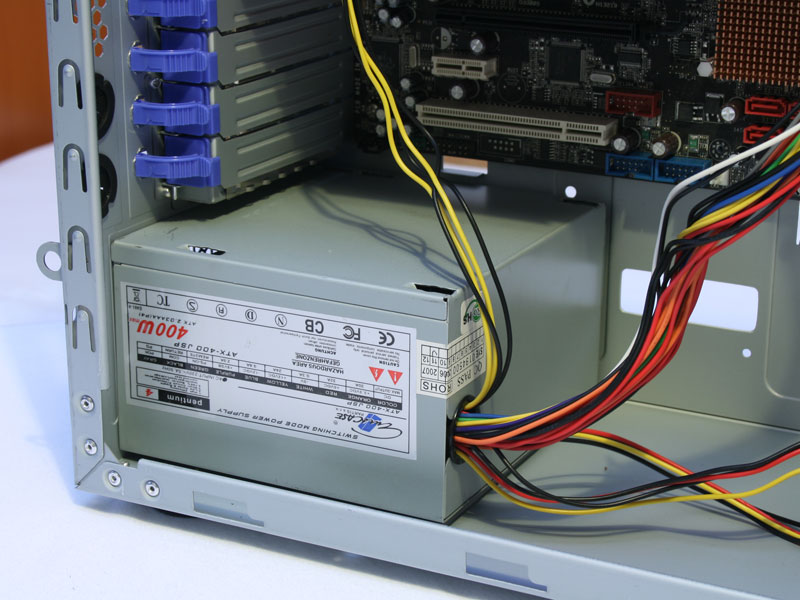
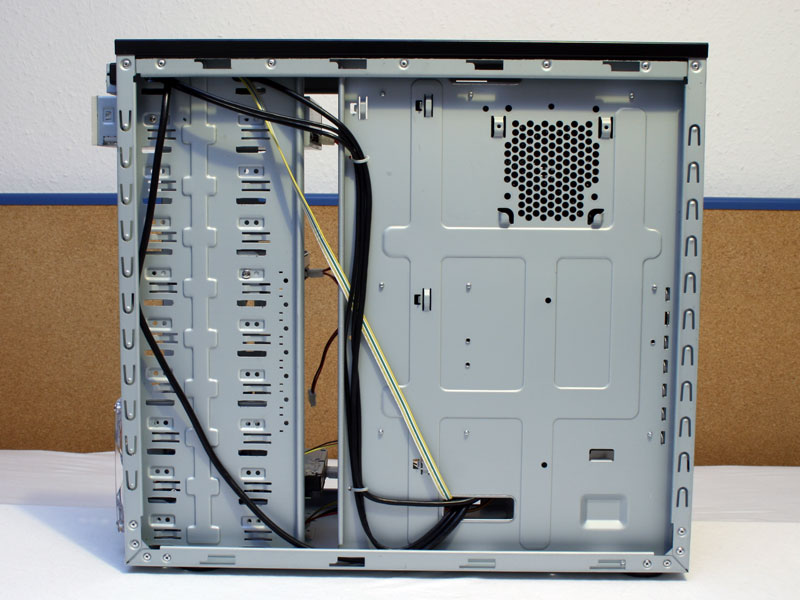
Installing a PSU is nothing out of the ordinary. You require four screws to hold the unit in place. Just make sure you have a power supply with long cables, as most mainboard manufacturers place the P4 power and ATX connector fairly high up on the board. I was using an OEM 400W PSU and the 4-pin CPU power cable was too short.
Once all the parts are installed, it is time to replace the front and secure both side panels. There is still plenty of space to work with and the fact that you can remove the entire front makes things a bit easier as well, as you can reach into the case from that direction as well.
Jan 31st, 2025 16:03 EST
change timezone
Latest GPU Drivers
New Forum Posts
- What are you playing? (22722)
- Is there a way to improve graphics in an old DX9.0c game? (13)
- The TPU UK Clubhouse (25670)
- In regards to the 5090 "launch" a message to Nvidia, from a long time supporter (31)
- Help How to disable Amd Bios Protection/Security Check RSA Key... (1)
- Advice for DDR5 CU-DIMM 2 x 24gb 8400mhz (16)
- Asus PCE-AC55BT can I replace the WLAN card? (3)
- External Samsung T7 Speed issue (7)
- 1.18 and NVAPP dependencies. (2)
- I dont like my new CPU Cooler (66)
Popular Reviews
- NVIDIA GeForce RTX 5080 Founders Edition Review
- NVIDIA DLSS 4 Transformer Review - Better Image Quality for Everyone
- ASUS GeForce RTX 5090 Astral OC Review - Astronomical Premium
- Galax GeForce RTX 5080 1-Click OC Review
- NVIDIA GeForce RTX 5090 Founders Edition Review - The New Flagship
- MSI GeForce RTX 5090 Suprim SOC Review
- MSI GeForce RTX 5080 Vanguard SOC Review
- ASUS GeForce RTX 5080 Astral OC Review
- Gigabyte GeForce RTX 5080 Gaming OC Review
- MSI GeForce RTX 5080 Suprim SOC Review
Controversial News Posts
- NVIDIA 2025 International CES Keynote: Liveblog (470)
- AMD Debuts Radeon RX 9070 XT and RX 9070 Powered by RDNA 4, and FSR 4 (349)
- AMD is Taking Time with Radeon RX 9000 to Optimize Software and FSR 4 (251)
- AMD Denies Radeon RX 9070 XT $899 USD Starting Price Point Rumors (238)
- AMD Radeon RX 9070 XT & RX 9070 Custom Models In Stock at European Stores (226)
- NVIDIA GeForce RTX 5090 Features 575 W TDP, RTX 5080 Carries 360 W TDP (217)
- New Leak Reveals NVIDIA RTX 5080 Is Slower Than RTX 4090 (214)
- AMD's Radeon RX 9070 Launch Faces Pricing Hurdles (175)