 15
15
CM Storm Stryker Review
Value & Conclusion »Assembly
Installing the mainboard is a standard fare. There is plenty of space around the CPU area for even the largest ones.

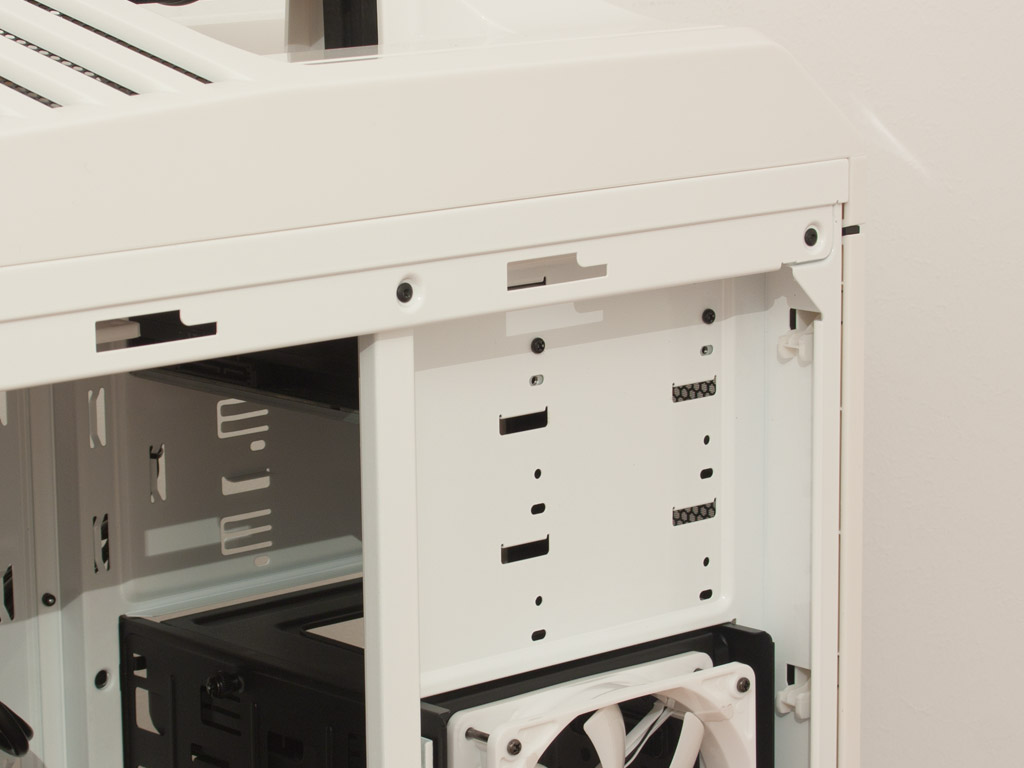
The little bay for 2.5 inch drives is simple but functional. Simply use the included screws to secure the device. You may install it in such a way that the connectors aim either towards the mainboard tray or the main side panel.
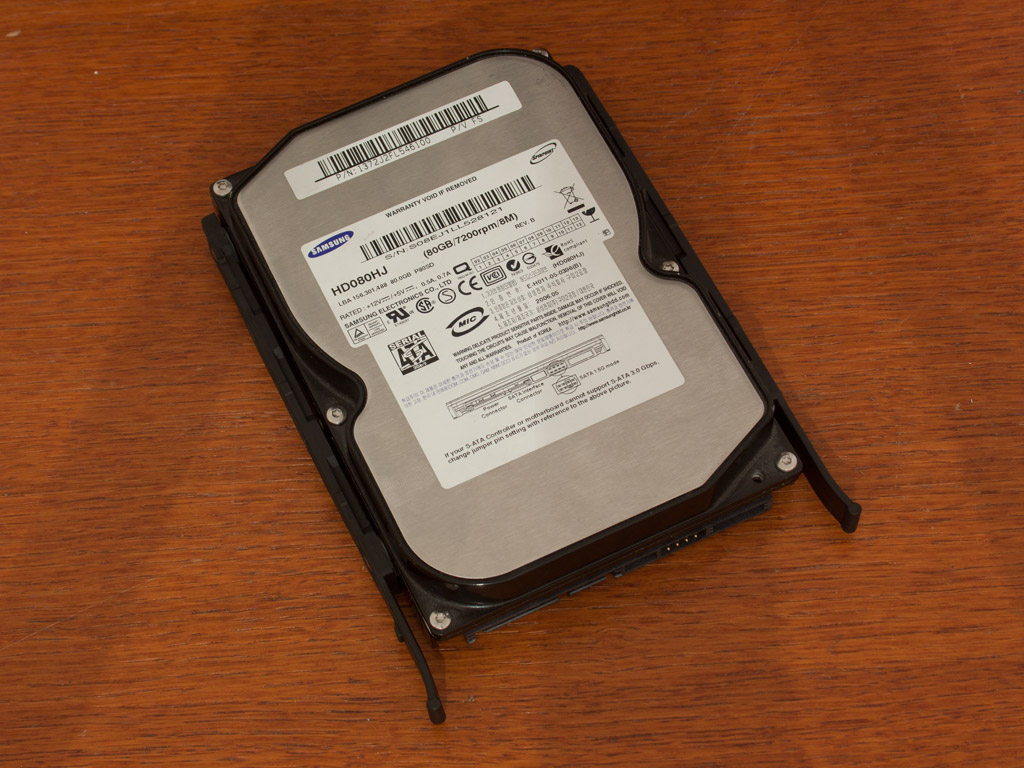
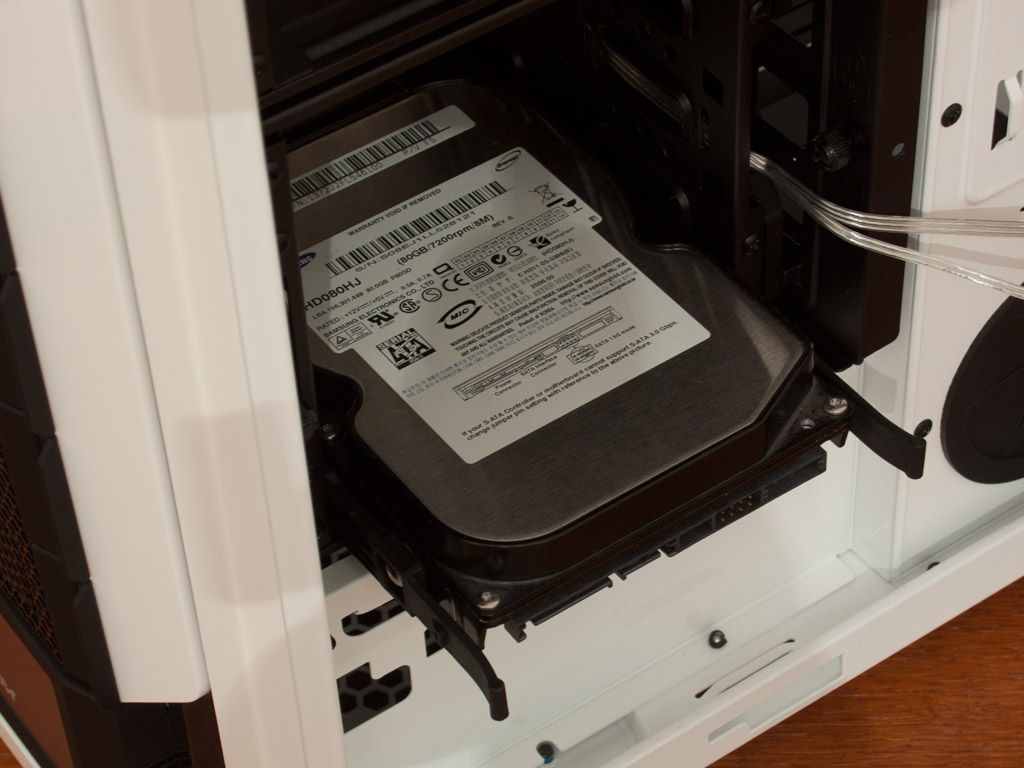
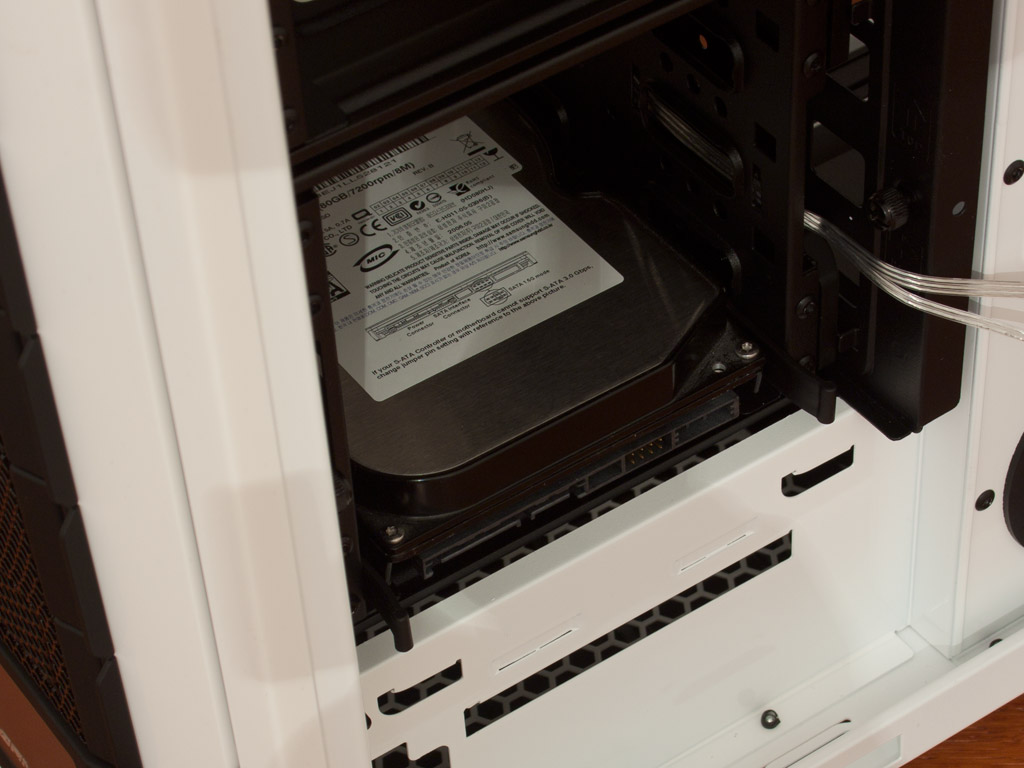
Installing a 3.5 inch drive is quite simple as well. Just place the drive unto the plastic tray and slide it into the bay until it snaps into place. This entire process is completely tool-less. The connectors face away from the fan or towards the interior of the chassis, depending on the setup of the drive bay.
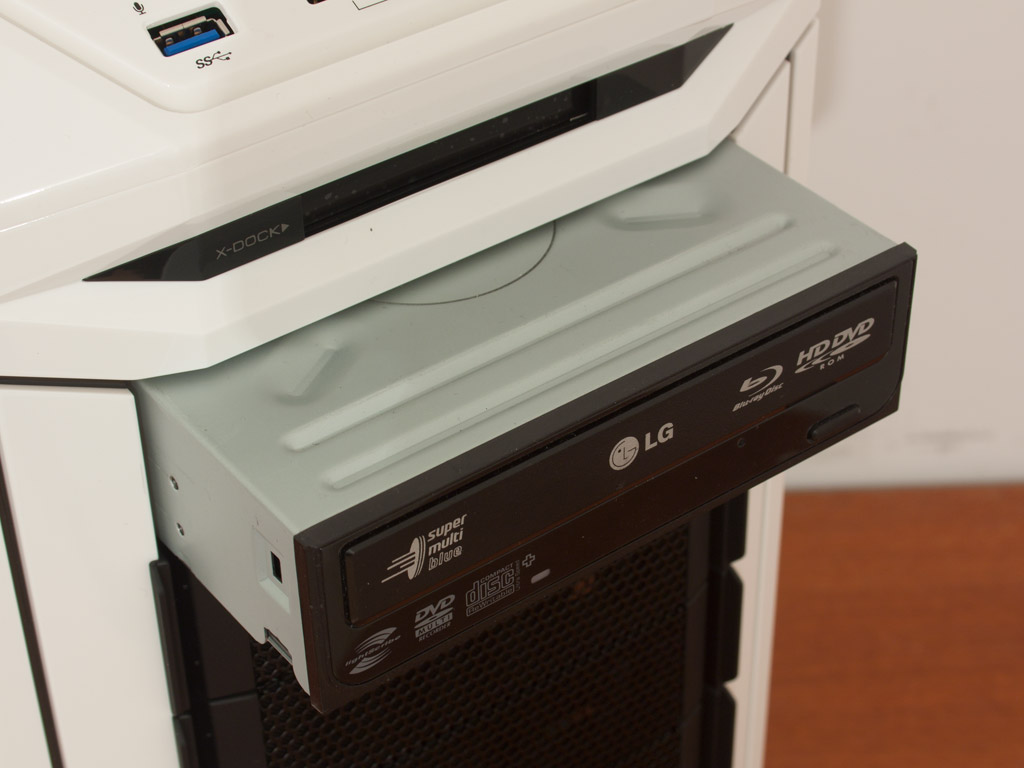
Inserting 5.25 inch drives is equally simple. Due to the construction of the front, the covers can easily be removed without having to pry off the entire panel. Once free, just slide in the device and screw it down properly. While there are plenty of capable screw-less or tool-less systems on the market today, the use of such traditional means is quite alright. The only thing I would have liked to see would have been thumb screws instead of normal ones.
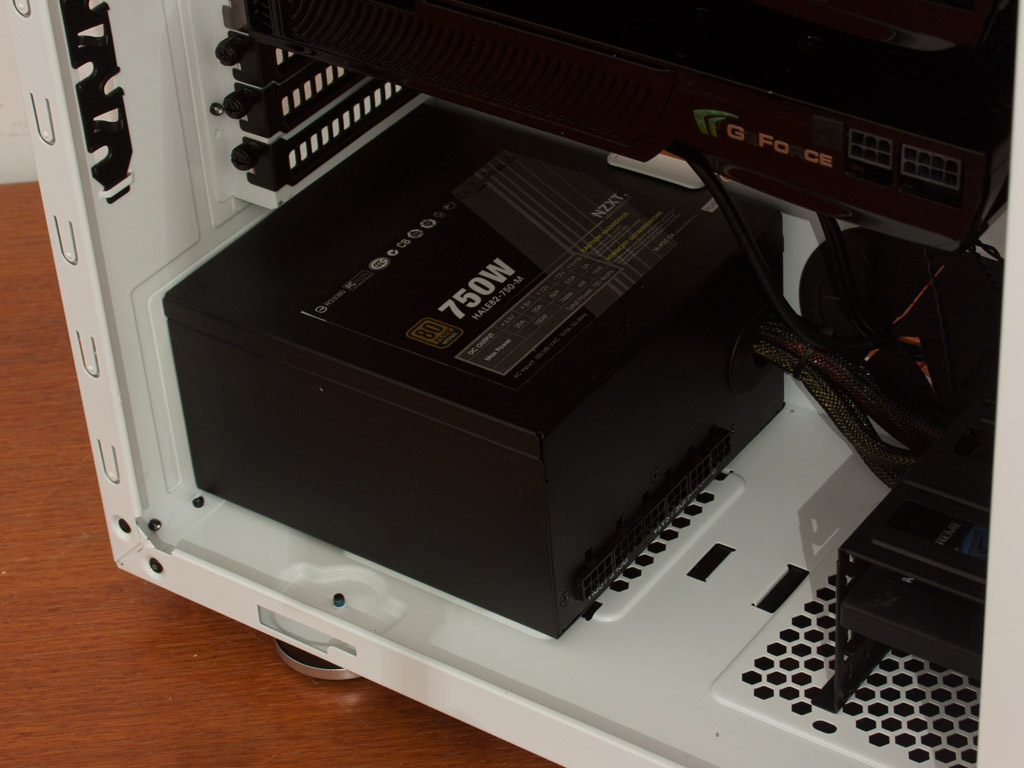
Last but not least, the PSU installation is just as you would expect. Place it in the proper location, screw it down and call it a day.

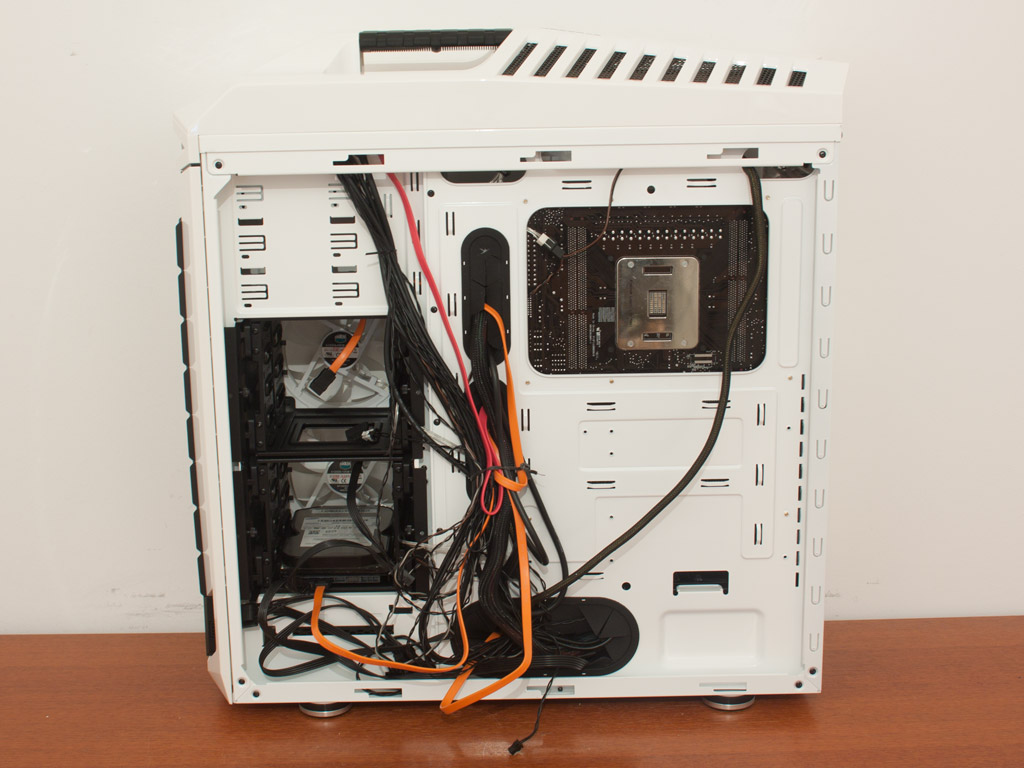
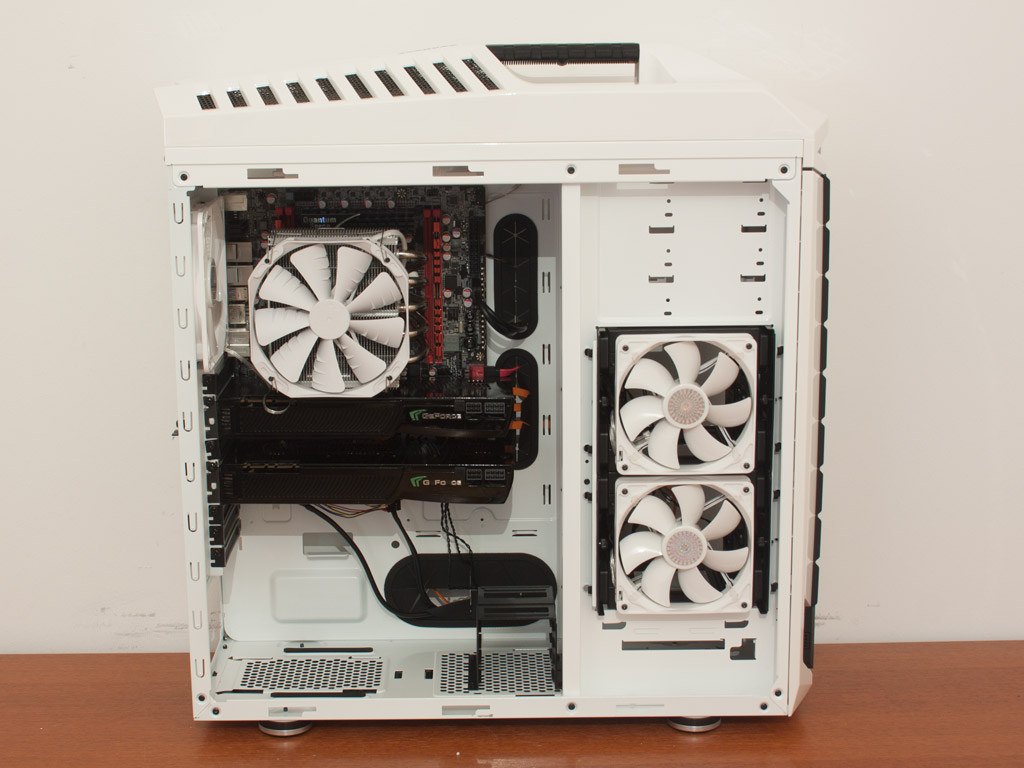
Once all the parts are in place, the interior of the chassis looks squeaky clean thanks to the excellent cable management possibilities. As you can see, the mess is hidden nicely behind the mainboard tray.
Finished Looks
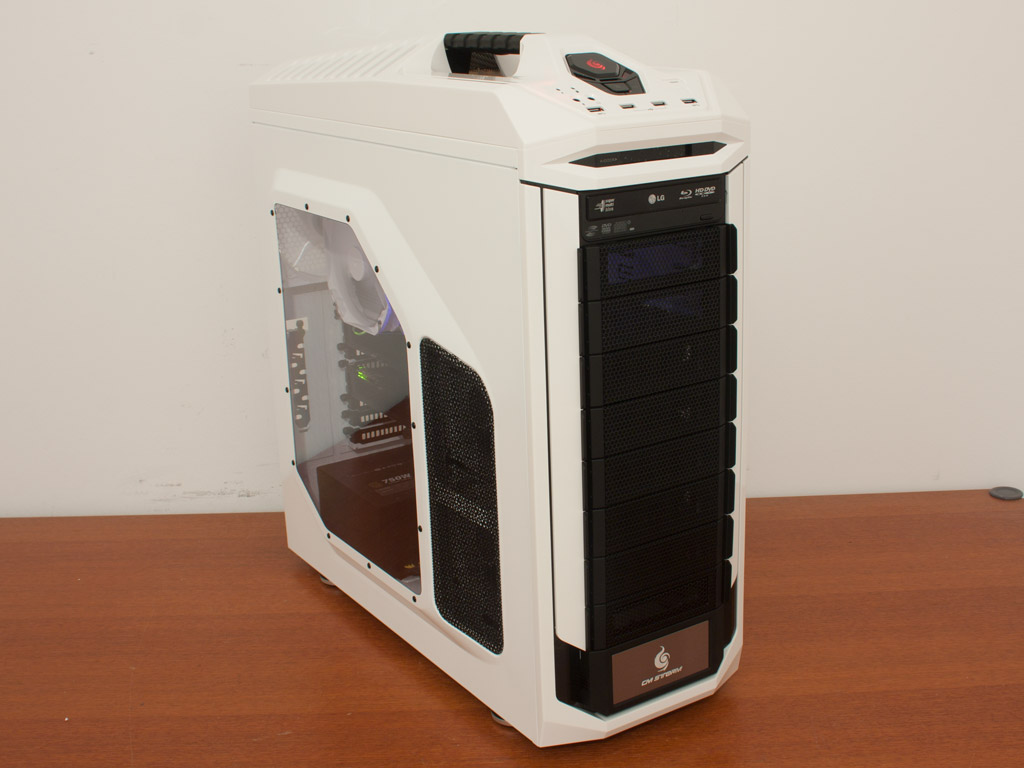
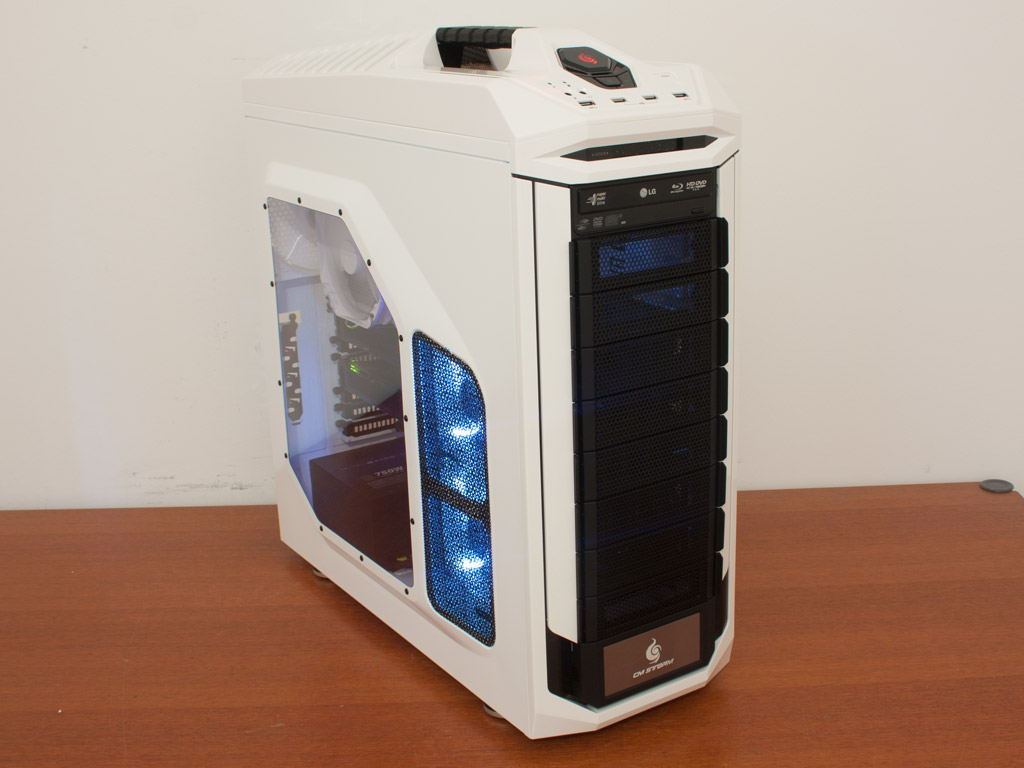
Overall, the CM Storm Stryker makes an excellent impression when closed up and turned on. Both fans are equipped with red LEDs, which may be toggled on or off by a button in the top part of the chassis.
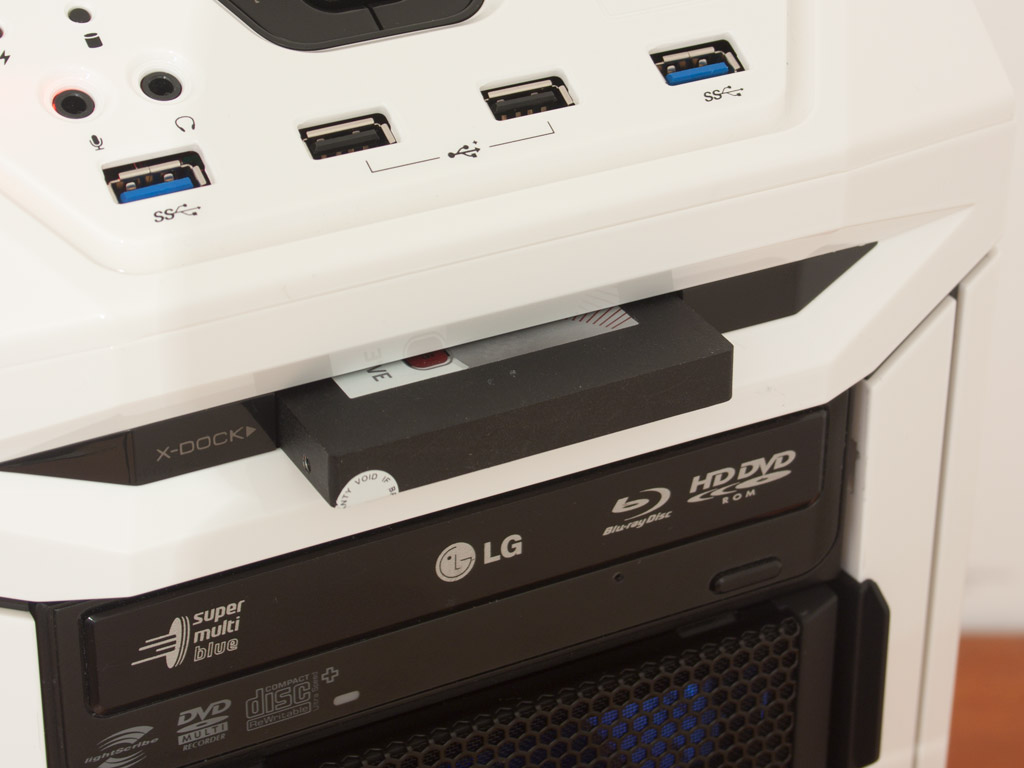
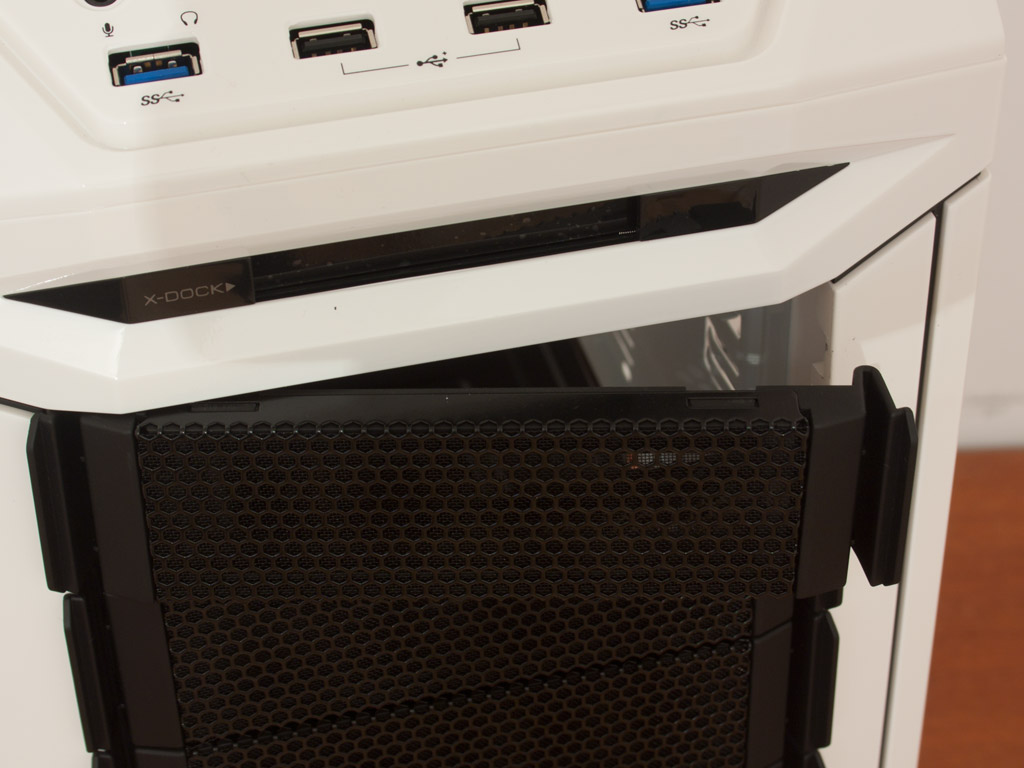
The 2.5 inch hot swap bay is quite simple but works as advertised. There is no eject functionality so you just have to pull it out when no longer needed. There is enough of the drive sticking out that you should be able to do so easily.
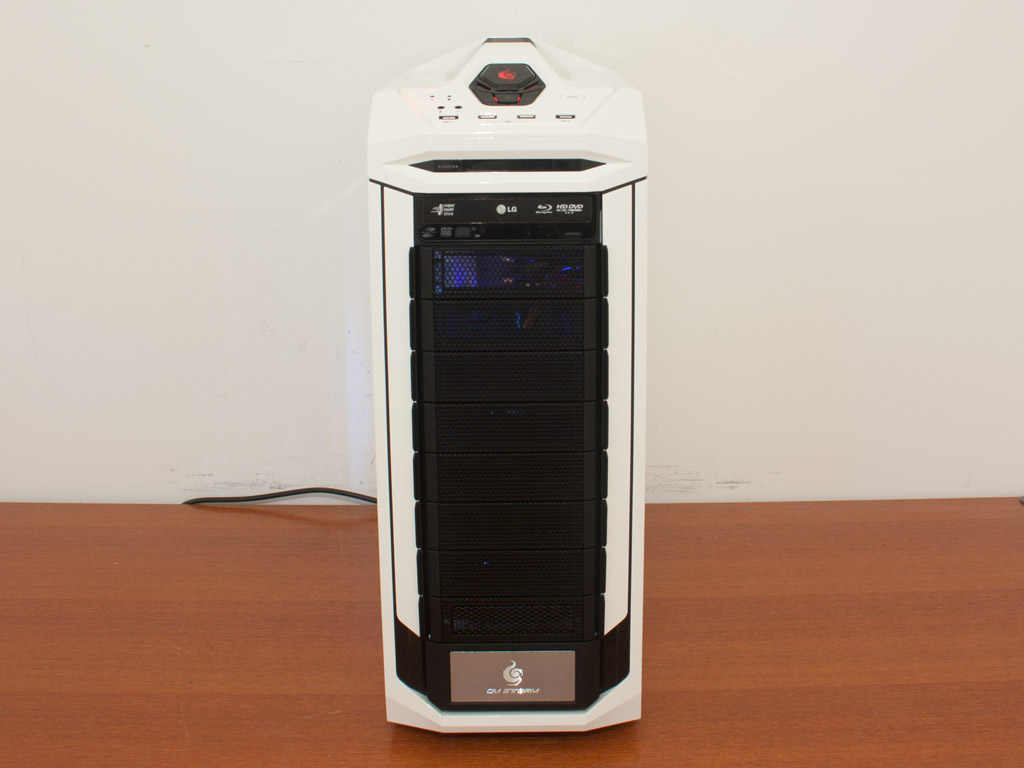
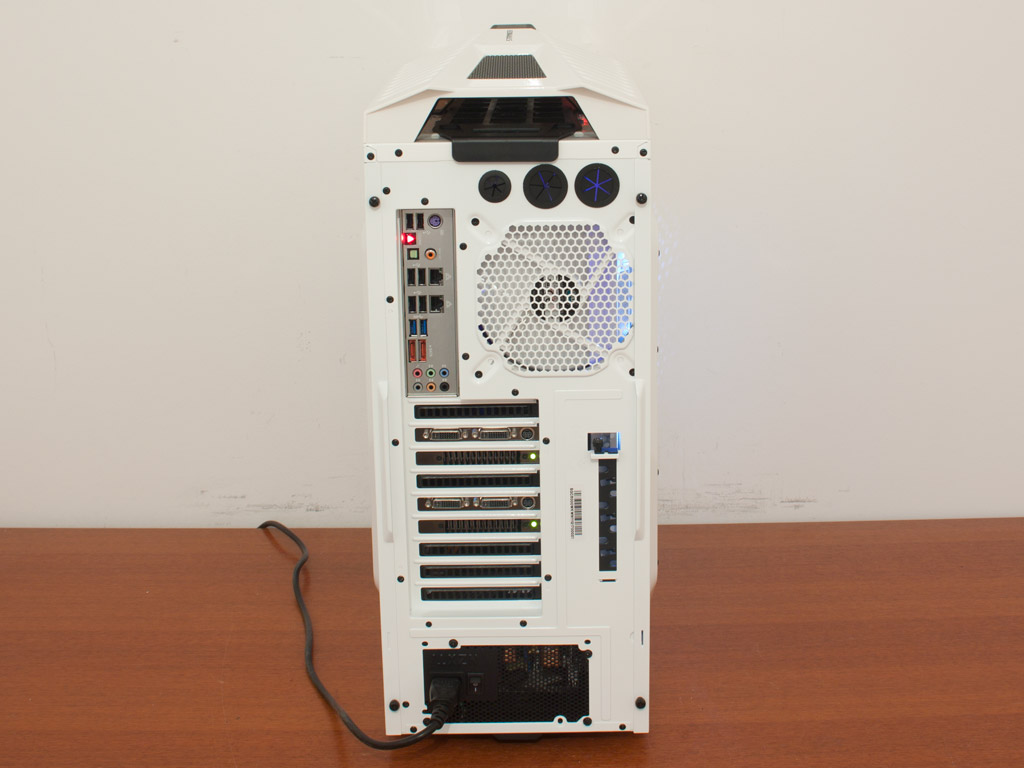
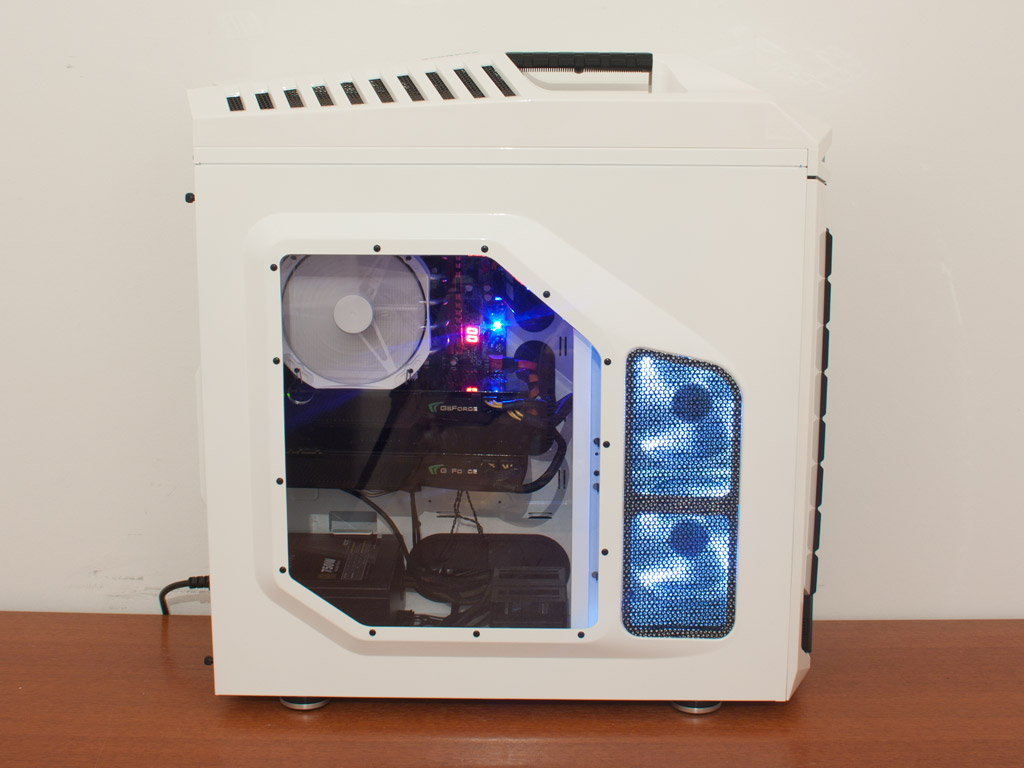
Even with the optical drive installed, it does not really disturb the overall looks of the chassis, as there are so many other elements that draw your focus. In the rear all areas are free and reachable, while the side shows a bit of the red LEDs from one of the fans shining through.
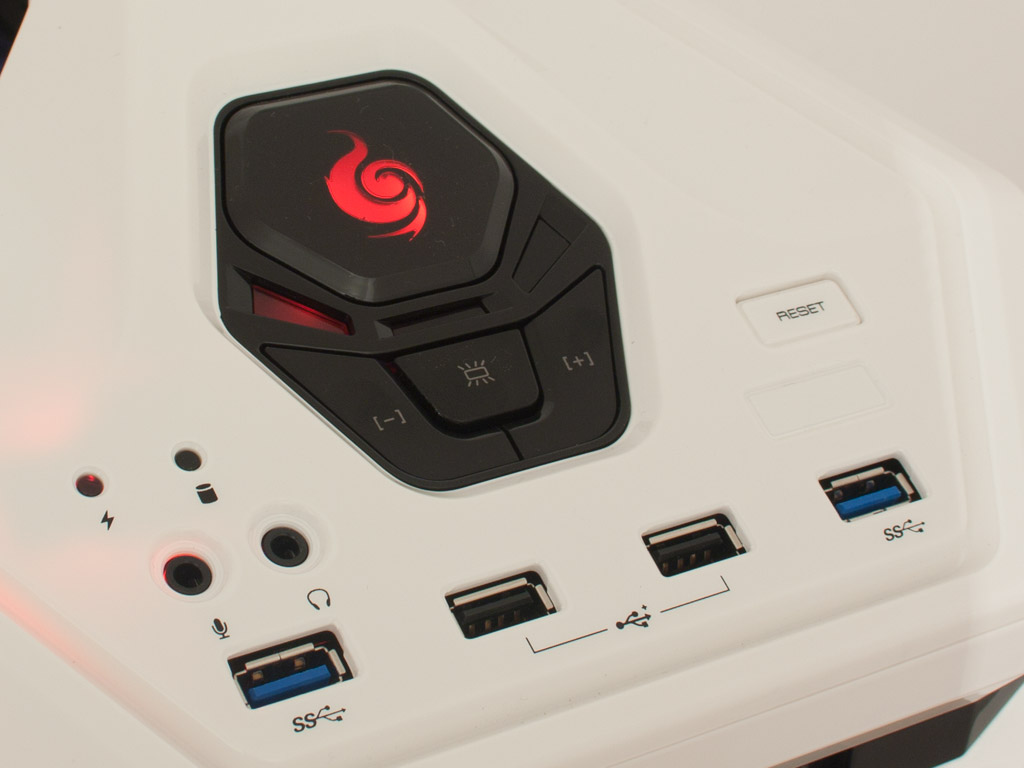
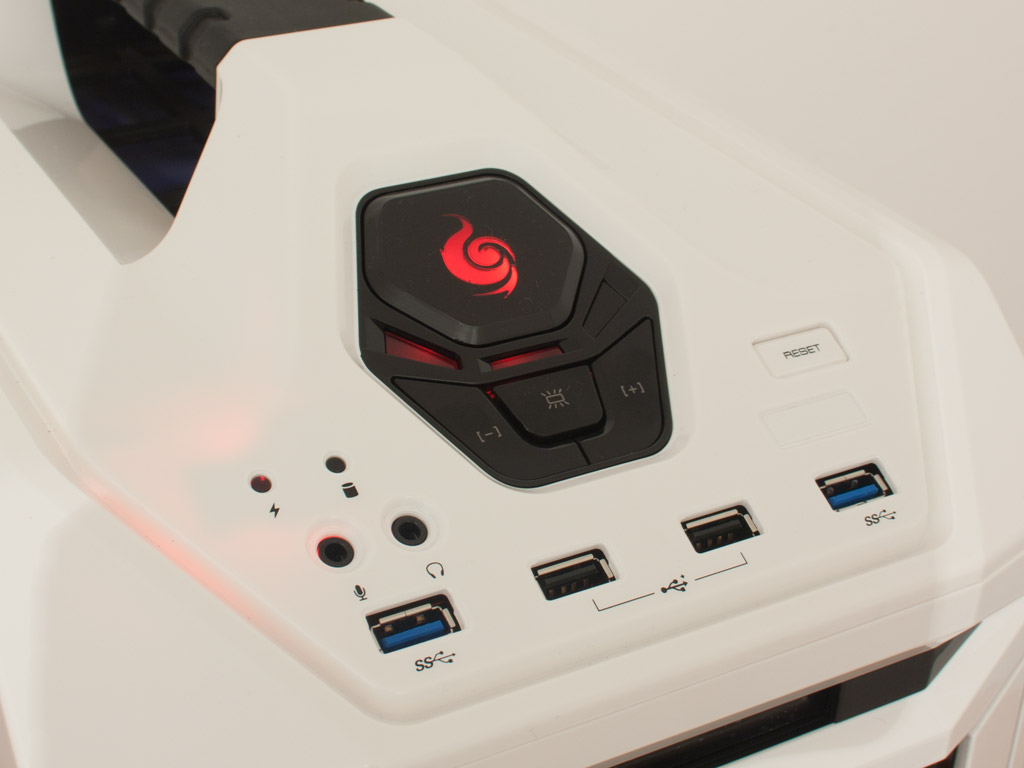
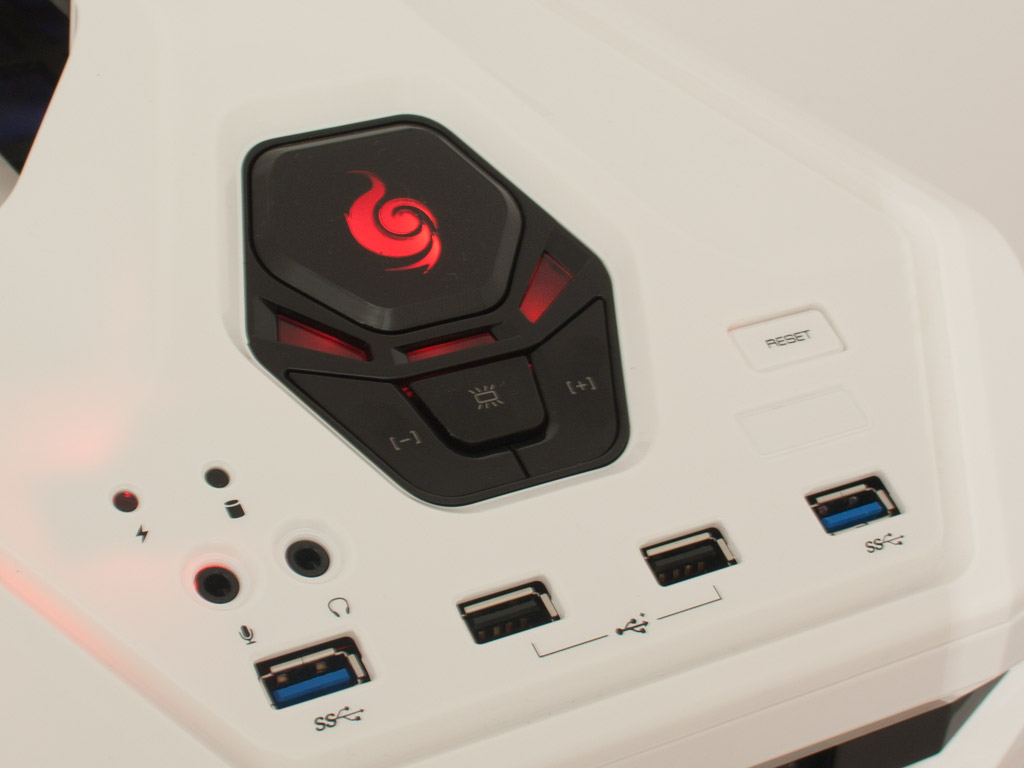
On top of the chassis, the CM Storm logo acts as a power LED while the multi-stage fan controller utilizes separate LEDs to display the current setting. This entire setup actually works quite well and looks damn spiffy.
Feb 24th, 2025 01:35 EST
change timezone
Latest GPU Drivers
New Forum Posts
- It's happening again, melting 12v high pwr connectors (903)
- is a 650w gold power supply enough for a amd 7 7700x OR 7 5700x and a msi geforce rtx 4070 super 12go gaming x slim ? (5)
- Your PC ATM (35252)
- What's your latest tech purchase? (23203)
- Testing max ram overclock pn Ryzen 1700 (73)
- How many continuous hours will it last my mini pc if connected to the LiitoKala battery pack that I've found for a cheap price ? (3)
- How's your old spinner holding up? (38)
- Looking for video bios for ATI Rage 128 (0)
- Problem with NVIDIA Driver 572.16 and GTX 1080 Ti. (3)
- New fans (3)
Popular Reviews
- ASUS GeForce RTX 5070 Ti TUF OC Review
- MSI GeForce RTX 5070 Ti Ventus 3X OC Review
- darkFlash DY470 Review
- MSI GeForce RTX 5070 Ti Vanguard SOC Review
- MSI GeForce RTX 5070 Ti Gaming Trio OC+ Review
- Galax GeForce RTX 5070 Ti 1-Click OC White Review
- Palit GeForce RTX 5070 Ti GameRock OC Review
- Fantech Aria II Pro Review
- Gigabyte GeForce RTX 5090 Gaming OC Review
- AMD Ryzen 7 9800X3D Review - The Best Gaming Processor
Controversial News Posts
- NVIDIA GeForce RTX 5090 Spotted with Missing ROPs, NVIDIA Confirms the Issue, Multiple Vendors Affected, RTX 5070 Ti, Too (454)
- AMD Radeon 9070 XT Rumored to Outpace RTX 5070 Ti by Almost 15% (304)
- AMD Plans Aggressive Price Competition with Radeon RX 9000 Series (271)
- AMD Radeon RX 9070 and 9070 XT Listed On Amazon - One Buyer Snags a Unit (247)
- Edward Snowden Lashes Out at NVIDIA Over GeForce RTX 50 Pricing And Value (241)
- AMD Denies Radeon RX 9070 XT $899 USD Starting Price Point Rumors (239)
- NVIDIA Investigates GeForce RTX 50 Series "Blackwell" Black Screen and BSOD Issues (229)
- New Leak Reveals NVIDIA RTX 5080 Is Slower Than RTX 4090 (215)