 16
16
Corsair Hydro Series H110 Review
Installed »Installation


Installing the Corsair Hydro Series H110 on Intel's Socket 2011 platform is pretty straightforward. Enthusiasts on other sockets will find the process a bit more involved because of the backplate. That said, mounting is not as easy to work with when compared to the now discontinued H100. Much like the H90, users will need to use the standoffs marked for the LGA2011 socket. Feed the screw through the top clip and down through the Intel mounting bracket before making sure the bottom clip is facing in the proper direction for the intended socket. At this point, it is as simple as pushing the bottom clip up until is snaps into place. Unlike other Intel sockets, there is no backplate to deal with for LGA2011, but, again, all AMD sockets and every other Intel sockets will, on the other hand, need the appropriate backplate.
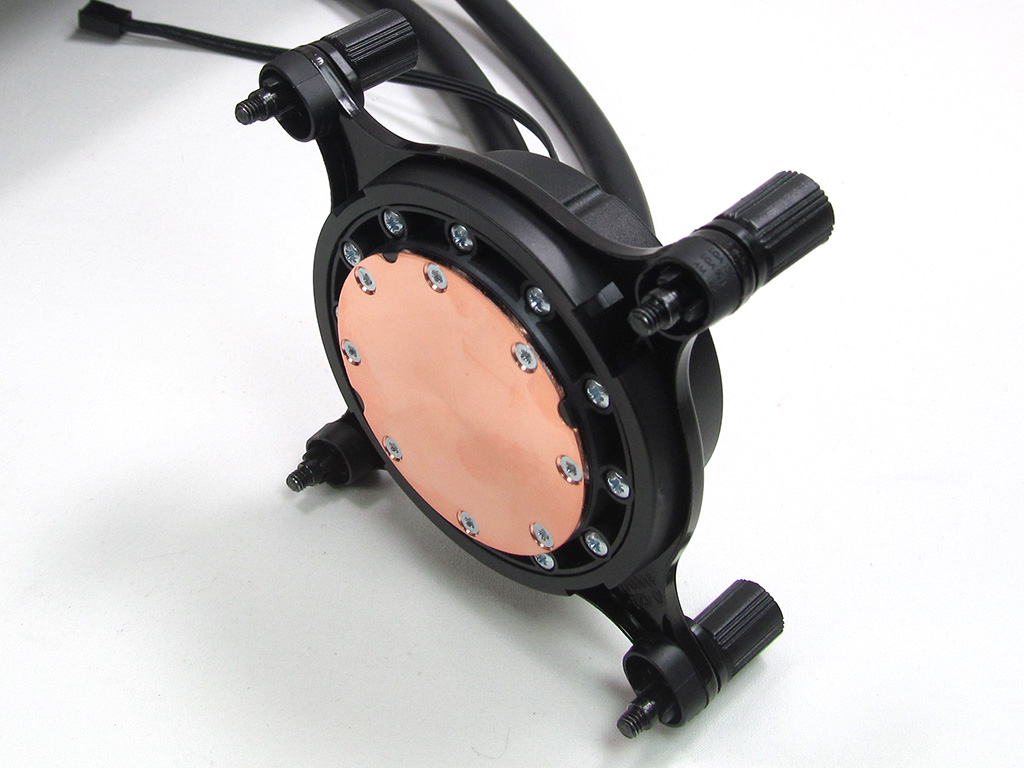
After installing all the thumbscrews into the mounting bracket, users will need to line up the small metal clips with the slots on the pump. After doing so, push up on the mounting ring to snap it into place. This will lock the mounting hardware into place. At this stage, the Corsair Hydro Series H110 is ready to be mounted onto the CPU.


Depending on the case chosen (please make sure your case can fit the Corsair H110), users may wish to install the fans first. Corsair recommends installing them as intakes to make them suck cool air in through the top of the case, blowing down on the radiator and into the chassis. Regardless, this step is pretty straightforward.
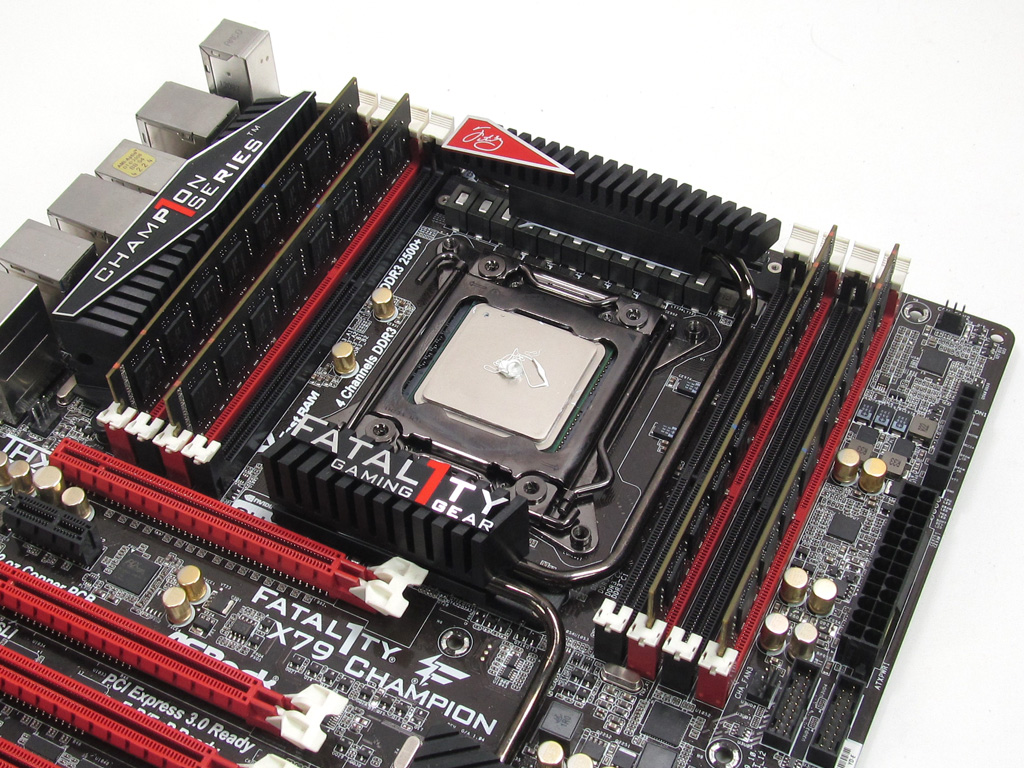

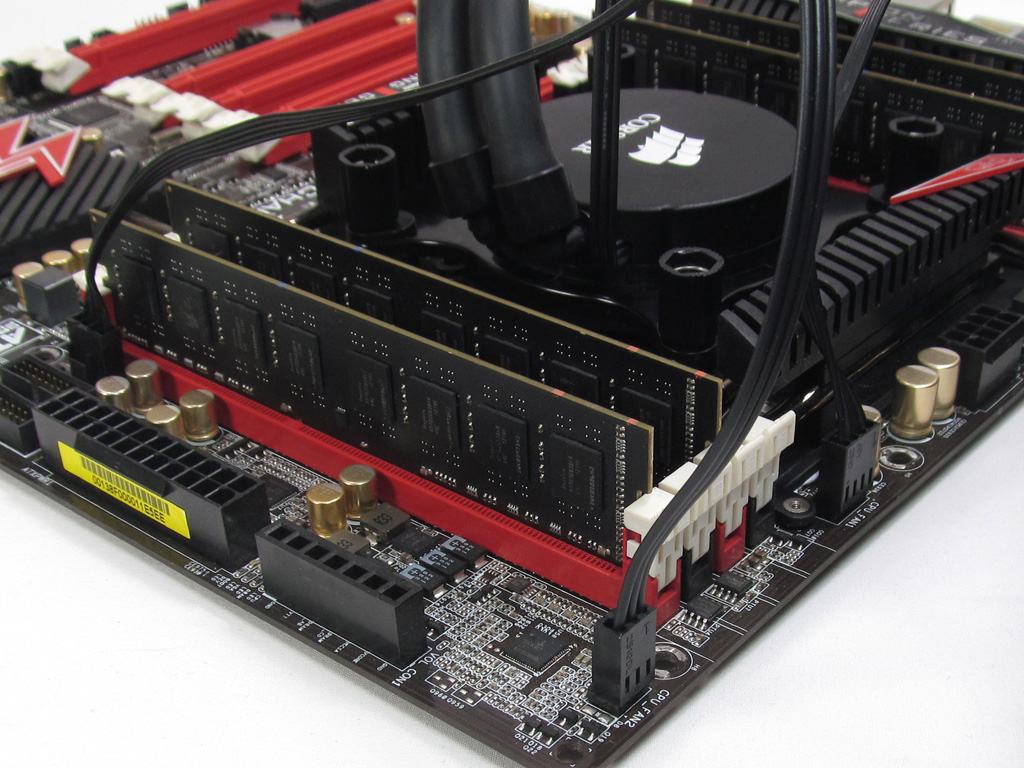
Though the Corsair Hydro Series H110 does come with pre-applied thermal paste, I have removed it to keep testing fair by using the same TIM on every cooler (Artic Silver Ceramique 2). After applying the TIM, it is a very simple process of lining up the thumbscrews with the four M4-threaded holes around the socket. Once aligned, screw the pump down while applying even pressure. Make sure not to over-tighten the thumb screws on other sockets - it can damage the backplate. Although rare, I thought it should be mentioned. Once attached, connect the fans and pump to the fan headers on the motherboard. I feel it would have been nice of Corsair to include a splitter cable to make things a bit easier at this stage. Nevertheless, with that last step taken care of, the Corsair Hydro Series H110 is ready to go.
The overall process of installing the Corsair Hydro Series H110 wasn't too hard—the cooler is a 6 on a scale of 1 (hardest) to 10 (easiest). Compared to previously released Hydro Series products, like the H100, the H110 is more difficult to install, but not terribly so.
Mar 6th, 2025 01:30 EST
change timezone
Latest GPU Drivers
New Forum Posts
- Get 9070 or 9070 XT (27)
- Cooling problems persist on LGA1700 (33)
- The future of RDNA on Desktop. (86)
- Windows 11 General Discussion (5828)
- Was pentium 4 an over engineered CPU? (124)
- i5-8365U Fujitsu Lifebook Throttlestop (1)
- [HELP] High End PC Random Stutters [Ryzen 7 7700X & 4090] (45)
- Rare GPUs / Unreleased GPUs (2040)
- RTX5000 Series Owners Club (148)
- Optical mouse switch (4)
Popular Reviews
- Sapphire Radeon RX 9070 XT Nitro+ Review - Beating NVIDIA
- NVIDIA GeForce RTX 5070 Founders Edition Review
- ASUS Radeon RX 9070 TUF OC Review
- AMD Radeon RX 9070 Series Technical Deep Dive
- EIZO FlexScan EV4340X Review - A Multitasking Powerhouse
- RAWM ES21M Review
- ASUS GeForce RTX 5070 Ti TUF OC Review
- AMD Ryzen 7 9800X3D Review - The Best Gaming Processor
- MSI GeForce RTX 5070 Ti Vanguard SOC Review
- MSI GeForce RTX 5070 Ti Ventus 3X OC Review
Controversial News Posts
- NVIDIA GeForce RTX 50 Cards Spotted with Missing ROPs, NVIDIA Confirms the Issue, Multiple Vendors Affected (513)
- AMD Plans Aggressive Price Competition with Radeon RX 9000 Series (277)
- AMD Radeon RX 9070 and 9070 XT Listed On Amazon - One Buyer Snags a Unit (261)
- AMD Mentions Sub-$700 Pricing for Radeon RX 9070 GPU Series, Looks Like NV Minus $50 Again (248)
- NVIDIA Investigates GeForce RTX 50 Series "Blackwell" Black Screen and BSOD Issues (244)
- AMD RDNA 4 and Radeon RX 9070 Series Unveiled: $549 & $599 (241)
- AMD Radeon RX 9070 and 9070 XT Official Performance Metrics Leaked, +42% 4K Performance Over Radeon RX 7900 GRE (195)
- AMD Radeon RX 9070-series Pricing Leaks Courtesy of MicroCenter (158)