 28
28
DAN A4-SFX Review - Ultra Compact and Ready for Big GPUs
Assembly & Finished Looks »A Closer Look - Inside
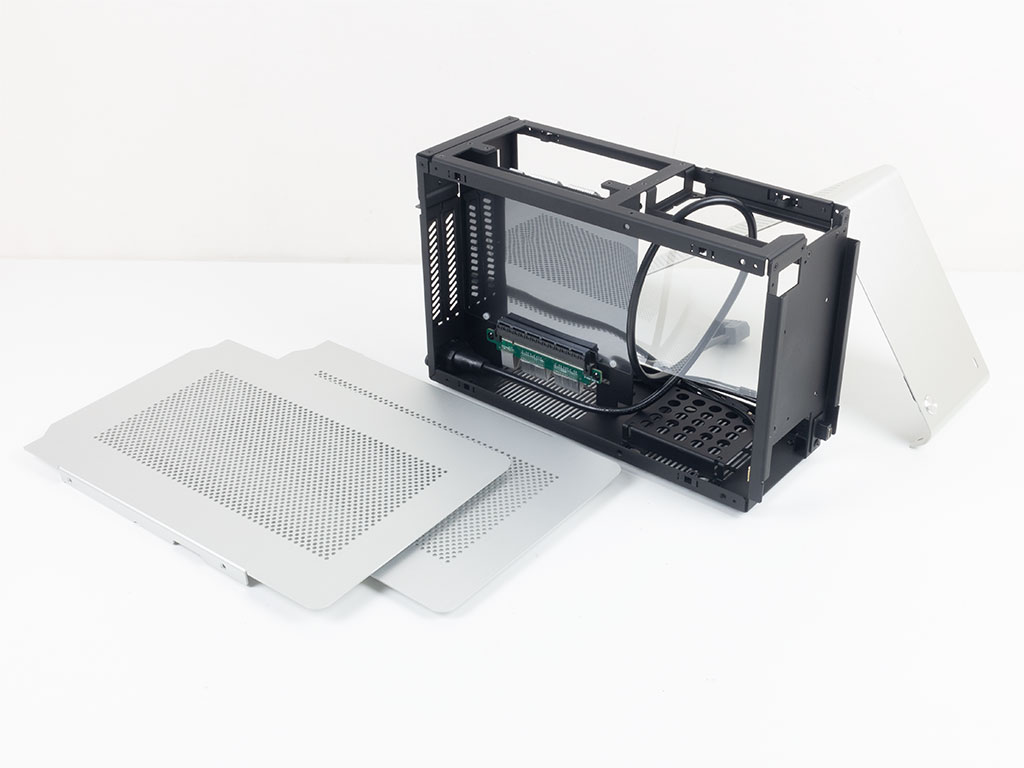
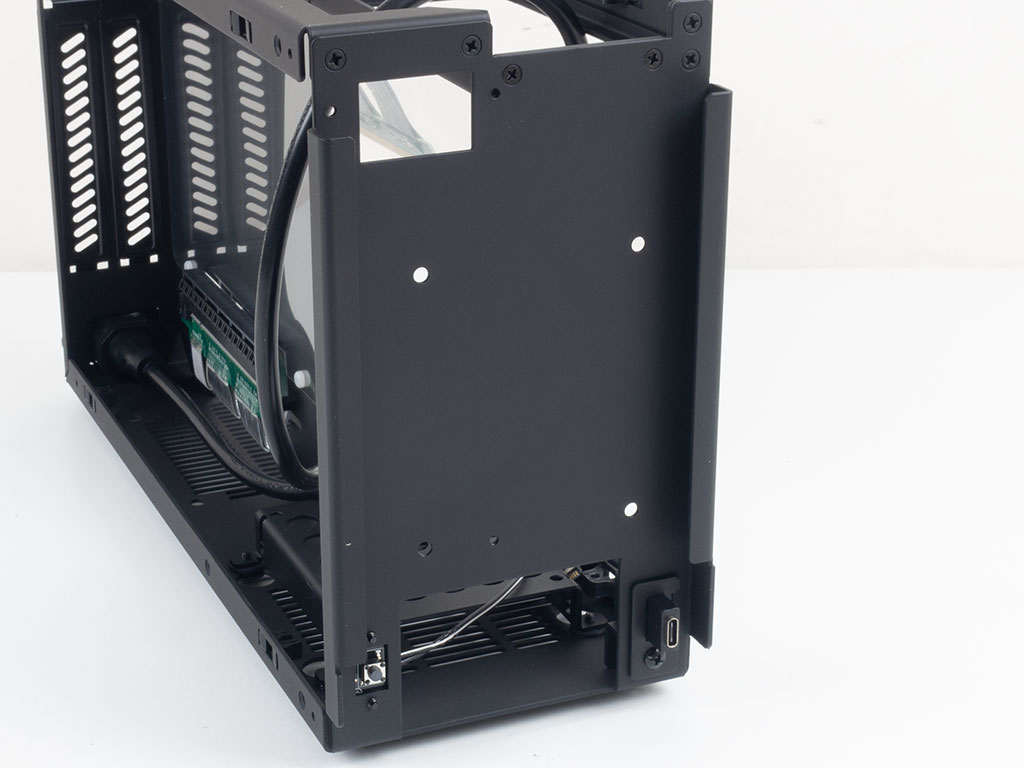
For assembly purposes, you can remove both side panels as well as the outer center layer of the chassis by removing a total of ten screws. By doing so, you get access to the chassis from three sides, which should make assembly quite easy for any ITX chassis.


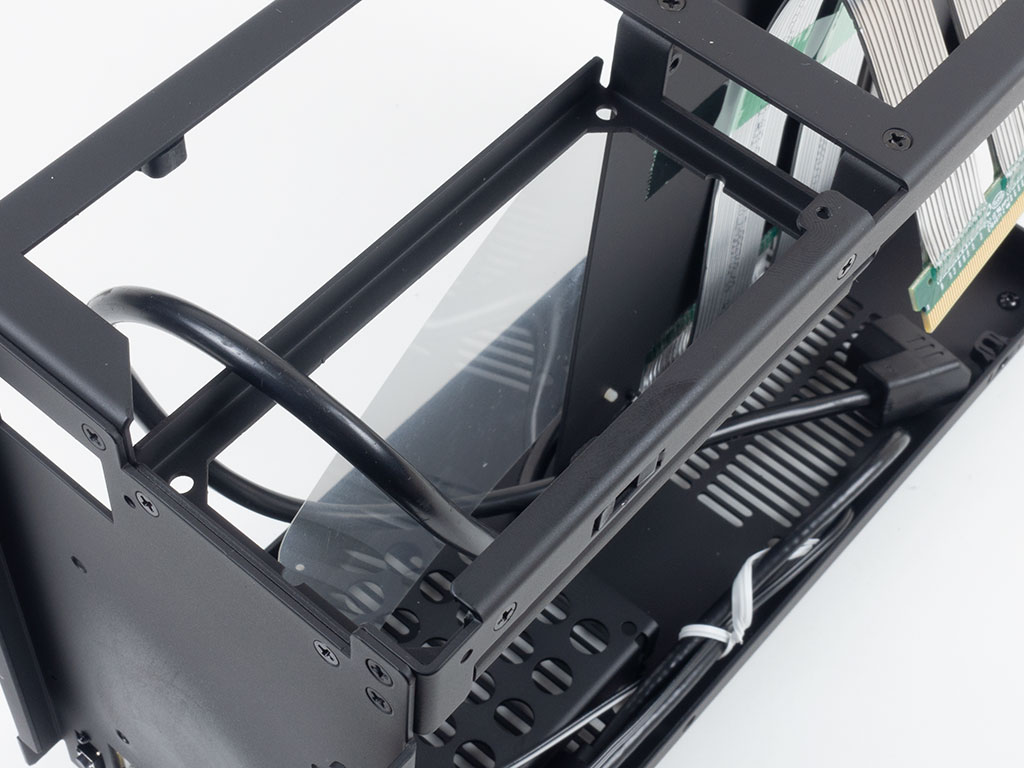
The right half of the chassis is meant for nothing else but your graphics card; DAN Cases does not envision it to be for a mix between a short GPU and more storage, for example. A pre-installed PCIe riser cable from 3M can also clearly be seen here. It actually comes taped down out of the box, which was quite convenient, so I left that tape in place during assembly. A plastic lining has also been applied as an insulating barrier between your GPU and the chassis. On the other side, you will get to install the motherboard as well as your SFX power supply.
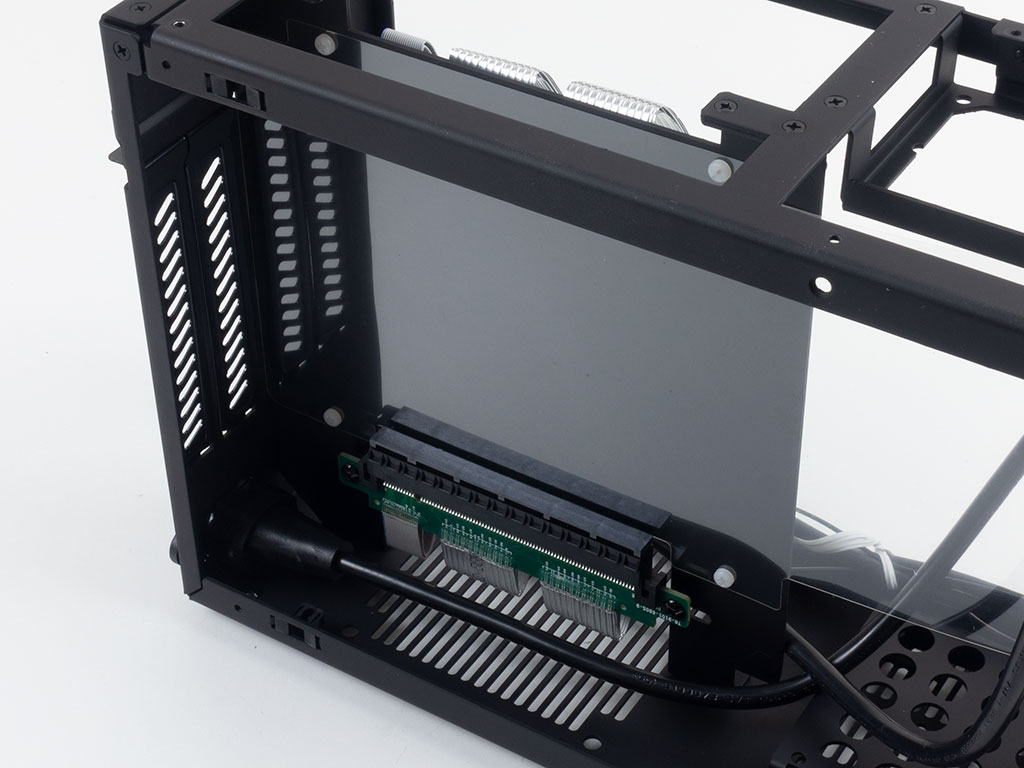
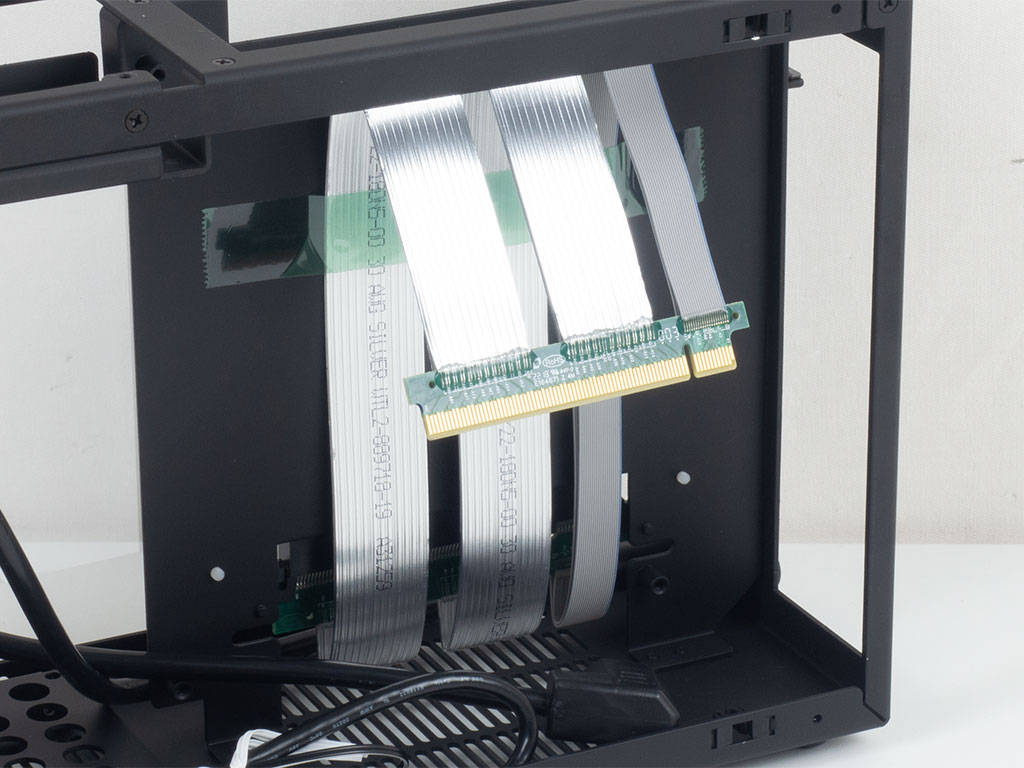
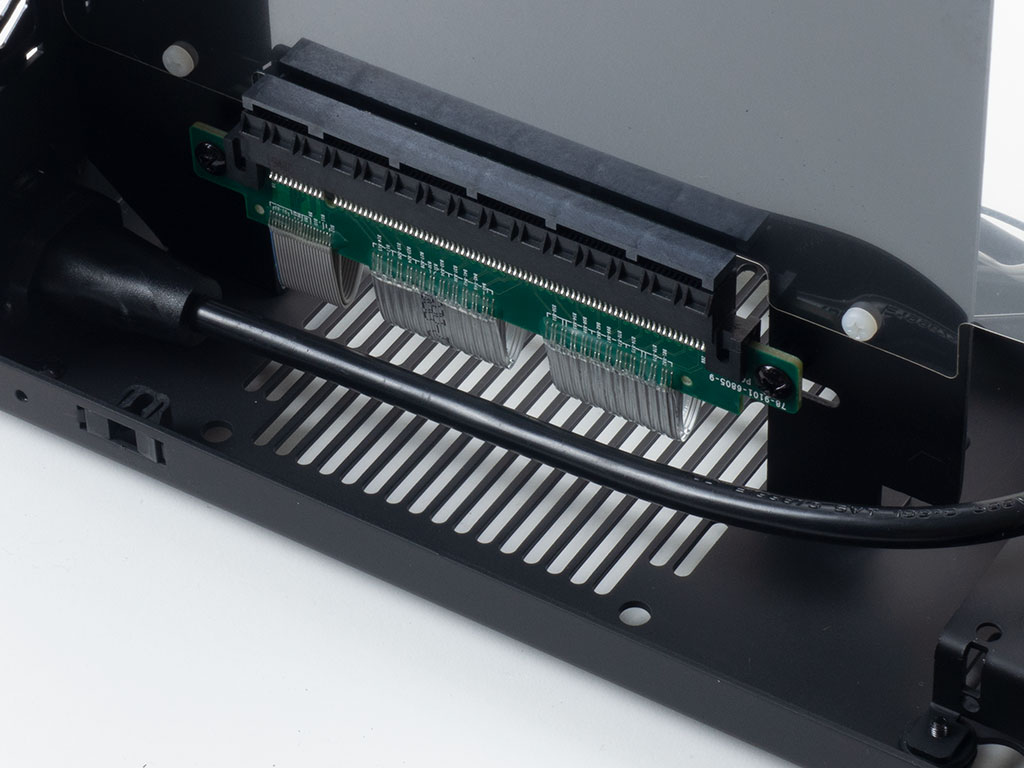
As the DAN A4-SFX is meant to take GPUs of up to 295 mm, it also comes with a dual-slot expansion configuration. There is very little room to go beyond a dual-slot card, but the few millimeters are enough should your GPU have a fancy shroud. The PCIe x16 slot is actually PCIe 4.0 from 3M, so those using Ryzen can take full advantage of the newest-generation interface. This riser brand and model is the other new element with the V4.1 chassis. Interestingly enough, the whole setup is raised off the floor of the chassis to make room for that potential 15 mm thick fan on the floor, which in turn also gives you a bit of space to store excess cables underneath your GPU.
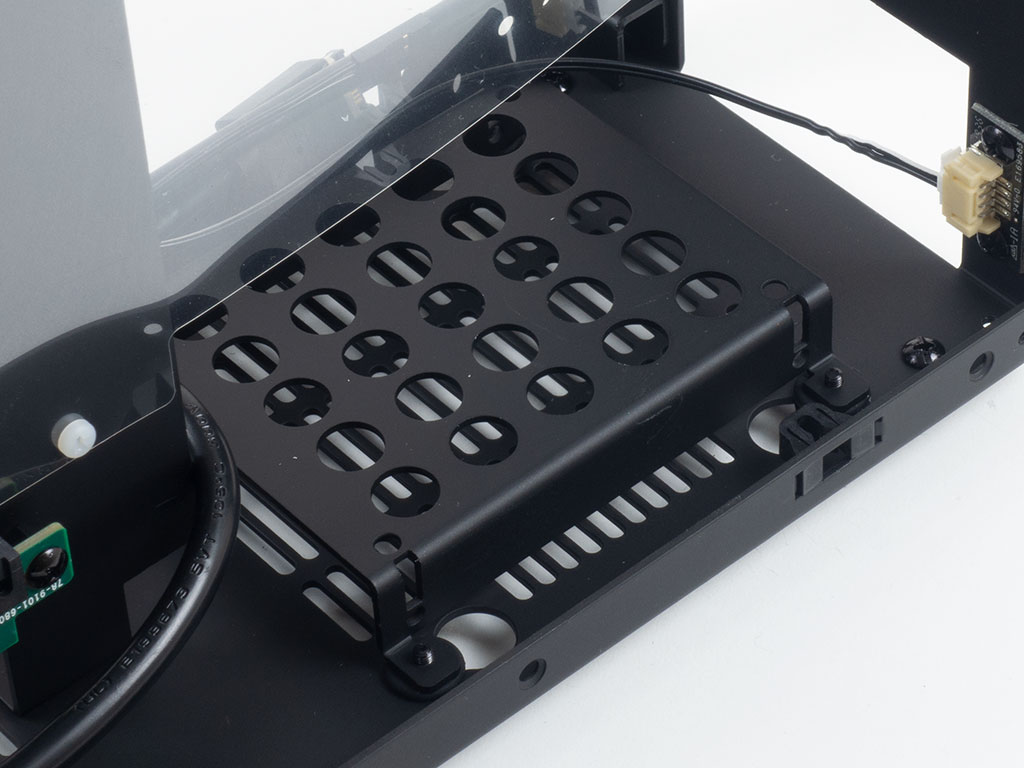
In terms of storage, you may install up to two 2.5" drives to the floor of the chassis with the compact cage. One of the drives is inside the cage, while the other sits on the top of it. Additionally, there is a third 2.5" slot sandwiched between the chassis frame and outer shell, which brings the total within the DAN A4-SFX to a respectable three slots.
Last but not least, there is the SFX PSU bay in the ceiling of the chassis on the motherboard side, towards the front of the case. This means the power is routed to the top of case, and its internal cables come out the bottom and go to their appropriate locations within the enclosure.
Mar 3rd, 2025 02:32 EST
change timezone
Latest GPU Drivers
New Forum Posts
- RTX5000 Series Owners Club (144)
- buying oled monitor - need your advice (4)
- Trying to run 4k 144hz using 3070ti (10)
- Cooling problems persist on LGA1700 (20)
- Recommended PhysX card for 5xxx series? [Is vRAM relevant?] (106)
- It's happening again, melting 12v high pwr connectors (989)
- Zotac RTX 3060Ti Twin Edge OC LHR PCB image (8)
- Found a weird Radeon HD 7950 with 1536 shaders and no temperature readout (17)
- Throttle stop and M18R2 (7)
- Windows 11 General Discussion (5757)
Popular Reviews
- AMD Radeon RX 9070 Series Technical Deep Dive
- be quiet! Pure Base 501 DX Review
- ASUS GeForce RTX 5070 Ti TUF OC Review
- AMD Ryzen 7 9800X3D Review - The Best Gaming Processor
- MSI GeForce RTX 5070 Ti Vanguard SOC Review
- ASUS ROG Harpe Ace Mini Review
- MSI GeForce RTX 5070 Ti Ventus 3X OC Review
- Gigabyte X870 Aorus Elite WiFi 7 Review
- KLEVV CRAS C930 2 TB Review
- MSI GeForce RTX 5070 Ti Gaming Trio OC+ Review
Controversial News Posts
- NVIDIA GeForce RTX 50 Cards Spotted with Missing ROPs, NVIDIA Confirms the Issue, Multiple Vendors Affected (509)
- AMD Plans Aggressive Price Competition with Radeon RX 9000 Series (274)
- AMD Radeon RX 9070 and 9070 XT Listed On Amazon - One Buyer Snags a Unit (257)
- AMD Mentions Sub-$700 Pricing for Radeon RX 9070 GPU Series, Looks Like NV Minus $50 Again (248)
- NVIDIA Investigates GeForce RTX 50 Series "Blackwell" Black Screen and BSOD Issues (244)
- AMD RDNA 4 and Radeon RX 9070 Series Unveiled: $549 & $599 (225)
- AMD Radeon RX 9070 and 9070 XT Official Performance Metrics Leaked, +42% 4K Performance Over Radeon RX 7900 GRE (192)
- AMD Radeon RX 9070-series Pricing Leaks Courtesy of MicroCenter (156)