 4
4
Ducky One 2 Skyline Keyboard Review
Driver & Performance »Disassembly
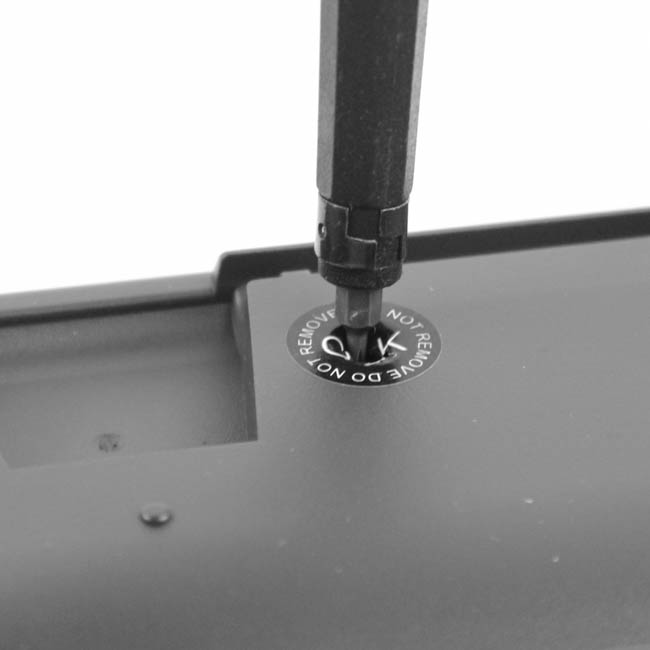

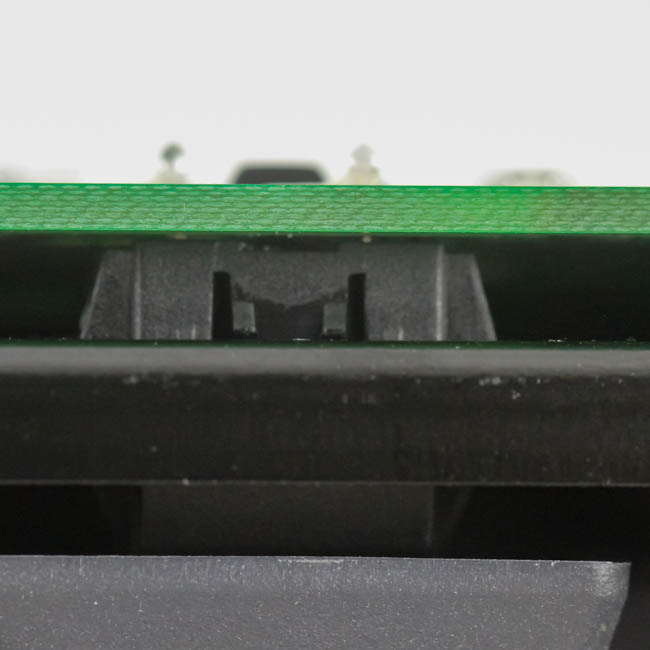
Disassembly of the Ducky One 2 Skyline is on the simpler side of things, but as with most plastic case keyboards there are multiple stages involved. To begin with, remove the three Phillips head screws on the back, including one under a telltale warranty void sticker, by using a precision Phillips screwdriver. Now, you have to pry apart multiple interlocking plastic tabs which keep the top case panel in place with the rest of the keyboard, and you may very well end up breaking some of the tabs, so I do not recommend opening up the keyboard unless absolutely necessary—say if the internal cable needs to be replaced.

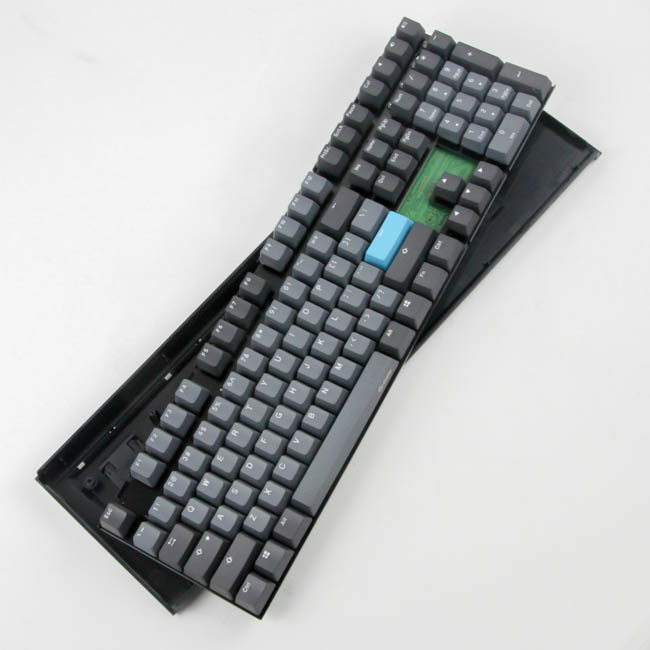
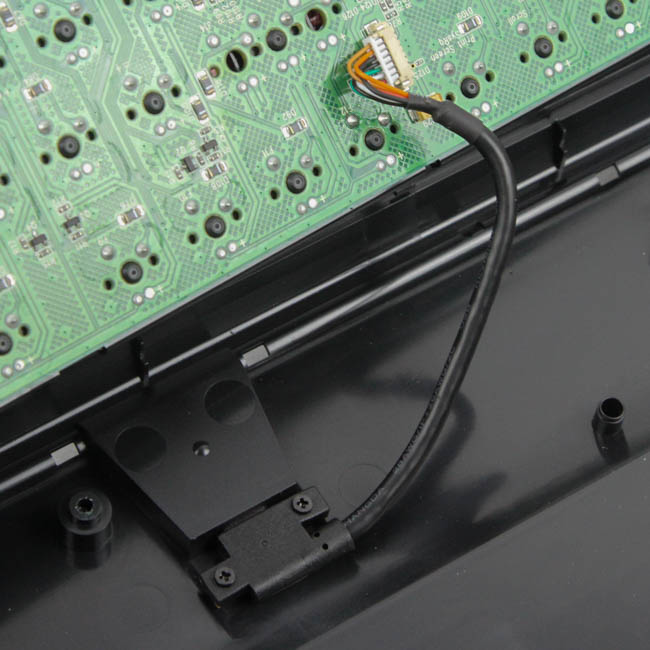
Two more screws secure the plate/PCB in place on the bottom case panel, and removing them allows for enough room to get the piece out for the internal USB cable to be unplugged from the connector on the PCB. This cable goes from the USB Type-C port that is screwed in place in the case to the PCB, which is different from what most detachable cable keyboards do, with the connector built into the PCB itself.
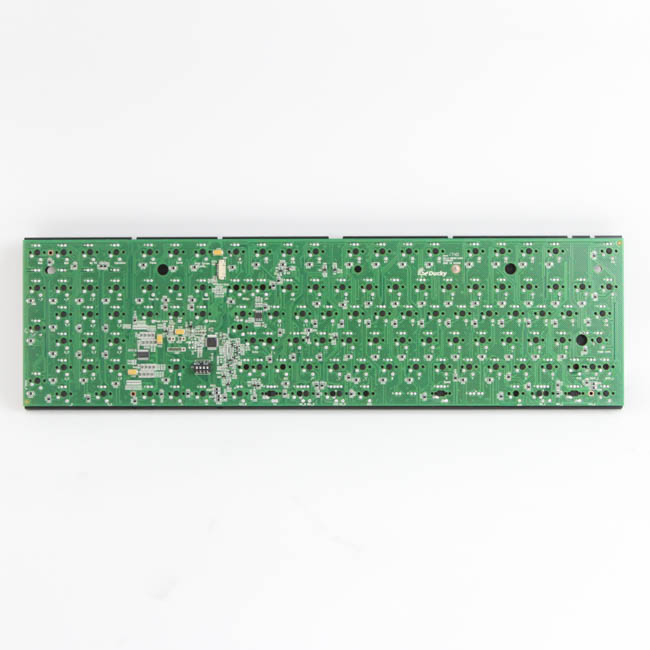
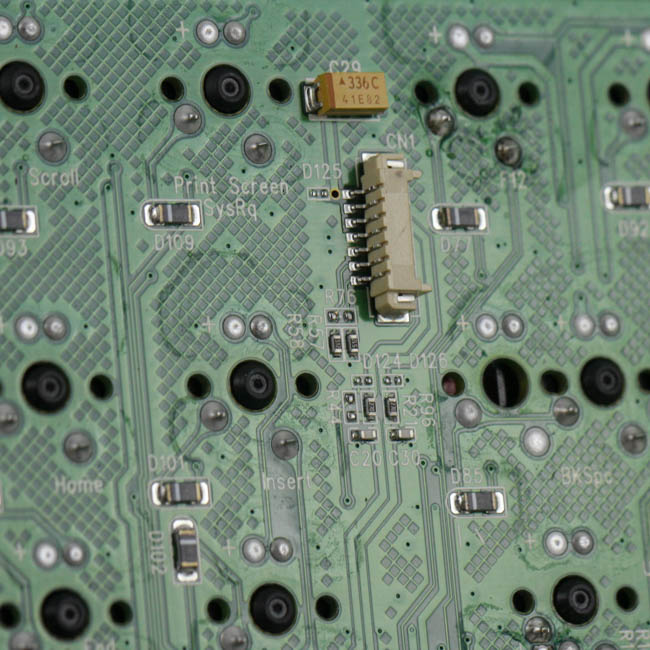
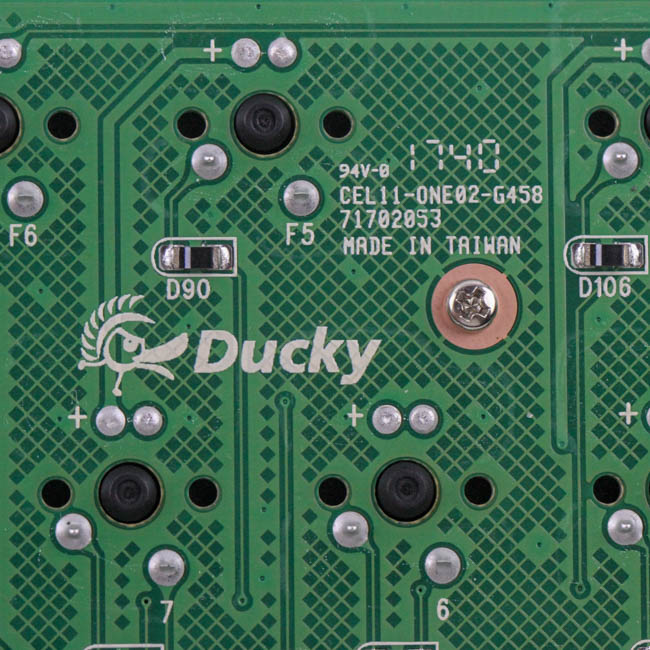
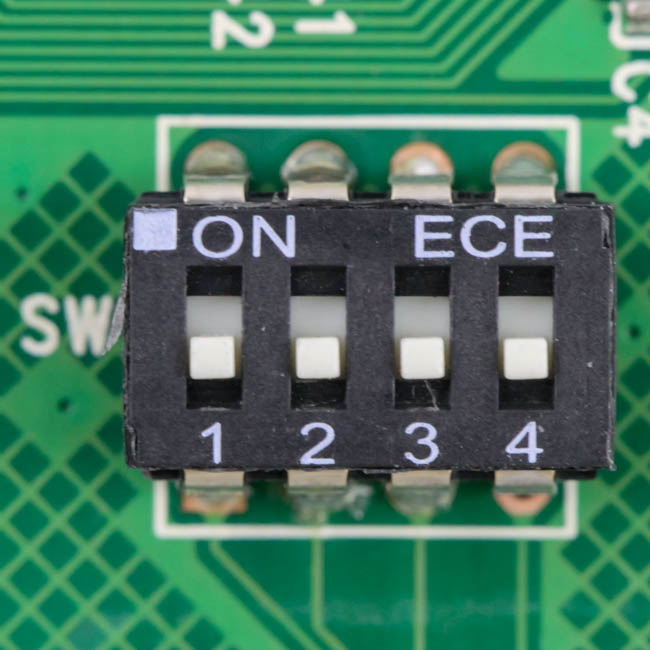
Now, we can get a better look at the PCB, and note the use of plate-mounted switches that go through the stainless steel plate and are soldered into the PCB. The PCB is green in color and has the Ducky logo printed on, letting you also know that this was made in Taiwan where Ducky is based out of. Solder quality is exceptional and undoubtedly machined rather than hand-assembled. Plenty of tantalum capacitors surround the power and data delivery section, and here, we get a better look at the dip switches that are soldered to the PCB.
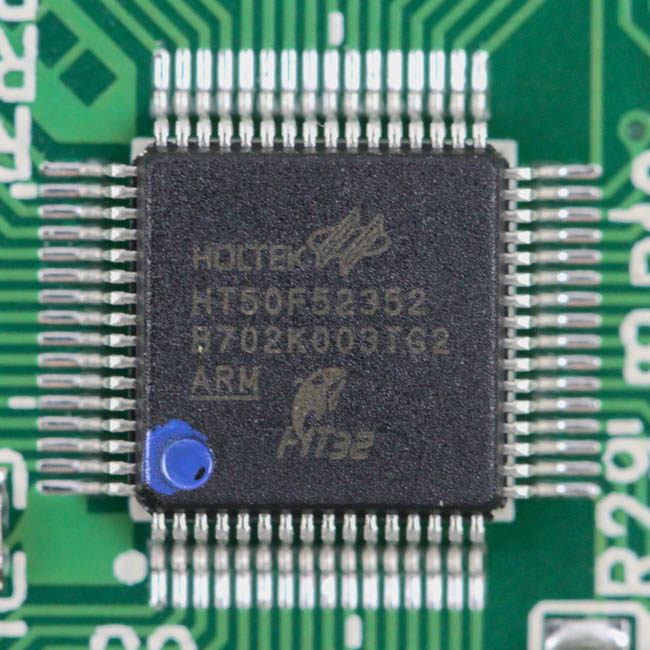
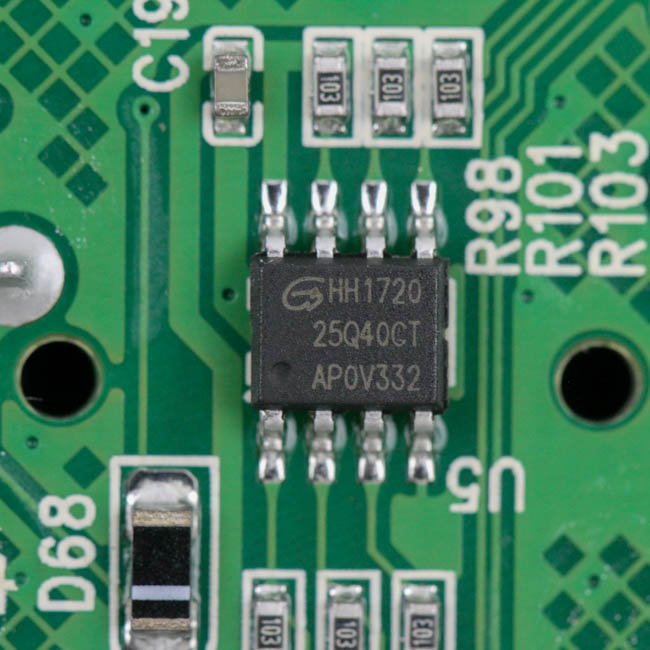
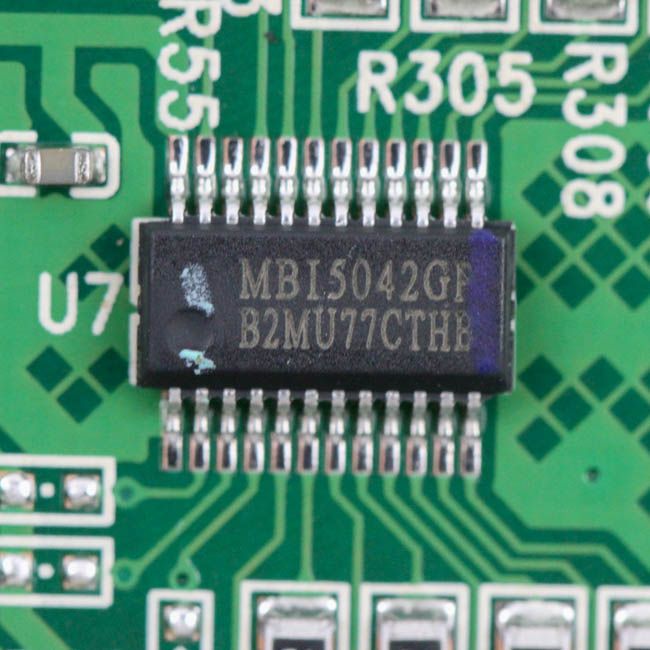
Powering the Ducky One 2 keyboard is a Holtek HT50F52352 USB microcontroller, and a data sheet of this was not available online. From what I could see, it was also used by Cooler Master for their MasterKeys Pro L series of keyboards that are backlit, so it may be that Ducky can use this PCB for other versions and simply add LEDs as well. This is further supported by the presence of a Macroblocks MBI5042 series discrete LED driver supporting 16-bit color depth PWM control across 16 constant-current output channels. Ducky was quick about confirming this, and it is logical to go with one PCB across product lines if it makes sense, so there are no issues here. Given the lack of backlighting, though, the hardware doesn't have to do much beyond taking care of the onboard controls, which we will examine in due course in this review. As it stands, all the components are soldered to a dual-layer PCB which Ducky prominently advertises on the product page for some reason— there's nothing new here.
Before we move on, be advised that disassembly will void the warranty and that TechPowerUp is not liable for any damages incurred if you decided to go ahead and do so anyway.
Mar 31st, 2025 03:51 EDT
change timezone
Latest GPU Drivers
New Forum Posts
- Windows 10 Vs 11, Which one too choose? (128)
- What is the latest game you finished or 100% (10)
- Help me pick a UPS (0)
- Can you guess Which game it is? (35)
- Your PC ATM (35309)
- Is RX 9070 VRAM temperature regular value or hotspot? (267)
- What do you do for a living? (457)
- Future-proofing my OLED (81)
- Question about Intel Optane SSDs (58)
- AMD RX 7000 series GPU Owners' Club (1310)
Popular Reviews
- Sapphire Radeon RX 9070 XT Pulse Review
- ASRock Phantom Gaming B850 Riptide Wi-Fi Review - Amazing Price/Performance
- Samsung 9100 Pro 2 TB Review - The Best Gen 5 SSD
- Palit GeForce RTX 5070 GamingPro OC Review
- Sapphire Radeon RX 9070 XT Nitro+ Review - Beating NVIDIA
- Assassin's Creed Shadows Performance Benchmark Review - 30 GPUs Compared
- Enermax REVOLUTION D.F. 12 850 W Review
- AMD Ryzen 7 9800X3D Review - The Best Gaming Processor
- ASRock Radeon RX 9070 XT Taichi OC Review - Excellent Cooling
- XPG LEVANTE II 360 Review
Controversial News Posts
- AMD RDNA 4 and Radeon RX 9070 Series Unveiled: $549 & $599 (260)
- MSI Doesn't Plan Radeon RX 9000 Series GPUs, Skips AMD RDNA 4 Generation Entirely (142)
- Microsoft Introduces Copilot for Gaming (124)
- AMD Radeon RX 9070 XT Reportedly Outperforms RTX 5080 Through Undervolting (119)
- NVIDIA Reportedly Prepares GeForce RTX 5060 and RTX 5060 Ti Unveil Tomorrow (115)
- Over 200,000 Sold Radeon RX 9070 and RX 9070 XT GPUs? AMD Says No Number was Given (100)
- NVIDIA GeForce RTX 5050, RTX 5060, and RTX 5060 Ti Specifications Leak (96)
- Retailers Anticipate Increased Radeon RX 9070 Series Prices, After Initial Shipments of "MSRP" Models (90)