 18
18
ECS LIVA Z2 Mini-PC Review
General Performance »A look Inside
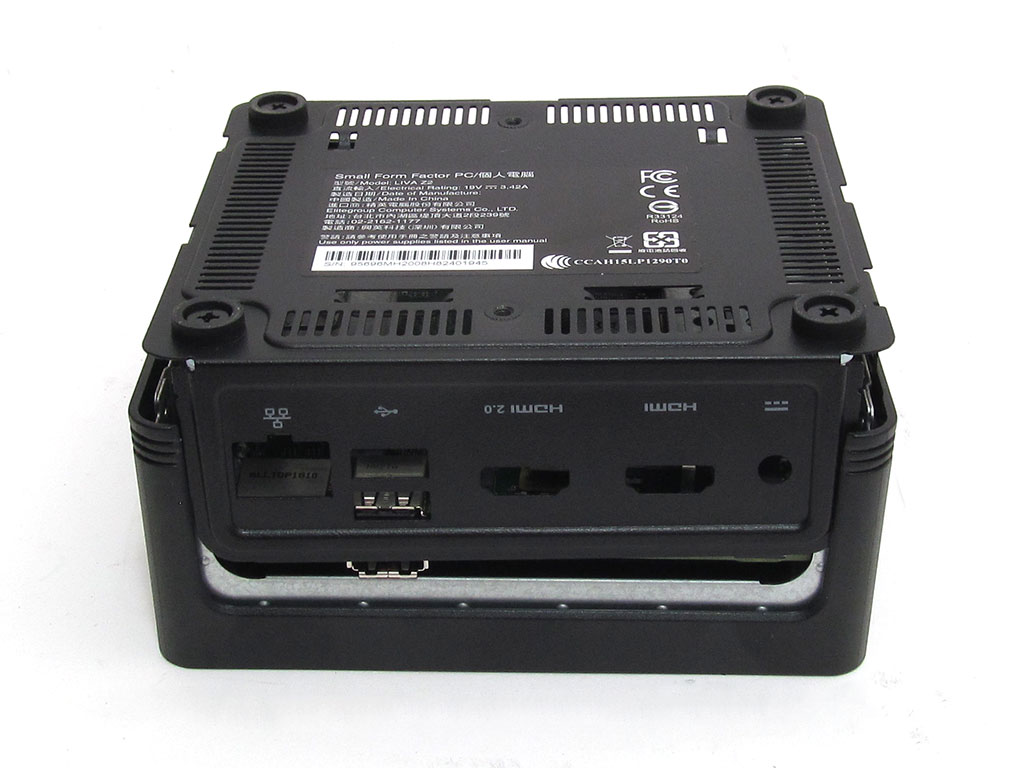
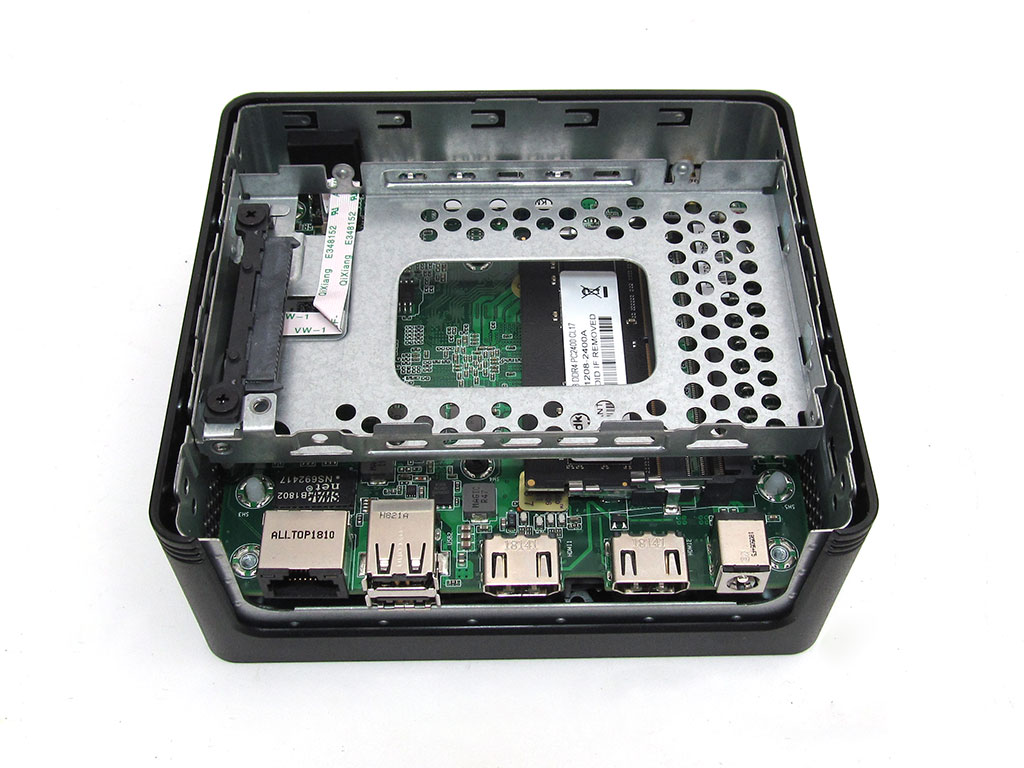
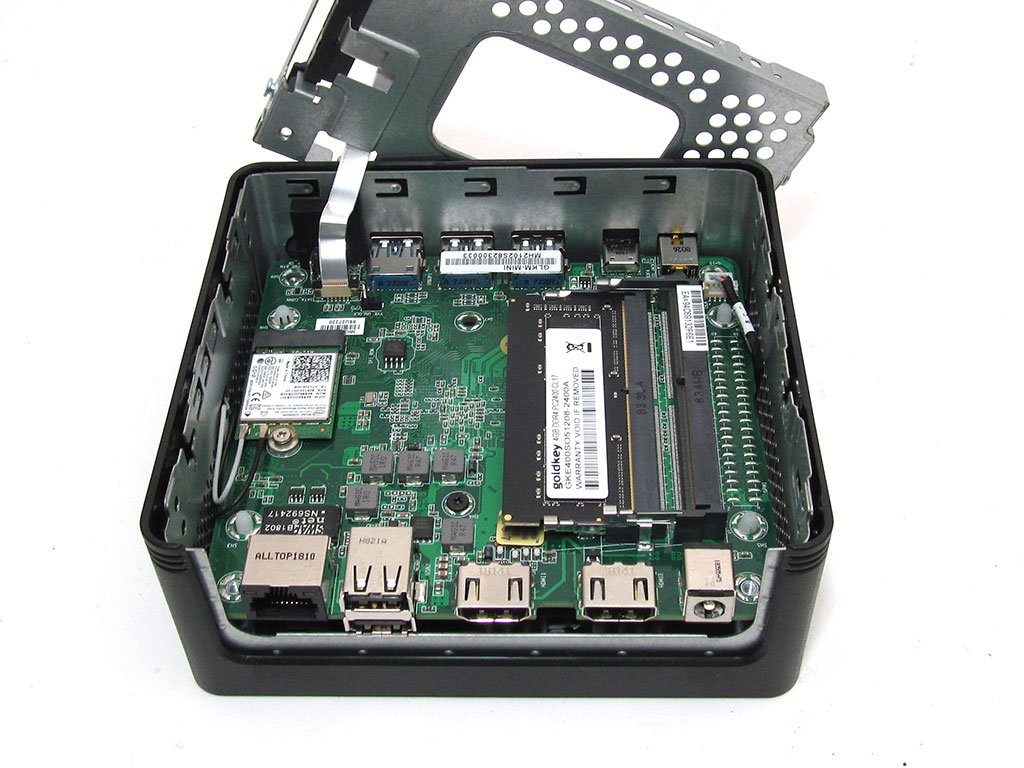
Taking the ECS LIVA Z2 apart is exceptionally easy, which is a very good thing. This is a unit anyone can service or upgrade. To gain access to the internals, simply unscrew the four bottom screws. The bottom plate can then be removed by lifting it and sliding it up and off. At this point, users can install the 2.5" HDD or SSD of their choice. If you plan to upgrade the memory, simply slide the HDD tray over and it will lift up and out of the way. Just be careful not to pull too hard on the thin ribbon cable.
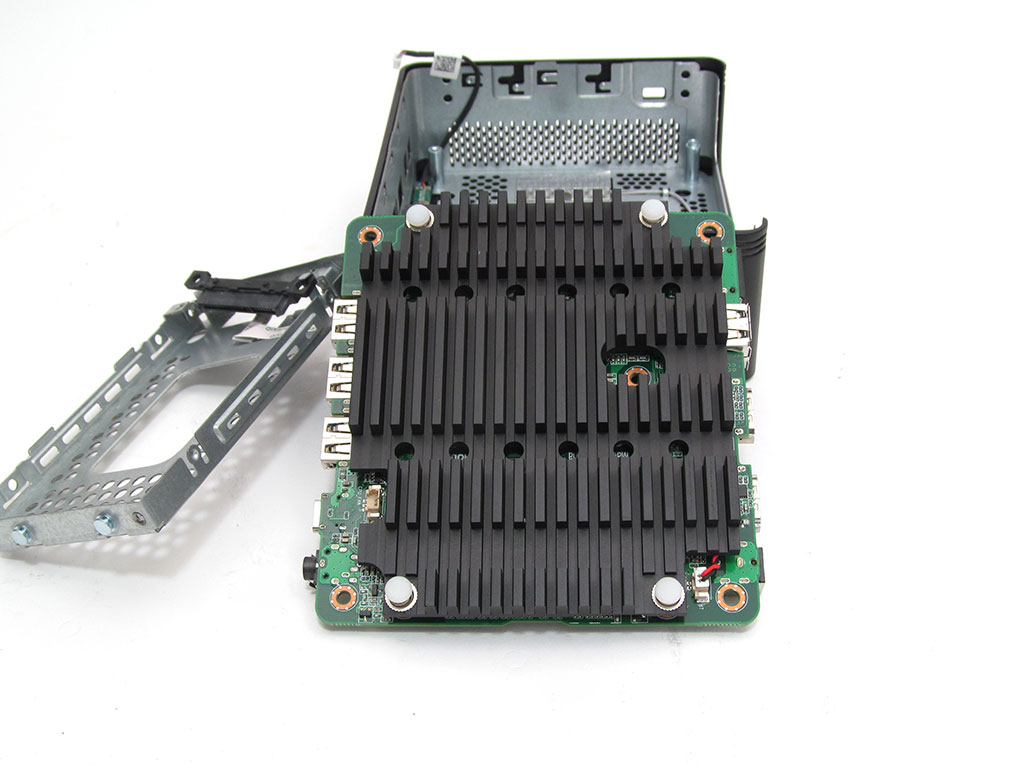

A single screw in the center holds the motherboard in place after everything else has been moved out of the way. Removing this screw and detaching the cable near the DDR4 SODIMM slots will allow you to remove the mainboard. At this point, you can gently remove the mainboard. Just be careful in regards to the WiFi antenna wires. With everything disassembled and the mainboard removed, it becomes clear that ECS went with the largest aluminium heatsink they possibly could based on how much space is provided by the chassis. Removing the heatsink is simple as well: just squeeze the push pins and apply pressure and the heatsink will eventually pop free.
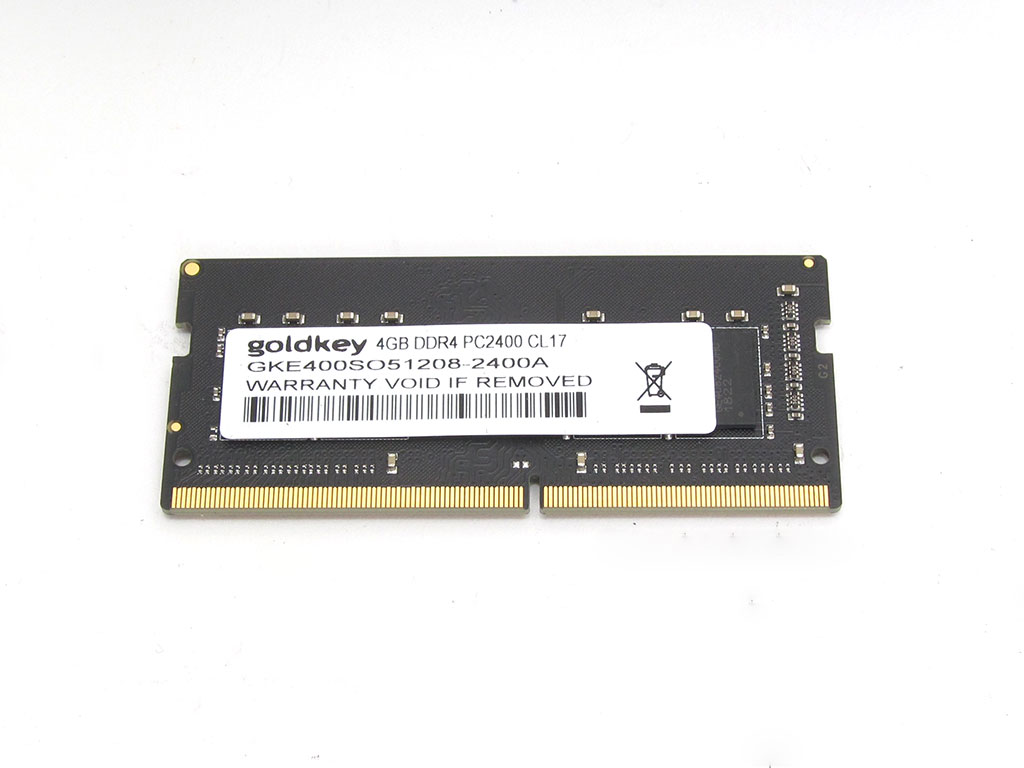

The single 4 GB SO-DIMM of DDR4 runs at a frequency of 2400 MHz with CL17 timings, and comes from Goldkey, a vendor I have not heard of before. That said, in today's world, 4 GB of memory is just not enough. ECS needs to populate these units with a dual channel 8 GB kit. It's not all bad, at least the memory can be upgraded since it is not soldered to the mainboard.
Jan 15th, 2025 08:46 EST
change timezone
Latest GPU Drivers
New Forum Posts
- This is my bad 3080ti situation (19)
- Help with RTX 4090 - Low timespy score and low fps in cyberpunk 2077, CPU bottleneck? (16)
- i7-7700k upgrade to 5700X3D worth it? (139)
- The TPU UK Clubhouse (25631)
- Poll: Do you think the 5090 will be thermally or power limited? (10)
- GE257AA SoundBlaster X-Fi XtremeGamer Audio Card (PCI) needed, or help me with an alternative sound card. (6)
- What's your latest tech purchase? (22874)
- All RTX 5090s only have 1x 16-pin connector (48)
- Need to set expectations... (5)
- Solidigm NVMe Custom Modded Driver for All NVMe Brands SSDs & Any NVMe SSDs (196)
Popular Reviews
- AMD Ryzen 7 9800X3D Review - The Best Gaming Processor
- ASUS ROG Strix B860-A Gaming Wi-Fi Review
- ThieAudio Origin In-Ear Monitors Review - Basshead Love
- LAMZU Maya X Review
- ASUS ROG Strix B850-F Gaming WiFi Review
- GPU Test System Update for 2025
- Upcoming Hardware Launches 2024 (Updated Nov 2024)
- Arrow Lake Retested with Latest 24H2 Updates and 0x114 Microcode
- DDR5 Memory Performance Scaling with AMD Zen 5
- Royal Kludge S85 TKL Wireless Mechanical Keyboard Review
Controversial News Posts
- NVIDIA 2025 International CES Keynote: Liveblog (467)
- AMD Debuts Radeon RX 9070 XT and RX 9070 Powered by RDNA 4, and FSR 4 (348)
- NVIDIA GeForce RTX 5090 Features 575 W TDP, RTX 5080 Carries 360 W TDP (212)
- AMD Radeon RX 9070 XT Alleged Benchmark Leaks, Underwhelming Performance (204)
- 32 GB NVIDIA RTX 5090 To Lead the Charge As 5060 Ti Gets 16 GB Upgrade and 5060 Still Stuck With Last-Gen VRAM Spec (174)
- Potential RTX 5090 and RTX 5080 Pricing in China Leaks (173)
- AMD Radeon RX 9070 XT Boosts up to 3.10 GHz, Board Power Can Reach up to 330W (167)
- AMD Radeon RX 9070 XT Tested in Cyberpunk 2077 and Black Myth: Wukong (164)