 25
25
EK-Quantum Vector RE RTX 3080/3090 Active Backplate D-RGB - Plexi Review
Liquid Flow Restriction »Installation

Installation of the EK-Quantum Vector RE RTX 3080/3090 active backplate assumes you have already installed the complementing EK-Quantum Vector RE RTX 3080/3090 GPU block. For more on how we got to this point, refer to this page.

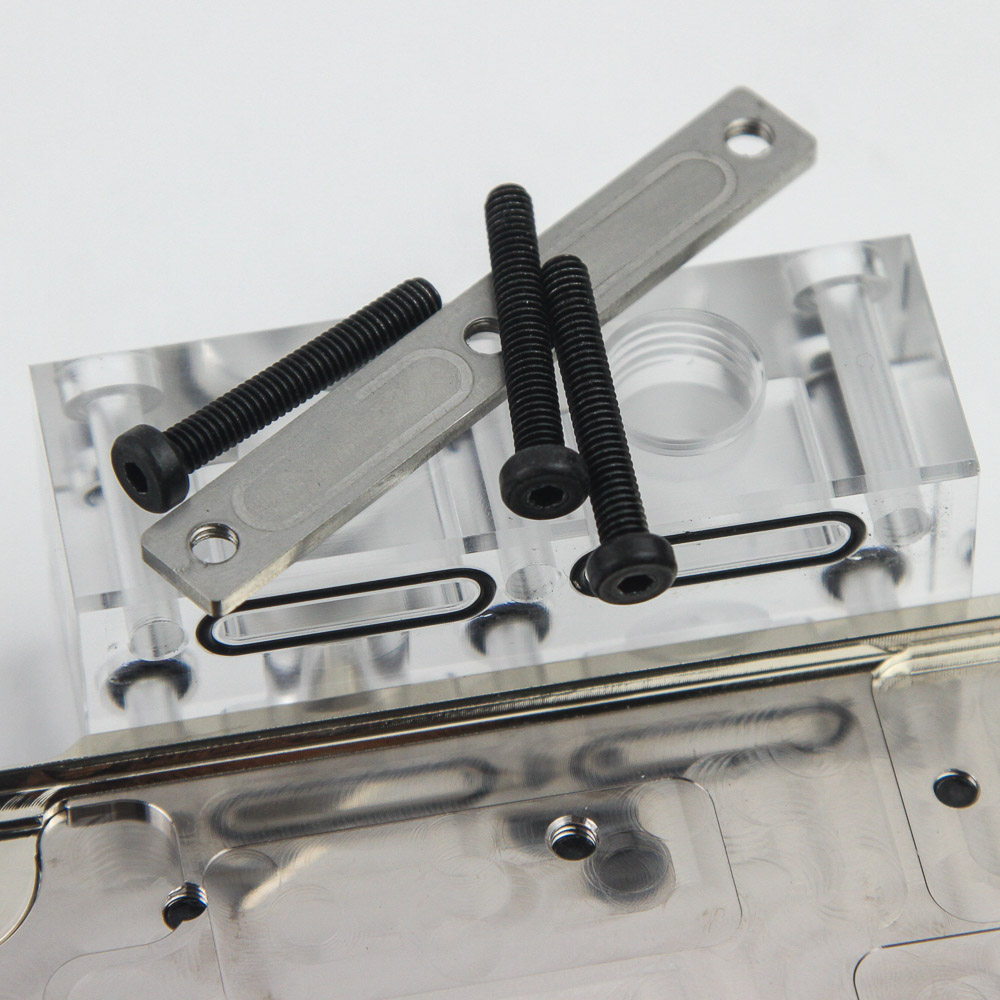
Remember that double-wide I/O terminal on the active backplate? It replaces the stock terminal on the GPU block, so go ahead and remove it by taking off the three screws holding it in place on the GPU block cold plate. Now do the same with the cover plate on the terminal that is on the active backplate, and be careful not to remove any of the O-rings. Carefully put them back in place if they come off. At this point, identify the screws that need to be removed on the back of the PCB going into the GPU block to accommodate the active backplate. There are a total of 12 screws, of which you need to remove five. Do it now since it will be impossible to do so once you have installed the I/O terminal on the GPU block cold plate. Likewise, be sure to measure, cut, and apply the thermal pads on the backplate for your GPU.

With that done, the active backplate is basically already in place. There is enough slack to accommodate the thermal pads, and do not try to force things if you mistakenly applied a thicker thermal pad than necessary. With the RTX 3080, there are no VRAM modules on the back. As such, I had to use the thicker pads after all. Now just make sure the screw holes are lined up, and use the longer screws that come with the backplate. I did notice that one of the screws was harder to secure, and another review pointed out the same on the same standoff, so I believe it was not threaded properly, with the threads not going all the way to the top. If you have the same issue, start with this standoff before any others. That solved the issue for me, but it is still a potential "bug" EK did not catch. Likewise, the black screws that came with my sample should have been silver instead, as with the regular backplate we saw separately.
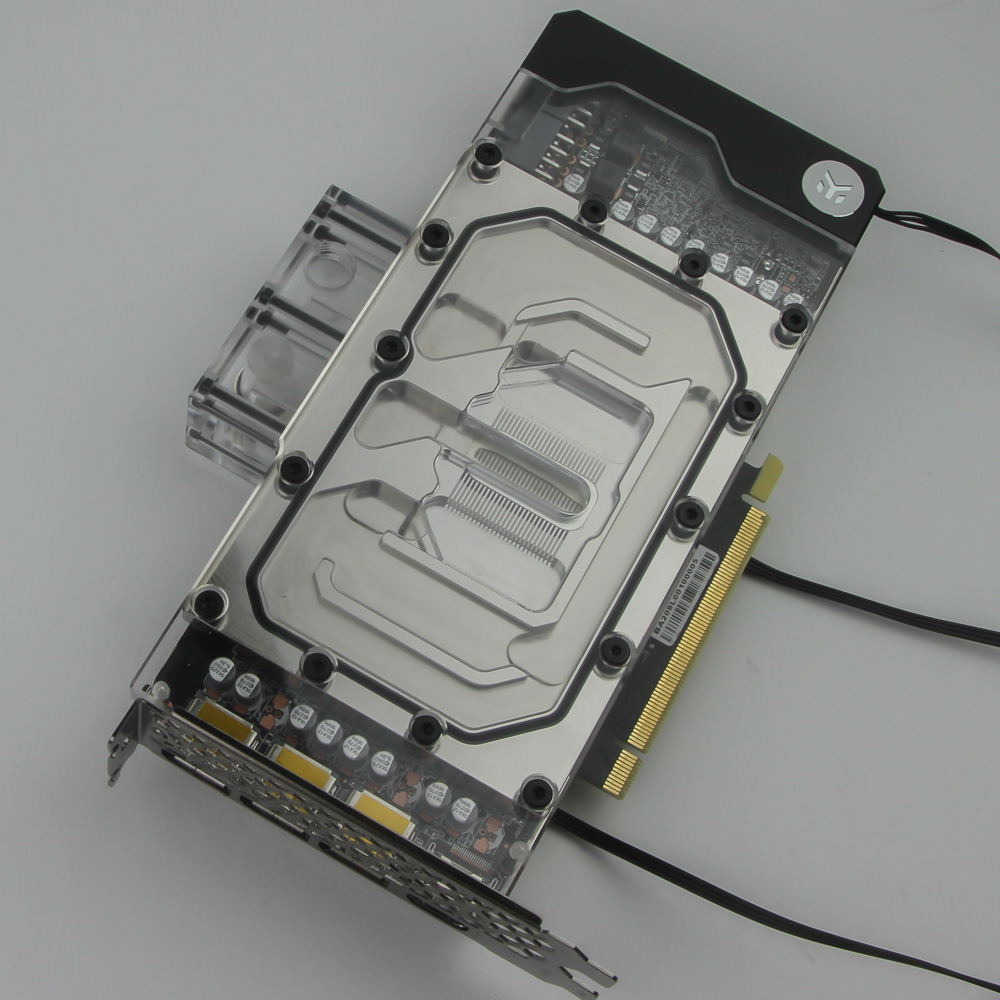
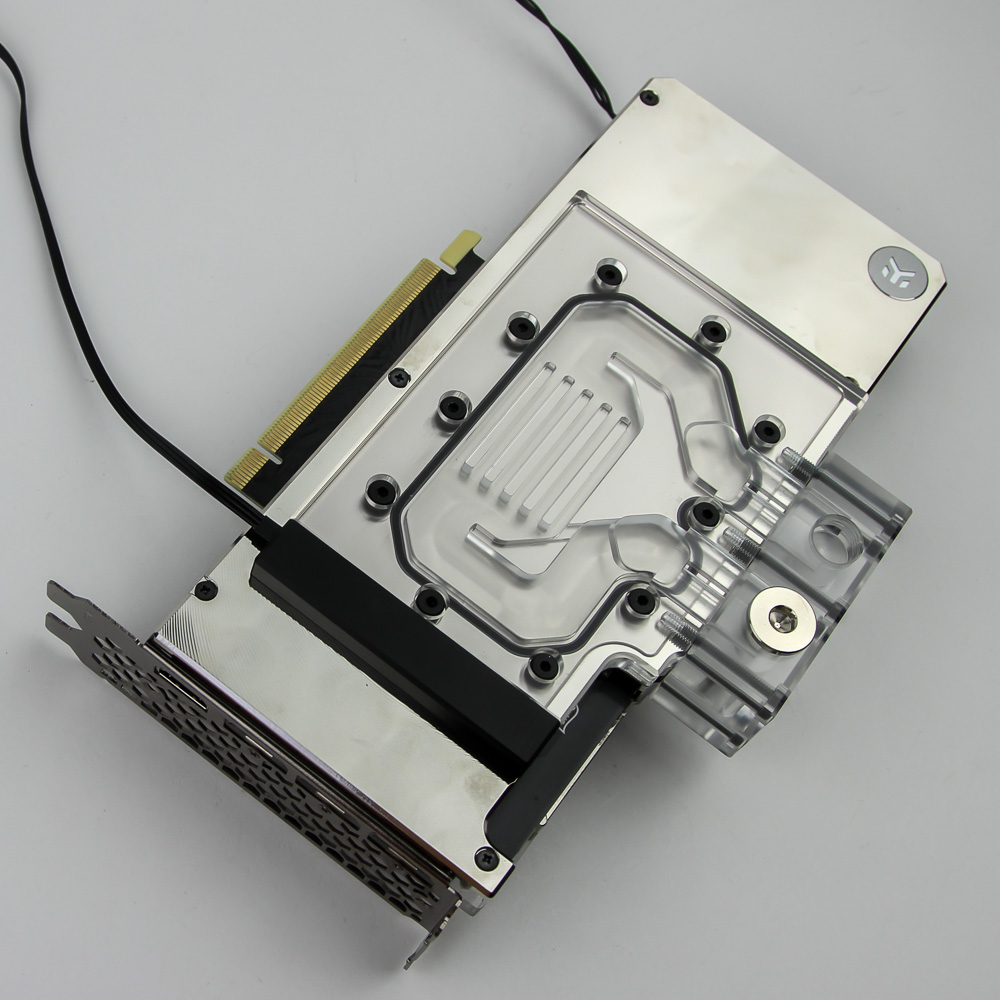

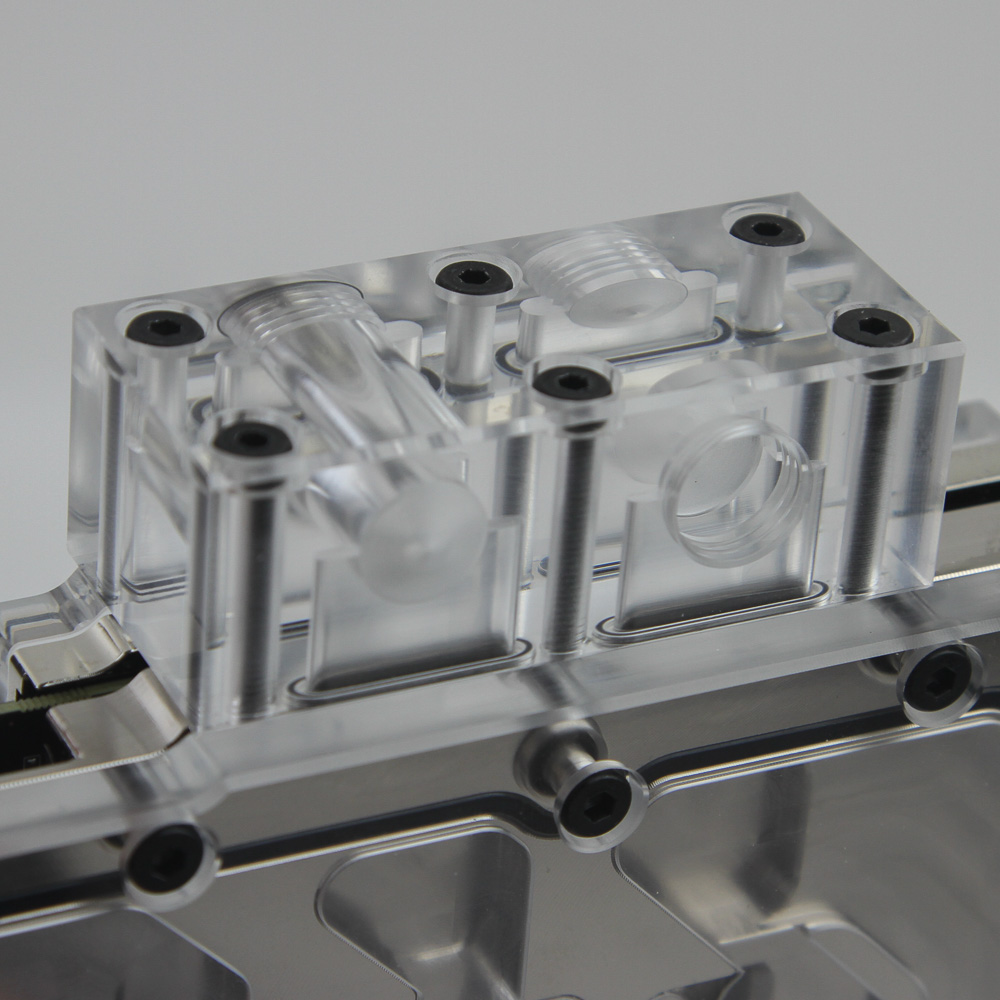
Once installed, the set looks quite snappy if I say so myself. Once again, photographing this without any reflections is tough. But it is a shiny piece of bling that actively cools the RTX 3080 on both sides. A lip on the backplate goes over the side to effectively make it seem like a continuous layer, and it weighs a lot as expected. This sandwich takes up two-slot spacing on your motherboard and case and has two cables for the the integrated lighting on the front and back. You can use a daisy-chain adapter to combine the two, which EK should have included in the box.
Lighting

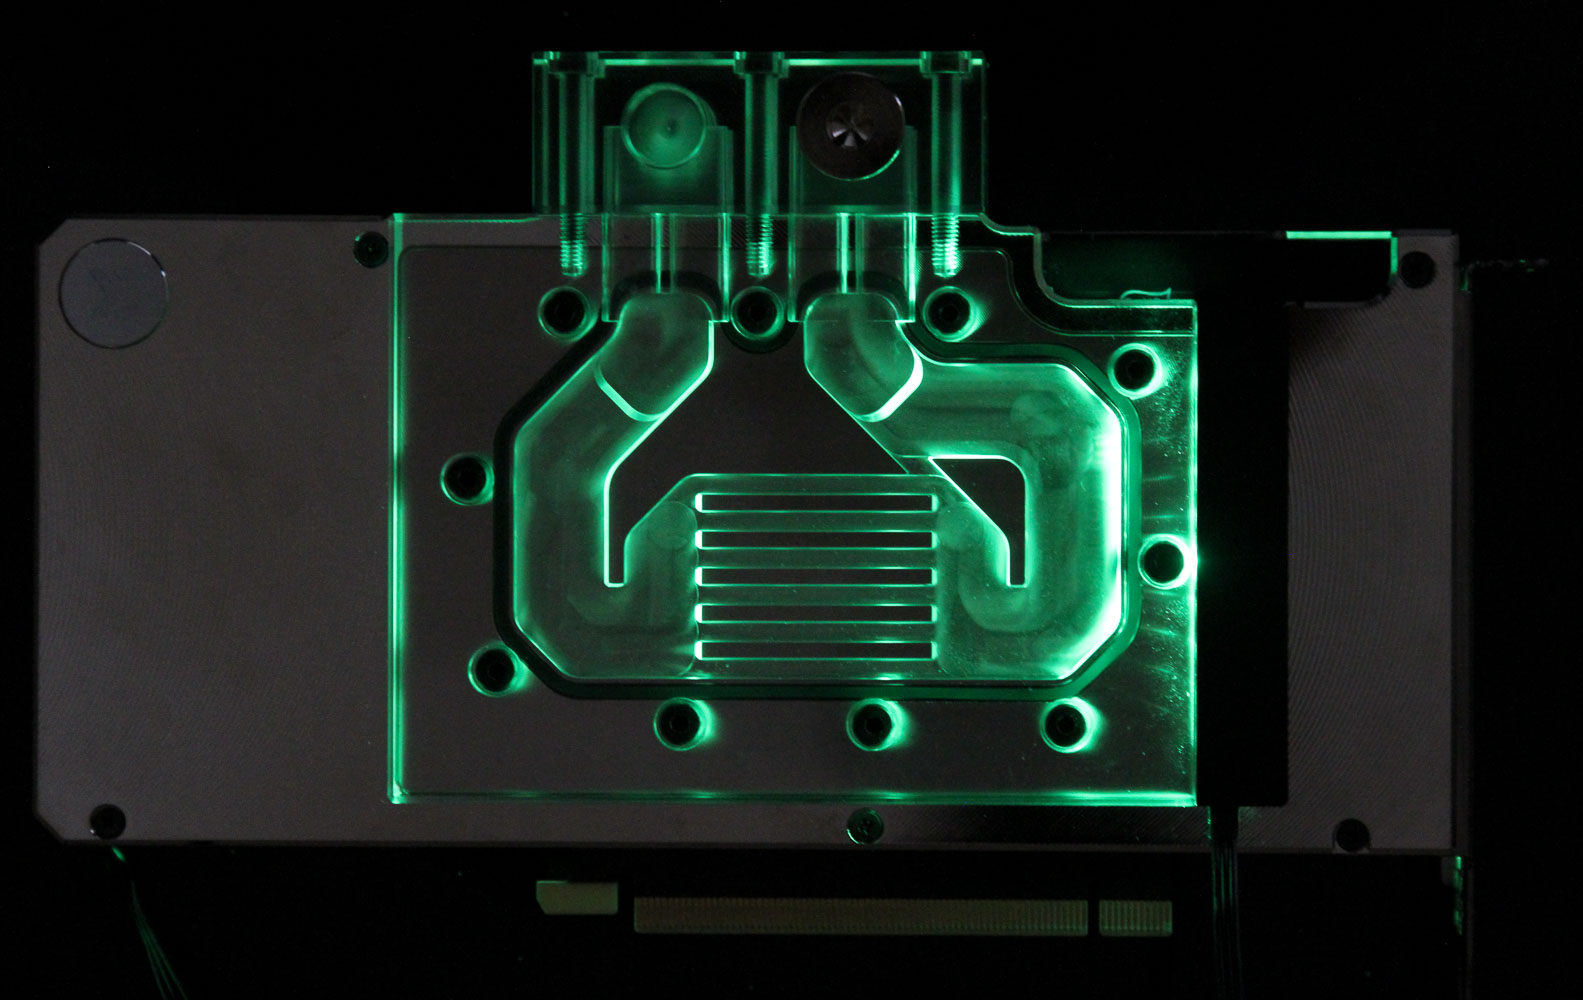
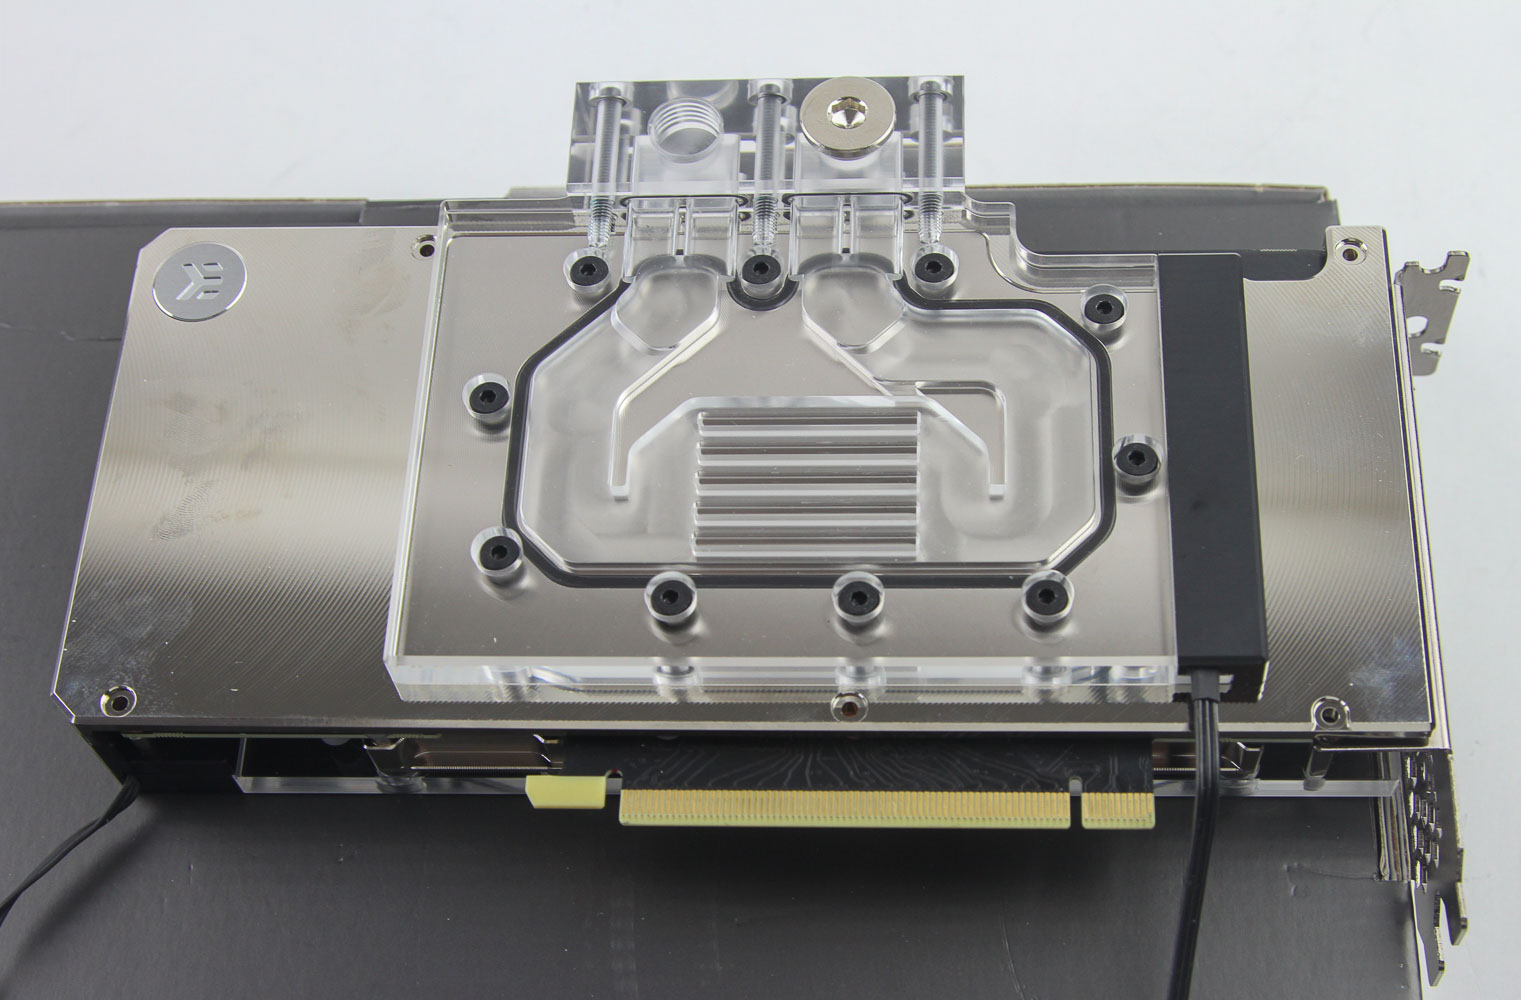
With vertically mounted GPUs becoming more popular than ever before, the front of the GPU block is all the more relevant in customizing a DIY watercooling loop to match your aesthetics. The plexi top allows for a look at the coolant flowing through, which has the functional benefit of ensuring there are no trapped air bubbles in the coolant flow path. There are also five integrated, individually addressable RGB LEDs that can be powered and controlled via a standard 3-pin D-RGB header, which means you can have the block lit up as seen above. However, the five LEDs are not enough for the entire top, so some sections aren't as bright as others. Some competitors use way more LEDs, which makes for a more impressive and consistent light show.
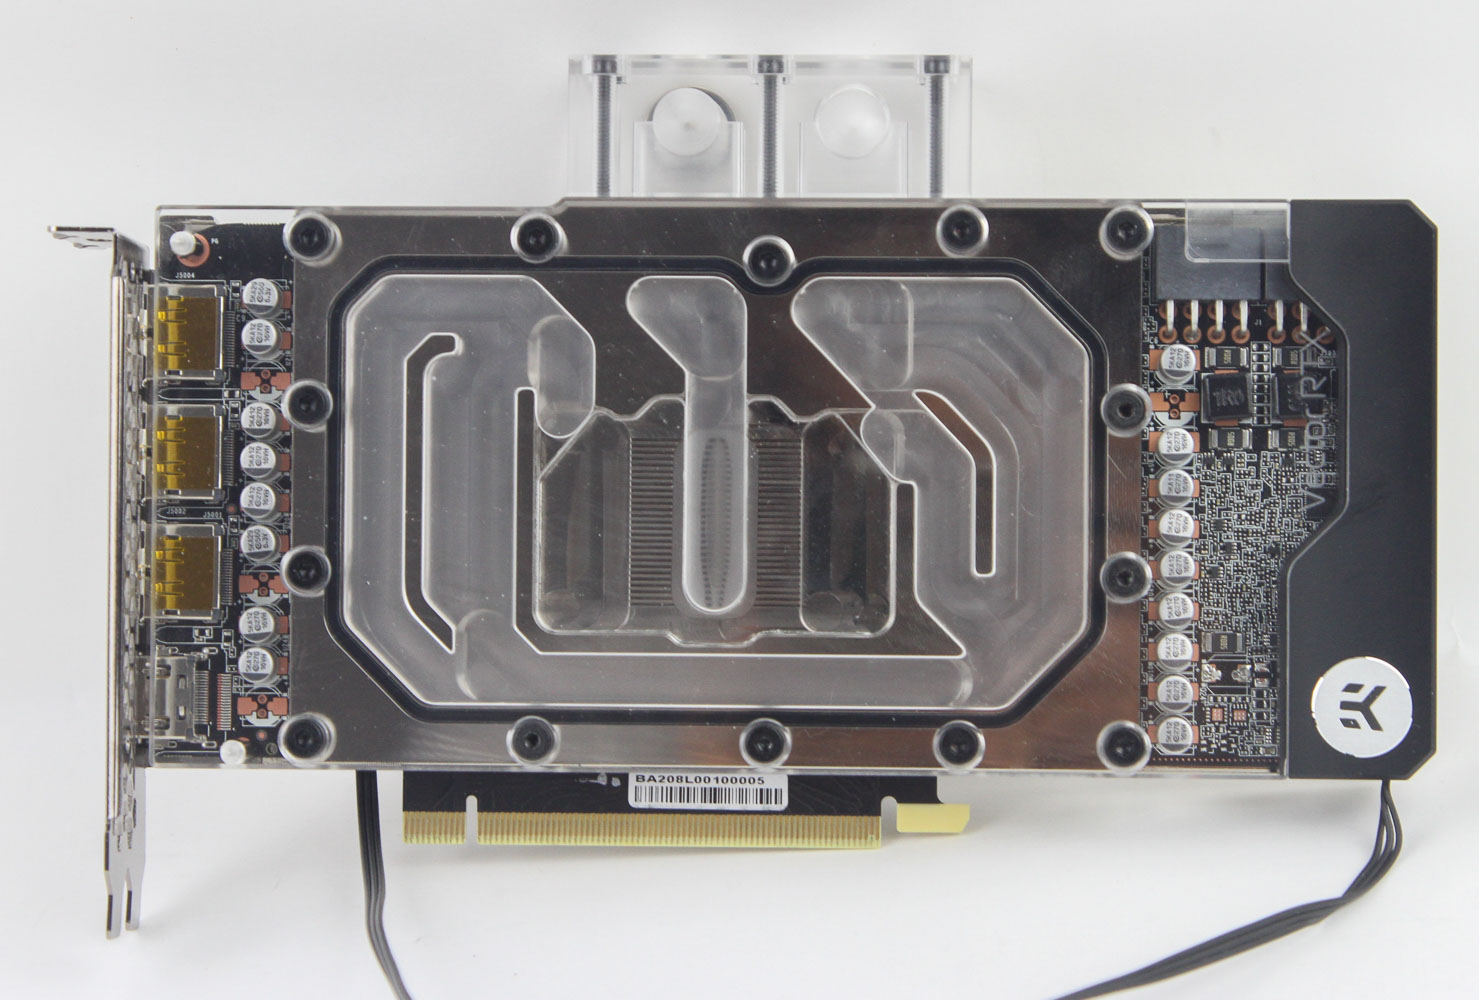
It was interesting thus to see that the active backplate got more LEDs at eight, but these are also side-mounted and have to work with a smaller surface to illuminate, too. The active backplate looks better with the lighting on, but even here you can clearly see that the side facing away from the LEDs barely lights up even in the dark. It somehow manages to do a similarly poor job of lighting even with better odds courtesy the increased LED density, so GPU block lighting remains a weakness for EK compared to the competition.
Jul 4th, 2025 21:42 CDT
change timezone
Latest GPU Drivers
New Forum Posts
- How do you view TPU & the internet in general? (With poll) (62)
- PSU fan was silent at first, now it's loud (10)
- Steering wheels, I think I had a mea culpa! (11)
- RDNA 4 Fine Wine? (HUB Vid) (75)
- suggestions for an affordable m.2 with good (or at least decent) random r/w (5)
- Can you guess Which game it is? (197)
- b550m aorus elite not posting with new ram (6)
- After applying last bios update something strange happen (8)
- ROG B550-A Splash screen bug? (1)
- Will you buy a RTX 5090? (621)
Popular Reviews
- Fractal Design Scape Review - Debut Done Right
- NVIDIA GeForce RTX 5050 8 GB Review
- Crucial T710 2 TB Review - Record-Breaking Gen 5
- ASUS ROG Crosshair X870E Extreme Review
- PowerColor ALPHYN AM10 Review
- Sapphire Radeon RX 9060 XT Pulse OC 16 GB Review - An Excellent Choice
- Upcoming Hardware Launches 2025 (Updated May 2025)
- AMD Ryzen 7 9800X3D Review - The Best Gaming Processor
- Sapphire Radeon RX 9070 XT Nitro+ Review - Beating NVIDIA
- NVIDIA GeForce RTX 5060 8 GB Review
TPU on YouTube
Controversial News Posts
- Intel's Core Ultra 7 265K and 265KF CPUs Dip Below $250 (288)
- NVIDIA Grabs Market Share, AMD Loses Ground, and Intel Disappears in Latest dGPU Update (212)
- Some Intel Nova Lake CPUs Rumored to Challenge AMD's 3D V-Cache in Desktop Gaming (140)
- NVIDIA GeForce RTX 5080 SUPER Could Feature 24 GB Memory, Increased Power Limits (115)
- Microsoft Partners with AMD for Next-gen Xbox Hardware (105)
- NVIDIA Launches GeForce RTX 5050 for Desktops and Laptops, Starts at $249 (105)
- AMD Radeon RX 9070 XT Gains 9% Performance at 1440p with Latest Driver, Beats RTX 5070 Ti (102)
- Intel "Nova Lake‑S" Series: Seven SKUs, Up to 52 Cores and 150 W TDP (100)