 2
2
EK-Quantum Vector RE RTX 3080 GPU Block + Backplate Review
Liquid Flow Restriction »Installation

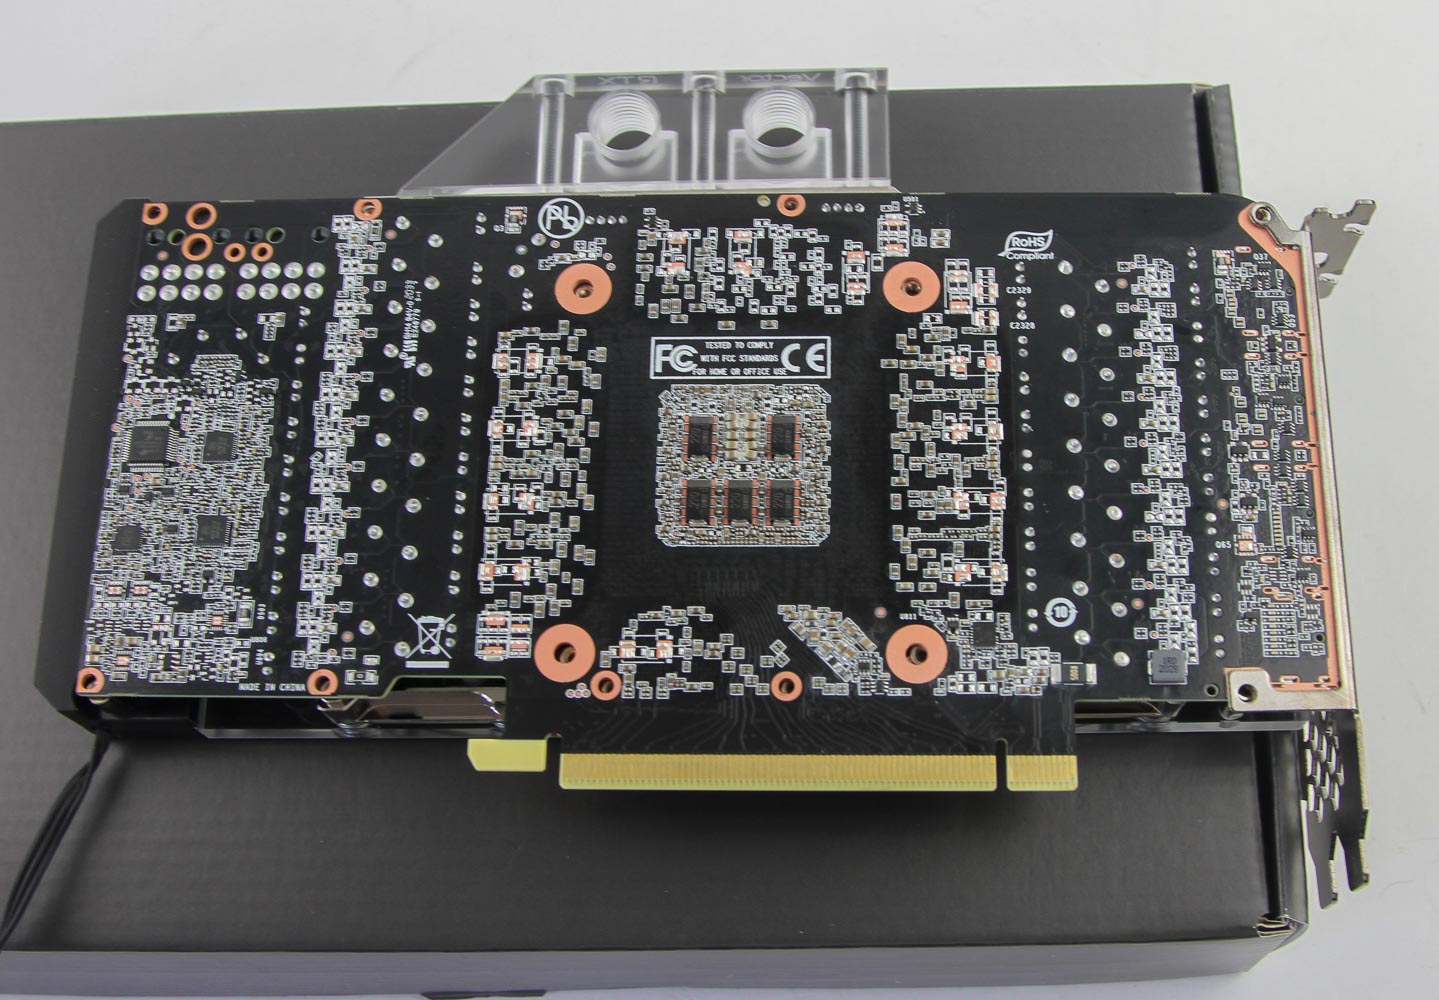
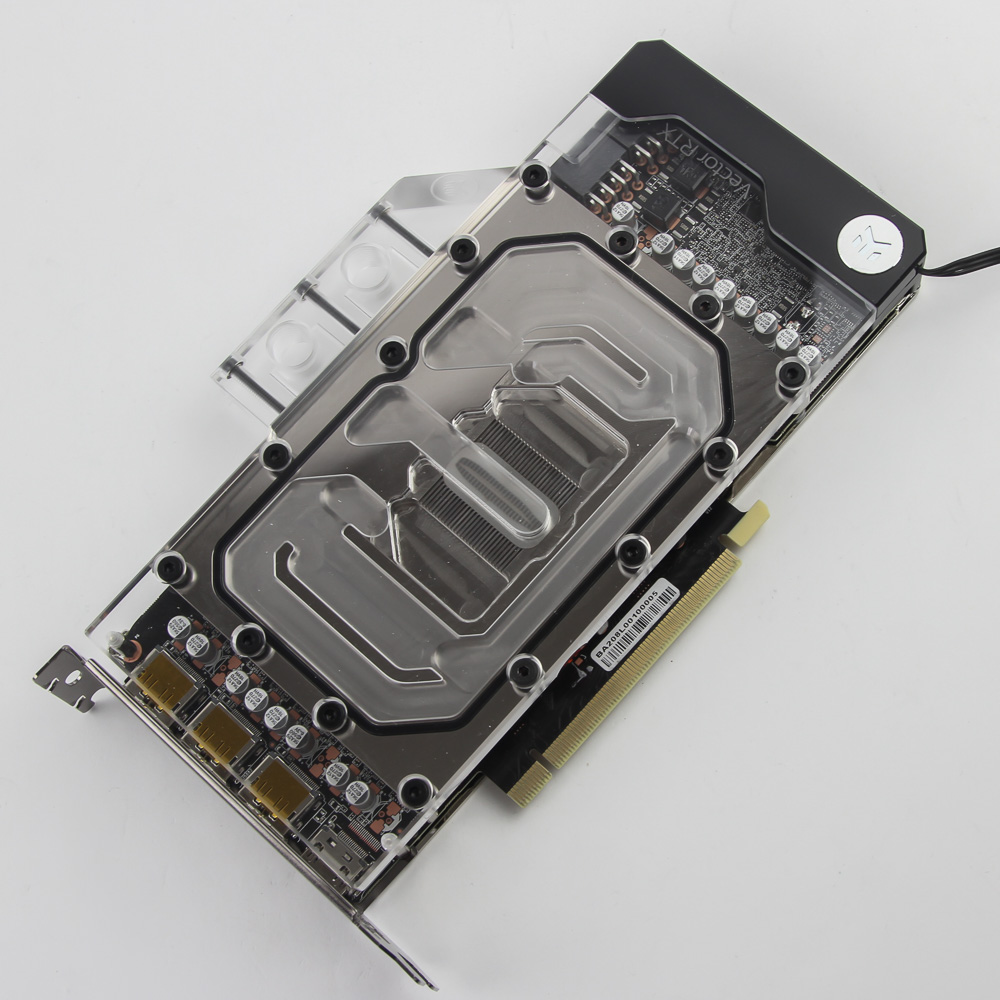
Behold the unicorn that is the working RTX 3080 PCB! I was originally conflicted on whether to go with the Founders Edition, which has led to some clever and different GPU blocks because of the unique PCB design, or the reference PCB used by several NVIDIA AICs and for which there is more support from block makers. In the end, the latter logically won out, so here we are.
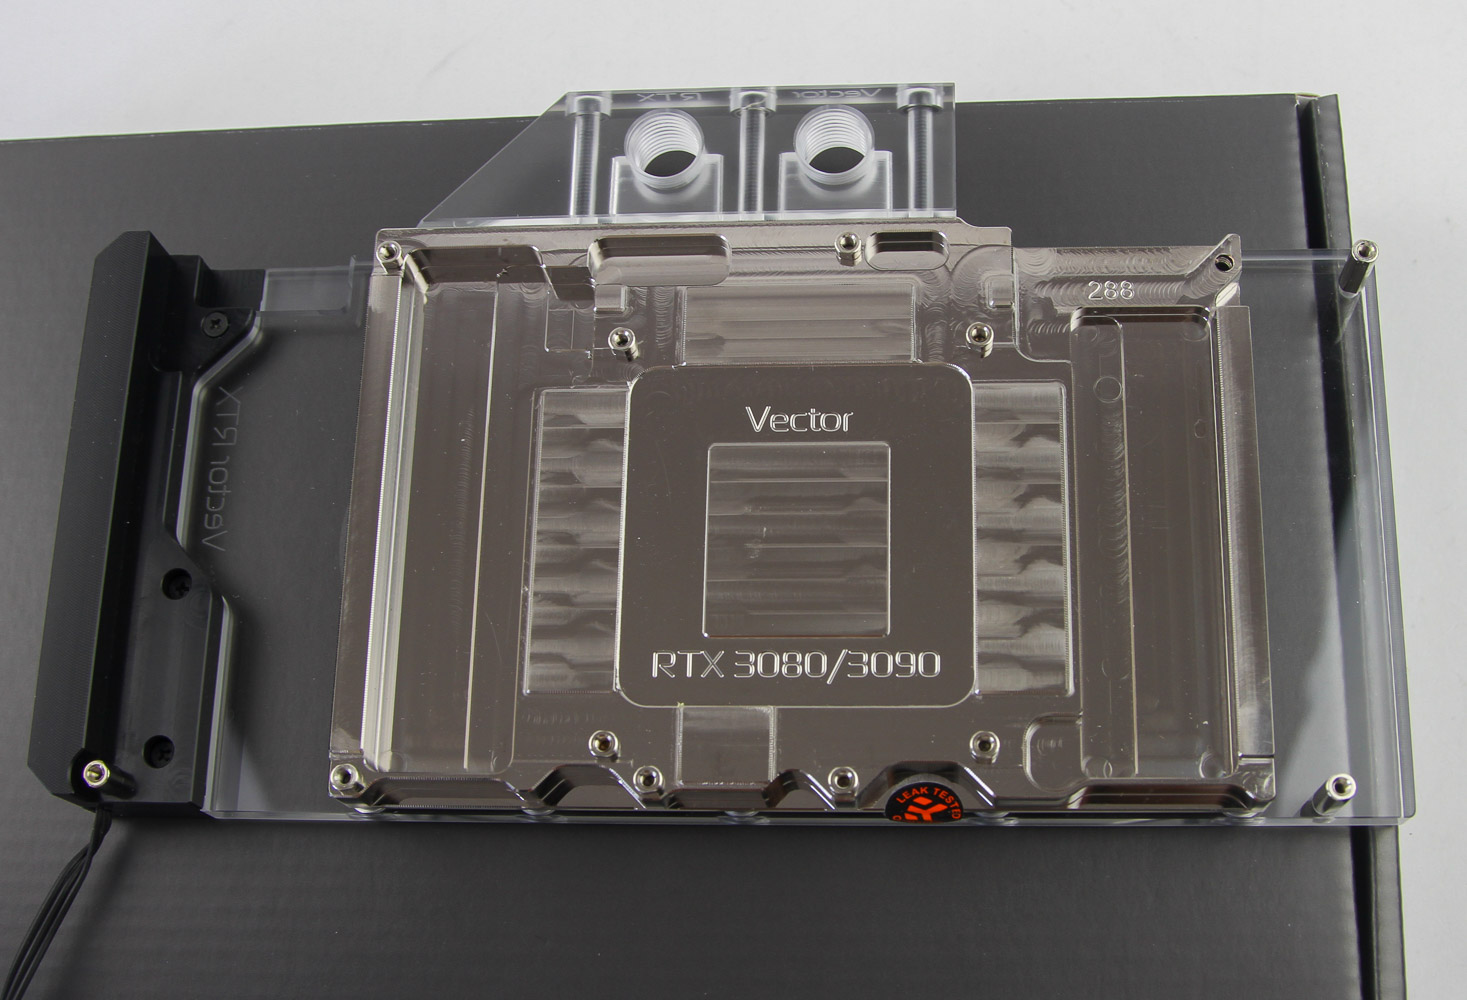

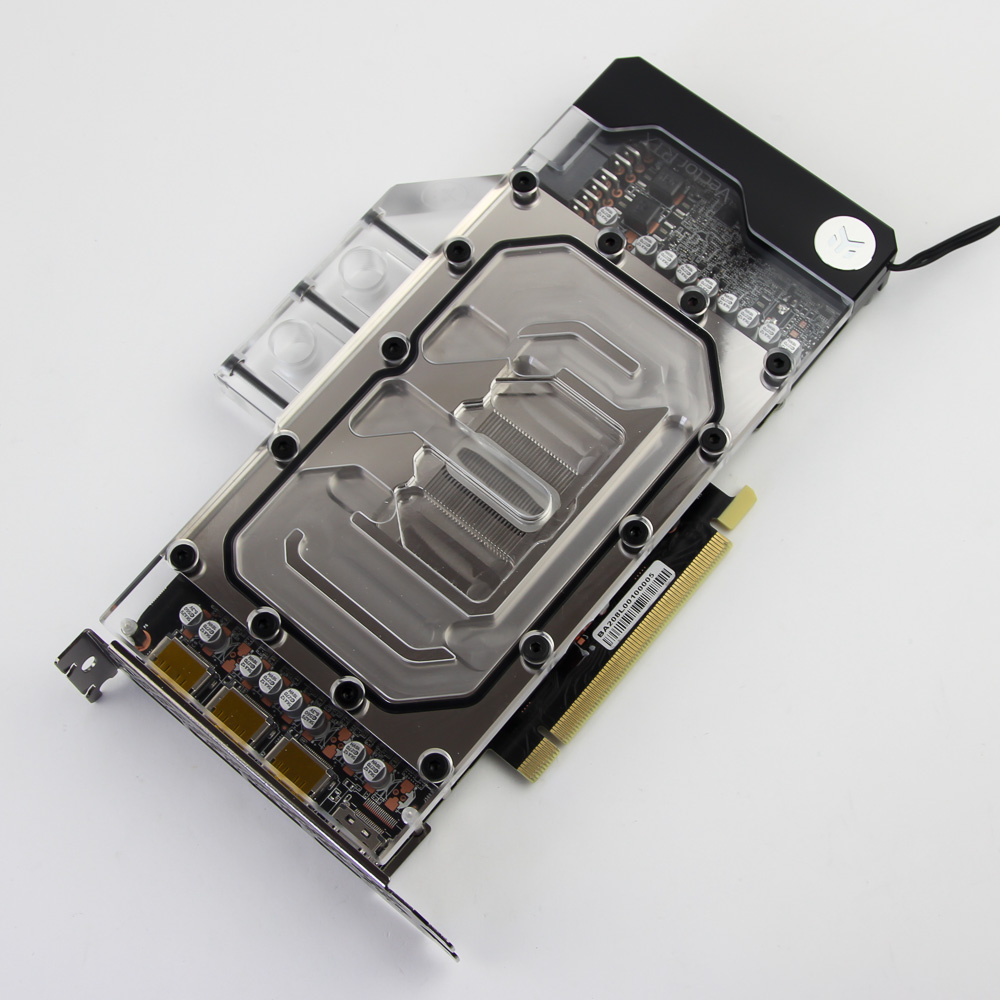
Installation of the GPU block is slightly more involved in the mise en place stage since you need to measure, cut, and apply thermal pads on all the relevant sections of the PCB as listed in the online manual. For the sake of this demo, I will not include any picture of this step since I have to be extra careful when applying the thermal pads for actual testing, as I otherwise would have a smaller space to work in and photo gear around. This is also why I am not showing the application of thermal paste, which I prefer to pre-spread over the GPU die. Lay the block with the cold plate facing up on a box and then place the PCB over the block such that the I/O bracket hangs off the edge of the box and does not interfere with the PCB touching the block. The other advantage of this method is that you can line the holes up better for the installation, which does mean you need to press down on the thermal pads slightly lest they fall off due to gravity.
Once done, start with the four screws and washers going around the GPU core itself. Do these in a diagonal manner, swapping between sets of two as with a CPU block, and don't tighten them all the way as you may have to slightly wiggle the PCB to better align all the holes for installation. With that done, move outwards until all 12 screws are in before you secure them. This is a precise installation in that you can screw them all the way into the standoffs on the block itself. It is not tool-less, however. You need a Phillips screwdriver since the screws have a Phillips head rather than the H2.5 head for the Allen key.
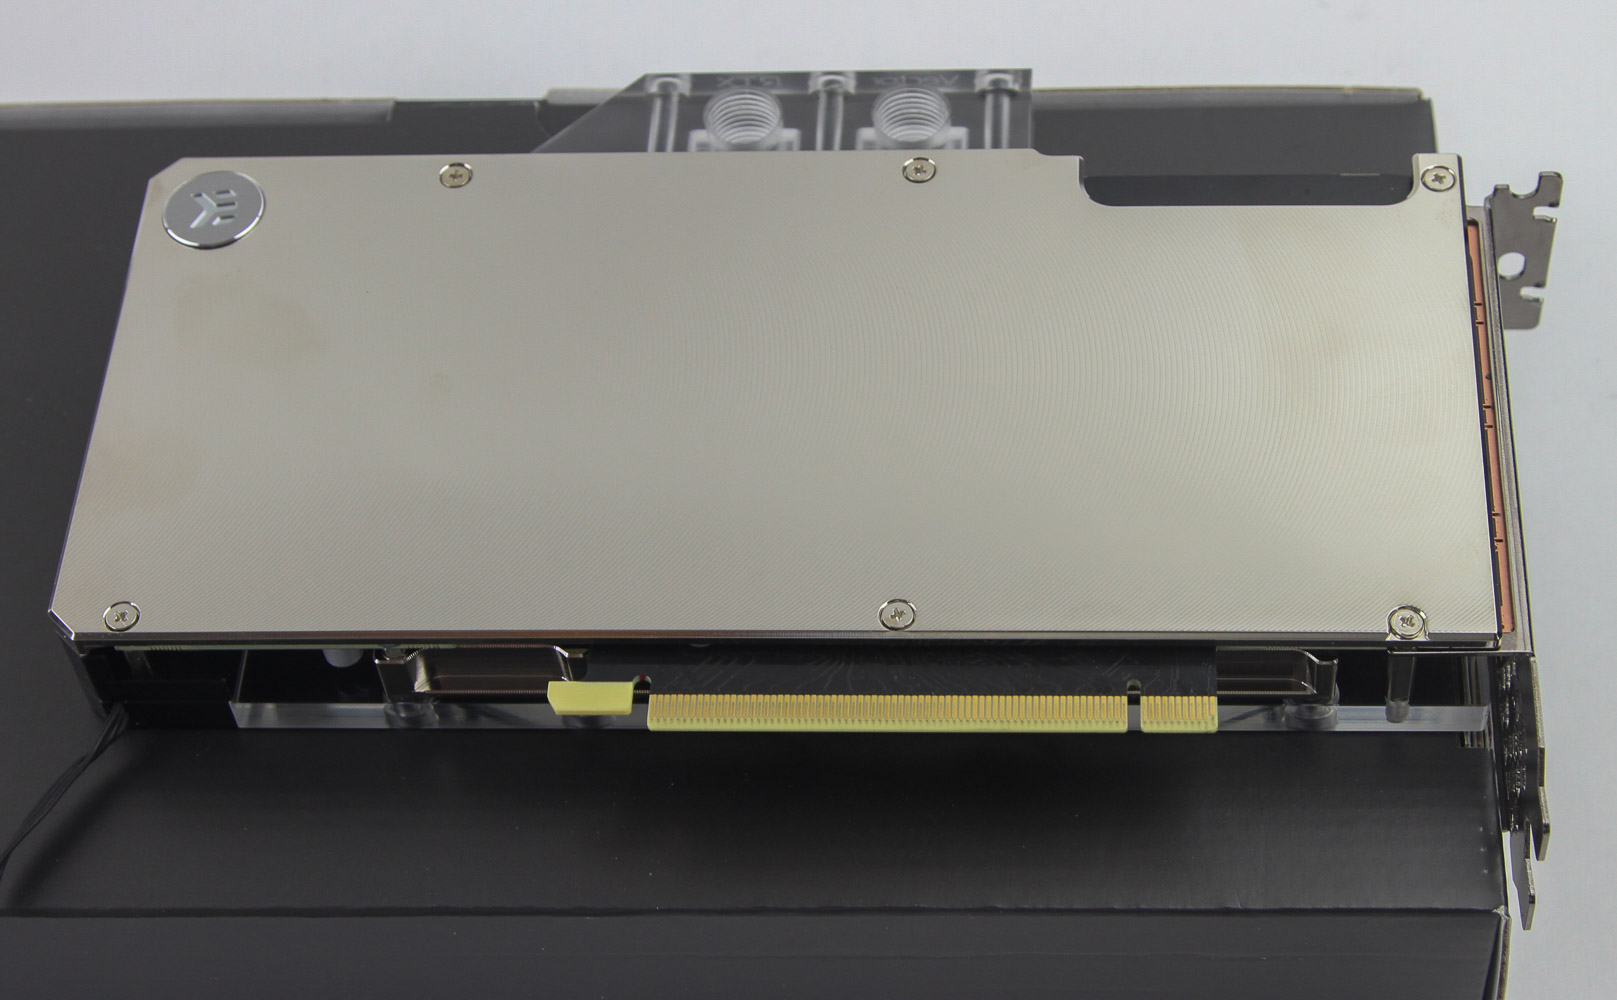
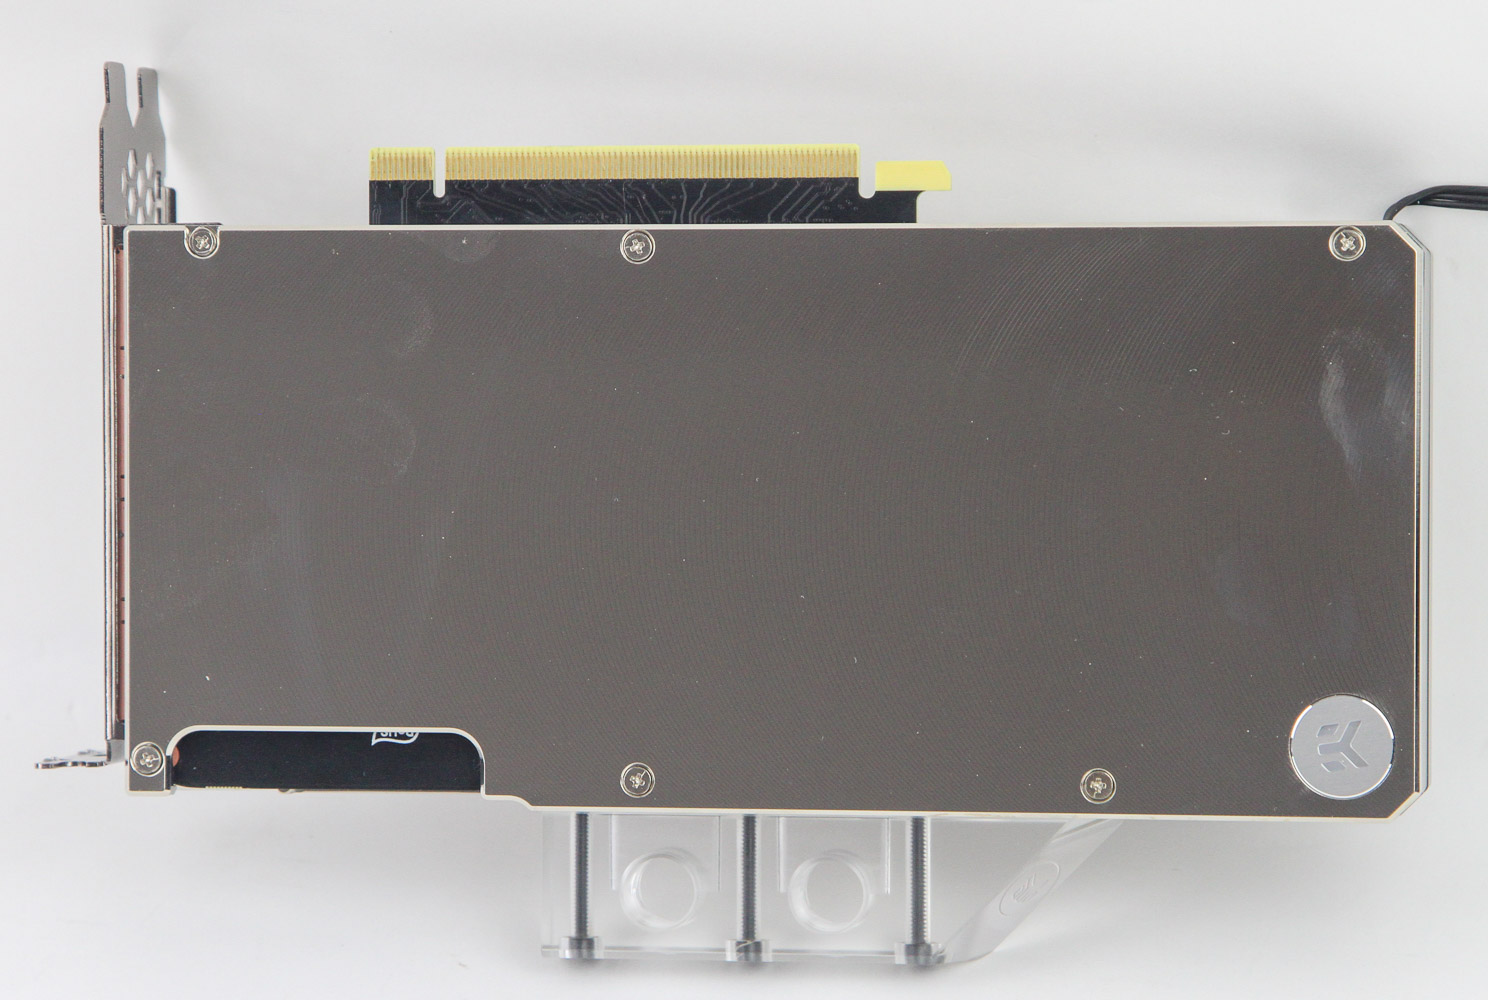
If you have either of the standard backplates, you will have to remove six screws and use the longer screws that come with the backplate. This also involves using provided thermal pads, which with the RTX 3080 is the thicker set to account for the lack of VRAM modules on the back of the PCB. The screws match the nickel backplate, which is a nice touch, and are flush with the surface of the backplate as well. I did notice that one of the screws was harder to secure, and another review pointed out the same on the same standoff, so I believe it was not threaded properly with the threads not going all the way to the top. If you have the same issue, start with this standoff. That solved the issue for me, but it is still a potential "bug" EK did not catch.
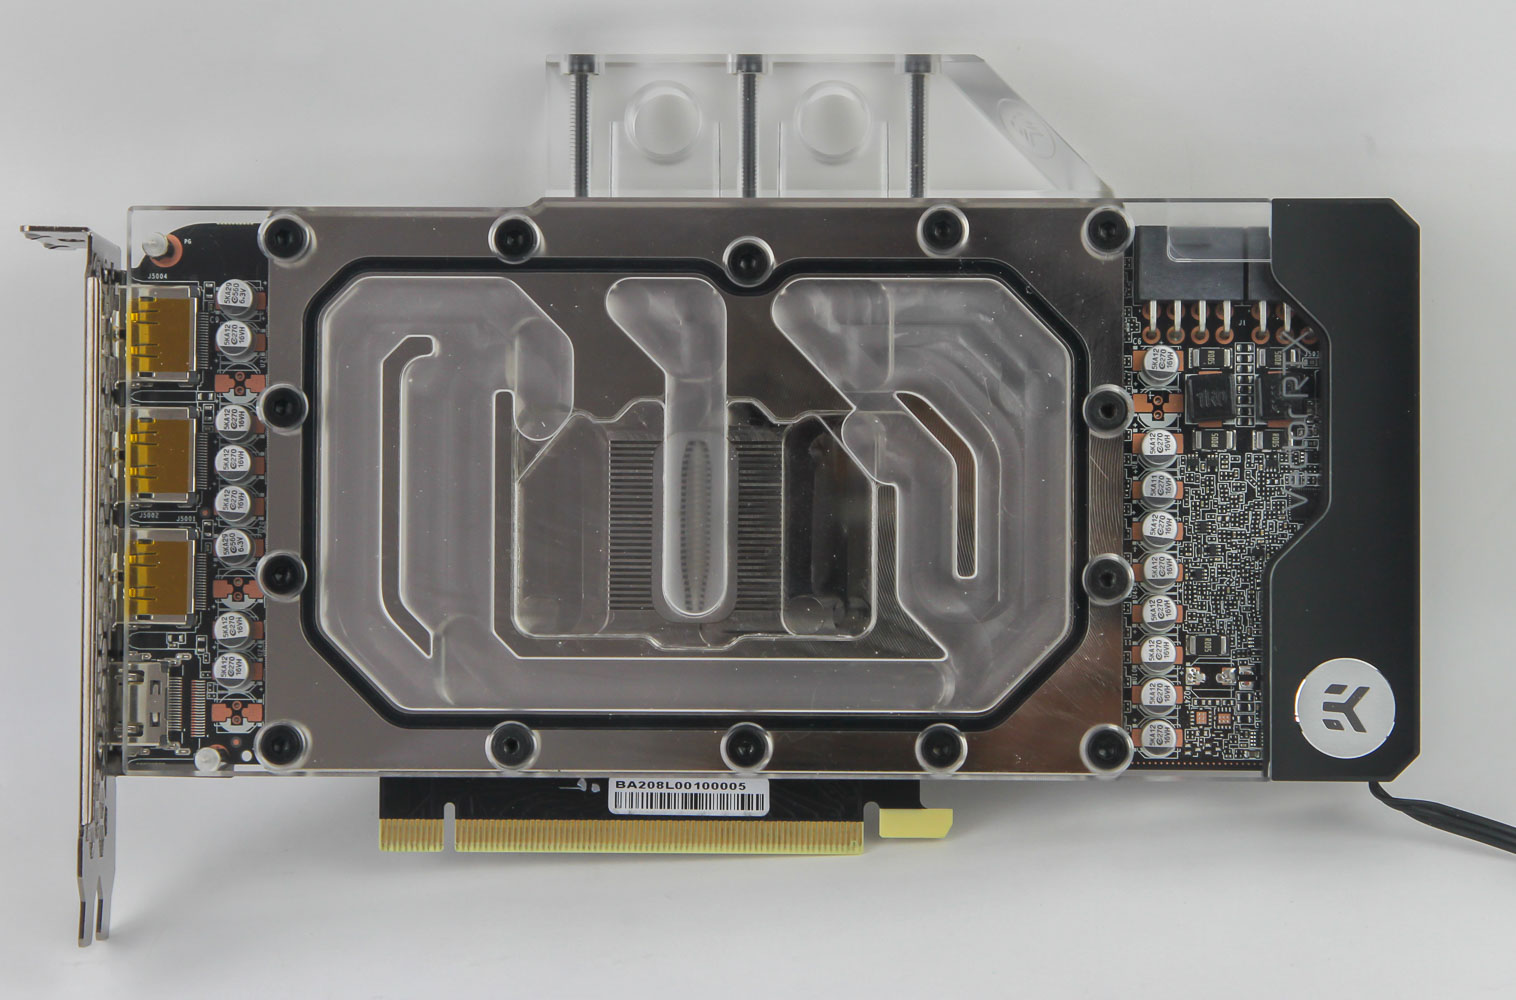
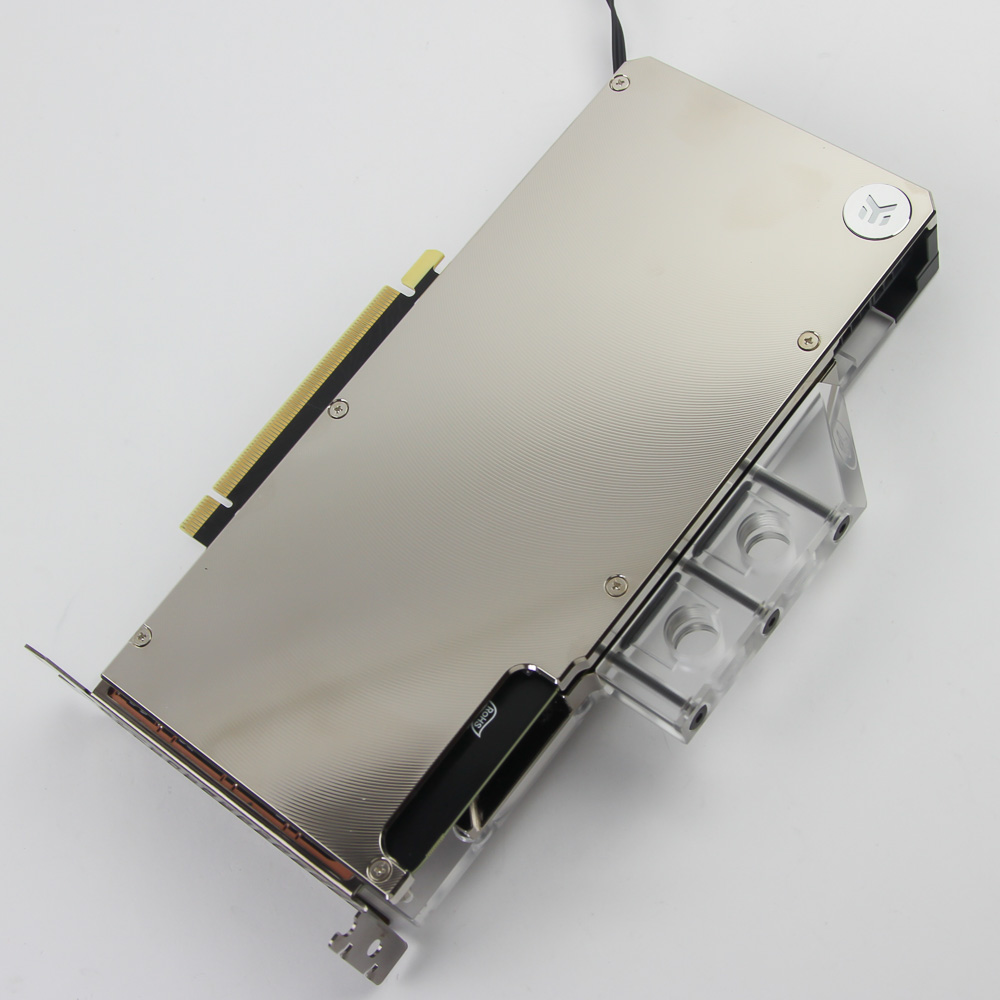
Once installed, the set looks quite snappy if I say so myself. Once again, photographing this without any reflections is tough, but it is a shiny piece of bling that also cools the RTX 3080. A lip on the backplate goes over the side to effectively make it seem like a continuous layer, which EK took further with the block for the RTX 3090 FE.
Lighting
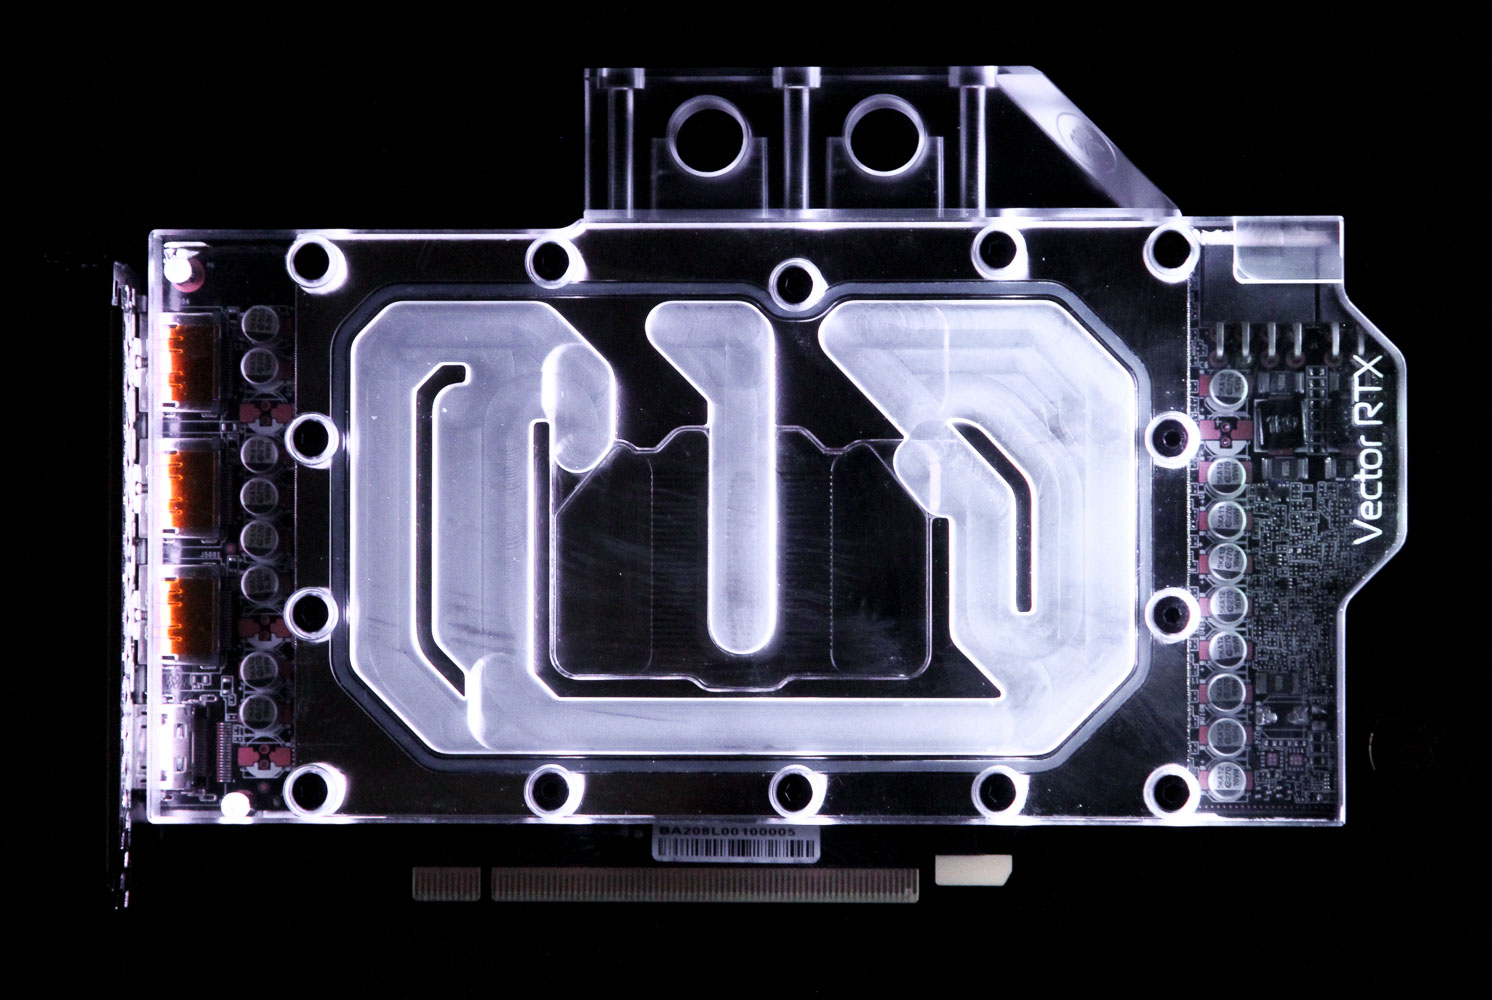
With vertically mounted GPUs becoming more popular than ever before, the front of the GPU block is all the more relevant for customizing a DIY watercooling loop to match your aesthetics. The plexi top allows for a look at the coolant flowing through, which also has the functional benefit of ensuring there are no trapped air bubbles in the coolant flow path. There are also five integrated, individually addressable RGB LEDs that can be powered and controlled via a standard 3-pin D-RGB header, which means you can have the block lit up as seen above. However, the five LEDs are not enough for the entire top, so there are sections that are not as bright as others. Some competitors include considerably more LEDs, which makes for a more impressive and consistent light show.
Mar 19th, 2025 12:26 EDT
change timezone
Latest GPU Drivers
New Forum Posts
- Gigabyte 9070 XT audio issues (13)
- anyone replace capacitors on a component? (2)
- Buying a new monitor - wiil I be able to drive 240 Hz@1440p ultrawide? (30)
- What are you playing? (23209)
- Asrock z590 oc formula best cpu and memory speeds? (13)
- HalfLife2 RTX Demo Is out! (142)
- OBS recording (1)
- wood workstation project (26)
- All about Grub issues and dual boot issues (16)
- Unlock the shaders - AMD Radeon RX 560D (345)
Popular Reviews
- Corsair SF750 750 W Review
- Sapphire Radeon RX 9070 XT Nitro+ Review - Beating NVIDIA
- ASRock Radeon RX 9070 XT Taichi OC Review - Excellent Cooling
- AMD Ryzen 9 9950X3D Review - Great for Gaming and Productivity
- MSI GeForce RTX 5070 Gaming Trio OC Review
- Kioxia Exceria Plus G4 2 TB Review - Energy-Efficient PCIe Gen 5
- XFX Radeon RX 9070 XT Mercury OC Magnetic Air Review
- ASUS Radeon RX 9070 TUF OC Review
- ASUS GeForce RTX 5090 TUF Review
- AMD Ryzen 7 9800X3D Review - The Best Gaming Processor
Controversial News Posts
- NVIDIA GeForce RTX 50 Cards Spotted with Missing ROPs, NVIDIA Confirms the Issue, Multiple Vendors Affected (519)
- AMD RDNA 4 and Radeon RX 9070 Series Unveiled: $549 & $599 (260)
- AMD Mentions Sub-$700 Pricing for Radeon RX 9070 GPU Series, Looks Like NV Minus $50 Again (250)
- NVIDIA Investigates GeForce RTX 50 Series "Blackwell" Black Screen and BSOD Issues (244)
- AMD Radeon RX 9070 and 9070 XT Official Performance Metrics Leaked, +42% 4K Performance Over Radeon RX 7900 GRE (195)
- AMD Radeon RX 9070-series Pricing Leaks Courtesy of MicroCenter (158)
- MSI Doesn't Plan Radeon RX 9000 Series GPUs, Skips AMD RDNA 4 Generation Entirely (140)
- Microsoft Introduces Copilot for Gaming (123)