 5
5
Glorious Modular Mechanical Keyboard Review
Driver »Disassembly

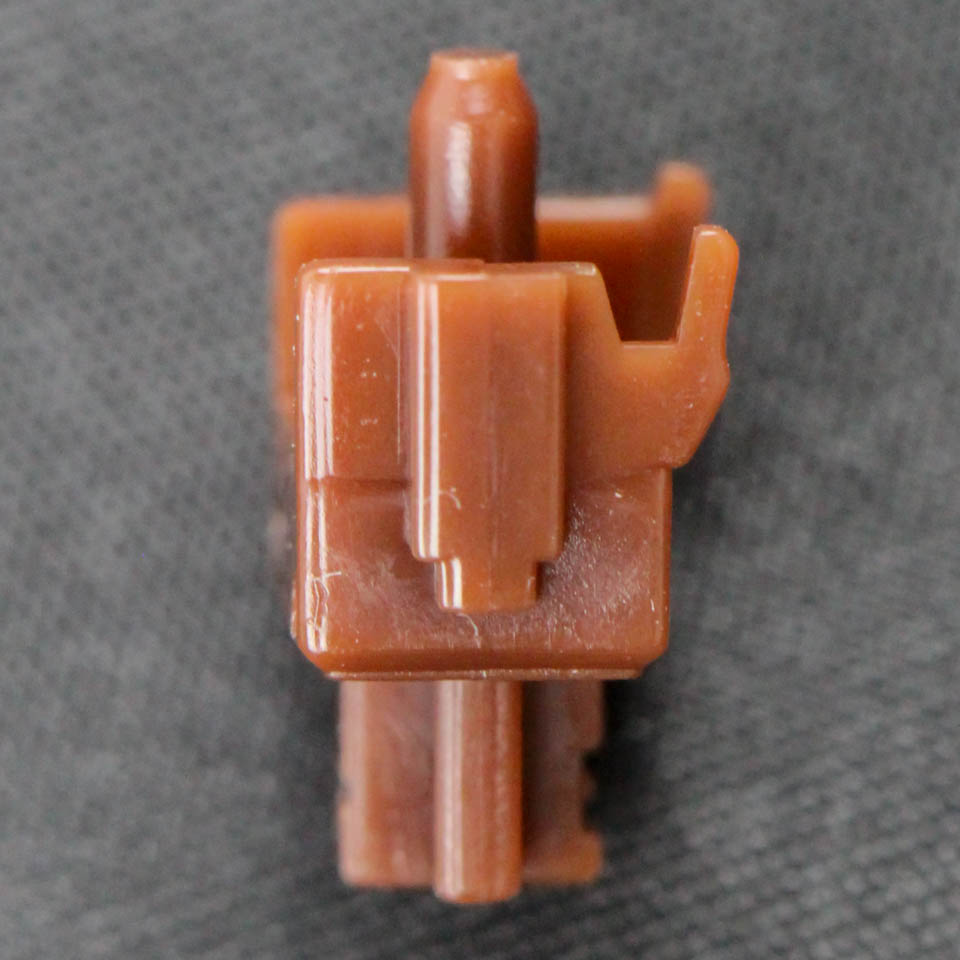
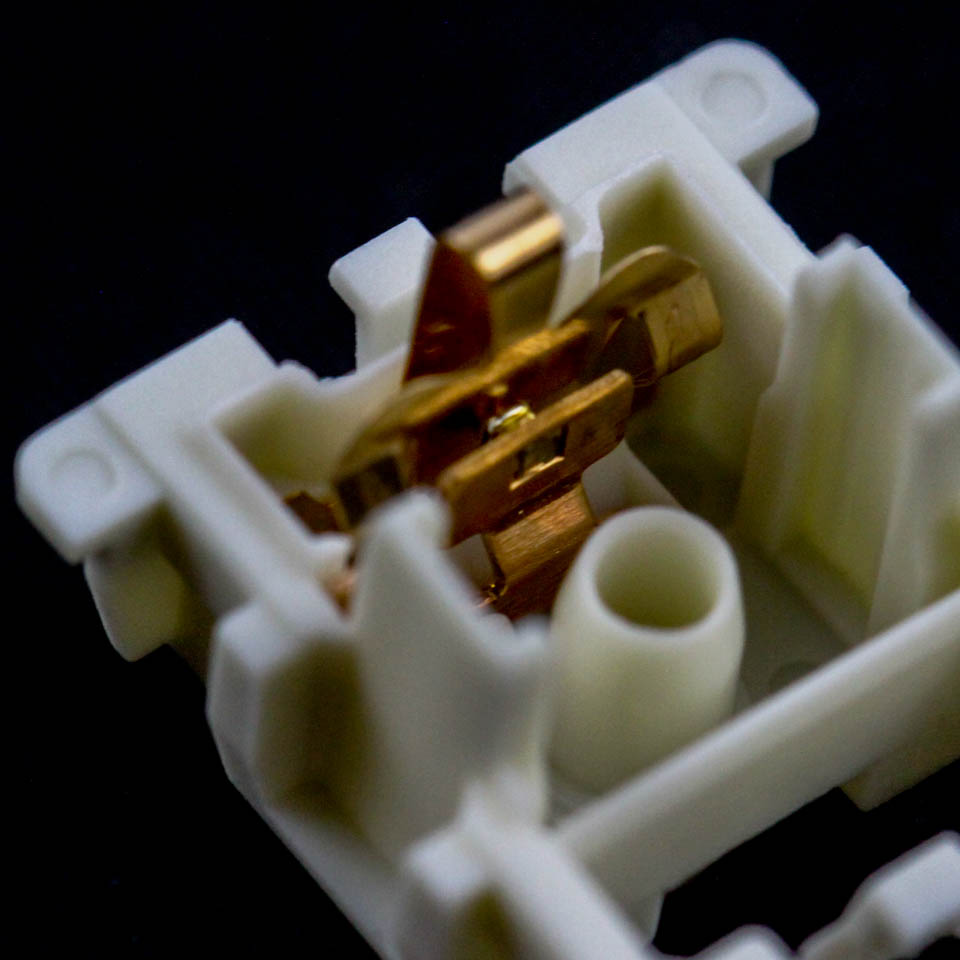
Given the modular switch feature employed with the Glorious Modular Mechanical Keyboard, I wanted to take a look inside the Gateron Brown switches first. The switch is held together with plastic clips on the top and bottom housing. Use a thin flat screwdriver to pry one side off before the other, but not by too much. The stem has a more pronounced notch relative to the Cherry MX Brown, which in turn accounts for a more pronounced tactile bump. The spring itself is similar in function, making for a light-medium force switch. Gold-plated crosspoint contacts, which make contact with the stem for the tactile feedback and switch actuation, complete the picture.


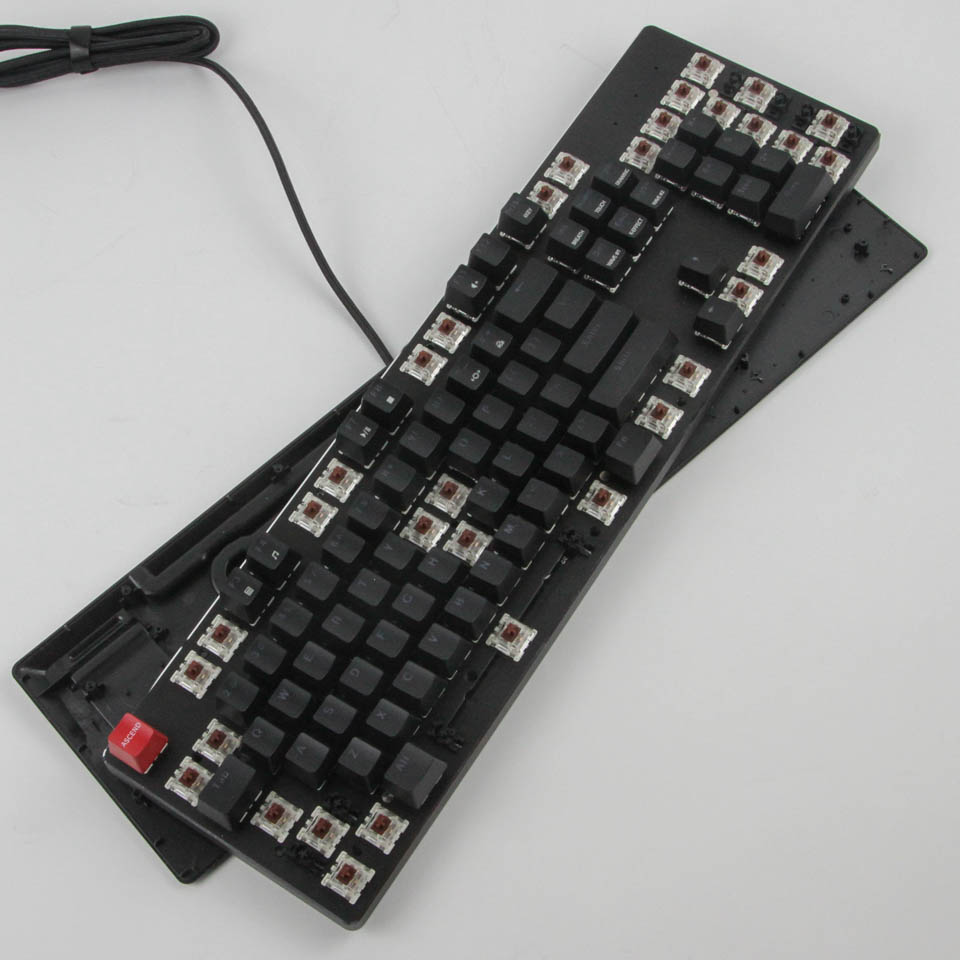
Disassembly of the GMMK itself is very easy since there are no hidden screws anywhere. There are 16 screws with countersunk Phillips heads underneath specific keycaps, as seen above, and removing the keycaps and the screws in that order helps separate the two main pieces of the keyboard by enough to dislodge the internal USB cable connecting the two pieces before separating them fully.
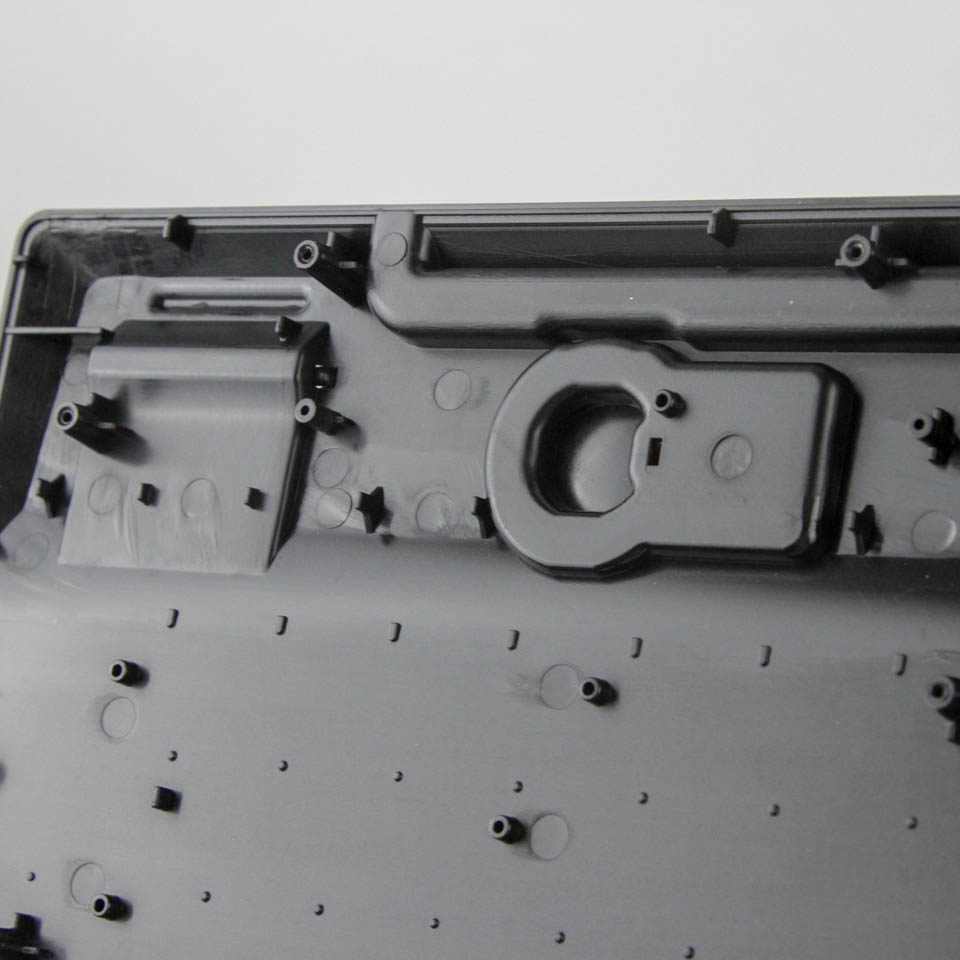
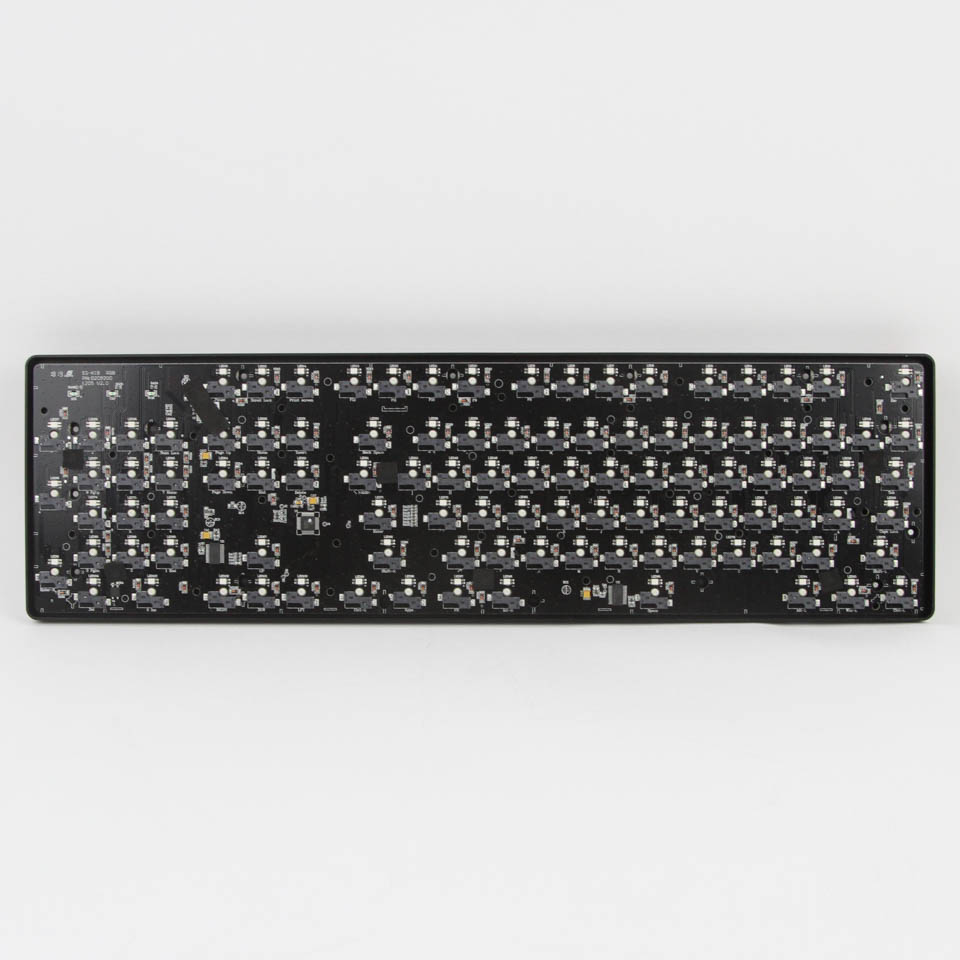
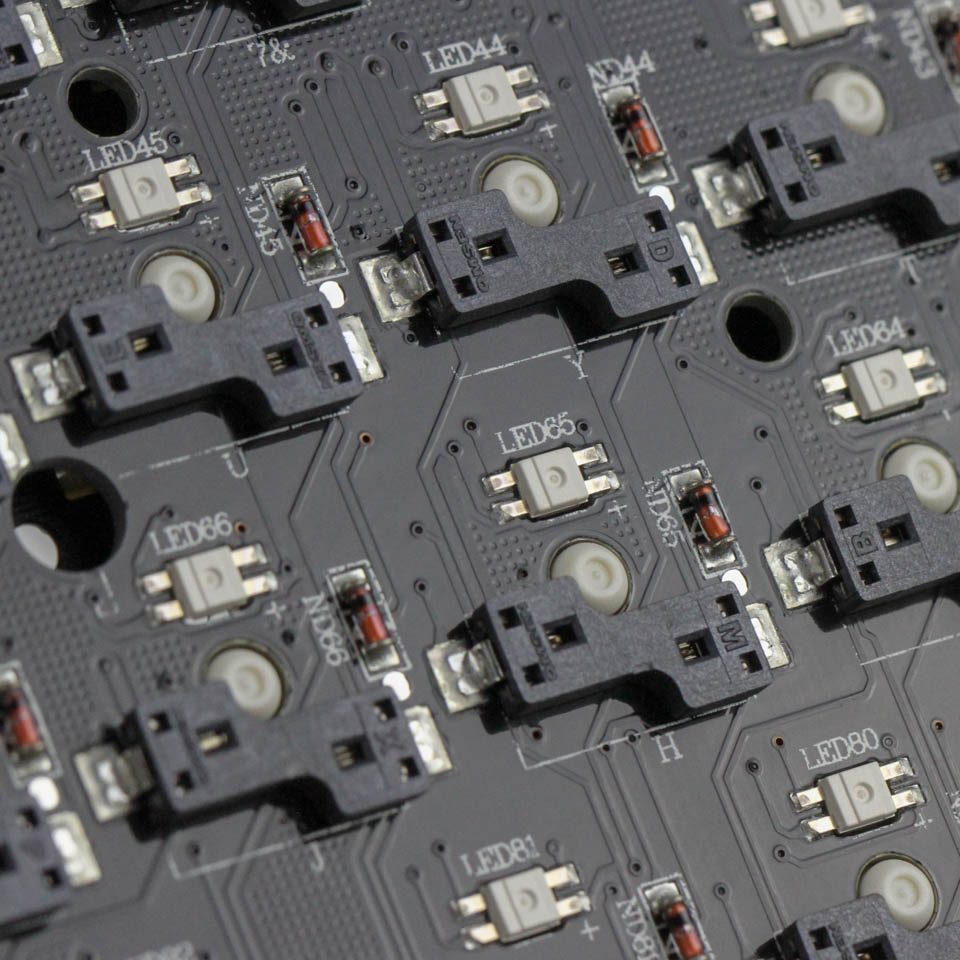
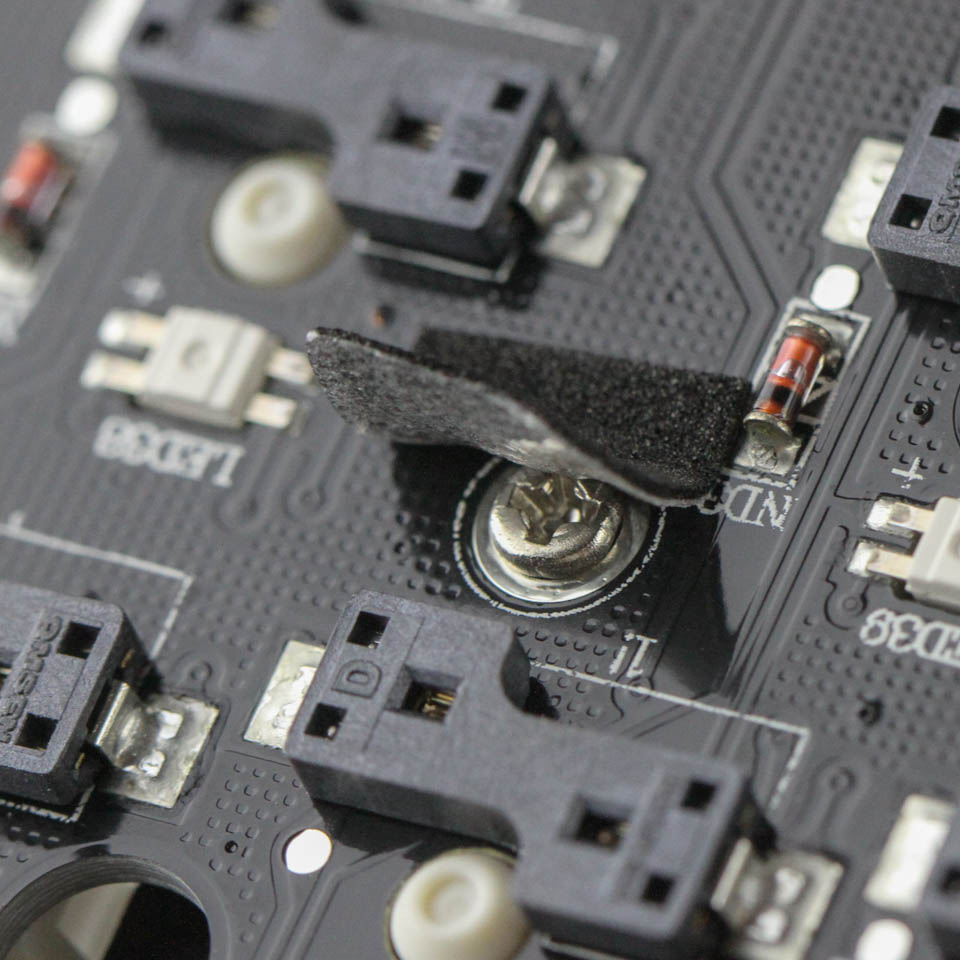
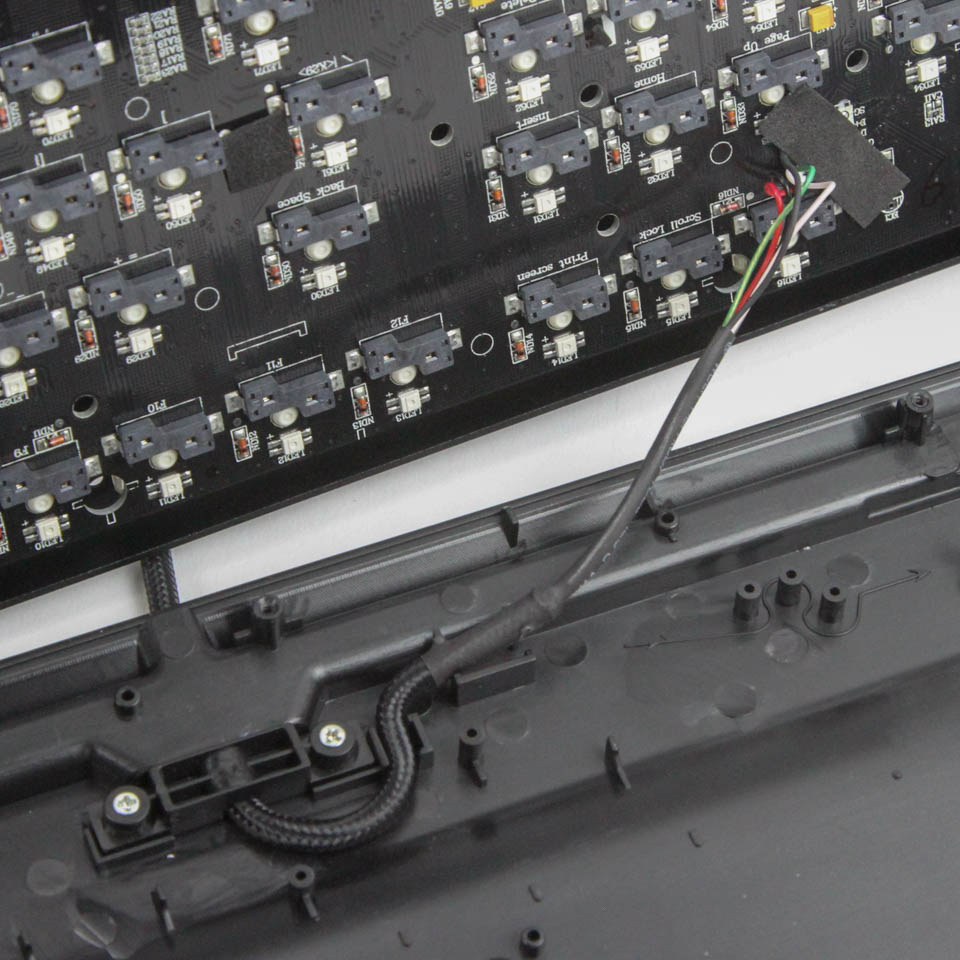
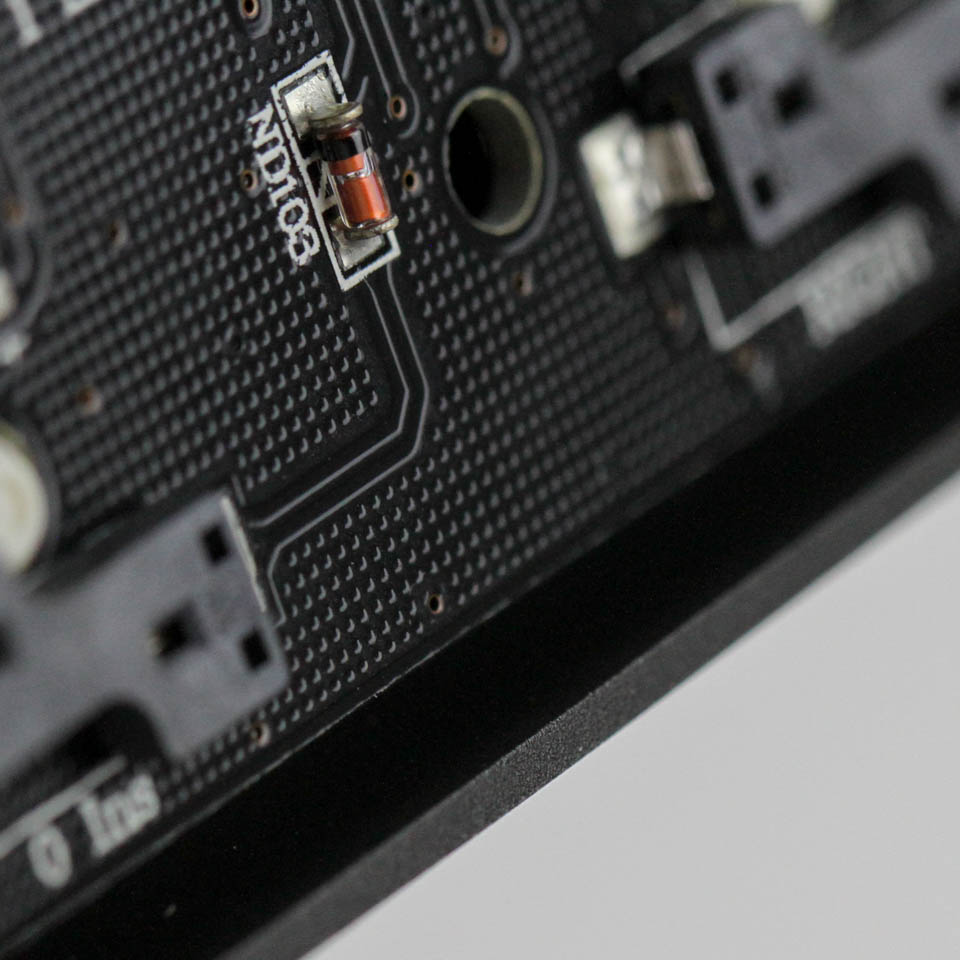
The bottom piece is made out of ABS plastic and has a cutout for the keycap puller to fit in, as well as more cutouts to accommodate the keyboard feet and cable-routing channels. The PCB is on the same pieces as the aluminium frame, with the switches pushed in place as seen before. We get a black PCB with very good soldering work throughout, including on the USB port and various LEDs. Some pieces of electrical insulating tape cover some screws here, which you can remove to then separate the PCB from the aluminium frame, but this involves taking off all the switches as well.
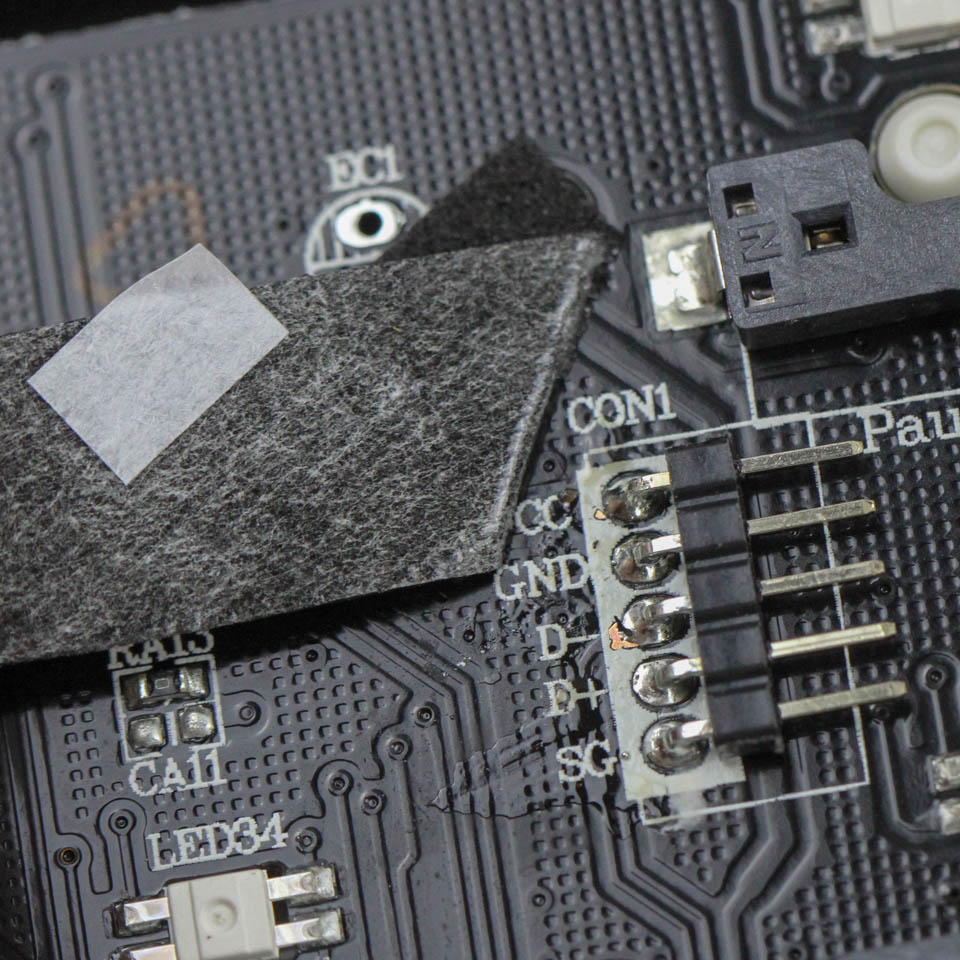
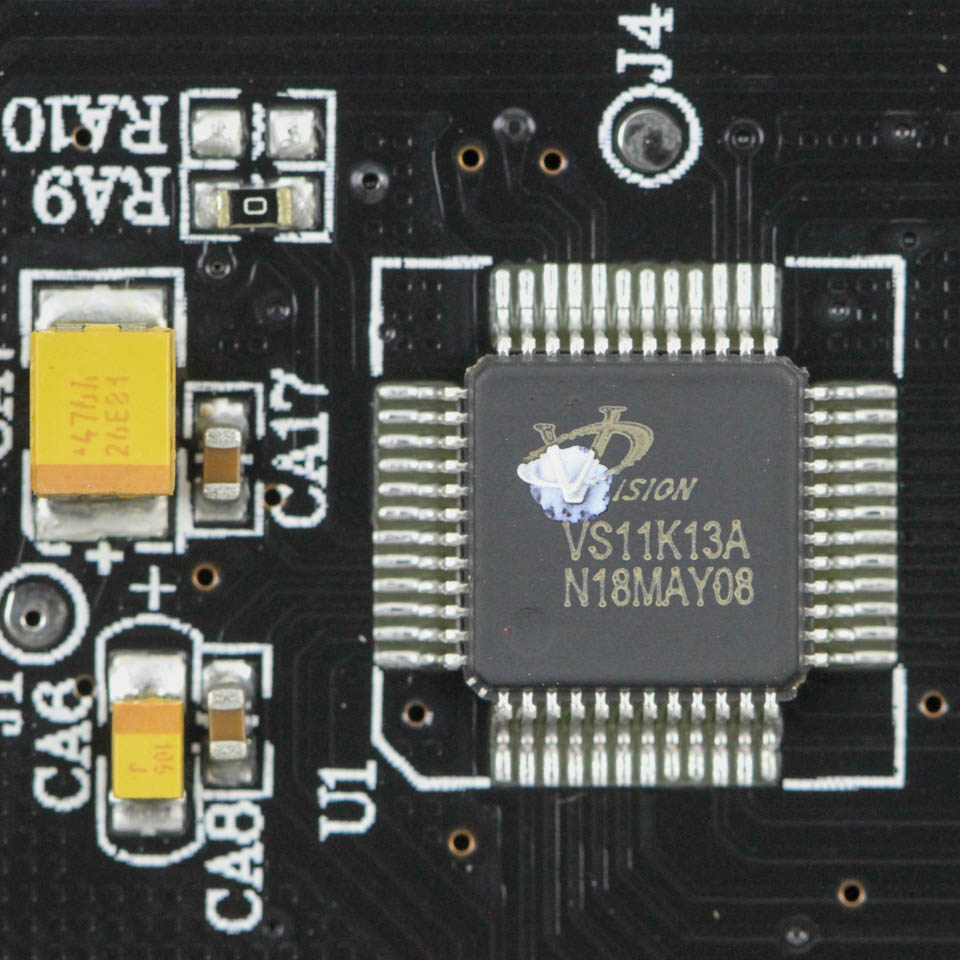
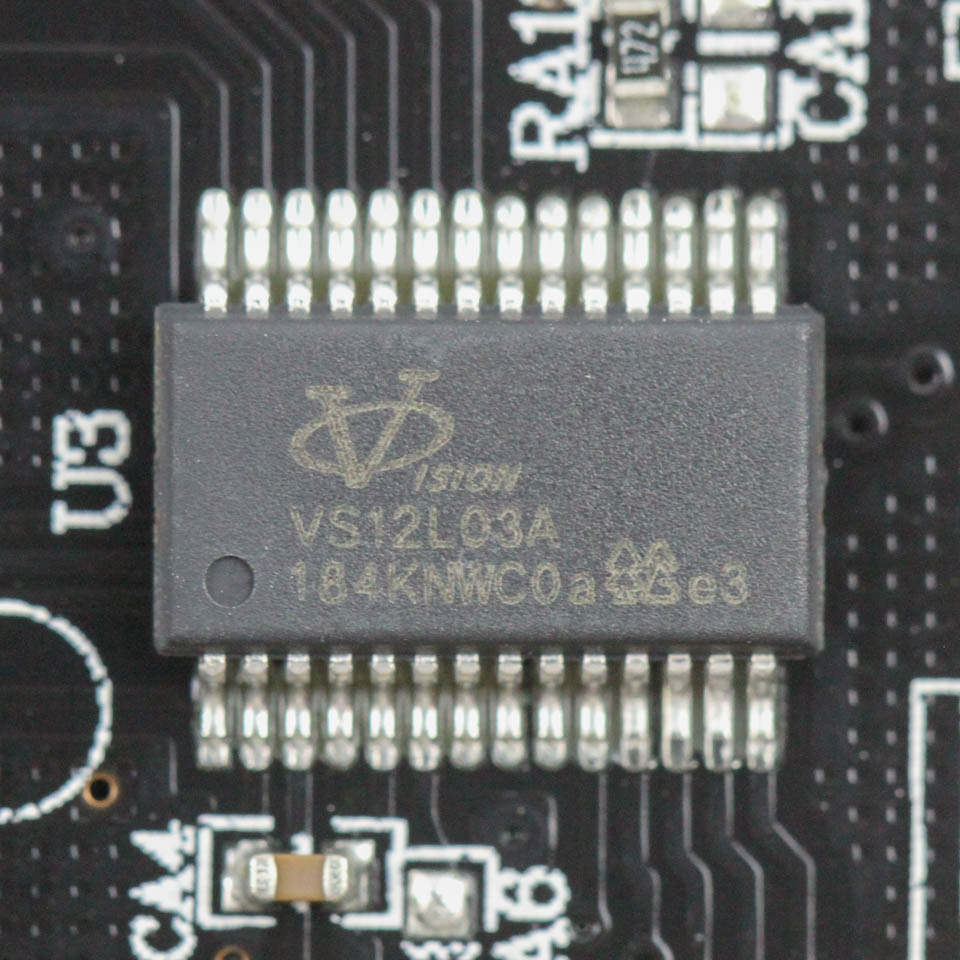
There is a similar piece of tape on the USB connector itself, which is more to help keep the cable connected than to prevent shorting. Powering the keyboard is a VISION VS11K13A USB microcontroller, of which there is not much information available online, but some time online revealed it being used by many other backlit keyboards to good effect, including the Cherry MX Board 8.0 RGB. There is not a whole lot going on in terms of pre-configured or customizable functionality, so the controller should be plenty fine given there are no complaints otherwise. There is also a dedicated Vision VS12L03A LED controller to help power the RGB backlighting supported by the keyboard. All components, including the LEDs and capacitors, are soldered to a multi-layered PCB.
Before we move on, be advised that disassembly may void the warranty and that TechPowerUp is not liable for any damages incurred if you decide to go ahead and do so anyway.
Mar 10th, 2025 22:08 EDT
change timezone
Latest GPU Drivers
New Forum Posts
- Biostar RX 6700 XT OC BIOS (8)
- Nvidia's GPU market share hits 90% in Q4 2024 (gets closer to full monopoly) (797)
- Mind If I Play Through? (11)
- ThrottleStop, mistake (4)
- ThrottleStop, auto-launching (1)
- Post your Old CDs, from back in the day thread. (3)
- AMD RX 9070 XT & RX 9070 non-XT thread (OC, undervolt, benchmarks, ...) (8)
- Wherein lies the difference (3)
- What's your latest tech purchase? (23279)
- CPU downclocks under any loads but it doesn't hit any limits (1)
Popular Reviews
- Sapphire Radeon RX 9070 XT Nitro+ Review - Beating NVIDIA
- XFX Radeon RX 9070 XT Mercury OC Magnetic Air Review
- ASUS Radeon RX 9070 TUF OC Review
- MSI MAG B850 Tomahawk Max Wi-Fi Review
- NVIDIA GeForce RTX 5070 Founders Edition Review
- Corsair Vengeance RGB CUDIMM DDR5-8800 48 GB CL42 Review
- AMD Ryzen 7 9800X3D Review - The Best Gaming Processor
- ASUS GeForce RTX 5070 Ti TUF OC Review
- MSI GeForce RTX 5070 Ti Gaming Trio OC+ Review
- MSI GeForce RTX 5070 Ti Ventus 3X OC Review
Controversial News Posts
- NVIDIA GeForce RTX 50 Cards Spotted with Missing ROPs, NVIDIA Confirms the Issue, Multiple Vendors Affected (513)
- AMD Plans Aggressive Price Competition with Radeon RX 9000 Series (277)
- AMD Radeon RX 9070 and 9070 XT Listed On Amazon - One Buyer Snags a Unit (261)
- AMD RDNA 4 and Radeon RX 9070 Series Unveiled: $549 & $599 (260)
- AMD Mentions Sub-$700 Pricing for Radeon RX 9070 GPU Series, Looks Like NV Minus $50 Again (248)
- NVIDIA Investigates GeForce RTX 50 Series "Blackwell" Black Screen and BSOD Issues (244)
- AMD Radeon RX 9070 and 9070 XT Official Performance Metrics Leaked, +42% 4K Performance Over Radeon RX 7900 GRE (195)
- AMD Radeon RX 9070-series Pricing Leaks Courtesy of MicroCenter (158)