 7
7
HyperX Alloy Origins 60 Review
Software »Disassembly


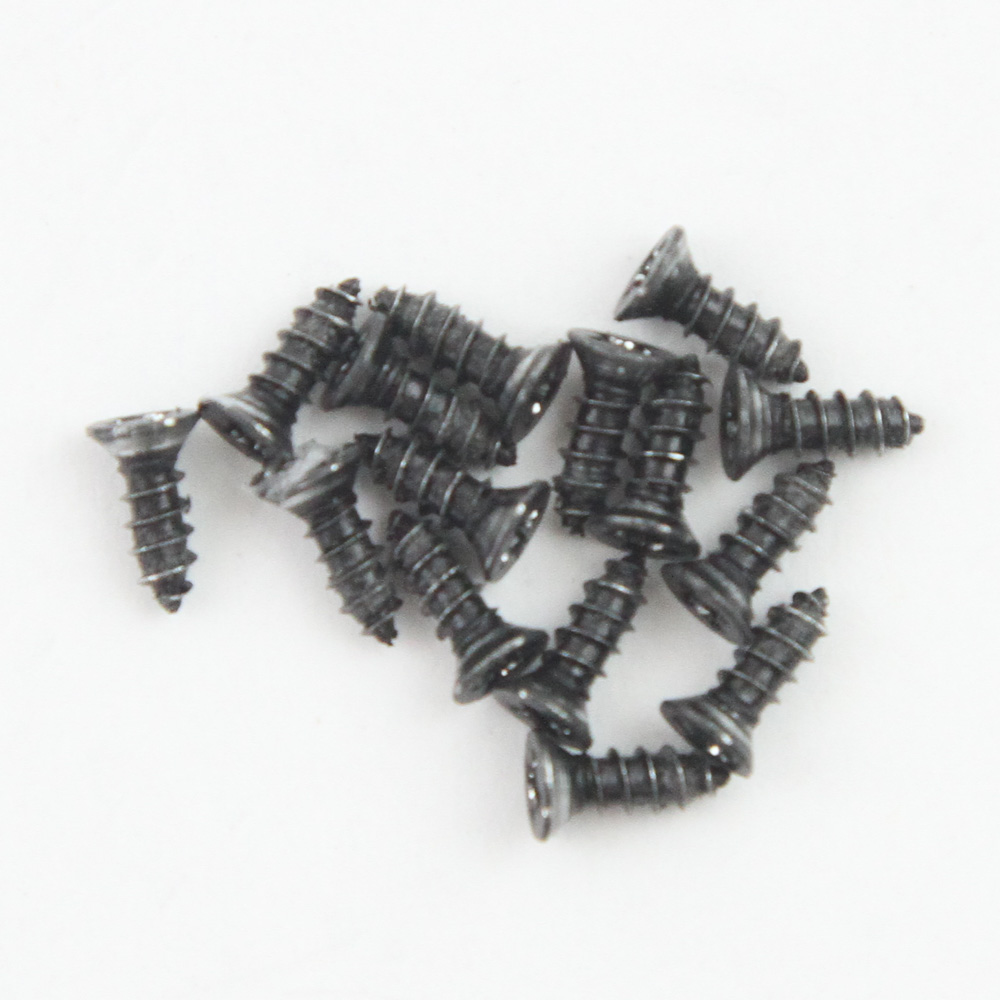

Aha, not this time HyperX! The Alloy Origins Core may have gotten one over me, but disassembly of the Alloy Origins 60 went as expected. It begins with the removal of several keycaps up top to access many Phillips head screws, and then there are a couple more on the back, hidden underneath the rubber pads. Once all 15 are removed, you can lift up the top piece. There are no internal USB cables to worry about, so you can fully separate the two pieces for a closer examination.
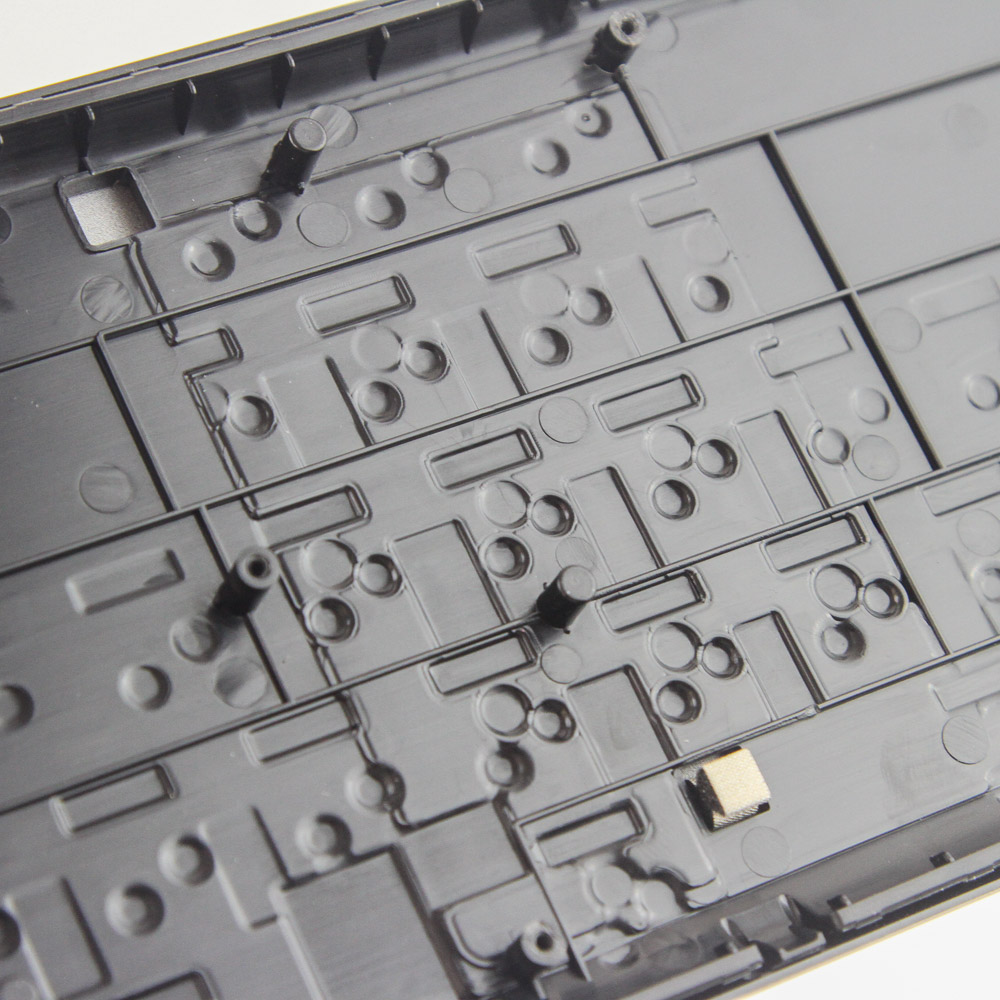
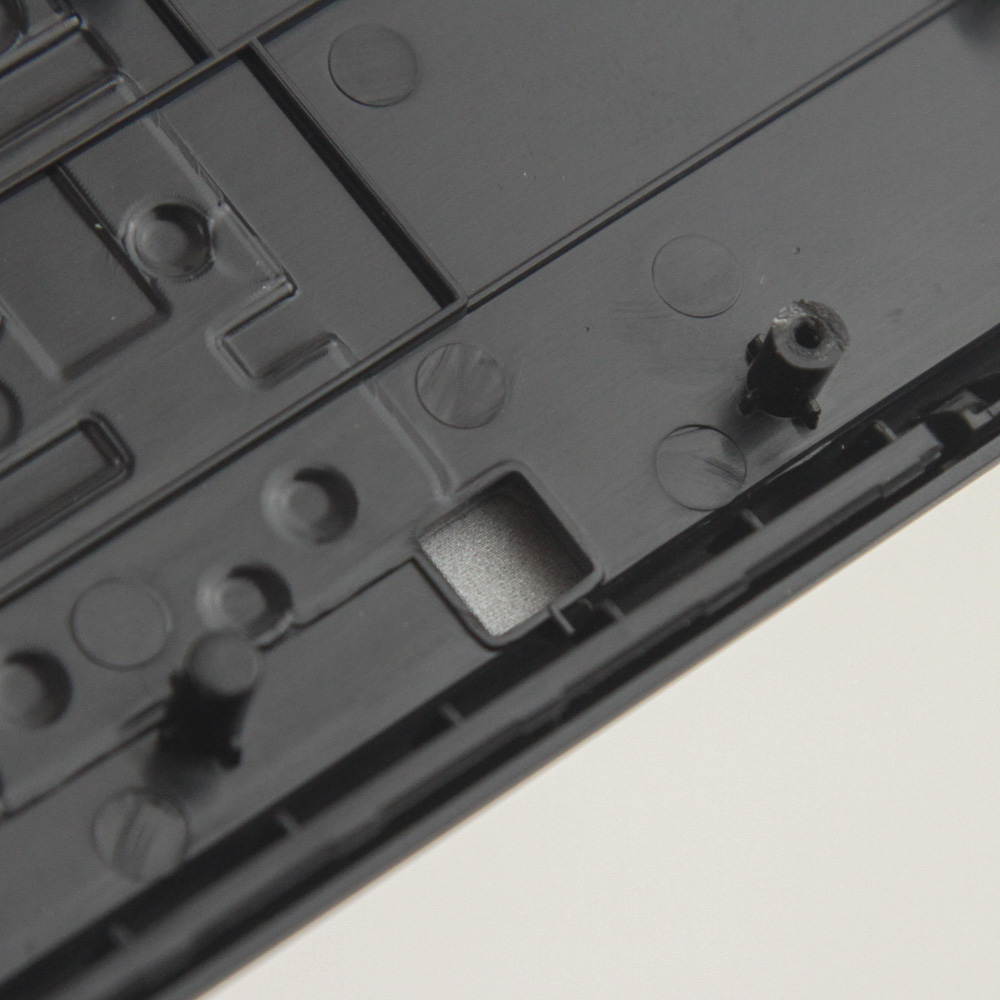

As with the other HyperX Alloy Origins keyboard, we have an aluminium body case on the bottom, with a plastic lining inside to prevent shorting and make it easy to mold things, including the keyboard feet. We also see a thin foam sheet in the gap, and this aluminium piece weighs a decent amount compared to the rest of the keyboard and the usual part out of just thin, light ABS plastic. The other piece has the switches soldered through the aluminium frame and onto the PCB, which has a matte black finish.
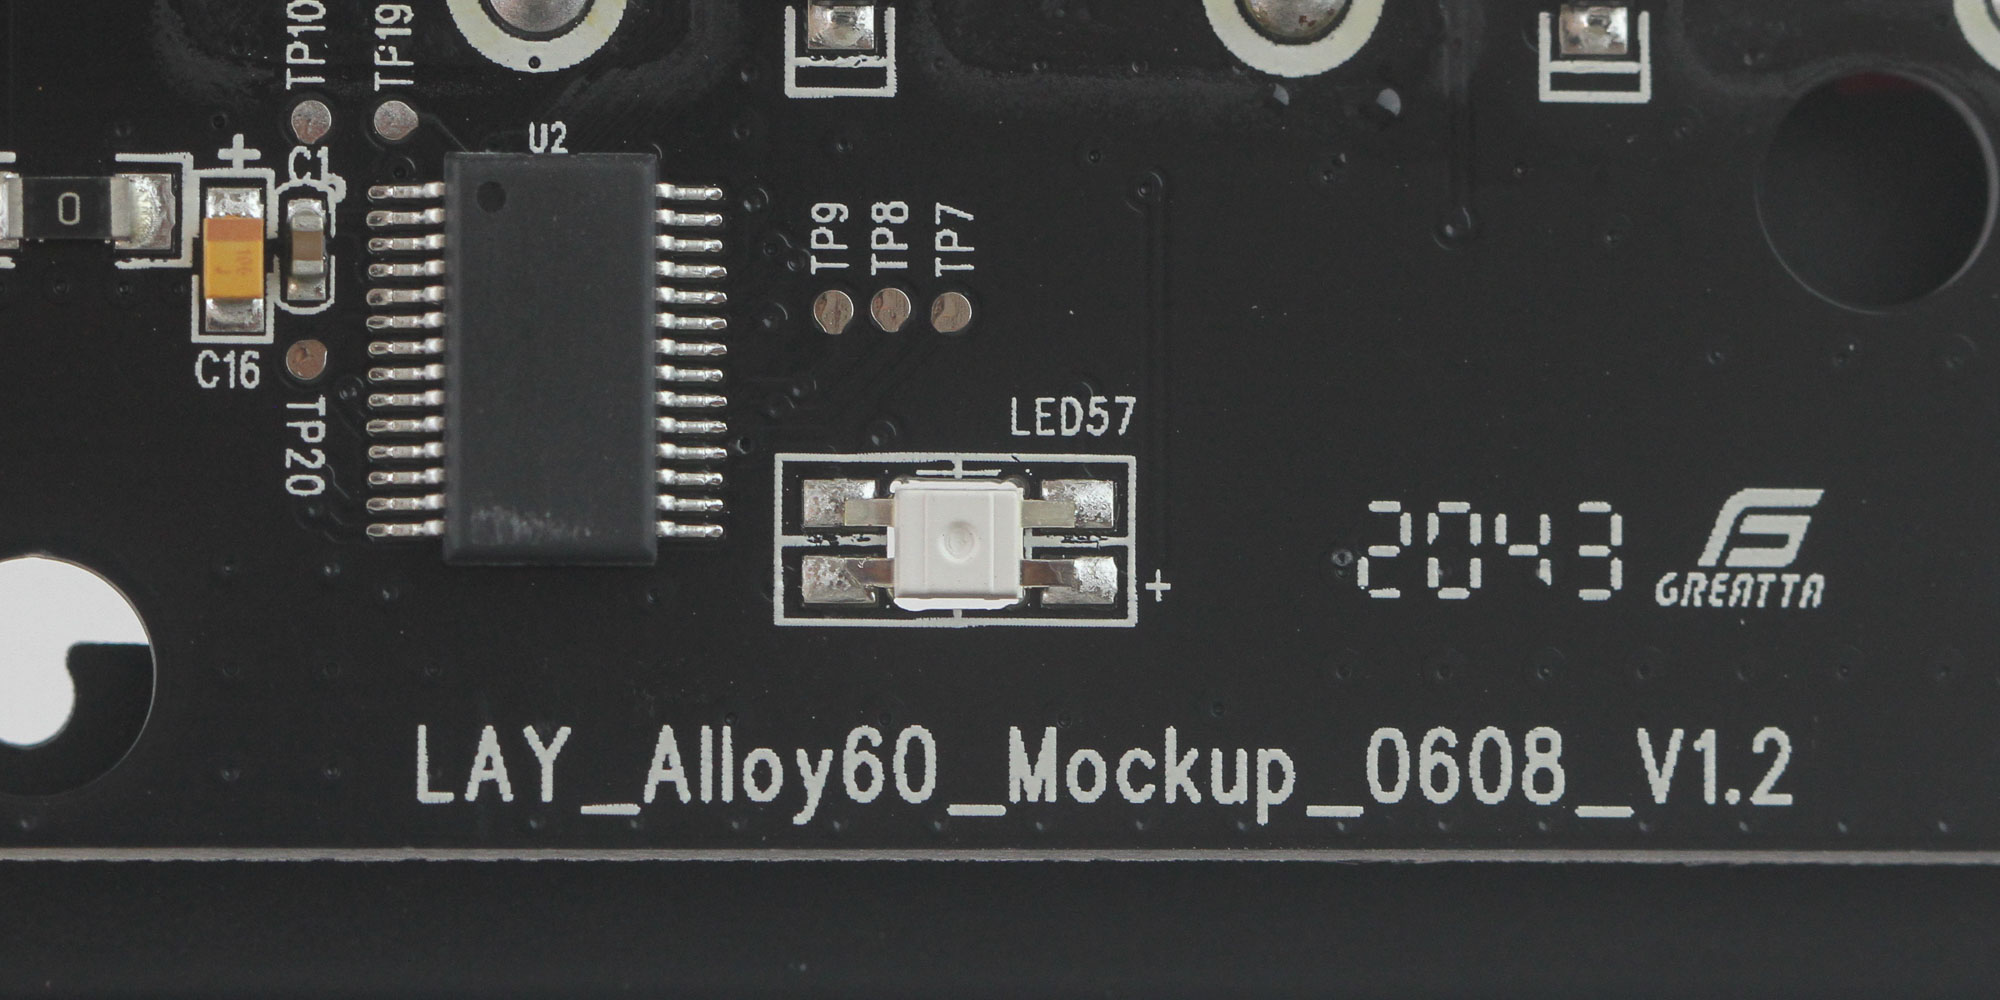
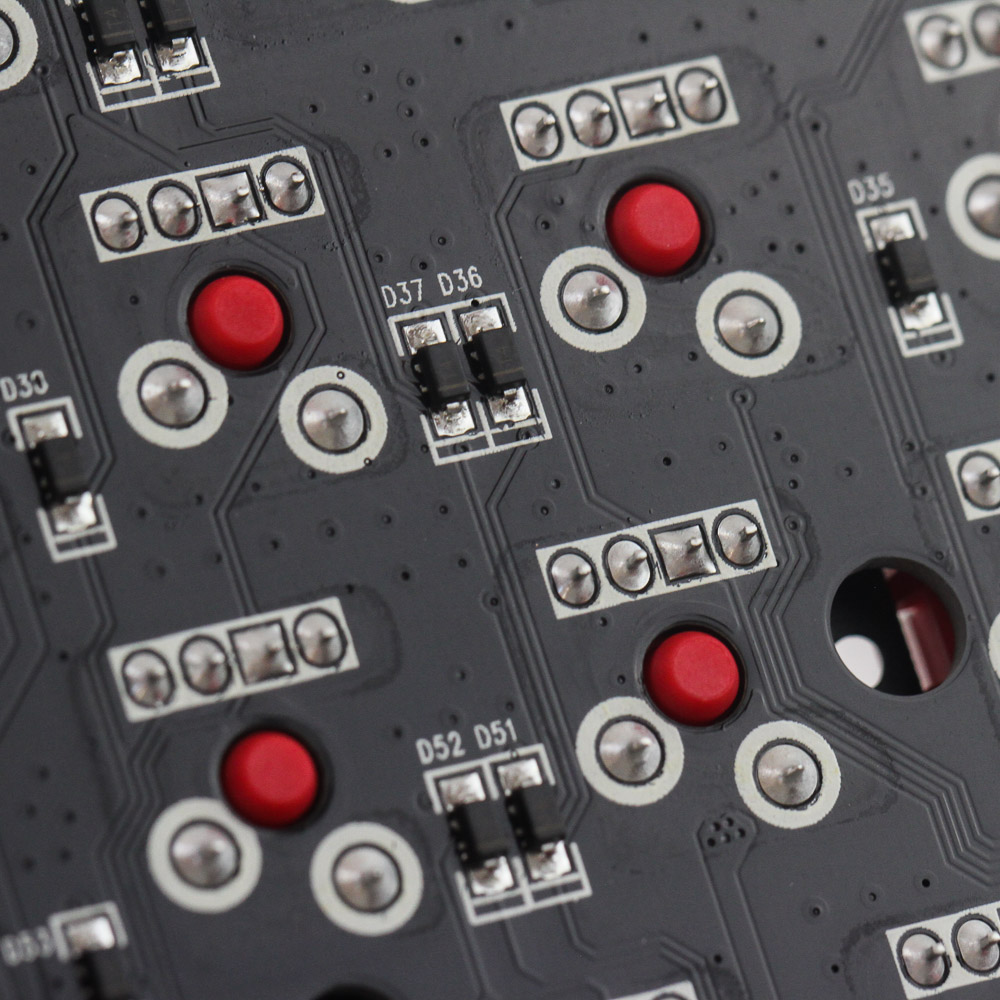
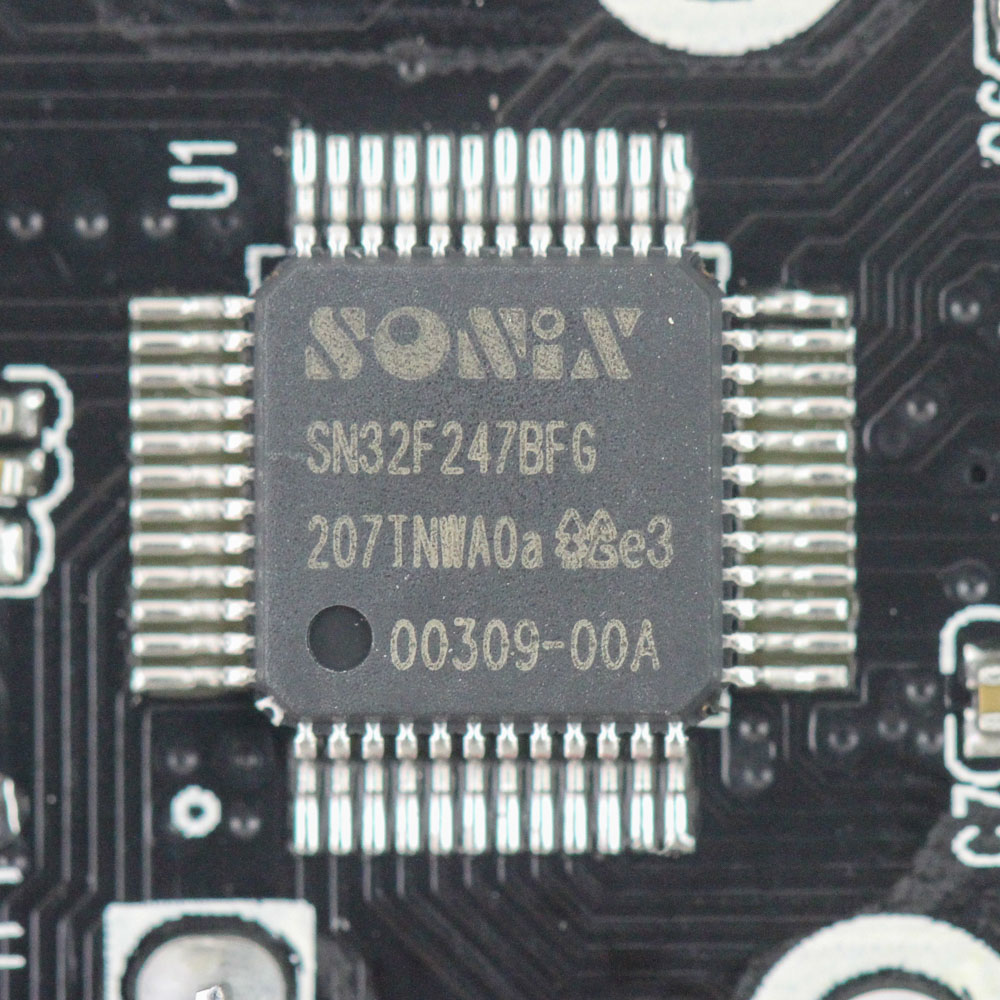
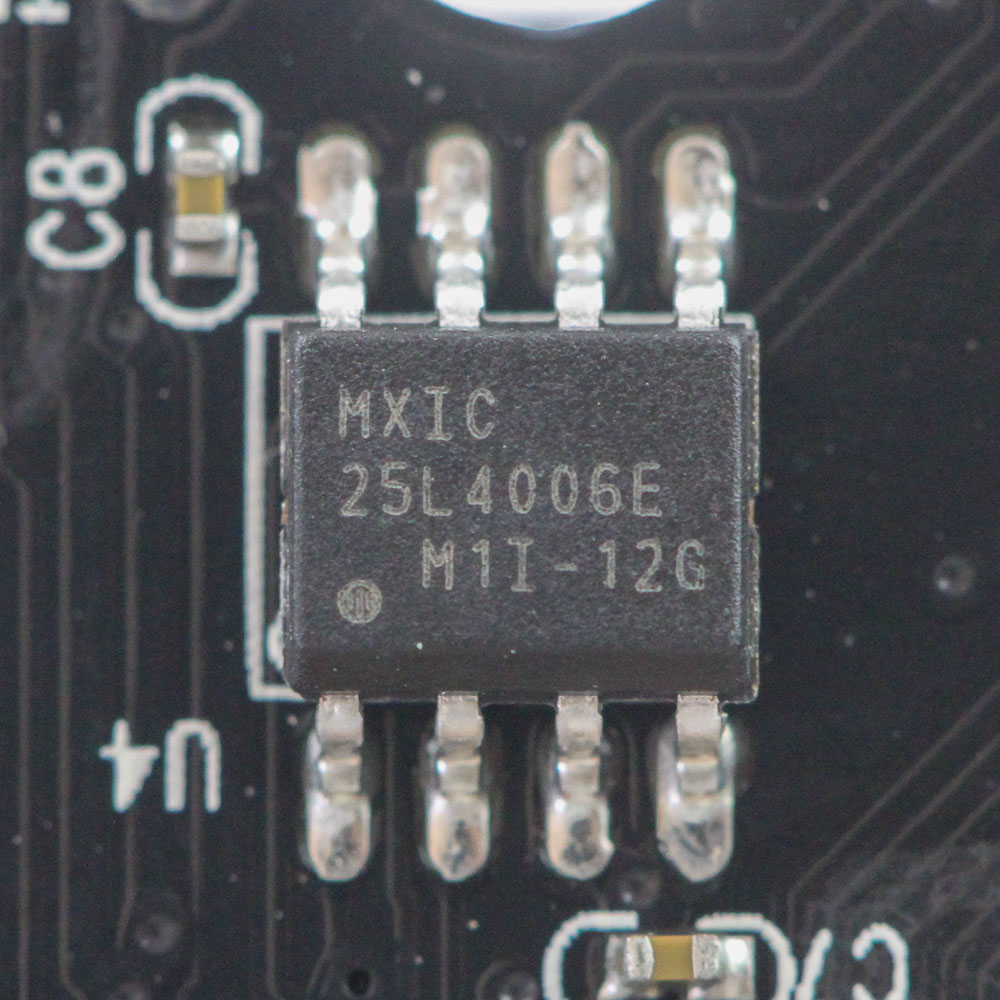
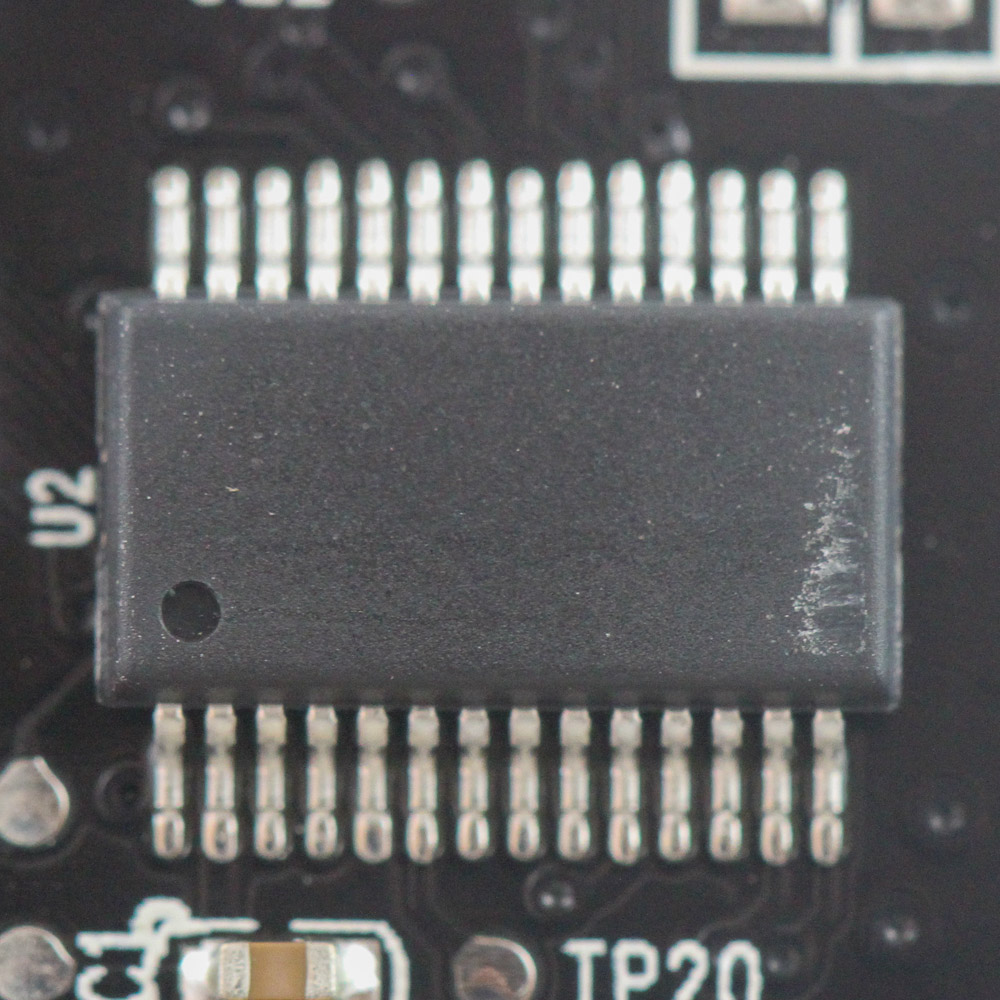
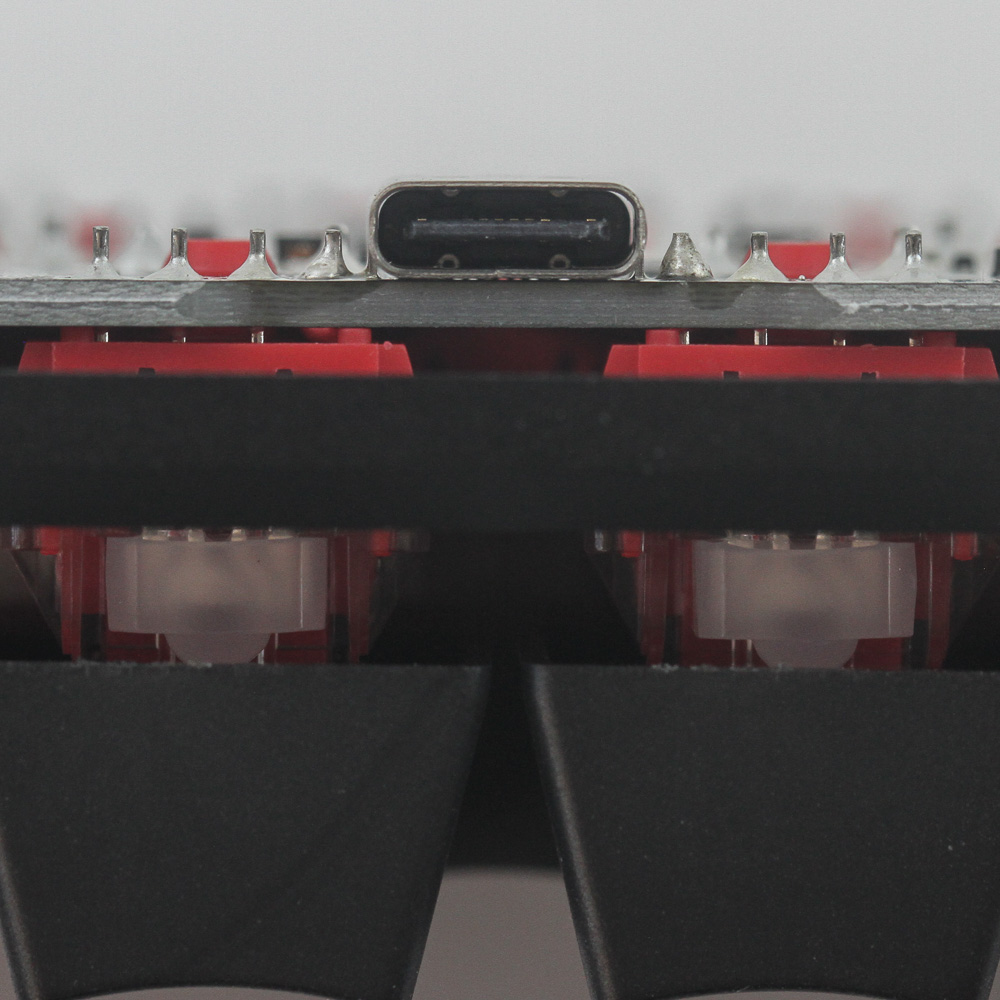
Mockup, you say? Solder quality on the PCB is excellent, and you can see the the HyperX Red is a 3-pin switch with the red slider poking through the PCB to add accent colors for the curious few doing this with me. Powering the keyboard is a Sonix SN32F247B 32-bit ARM Cortex-M0 USB microcontroller with 64 KB flash ROM, 8 KB SRAM, and 3 KB boot ROM. There is an additional Macronix 512 KB flash module for all the onboard functions, and what looks to be a dedicated LED driver with the marking removed. As is the norm, all the components are soldered onto a multi-layer PCB.
Before we move on, be advised that disassembly may void the warranty and that TechPowerUp is not liable for any damages incurred if you decide to go ahead and do so anyway.
Jan 30th, 2025 15:55 EST
change timezone
Latest GPU Drivers
New Forum Posts
- RTX 5080 - premature review - it sucks (122)
- NVIDIA RTX owners only - your opinion on DLSS Image quality (427)
- What are you playing? (22707)
- B650 Arous Elite AX rev1.0 red DRAM light (11)
- I dont like my new CPU Cooler (51)
- Will you buy a RTX 5090? (264)
- RANT- front panel connectors are a crime against pc builders/users (60)
- Possible to use NVCleanstall but also use Nvidia App? (22)
- New Motherboard no Orange audio output (2)
- Error applying NVEnc patch: Input buffer data mismatch (0)
Popular Reviews
- NVIDIA GeForce RTX 5080 Founders Edition Review
- NVIDIA DLSS 4 Transformer Review - Better Image Quality for Everyone
- ASUS GeForce RTX 5090 Astral OC Review - Astronomical Premium
- NVIDIA GeForce RTX 5090 Founders Edition Review - The New Flagship
- Galax GeForce RTX 5080 1-Click OC Review
- MSI GeForce RTX 5090 Suprim SOC Review
- MSI GeForce RTX 5090 Suprim Liquid SOC Review
- KLEVV URBANE V DDR5-7600 32 GB CL36 Review
- Palit GeForce RTX 5090 GameRock Review
- NVIDIA GeForce RTX 5090 PCI-Express Scaling
Controversial News Posts
- NVIDIA 2025 International CES Keynote: Liveblog (470)
- AMD Debuts Radeon RX 9070 XT and RX 9070 Powered by RDNA 4, and FSR 4 (349)
- AMD is Taking Time with Radeon RX 9000 to Optimize Software and FSR 4 (251)
- AMD Denies Radeon RX 9070 XT $899 USD Starting Price Point Rumors (227)
- AMD Radeon RX 9070 XT & RX 9070 Custom Models In Stock at European Stores (226)
- NVIDIA GeForce RTX 5090 Features 575 W TDP, RTX 5080 Carries 360 W TDP (217)
- New Leak Reveals NVIDIA RTX 5080 Is Slower Than RTX 4090 (212)
- AMD's Radeon RX 9070 Launch Faces Pricing Hurdles (175)