 21
21
In Win D-Frame Review
Assembly & Finished Looks »The Assembly Process - The Insides
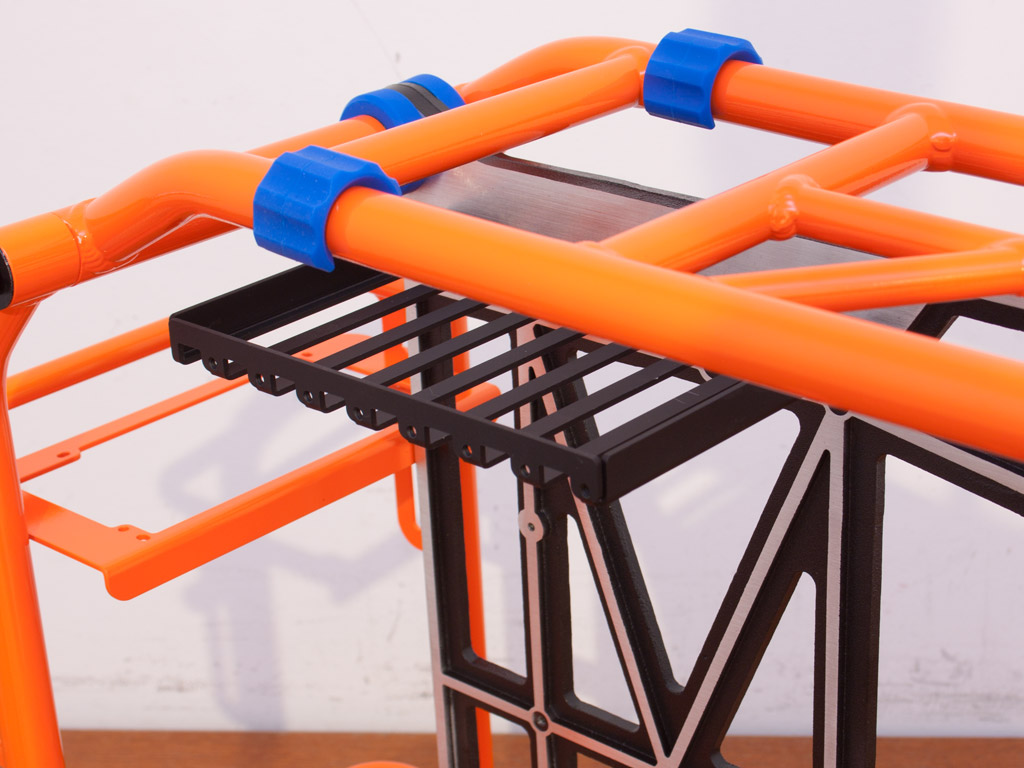
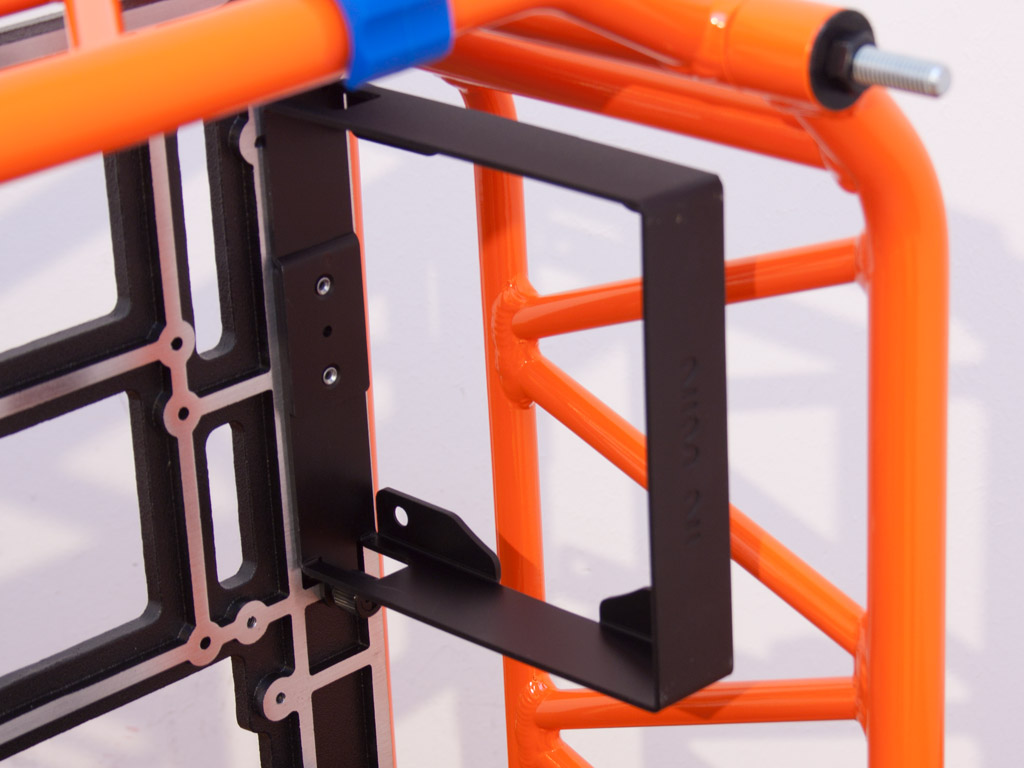
The next step, with the exterior done, is to fill up the insides by adding all the necessary bays and the functionality. This is done by using the black screws to attach parts to the die cast centerpiece. Its arbitrary shape actually serves a very specific purpose. Every intersection and all the straights have various mounting points. I placed the motherboard expansion slot frame first by using two of the black screws.

Next is the hard drive cage that can hold up to three drives. It also comes with a plastic sliding lock to ensure that an inserted drive does not fall out, since the case may be flipped upside down. In Win usually numbers each of its D-Frame cases individually as only a limited number of them will be produced, but the one we got was simply a "Review Sample".
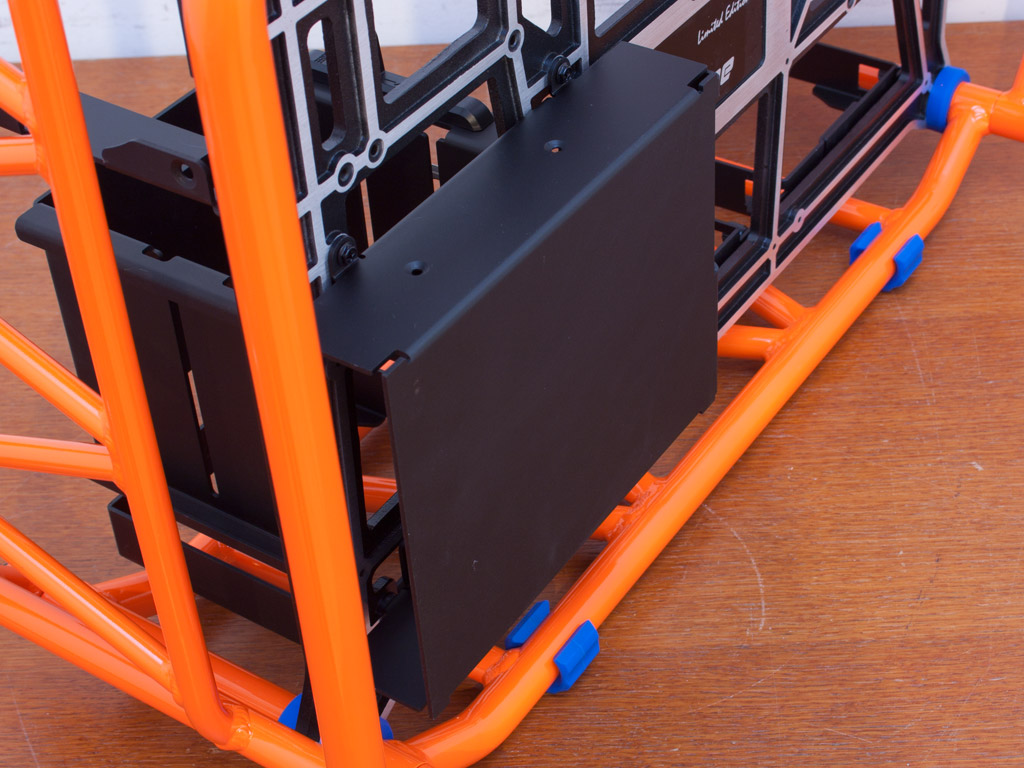
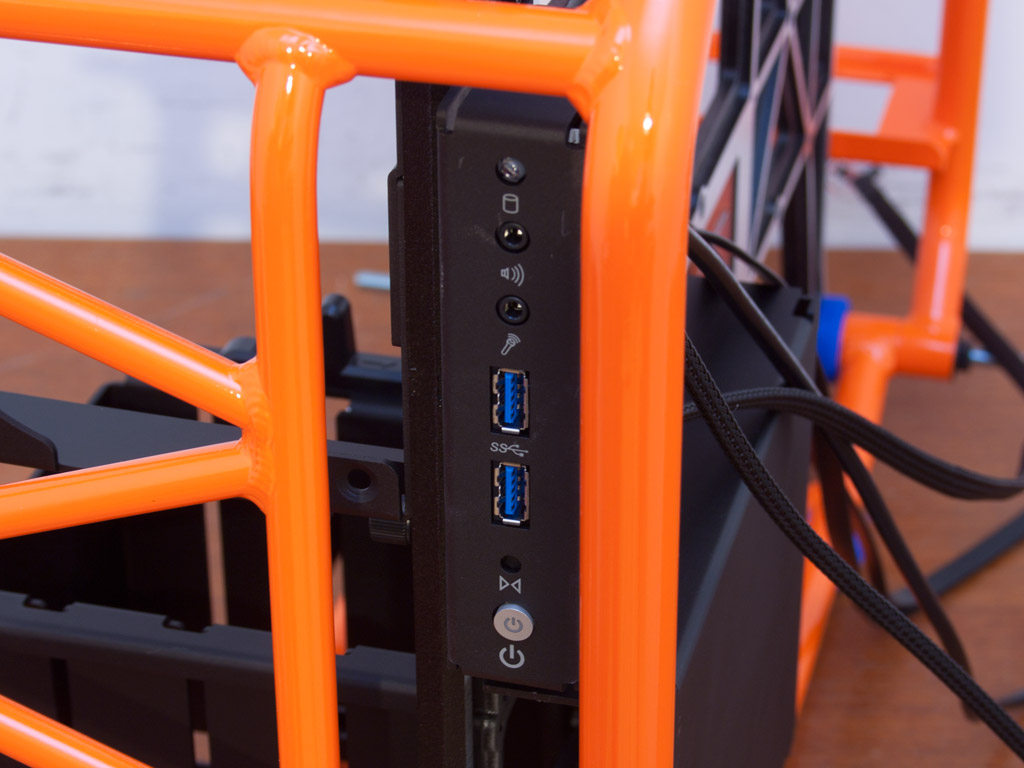
At this point, the case still lacks an external drive bay. In Win has taken the same tray shape as that of the H-Frame before editing it slightly to fit onto the D-Frame. The bracket with the power button, LED, and I/O is placed above the external drive bay. You will have access to a pair of USB 3.0 ports and the usual audio connectors.
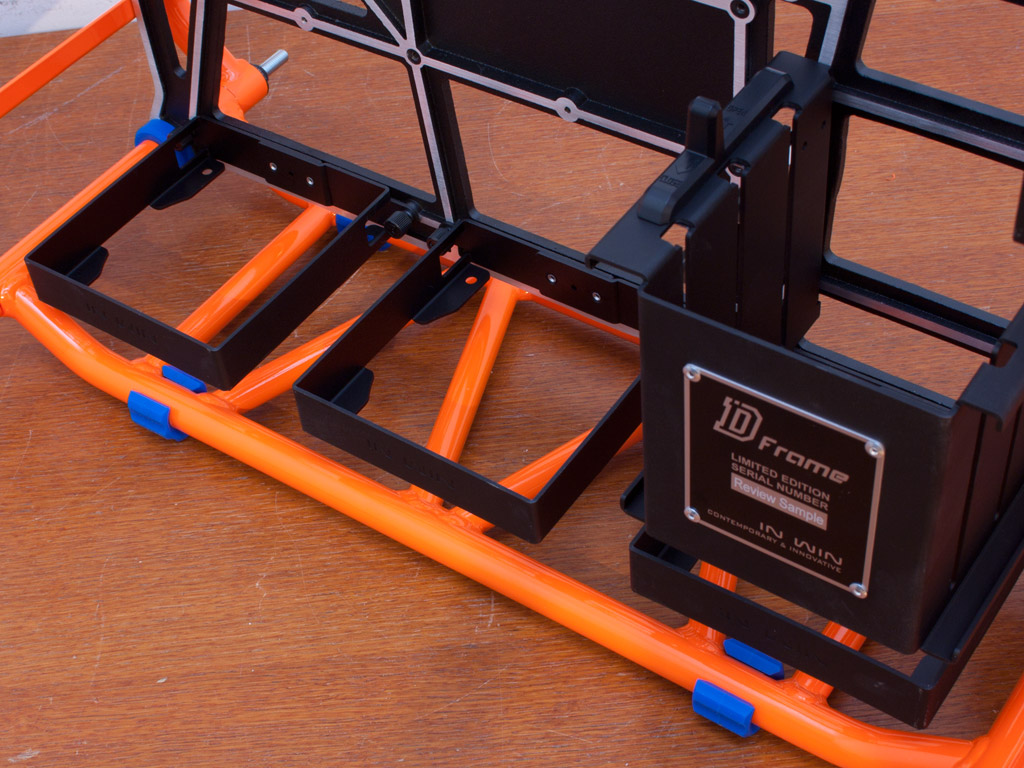
Although this case is completely open, In Win has included a total of four frames for fans. Three of them are to be installed at the floor of the case, while one can be placed right behind the D-Frame's front.
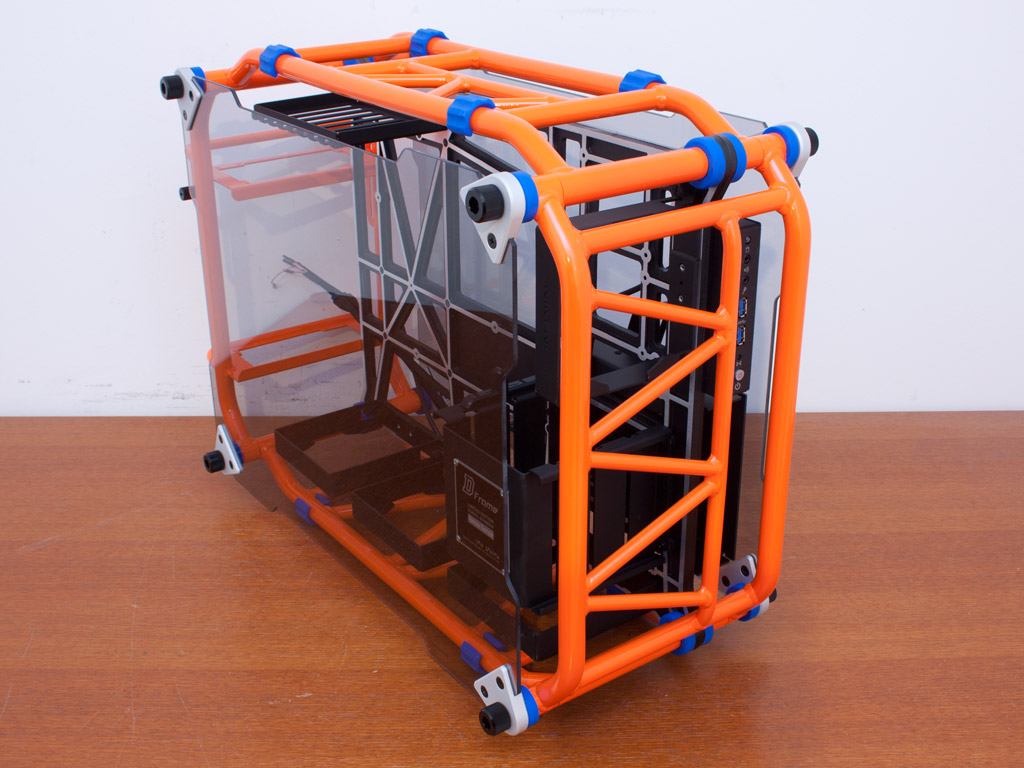
With all the internal parts in place, the only thing left to do is to slide the tempered glass side panels unto the case—using the big black nuts to hold them in place. The task of assembly might seem daunting at first, but it is no harder than building something out of LEGO or putting together a piece of IKEA furniture.
Apr 7th, 2025 23:25 EDT
change timezone
Latest GPU Drivers
New Forum Posts
- The easiest way to connect the BOOTSEL test metal terminal and the GND terminal.... (1)
- Anyone with true HDDs still around here? (337)
- is it worth using ssd with usb2? (12)
- 28TB hard disk (30)
- Question about Intel Optane SSDs (70)
- USB case with dual USB-C and dual USB-A (6)
- The TPU UK Clubhouse (26058)
- Help me pick a UPS (88)
- 12v lines 0 reads occansionally (2)
- Someone run games on AMD BC-250 under Linux * Cut down PS5 die to 6 CPU cores 24 GPU cores for use in crypto mining (79)
Popular Reviews
- The Last Of Us Part 2 Performance Benchmark Review - 30 GPUs Compared
- UPERFECT UStation Delta Max Review - Two Screens In One
- ASUS Prime X870-P Wi-Fi Review
- PowerColor Radeon RX 9070 Hellhound Review
- Upcoming Hardware Launches 2025 (Updated Apr 2025)
- Sapphire Radeon RX 9070 XT Pulse Review
- MCHOSE L7 Pro Review
- Corsair RM750x Shift 750 W Review
- Sapphire Radeon RX 9070 XT Nitro+ Review - Beating NVIDIA
- DDR5 CUDIMM Explained & Benched - The New Memory Standard
Controversial News Posts
- NVIDIA GeForce RTX 5060 Ti 16 GB SKU Likely Launching at $499, According to Supply Chain Leak (161)
- MSI Doesn't Plan Radeon RX 9000 Series GPUs, Skips AMD RDNA 4 Generation Entirely (146)
- Microsoft Introduces Copilot for Gaming (124)
- AMD Radeon RX 9070 XT Reportedly Outperforms RTX 5080 Through Undervolting (119)
- NVIDIA Reportedly Prepares GeForce RTX 5060 and RTX 5060 Ti Unveil Tomorrow (115)
- Over 200,000 Sold Radeon RX 9070 and RX 9070 XT GPUs? AMD Says No Number was Given (100)
- NVIDIA GeForce RTX 5050, RTX 5060, and RTX 5060 Ti Specifications Leak (97)
- Nintendo Switch 2 Launches June 5 at $449.99 with New Hardware and Games (92)