 21
21
In Win D-Frame Review
Value & Conclusion »Assembly
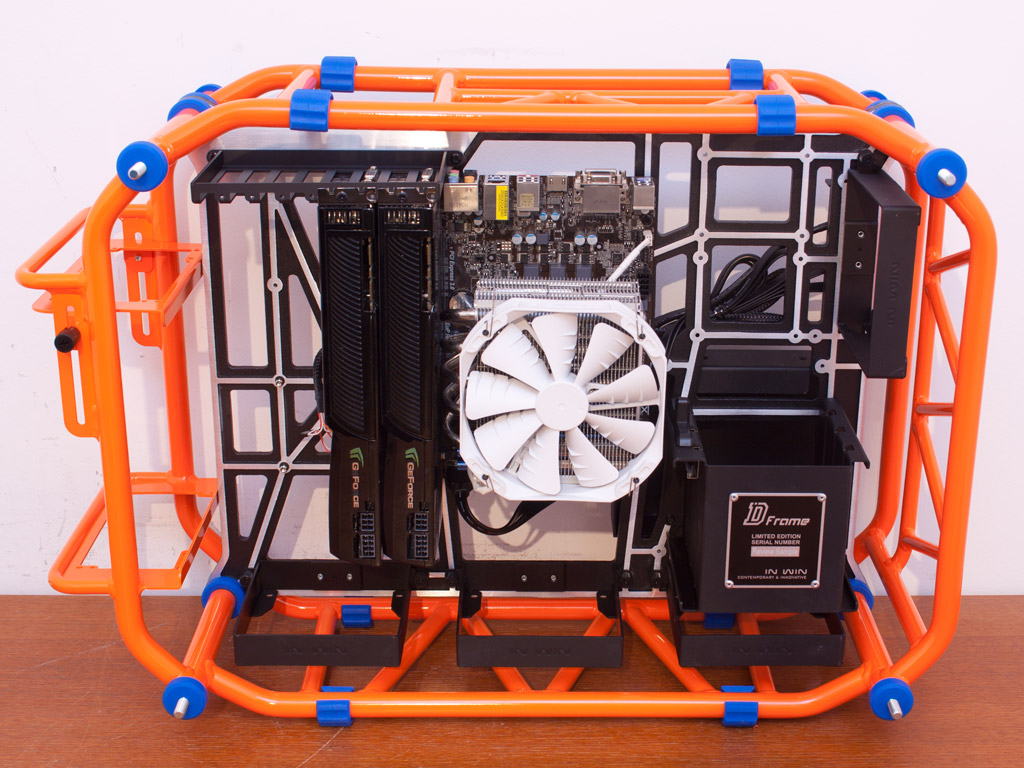
Installing the system components from this point onward is pretty much like you would expect it to be with any other chassis. The same goes for the motherboard tray: it rests on classic standoffs and requires screws to be held in place. There is a lot of space for even the largest CPU coolers; that is, if they are not too high. Long graphics cards should not be an issue, and one can remove the fan frame to gain the necessary space if they do happen to be really long.


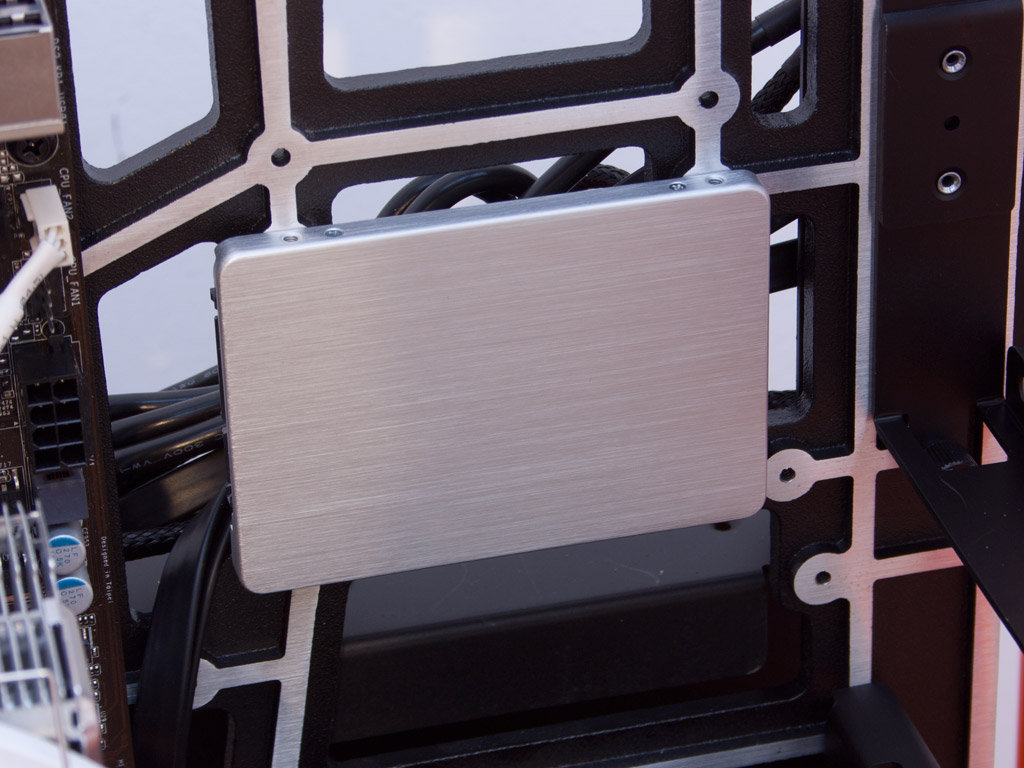
Prepping the 3.5 inch hard drive requires you to attach four special screws to the unit before simply dropping the hard drive into one of three available slots. Installing a 2.5 inch drive is quite simple as well. The In Win D-Frame can hold two such units through mounting holes in its skeletal frame.
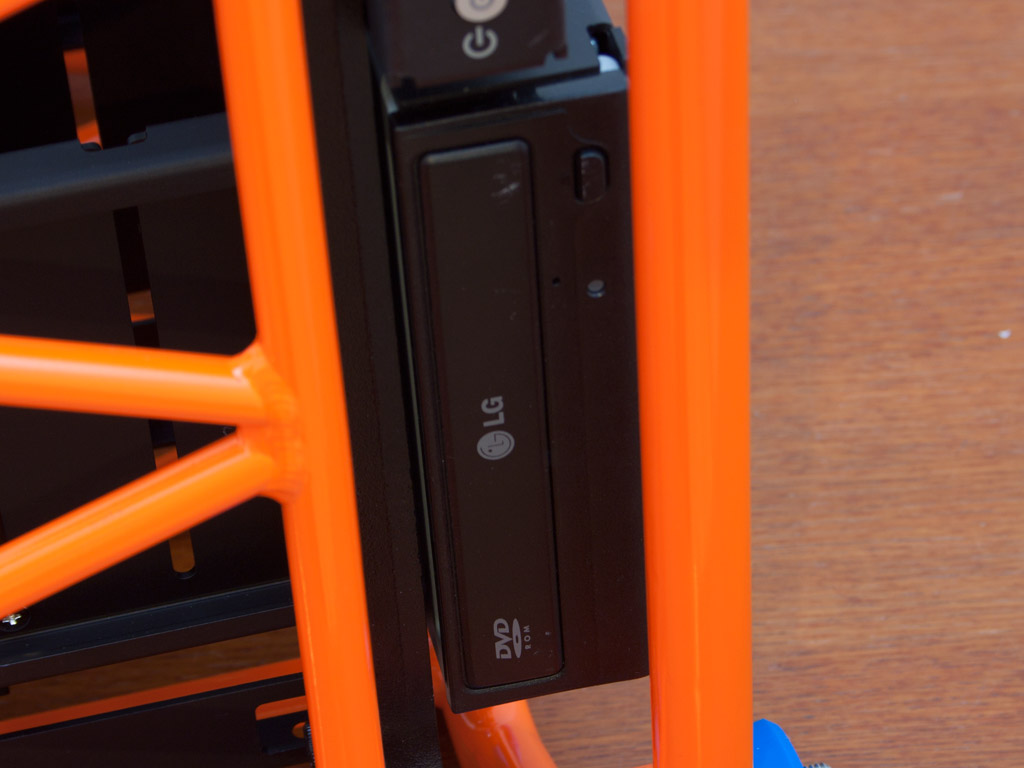
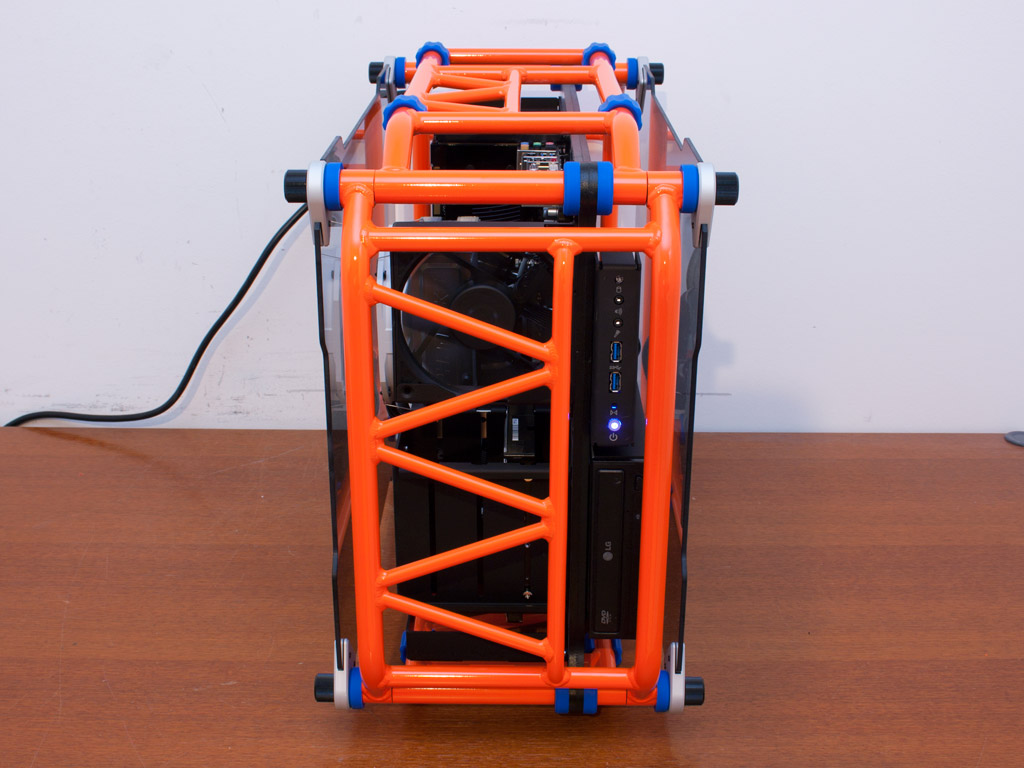
An ODD is installed by placing it into the black cage and screwing it down with the provided black screws. It needs to be mounted in such a way for the tray to open up and pass through two orange bars.
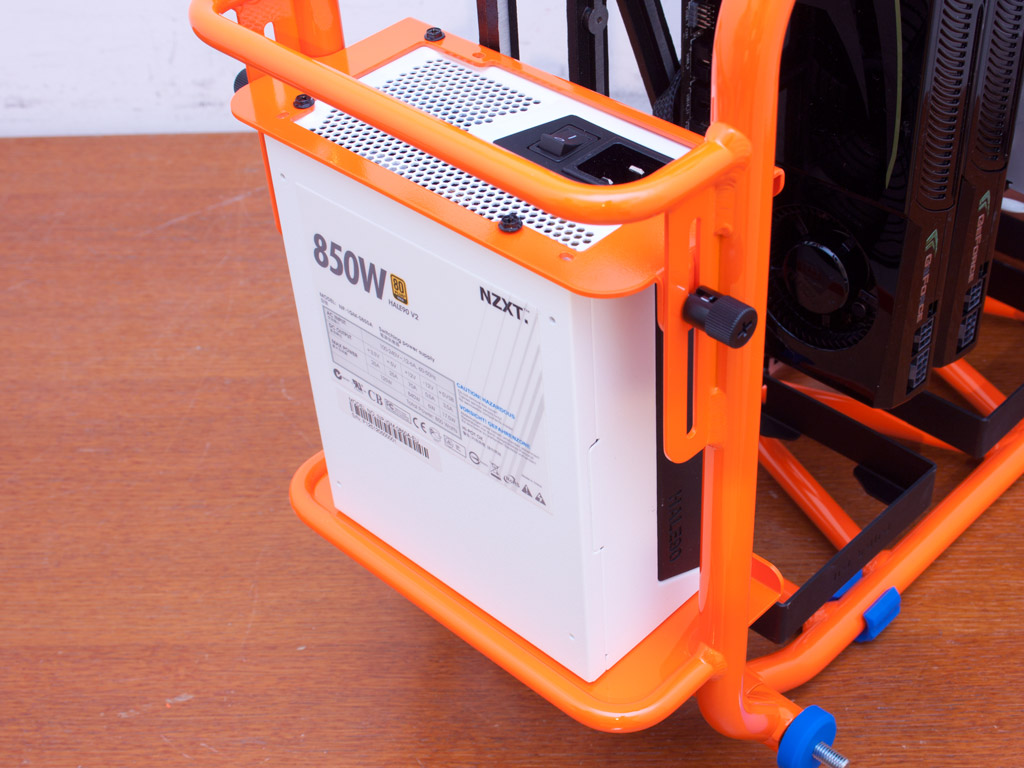
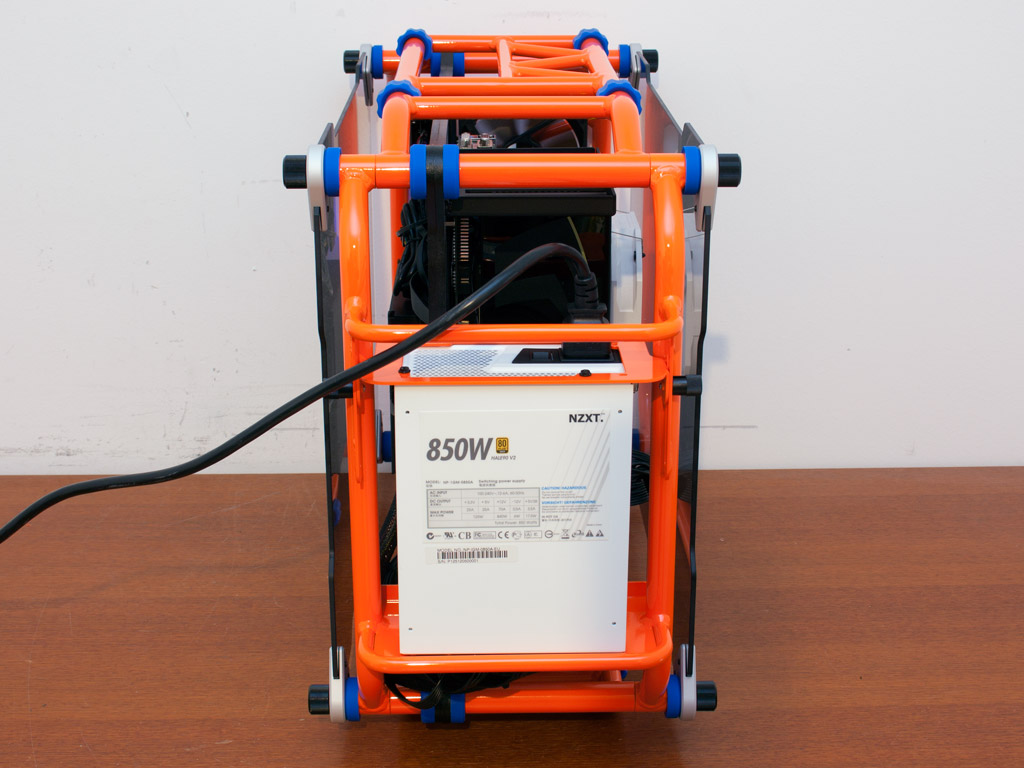
You can, thanks to the vertically configured PSU bracket, install the longest unit within the D-Frame without much issue. You can, as both the immobile bottom part of the bracket and the adjustable top piece have mounting holes for a power supply, freely pick the direction the cables will face. I have chosen to have the internal cables come out the bottom, which leaves the power cable to be plugged into the top.
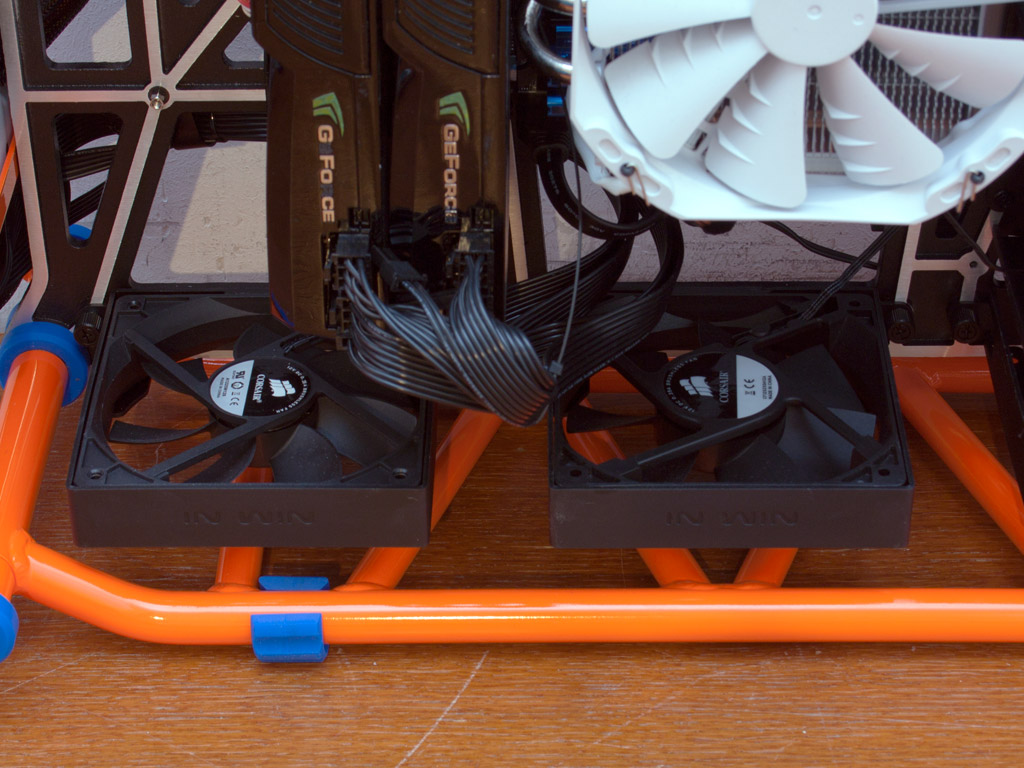
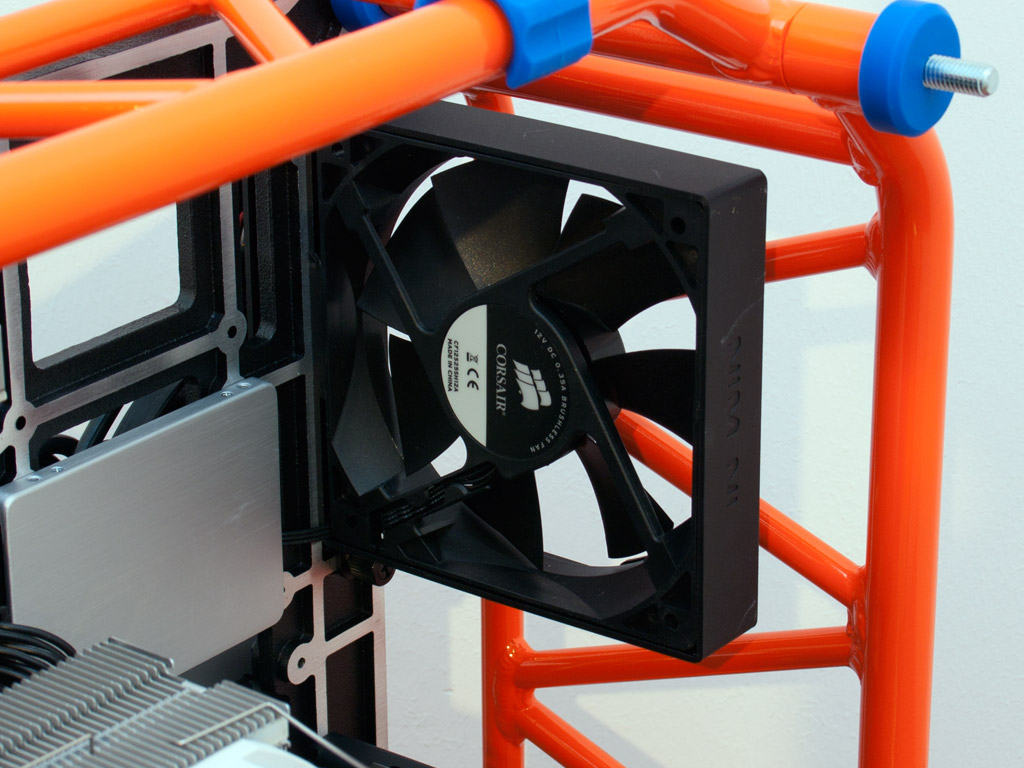
As the D-Frame can hold up to four fans, I have installed two units at the floor of the chassis and one at the front. While I am sure that it won't be detrimental to have these installed into the chassis, the fact that the unit has so many open sides means that they won't make as much of a difference in temperatures.

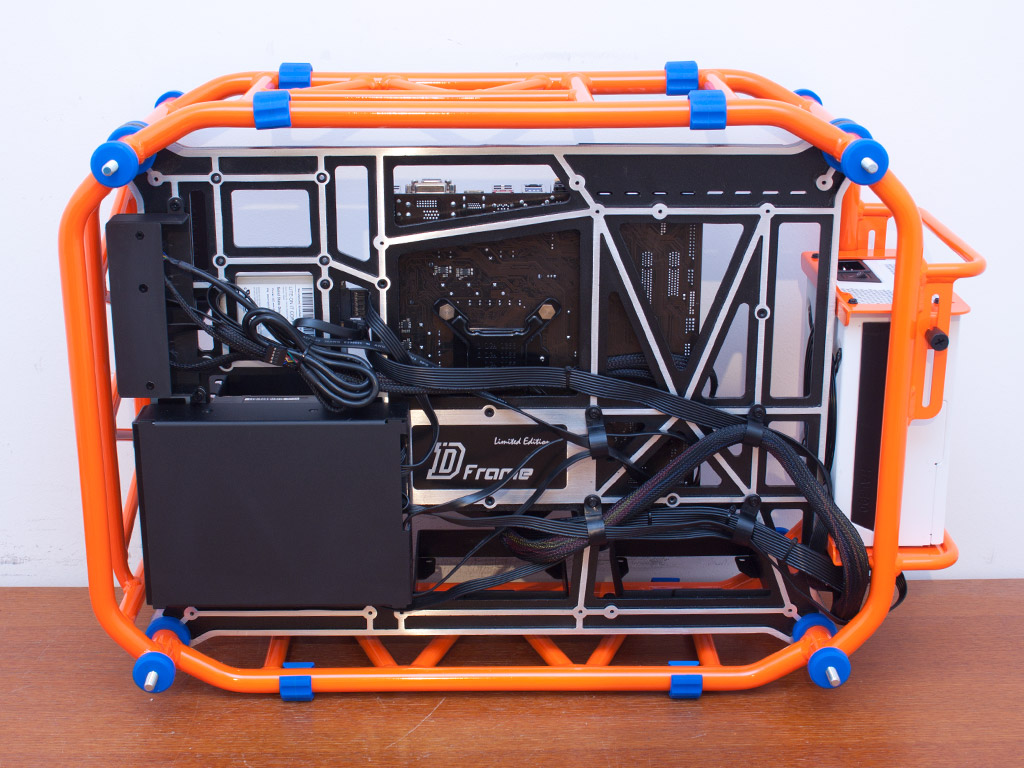
With all the parts in place, the case makes a clean impression. This is mostly due to the use of a modular PSU and all black cabling, but its clean look is also made possible through the inclusion of plastic clips that can be screwed onto the skeletal frame, which allows the user to bunch up cables properly.
Finished Looks
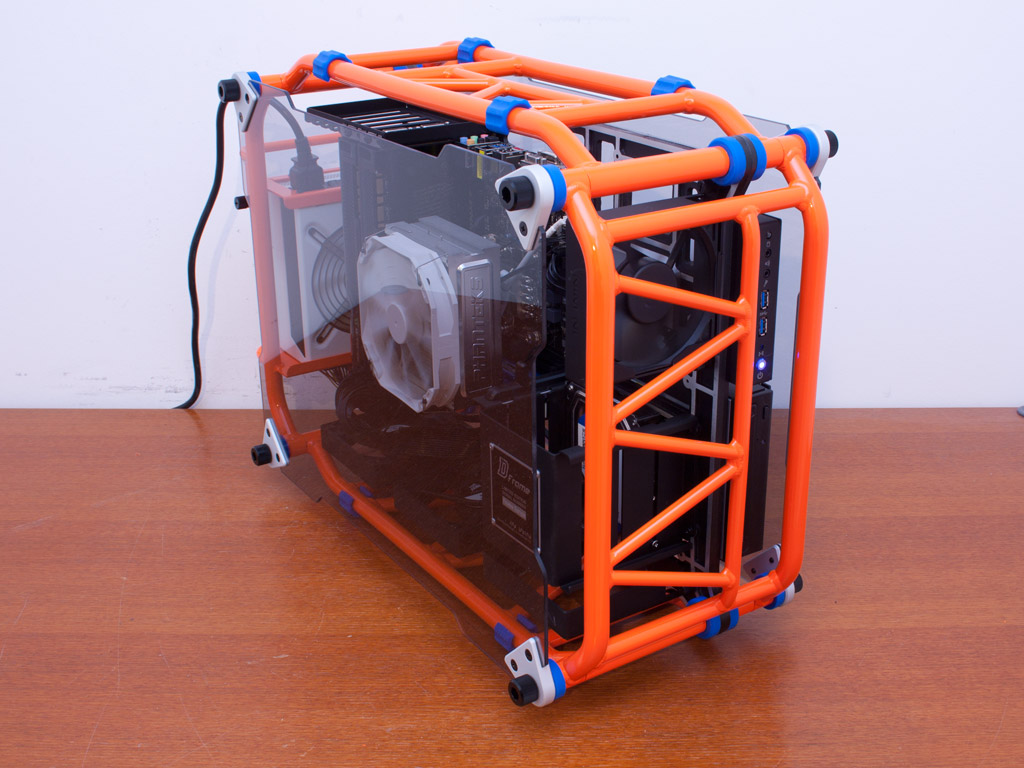
Once the tempered glass panels are put into place, the case really looks spiffy. You should, as long as you watch the height of the CPU cooler, have no issues creating an incredibly cool looking system.
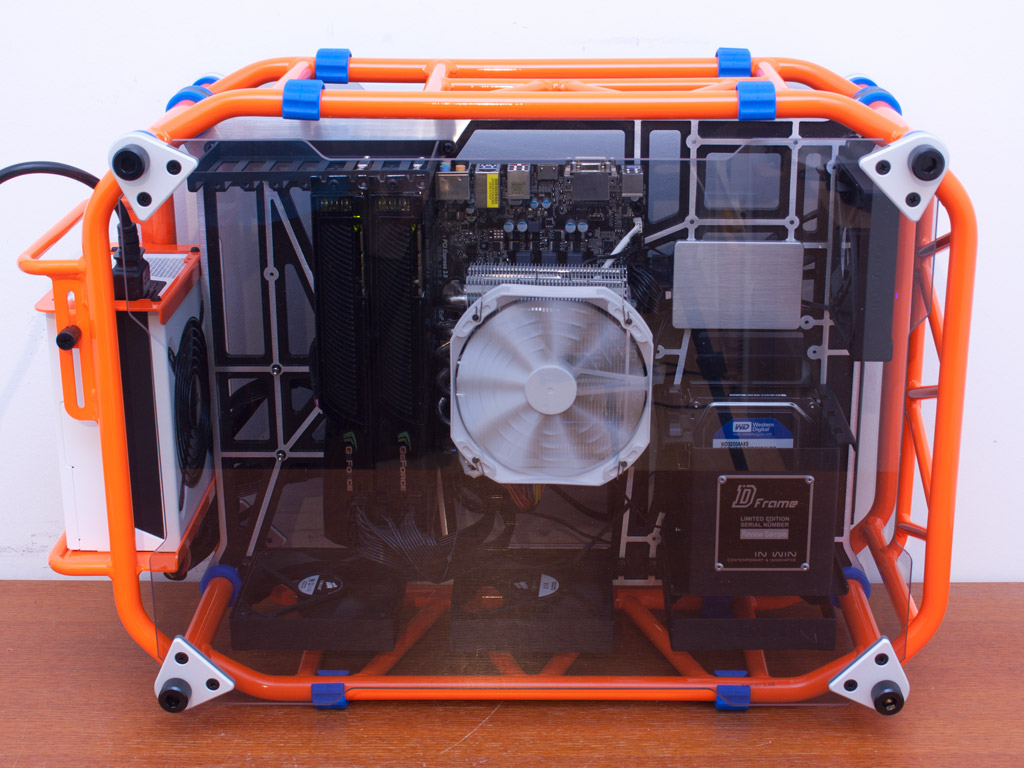
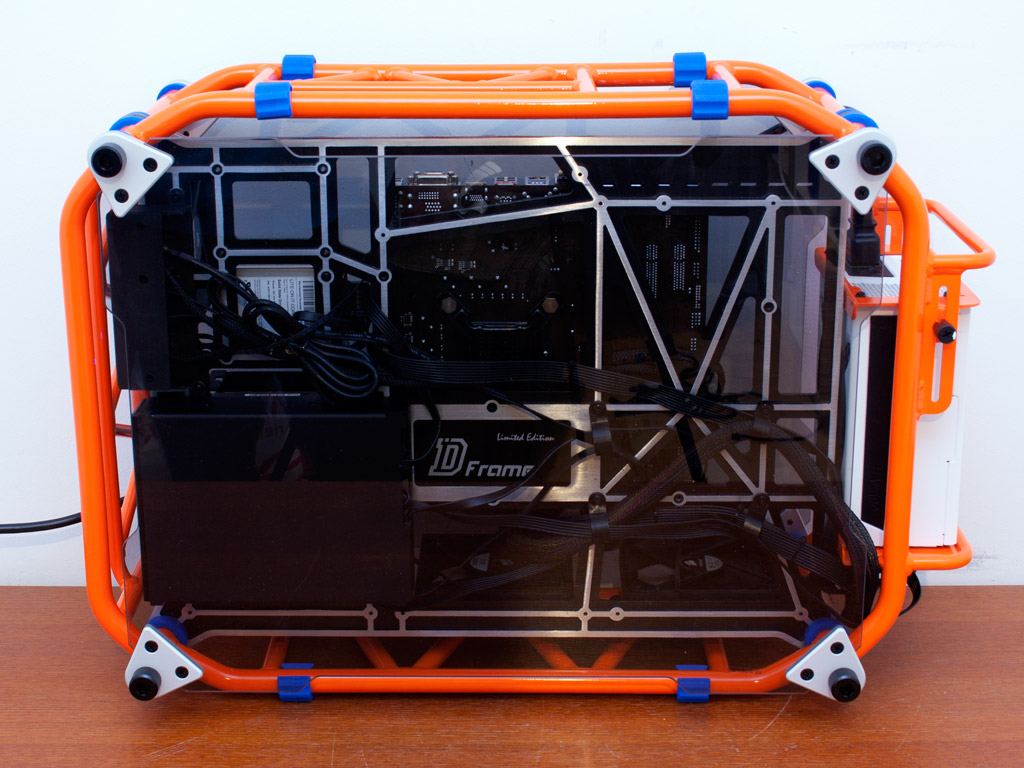
All the parts within are clearly visible through all sides. The unique 90 degree turn of the motherboard tray allows for better thermals, as the graphic cards now push hot air out through the top of the case.
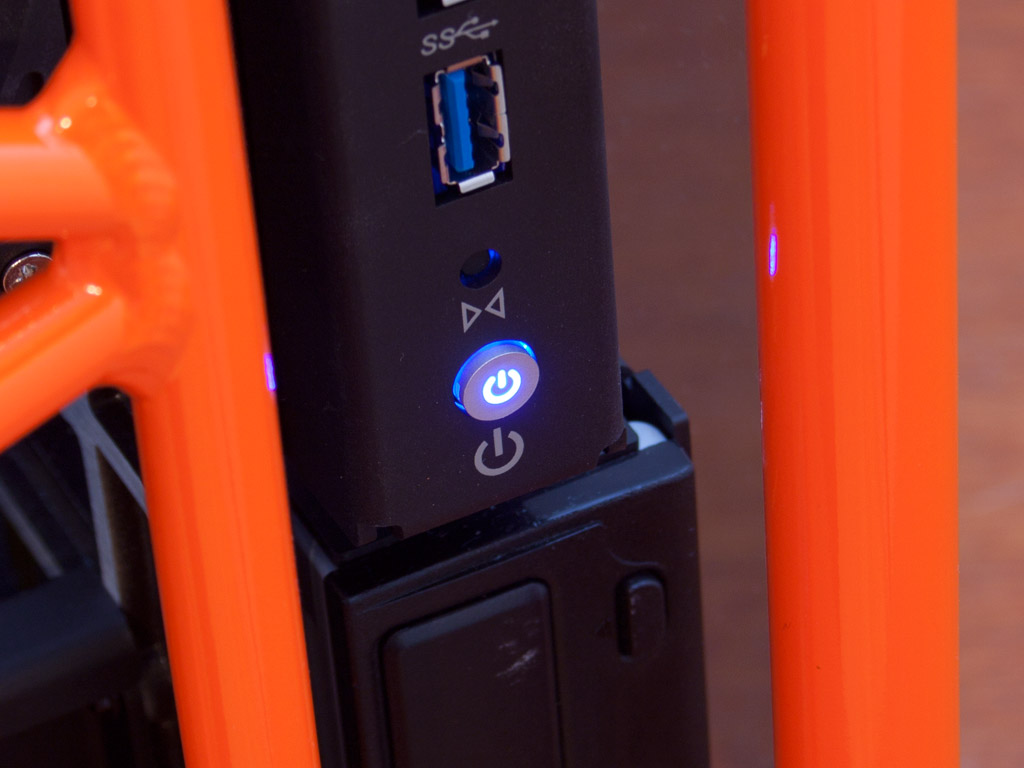
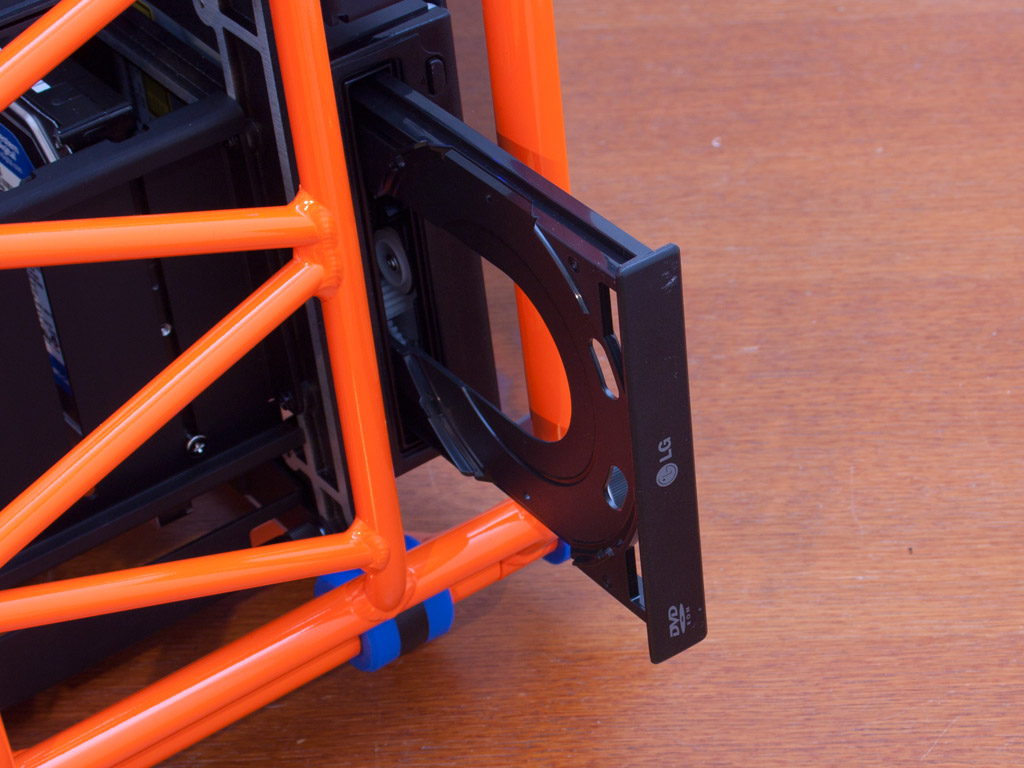
The power LED is built right into the small power button and lights up blue when turned on. As you can see, the ODD pops out facing toward the system, so you should easily be able to place a disk inside the tray when the system is standing to the right of you.
Apr 7th, 2025 06:48 EDT
change timezone
Latest GPU Drivers
New Forum Posts
- What are you playing? (23353)
- RX 9000 series GPU Owners Club (207)
- Kindly help in Identifying GPU and Suitable bios (0)
- Identify my GPU - RX 570 8GB (or what?) (10)
- 9070XT or 7900XT (54)
- A Final Fantasy IX Reminiscence - My love letter and homage to one of the best stories ever told (88)
- Windows 11 General Discussion (5926)
- Stock PSU with Razer Core X with adapter to 12VHPWR (4)
- gpu heirarchy/performance/benchmarks- whos lying? (41)
- Possible to stream your nintendo switch to discord ? (5)
Popular Reviews
- ASUS Prime X870-P Wi-Fi Review
- UPERFECT UStation Delta Max Review - Two Screens In One
- PowerColor Radeon RX 9070 Hellhound Review
- Upcoming Hardware Launches 2025 (Updated Apr 2025)
- Corsair RM750x Shift 750 W Review
- Sapphire Radeon RX 9070 XT Pulse Review
- Sapphire Radeon RX 9070 XT Nitro+ Review - Beating NVIDIA
- DDR5 CUDIMM Explained & Benched - The New Memory Standard
- AMD Ryzen 7 9800X3D Review - The Best Gaming Processor
- AMD Ryzen 9 9950X3D Review - Great for Gaming and Productivity
Controversial News Posts
- NVIDIA GeForce RTX 5060 Ti 16 GB SKU Likely Launching at $499, According to Supply Chain Leak (148)
- MSI Doesn't Plan Radeon RX 9000 Series GPUs, Skips AMD RDNA 4 Generation Entirely (146)
- Microsoft Introduces Copilot for Gaming (124)
- AMD Radeon RX 9070 XT Reportedly Outperforms RTX 5080 Through Undervolting (119)
- NVIDIA Reportedly Prepares GeForce RTX 5060 and RTX 5060 Ti Unveil Tomorrow (115)
- Over 200,000 Sold Radeon RX 9070 and RX 9070 XT GPUs? AMD Says No Number was Given (100)
- NVIDIA GeForce RTX 5050, RTX 5060, and RTX 5060 Ti Specifications Leak (97)
- Nintendo Switch 2 Launches June 5 at $449.99 with New Hardware and Games (92)