 7
7
JDS Labs Atom DAC+ and Atom Amp+ Stack Review
Value & Conclusion »Setup and Performance


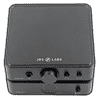
Seen above is my preferred setup for the stack, with the Atom Amp+ placed above the Atom DAC+ for more heat dissipation with the amplifier, as well as a measure for any active or semi-active airflow to better reach the amplifier. The short RCA interconnects come in handy, and the offset positions allow for the cables to reach without a steep bending radius. These will still lift up slightly owing to the cables, especially since the two enclosures are so light, which the slight offset up front somewhat mitigates. While JDS Labs does provide additional weights at no additional cost for these enclosures upon request as the order is placed, it is still something to be aware of.


The other option is to go with the Atom DAC+ placed on top of the Atom Amp+, of course, which adds more weight on top of the amplifier and reduces the potential for it to move around if or when you connect and disconnect your headphone up front. In practice, the amplifier gets warmer than the above configuration with everything else remaining the same, but not to where this combination is a no-go by any means. It inherently runs warm owing to the high current linear power supply design. Make sure to orient and rotate the RCA cable to minimize ungainly angles before pushing them all the way in.

Note that the cable on the back will apply downward pressure if heading down from the table, so that alone may tilt the stack upward at the front. If these are on a desk, it should not be much of an issue since the cable will also lie on the desk. At the same time, notice how the RCA cables push the top unit up at the back either way, so maybe having the other cables pull it down slightly is not a bad thing! The aforementioned weights come in handy too, as does simply placing something on top, such as a metal headphone stand, perhaps even as a pseudo heatsink. These are just things to be aware of when dealing with the more budget-friendly plastic construction here. Regardless, once powered on, the two LED rings light up white to indicate all is well. The volume wheel on the amplifier does have to be moved past the click to actuate the power, and the lights go off in standby mode, which is nice in the absence of a switch to turn the lights on/off manually.

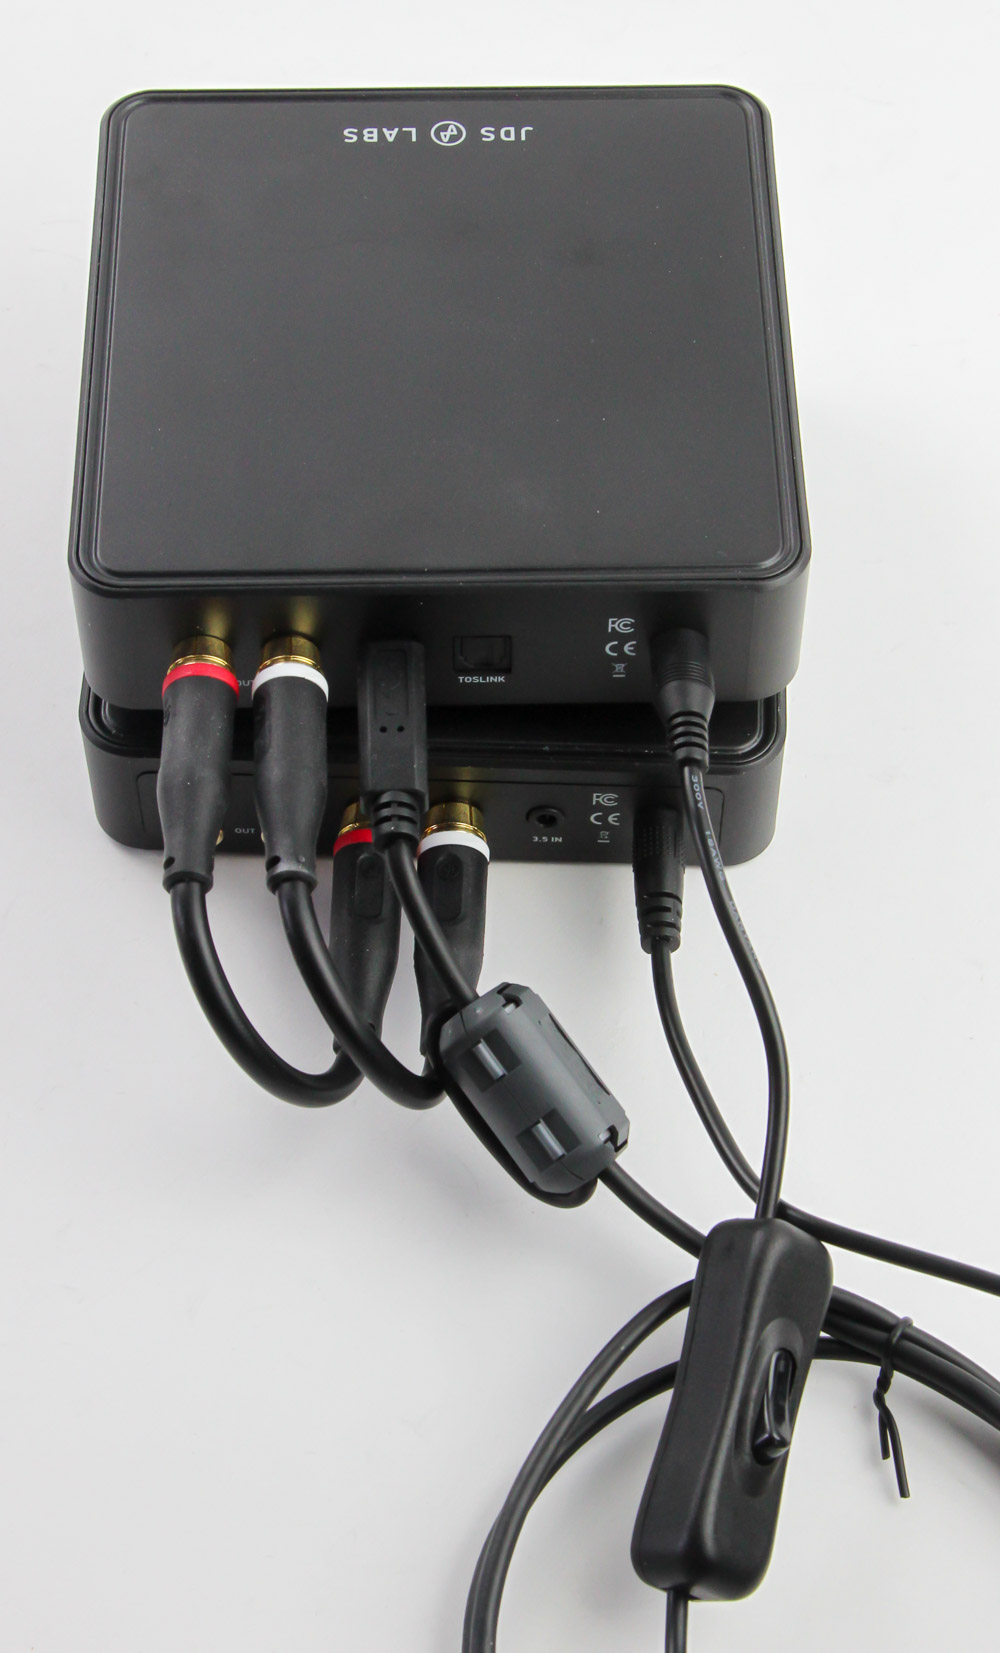
It was at this time that JDS Labs got back to me, showing that I was too lenient on the RCA interconnect cables with the material adhering to a bending radius of over 180° and holding shape! Seen above is what a perfect stack can thus be, so I will say that I don't feel you have to hold back, as clearly demonstrated by the company itself.
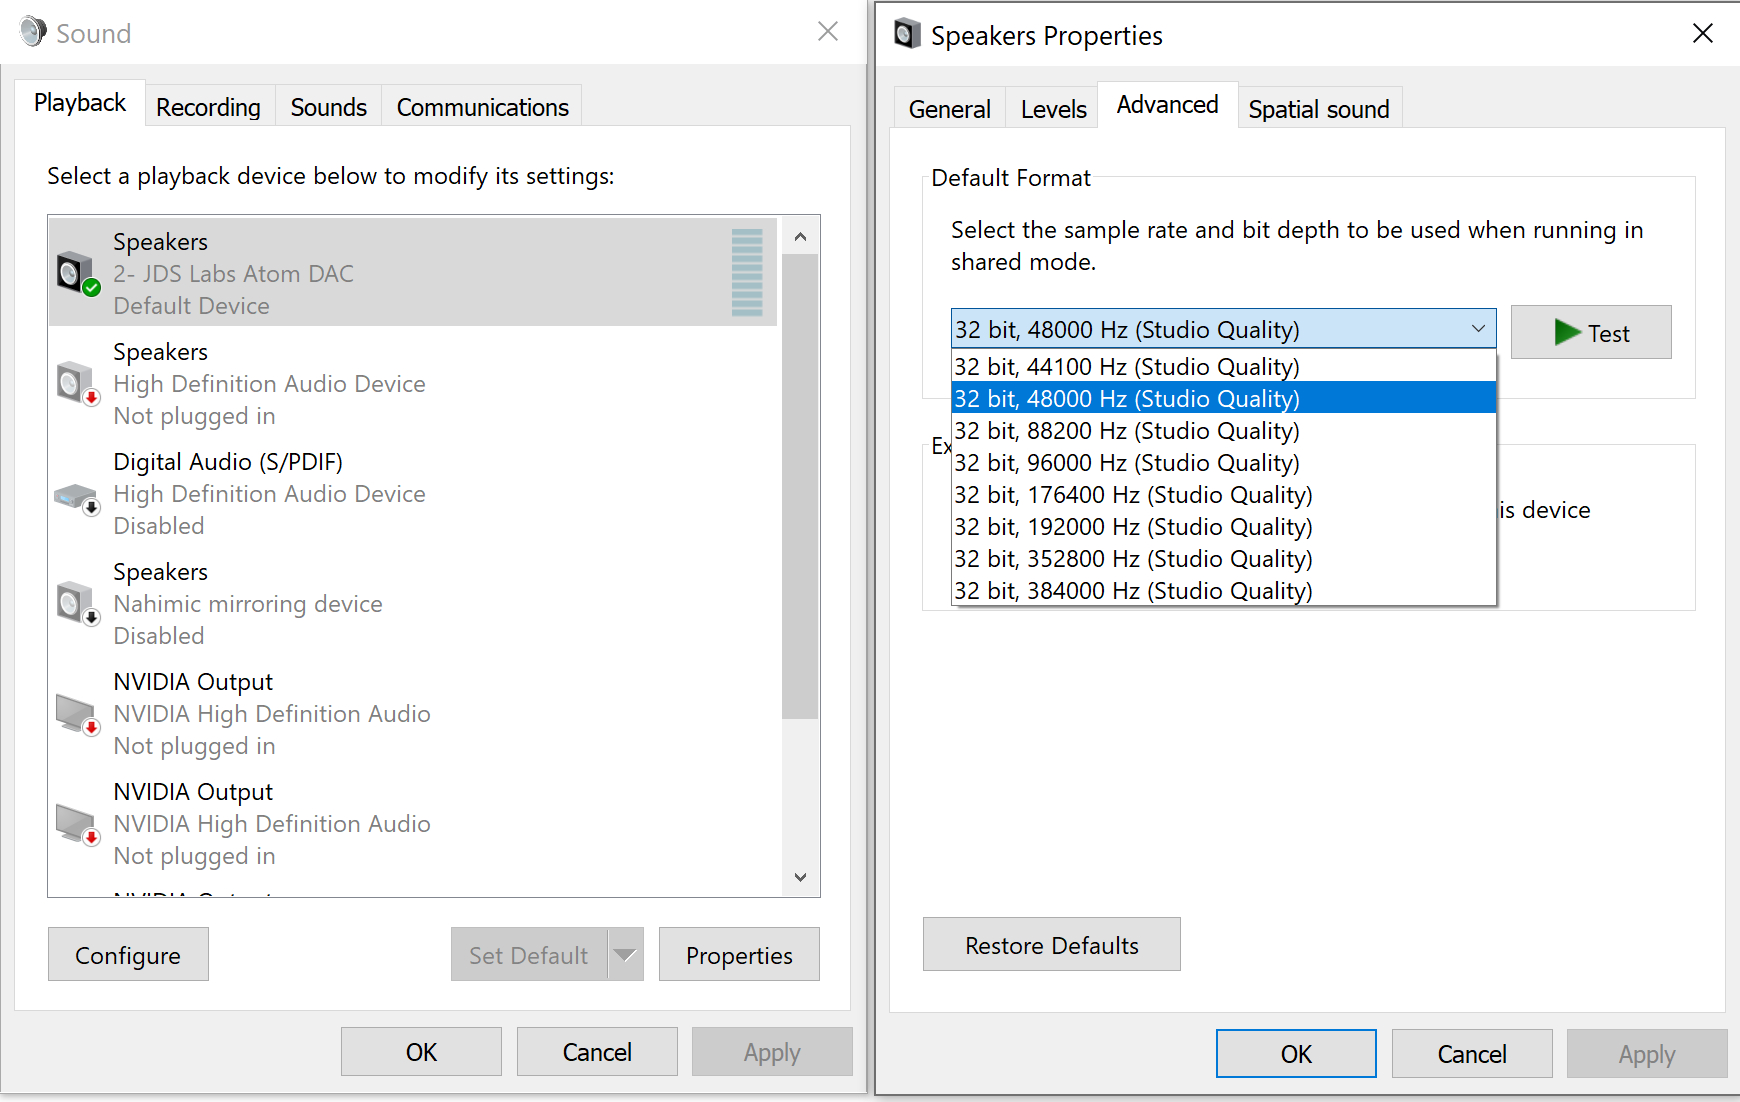
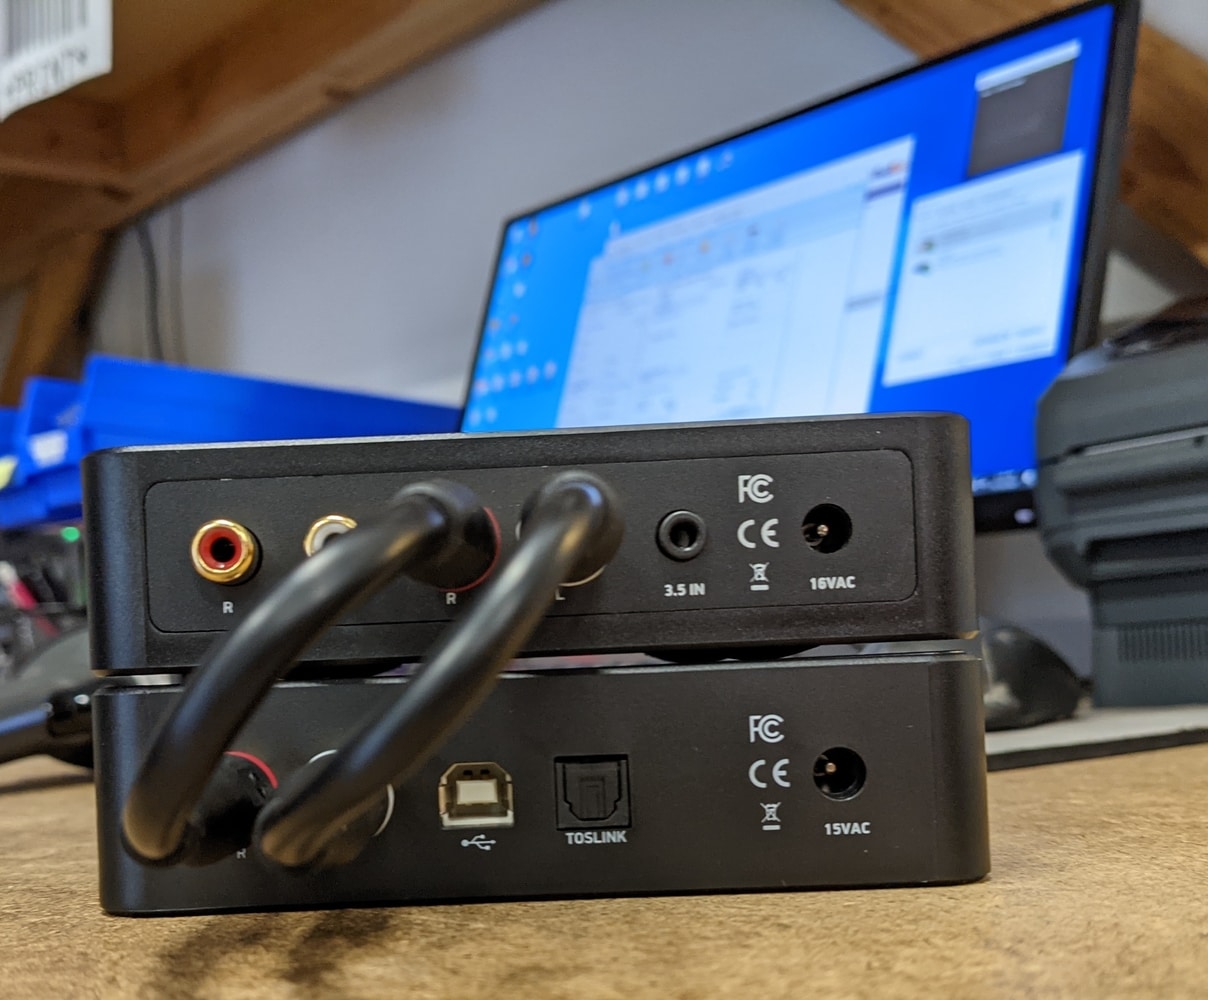
There is no need to install drivers for use with Windows 10 or 11, wherein the Atom DAC+ is recognized automatically and set up as a speaker output by default with nothing connected to the headphone jack. This allows for 32-bit playback with 44.1 kHz to 384 kHz in Windows. Of course, this is assuming your PC is a compatible UAC2 device, which anyone reading this review typically will be fine with. It's when used with consoles in particular that you need to rely on UAC1, which the cable from earlier is for. If you use the optical input, playback is limited to "only" 24-bit/192 kHz. Those on recent macOS, Linux, OS and Android versions will also see the Atom DAC+ as a plug-and-play device with respective cable adapters.

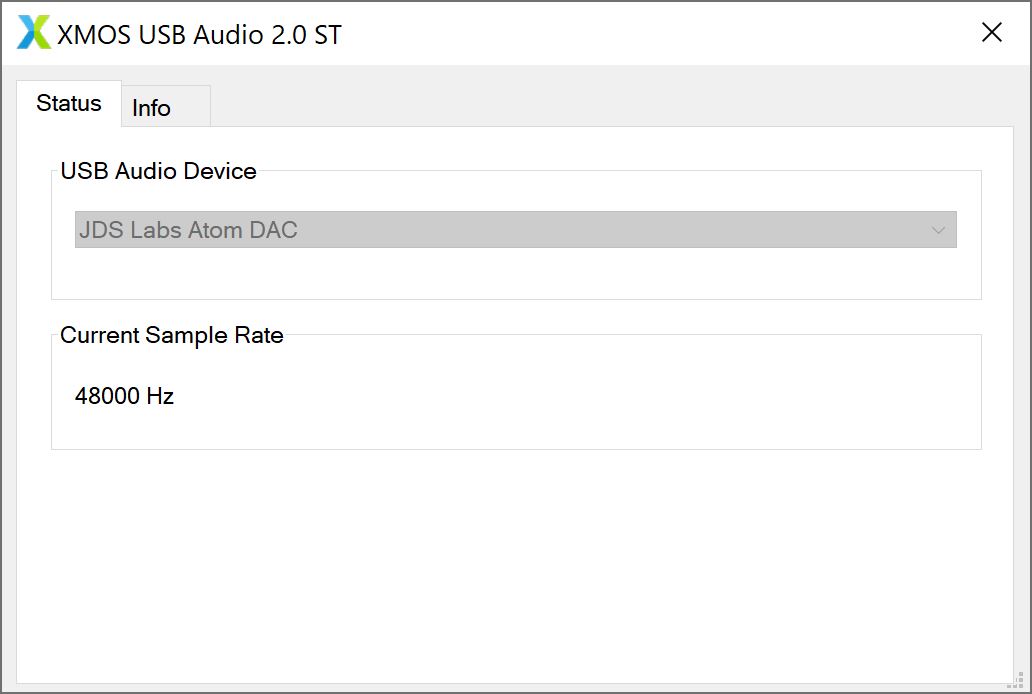
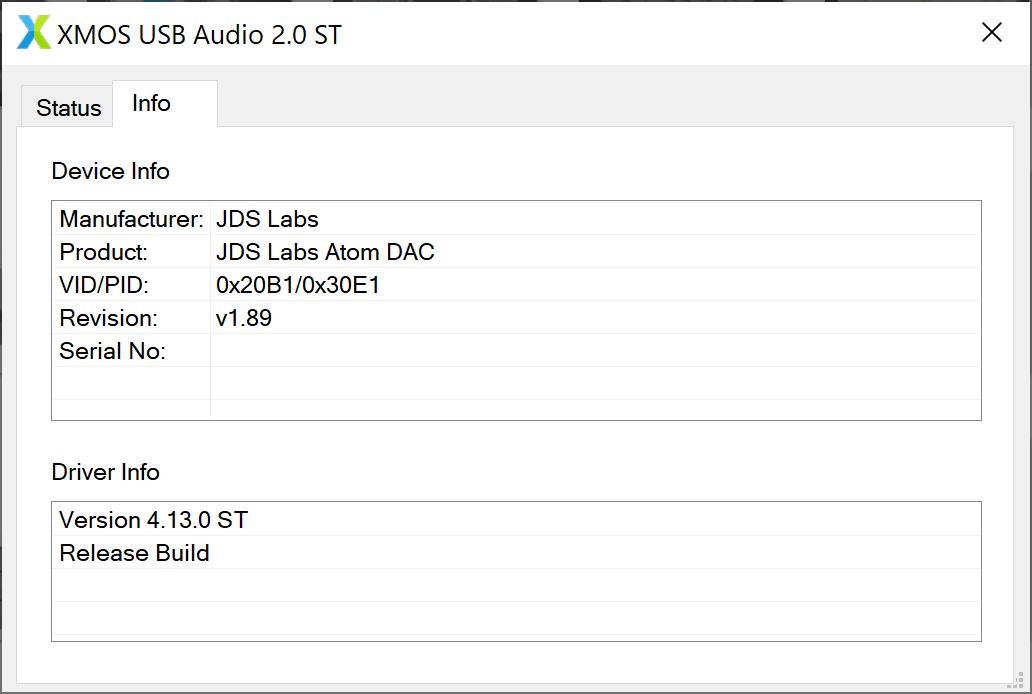
Earlier Windows versions, including Win 7, which I know some are still on, do not have native XMOS decoding support. This is where you should download the generic XMOS drivers, whose installer is hosted on the JDS Labs website. These drivers also permit enabling WASAPI exclusive mode in the player of your choice, instead of just ASIO, which holds true in Windows 10/11 as well. JRiver had no issues detecting both outputs, and you can always check the status of the drivers as it pertains to the controlled hardware to ensure it is indeed the Atom DAC+ being configured. As seen above, the XMOS drivers allow for 16 and 24-bit playback now. My default setup was 32-bit audio over JRiver, with volume in Windows 10 set to ~95% and me using the volume wheel of the Atom Amp+ to change the volume. I then set the sampling rate to an integer multiple of the source-file quality. JDS Labs suggests as much; for example, use 192 kHz playback with 48/96/192 kHz audio files.

Ultimately, what matters is how clean the signal output is and how much power can be provided to drive headphones, or the RCA out if used as a preamp with powered speakers. The most useful metric in this regard is the 1 W (5.66 Vrms) maximum continuous power rating at 32 Ω, which is plenty to drive any portable device, especially with an output impedance of 0.1 Ω on the amplifier, so much so that the high gain setting this value is taken from needs to be turned to low gain when used with higher sensitivity earphones and headphones. As expected, low gain has the maximum continuous power rating drop to 545 mW (9.04 Vrms) at 150 Ω and 136 mW (9.05 Vrms) at 600 Ω. You can find a very handy power calculator for headphones here, which confirms that the amplifier in this JDS Labs Atom stack is more than capable of driving the vast majority of stereo headphones out there. Seen above is the recently reviewed HIFIMAN Arya, which I had tested and measured with the JDS Labs Element II as well as a Topping E50/L50 stack that will be reviewed separately, and all three sources are acoustically transparent to where I noticed no difference in the sound signature of the JDS Lams Atom DAC+/Amp+ stack compared to a reference sound card, or the Element II. As such, don't expect this stack to add any coloring to the tonality of headphones, which to many is music to the ears already. This is why I am not even showing a frequency response measurement this time around. I will instead refer you to the same testing done with the Element II, as it might as well just be copied over.
Custom firmware builds are part of the reason the enthusiast and modding community has taken to JDS Labs well, with a whole page dedicated to these builds on the company website. Some of these pertain to the implementation of UAC1/UAC2, especially with the compatible cable for consoles, including the Sony PS4/PS5 and Nintendo Switch. Some features are also being tested as we speak, and this is where the company seems quite receptive to community ideas as a whole. The shipped sample was already on the suggested default firmware v1.8.9, but I went through the process again to see whether updating the firmware is easily done or not. It took me a while to figure out where the firmware flash tool is located, but its whereabouts are indicated on the page linked above, and updating itself does not take long, which is a good thing. I then tried out the experimental firmware v1.8.3 found on this page instead, which boosts some third-order harmonics for a lower SINAD, but makes for a more tube-like sound signature. I could certainly tell things were different, not by much, but enough to know that my lack of experience with tube sources wasn't helping for a comparison here. I may well revisit this in the future if things change, but play around with this if for you.
There were obvious improvements in comparison to my laptop's own Realtek ALC3266 chipset throughout the frequency range of all tested headphones and earphones, and this is before the speaker option with the preamp comes in. The Atom DAC+ cleans up the sound output and provides for a fantastic listening experience. Note that I also tested this with some motherboards, but could not easily get my PC near the noise-dampened chamber where testing is done. With some higher-end motherboards that boast great onboard audio, I was not able to discern a difference between the integrated audio circuit and Atom DAC+ on most files, but orchestral music recorded in FLAC still showed an improvement. In fact, much is shared between the Atom DAC+ and higher-end JDS Labs Element II DAC section, and the power output from the Atom Amp+ is only just under that of the Element II. I also acknowledge that testing a DAC/amp requires an oscilloscope at the very least, but I do not have access to one personally and wasn't able to "borrow" an expensive set from work.
Jul 5th, 2025 15:52 CDT
change timezone
Latest GPU Drivers
New Forum Posts
- Stalker 2 is looking great. (187)
- Frametime spikes and stuttering after switching to AMD CPU? (520)
- Do you use Linux? (676)
- b550m aorus elite not posting with new ram (7)
- Gigabyte graphic cards - TIM gel SLIPPAGE problem (131)
- Can you guess Which game it is? (203)
- How do you view TPU & the internet in general? (With poll) (74)
- EVGA XC GTX 1660 Ti 8GB ROM (9)
- What are you playing? (23892)
- AMD RX 9070 XT & RX 9070 non-XT thread (OC, undervolt, benchmarks, ...) (155)
Popular Reviews
- NVIDIA GeForce RTX 5050 8 GB Review
- Fractal Design Scape Review - Debut Done Right
- Crucial T710 2 TB Review - Record-Breaking Gen 5
- ASUS ROG Crosshair X870E Extreme Review
- PowerColor ALPHYN AM10 Review
- Sapphire Radeon RX 9060 XT Pulse OC 16 GB Review - An Excellent Choice
- Upcoming Hardware Launches 2025 (Updated May 2025)
- AMD Ryzen 7 9800X3D Review - The Best Gaming Processor
- Sapphire Radeon RX 9070 XT Nitro+ Review - Beating NVIDIA
- NVIDIA GeForce RTX 5060 8 GB Review
TPU on YouTube
Controversial News Posts
- Intel's Core Ultra 7 265K and 265KF CPUs Dip Below $250 (288)
- NVIDIA Grabs Market Share, AMD Loses Ground, and Intel Disappears in Latest dGPU Update (212)
- Some Intel Nova Lake CPUs Rumored to Challenge AMD's 3D V-Cache in Desktop Gaming (140)
- NVIDIA GeForce RTX 5080 SUPER Could Feature 24 GB Memory, Increased Power Limits (115)
- Microsoft Partners with AMD for Next-gen Xbox Hardware (105)
- NVIDIA Launches GeForce RTX 5050 for Desktops and Laptops, Starts at $249 (105)
- AMD Radeon RX 9070 XT Gains 9% Performance at 1440p with Latest Driver, Beats RTX 5070 Ti (102)
- Intel "Nova Lake‑S" Series: Seven SKUs, Up to 52 Cores and 150 W TDP (100)