 36
36
MSI Z87 MPOWER MAX (Intel LGA 1150) Review
BIOS Walkthrough »Test System
| Test System | |
|---|---|
| CPU: | Intel 4770K 3.5 GHz, 8 MB Cache |
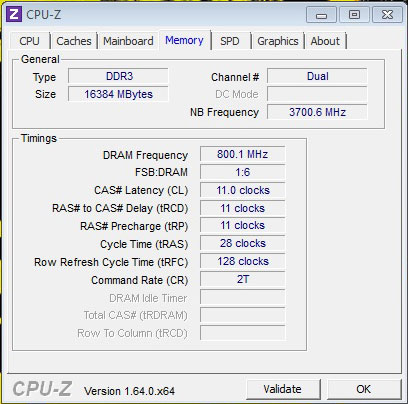
| Memory: | 16 GB DDR3 (4x 4 GB) GSkill TridentX F3-2666C11Q-16GTXD |
| Cooling: | CoolerMaster TPC 812 |
| Motherboard: | MSI Z87 MPOWER MAX Intel Z77 Express, BIOS v1.2 |
| Video Card: | 2x MSI GTX670 Power Edition OC 2 GB |
| Harddisk: | Corsair ForceGT 60 GB SATA 6 Gb/s SSD (OS) Corsair F60 60 GB SATA 3 Gb/s SSD (USB 3.0) Western Digital Caviar SE 16 WD5000AAKS 500GB SATA2 |
| Power Supply: | Seasonic SS-860XP2 |
| Case: | Lian Li T60 Test Bench |
| Software: | Windows 7 64-bit SP1, Nvidia 320.18 WHQL |
Initial Setup
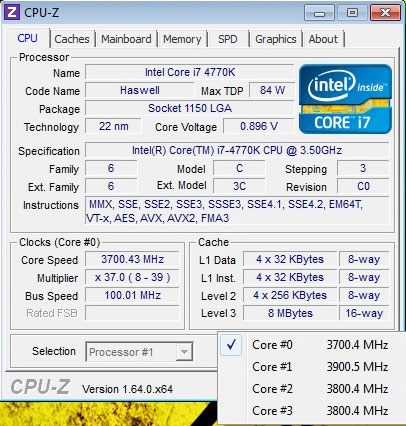
Initial boot-up with the MSI Z87 MPOWER MAX was quick and simple, and installing device drivers off the CD was quick and painless. There's not a lot for me to say here because everything worked exactly as expected, but I noticed that the MSI Z87 MPOWER MAX runs with a slightly boosted Turbo profile.
Some boards have custom Turbo profiles that boost performance at "stock" settings, giving the appearance of having more performance than they really should. MSI has their own take on this, and while I don't totally agree with using advanced Turbo profiles by default, it does make some sense on a high-end motherboard like the MSI Z87 MPOWER MAX. A boosted Turbo profile becomes available when XMP is enabled, or, at other times, via switching some options in the BIOS, but it can also simply be disabled via those same option in the BIOS. I personally feel that a coupon for Intel's Performance Tuning Protection Plan should be included in the box to protect against CPU failures if boards do this without giving the end user a way to turn it off, or don't explicitly state doing so. For more information on Intel's Performance Tuning Protection Plan, check their site found HERE.
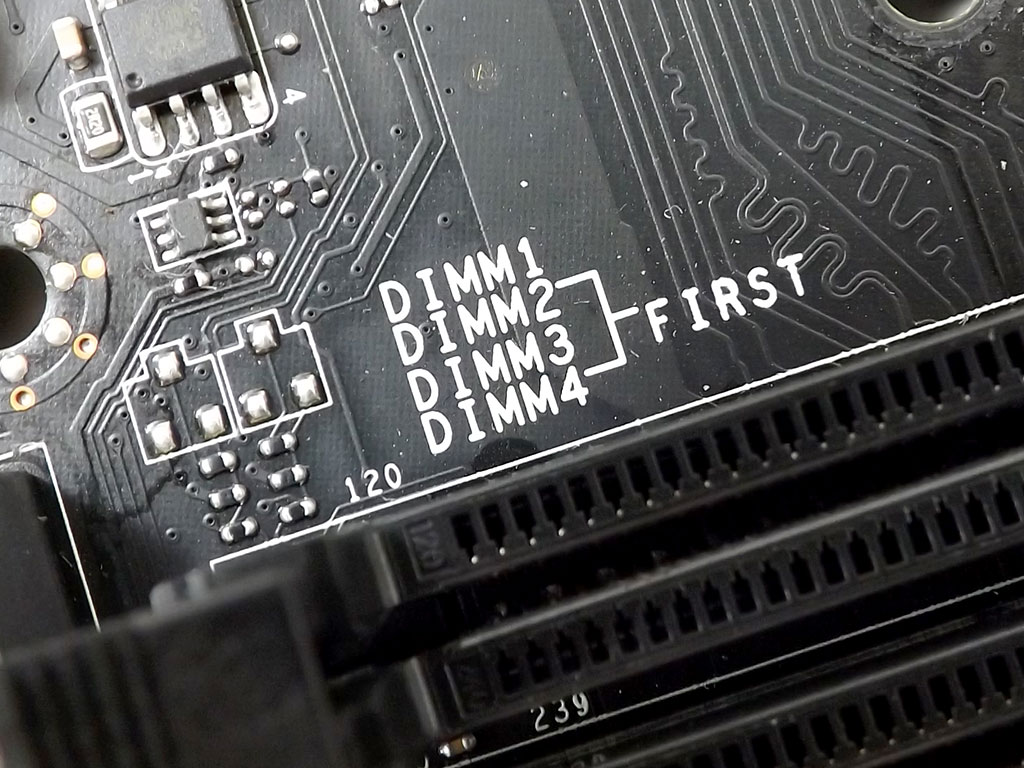
MSI does put a bit of effort into ensuring that your first boot-up experience with their products, and even their assembly, works well. This is easily highlighted by the fact that they clearly mark, directly on the PCB, which DIMM slots to populate first for the best possible compatibility.
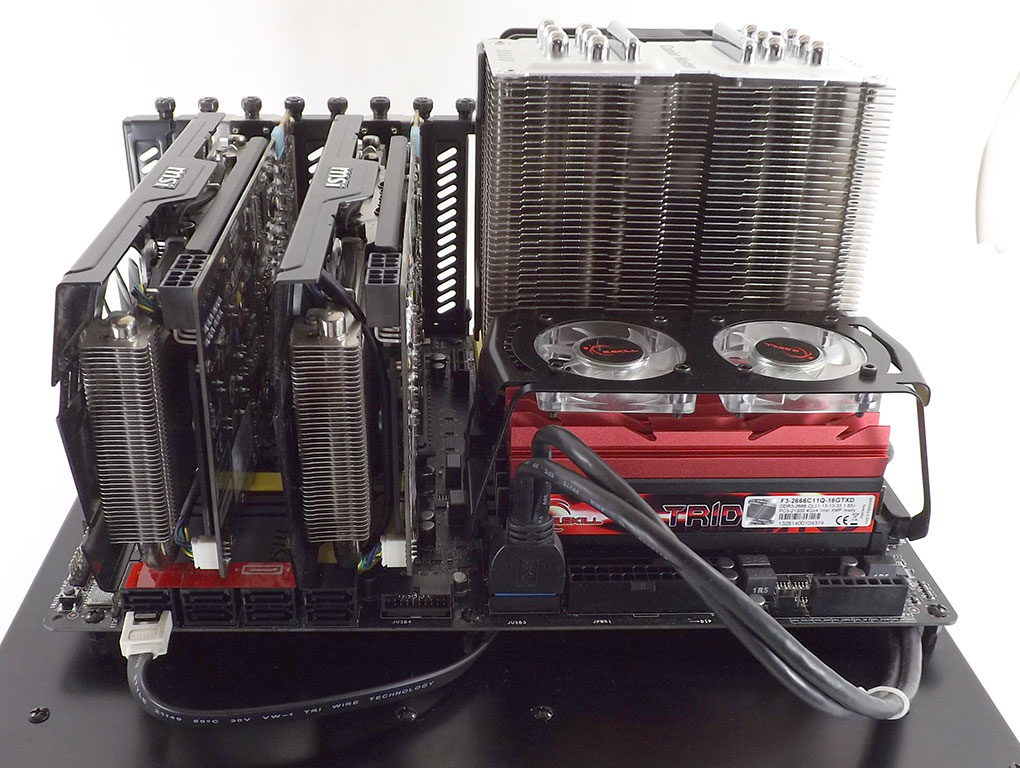
Getting the board filled with my normally installed components on top of my LianLi test bench proved pretty easy, with lots of space all around for everything to fit. There was plenty of room for me to install my G.Skill memory fan with an MSI GTX670 Power Edition VGA in the top PCIe x16 slot.
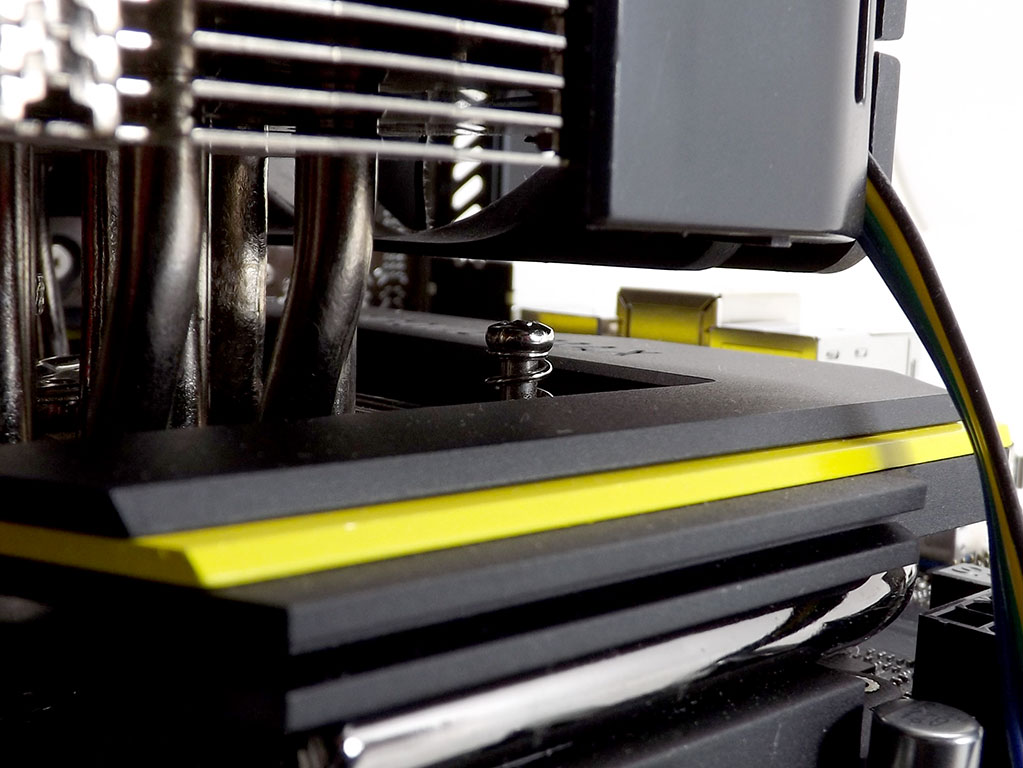
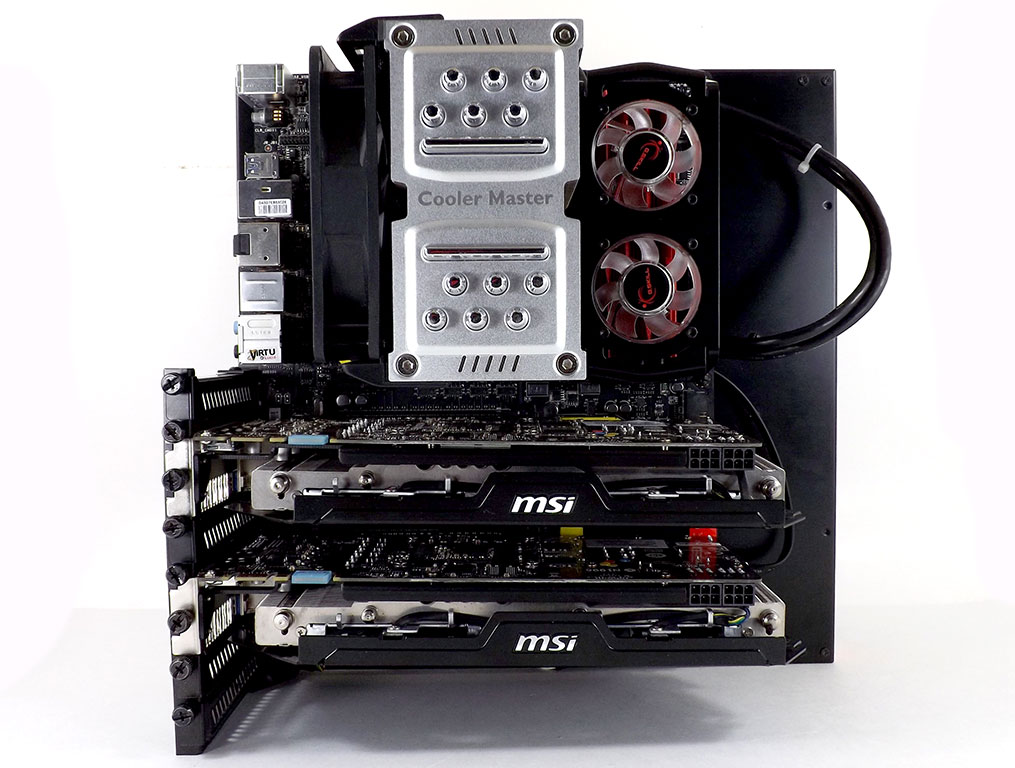
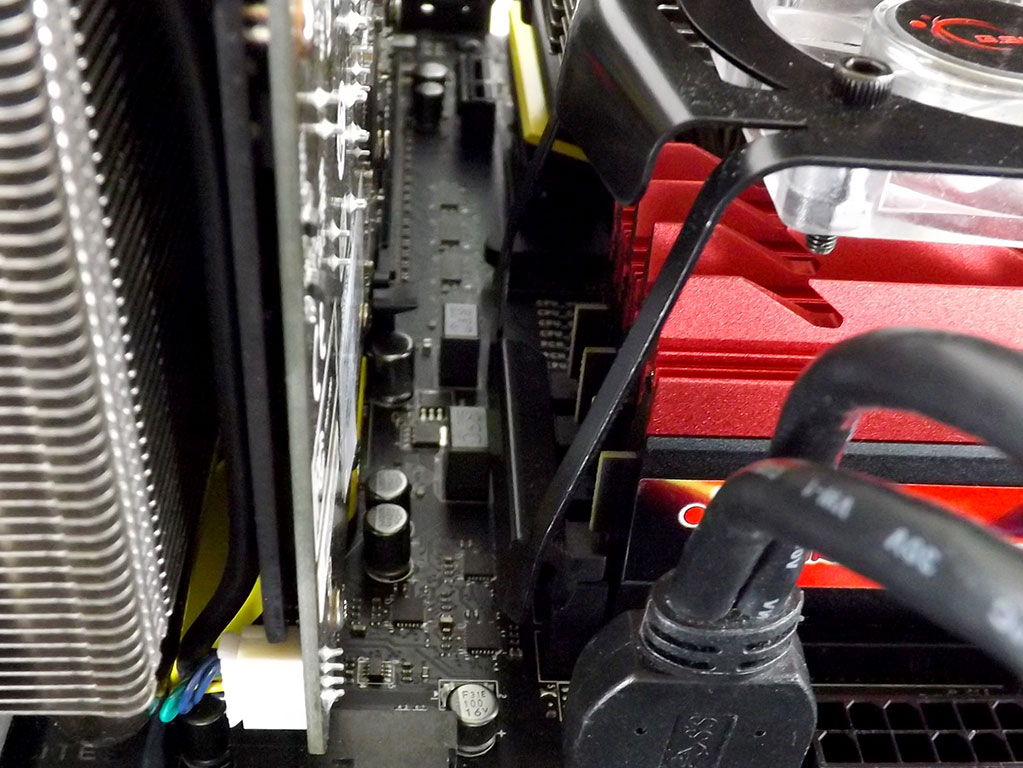
Clearance between the CoolerMaster heatsink and the MOSFET cooler was perfect, with plenty of room for the installed fan. I was pretty impressed with how it looks all built up, even if the RAM refused to perfectly match the rest of the system—I just wish I had some nice Lightning VGAs to match!
Power Consumption
We measure CPU power consumption since one of our first tasks is to truly verify system stability. I isolate the power coming through the 8-pin ATX connector using an in-line meter that provides voltage and current readings, and total wattage passed through. While this may not prove to isolate the CPU power draw in all instances, it does serve as a good indicator of board efficiency and effective VRM design. Total system power consumption is no longer reported as this figure can change depending on what VGA is installed. The sole board-only power measurements possible without physically modifying a motherboard are those taken via the 8-pin CPU connector, making it the only figure of value worth reporting. I use wPrime with eight threads selected in the options, since it provides a consistently high workload throughout the full length of the test and runs long enough for the VRM and CPU to produce a fair bit of heat. Most average workloads will draw far less than this, although distributed computing applications are quite similar. This is not supposed to test stability since I use several other applications to do so, but merely to provide repeatable power draw numbers that anyone can replicate. The meter used is an off-the-shelf Zalman unit that has been on the market for some time. It provides quite similar results in my test environment when compared with a FLUKE 337 clamp meter.| Load Condition | CPU Voltage | Ring voltage | Idle Power | Load Power |
|---|---|---|---|---|
| Stock Clocks | 1.041 V | 1.022 V | 16W | 72W |
| Overclocked | 1.285 V | 1.150 V | 23W | 127W |
Power consumption with the MSI Z87 MPOWER MAX was right in line with other products I tested to date. Idle power consumption on overclock was actually better than I had expected, but stock idle power consumption could have been a bit better too—interesting.
Jul 1st, 2025 22:46 CDT
change timezone
Latest GPU Drivers
New Forum Posts
- PCMA2305 Phase Change Metal Alloy (PCMA) (7)
- Best motherboards for XP gaming (18)
- What would you buy? (32)
- Is my m2 possibly fake ? and possible laptop hardware damage ? (28)
- HP Zbook 15 G2 GPU Upgrade (4)
- Help me overclocking my GSkill Ripjaws 3200MHz CL 16 DDR4 RAMs. (20)
- MACPRO 3,1 booting windows (0)
- My PCIe5 SSD is slow. Samsung 9100 PRO (29)
- Steering wheels, I think I had a mea culpa! (0)
- My PSU died.. (1)
Popular Reviews
- ASUS ROG Crosshair X870E Extreme Review
- Crucial T710 2 TB Review - Record-Breaking Gen 5
- Sapphire Radeon RX 9060 XT Pulse OC 16 GB Review - An Excellent Choice
- AVerMedia CamStream 4K Review
- Upcoming Hardware Launches 2025 (Updated May 2025)
- AMD Ryzen 7 9800X3D Review - The Best Gaming Processor
- Lexar NQ780 4 TB Review
- Sapphire Radeon RX 9070 XT Nitro+ Review - Beating NVIDIA
- AMD Ryzen 9 9950X3D Review - Great for Gaming and Productivity
- NVIDIA GeForce RTX 5060 8 GB Review
TPU on YouTube
Controversial News Posts
- Intel's Core Ultra 7 265K and 265KF CPUs Dip Below $250 (288)
- NVIDIA Grabs Market Share, AMD Loses Ground, and Intel Disappears in Latest dGPU Update (208)
- Some Intel Nova Lake CPUs Rumored to Challenge AMD's 3D V-Cache in Desktop Gaming (140)
- NVIDIA GeForce RTX 5080 SUPER Could Feature 24 GB Memory, Increased Power Limits (112)
- Microsoft Partners with AMD for Next-gen Xbox Hardware (105)
- NVIDIA Launches GeForce RTX 5050 for Desktops and Laptops, Starts at $249 (105)
- Intel "Nova Lake‑S" Series: Seven SKUs, Up to 52 Cores and 150 W TDP (100)
- NVIDIA DLSS Transformer Cuts VRAM Usage by 20% (91)