 41
41
Phanteks Enthoo Pro II Review - Two Systems, Affordable
A Closer Look - Inside »A Closer Look - Outside
Taking a look at the exterior, you will immediately notice the large fabric-based air vent and a design that is clearly attributable to what the Enthoo family of cases looks like. The interior of the Phanteks Enthoo Pro II is in essence the same as in the Enthoo 719.

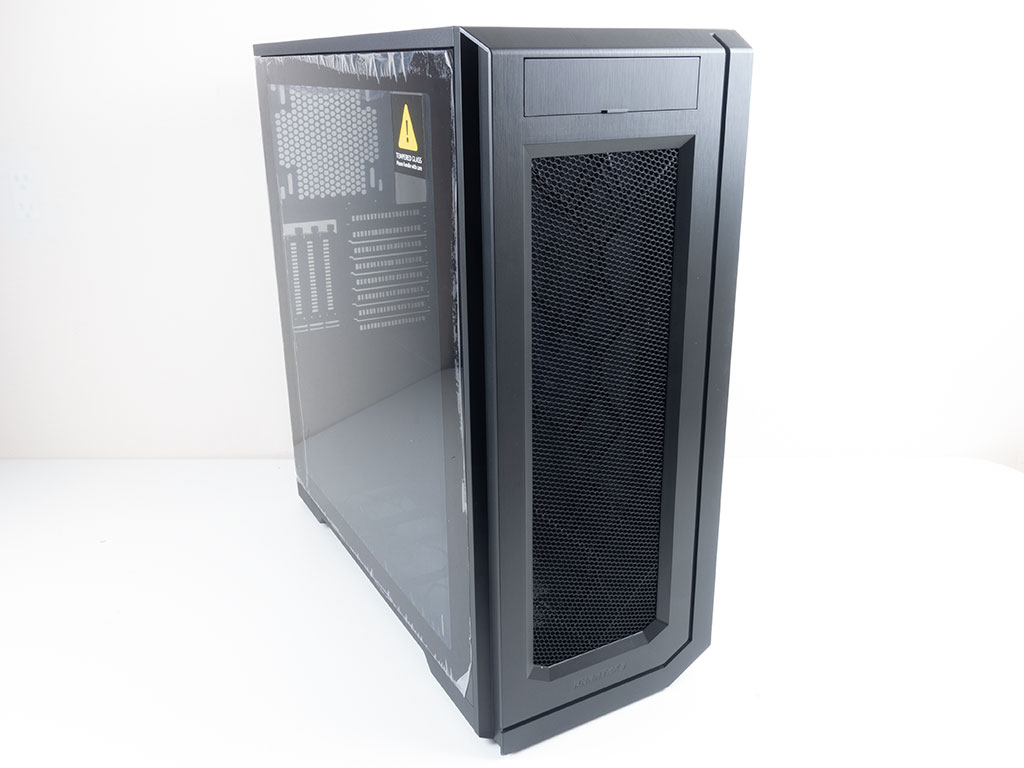
Looking at the front, you can clearly see through the fabric in the center of the plastic front panel. It sports an asymmetrical design and a little cover that hides the I/O ports in the very top. In the rear, everything is essentially where you would expect it, with the PSU in the bottom of the chassis. However, the power supply is meant to be installed upright to give you room for the secondary system.

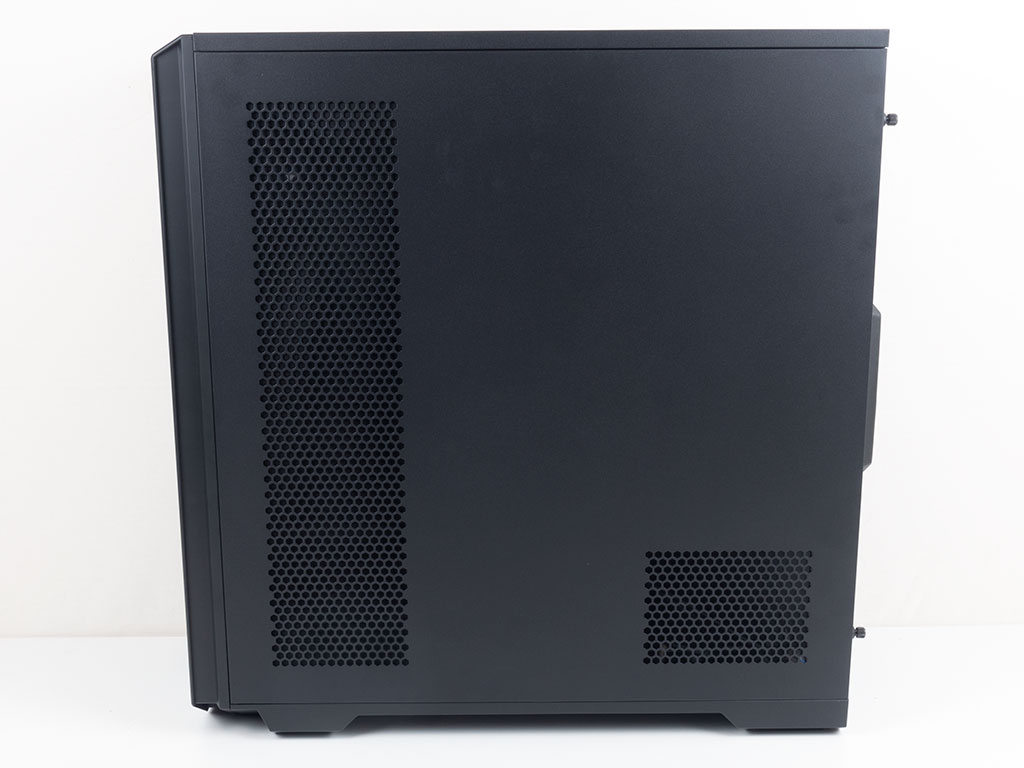
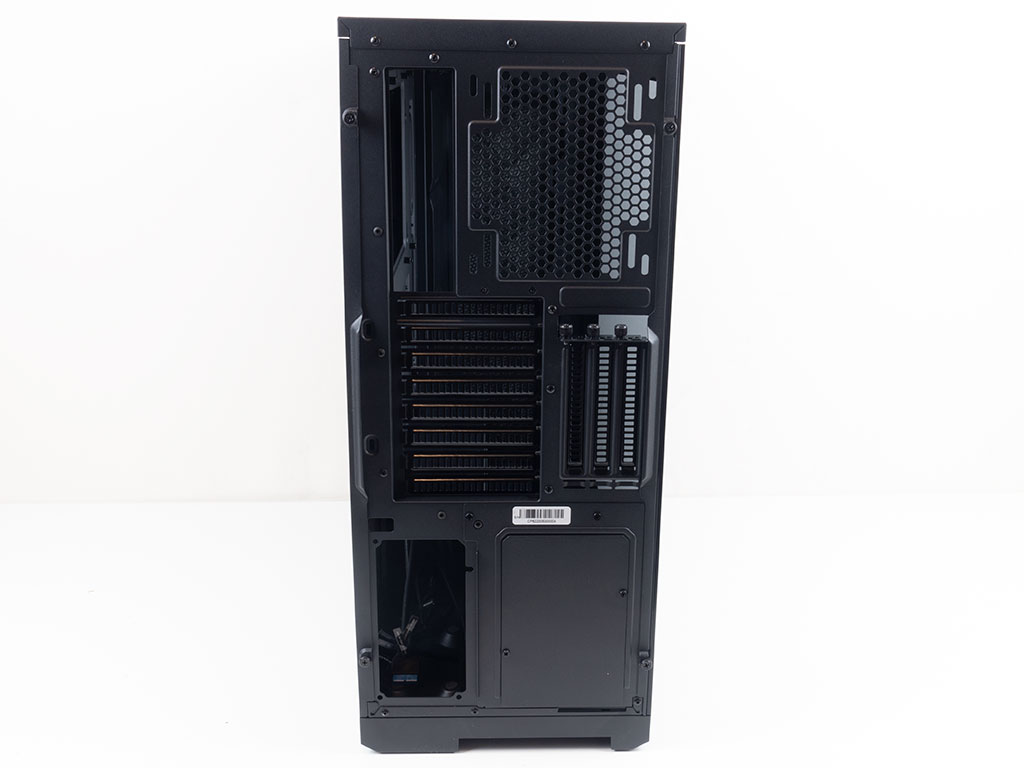
The main side panel is made out of tempered glass with no visible screws and a nice black frame. It is barely tinted, so you will be able to see all your components clearly. The opposite side of the Phanteks Enthoo Pro II has two air vents, one in the front of the chassis, which is where you could install liquid cooling, and one the PSU draws fresh air through.
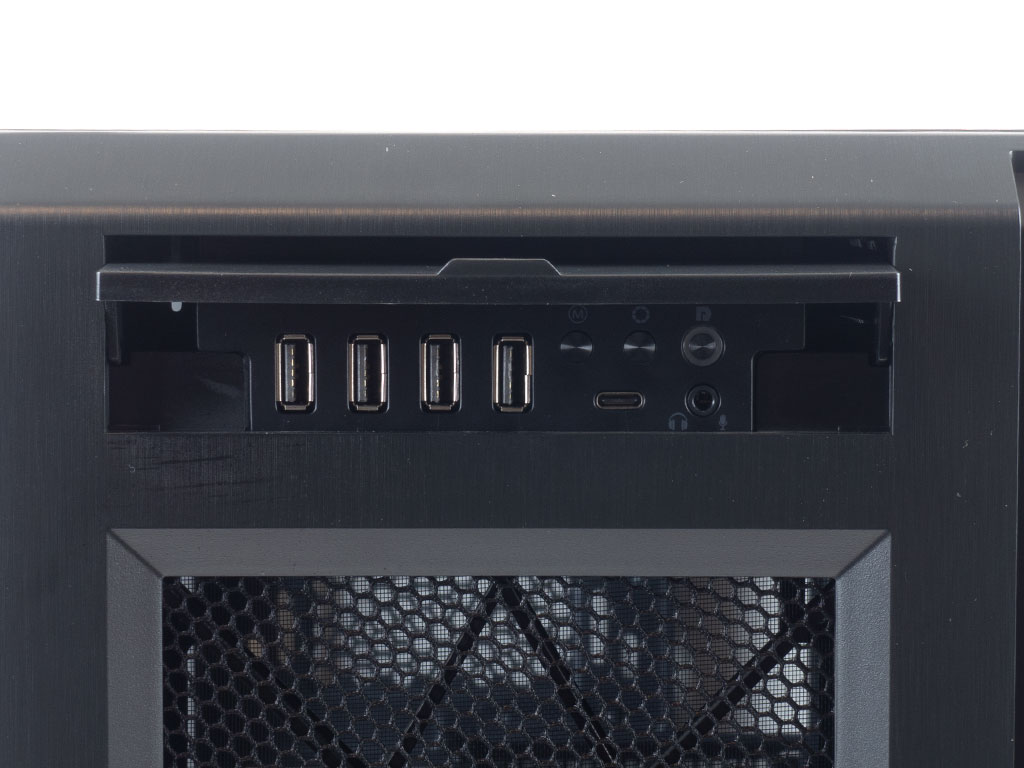
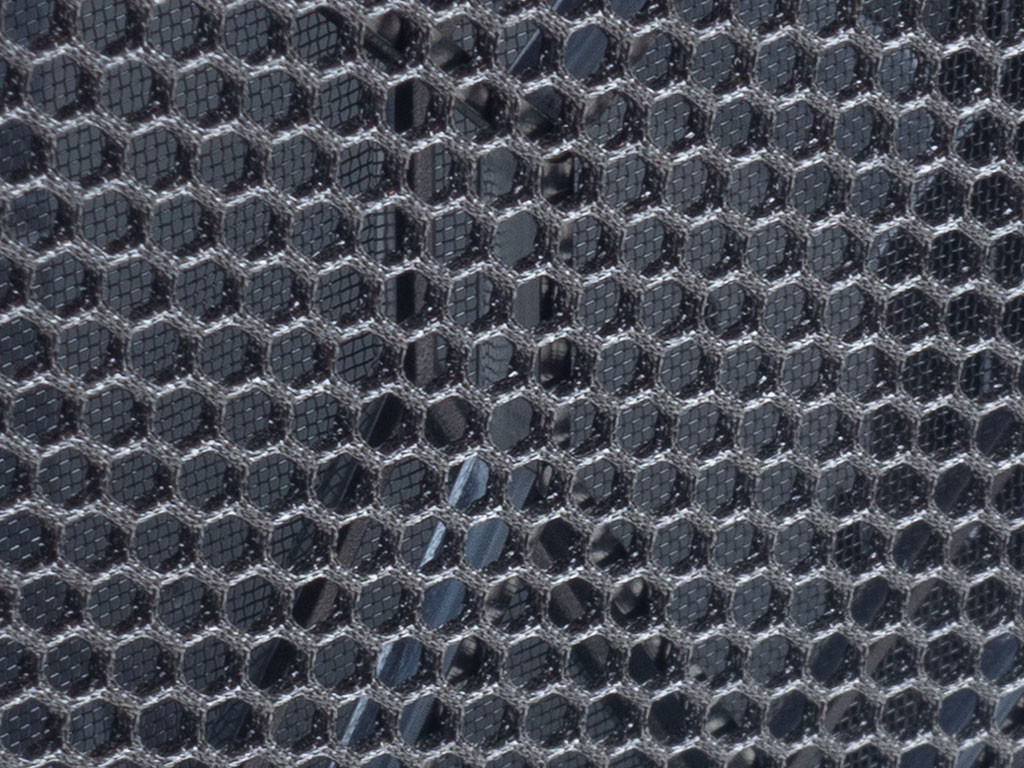
The I/O of the chassis is hidden behind a flip-up panel, which is a nice touch as it ensures that the front looks really clean. However, the whole cover feels cheap, and behind it, things look ugly. On the bright side, you will find four USB 3.0 ports, a single USB 3.1 Gen2 Type-C, and a combo audio port here. Phanteks has also included an ARGB controller with two buttons to adjust your internal lighting to your liking. Lastly, there is a reset button with an LED ring as well. If you are running a dual-system setup, this button and its LED will be repurposed to act as a power button and LED instead. One of the highlights of the chassis is the unique fabric that has been applied to the front. It is actually quite thick, essentially forming a 3D honeycomb pattern. This material allows for plenty of unrestricted airflow.
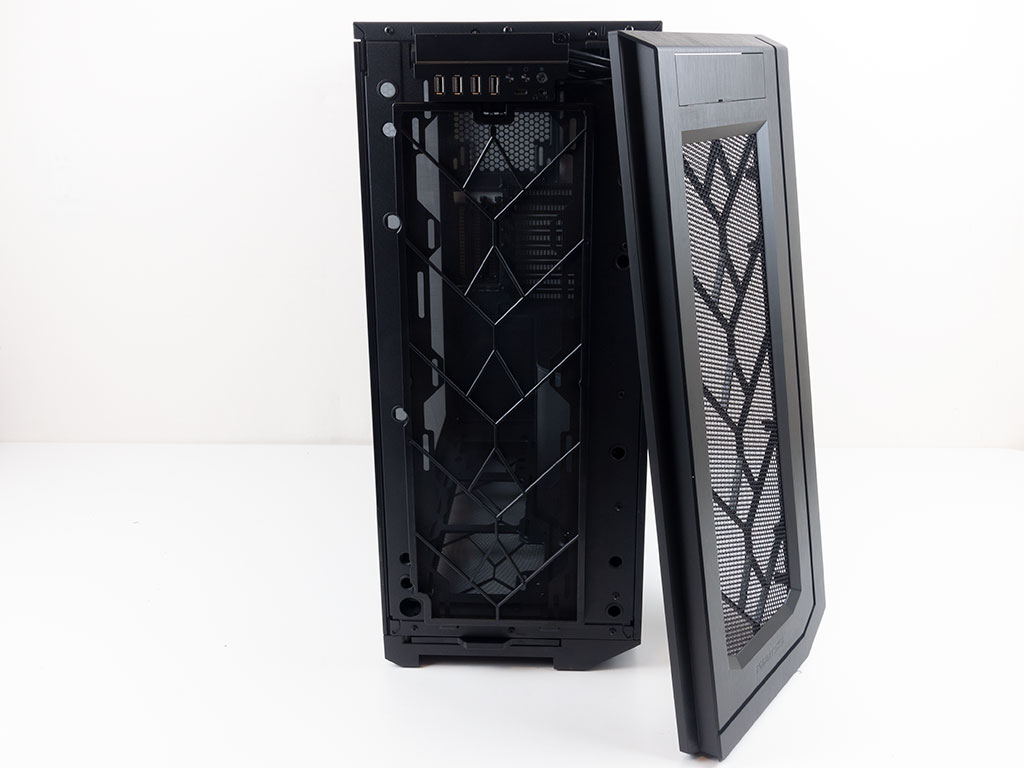
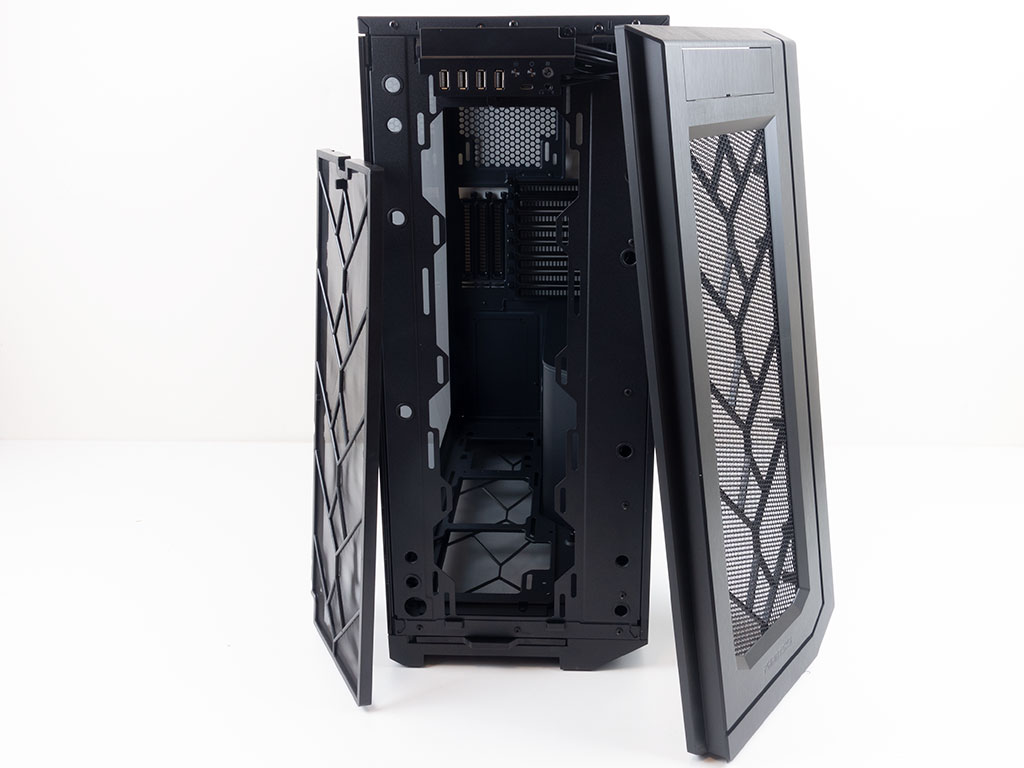
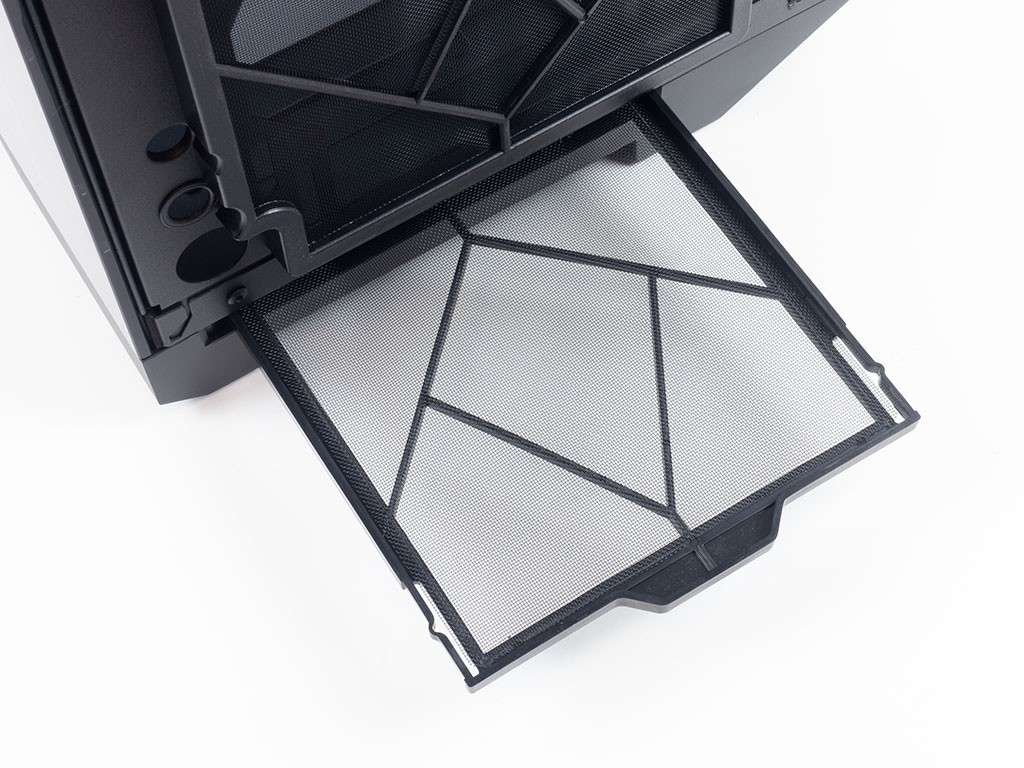
You may pull the plastic cover off the chassis to reveal a fine dust filter, which is held in place magnetically. Once removed, it will give way to four 120 mm or three 140 mm fan mounts, which also allows for radiators of up to 480 mm. With the front cover removed, the dust filter on the floor may also be removed for easy cleaning.
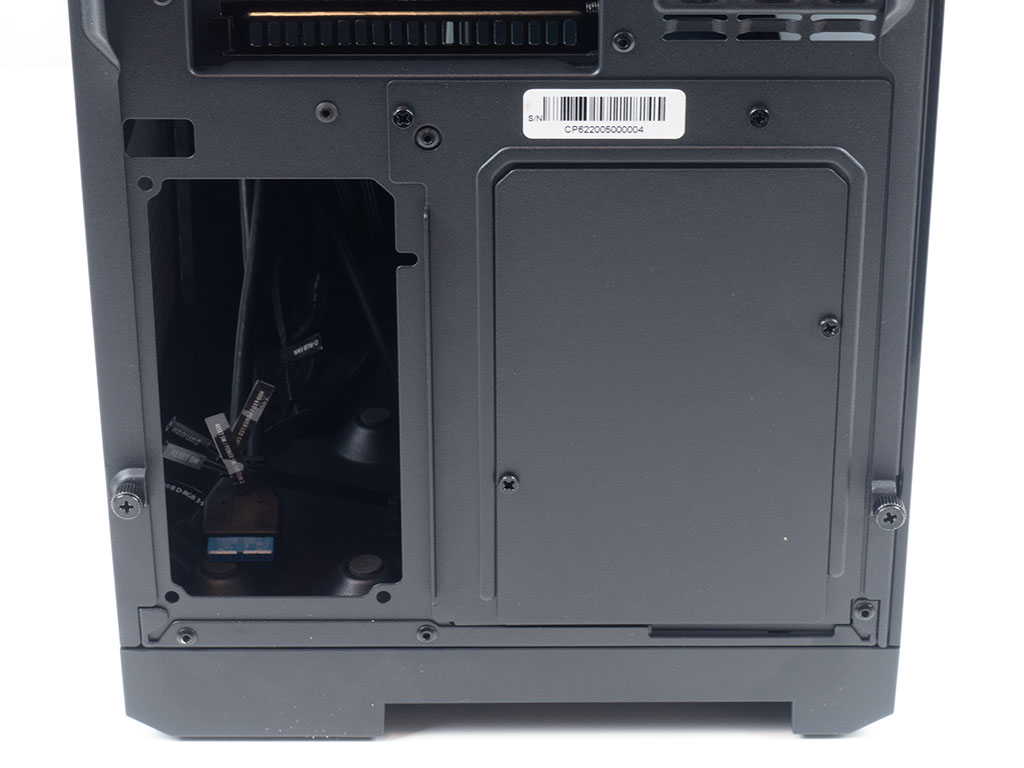
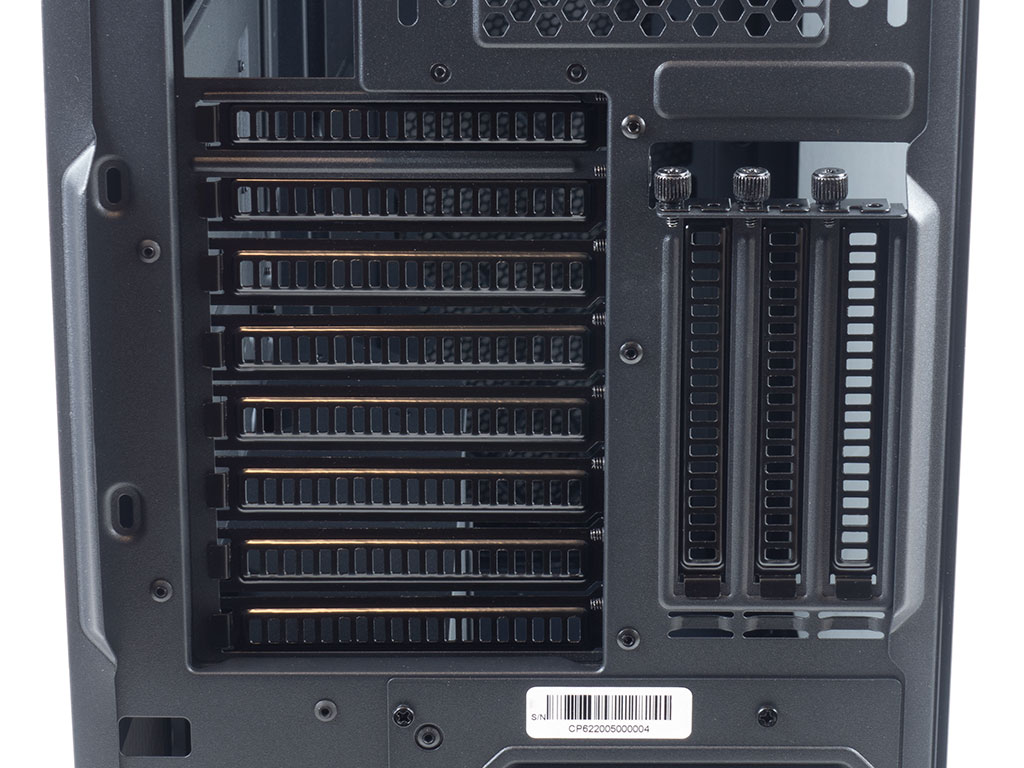
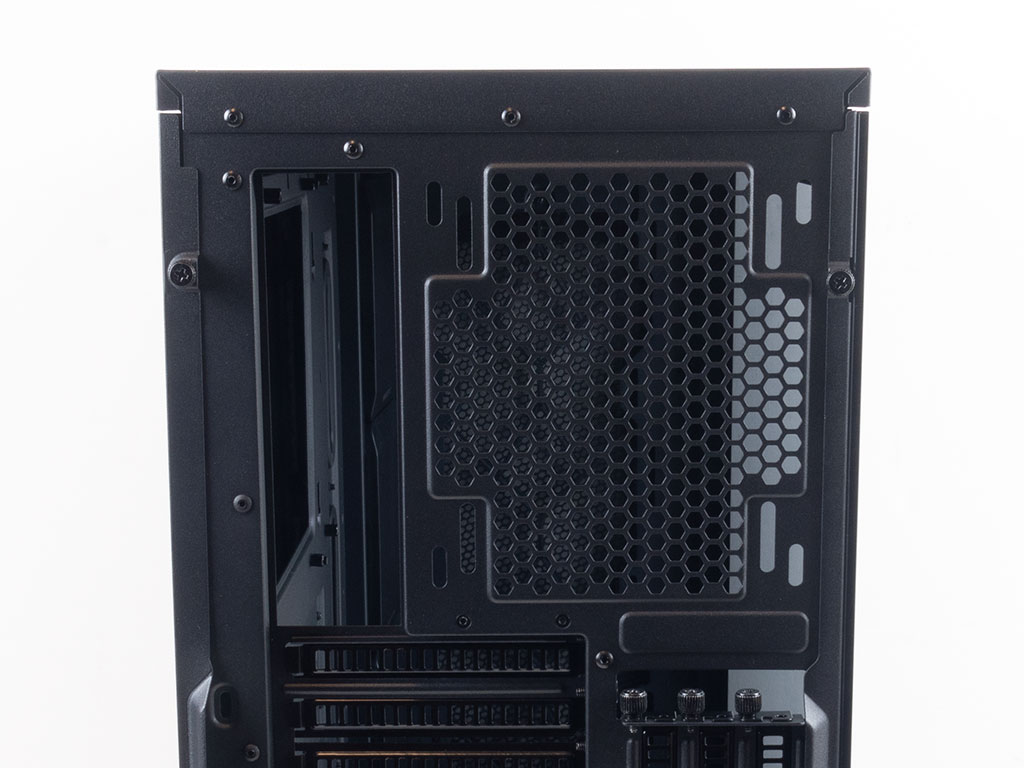
In the rear, starting at the bottom, the primary ATX PSU is positioned upright, to the left, and you may install another PSU to the right by removing the solid cover. As we will see later on, two screws hold the greater metal panel in place you will have to take off to install the ITX PSU. Above that are the 8 + 3 expansion slots, which are protected by reusable covers with thumb screws. In the very top is space for either a 120 or 140 mm fan.
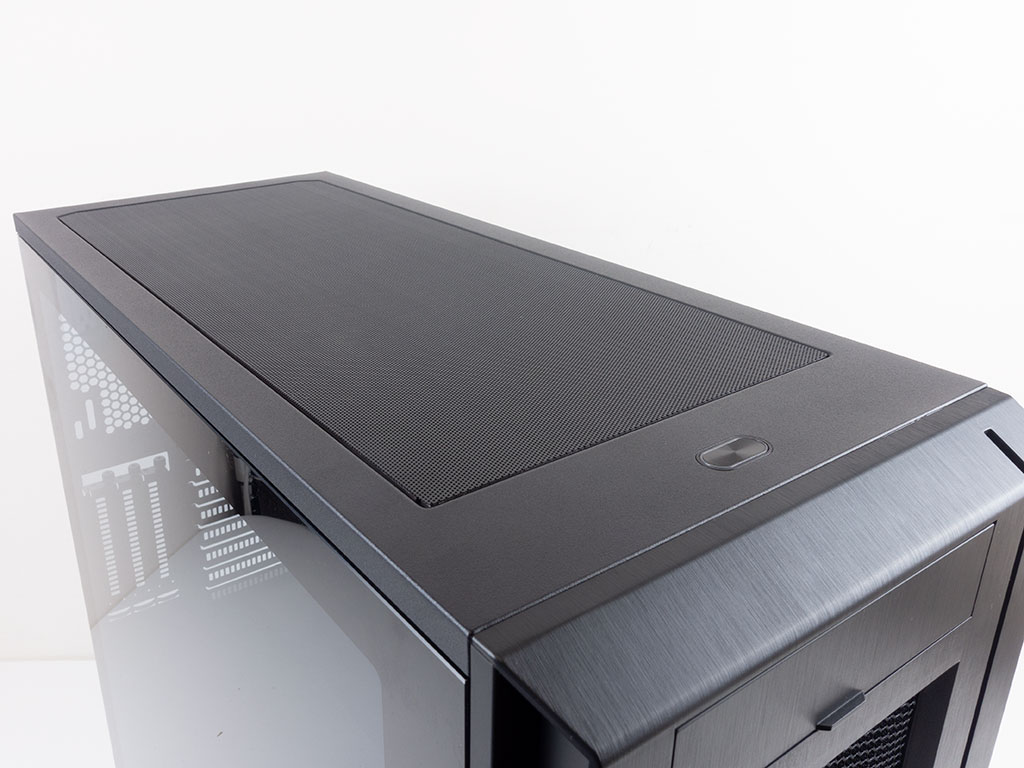
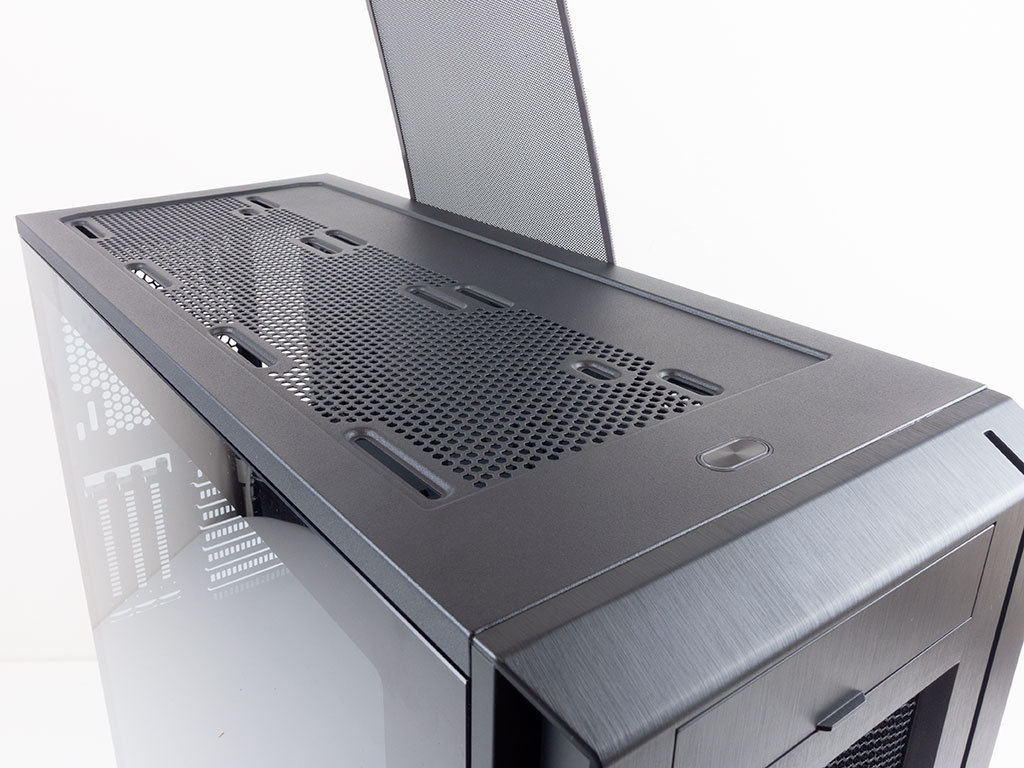
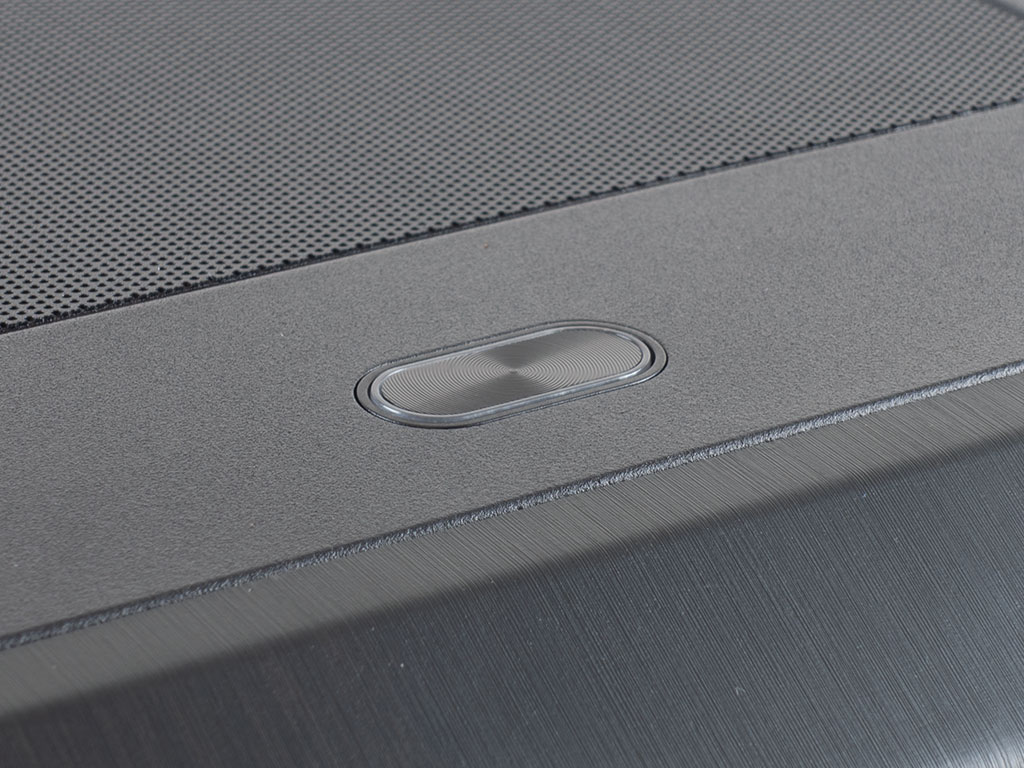
The very top is also intended for air or liquid cooling. Underneath the magnetic metal mesh dust filter, you may install three 120 or 140 mm fans or a radiator of up to 360 mm. A single power button sits at the front edge of the top cover. It actually features an ARGB power LED you can sync with the rest of your system.
Mar 27th, 2025 21:26 EDT
change timezone
Latest GPU Drivers
New Forum Posts
- tape v hard disk (18)
- How to quickly & easily fix coil-whine(coil choke noise) (1138)
- Gigabyte graphic card - TIM GEL application failure? (6)
- The TPU UK Clubhouse (25981)
- TPU's Nostalgic Hardware Club (20132)
- Fun with SBCs (7)
- Future-proofing my OLED (28)
- 9070 XT - 2x HDMI high refresh displays (144 and 120 Hz) not working (68)
- Your PC ATM (35293)
- How's your old spinner holding up? (65)
Popular Reviews
- Sapphire Radeon RX 9070 XT Pulse Review
- Samsung 9100 Pro 2 TB Review - The Best Gen 5 SSD
- Assassin's Creed Shadows Performance Benchmark Review - 30 GPUs Compared
- Pulsar Feinmann F01 Review
- ASRock Phantom Gaming B860I Lightning Wi-Fi Review
- be quiet! Pure Rock Pro 3 Black Review
- Sapphire Radeon RX 9070 XT Nitro+ Review - Beating NVIDIA
- ASRock Radeon RX 9070 XT Taichi OC Review - Excellent Cooling
- ASUS ProArt X870E-Creator Wi-Fi Review
- Montech XR Wood Review
Controversial News Posts
- AMD RDNA 4 and Radeon RX 9070 Series Unveiled: $549 & $599 (260)
- MSI Doesn't Plan Radeon RX 9000 Series GPUs, Skips AMD RDNA 4 Generation Entirely (142)
- Microsoft Introduces Copilot for Gaming (123)
- AMD Radeon RX 9070 XT Reportedly Outperforms RTX 5080 Through Undervolting (118)
- NVIDIA Reportedly Prepares GeForce RTX 5060 and RTX 5060 Ti Unveil Tomorrow (115)
- Over 200,000 Sold Radeon RX 9070 and RX 9070 XT GPUs? AMD Says No Number was Given (100)
- NVIDIA GeForce RTX 5050, RTX 5060, and RTX 5060 Ti Specifications Leak (96)
- Retailers Anticipate Increased Radeon RX 9070 Series Prices, After Initial Shipments of "MSRP" Models (90)