 12
12
Phanteks Evolv X Review
A Closer Look - Inside »A Closer Look - Outside

Out of the box, the Phanteks Evolv X looks very similar to the original Evolv ATX with its glass panel shape and unique, metal front cover. That said, it is not identical as there are a few subtle but important differences. The matte white variant looks beautiful, especially with those white-framed glass panels.
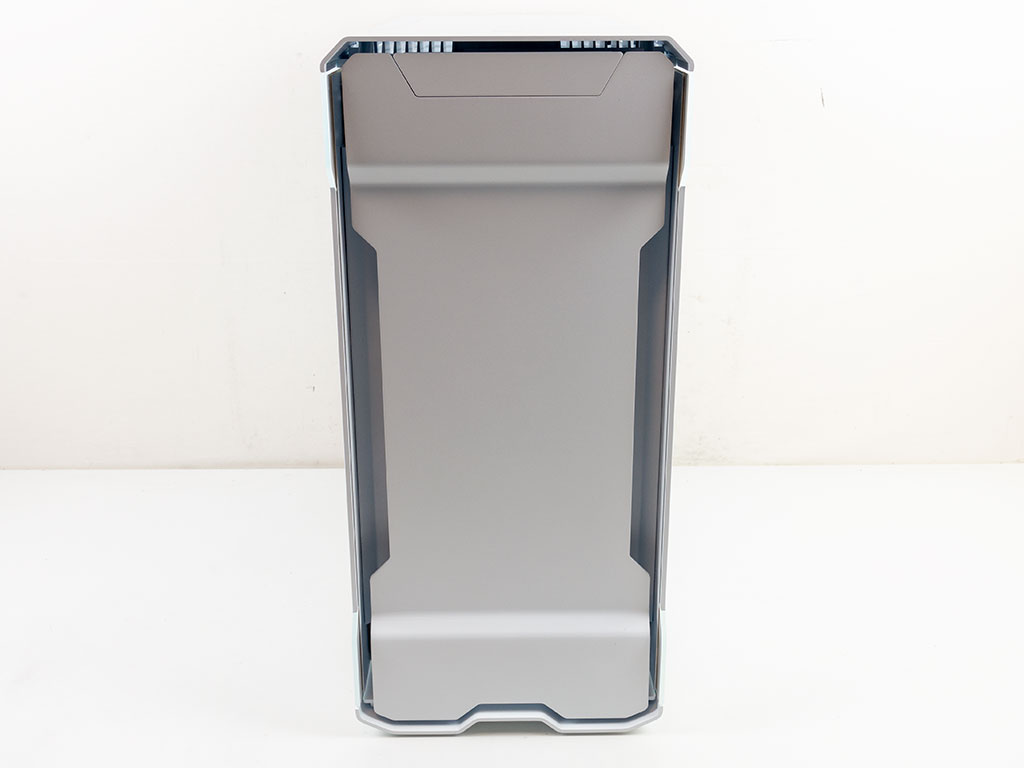
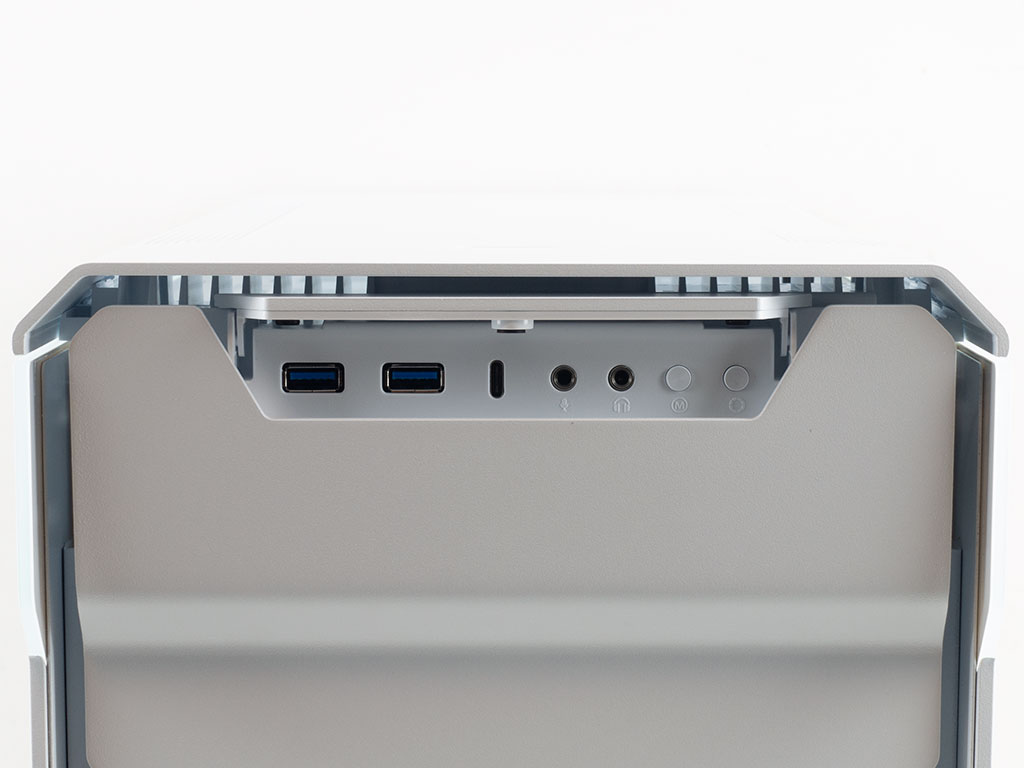
In the front is the solid metal cover with gaps for air intake on the left and right. Those are capped off by the glass panels nicely. In the top is a flip-up cover, which is covered by a metal piece that has it perfectly fit with the rest of the panel. You will find a USB 3.2 Type-C, two USB 3.0, the usual audio plugs, and two buttons to adjust the mode and color of any connected ARGB elements here. Turning our attention to the rear, the general layout is modern, yet traditional, but you also get a vertical triple-slot GPU-mounting possibility.
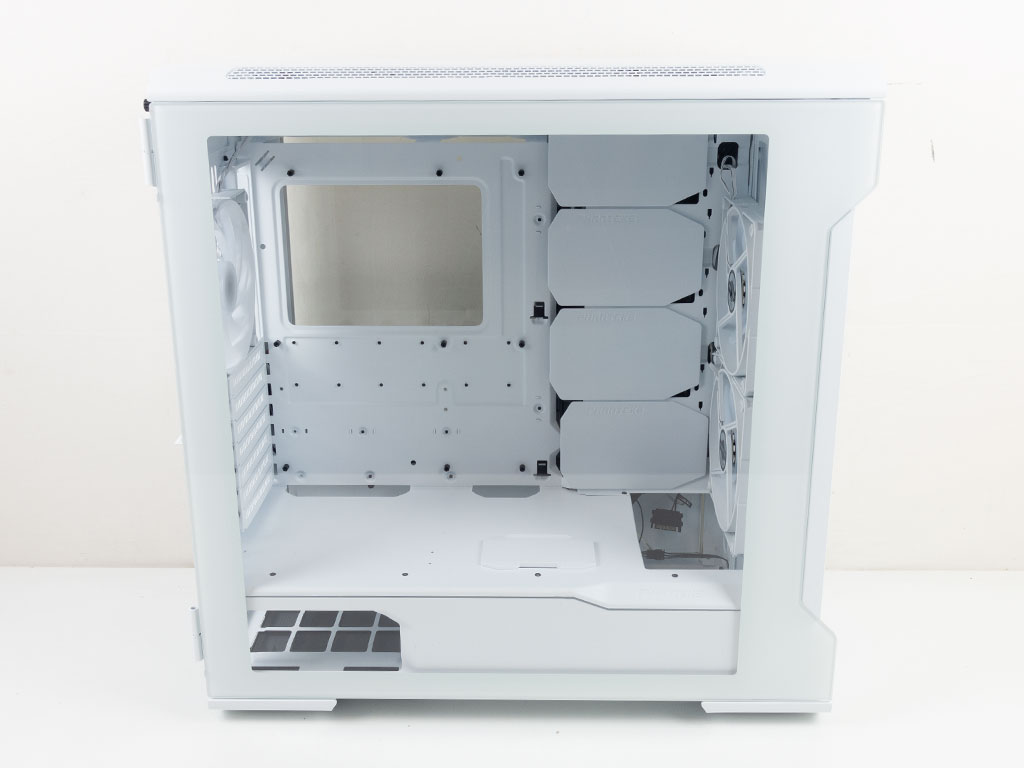
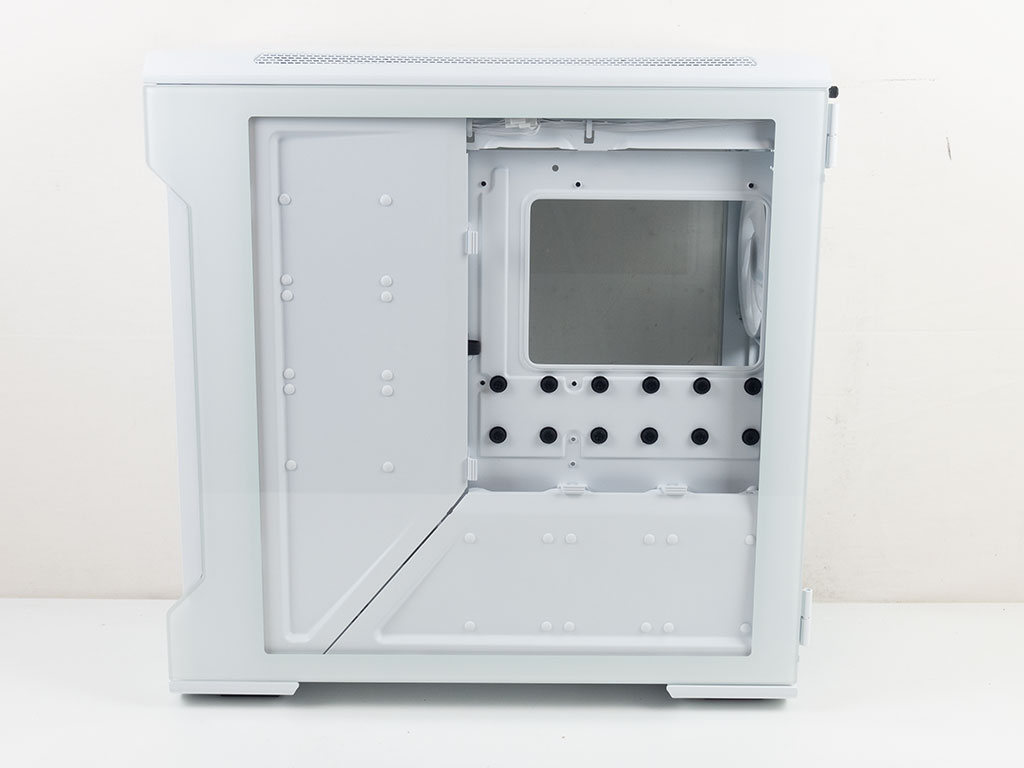
Both glass panels of the Phanteks Evolv X are hinged, completely clean and clear, so you can see all the hardware within. Having no tint on the one covering the area behind the motherboard takes including features that ensure you aren't looking at a complete cable mess, and Phanteks certainly seems to have that covered (all the pun intended) as well. Unlike the original Evolv, Phanteks is not even attempting to cover the PSU bay, but instead allows you to show off that element of your build nicely.
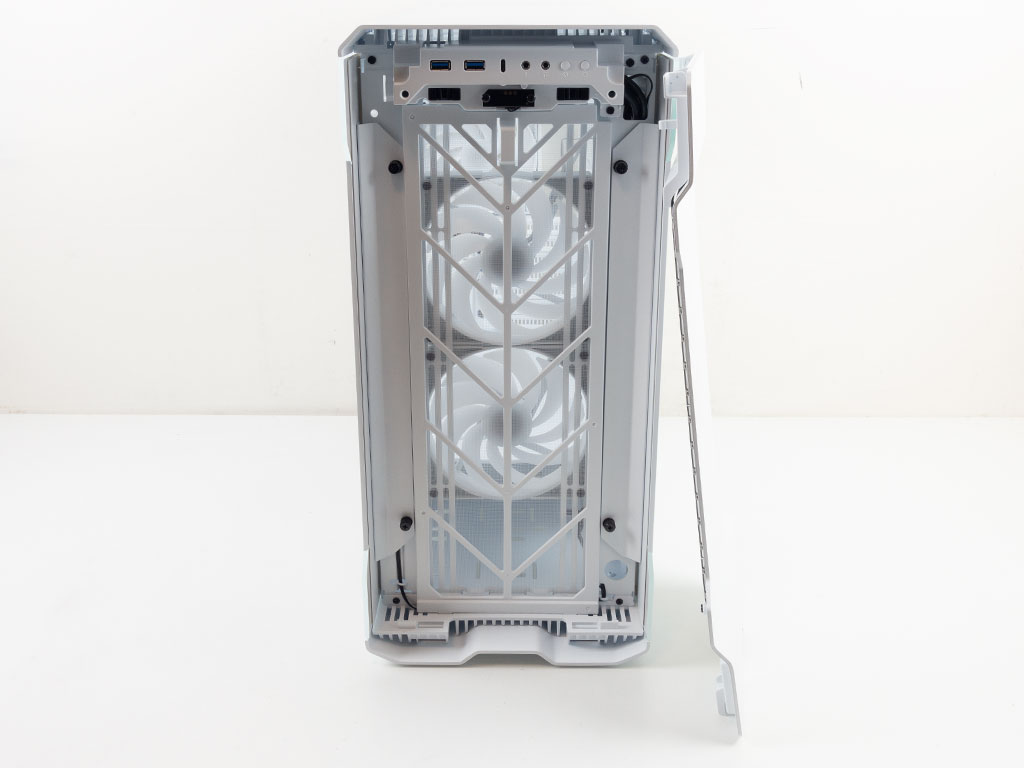
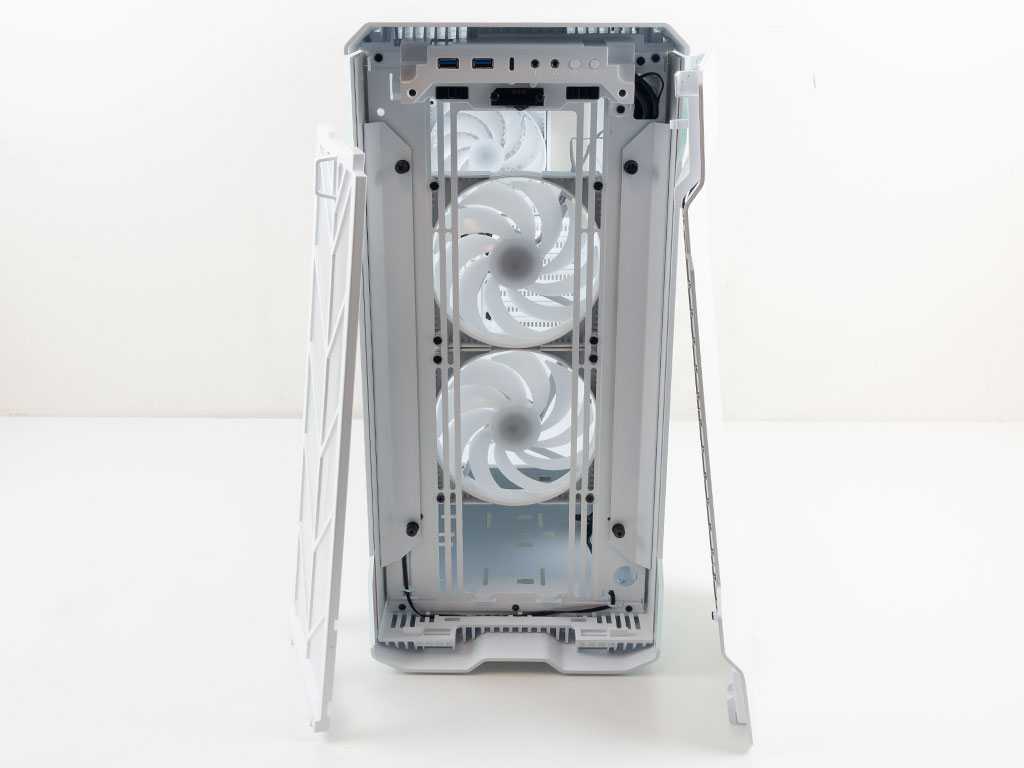
You may pull the solid front cover off to reveal a magnetic fine-mesh dust filter behind which the two 140 mm intake fans sit. As you can see, these are exactly the same fans as those in the retail triple-pack we took a look at on the previous page. If you look closely, you can also spot a round opening in the bottom-right corner, which is a drain port to easily empty out your loop at its lowest point.
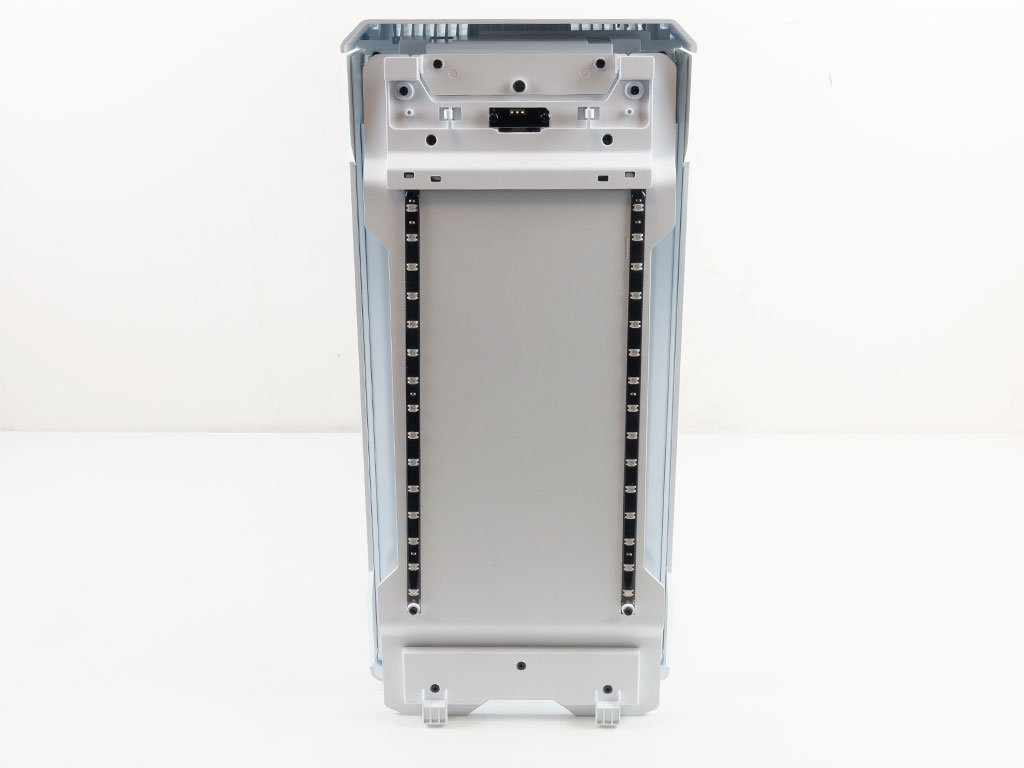
Even though you may remove the whole front cover, Phanteks employs a push pin connector to power the two LED strips running down the back of the panel, which should make for some excellent lighting effects as well.
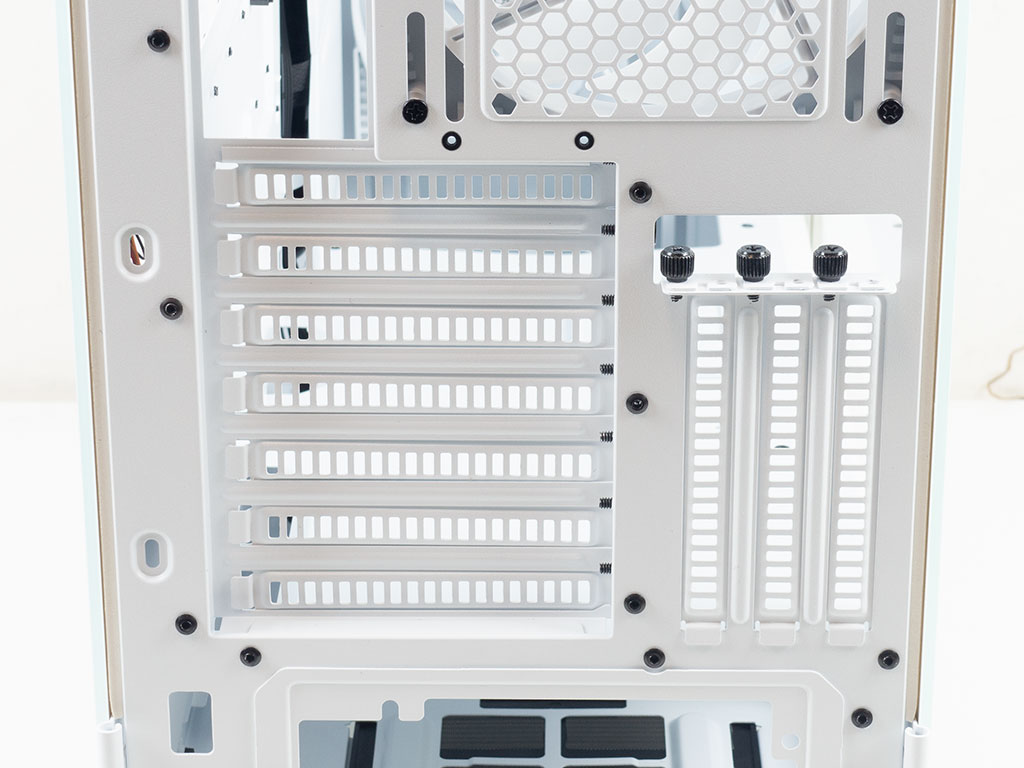
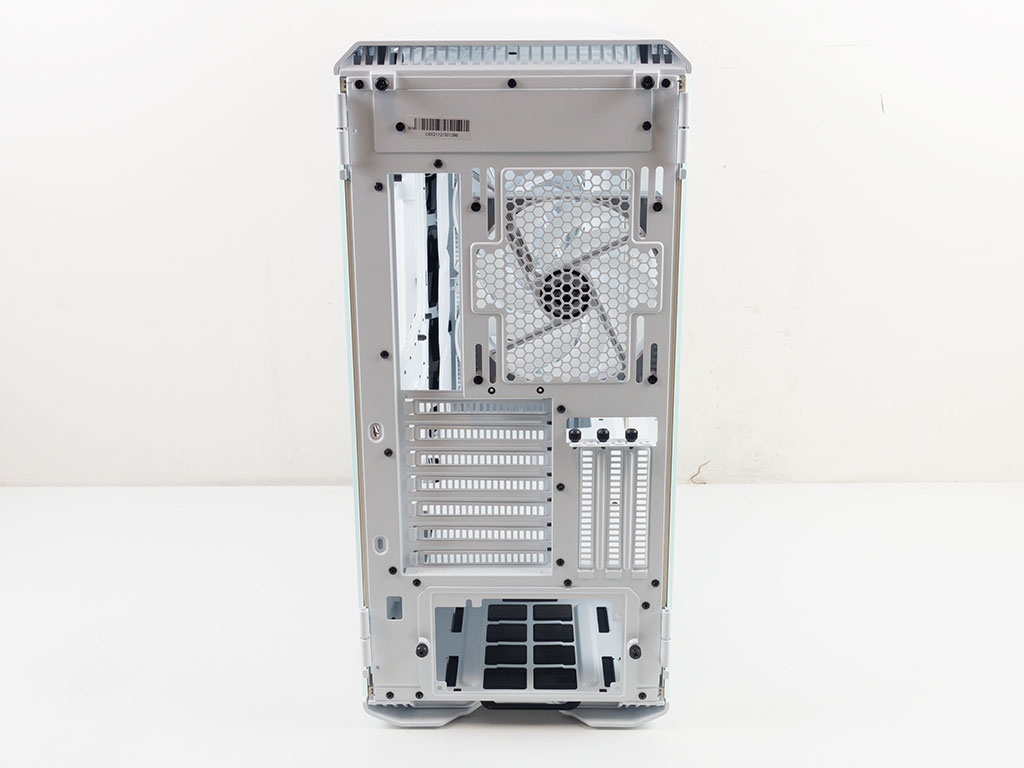
In the bottom is a PSU frame, which means you have to attach it to the power supply before sliding the whole unit into the chassis through the rear. Above that are the 7+3 expansion slots. Having that extra vertical slot means you should be able to squeeze any GPU you can buy in there. Having the extra space also benefits any traditional two-slot card, as there is a bigger air gap between the fans and glass side panel. In the very top is the third 140 mm ARGB fan, which is set to push hot air out the back of the Evolv X. It includes elongated holes, so you may vertically align it with your air cooler. Look closely and you will see another removable panel above—it is used for a secondary ITX system as the Evolv X comes with dual-system support. Just like with a vertical GPU, you have to buy the required parts separately.
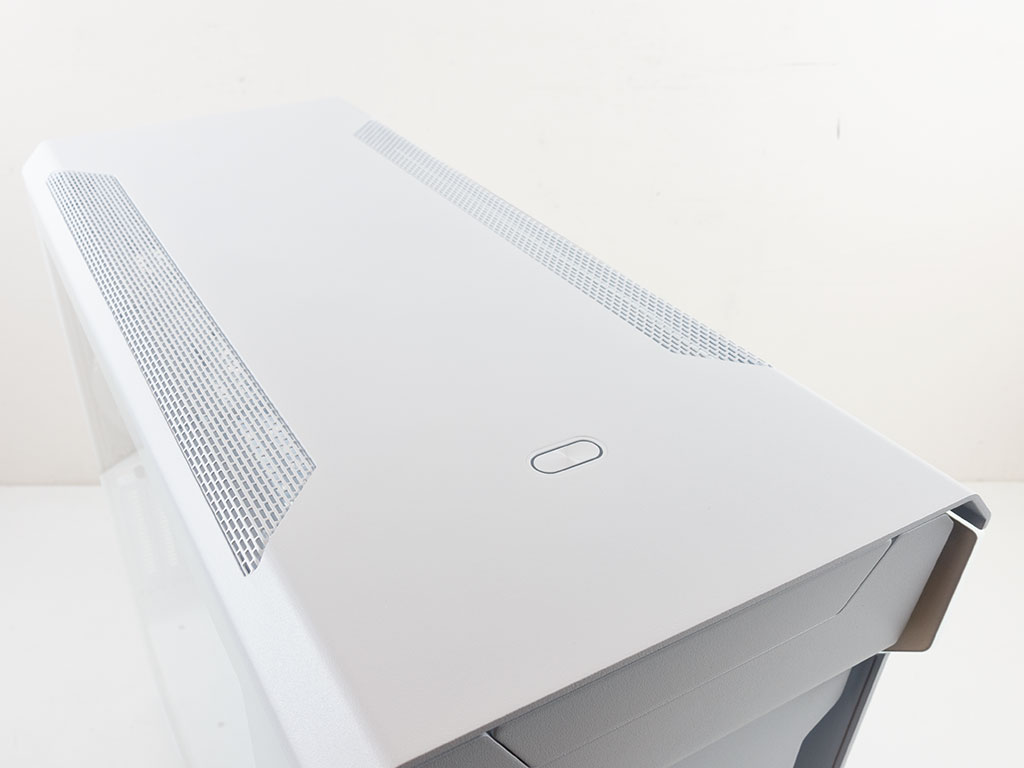
While the general shape of the cover on top of the Evolv X does remind of the original, Phanteks has created larger vents for air to flow through. They do not feature a dust filter, which means these are best-suited for pushing hot air out the top of the case instead of pulling cool air (and thus dust) in.
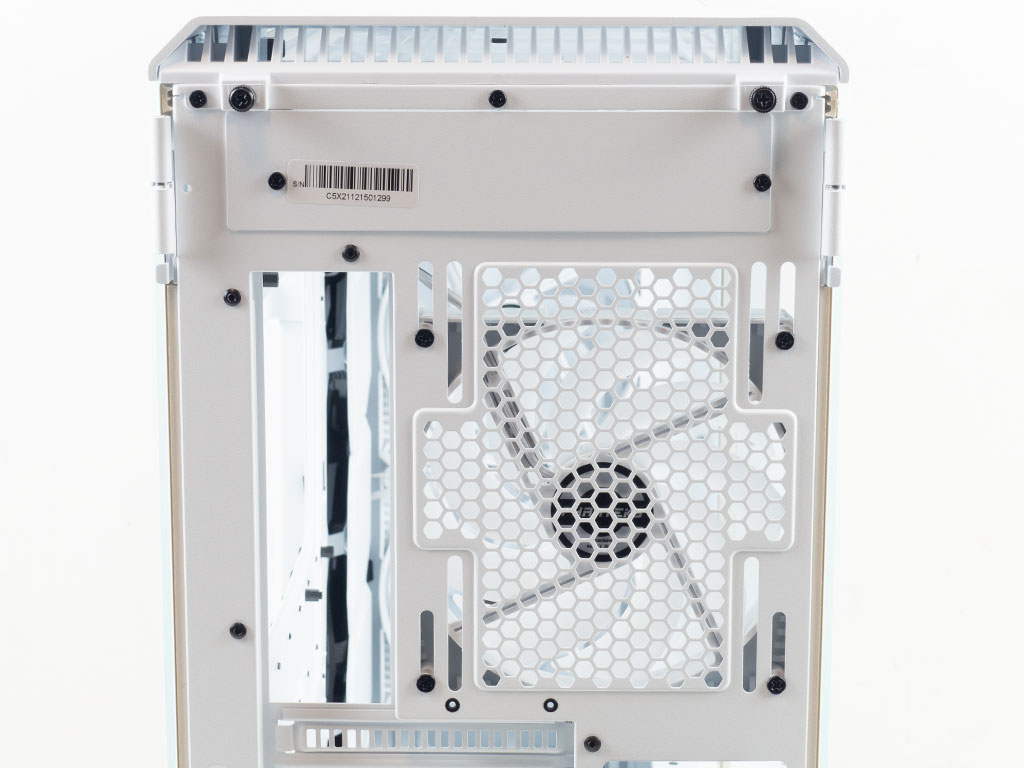
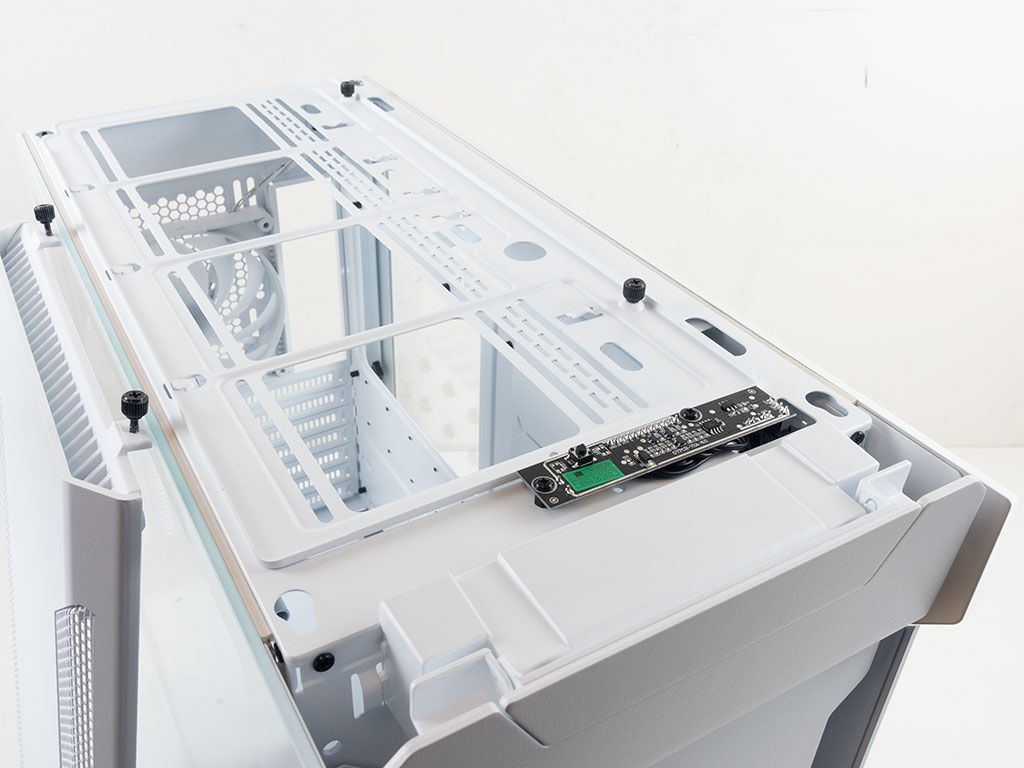
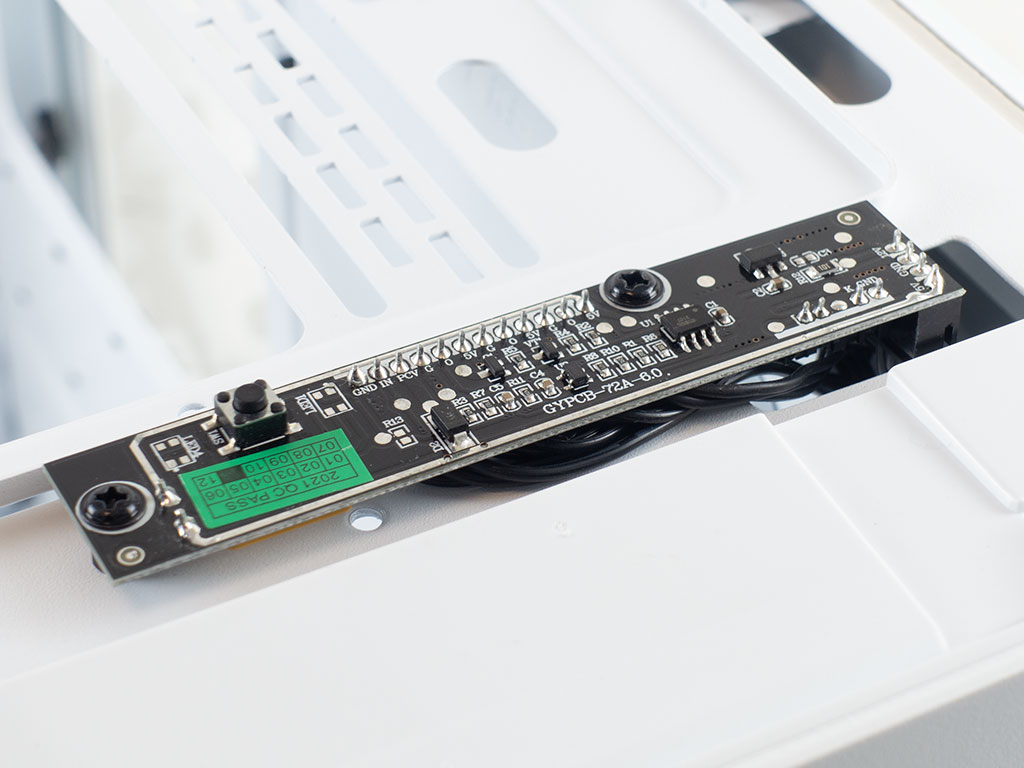
Removing the cover reveals the frame to attach an AIO of up to 360 mm. If you happen to go for a smaller one, the solid cover from the accessories box can be placed on the front or rear square to block it off for the best-possible airflow. Towards the front is another round opening—this one is for a fill port and strategically placed at the highest point of the system. You will find the PCB for the power button here, which actually includes the ARGB controller. If you look closely, the two soldering positions for LED1 and LED4 are missing LEDs, and upon bringing this to the attention of Phanteks, we were told that this was an issue with the sample. Retail cases will have these, so your power button will be lit up accordingly, too.
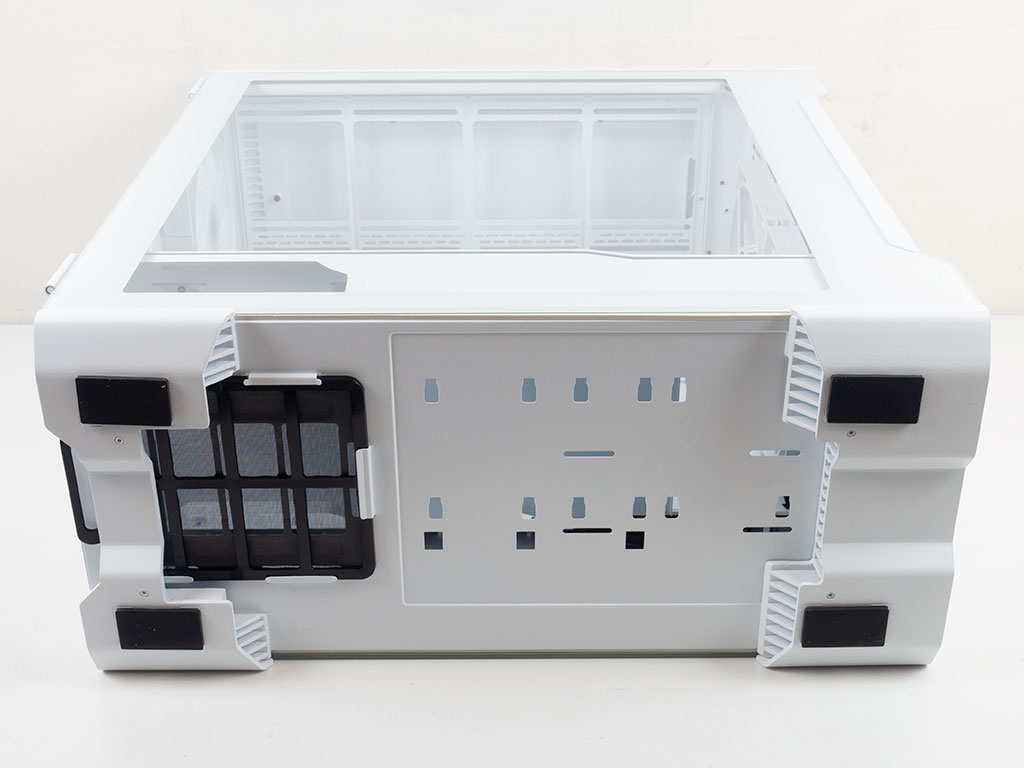
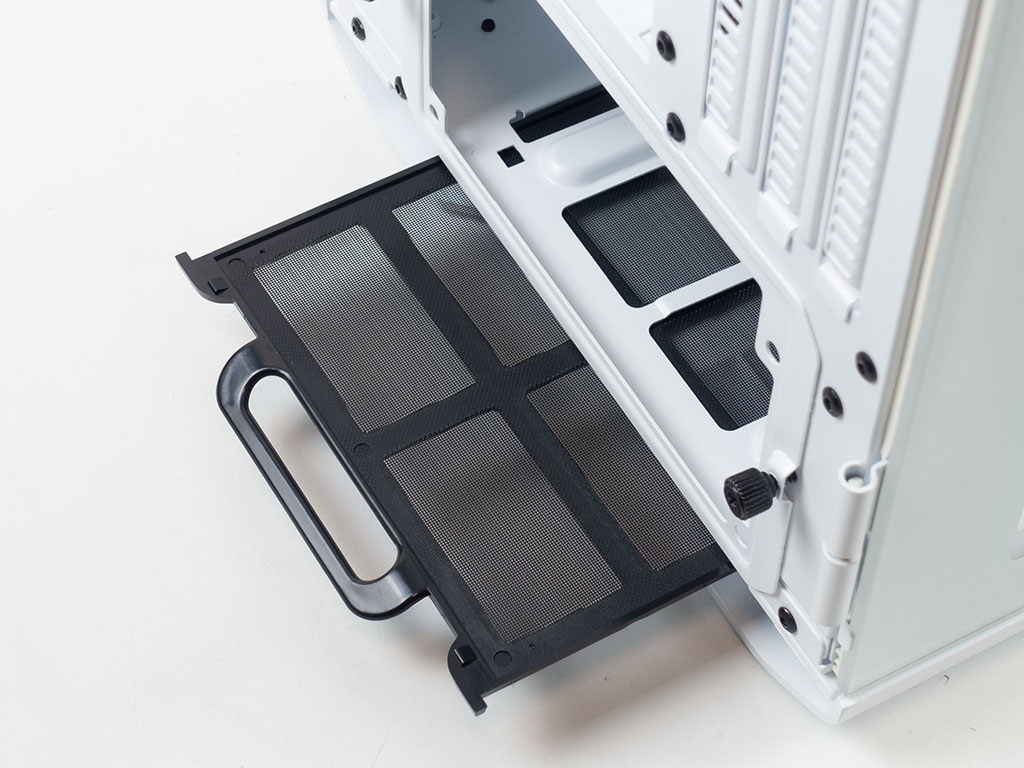
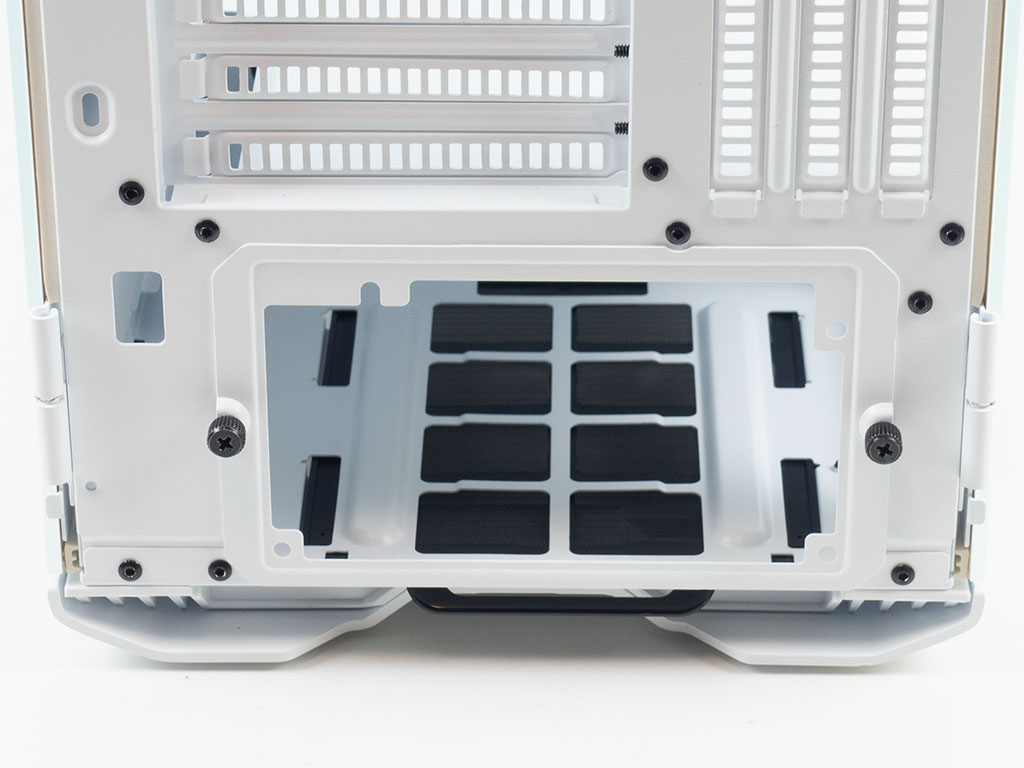
Looking at the underside, two HDD brackets may be secured to the floor of the case, next to each other or in one central location as a compromise for thick radiator setups in the front, in combination with a long power supply. A dust filter you may pull out easily without having to tip over the chassis protects the PSU.
Jul 5th, 2025 23:00 CDT
change timezone
Latest GPU Drivers
New Forum Posts
- Help Watercooling my PC (8)
- Will you buy a RTX 5090? (627)
- RX 9000 series GPU Owners Club (1128)
- 9800x3d temps (3)
- Last game you purchased? (862)
- TPU's Rosetta Milestones and Daily Pie Thread (2375)
- What are you playing? (23897)
- Folding Pie and Milestones!! (9607)
- Do you game on a handheld console? (98)
- TPU's Nostalgic Hardware Club (20486)
Popular Reviews
- NVIDIA GeForce RTX 5050 8 GB Review
- Fractal Design Scape Review - Debut Done Right
- Crucial T710 2 TB Review - Record-Breaking Gen 5
- ASUS ROG Crosshair X870E Extreme Review
- Sapphire Radeon RX 9060 XT Pulse OC 16 GB Review - An Excellent Choice
- PowerColor ALPHYN AM10 Review
- Upcoming Hardware Launches 2025 (Updated May 2025)
- AMD Ryzen 7 9800X3D Review - The Best Gaming Processor
- Sapphire Radeon RX 9070 XT Nitro+ Review - Beating NVIDIA
- NVIDIA GeForce RTX 5060 8 GB Review
TPU on YouTube
Controversial News Posts
- Intel's Core Ultra 7 265K and 265KF CPUs Dip Below $250 (288)
- NVIDIA Grabs Market Share, AMD Loses Ground, and Intel Disappears in Latest dGPU Update (212)
- Some Intel Nova Lake CPUs Rumored to Challenge AMD's 3D V-Cache in Desktop Gaming (140)
- NVIDIA GeForce RTX 5080 SUPER Could Feature 24 GB Memory, Increased Power Limits (115)
- Microsoft Partners with AMD for Next-gen Xbox Hardware (105)
- NVIDIA Launches GeForce RTX 5050 for Desktops and Laptops, Starts at $249 (105)
- AMD Radeon RX 9070 XT Gains 9% Performance at 1440p with Latest Driver, Beats RTX 5070 Ti (102)
- Intel "Nova Lake‑S" Series: Seven SKUs, Up to 52 Cores and 150 W TDP (100)