 11
11
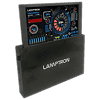
Quick Look: Lamptron HM070 Lift
(11 Comments) »Lamptron HM070 Lift
I would like to thank Lamptron for supplying the review sample.

Lamptron makes a variety of displays for real-time monitoring of PC hardware. Some of those units are meant to be installed into drive bays, while others come in their own housing for external use. The HM070 Lift goes a step further, providing a motorized housing which raises the screen with the press of a button.
Packaging and Contents


The unit ships in a plain brown cardboard box with a sticker of what is within. Lamptron isn't really well known for creating interesting marketing materials, so all you will see is a picture of the screen, brand and model, and mandatory UPC code. Within are foam spacers to securely hold the screen in place, so you won't have to worry about it getting damaged during shipping.


Alongside the unit itself, you will receive an HDMI cable, USB lead for power, and Lamptron-branded Kingston USB 2.0 drive which contains the monitoring software and documentation for the screen. In addition to this, there are two remotes with which you may raise or lower the screen out of its housing.
A Closer Look


Taking a closer look at the HM070 Lift, the metal housing and flush screws make a solid impression, though it feels a bit simple. The company logo is on the front, while the rear just holds a sticker with the model name, UPC code, and unique serial number for the included AIDA64 Business Edition. As that software is sold at $199.90 for ten nodes, you can consider this addition to the screen roughly a $20 value.


Looking at the top, you can see the silver spine on which the screen will be pushed up when raised. There is a small antenna wire on the right edge of the display. It works fine, but the wiring has been squeezed between the metal housing and display frame, which feels like it could damage the wire over time. Instead, Lamptron could have simply drilled a hole into the housing up top and routed that cable through it instead. On the side, you will find the full-size HDMI port along with the Micro-USB power port. Lastly, there is also an audio out to pipe the HDMI audio through a set of speakers or headset.


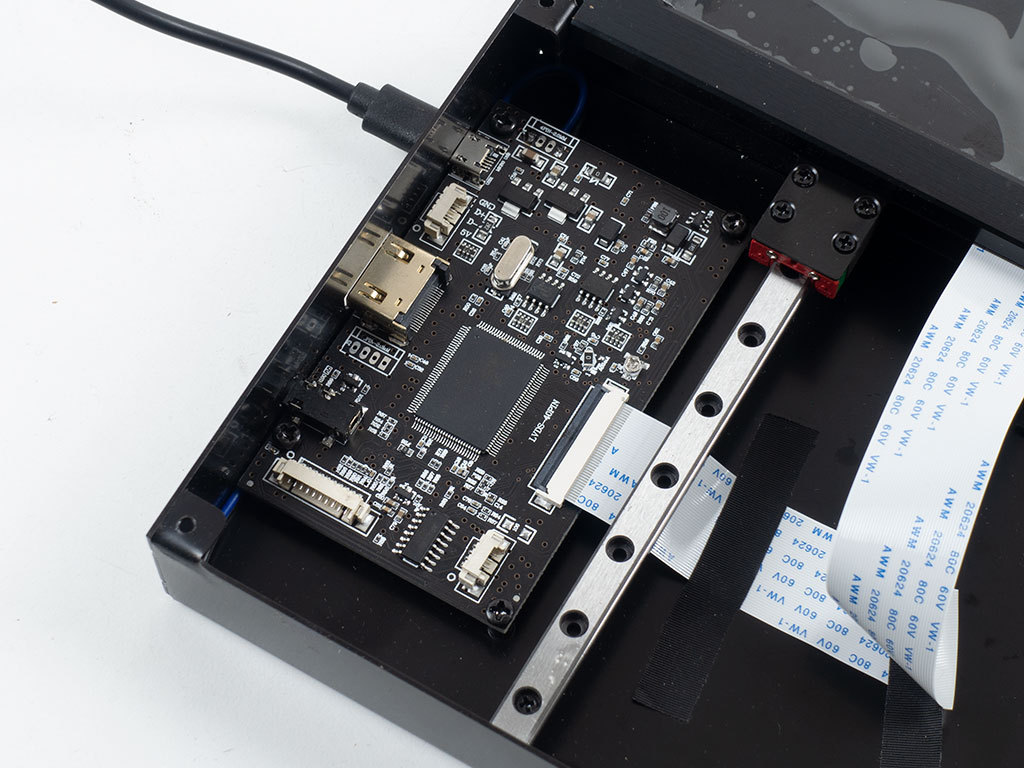
There is no need for you to open up your unit, but out of sheer curiosity, we went ahead and removed the front panel which is held in place by four classic screws. The first thing you will notice is the two rails on which the screen will move up and down on. On the left is the usual PCB we have also seen in the HX070. This controller board provides all the aforementioned I/O and interfaces with the screen through a single flat-band cable. From here, two wires run across to the right side of the interior to charge the included battery. The charging PCB has four red LEDs that indicate the battery charge level. The battery is mainly needed to lower the screen automatically once a loss of USB power is detected. In other words, when you shut down your host PC, the screen will use the battery as a power source to automatically lower itself into the housing. If you look closely, you will see two switches here as well. The one on the bottom is triggered when the screen lowers, which cuts power to the motors. The top switch cuts power to them as soon as the display is fully raised; otherwise, the screen may jump out of the housing. This dual-switch mechanism is simple but effective.
Our Patreon Silver Supporters can read articles in single-page format.
Mar 25th, 2025 22:50 EDT
change timezone
Latest GPU Drivers
New Forum Posts
- The Official Thermal Interface Material thread (1677)
- Did Nvidia purposely gimp the performance of 50xx series cards with drivers (50)
- Is RX 9070 VRAM temperature regular value or hotspot? (192)
- Milestones (14010)
- Has anyone tried enabling FSR 4 on NVIDIA cards? (10)
- The TPU UK Clubhouse (25948)
- What's your latest tech purchase? (23399)
- Dicasver RTX 3060 6gb (6)
- Hotspot 110° (9)
- maxsun rx590* vbios (11)
Popular Reviews
- Assassin's Creed Shadows Performance Benchmark Review - 30 GPUs Compared
- be quiet! Pure Rock Pro 3 Black Review
- ASUS ProArt X870E-Creator Wi-Fi Review
- ASRock Radeon RX 9070 XT Taichi OC Review - Excellent Cooling
- Sapphire Radeon RX 9070 XT Nitro+ Review - Beating NVIDIA
- Pulsar Feinmann F01 Review
- ASUS GeForce RTX 5070 TUF OC Review
- AMD Ryzen 9 9950X3D Review - Great for Gaming and Productivity
- AMD Ryzen 7 9800X3D Review - The Best Gaming Processor
- Montech XR Wood Review
Controversial News Posts
- AMD RDNA 4 and Radeon RX 9070 Series Unveiled: $549 & $599 (260)
- AMD Radeon RX 9070-series Pricing Leaks Courtesy of MicroCenter (158)
- MSI Doesn't Plan Radeon RX 9000 Series GPUs, Skips AMD RDNA 4 Generation Entirely (142)
- Microsoft Introduces Copilot for Gaming (123)
- AMD Radeon RX 9070 XT Reportedly Outperforms RTX 5080 Through Undervolting (118)
- NVIDIA Reportedly Prepares GeForce RTX 5060 and RTX 5060 Ti Unveil Tomorrow (115)
- Over 200,000 Sold Radeon RX 9070 and RX 9070 XT GPUs? AMD Says No Number was Given (100)
- NVIDIA GeForce RTX 5050, RTX 5060, and RTX 5060 Ti Specifications Leak (96)