 20
20
Raijintek Pan Slim ITX Review
Thermal Stress Test »Review System
| System Parts for Case Reviews | |
|---|---|
| Processor: | Intel Core i5-9600K |
| Motherboards: | ATX: MSI Z390 GAMING EDGE AC MATX: Z370M GAMING EDGE AC Mini-ITX: MSI Z370I GAMING EDGE AC Provided by: MSI |
| Graphics Card: | ATX/mATX: Palit GeForce RTX 2080 Gaming Pro OC ITX: EVGA GTX 1650 SC Ultra Black 4 GB |
| Memory: | 16 GB XPG GAMMIX D20 DDR4 3200 MHz 16 GB XPG SPECTRIX D50 DDR4 3200 MHz Provided by: ADATA |
| HDD: | Western Digital 320 GB 7200 RPM |
| SSD: | ITX: ADATA SX6000 Pro M.2 256 GB mATX: ADATA GAMMIX S11 Pro M.2 256 GB ATX: ADATA SPECTRIX S40G M.2 256 GB ADATA XPG SX850 256 GB ADATA Ultimate SU800 512 GB ADATA Ultimate SU720 500 GB Provided by: ADATA |
| Power Supply: | Fractal Design SFX Ion 650W 80 Plus Gold Provided by: Fractal Design |
| Cooling: | Raijintek EOS 240 RBW ‚Provided by: Raijintek |
Assembly

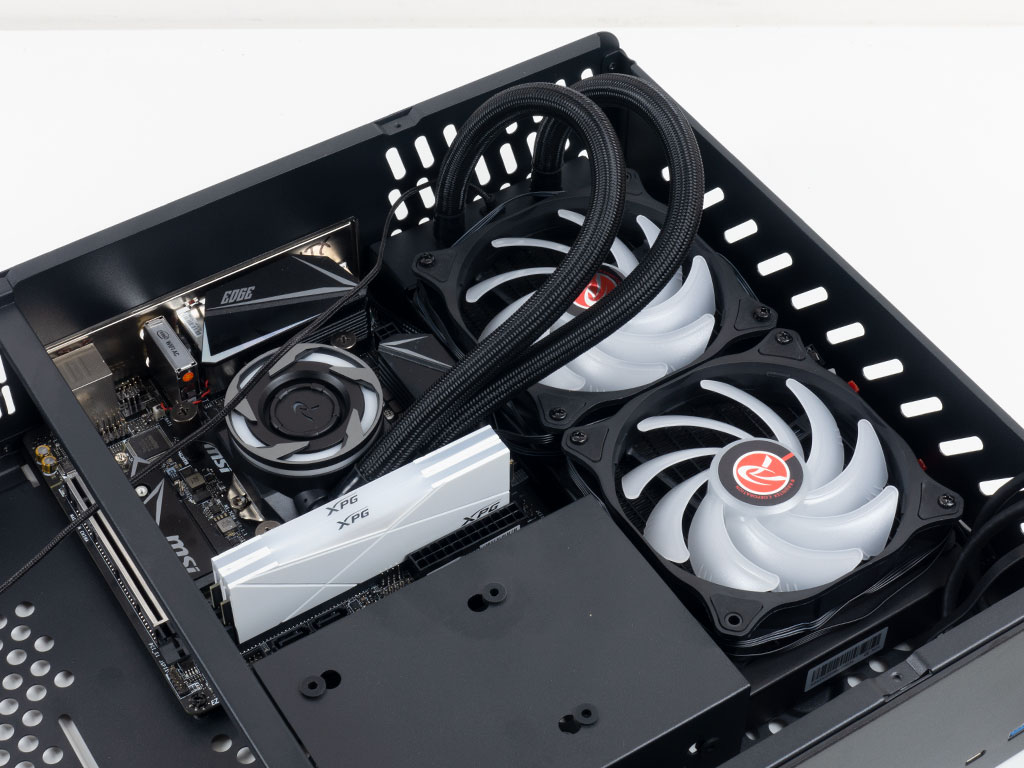
Installing the motherboard is done by traditional means, and there is plenty of space all around to reach all the connector. As you can see, there was no need to remove any of the support beams for this step. However, as soon as the liquid cooler went in, we had to take off the beams. As there are no provided means to secure cables to the chassis interior, we wrapped them around the fans before assembly to keep things as tidy as possible.
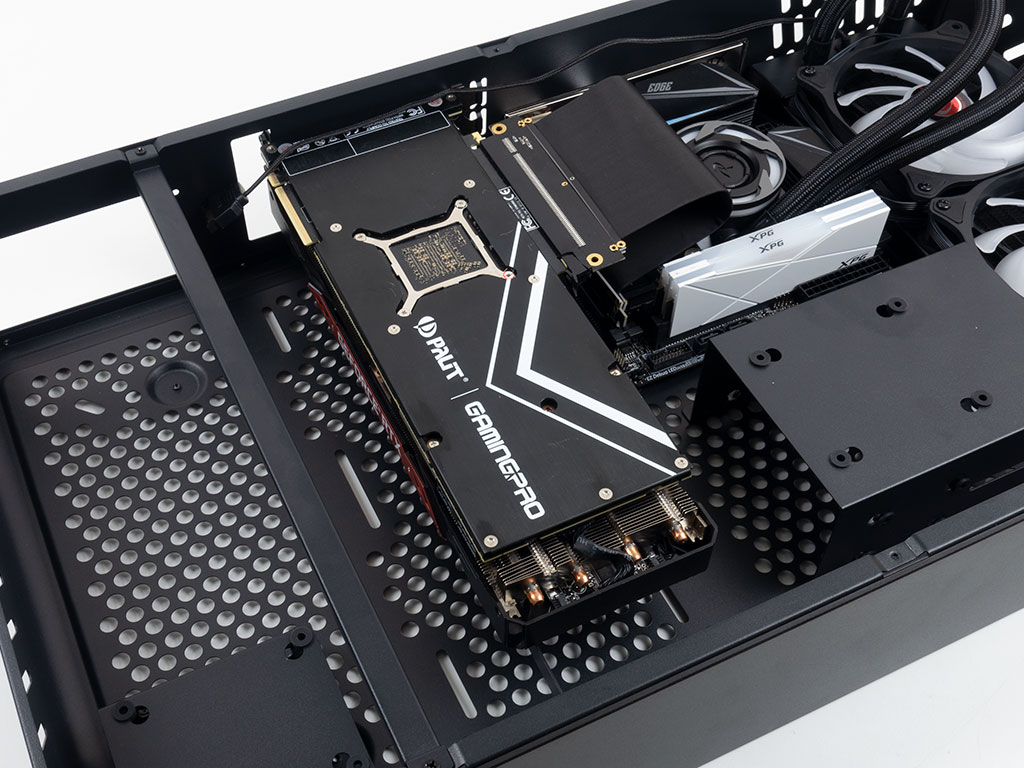
Adding the GPU is easy as well because of the spread out layout of the Pan Slim. You first have to connect the PCIe ribbon cable to the motherboard. With that done, screw in your graphics card while making sure the support bracket keeps it nice and level. The slot end of the ribbon then simply clips into the connector on your GPU.
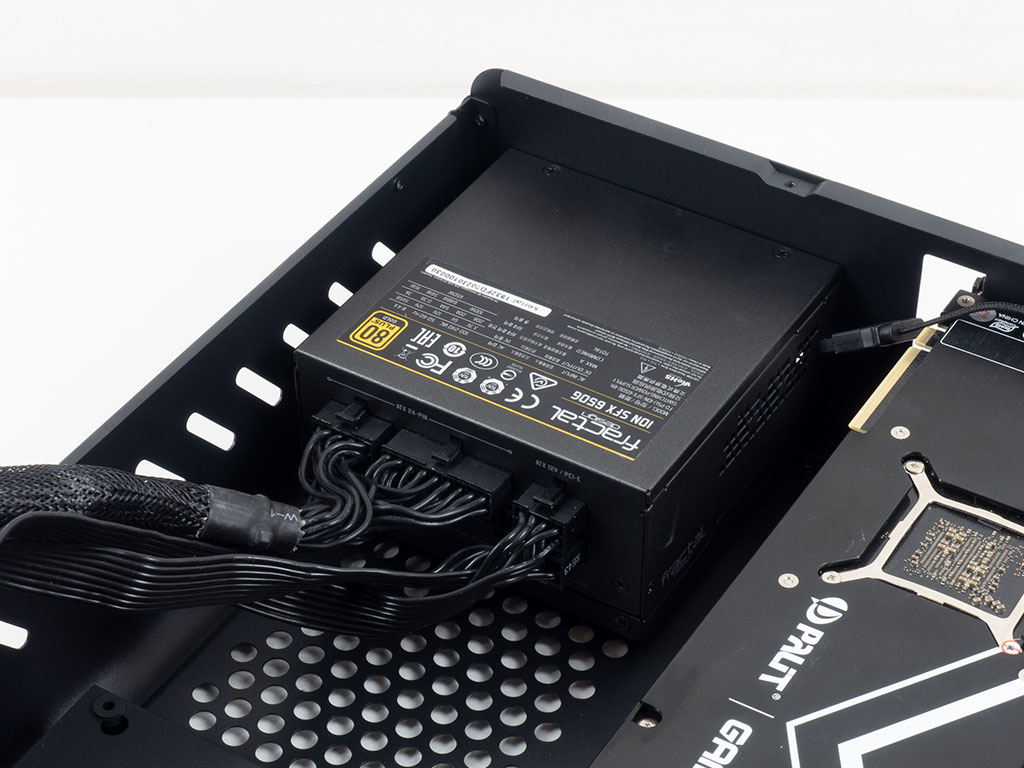

Placing the SFX-L PSU was just as comfortable, with loads of room all around. Raijintek includes six classic screws, so the power supply won't go anywhere. Interestingly enough, the Pan Slim could easily hold an ATX PSU without any issues at all. All Raijintek would need to do is offer the cutout in the back and move the fan-mounting holes underneath the GPU area half an inch to the right to make sure the PSU and fans don't interfere.


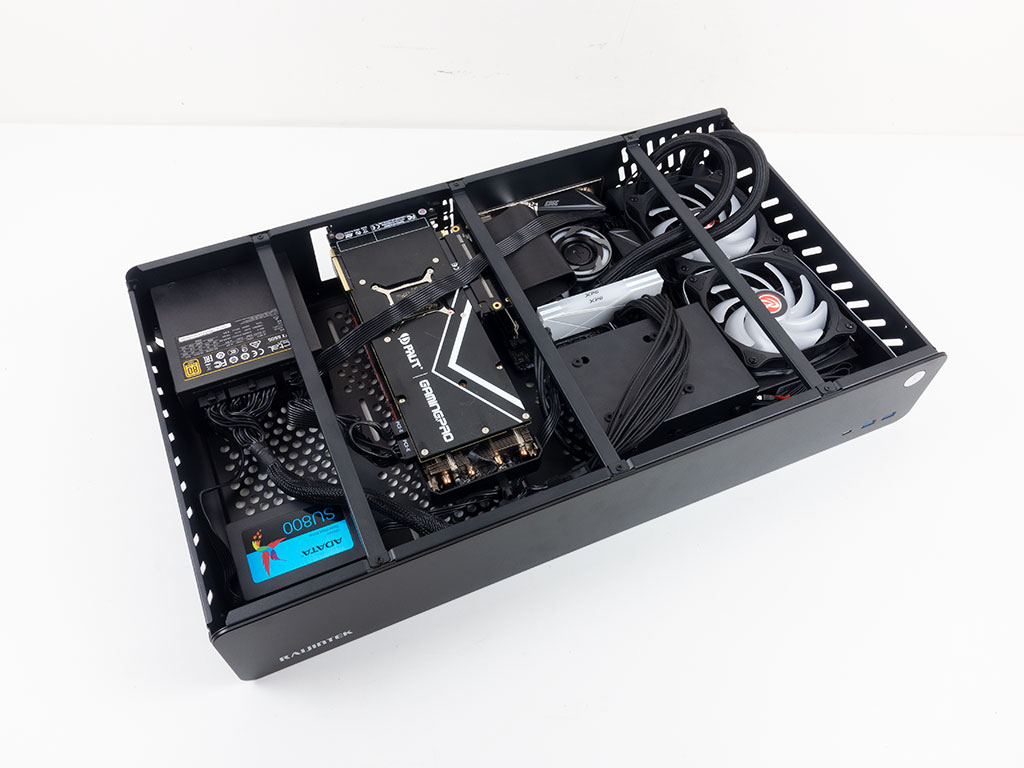
Including SSDs can be done outside of the chassis, and rubber rings have been pre-mounted on the cages. We chose to install one drive on top of the case for visibility, but you may add two more within for a total of three.


Classic 3.5" drives are installed the same way utilizing the larger cage. Once filled, simply place the cage back inside the case. We made sure both cages face each other with the connectors and used a single strand from the modular PSU to power the drives, along with the pump of the radiator.


With everything installed, wiring up the power elements was a little trickier than expected because most SFX units tend to come with shorter cables than ATX variants. The CPU power cable was just long enough to go straight from the PSU to its port, and we ran it above the GPU to keep it away from the fans. Then, the 24-pin ATX power cable was too short, so we had to use one of our sleeved extension cables to reach the motherboard. At that point, it was long enough to swing around the GPU area as well. Flipping it over, you can see where the radiator is mounted on the left side, as well as the rear of the GPU and the clear opening for the CPU cooler mounting bracket.
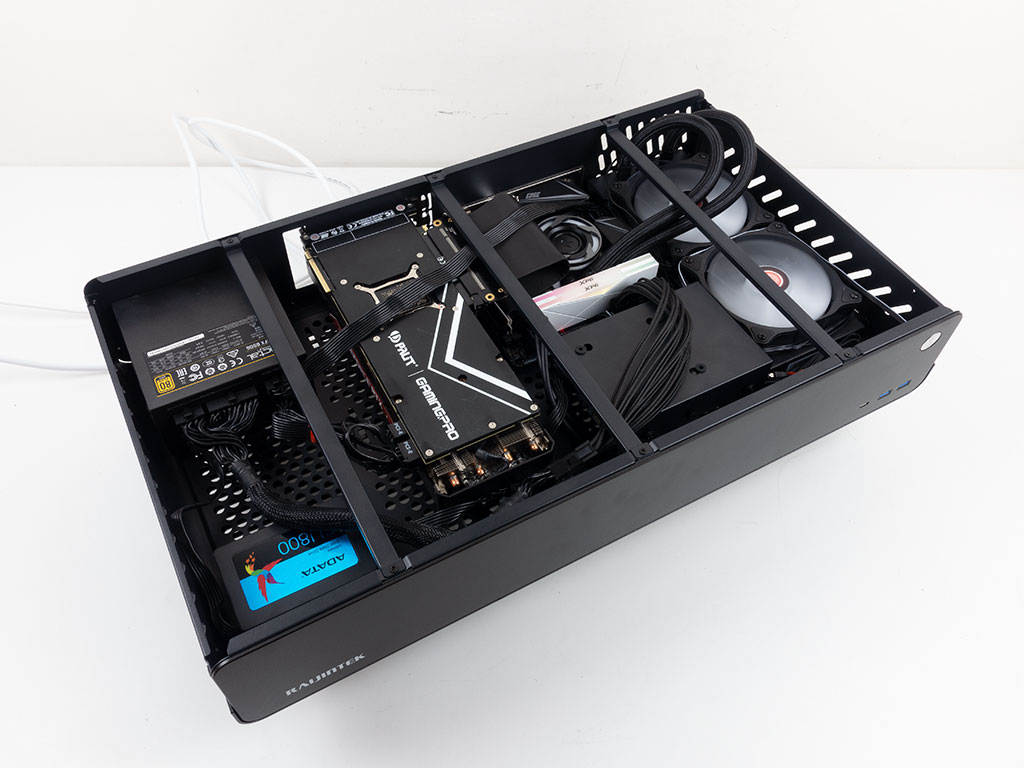
Flipping it back over, we could not resist turning the system on before putting the cover back on. While the tubing is hovering above the fans, their tension means they are never going to fall on the fans anyways. That said, if you are worried, you can get fan grills for a couple of dollars.
Finished Looks

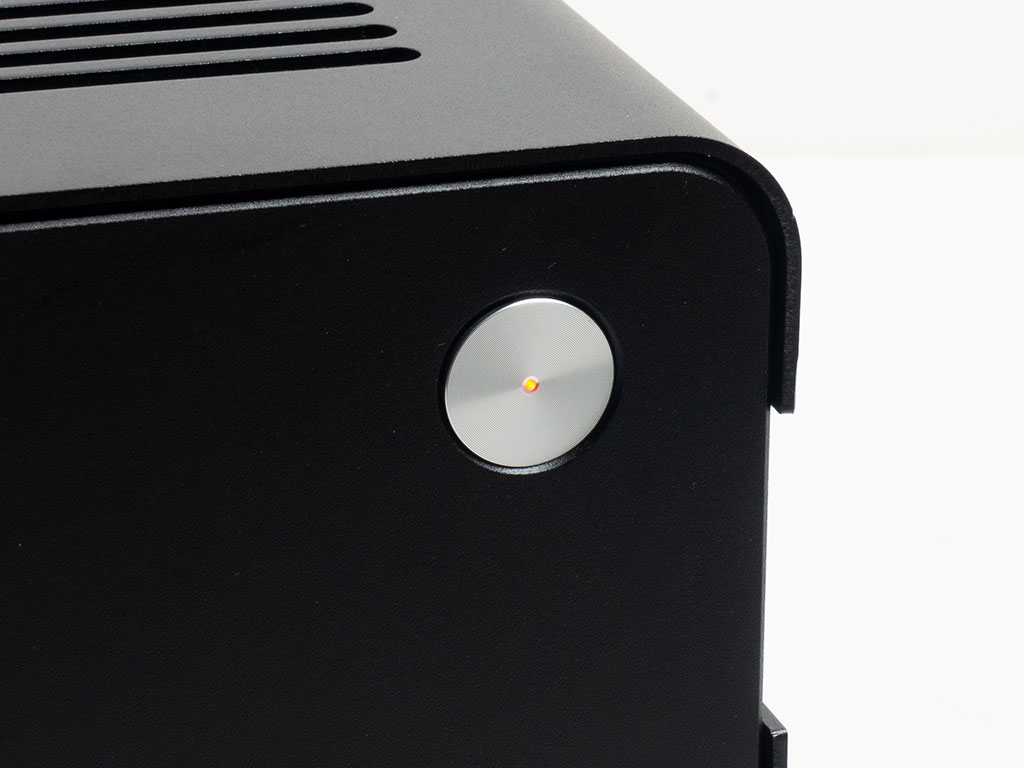
With the cover in place and the system turned on, you can see a red LED within the power button to let you know things are actually up and running. While this is fine, red is so 1999. White or at least blue instead would have been nice, but that is only my subjective opinion.
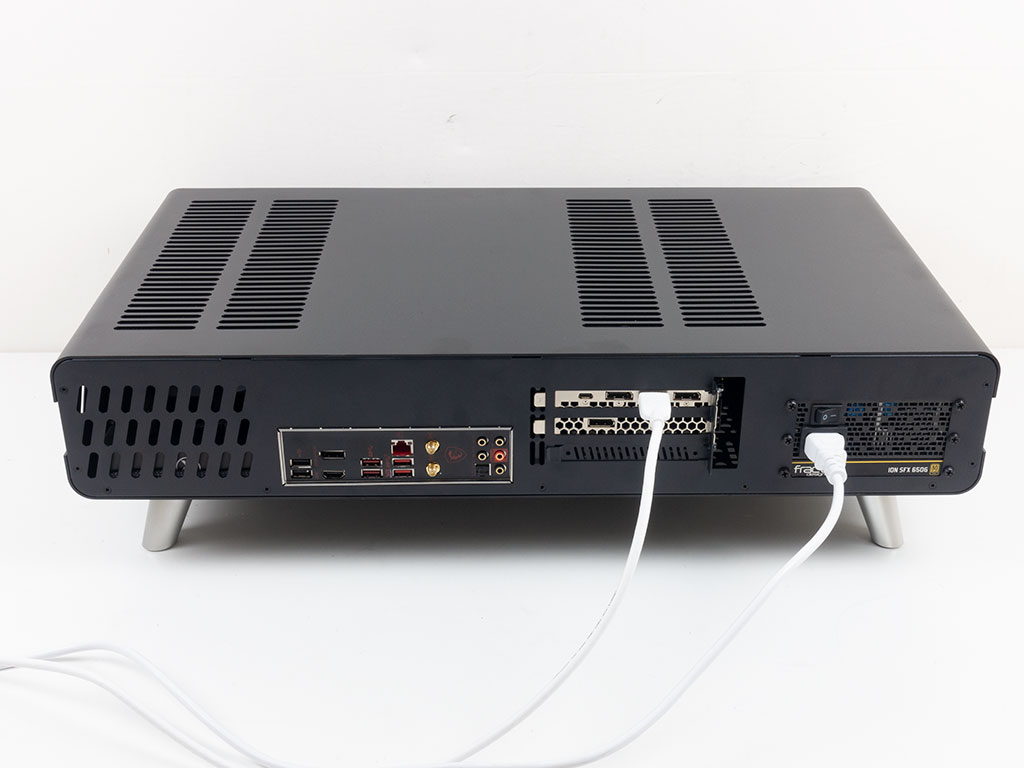


In the rear, all the functional parts of the case are spread out across the whole width of the Raijintek Pan Slim and easily accessible. You can also see the GPU and AIO fans through the two openings in the top of the chassis. As our ITX board did not come with a 5 V RGB header, the hub-mounted LEDs within the fans are off, but should yours have lighting, you will certainly see them from this angle.
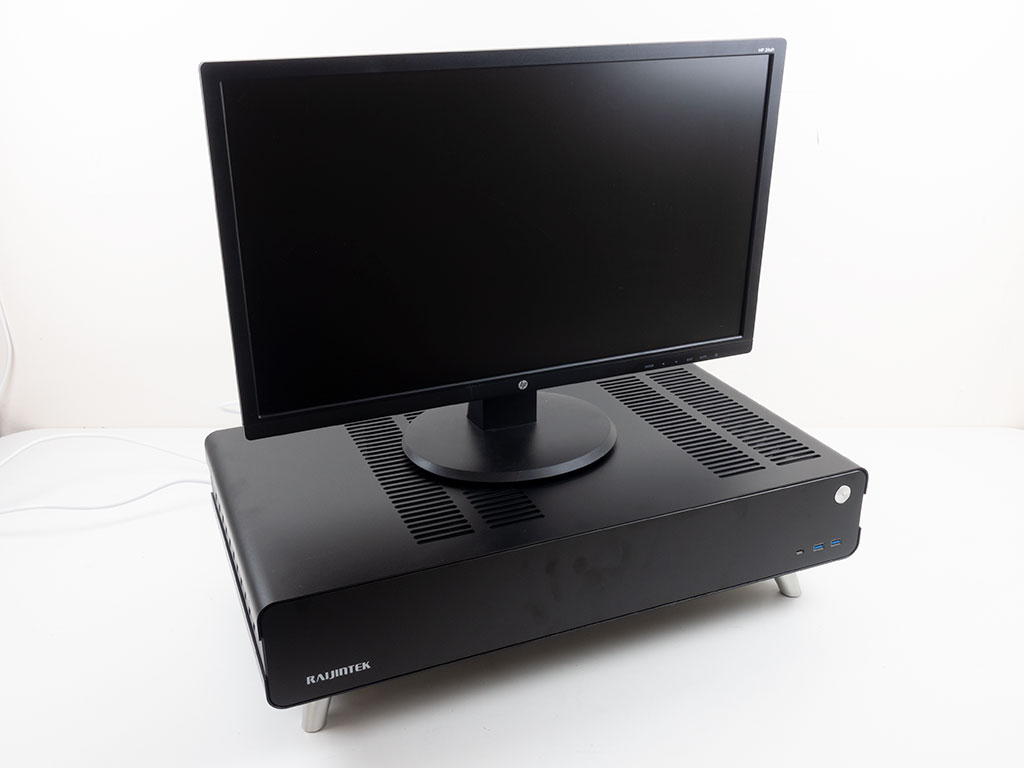
Also, as you are meant to place a monitor on the Raijintek Pan Slim, we went ahead and placed a 24" HP monitor on it for good measure. Compared to the width of the chassis, it has around an inch less on each side.
Mar 10th, 2025 23:19 EDT
change timezone
Latest GPU Drivers
New Forum Posts
- AAF Optimus Modded Driver For Windows 10 & Windows 11 - Only for Realtek HDAUDIO Chips (376)
- What motherboard with spdif should I get? PC to 5.1 blu-ray player via optical (2)
- Add a button to auto-launch at startup OC (3)
- Avowed same FPS in every setting (0)
- Post your Old CDs, from back in the day thread. (4)
- Wherein lies the difference (5)
- Gaming PC instabiliity (23)
- Nvidia's GPU market share hits 90% in Q4 2024 (gets closer to full monopoly) (810)
- CPU downclocks under any loads but it doesn't hit any limits (2)
- Mind If I Play Through? (12)
Popular Reviews
- Sapphire Radeon RX 9070 XT Nitro+ Review - Beating NVIDIA
- XFX Radeon RX 9070 XT Mercury OC Magnetic Air Review
- ASUS Radeon RX 9070 TUF OC Review
- MSI MAG B850 Tomahawk Max Wi-Fi Review
- NVIDIA GeForce RTX 5070 Founders Edition Review
- Corsair Vengeance RGB CUDIMM DDR5-8800 48 GB CL42 Review
- AMD Ryzen 7 9800X3D Review - The Best Gaming Processor
- ASUS GeForce RTX 5070 Ti TUF OC Review
- MSI GeForce RTX 5070 Ti Gaming Trio OC+ Review
- MSI GeForce RTX 5070 Ti Ventus 3X OC Review
Controversial News Posts
- NVIDIA GeForce RTX 50 Cards Spotted with Missing ROPs, NVIDIA Confirms the Issue, Multiple Vendors Affected (513)
- AMD Plans Aggressive Price Competition with Radeon RX 9000 Series (277)
- AMD Radeon RX 9070 and 9070 XT Listed On Amazon - One Buyer Snags a Unit (261)
- AMD RDNA 4 and Radeon RX 9070 Series Unveiled: $549 & $599 (260)
- AMD Mentions Sub-$700 Pricing for Radeon RX 9070 GPU Series, Looks Like NV Minus $50 Again (248)
- NVIDIA Investigates GeForce RTX 50 Series "Blackwell" Black Screen and BSOD Issues (244)
- AMD Radeon RX 9070 and 9070 XT Official Performance Metrics Leaked, +42% 4K Performance Over Radeon RX 7900 GRE (195)
- AMD Radeon RX 9070-series Pricing Leaks Courtesy of MicroCenter (158)