 12
12
Rosewill RX82-U HDD Enclosure Review
Performance »Installation
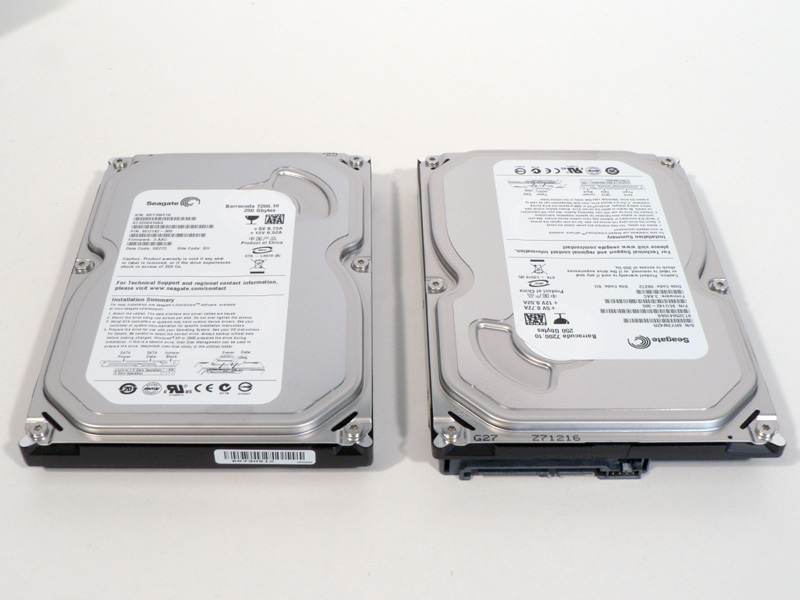
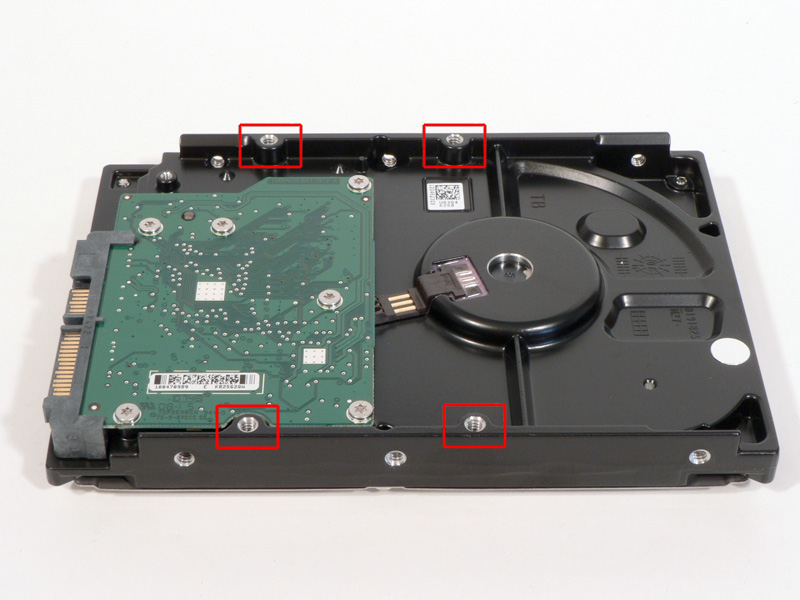
Installing hard drives into the Rosewill RX82-U enclosure is very simple. We will be using two 250GB Seagate 7200.10 SATA2 drives for our testing. The drives will mount using the four screw holes on the bottom of the drives, as shown in the red boxes.

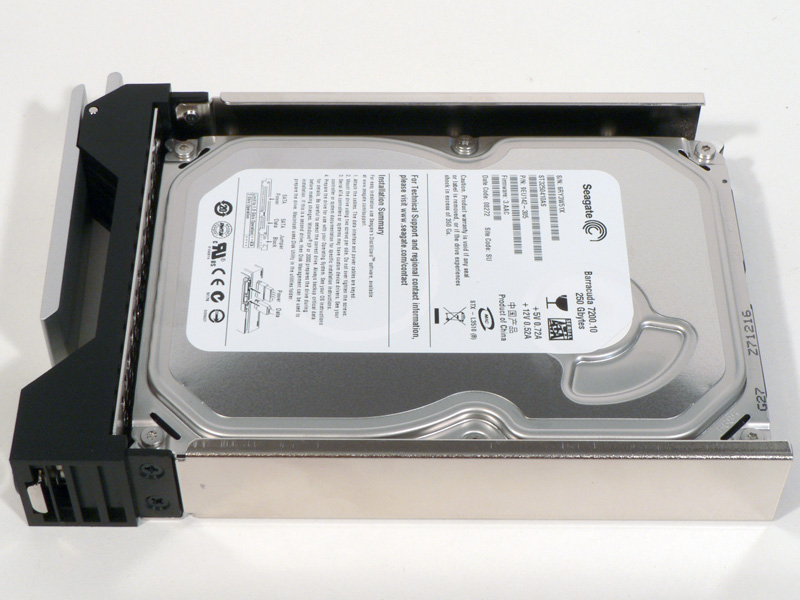
With each tray removed, insert the four screws through the bottom of the tray into the holes on the hard drive, making sure to position the connectors at the rear of the tray. When the screws are tightened, the heads sit flush with the tray, and that makes sure the screws do not snag on anything when inserted. Notice the notch at the back of the tray is perfectly placed so that the connections on the drive are exposed, but still somewhat protected.
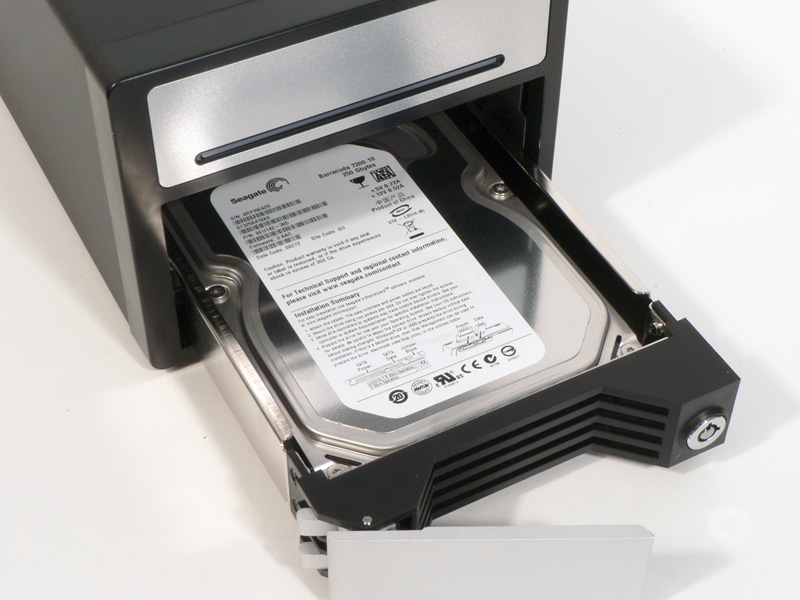
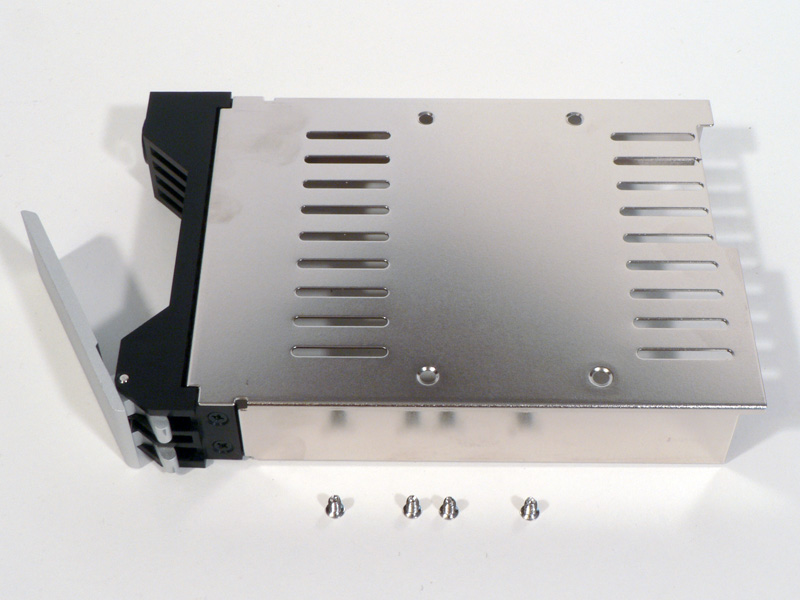
Each of the trays can now be inserted into the enclosure. The silver flap on the front of the tray needs to be extended until the drive is seated fully. Incidentally, Rosewill sells additional trays so that multiple drives can be preinstalled and swapped out as needed.
Software Installation
The Rosewill RX82-U does not need any software installed in order to run, with the possible exception of drivers for Windows 98. After the device is plugged into the USB port and powered on, the drives need to be initialized in Disk Management just like any other hard drive. With the JBOD (Just a Bunch Of Disks) functionality, each drive is seen as an individual in the computer.
Feb 23rd, 2025 20:34 EST
change timezone
Latest GPU Drivers
New Forum Posts
- Keep a 4080s or take a 5070ti? (47)
- Gigabyte AORUS RTX5080 Missing 16 ROP's (26)
- eXtreme Outer Vision PSU Calculator Shutting Down :( (23)
- Dell Studio XPS 1640 CPU Upgrade (0)
- Will undervolting a 4090 keep the connector from melting? A discussion about electrical theory. (37)
- wood workstation project (23)
- What's your latest tech purchase? (23202)
- RDNA4 Prediction Time Part Deux!!! (32)
- Warning about DOCP (17)
- 16TB (13)
Popular Reviews
- ASUS GeForce RTX 5070 Ti TUF OC Review
- MSI GeForce RTX 5070 Ti Ventus 3X OC Review
- darkFlash DY470 Review
- MSI GeForce RTX 5070 Ti Vanguard SOC Review
- MSI GeForce RTX 5070 Ti Gaming Trio OC+ Review
- Galax GeForce RTX 5070 Ti 1-Click OC White Review
- Palit GeForce RTX 5070 Ti GameRock OC Review
- Fantech Aria II Pro Review
- Gigabyte GeForce RTX 5090 Gaming OC Review
- AMD Ryzen 7 9800X3D Review - The Best Gaming Processor
Controversial News Posts
- NVIDIA GeForce RTX 5090 Spotted with Missing ROPs, NVIDIA Confirms the Issue, Multiple Vendors Affected, RTX 5070 Ti, Too (449)
- AMD Radeon 9070 XT Rumored to Outpace RTX 5070 Ti by Almost 15% (304)
- AMD Plans Aggressive Price Competition with Radeon RX 9000 Series (271)
- AMD Radeon RX 9070 and 9070 XT Listed On Amazon - One Buyer Snags a Unit (247)
- Edward Snowden Lashes Out at NVIDIA Over GeForce RTX 50 Pricing And Value (241)
- AMD Denies Radeon RX 9070 XT $899 USD Starting Price Point Rumors (239)
- NVIDIA Investigates GeForce RTX 50 Series "Blackwell" Black Screen and BSOD Issues (225)
- New Leak Reveals NVIDIA RTX 5080 Is Slower Than RTX 4090 (215)