 28
28
ssupd Meshroom S Review
Thermal Stress Test »Alternative Layout Options
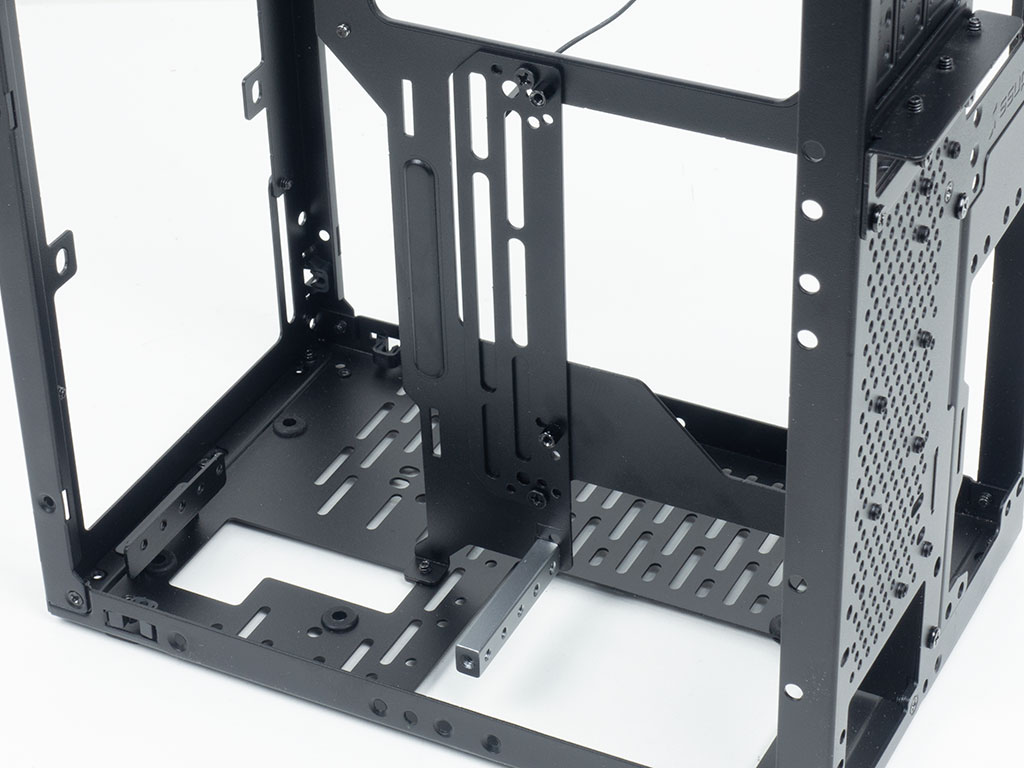

The ssupd Meshroom S advertises the ability to hold M-ATX or even ATX motherboards alongside a long GPU and 240 mm radiator. At just under 15 L, that would be quite the feat. To do so however, there are several things to consider. Officially, when using an ATX board, you are meant to plug the ribbon cable into the second PCIe slot, which may not be wired for x16 speed. That seems a bit odd, as ssupd could have simply supplied a slightly longer cable to reach the top slot instead. Thankfully, with the current PCIe ribbon SKU, there is no issue with M-ATX as the ribbon cable will reach that top PCIe expansion slot. To prepare the case, you first have to secure the PCIe ribbon cable utilizing the multi-purpose mounting plate. Setting this up is a bit of a guessing game, as the manual does not provide any insights into this, either.


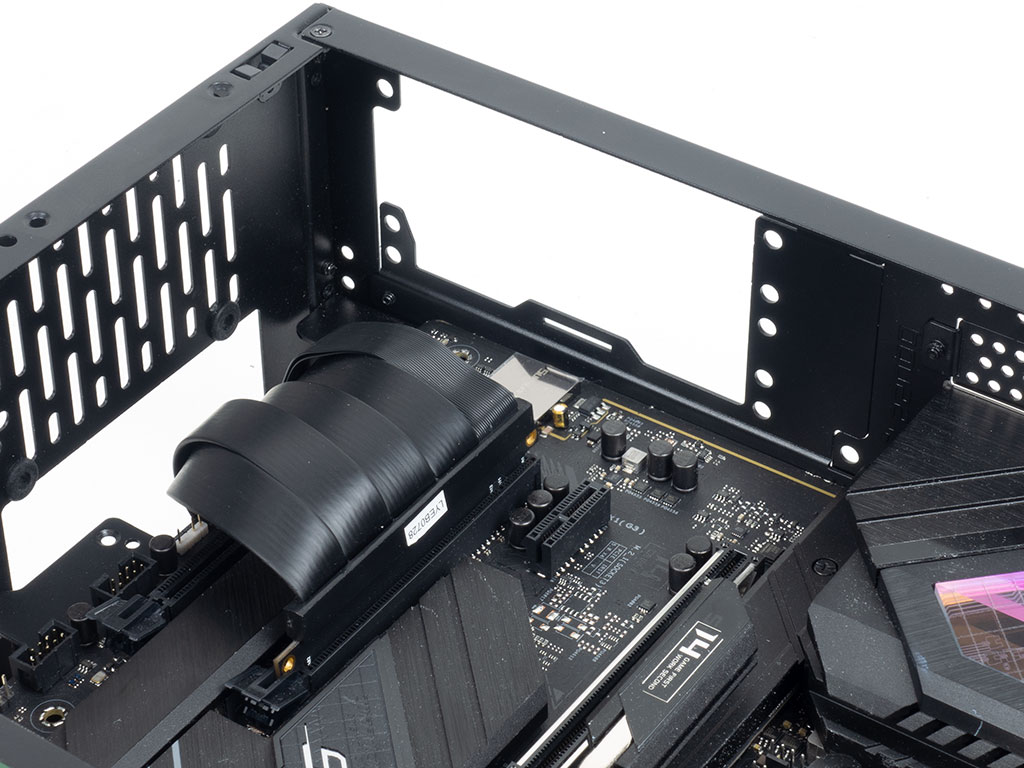
The good news is, ATX and M-ATX boards will fit, but it is down to the millimeter, as such, cable management needs meticulous planning, and any angled SATA ports are completely blocked. And while ssupd marketing/press materials communicate that a 270 mm cable plugged into the second slot of the board will work, that is simply not the case. You will need a longer cable to reach the top PCIe slot - something even their marketing imagery reflects. Also, the optional ribbon cable feels quite fragile, unlike the one that ships with the chassis for the ITX configuration, folding it to fit your needs is a sweat inducing exercise.
Things fall into place far better with an mATX board using the ribbon cable, reaching the top slot without much length to spare. This further underlines the fact that ssupd needs to revisit their advertised length numbers, or provide the proper SKU for these configurations. It will be interesting to see what builders create with the provision for full size motherboards.

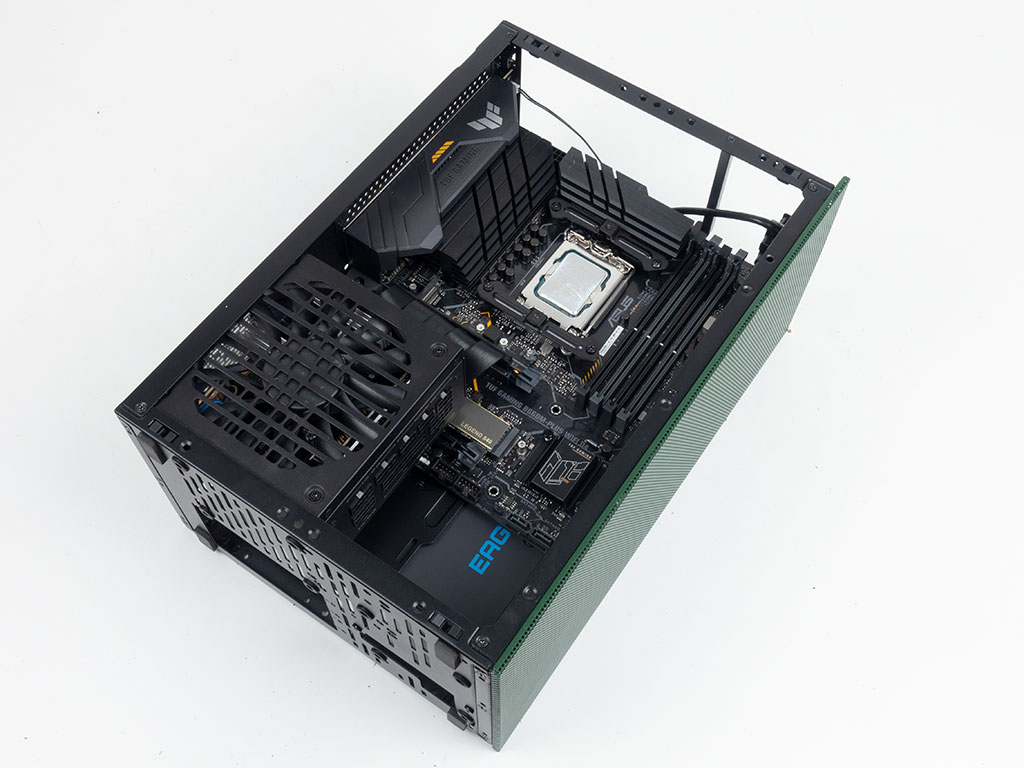
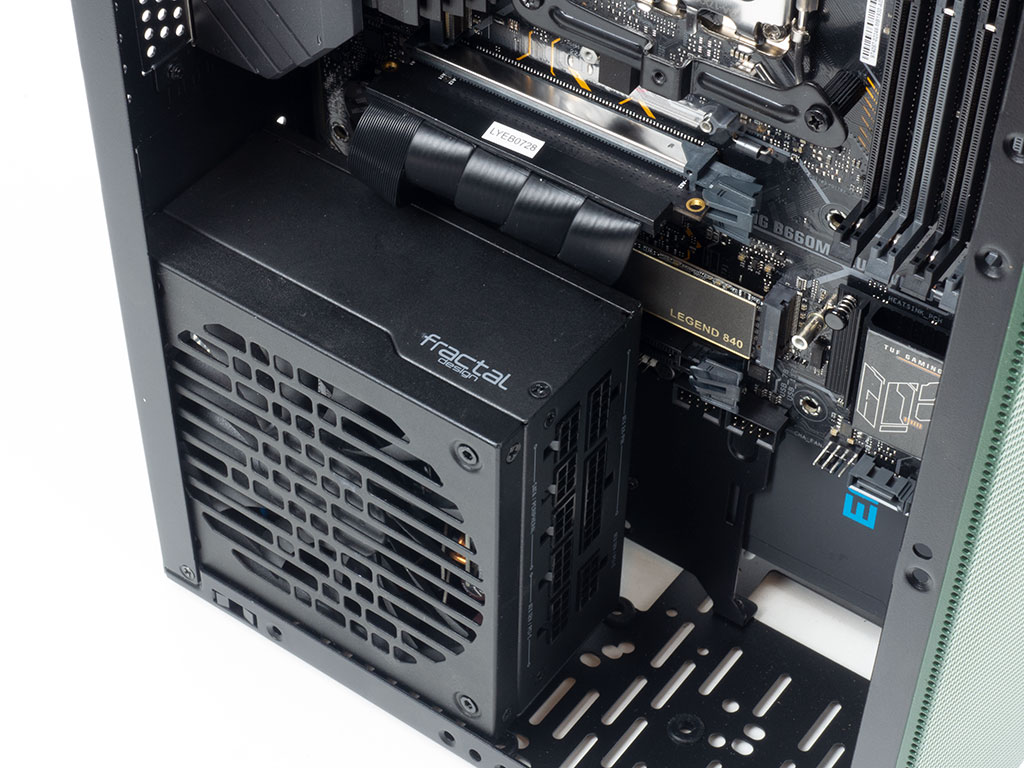
With either of these setups, the GPU should be moved forward, possible due to the re-engineered securing bracket. This frees space for a 240 mm liquid cooling setup, where the tubing is routed across the top and down to the motherboard.
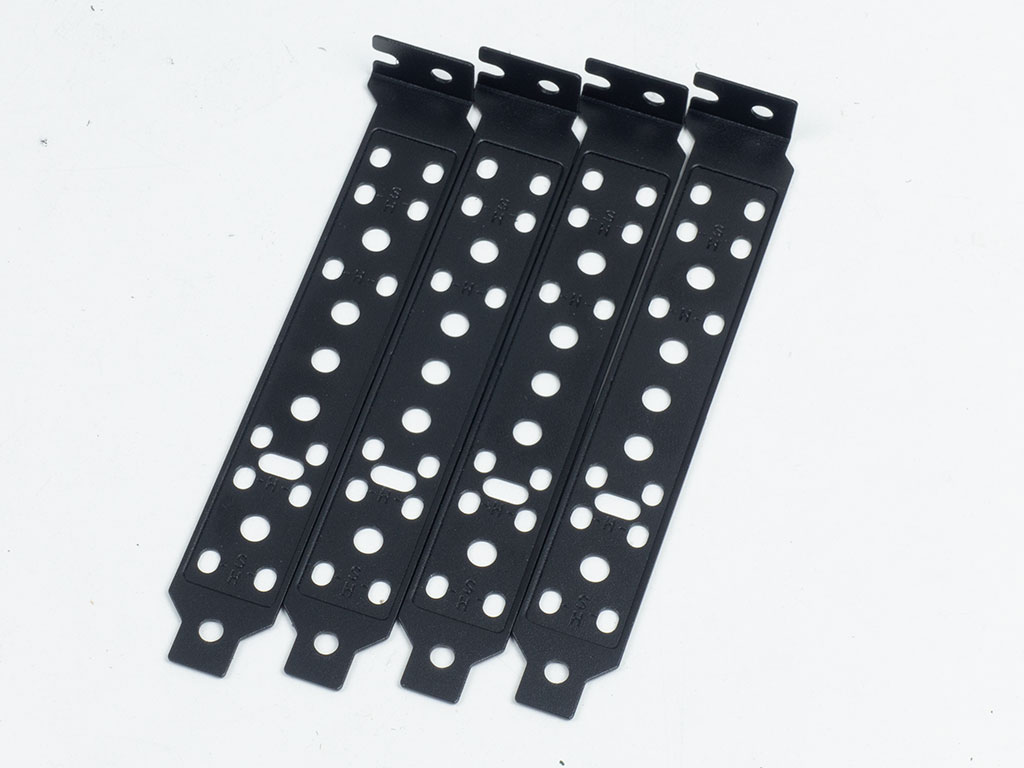
Thanks to the innovative idea of well placed holes in the expansion slot covers, you are able to mount up to four 2.5" drives, secured below a short, horizontal GPU setup, if storage is your focus.
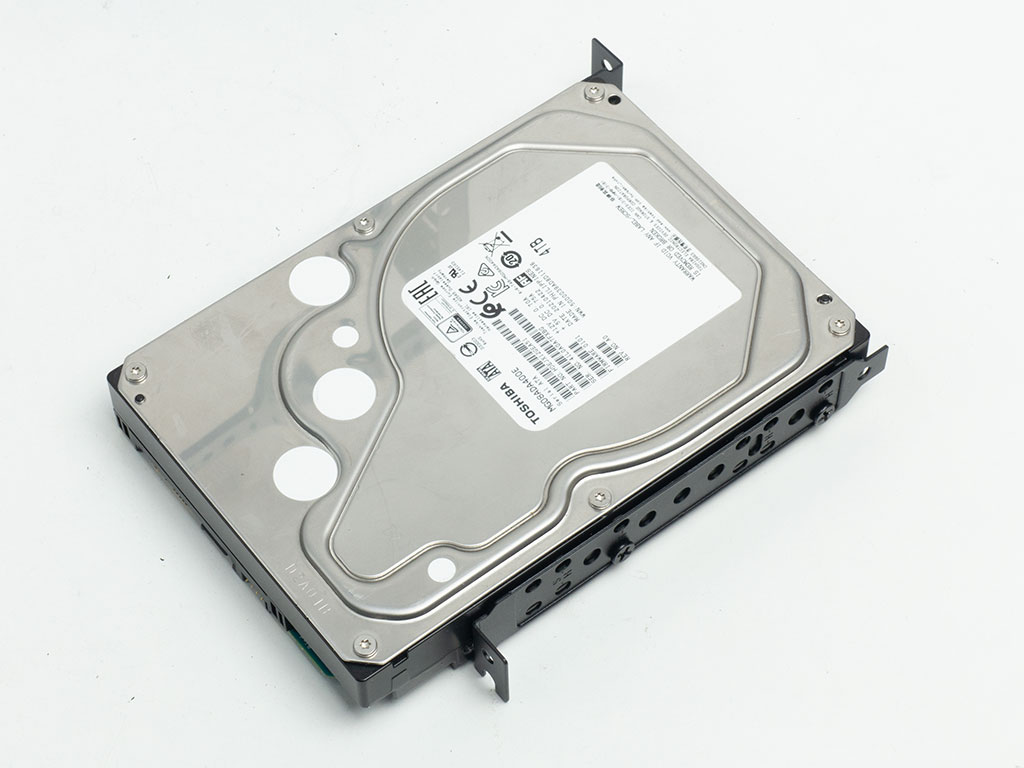
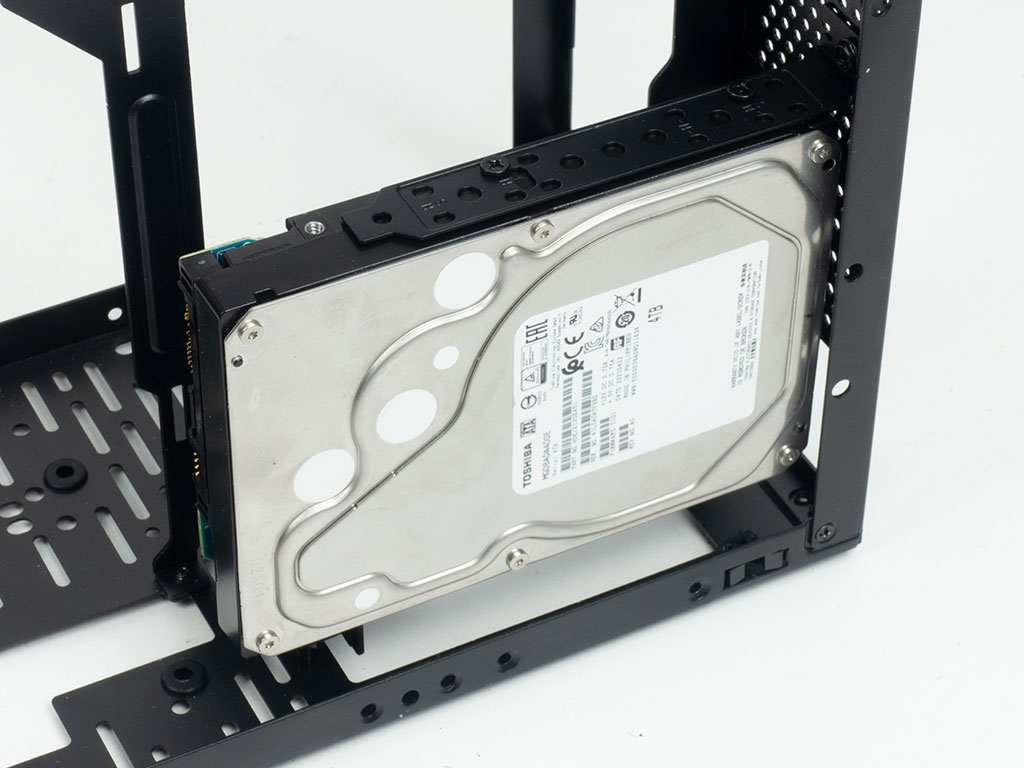
The same applies to 3.5" drives, but with these type of drives you are limited to two at most.
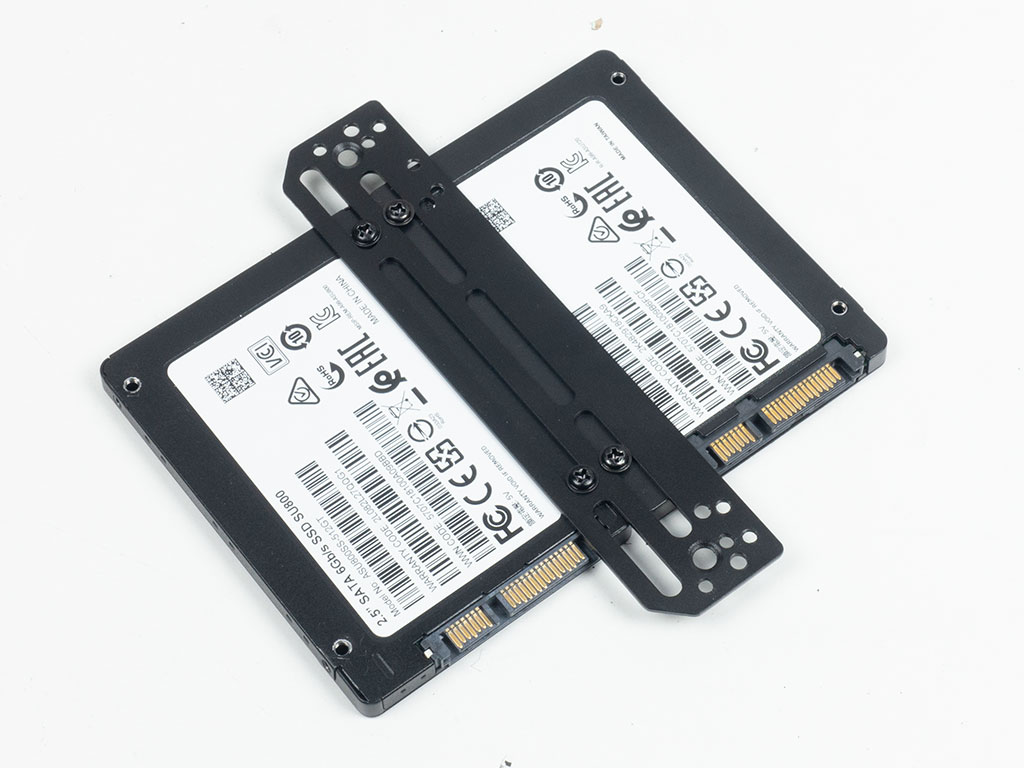
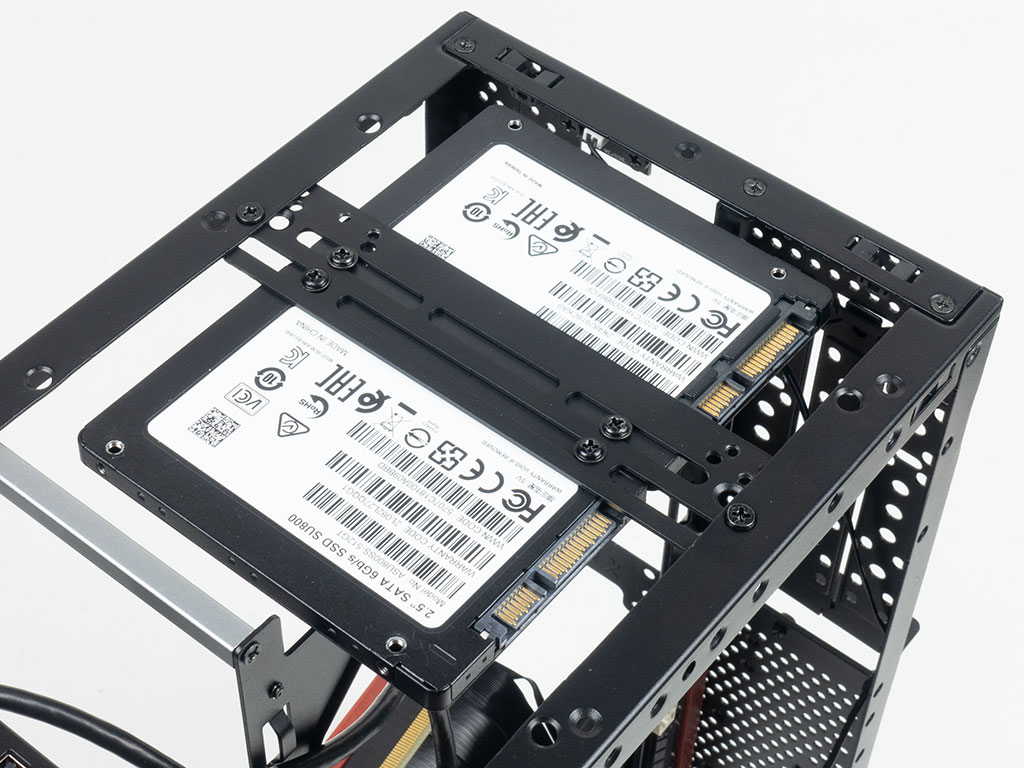
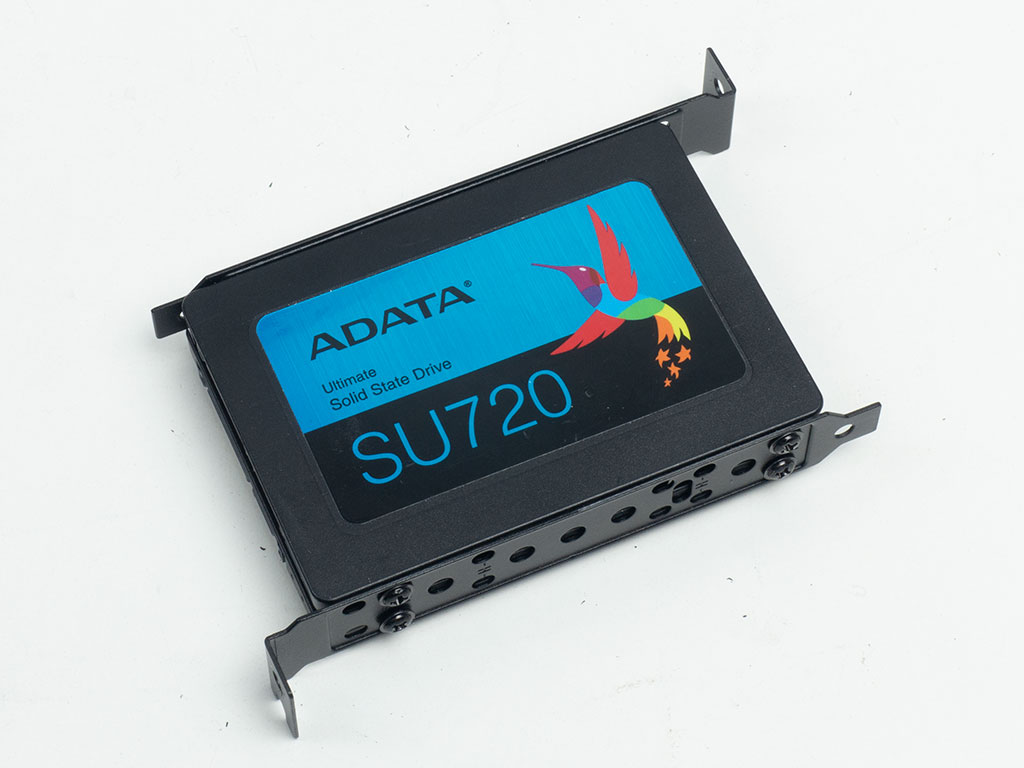
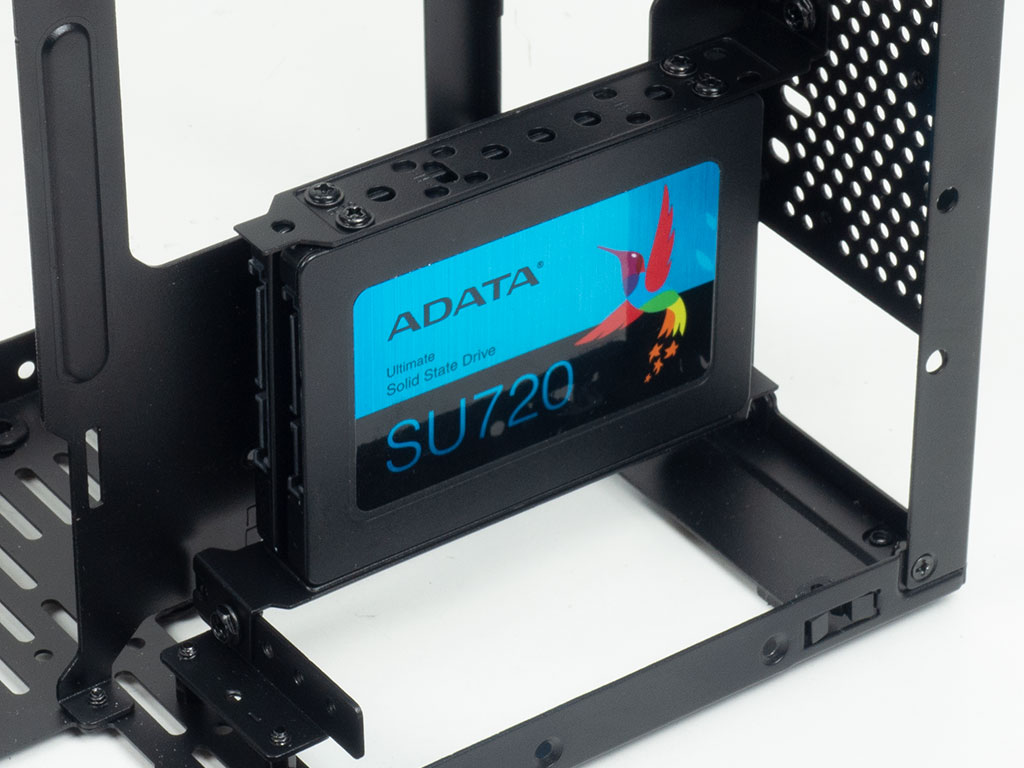
That multi-purpose bracket may also be used to mount two 2.5" drives to the top of the chassis, a nice touch, but once again, the manual doesn't provide some details necessary. In the manual, this mounting plate has labels edged into it, while the one provided with the chassis does not.
Finished Looks
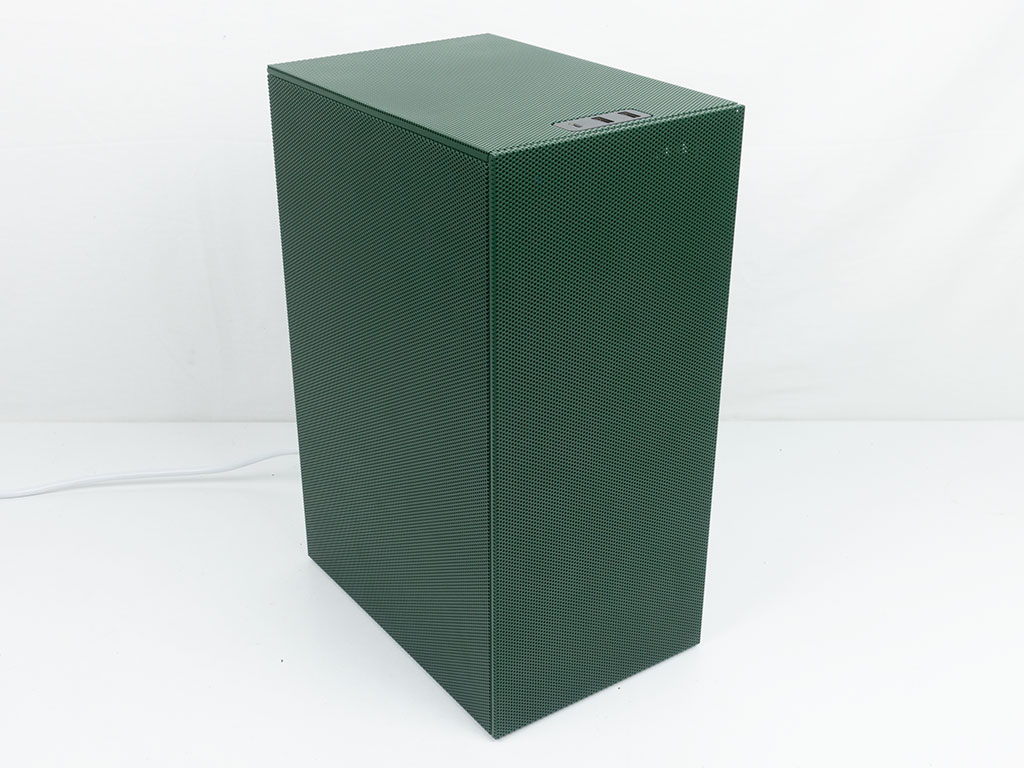
Once finished, the side panels can be fitted back to the chassis as easily as they came off. As seen in images above, the green colorway is pleasing to look at, with RGB elements providing a gentle glow from within. The power button lacks a tactile click, as such, when pressing it you may wonder if it worked. As there are no LEDs for system or HDD activity, having at least one RGB system element could be practically beneficial for a change.
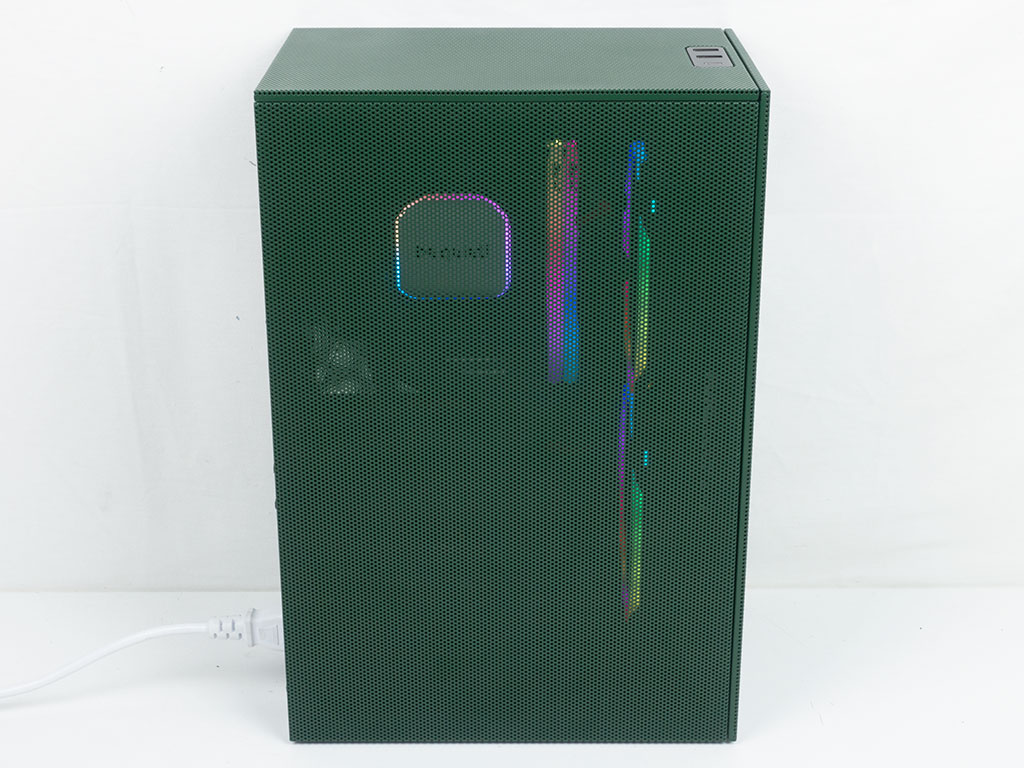
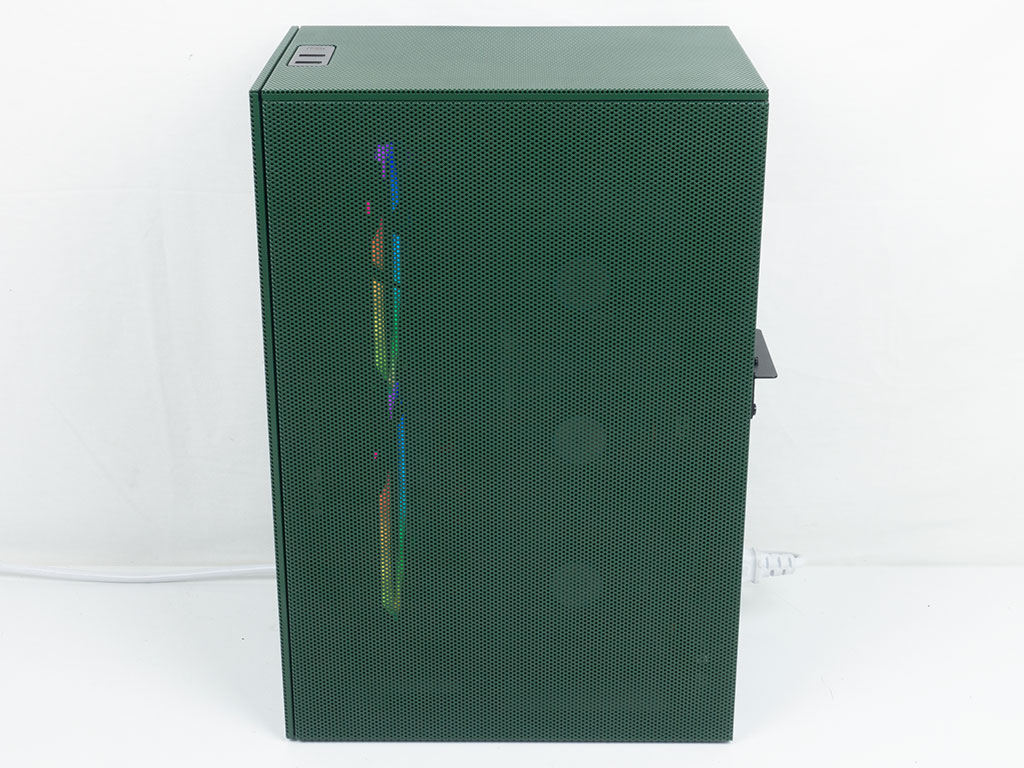
Both mesh panels are uniform, and provide equal access to fresh air for the CPU/PSU as well as the GPU.
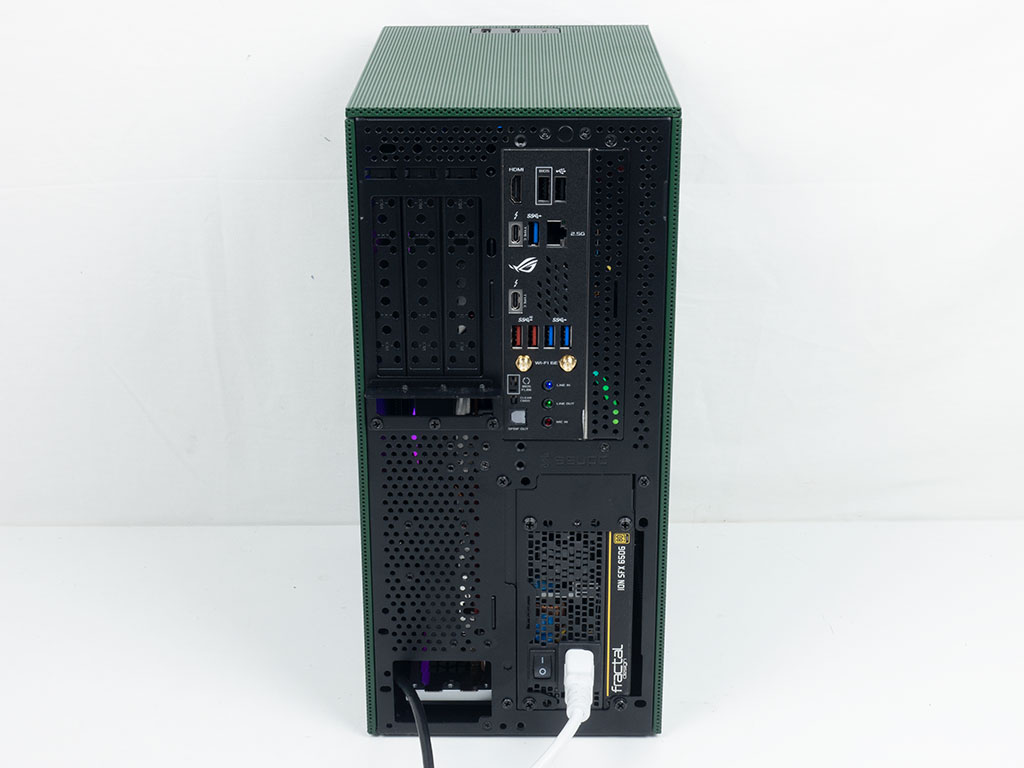
The provided black HDMI cable routes out the back of the chassis. In the top, some internal hardware is visible as well.
Mar 10th, 2025 22:11 EDT
change timezone
Latest GPU Drivers
New Forum Posts
- Nvidia's GPU market share hits 90% in Q4 2024 (gets closer to full monopoly) (798)
- Biostar RX 6700 XT OC BIOS (8)
- Mind If I Play Through? (11)
- ThrottleStop, mistake (4)
- ThrottleStop, auto-launching (1)
- Post your Old CDs, from back in the day thread. (3)
- AMD RX 9070 XT & RX 9070 non-XT thread (OC, undervolt, benchmarks, ...) (8)
- Wherein lies the difference (3)
- What's your latest tech purchase? (23279)
- CPU downclocks under any loads but it doesn't hit any limits (1)
Popular Reviews
- Sapphire Radeon RX 9070 XT Nitro+ Review - Beating NVIDIA
- XFX Radeon RX 9070 XT Mercury OC Magnetic Air Review
- ASUS Radeon RX 9070 TUF OC Review
- MSI MAG B850 Tomahawk Max Wi-Fi Review
- NVIDIA GeForce RTX 5070 Founders Edition Review
- Corsair Vengeance RGB CUDIMM DDR5-8800 48 GB CL42 Review
- AMD Ryzen 7 9800X3D Review - The Best Gaming Processor
- ASUS GeForce RTX 5070 Ti TUF OC Review
- MSI GeForce RTX 5070 Ti Gaming Trio OC+ Review
- MSI GeForce RTX 5070 Ti Ventus 3X OC Review
Controversial News Posts
- NVIDIA GeForce RTX 50 Cards Spotted with Missing ROPs, NVIDIA Confirms the Issue, Multiple Vendors Affected (513)
- AMD Plans Aggressive Price Competition with Radeon RX 9000 Series (277)
- AMD Radeon RX 9070 and 9070 XT Listed On Amazon - One Buyer Snags a Unit (261)
- AMD RDNA 4 and Radeon RX 9070 Series Unveiled: $549 & $599 (260)
- AMD Mentions Sub-$700 Pricing for Radeon RX 9070 GPU Series, Looks Like NV Minus $50 Again (248)
- NVIDIA Investigates GeForce RTX 50 Series "Blackwell" Black Screen and BSOD Issues (244)
- AMD Radeon RX 9070 and 9070 XT Official Performance Metrics Leaked, +42% 4K Performance Over Radeon RX 7900 GRE (195)
- AMD Radeon RX 9070-series Pricing Leaks Courtesy of MicroCenter (158)