 15
15
SteelSeries Rival 3 Wireless Review
Sensor & Performance »Build Quality
Overall build quality is very solid. When shaking the mouse, a slight rattle comes from the scroll wheel. When applying lateral pressure, no creaking or flexing of the shell can be observed. It's impossible to activate the side buttons by squeezing the sides. Lastly, no accidental clicks occur when slamming the mouse down.Buttons
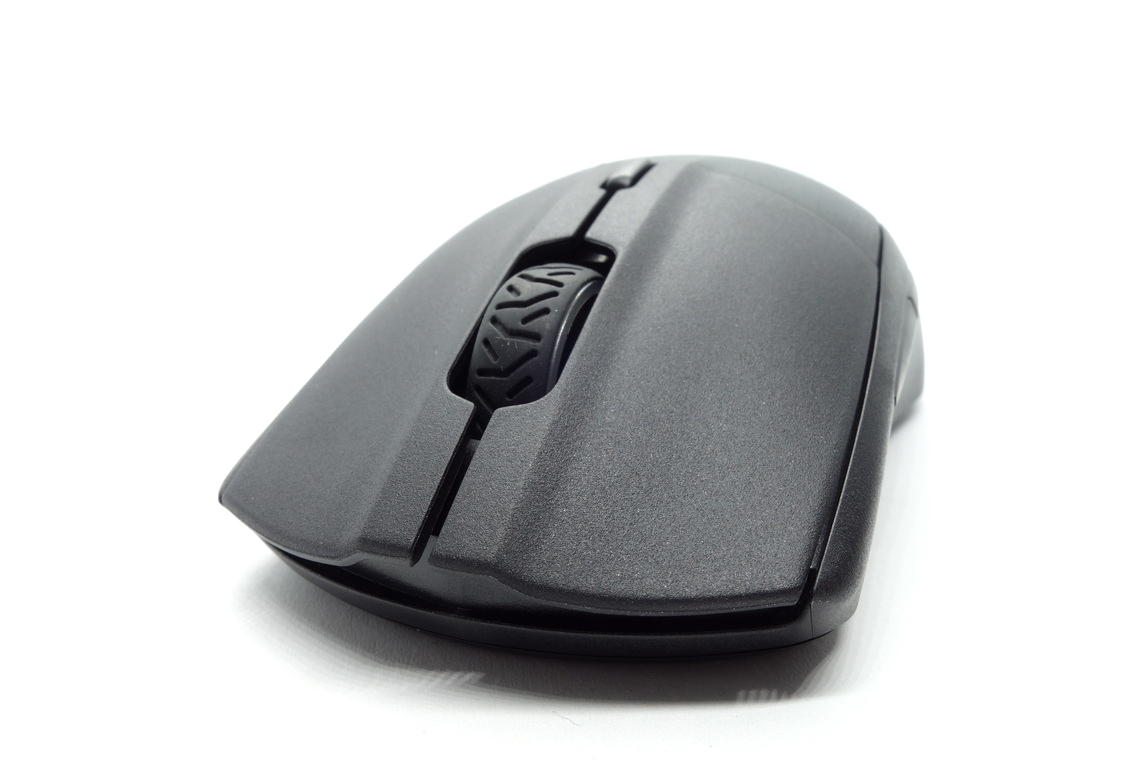
Main buttons on the Rival 3 Wireless are very good. Both pre and post-travel are low, resulting in a firm and satisfying click response. Click feel is still a bit dull, however. Having said that, I do prefer these buttons over those of the regular Rival 3. While the buttons are separated from the shell, there is only minor button wiggle. Button stiffness is light. SteelSeries-branded switches (blue plunger) are used here, which apparently are essentially Zippy DF3-P1L1 (60M) switches.

Side buttons are very good. Both pre and post-travel are low, resulting in a snappy click response. The pressure point is even across the entire button as well. They're very small and thin, however, which makes readily actuating these by rolling one's thumb across difficult. TTC switches (black plunger) are used for these.
At the top of the mouse is a single button for cycling through the set CPI levels. Its click feel is good. Another TTC switch (blue plunger) is used for this one.
Scroll Wheel


The scroll wheel is good. Scrolling is rather noisy, but the individual steps are quite nicely separated, resulting in good tactility. Much like on the Rival 3, the scroll wheel still sits a bit low, which may be irritating depending on one's preferences. The middle (scroll wheel) click requires medium force for actuation. A seemingly unbranded tactile switch is used here.
Coating
The Rival 3 Wireless has a slightly grainy and rough matte coating all over. It provides fantastic grip and doesn't attract fingerprints, dirt, or the likes much at all. It's easy to clean, and there are no signs of wear left after doing so. All in all, an excellent coating.Button Sound Test
Disassembly
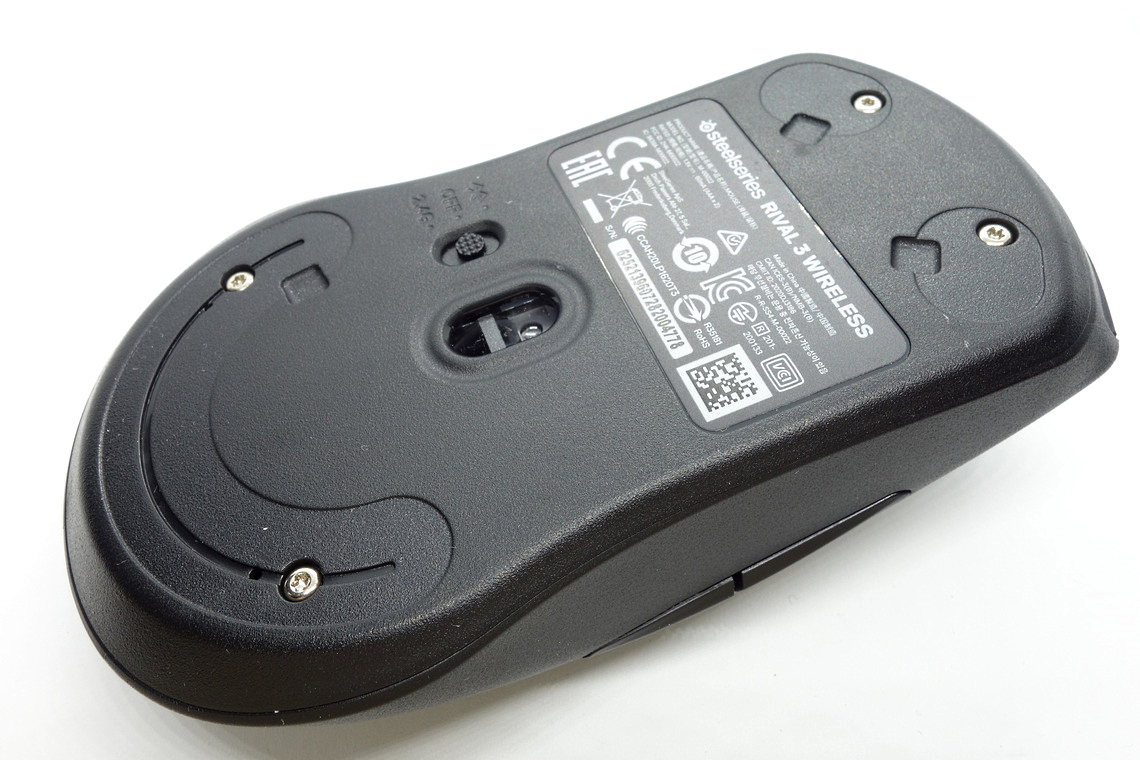
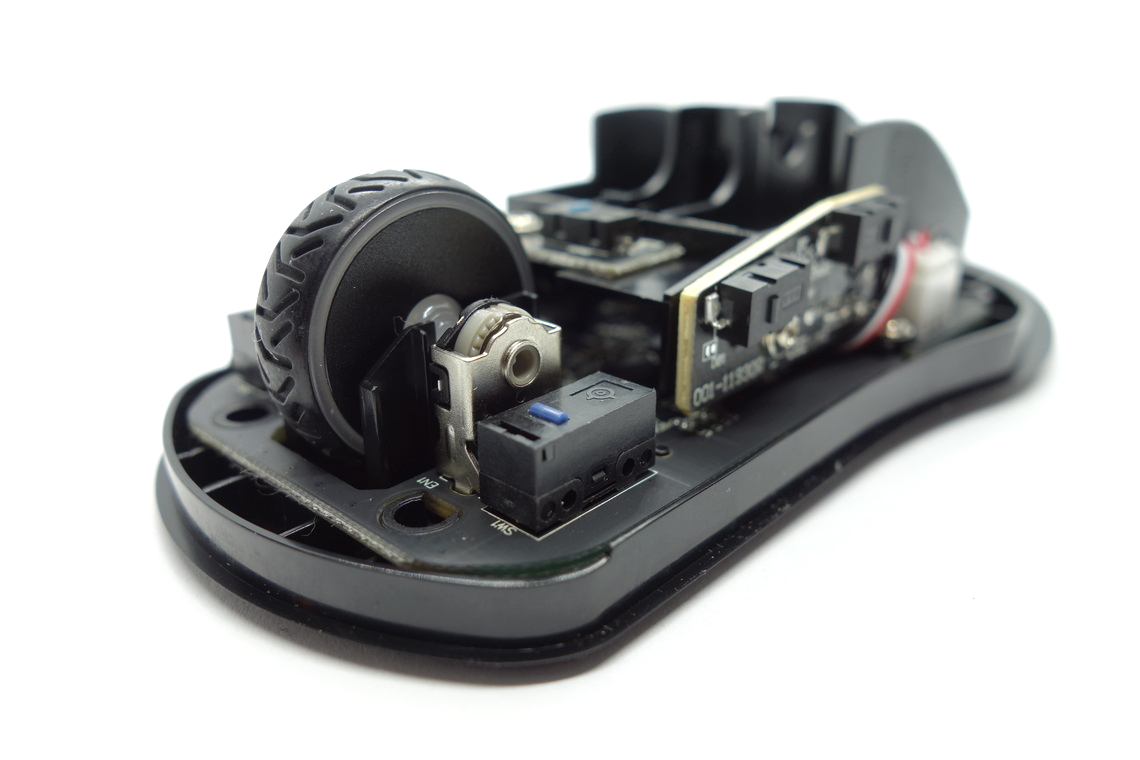
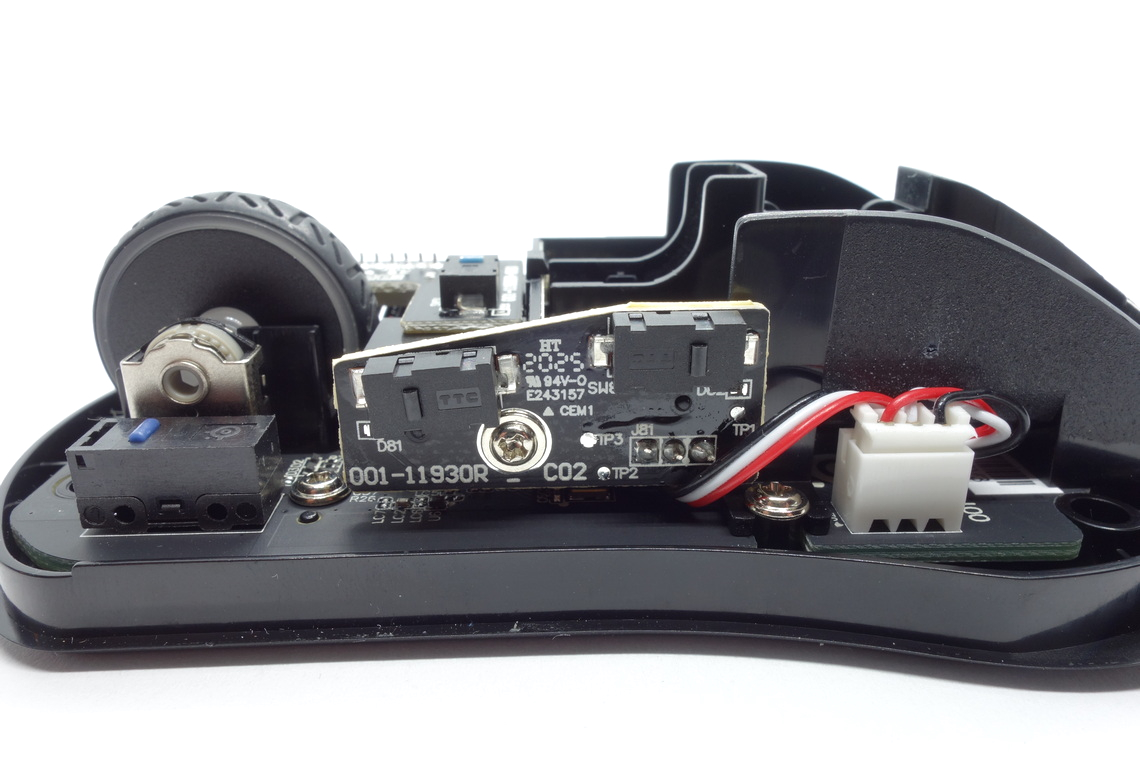
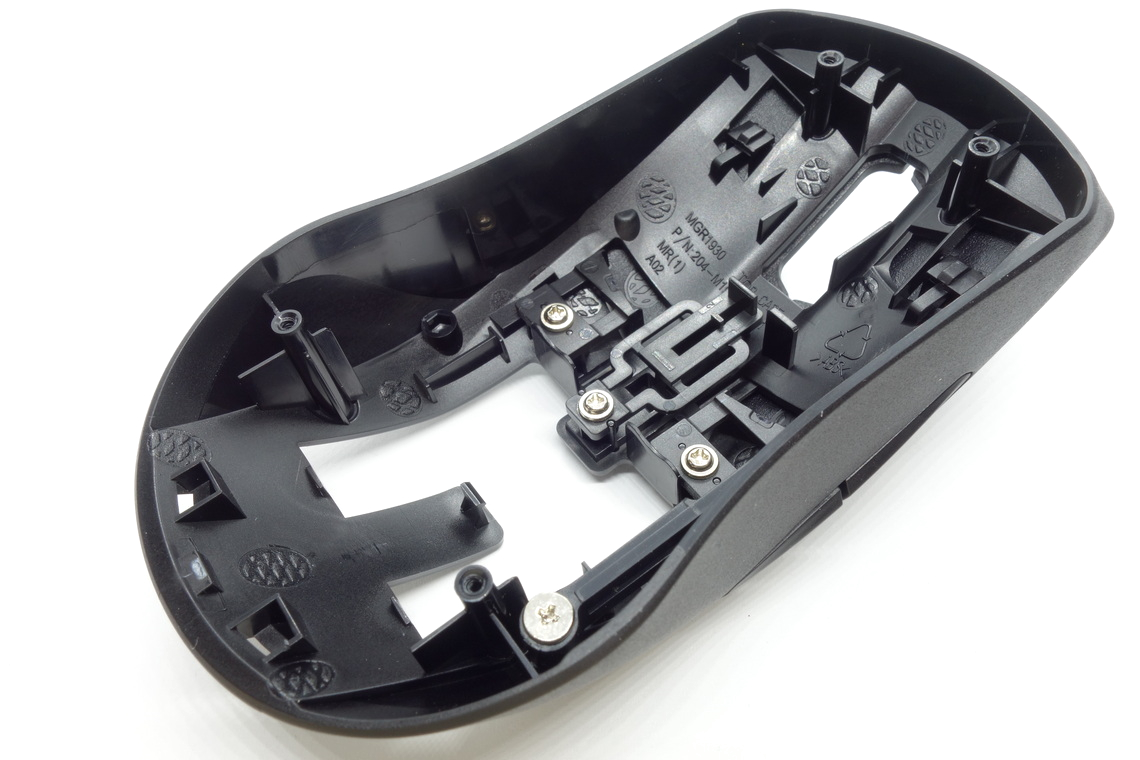
Disassembling the Rival 3 Wireless is quite easy. First, remove all the feet. Beneath these, you'll find four Torx T6 screws. Regular readers will know that I have a special disdain for this screw head type. Once those are taken care of, simply pop the top and bottom shells apart.
Although the internal design may look somewhat complicated, it's actually pretty simple. The battery case is affixed to the bottom shell with three screws, along with an additional screw that secures the scroll wheel illumination and CPI button PCB. To the left of the battery holder, you'll find the side-button PCB, which is connected to the main PCB with a 3-pin JST connector. The battery holder itself is connected to the main PCB with a 3-pin JST connector as well. The main PCB is rather big and affixed to the bottom shell with two screws. Although the PCBs vary in thickness, they all tend to be on the thicker side of things. What we can also see is the 8-pin DIP sensor package along with external illumination, which lends credence to the notion of the TrueMotion Air indeed being 3335-based. The MCU is a Nordic nRF52810, whose datasheet can be found here.
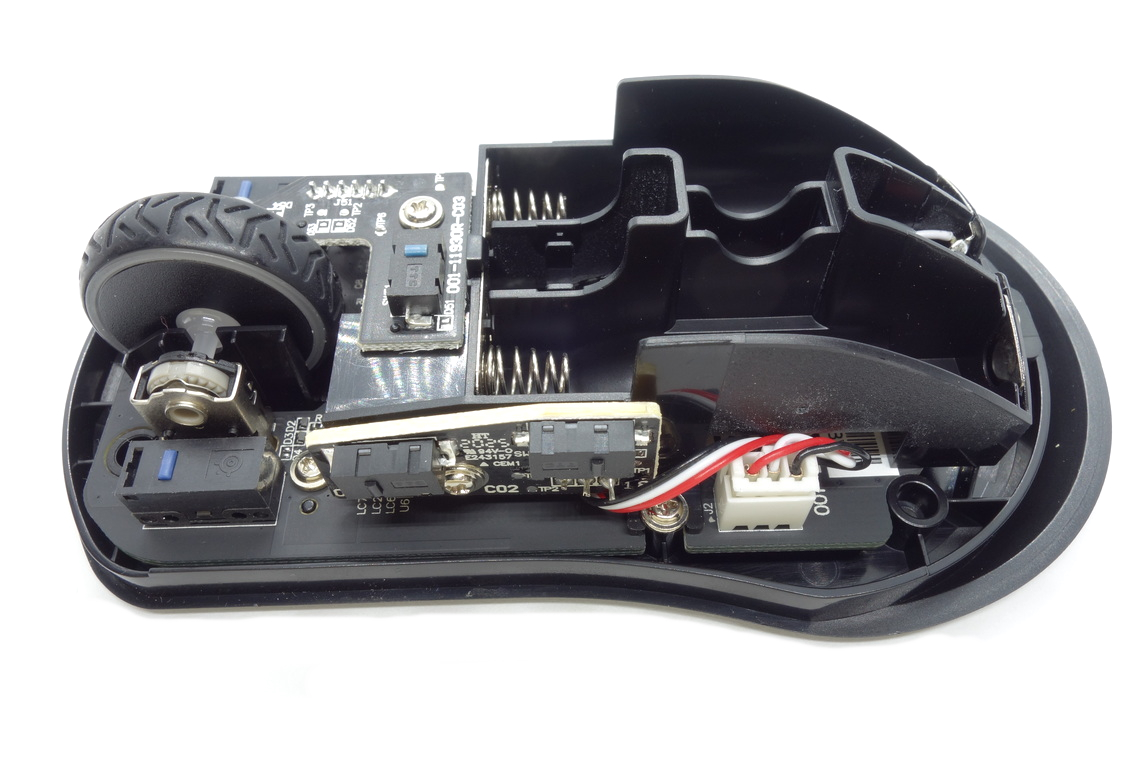
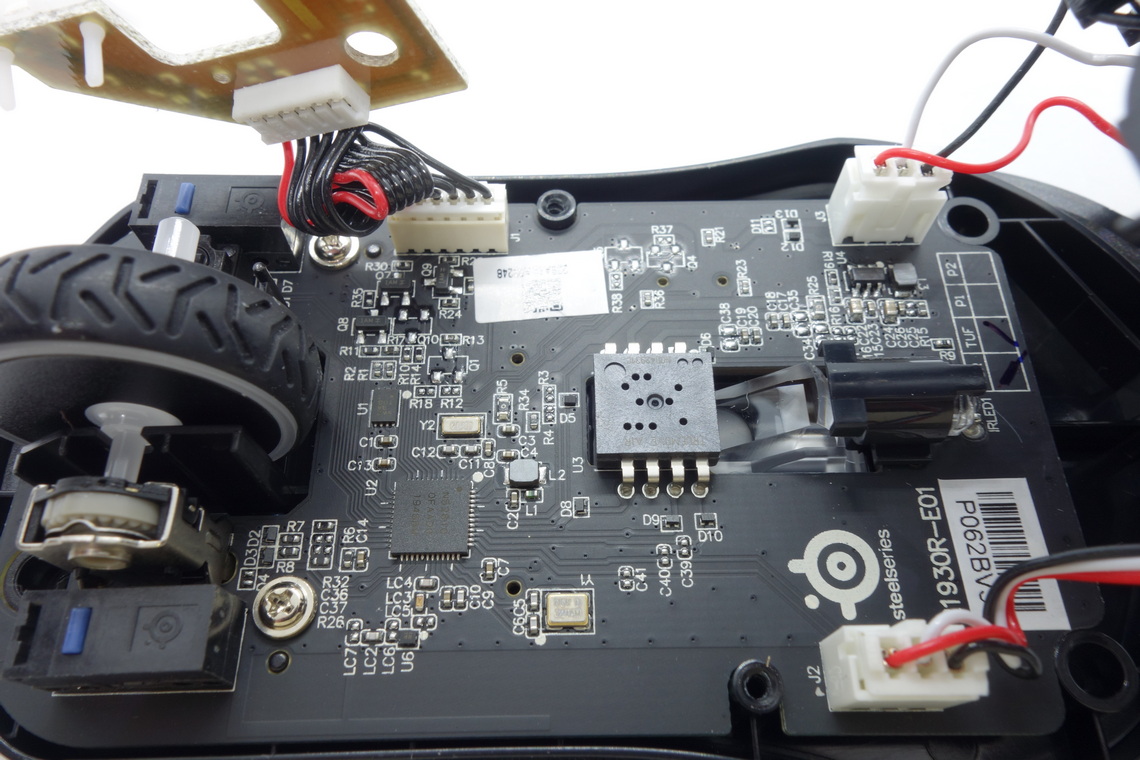
As for the soldering and general quality of the PCB, I'm unable to find any noteworthy flaws.
Mar 6th, 2025 03:34 EST
change timezone
Latest GPU Drivers
New Forum Posts
- 6TB Iron Wolf $110 (3)
- Oh boy here we go again...potential X3D woes (50)
- Rare GPUs / Unreleased GPUs (2043)
- High-end build in the 2025 mad world situation (16)
- Cooling problems persist on LGA1700 (34)
- I'm looking for a good tool to make the 3D scanning of my mini-pc using the photogrammetry and my Kinect 2. (1)
- Windows 11 General Discussion (5829)
- Extending wifi from a lousy router (32)
- Get 9070 or 9070 XT (28)
- I5 10300H undervolting ,need to stop thermal throttle (18)
Popular Reviews
- Sapphire Radeon RX 9070 XT Nitro+ Review - Beating NVIDIA
- NVIDIA GeForce RTX 5070 Founders Edition Review
- ASUS Radeon RX 9070 TUF OC Review
- AMD Radeon RX 9070 Series Technical Deep Dive
- EIZO FlexScan EV4340X Review - A Multitasking Powerhouse
- RAWM ES21M Review
- ASUS GeForce RTX 5070 Ti TUF OC Review
- AMD Ryzen 7 9800X3D Review - The Best Gaming Processor
- MSI GeForce RTX 5070 Ti Vanguard SOC Review
- MSI GeForce RTX 5070 Ti Ventus 3X OC Review
Controversial News Posts
- NVIDIA GeForce RTX 50 Cards Spotted with Missing ROPs, NVIDIA Confirms the Issue, Multiple Vendors Affected (513)
- AMD Plans Aggressive Price Competition with Radeon RX 9000 Series (277)
- AMD Radeon RX 9070 and 9070 XT Listed On Amazon - One Buyer Snags a Unit (261)
- AMD Mentions Sub-$700 Pricing for Radeon RX 9070 GPU Series, Looks Like NV Minus $50 Again (248)
- NVIDIA Investigates GeForce RTX 50 Series "Blackwell" Black Screen and BSOD Issues (244)
- AMD RDNA 4 and Radeon RX 9070 Series Unveiled: $549 & $599 (241)
- AMD Radeon RX 9070 and 9070 XT Official Performance Metrics Leaked, +42% 4K Performance Over Radeon RX 7900 GRE (195)
- AMD Radeon RX 9070-series Pricing Leaks Courtesy of MicroCenter (158)