 16
16
Streacom DA2 Review - What a Beautiful SFF Case
Temperature & Noise Testing »Test System
| System Parts for Case Reviews | |
|---|---|
| Processor: | Intel Core i5-9600K |
| Motherboards: | ATX: MSI Z390 GAMING EDGE AC MATX: Z370M GAMING EDGE AC Mini-ITX: MSI Z370I GAMING EDGE AC Provided by: MSI |
| Graphics Card: | Long: Palit GeForce RTX 2080 Gaming Pro OC Short: EVGA GTX 1650 SC Ultra Black 4 GB |
| Memory: | 16 GB XPG GAMMIX D30 DDR4 2666 MHz CL16-18-18 1.20 V 16 GB XPG SPECTRIX D60G DDR4 3000 MHz CL16-18-18 1.35 V Provided by: ADATA |
| HDD: | Western Digital 320 GB 7200 RPM |
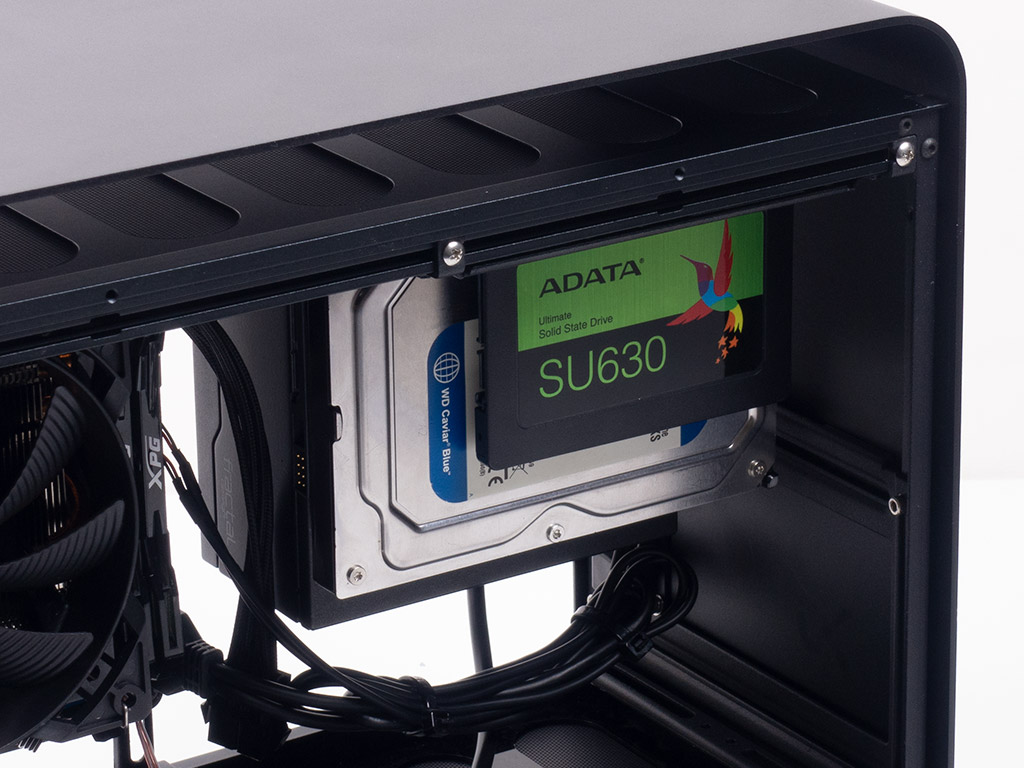
| SSD: | ITX: ADATA SX6000 Pro M.2 256 GB mATX: ADATA GAMMIX S11 Pro M.2 256 GB ATX: ADATA SPECTRIX S40G M.2 256 GB ADATA XPG SX850 256 GB ADATA Ultimate SU630 240 GB ADATA Ultimate SU750 256 GB Provided by: ADATA |
| Power Supply: | ATX:Fractal Design Ion+ 750W 80 Plus Platinum ITX: Fractal Design Ion SFX-L 650W 80 Plus Gold Provided by: Fractal Design |
| Cooling: | be quiet! Dark Rock 4 be quiet! Dark Rock Slim be quiet! Shadow Rock LP Provided by: be quiet! |
Assembly

Adding the motherboard is done by mounting it on the four pre-installed spacers.
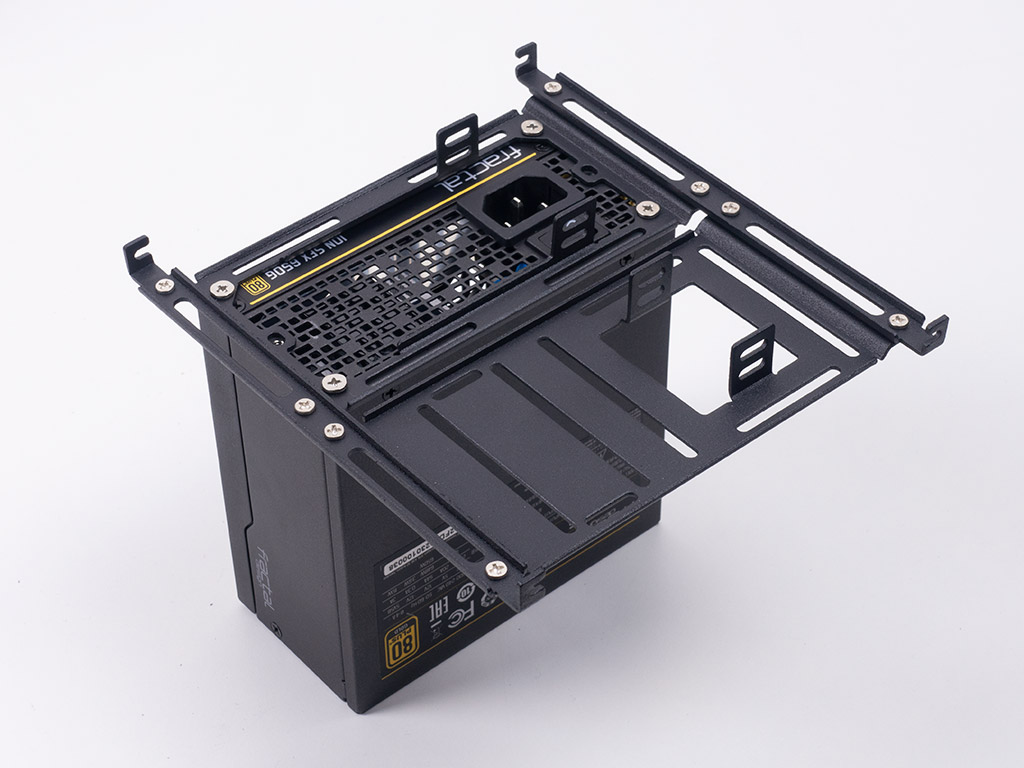
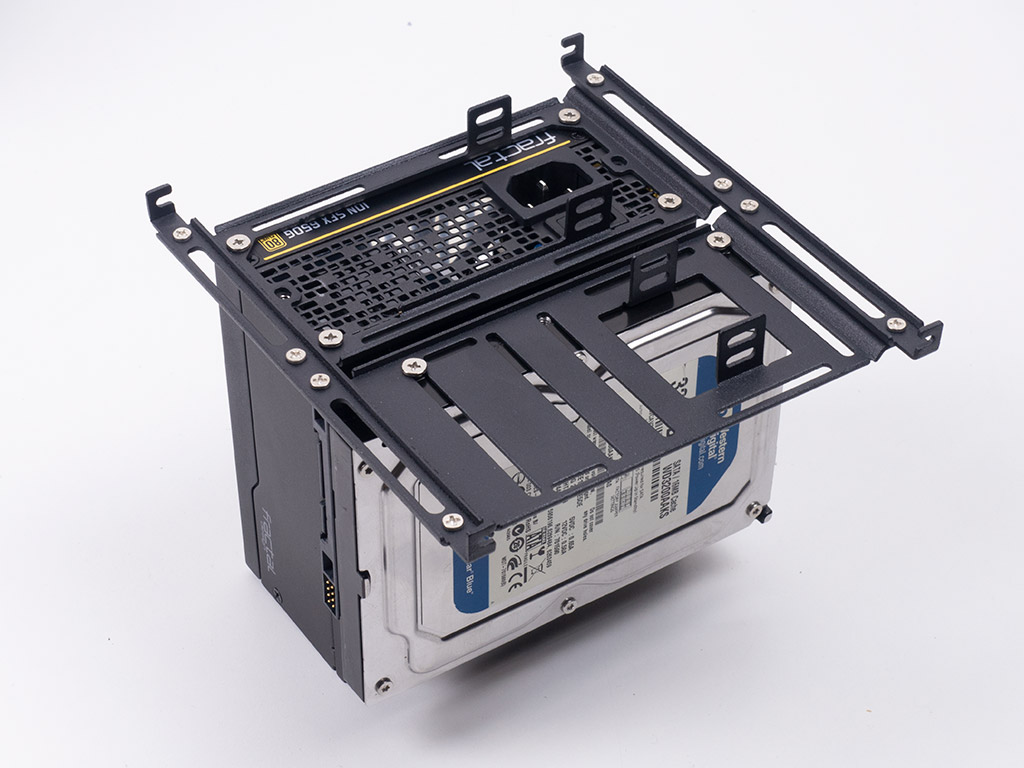

To install your PSU, simply screw it onto the frame outside of the confines of the DA2. We were a bit lazy and did not detach the bracket from the the rails as there was no need to. With the PSU is in place, screwing in the storage elements was just as easy. You can totally disassemble things if you need to and are absolutely encouraged to do so.
Putting the contraption back in place is easily done as well, as you just hold it in place and slide the screws into place before securing things. You do need to make sure the PSU cable is plugged in and the PSU switch set to on before because there is no way to reach this contraption with everything assembled.
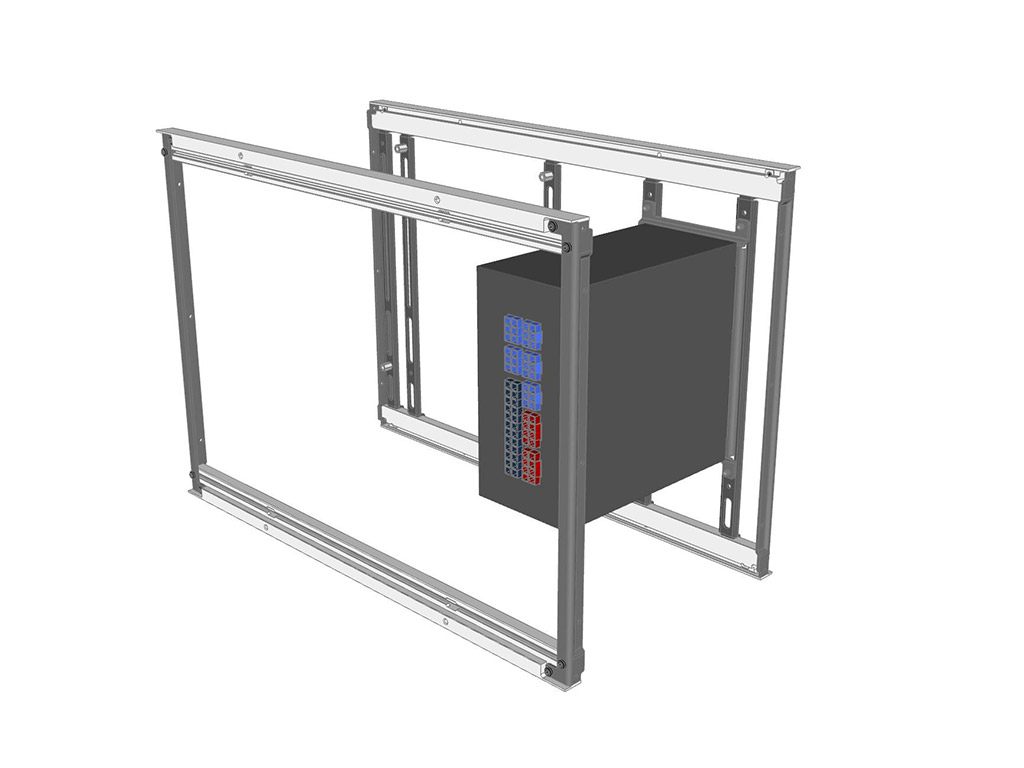

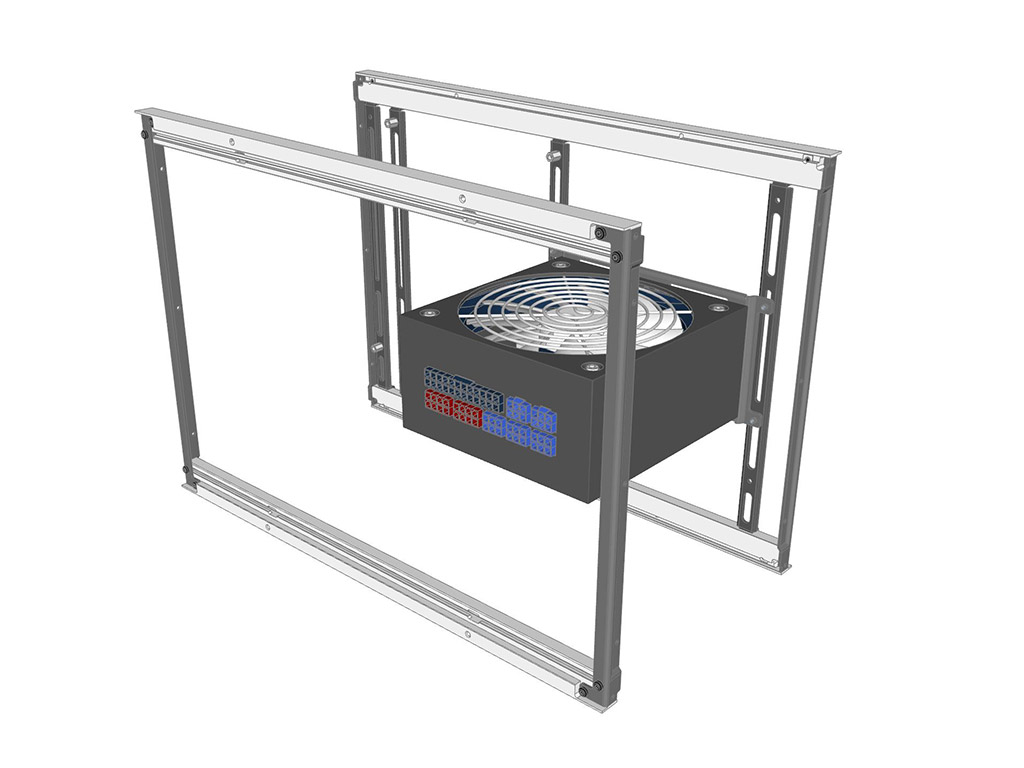
Streacom also mentioned that you could add classic motherboard spacers to the PSU bracket to move it away from the ceiling, but as this little mod is not officially part of the case as of now, we did not try it. However, Streacom also offers 3D files for their cases, so you could test fit your hardware before buying everything, and we were given a few possible positions for a PSU to fit, which showcases the universal nature of the mounting bars nicely.


To secure the GPU, first unscrew the two external and one internal screw holding that solid block in place. Once detached, there is nothing in the way of installing the graphics card of your choice. As the Streacom DA2 allows for GPUs of up to 330 mm, you can easily install something like a GeForce 2080 within the chassis, with it drawing in cool air through the bottom. While we do not use this GPU for our thermal tests, it is nice to show this setup off for a visual of such a long graphics card within the chassis.

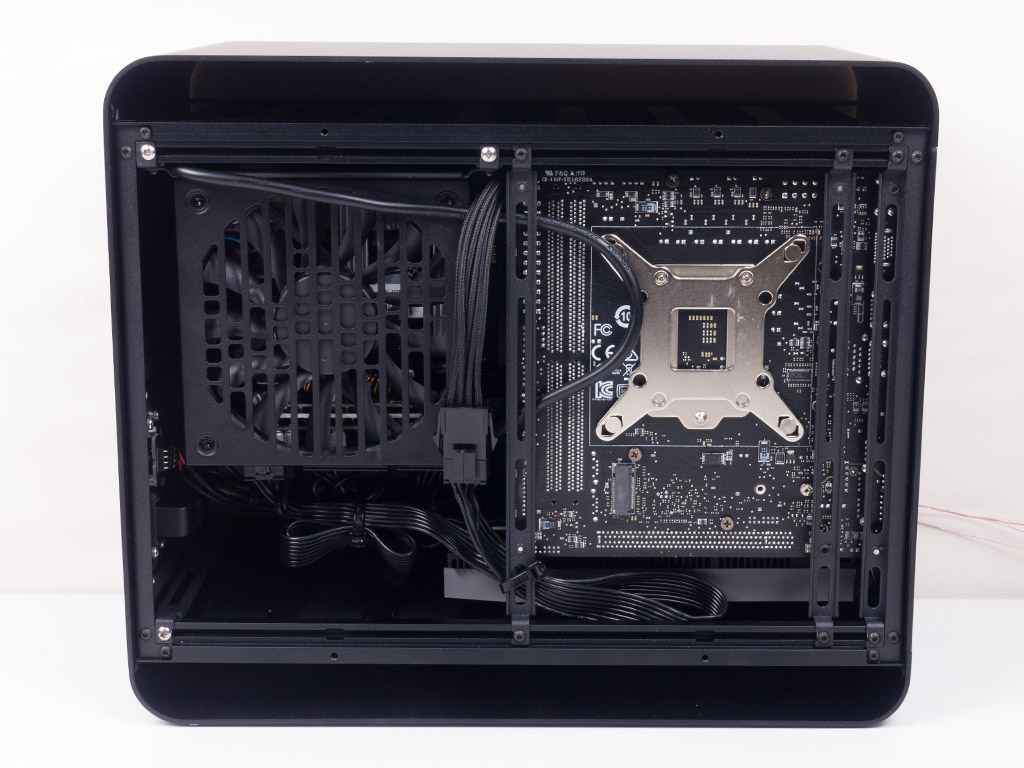
After securing the actual GPU with which we run our ITX system benchmark, the DA2 continues to make an excellent impression. Things are overall clean and accessible with the only mess residing underneath the PSU, and potentially sandwiched between a long GPU.
Finished Looks
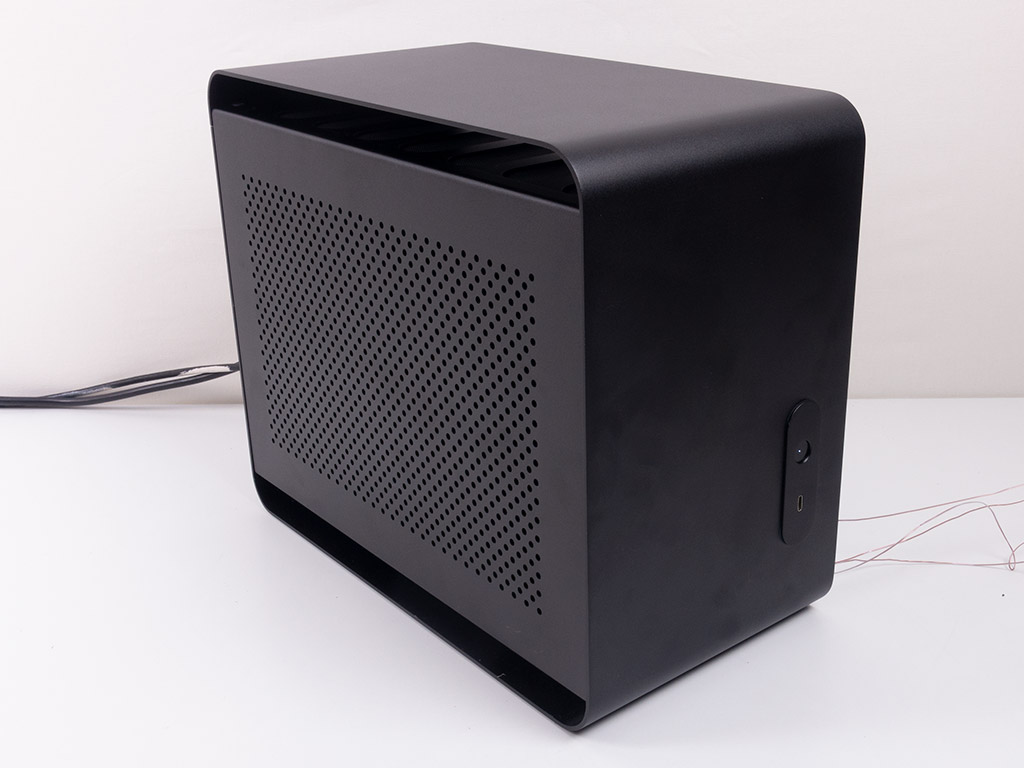
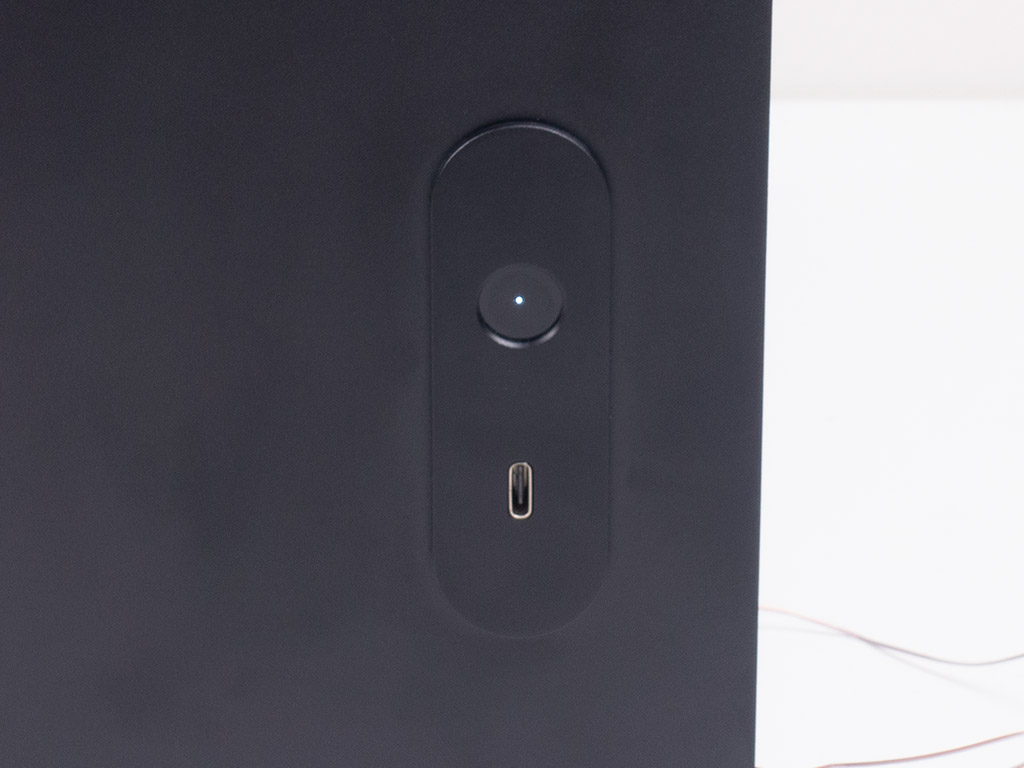
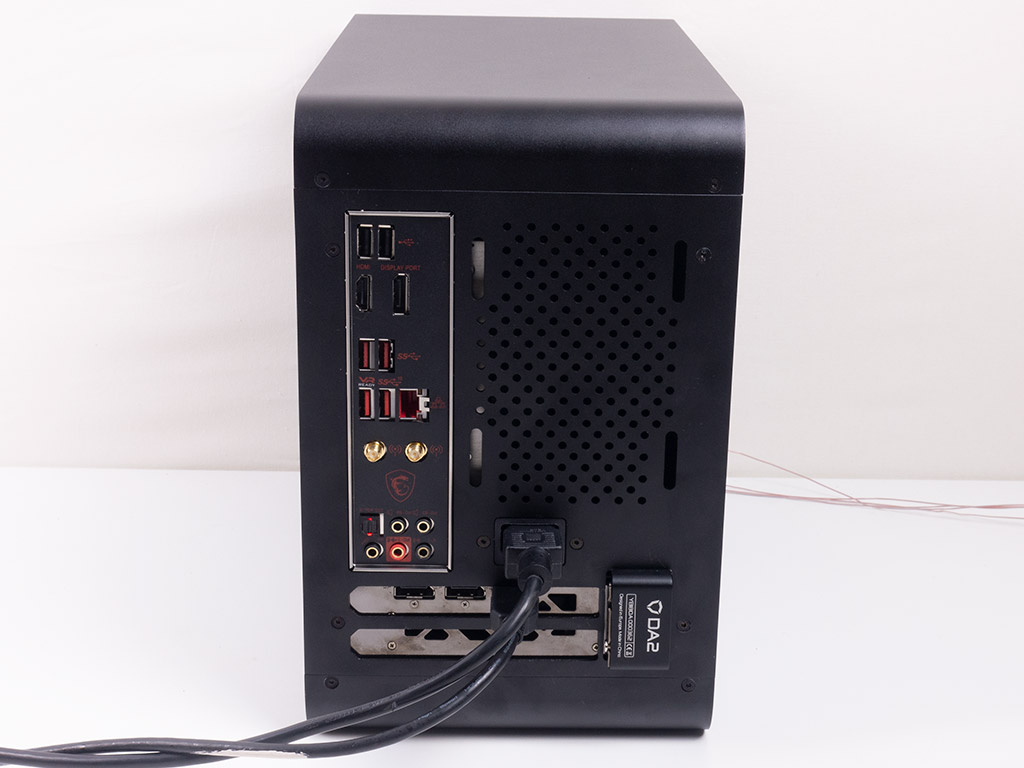
Once the standard side panels are back on, everything is nicely hidden, and the only visual element to let you know that the system is up and running is the embedded tiny white LED. In the rear, everything is where you would expect it to be.
Jan 8th, 2025 02:39 EST
change timezone
Latest GPU Drivers
New Forum Posts
- [leak] DLSS4 is coming (9)
- NVIDIA has revealed the prices for the RTX 5090, 5080 and 5070 (108)
- All RTX 5090s only have 1x 16-pin connector (0)
- Best time to sell your used 4090s is now. (155)
- Price of 4x series when they release 5x gpus (21)
- What was lacking GPU-wise at this year's CES (43)
- The TPU UK Clubhouse (25516)
- Looking for suggestions on z890 motherboard (0)
- Dell Workstation Owners Club (3259)
- in the whole computing world , this does not compute (2)
Popular Reviews
- ASUS ROG Strix B850-F Gaming WiFi Review
- DDR5 Thermal Testing & Analysis
- AMD Ryzen 7 9800X3D Review - The Best Gaming Processor
- SCYROX V8 Review
- Klevv Genuine G560 2 TB Review
- GPU Test System Update for 2025
- Intel Arc B580 Review - Excellent Value
- Upcoming Hardware Launches 2024 (Updated Nov 2024)
- STALKER 2 Performance Benchmark Review - 35 GPUs Tested
- Arrow Lake Retested with Latest 24H2 Updates and 0x114 Microcode
Controversial News Posts
- NVIDIA 2025 International CES Keynote: Liveblog (319)
- AMD Debuts Radeon RX 9070 XT and RX 9070 Powered by RDNA 4, and FSR 4 (297)
- NVIDIA GeForce RTX 5090 Features 575 W TDP, RTX 5080 Carries 360 W TDP (208)
- AMD Radeon RX 9070 XT Alleged Benchmark Leaks, Underwhelming Performance (204)
- Potential RTX 5090 and RTX 5080 Pricing in China Leaks (173)
- 32 GB NVIDIA RTX 5090 To Lead the Charge As 5060 Ti Gets 16 GB Upgrade and 5060 Still Stuck With Last-Gen VRAM Spec (173)
- AMD Radeon RX 9070 XT Boosts up to 3.10 GHz, Board Power Can Reach up to 330W (167)
- NVIDIA GeForce RTX 5070 Ti Leak Tips More VRAM, Cores, and Power Draw (161)