 0
0
Thermaltake Armor A60 Review
Value & Conclusion »Assembly
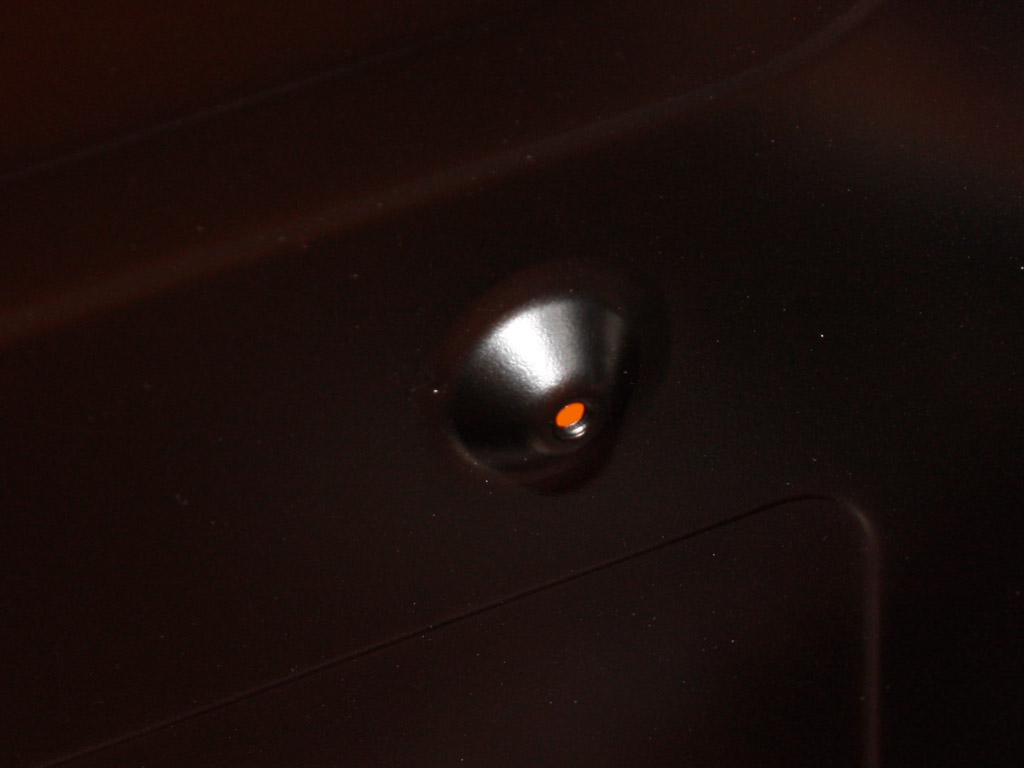
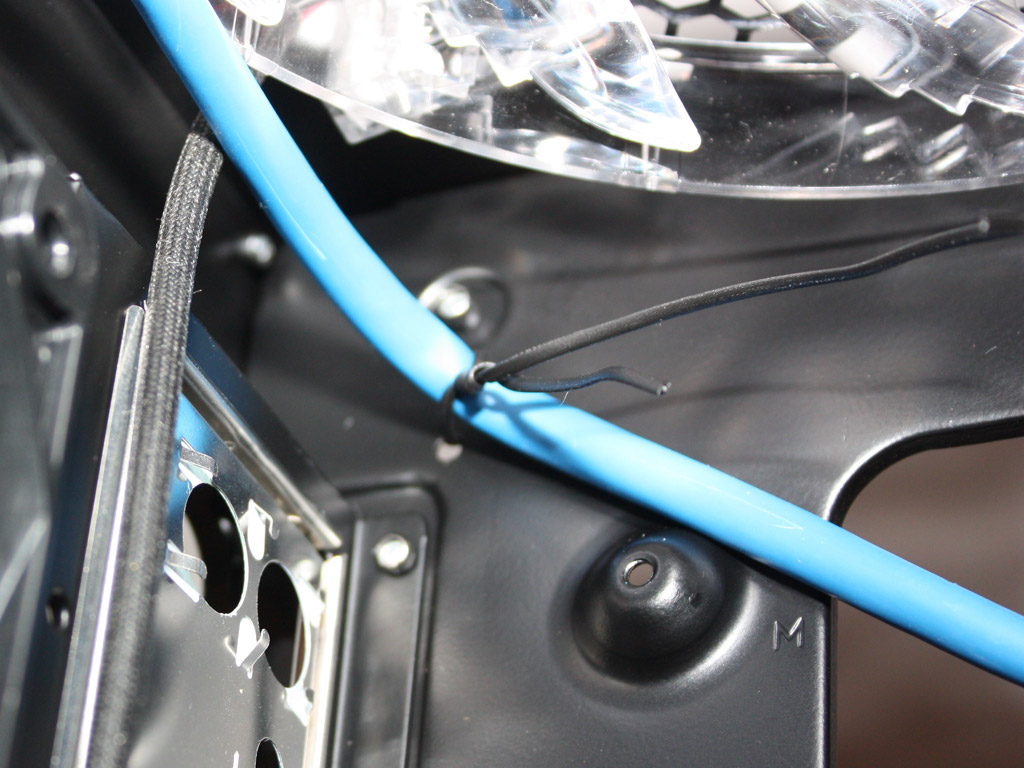
Before we dive into assembly, there are a few weird aspects of the chassis, which are simply due to the fact, that Thermaltake has kept the unique tooling of the chassis at a minimum to keep cost down. First off the mainboard bumps, which replace the traditional spacers found in most other cases. While these humps are alright in a cheap OEM case, they are not something you want to see in a case of this price class. Having worked as a computer assembler for some time, I can tell you that such a system is prone to shorting mainboards which have long leads coming out the bottom of the board. These may touch the metal surface of these bumps. Then there is the afore mentioned USB 3.0 cable. Thermaltake has simply fixed it to the mainboard tray with a simple wire, which in turn may also short the mainboard if you are unlucky. Then there is the unusable SSD bay in the flooring of the chassis. Since Thermaltake had to change the tooling for the hard drive bays, the round opening is barely not big enough to allow for a 2.5 inch drive to be placed here. While it would work with a bit of force, I do not believe that anyone wants to put any kind of strain on an expensive solid state drive for example.
It would have been nice to see Thermaltake to put more effort into the interior of the enclosures, something which has not seem to be the case with the last few products we have reviewed. Other manufacturers also use existing tooling in combination with specific parts, but they manage to create unique and functional cases, so there is no reason that Thermaltake could not do so either.
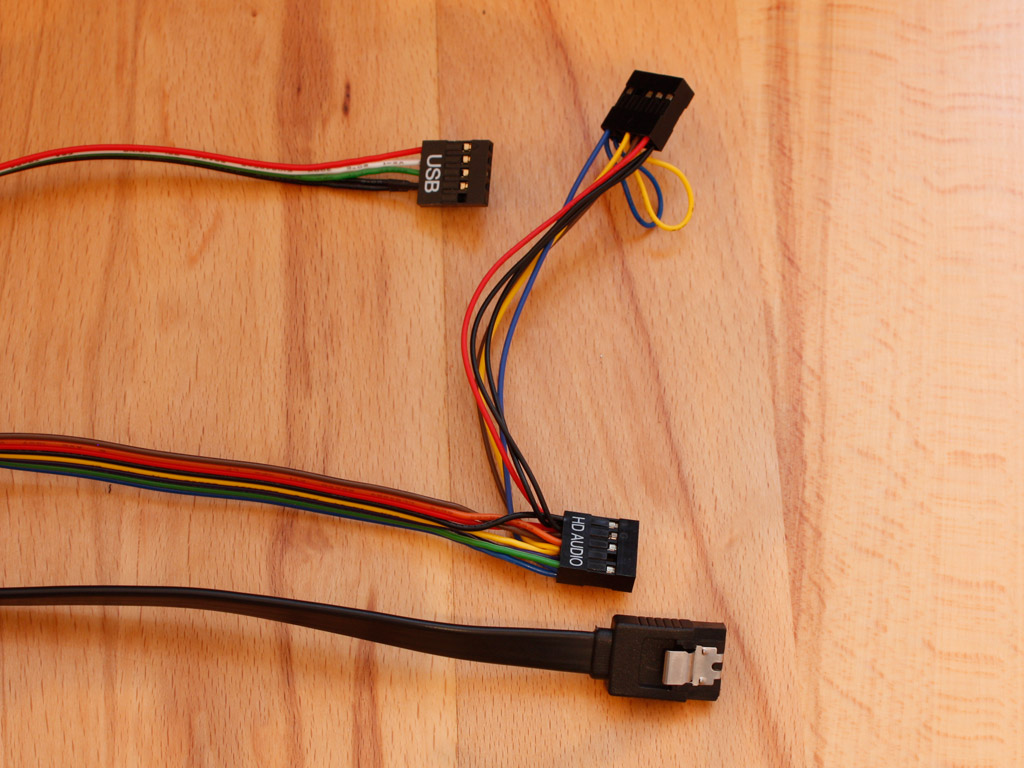
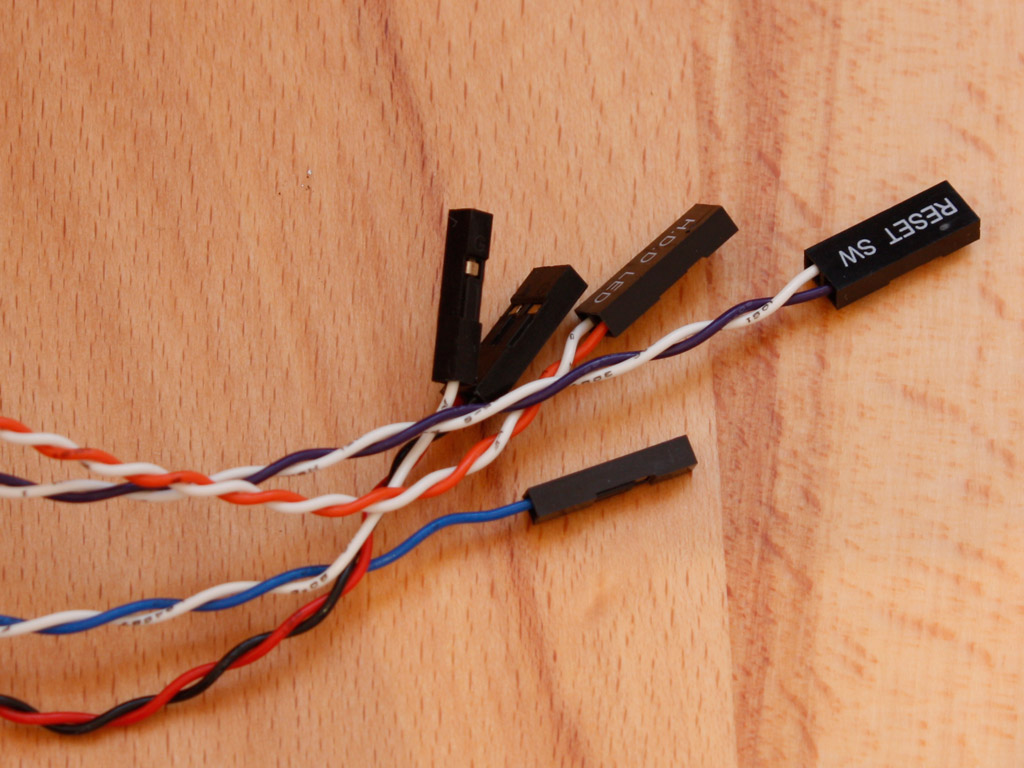
Both cable sets are of the ordinary kind. They work well and should fit every modern mainboard. It is nice to see a SATA connector with a metal clip so that it stays in place once plugged in.
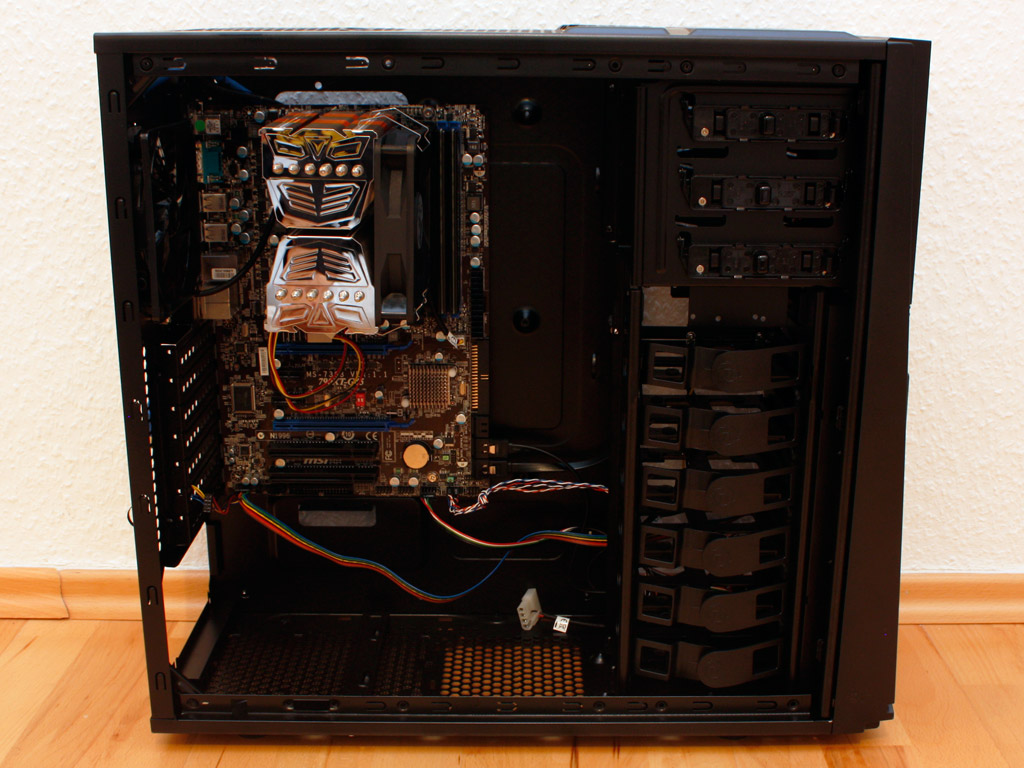
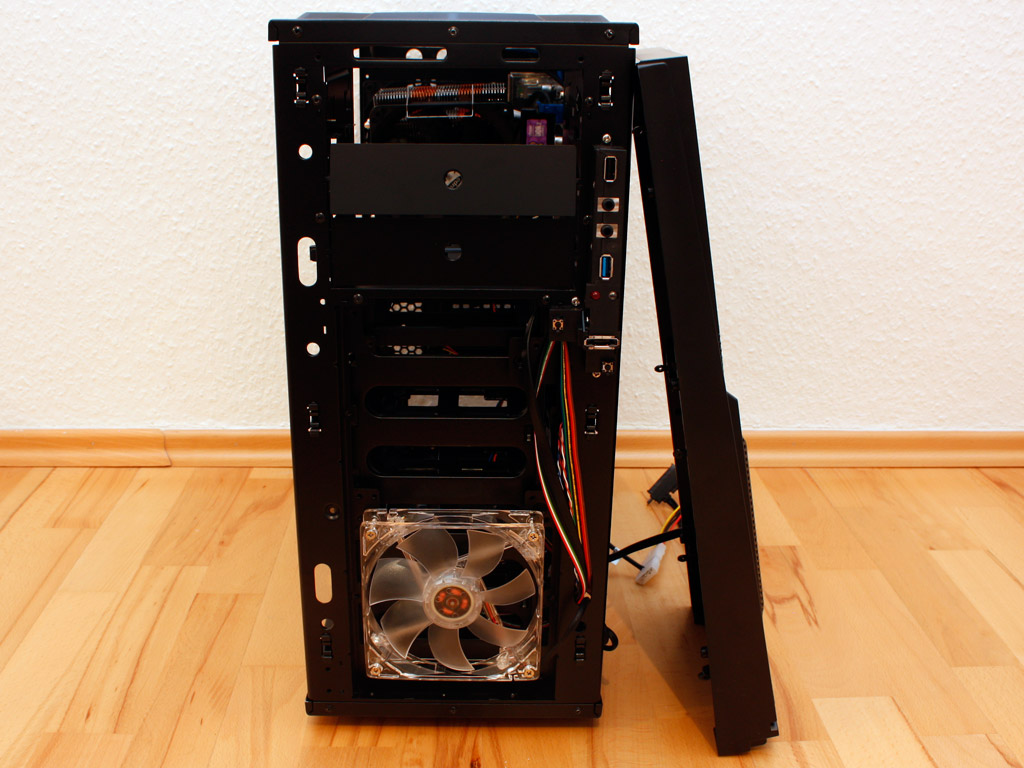
Installing the mainboard bears no surprises and the bumps did not cause any problems with our MSI board. As you can see, there is plenty of space around the CPU area to install a large fan, so you should be fine no matter what cooler you choose to go with. As there is no easy way to hide the cables, they are easily visible running along above the PSU bay.
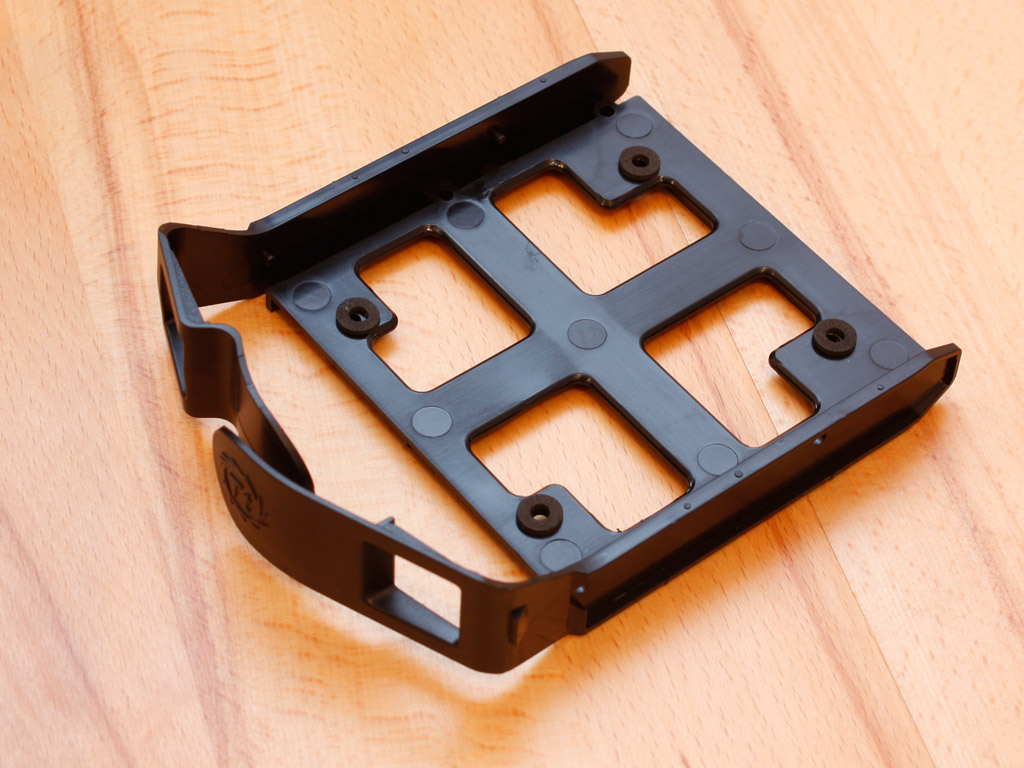
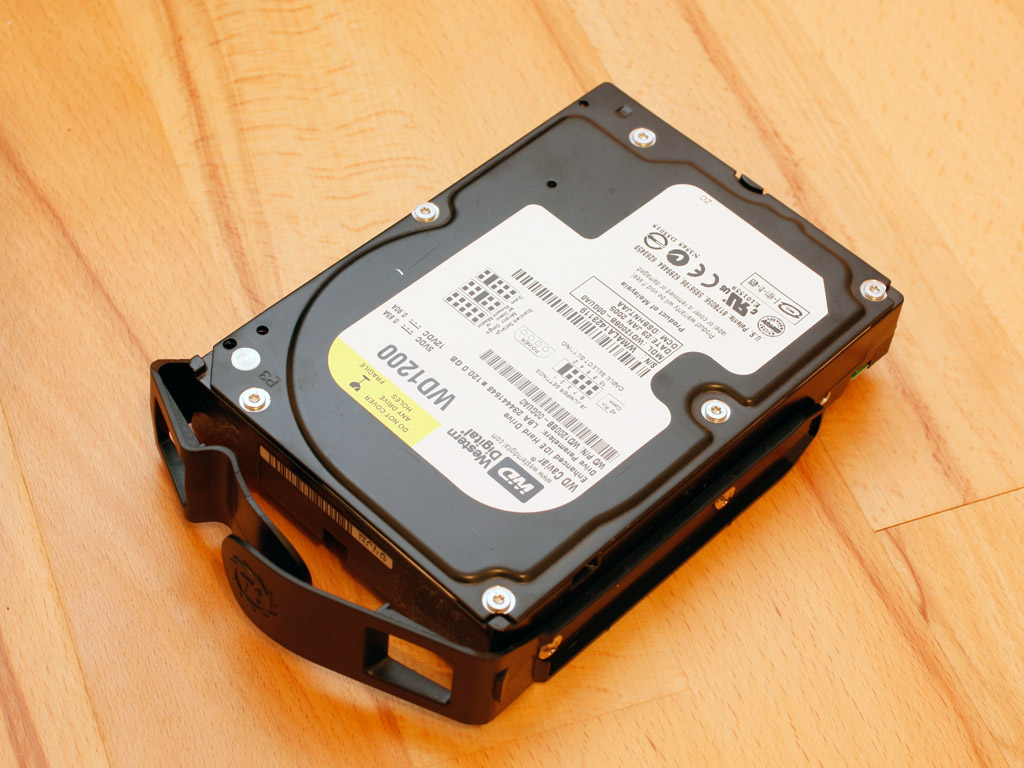

Installing a hard drive does require the use of tools, as the drive is held in place by simple screws. Once installed, you can easily slide the entire contraption into the bay until it snaps into place. This system is very nice, but only 2.5 inch drives have rubber rings to kill any vibrations, while nothing is in present for 3.5 inch drives.
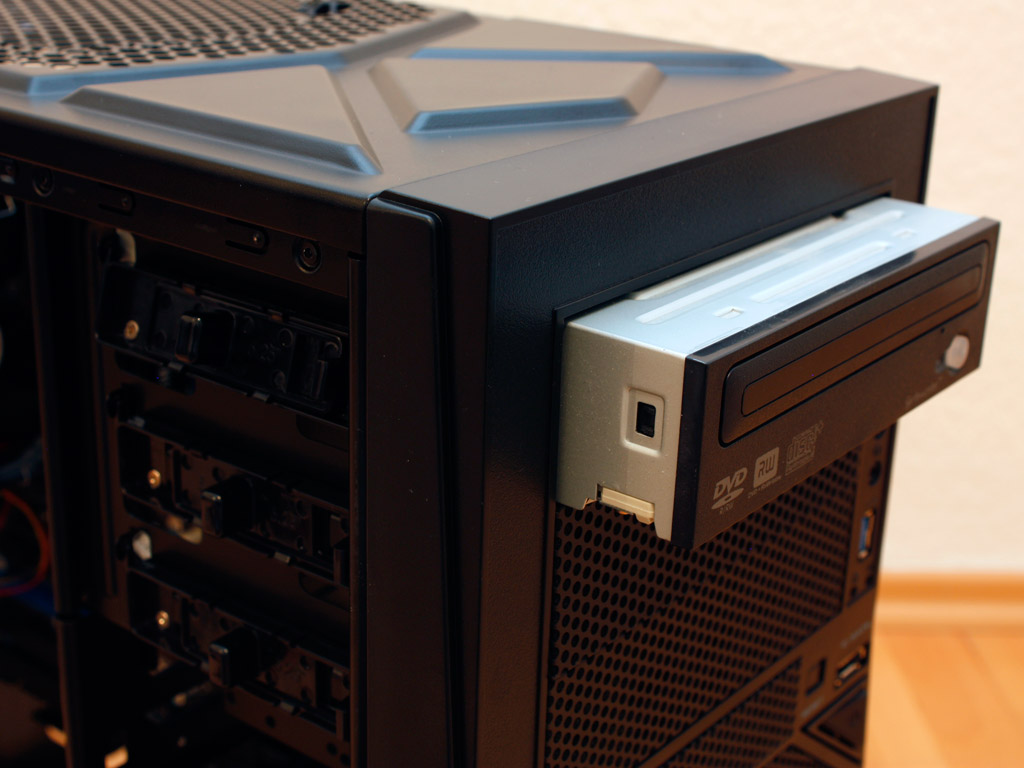

To install an optical drive, one has to pull off the front of the Armor A60 to push out one of the covers. You can clearly see the simple fan, which come equipped with blue LEDs, which cools the bottom three drives. You may install an additional fan for the top three HDDs or move the present one up there if you wish. Once the drive bay is open, simply slide the optical drive into place and lock it down with the plastic screw-less system. This works alright, but there is still some play. Thus I would suggest using a screw or two to secure things firmly - especially if you plan on transporting the full system.
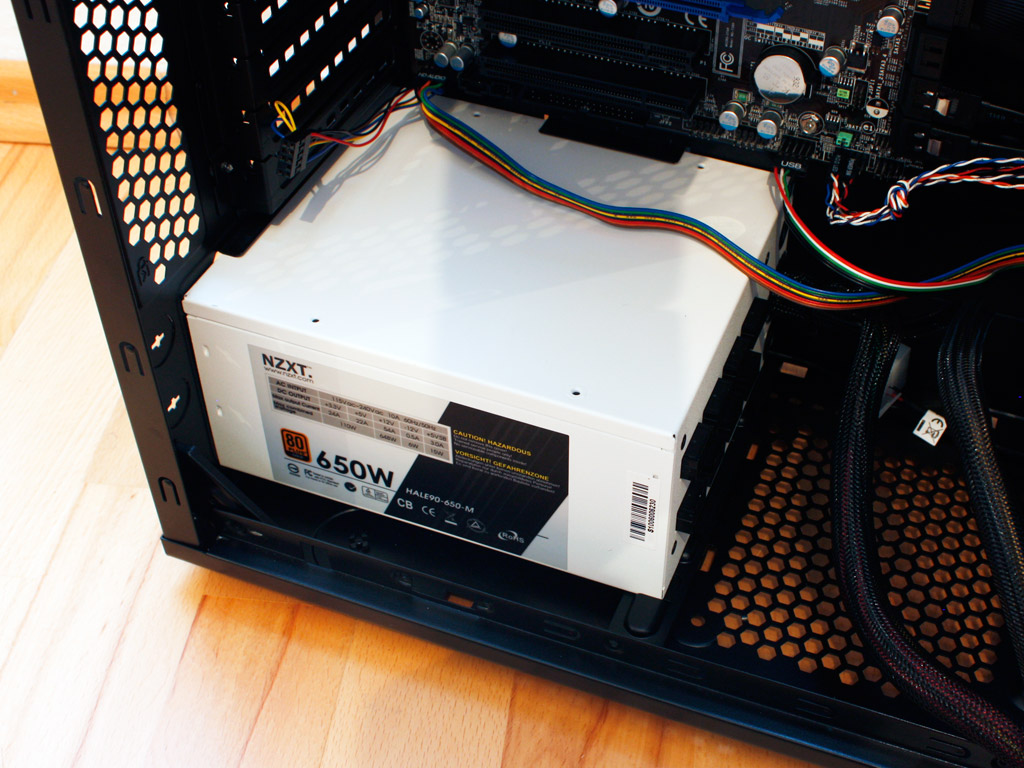
Installing the PSU is done by traditional means. First you have to make sure that the support bar is at the right location, then you can jam the unit into place and secure it with four case screws.
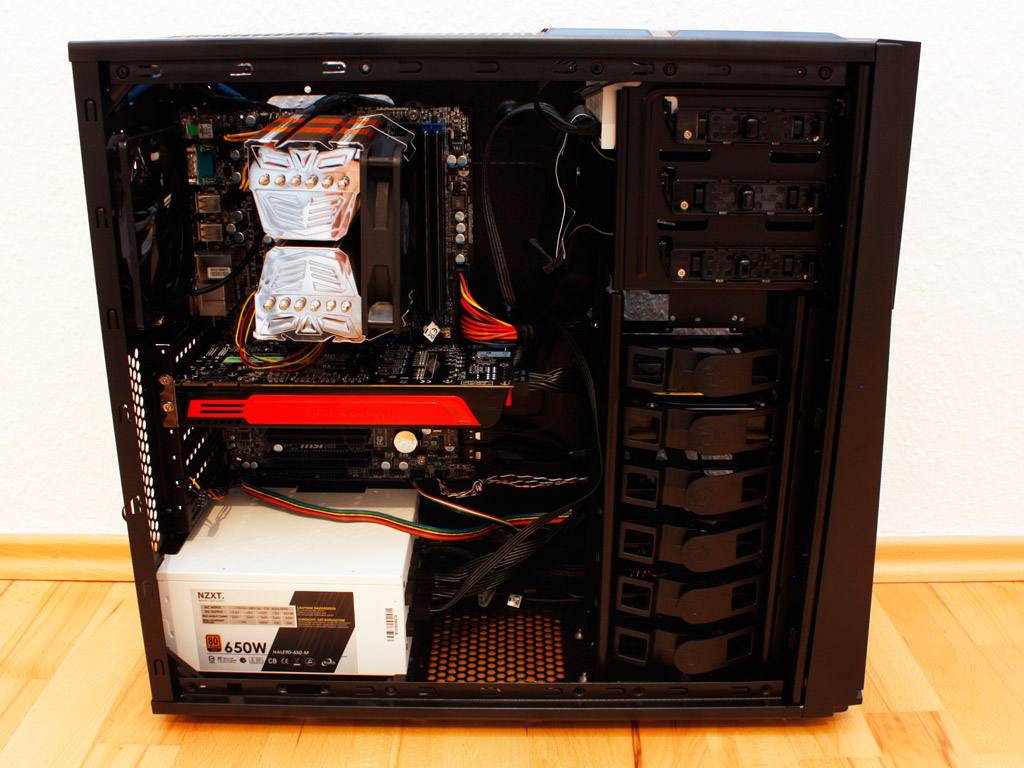
Once everything is installed, you can clearly see that the case is fairly full, as there is no way to hide or route the cables within the chassis. I have pushed most of the cables behind one of the unused hard drive bays, but considering I have used a modular PSU with flat cables instead of one with a full cable tree which may even be sleeved, the result is not really adequate by today's standards. Another aspect to keep in mind is the fact, that I have only installed one hard drive and one optical drive. Those who use more will quickly find themselves in front of a jam packed case.
Finished Looks
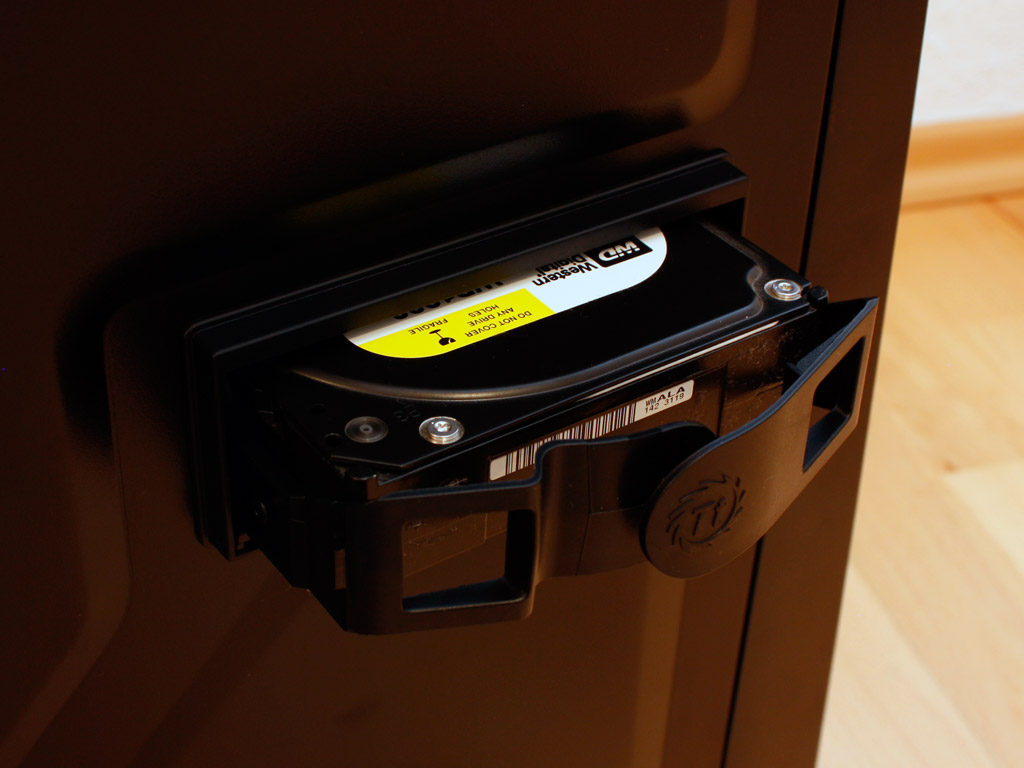
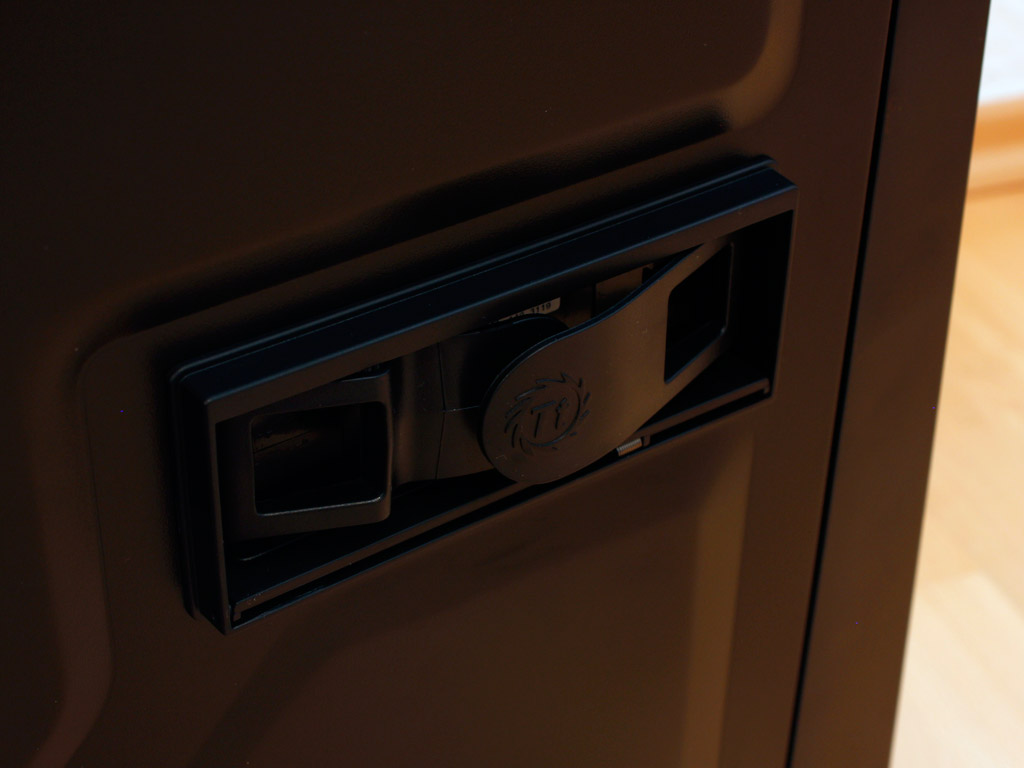
Once everything is installed and the side panels have been placed back on the chassis, the hot-swap bay was tried out. As you can see, it works well, but does disturb the overall look of the chassis a bit. Nonetheless, this is a very cool and useful feature. The only downside would be that the drive requires the use of the large plastic tray, which makes the occasional swap a bit of a task, as you need to insert the drives into the tray using a screw driver.
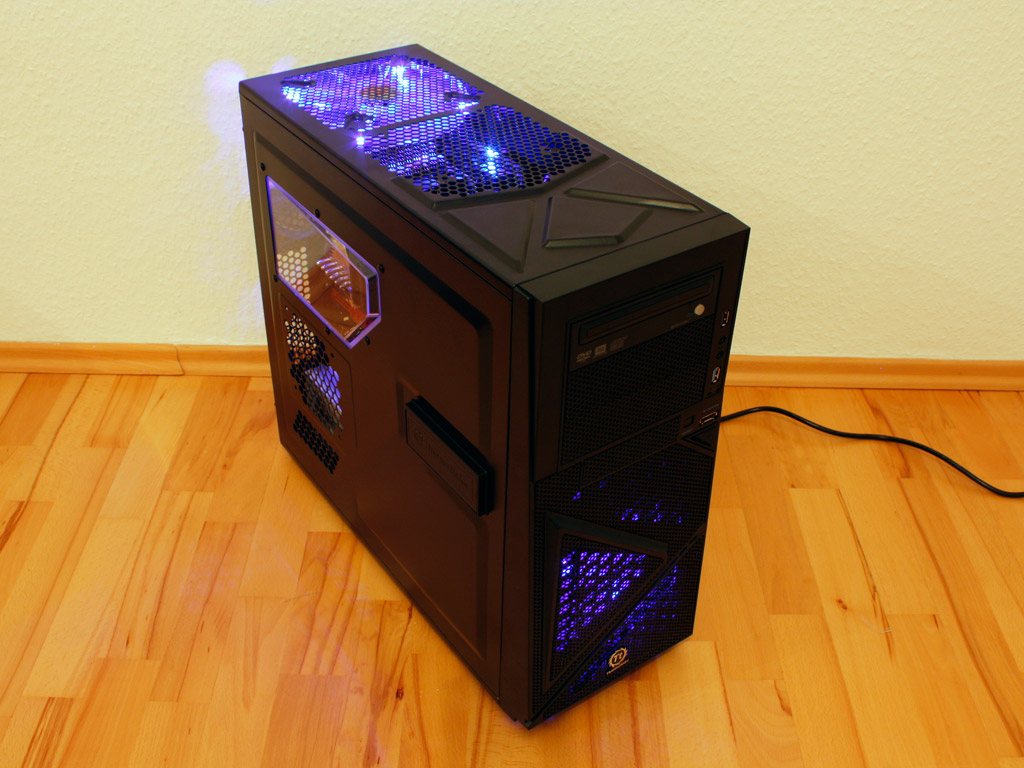
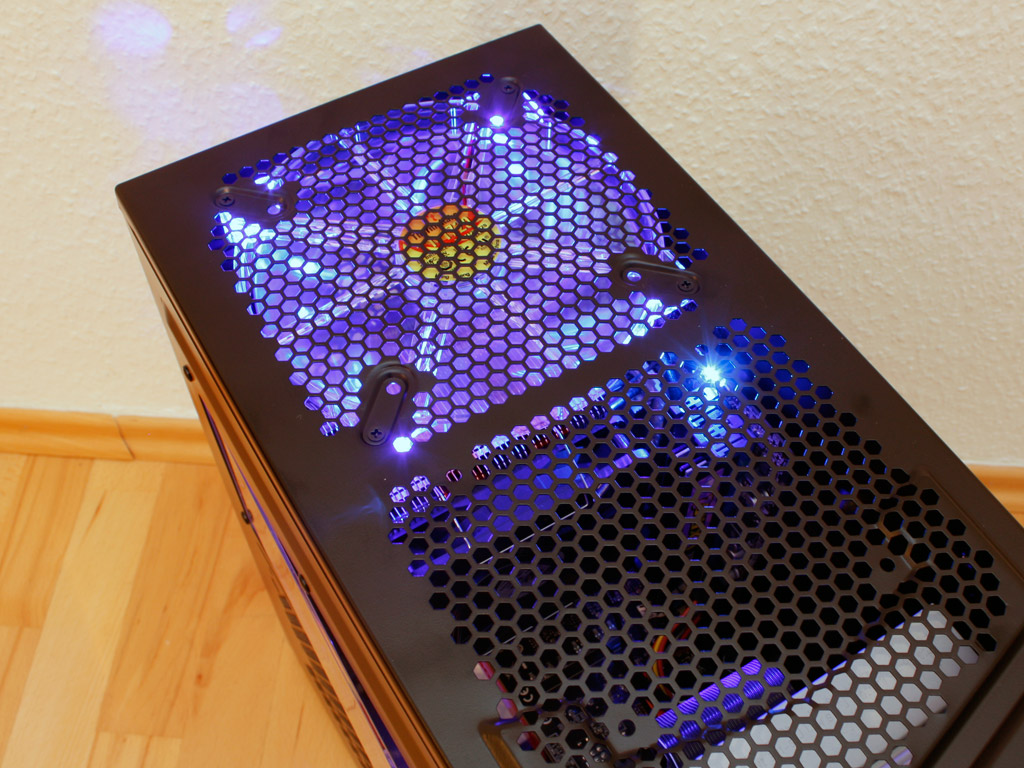
Once turned on, the two LED fans light up, giving the Armor A60 the same cool look as we have seen on the A90. The fact that the large top fan is no longer covered by a plastic piece also means that more light can be seen. This looks nice, but may be a bit too much for those who have the system running through the night for example.
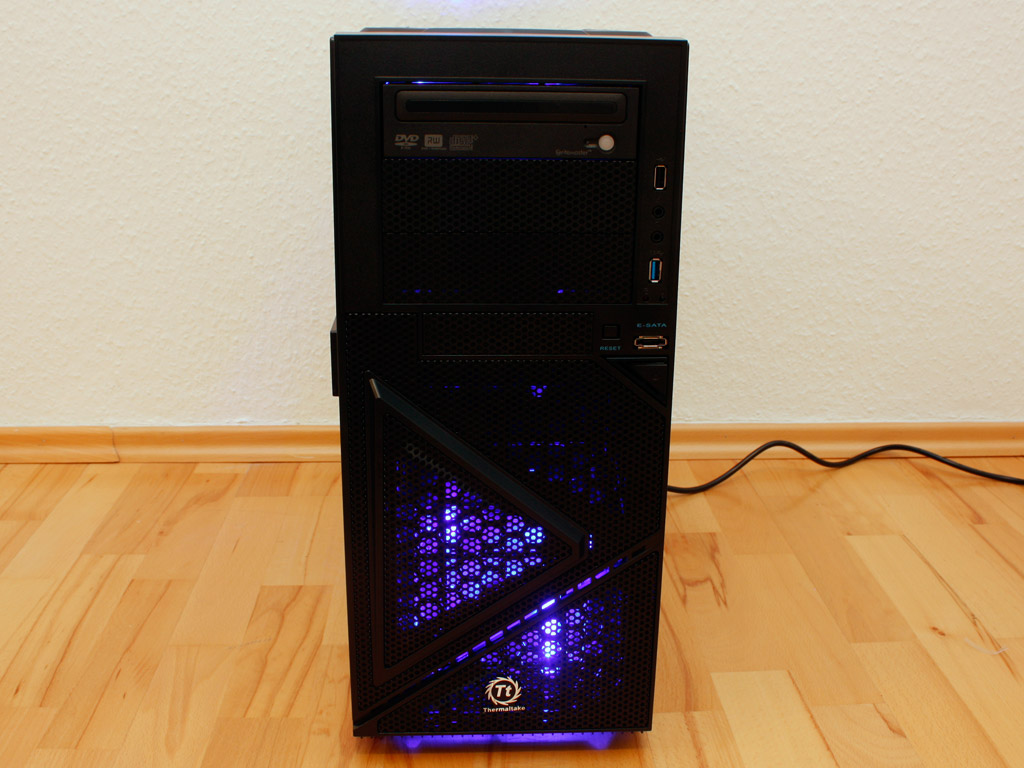
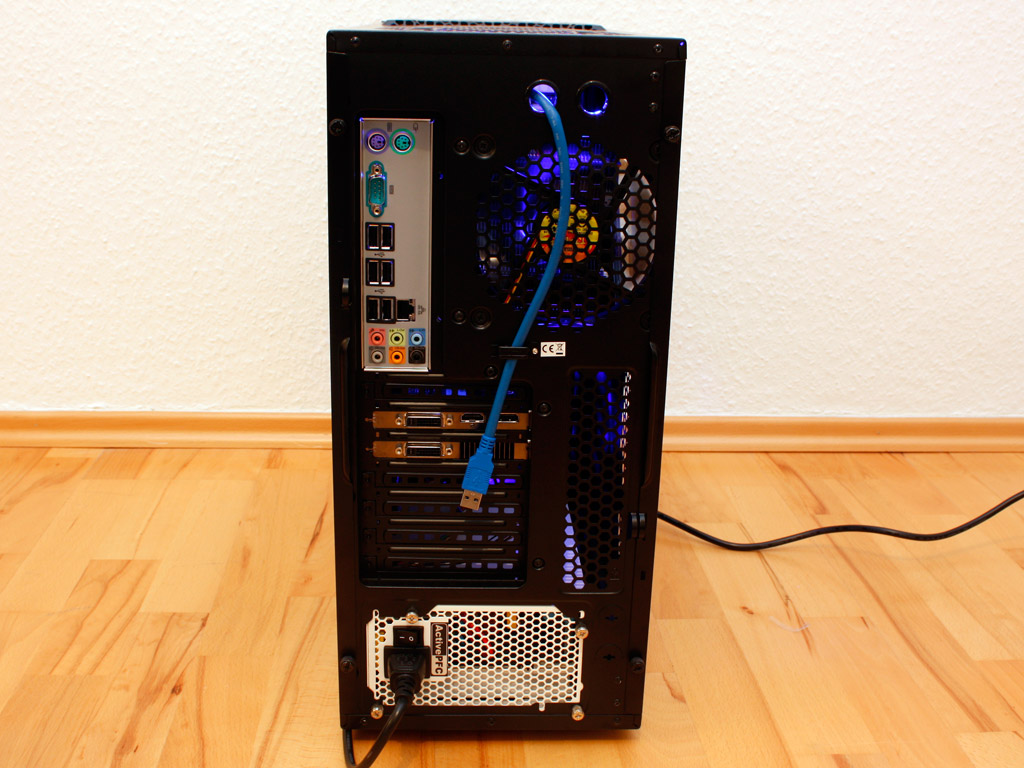
The front of the case comes across eerily similar to the A90, thus I would say that Thermaltake has achieved the task of transplanting the design of the larger case to the Armor A60. Turning the chassis around, the USB 3.0 cable can either be connected to an onboard connector in the rear or to an USB 3.0 expansion card. The cable is too short to reach all the way down, so you have to install such a card in one of the top three or four slots.
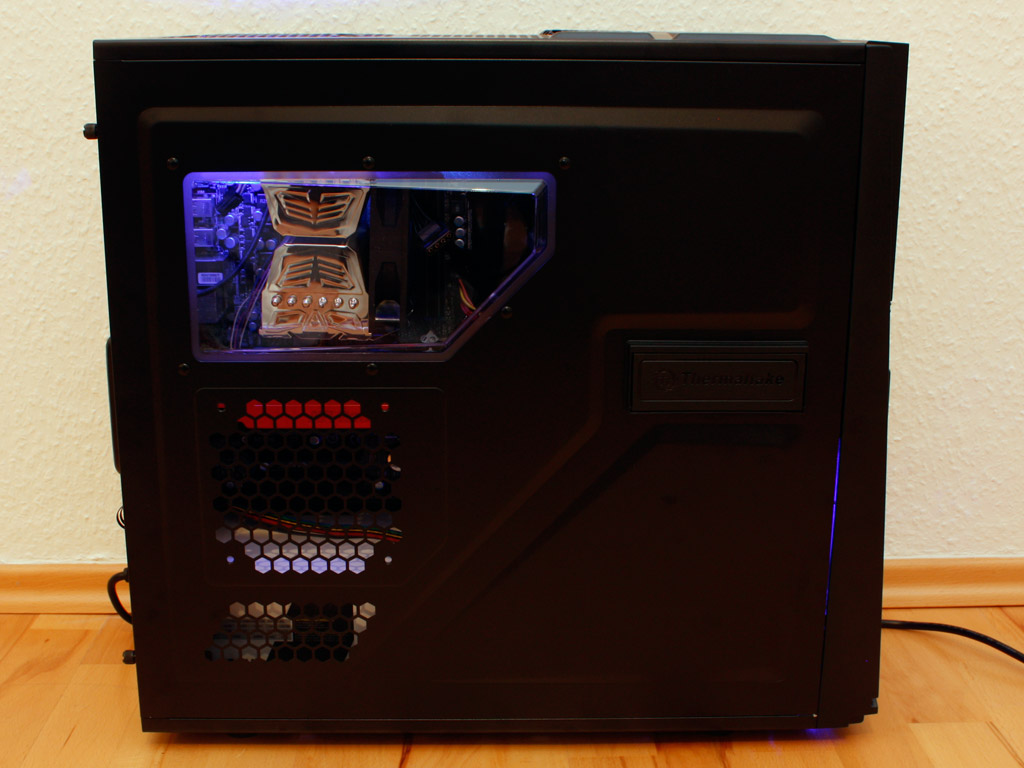
The asymmetrical window in the side panel is large enough to allow view to the CPU area and is lit a bit by the top fan, which looks great and should be a nice way to draw some attention during a dimly lit LAN party. The noise level of all the fans is good, only emitting a clean but noticeable "swooshing" sound.
Jul 1st, 2025 22:44 CDT
change timezone
Latest GPU Drivers
New Forum Posts
- PCMA2305 Phase Change Metal Alloy (PCMA) (7)
- Best motherboards for XP gaming (18)
- What would you buy? (32)
- Is my m2 possibly fake ? and possible laptop hardware damage ? (28)
- HP Zbook 15 G2 GPU Upgrade (4)
- Help me overclocking my GSkill Ripjaws 3200MHz CL 16 DDR4 RAMs. (20)
- MACPRO 3,1 booting windows (0)
- My PCIe5 SSD is slow. Samsung 9100 PRO (29)
- Steering wheels, I think I had a mea culpa! (0)
- My PSU died.. (1)
Popular Reviews
- ASUS ROG Crosshair X870E Extreme Review
- Crucial T710 2 TB Review - Record-Breaking Gen 5
- Sapphire Radeon RX 9060 XT Pulse OC 16 GB Review - An Excellent Choice
- AVerMedia CamStream 4K Review
- Upcoming Hardware Launches 2025 (Updated May 2025)
- AMD Ryzen 7 9800X3D Review - The Best Gaming Processor
- Lexar NQ780 4 TB Review
- Sapphire Radeon RX 9070 XT Nitro+ Review - Beating NVIDIA
- AMD Ryzen 9 9950X3D Review - Great for Gaming and Productivity
- NVIDIA GeForce RTX 5060 8 GB Review
TPU on YouTube
Controversial News Posts
- Intel's Core Ultra 7 265K and 265KF CPUs Dip Below $250 (288)
- NVIDIA Grabs Market Share, AMD Loses Ground, and Intel Disappears in Latest dGPU Update (208)
- Some Intel Nova Lake CPUs Rumored to Challenge AMD's 3D V-Cache in Desktop Gaming (140)
- NVIDIA GeForce RTX 5080 SUPER Could Feature 24 GB Memory, Increased Power Limits (112)
- Microsoft Partners with AMD for Next-gen Xbox Hardware (105)
- NVIDIA Launches GeForce RTX 5050 for Desktops and Laptops, Starts at $249 (105)
- Intel "Nova Lake‑S" Series: Seven SKUs, Up to 52 Cores and 150 W TDP (100)
- NVIDIA DLSS Transformer Cuts VRAM Usage by 20% (91)