 11
11
Xigmatek Aegir SD128264 Review
Installed »Installation
You need not latch the fan onto the heatsink first. It may obstruct a key step later on.
Installation begins with clearing the pre-punched holes in the foam cushion of the back-plate, to suit your socket type. The corner elliptical opening of the backplate has three pre-punched holes, the farthest holes from the center are for LGA1366, middle for LGA1156, and the closest to the center for LGA775. Pull out the central detachable portion of the foam (leaving the peripheral parts, they're important), and place it on the back of the CPU socket to match the mounting holes.
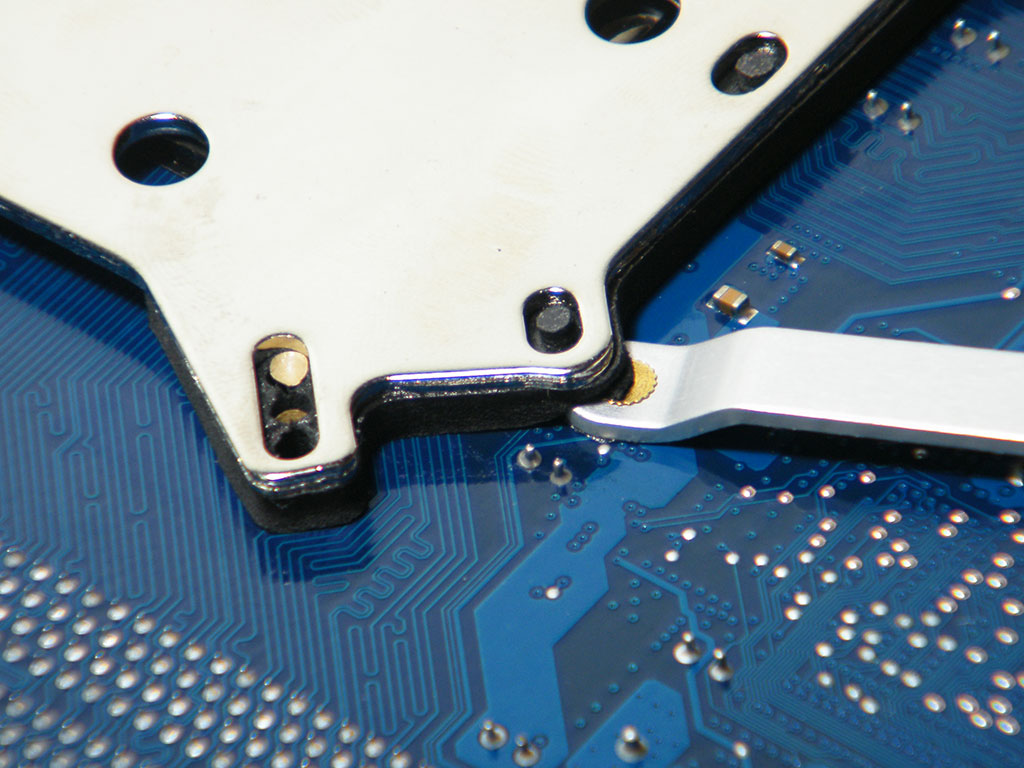
Oh noes. A part of Aegir's backplate is obstructing the retention bar of the motherboard's northbridge heatsink. The foam seems quite flexible, and after the installation, we found this anomaly not to affect the balance of the back-plate.

After making sure you can see through the cooler mounting holes of the board, insert the four long screws. These are the very pillars of Aegir's installation, at this step they slide through with minimal insertion force. After inserting all four screws, flip the board while making sure the screws don't slide off. Slip in the washers over all four screws.
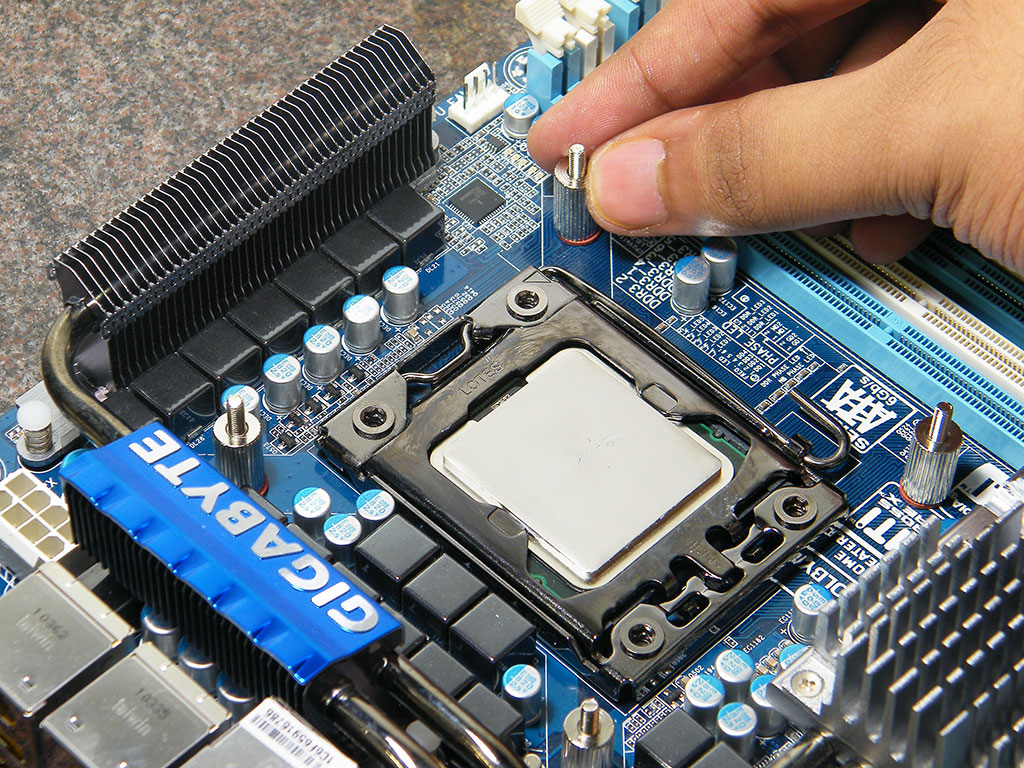
Fasten the screws with the threaded nuts. This step is tool-free, there's enough grip to tighten them well.

Now place the retention beams over the screws. At this step, you get to pick the orientation of the heatsink, whether you want it to blow hot air out from the rear of the case, or from the top vents of the case (if available). Place one beam over the SW (south-west of the socket) and NW (north-west) screws, and the other over SE (south-east) and NE (north-east) screws for rear-exhaust orientation, or one beam over SW and SE and the other over NW and NE screws for top-exhaust orientation.
Fasten the beams with hex nuts, use the spanner provided.

Apply the thermal interface material (TIM) provided. Xigmatek's TIM is viscous and silvery in appearance, indicating it's a silver-based thick compound, similar to Arctic Silver 5. Apply a small dab in the center, let the heatsink's pressure spread it out. Another method is to use an old plastic card to create a thin layer of TIM. Be sure to keep the layer very thin, too thick a layer, and it will actually pose as an insulator. Aegir's base is smooth and leveled enough for you to use the first method.
Props to Xigmatek for supplying the TIM in a syringe and not a sachet. Sachets tend to get messy, and after a use, tend to make the leftover TIM dry up.
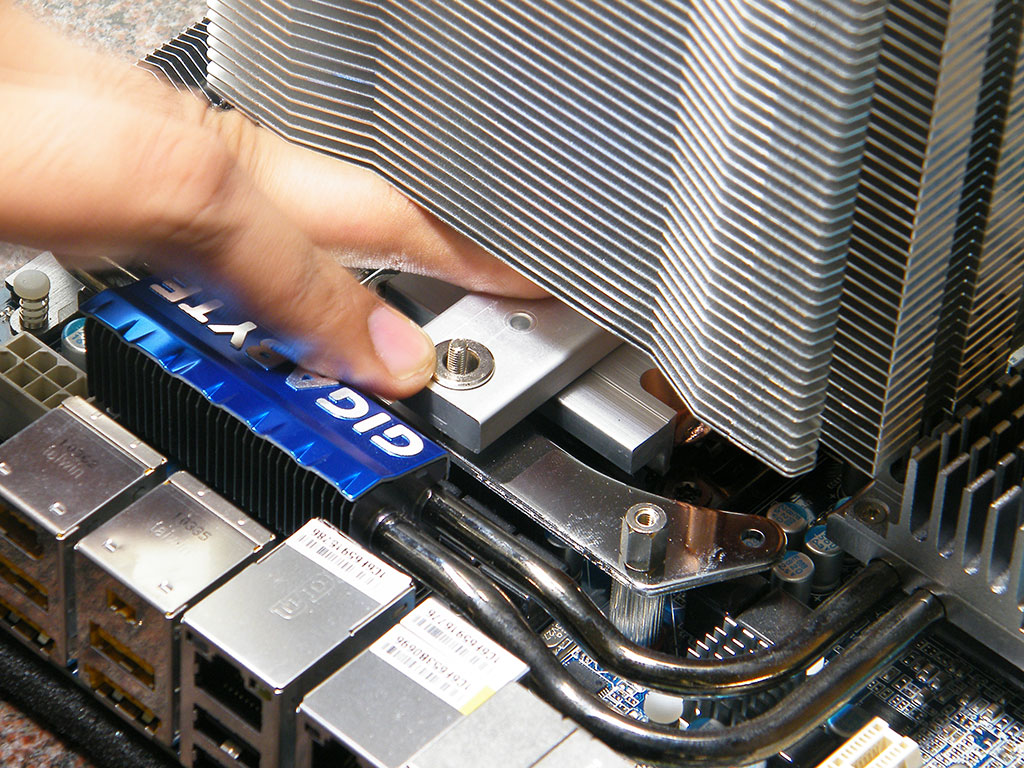
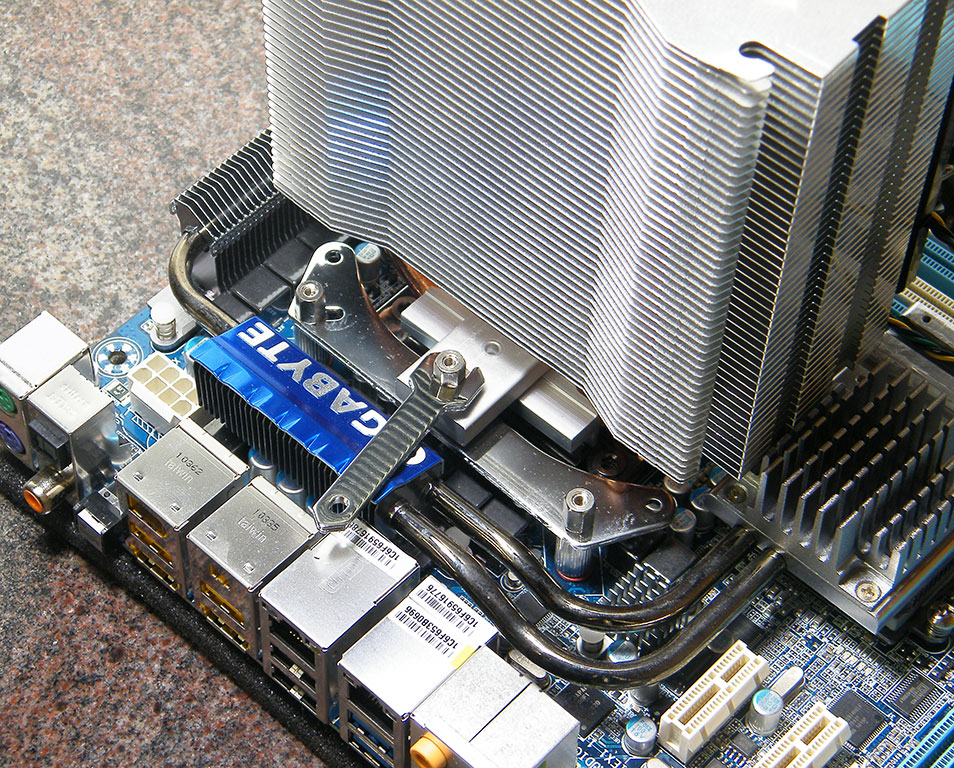
Slide the aluminum retention bar with its tiny protrusions facing downwards. Those protrusions should lock into the two side holes of the CPU base, and the holes of the bar should pass through the fixed bolts of the retention beams, telling you the bar is properly placed.
Now use the remaining two hex nuts and fasten the aluminum bar to the retention beams. I suggest you insert both nuts and turn them down loosely, and later tighten them one after another, or there's chance that the bar will slip out of the bolt on the other end.

First attach all four rubber bolts to the fan frame, then latch the drum ends of the bolts through the fan-retention grooves of the heatsink.
On a scale of 10, I'd rate the ease of installation at 7. Installing the Xigmatek Aegir requires that you have access to the back of the motherboard. If the motherboard tray of your case doesn't have a hole under the CPU socket area, you will have to dissemble your system and pull out the motherboard. A cumbersome task. Rubber bolts as fan retention can also be cumbersome to install or remove, compared to metal clips.
Jul 5th, 2025 23:40 CDT
change timezone
Latest GPU Drivers
New Forum Posts
- Last game you purchased? (863)
- 9800x3d temps (4)
- Help Watercooling my PC (8)
- Will you buy a RTX 5090? (627)
- RX 9000 series GPU Owners Club (1128)
- TPU's Rosetta Milestones and Daily Pie Thread (2375)
- What are you playing? (23897)
- Folding Pie and Milestones!! (9607)
- Do you game on a handheld console? (98)
- TPU's Nostalgic Hardware Club (20486)
Popular Reviews
- NVIDIA GeForce RTX 5050 8 GB Review
- Fractal Design Scape Review - Debut Done Right
- Crucial T710 2 TB Review - Record-Breaking Gen 5
- ASUS ROG Crosshair X870E Extreme Review
- Sapphire Radeon RX 9060 XT Pulse OC 16 GB Review - An Excellent Choice
- PowerColor ALPHYN AM10 Review
- Upcoming Hardware Launches 2025 (Updated May 2025)
- AMD Ryzen 7 9800X3D Review - The Best Gaming Processor
- Sapphire Radeon RX 9070 XT Nitro+ Review - Beating NVIDIA
- NVIDIA GeForce RTX 5060 8 GB Review
TPU on YouTube
Controversial News Posts
- Intel's Core Ultra 7 265K and 265KF CPUs Dip Below $250 (288)
- NVIDIA Grabs Market Share, AMD Loses Ground, and Intel Disappears in Latest dGPU Update (212)
- Some Intel Nova Lake CPUs Rumored to Challenge AMD's 3D V-Cache in Desktop Gaming (140)
- NVIDIA GeForce RTX 5080 SUPER Could Feature 24 GB Memory, Increased Power Limits (115)
- Microsoft Partners with AMD for Next-gen Xbox Hardware (105)
- NVIDIA Launches GeForce RTX 5050 for Desktops and Laptops, Starts at $249 (105)
- AMD Radeon RX 9070 XT Gains 9% Performance at 1440p with Latest Driver, Beats RTX 5070 Ti (102)
- Intel "Nova Lake‑S" Series: Seven SKUs, Up to 52 Cores and 150 W TDP (100)