 24
24
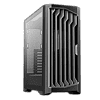
Antec Performance 1 FT Review
Thermal Stress Test »Review System
| System Parts for Case Reviews | |
|---|---|
| Processor: | Intel Core i5-12600K Provided by: Intel |
| Motherboards: | ATX: ASUS ROG Strix Z690-E Gaming WiFi mATX: ASUS TUF Gaming B660M-PLUS WiFi D4 ITX: ASUS ROG STRIX Z690-I Gaming WiFi Provided by: ASUS |
| Graphics Card: | Gigabyte Radeon RX 6600 Eagle Provided by: Gigabyte ZOTAC GAMING GeForce RTX 3060 Ti Twin Edge OC Provided by: Zotac |
| Memory: | 32 GB XPG LANCER RGB DDR5 6000 MHz 32 GB XPG CASTER DDR5 6400 MHz 32 GB XPG HUNTER DDR5 5200 MHz Provided by: ADATA |
| HDD: | Toshiba MG08ADA400E 7200 RPM SATA III Provided by: Toshiba |
| SSD: | ATX:XPG GAMMIX S70 BLADE 1 TB mATX: ADATA LEGEND 840 512 GB ITX: XPG SPECTRIX S20G 500 GB ADATA Ultimate SU800 512 GB ADATA Ultimate SU720 500 GB Provided by: ADATA |
| Power Supply: | ATX: Fractal Design ION+ 650W 80 Plus Gold SFX: Fractal Design ION SFX-L 650W 80 Plus Gold Provided by: Fractal Design |
| Cooling: | be quiet! Pure Loop 120/ Pure Loop 2 FX 240/280/360 Provided by: be quiet! |
Assembly
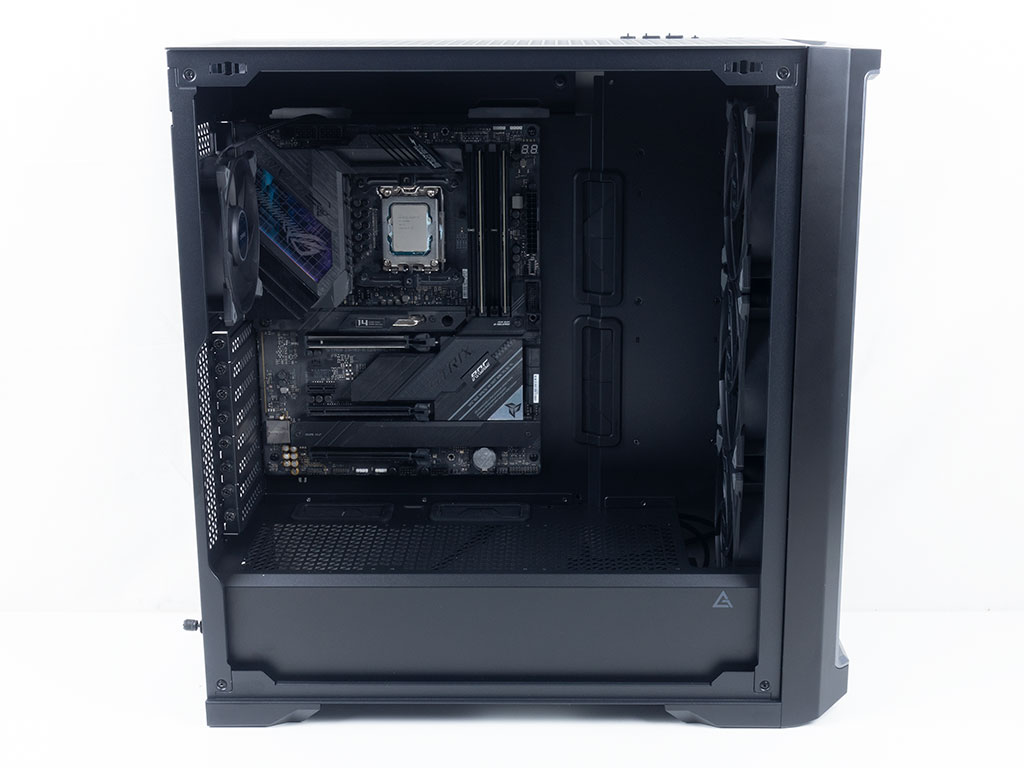


Installing the motherboard is straight forward, using spacers and screws. There is tons of room at the top and naturally towards the front. The Antec Performance 1 FT can take on wider boards of up to 285 mm in width. When installing the GPU, we ran into a small, but odd annoyance. While the large thumb screws are nice to handle, they are also blocking you from removing the cover above it, as such we had to unscrew three covers to remove the top two. Thanks to the bigger dimensions of the chassis, there is tons of room for even the biggest and longest GPUs alongside any air or liquid cooling setup you may have in mind. That makes sense, as Antec does mention that the chassis supports RTX 40 series GPUs, much like most modern ATX cases. That is just a specific way for their marketing to quantify the space, as such your brand new 7900 XTX or any other GPU will fit just fine as well.


Adding an SSD may be done by simply screwing it down to the insides of the case or using one of three metal trays. Once the SSD is installed to a tray, you may put the tray back into its place and secure it with the captive thumb screw.


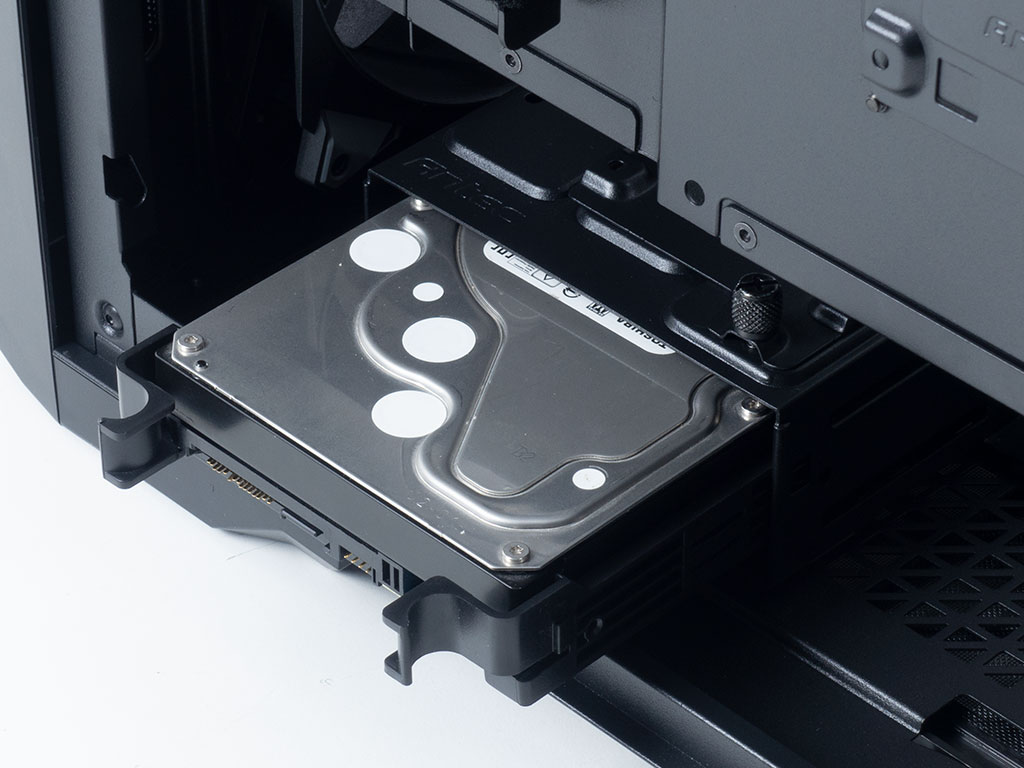
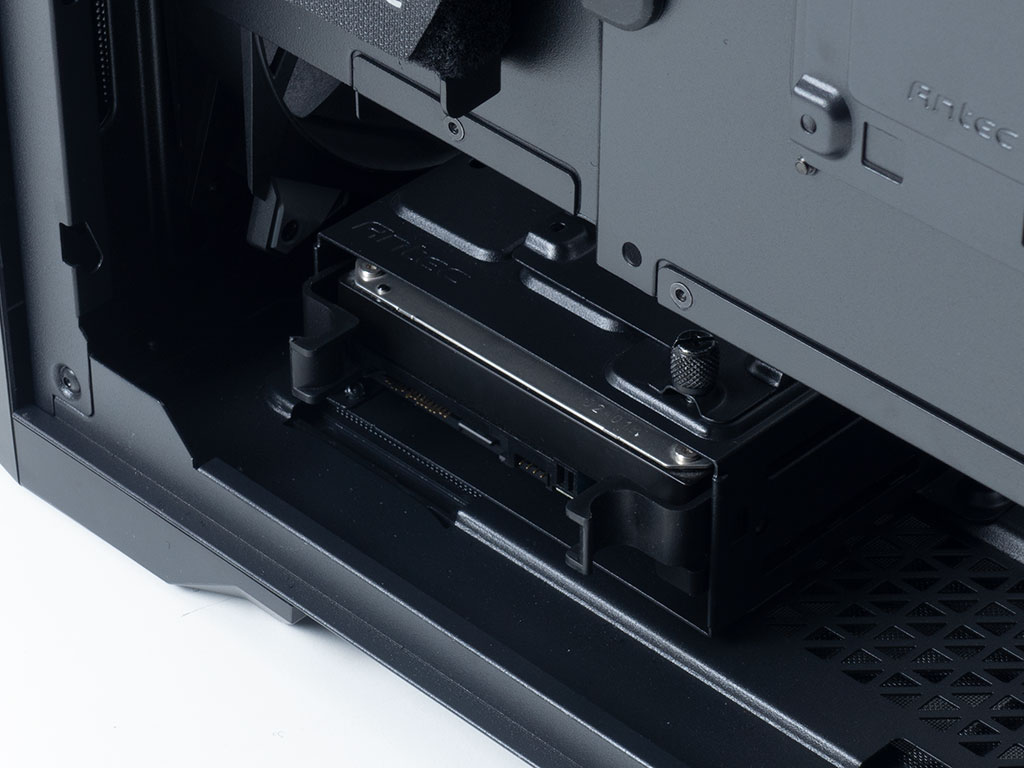
To install a 3.5" drive, the easiest method is using the plastic tray. It is tool-less, you just snap the drive into place and then slide it back into the case until that tray pops into the cage securely.


As there is no room to slide the PSU in from the interior of the chassis, you first have to screw it unto the mounting frame and push it in through the rear of the Performance 1 FT. Two thumb screws hold the frame in place nicely, and as you can see, there is lots of room for cables or longer units.


The chassis features a removable top panel, which is held in place by two screws. This allows you to prep your AIO easily outside of the confines of your chassis while also greatly simplifying the cable management aspect.


Once the whole setup is dropped back into place you may have to adjust the alignment of your 360 mm AIO a bit, but everything has plenty of room. As such, one of the selling points of the case being able to hold two 360 mm radiators at the same time also holds true.
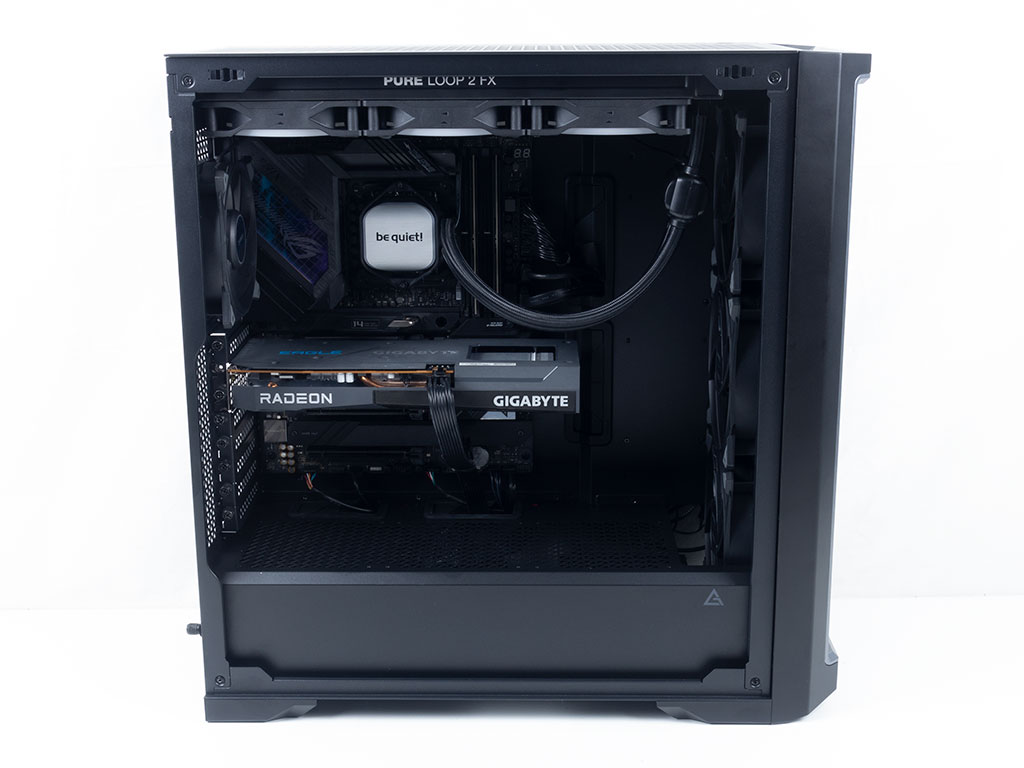


With everything installed, the interior of the chassis looks really nice and clean, thanks to the well designed and placed grommets. Turning the system around, we tried to employ as few zip ties as possible and the result is great. Antec does provide Velcro strips for the hooks below the SSDs, but we used zip ties there for visibility. Considering that the entire IO cable assembly and fans did not require any zip ties and are still contained within the trench, it is a great result. With the internal covers back in place most of that is hidden, with the SSD fully exposed. There is still that cable management aspect at the back edge of the chassis which is visible though.
Finished Looks


Turning the Antec Performance 1 FT on, there isn't really anything to let you know that the system is on from the chassis itself. Looking at the front, you won't notice the fans either. Here everything is where you would expect to see it, as Antec sticks to that modern layout we have come to expect from enclosures.
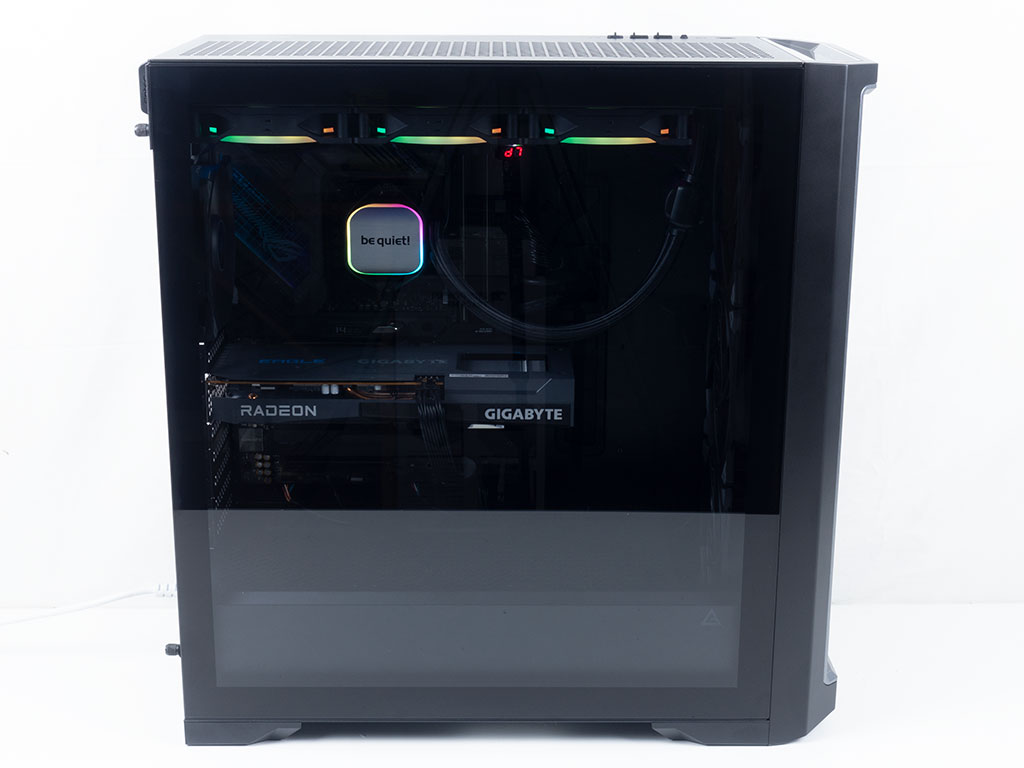

Thanks to the clear glass panels, you can view your hardware within nicely, even without much external illumination. The SSD in the back is also clearly visible and thanks to the black framing some of that initially remaining cable mess is hidden as well.
Antec iUtility and Display


One of the key selling points of the Antec Performance 1 FT is the embedded display which requires the Antec iUnity app to be installed and running. The software sports a futuristic UI that goes into some details about the hardware you have, which in our case was the thermal testing rig. At the time of review the version we had was 1.0.8.0 and while it was functional, an inconsistency seems to be the fact that - at least with our platform - the CPU temperature was always a whole number in Celsius, with no decimals, while the GPU did offer temperature details to one decimal point.
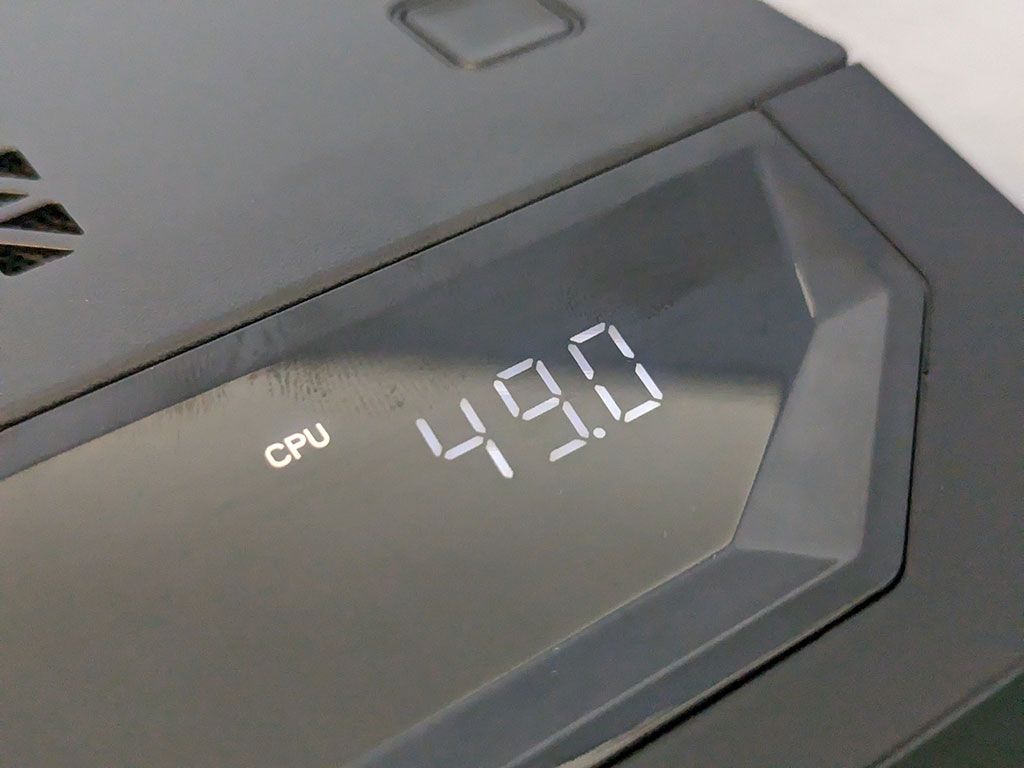

The display is embedded at the top of the chassis, which seems to suggest you should be placing your system on the floor so that you may glance at the temperature while gaming for example. With the press of a button, it toggles to the GPU and if you were to press it again, turn off completely. While a simple implementation, the display build and engineering behind the black plastic strip looks great and due to using software to pull the temperature readings, you won't have to deal with thermal diodes. As you can see by the partial fingerprint, that plastic cover's glossy finish would likely scratch rather easy though, so appropriate care is recommended.
Jul 5th, 2025 13:41 CDT
change timezone
Latest GPU Drivers
New Forum Posts
- Are there others on TPU with a dual system (two pc´s in one case)? (10)
- FINAL FANTASY XIV: Dawntrail Official Benchmark (196)
- Help Watercooling my PC (1)
- TPU's Nostalgic Hardware Club (20484)
- How do you view TPU & the internet in general? (With poll) (71)
- GravityMark v1.89 GPU Benchmark (310)
- Optane performance on AMD vs Intel (57)
- EVGA XC GTX 1660 Ti 8GB ROM (8)
- TPU's Rosetta Milestones and Daily Pie Thread (2374)
- Have you got pie today? (16775)
Popular Reviews
- NVIDIA GeForce RTX 5050 8 GB Review
- Fractal Design Scape Review - Debut Done Right
- Crucial T710 2 TB Review - Record-Breaking Gen 5
- ASUS ROG Crosshair X870E Extreme Review
- PowerColor ALPHYN AM10 Review
- Sapphire Radeon RX 9060 XT Pulse OC 16 GB Review - An Excellent Choice
- Upcoming Hardware Launches 2025 (Updated May 2025)
- AMD Ryzen 7 9800X3D Review - The Best Gaming Processor
- Sapphire Radeon RX 9070 XT Nitro+ Review - Beating NVIDIA
- NVIDIA GeForce RTX 5060 8 GB Review
TPU on YouTube
Controversial News Posts
- Intel's Core Ultra 7 265K and 265KF CPUs Dip Below $250 (288)
- NVIDIA Grabs Market Share, AMD Loses Ground, and Intel Disappears in Latest dGPU Update (212)
- Some Intel Nova Lake CPUs Rumored to Challenge AMD's 3D V-Cache in Desktop Gaming (140)
- NVIDIA GeForce RTX 5080 SUPER Could Feature 24 GB Memory, Increased Power Limits (115)
- NVIDIA Launches GeForce RTX 5050 for Desktops and Laptops, Starts at $249 (105)
- Microsoft Partners with AMD for Next-gen Xbox Hardware (105)
- AMD Radeon RX 9070 XT Gains 9% Performance at 1440p with Latest Driver, Beats RTX 5070 Ti (102)
- Intel "Nova Lake‑S" Series: Seven SKUs, Up to 52 Cores and 150 W TDP (100)