 75
75
Aqua Computer LEAKSHIELD Review - No More Leaks
Value & Conclusion »Performance Testing
LEAKSHIELD Operating Mechanism

The diagram above is of an example system running the working mechanism of the Aqua Computer LEAKSHIELD in a manner I can certainly understand. We saw over the previous pages how there are physical solenoid valves and a vacuum pump with a membrane, and how the data fed to it via aquasuite helps generate calibration charts for coolant levels in the reservoir as a function of the measured pressure at the membrane surface. As long as everything is working fine and the membrane is not damaged, meaning NO nano-dispersion coolants are to be used, with even colored coolants highly discouraged, there is a sensitive 24-bit pressure sensor for the actual pressure readout. Two on/off solenoid valves lead to either an air purge to get rid of the built up vacuum or the vacuum pump that moves air in the reservoir out of the loop. In-line sensors add more data if available, especially flow sensors to relate how well the coolant pump is running and pressure sensors to add more data points for the operating pressure at different points of the loop.
In fact, the more pressure sensors you have for a complex loop, the better it will be. This is all the more critical for the LEAKSHIELD UNIVERSAL, where the piece of tubing and air in it is the "reservoir." A steady state of the loop can thus be seen as two competing mechanisms of the coolant pump, typically a centrifugal pump pushing coolant out, driving positive pressure, and the vacuum pump in the LEAKSHIELD driving negative pressure. This is why there is a hard limit on the pump head, with a typical D5 pump being fine, but results sub-optimal with higher-head pumps or multiple pumps in series. I do not believe there is support for multiple LEAKSHIELDs, especially since it is hard to measure where each will be and how they would operate. This is also why any pressure equalization fittings or lids have to be removed—either could add a variable you do not want in the system. Going a step beyond, if there is too much of a vacuum with a water-based coolant, the water may potentially start to boil at operating conditions. Cavitation is likely too, which will hurt the coolant pump impeller and bearing especially. FYI, water boils at ~88 °C at 450 mbar of vacuum, which is well beyond the typical coolant temperatures in a DIY watercooling loop.
LEAKSHIELD Operating Modes

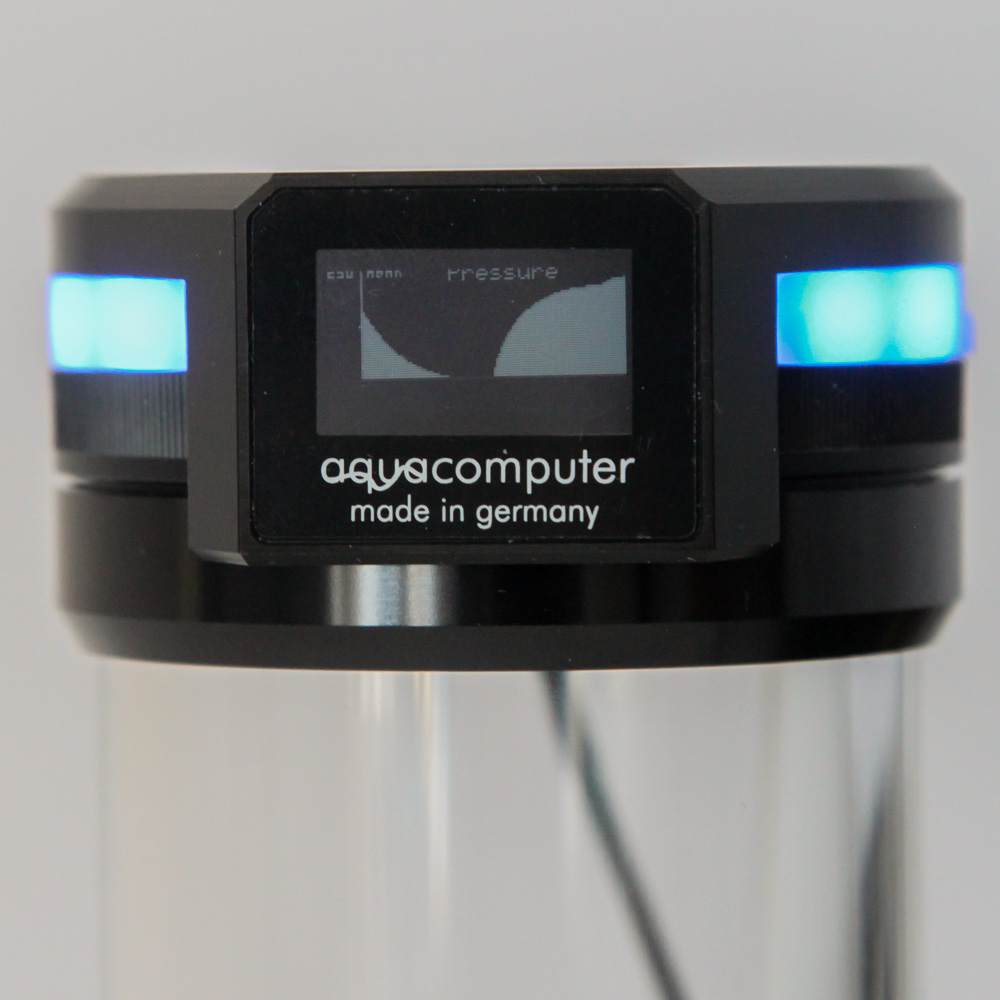
I said earlier that there are three operating modes, but in practice, a few other actions might as well be modes. Let's go with Aqua Computer's definition of modes here, with the recommended one being Shield. I will go as far as to say that you should have the LEAKSHIELD in this mode all the time for a regular operation. The LEDs light up blue to indicate the mode for a quick visual confirmation, and this is where the balance of the two pumps and achieved negative pressure comes into play. So how does it work?

Does this answer your question? Now, I did not take a drill to my system, so when Aqua Computer did it instead, I obviously had to use it to make the point. In fact, look out for an even wilder launch video from the company soon. What I did do was more subtle, but also nowhere near my photo setup for obvious reasons. The main sources of leaks in a DIY watercooling loop are incorrectly installed fittings and bad seals inside rotary fittings. The former was easy enough to test, wherein I loosened a fitting on a CPU block in a simple LEAKSHIELD-reservoir-pump-CPU block-reservoir loop to where things should have certainly leaked. What happened instead was that the coolant continued to move past the leak source, and air started getting sucked into the loop, meaning the vacuum the LEAKSHIELD applied was higher than the operating positive pressure from the D5 pump in the loop.
We can actually take this further in terms of more practical applications. Think of a GPU block with the large internal O-ring and lots of screws applying pressure on it to keep the GPU block top and cold plate sandwich intact. The screws are what keep the block from leaking and can result in micro-fractures in an acrylic top if applied incorrectly. Chances of the same happening with user-installed fittings are even higher. With LEAKSHIELD, you can have a constant state of negative pressure throughout to where you do not need to tighten screws or fittings much, and I in fact even removed some of the screws holding the aforementioned CPU block together with no issue at all! Combined with common sense, this can result in peace of mind that is worth the price of admission alone.
There are some caveats to keep in mind, though, including the choice of components in the loop. We saw before how non-Aqua Computer products without aquasuite support will make life harder, but the tubing used matters way more, with the company recommending rigid tubing to be on the safe side for handling the vacuum. The company also recommends an OD/ID ratio of at least 1.5 for PVC tubing and 1.2 for PUR tubing. Then there is the choice of pump(s), which we have covered in great detail above. The takeaway here is that it is best to use the LEAKSHIELD with Aqua Computer products guaranteed to work with it to also make the setup a breeze, which is no doubt what the company would rather everyone do anyway. Oh, before I forget, spend the extra on the external USB adapter cable and plug the LEAKSHIELD to a USB port that provides power even when the system is off. You do not want the vacuum pump to lose power if there is a small leak and you shut down the system (or it does)! Most motherboards allow a UEFI toggle for power to the internal USB headers as well, so check if your system offers that option (should be on by default) in which case of course this ends up being a non-issue.
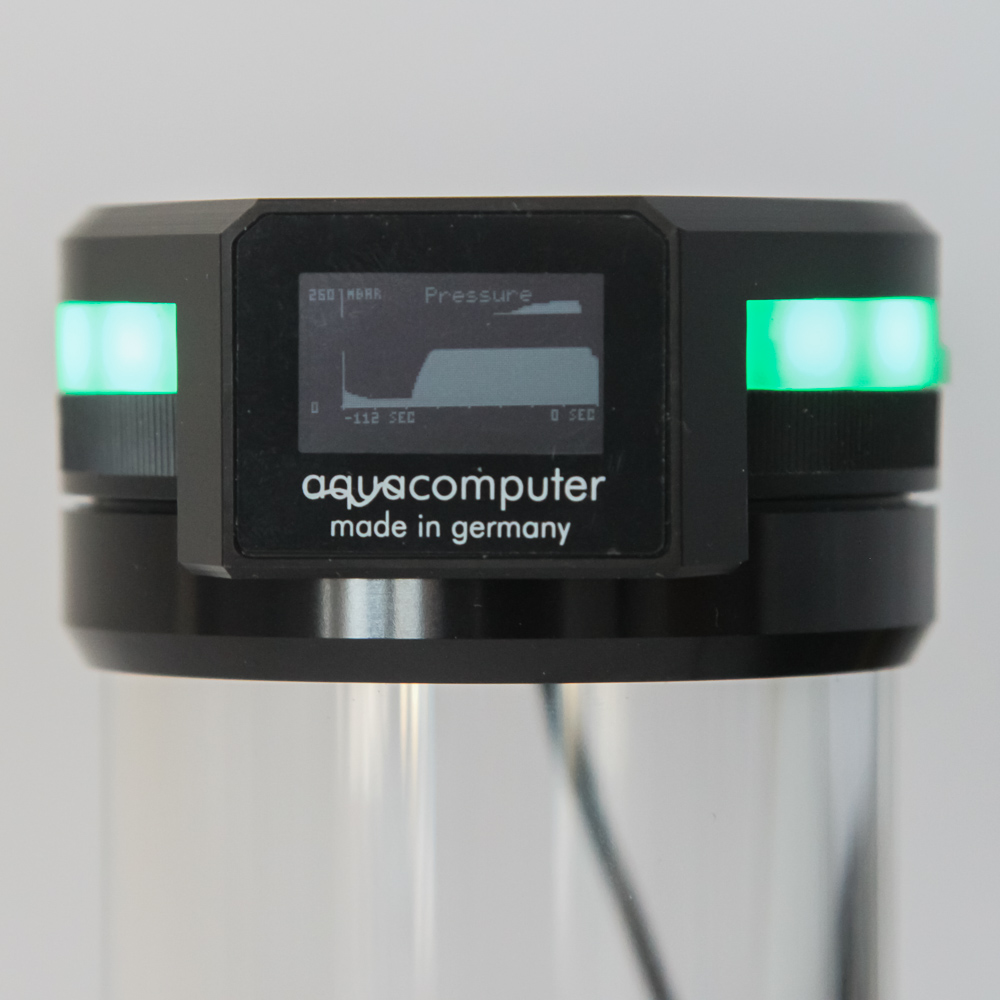
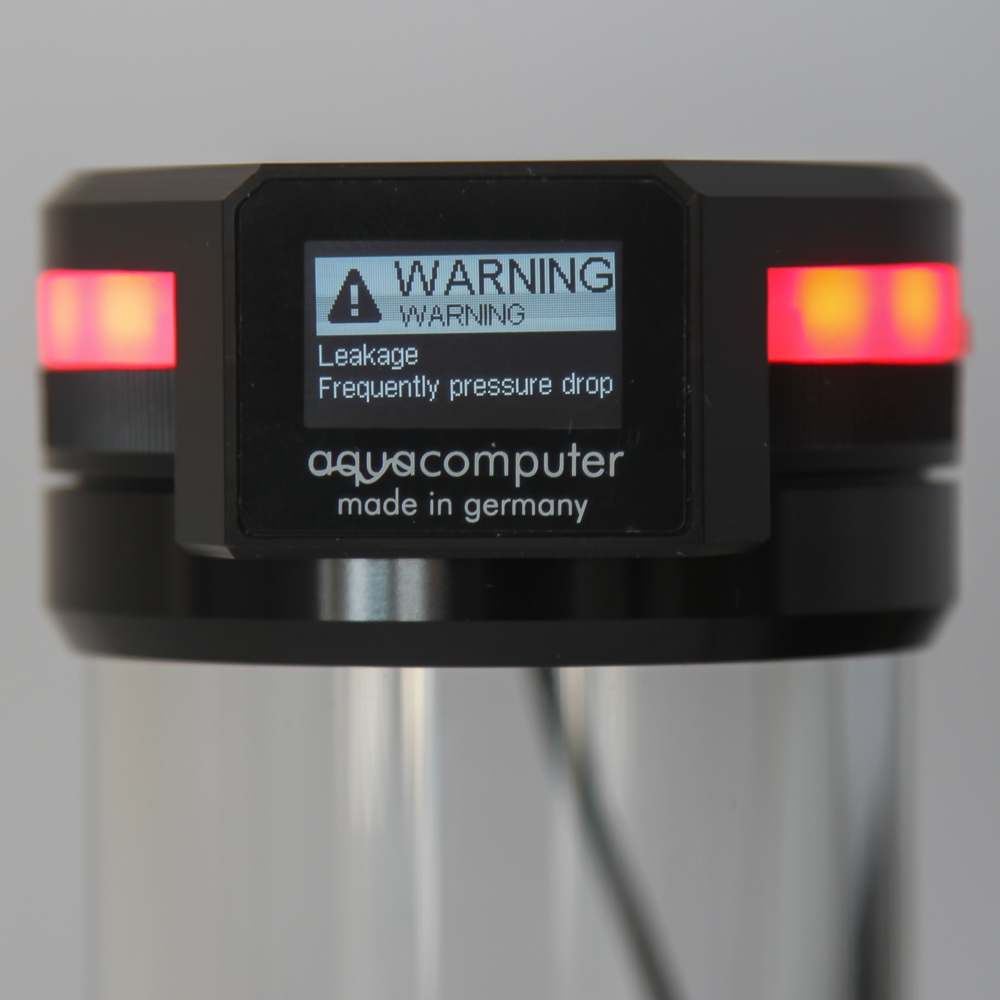
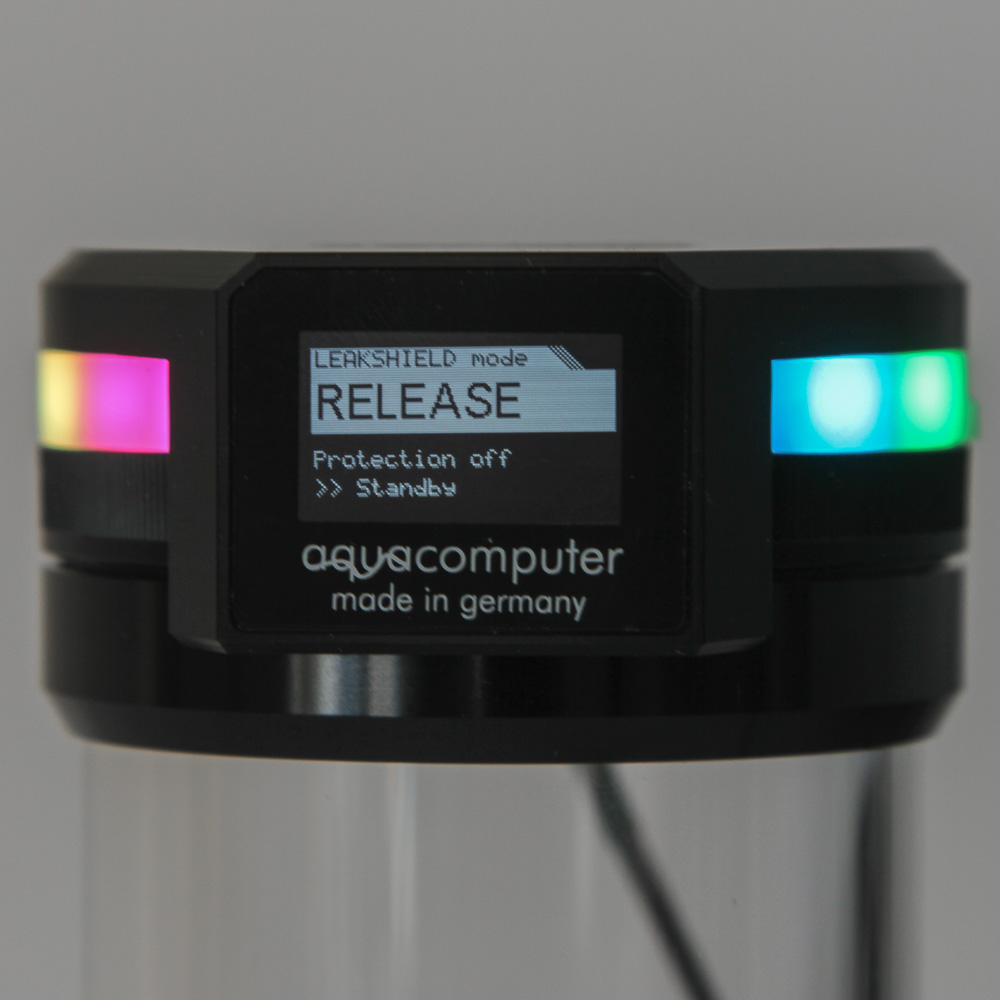
Monitor mode is more passive, acting purely as a means to detect any leaks as a result of pressure changes. The LEDs turn green, and you can use this mode with a much lower negative pressure of ~50 mbar vacuum. The third mode is Release, which, as we saw before, simply vents air into the system after having turned off the vacuum pump and associated valve. If an alarm triggers, and believe me it will, the default setting has the LEDs light up an aggressive red along with a buzzer alarm from the unit coupled with any system-specific shutdown actions if programmed with the optional accessory cable. Unfortunately, this is where things dropped from the high I was operating in during testing. I was working with older firmware most of the time, but using the LEAKSHIELD without having configured the alarm settings was a mistake I would not want you to make. The pressure gauge is far too sensitive otherwise, with even the valves in the LEAKSHIELD alone not 100% leak-proof to the sensitivity of the thing. Once configured to ignore "minor" leaks, you need to really put some effort into identifying the associated pressure and flow-rate changes, after which things do get much better.
In a properly working Shield mode, triggering an alarm is highly unlikely. So you can go ahead and use the RGBpx function to set up a light show on the LEAKSHIELD as well, an example of which I have included above. The LEDs can also be configured to work with other hardware or software sensor inputs, and it works well enough. The OLED is otherwise the primary source of information, which is nearly useless inside a case that is a couple of feet away. Standalone operation paired with the OLED was quite handy for my testing, however, and the lowest brightness was plenty enough in typical daylight conditions to further avoid burn-in.

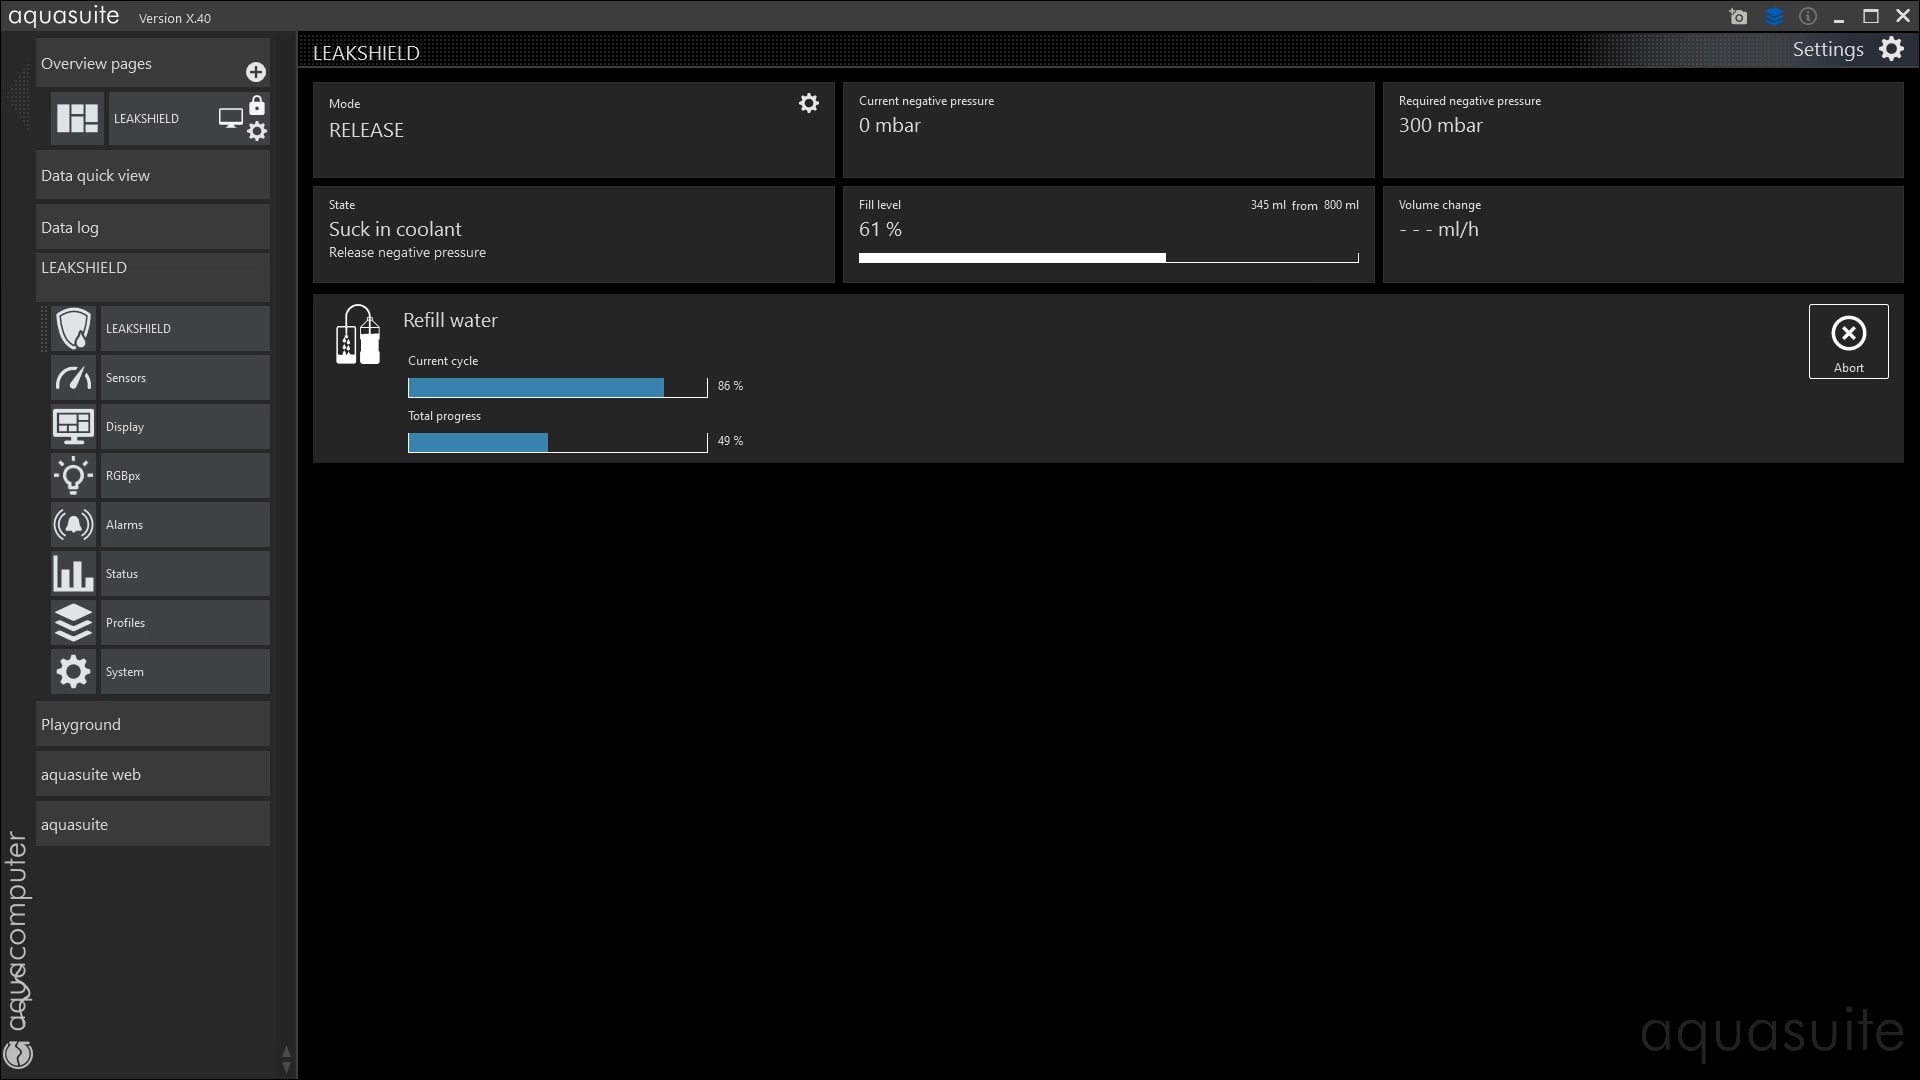
There are four actions on the main page that are really the icing on this cake, in case you were not convinced yet. The measure coolant level action is self-explanatory, and part of the setup and Shield mode as well. It acts as a quick way to gauge whether it is time to top up the coolant, but note that there is no active leak protection during this process. If you do decide to add coolant, the Refill System action helps by lowering the vacuum to ~250–300 mbar, allowing coolant to basically be sucked into the system from a fill port. There is a Pause button to also stop the vacuum pump temporarily while still maintaining the operating pressure, and exiting the action has everything revert to the previous mode of operation.
The other two actions are arguably more exciting and relevant, with there being a Test action which does a better job of leak testing your freshly put together loop than any consumer-grade solution today. Keep in mind that the pressure gauge is really sensitive, so it is a good thing that you can choose an operating negative pressure anywhere between 80 to 450 mbar, following which you can track the pressure change over time, if any. The Deaerate system action is also fantastic once you are set up with no practical leaks, and the LEAKSHIELD periodically builds up and releases vacuum into the loop to get stubborn air pockets out and away without having to play with coolant pump speed or rotating the case at different angles. This is also very useful for when any air gets sucked into the loop if you have a leak, thus minimizing downtime and maintenance.
Oh, before you ask—Aqua Computer is not recommending this for use in critical-application systems. This is purely to prevent any issues from coming back to the company in the form of complaints, but we both know that someone somewhere will definitely use this for a prosumer application. For those interested, there is an official FAQs list that goes over this and more.
Before we move on, I had asked Aqua Computer what led to the development of the LEAKSHIELD and got a reply directly from the company's CEO. Here is the quote below:
"The idea for LEAKSHIELD was born several years ago. At that time, we developed and built cooling systems for data centers used by banks. The requirements for operational reliability are extremely high and the customer expressed the wish to have all pipes double-walled.
The effort involved is enormous and I thought hard about what possible options we had. I came up with the idea of operating the entire cooling system under negative pressure and, in the event of a drop in negative pressure, activating industrial vacuum cleaners to evacuate the cooling system in an emergency. I had previously seen vacuum cleaners sucking up water columns up to 3m high at a trade fair and was still inspired by this.
This way, even a broken pipe - and the pipes had diameters of 25mm - would not have been a problem. In the end, the project was realized without such a system, but the idea remained in my head. Such a system would have been too big and too expensive for our usual water cooling systems. So I started to develop concepts of such a system which are small and easy to integrate. Today's LEAKSHIELD is the result of a series of ideas and a puzzle that in the end became the finished product.
I would like to say one more word: the only thing I am sorry about today is the fact that we have been producing water cooling systems for 20 years and this product is only coming to the market today. It would have helped so many customers and brought water cooling into completely different areas. Nevertheless, I am of course pleased that we are taking an important step into the future today!
Stephan Wille, CEO"
Jul 12th, 2025 07:28 CDT
change timezone
Latest GPU Drivers
New Forum Posts
- Will you buy a RTX 5090? (647)
- 5070 Ti Variants, do they even matter? (20)
- 'NVIDIA App' not usable offline? (10)
- Chrome has removed uBlock Origin 1.64.0 (remove google search suggestions) (8)
- Gpu overheating after bios flash (2)
- What's your latest tech purchase? (24242)
- 3D Printer Club (540)
- Can you guess Which game it is? (230)
- Is RX 9070 VRAM temperature regular value or hotspot? (401)
- AAF Optimus Modded Driver For Windows 10 & Windows 11 - Only for Realtek HDAUDIO Chips (575)
Popular Reviews
- Fractal Design Epoch RGB TG Review
- Lexar NM1090 Pro 4 TB Review
- Corsair FRAME 5000D RS Review
- NVIDIA GeForce RTX 5050 8 GB Review
- NZXT N9 X870E Review
- Our Visit to the Hunter Super Computer
- Sapphire Radeon RX 9060 XT Pulse OC 16 GB Review - An Excellent Choice
- AMD Ryzen 7 9800X3D Review - The Best Gaming Processor
- Upcoming Hardware Launches 2025 (Updated May 2025)
- Chieftec Iceberg 360 Review
TPU on YouTube
Controversial News Posts
- Intel's Core Ultra 7 265K and 265KF CPUs Dip Below $250 (288)
- Some Intel Nova Lake CPUs Rumored to Challenge AMD's 3D V-Cache in Desktop Gaming (140)
- AMD Radeon RX 9070 XT Gains 9% Performance at 1440p with Latest Driver, Beats RTX 5070 Ti (131)
- NVIDIA Launches GeForce RTX 5050 for Desktops and Laptops, Starts at $249 (119)
- NVIDIA GeForce RTX 5080 SUPER Could Feature 24 GB Memory, Increased Power Limits (115)
- Microsoft Partners with AMD for Next-gen Xbox Hardware (105)
- Intel "Nova Lake‑S" Series: Seven SKUs, Up to 52 Cores and 150 W TDP (100)
- NVIDIA DLSS Transformer Cuts VRAM Usage by 20% (97)