 41
41
ASUS TUF Gaming GT502 Review
Thermal Stress Test »Review System
| System Parts for Case Reviews | |
|---|---|
| Processor: | Intel Core i5-12600K Provided by: Intel |
| Motherboards: | ATX: ASUS ROG Strix Z690-E Gaming WiFi mATX: ASUS TUF Gaming B660M-PLUS WiFi D4 ITX: ASUS ROG STRIX Z690-I Gaming WiFi Provided by: ASUS |
| Graphics Card: | Gigabyte Radeon RX 6600 Eagle Provided by: Gigabyte ZOTAC GAMING GeForce RTX 3060 Ti Twin Edge OC Provided by: Zotac |
| Memory: | 32 GB XPG LANCER RGB DDR5 6000 MHz 32 GB XPG CASTER DDR5 6400 MHz 32 GB XPG HUNTER DDR5 5200 MHz Provided by: ADATA |
| HDD: | Toshiba MG08ADA400E 7200 RPM SATA III Provided by: Toshiba |
| SSD: | ATX:XPG GAMMIX S70 BLADE 1 TB mATX: ADATA LEGEND 840 512 GB ITX: XPG SPECTRIX S20G 500 GB ADATA Ultimate SU800 512 GB ADATA Ultimate SU720 500 GB Provided by: ADATA |
| Power Supply: | ATX: Fractal Design ION+ 650W 80 Plus Gold SFX: Fractal Design ION SFX-L 650W 80 Plus Gold Provided by: Fractal Design |
| Cooling: | be quiet! Pure Loop 120/ Pure Loop 2 FX 240/280/360 Provided by: be quiet! |
Assembly

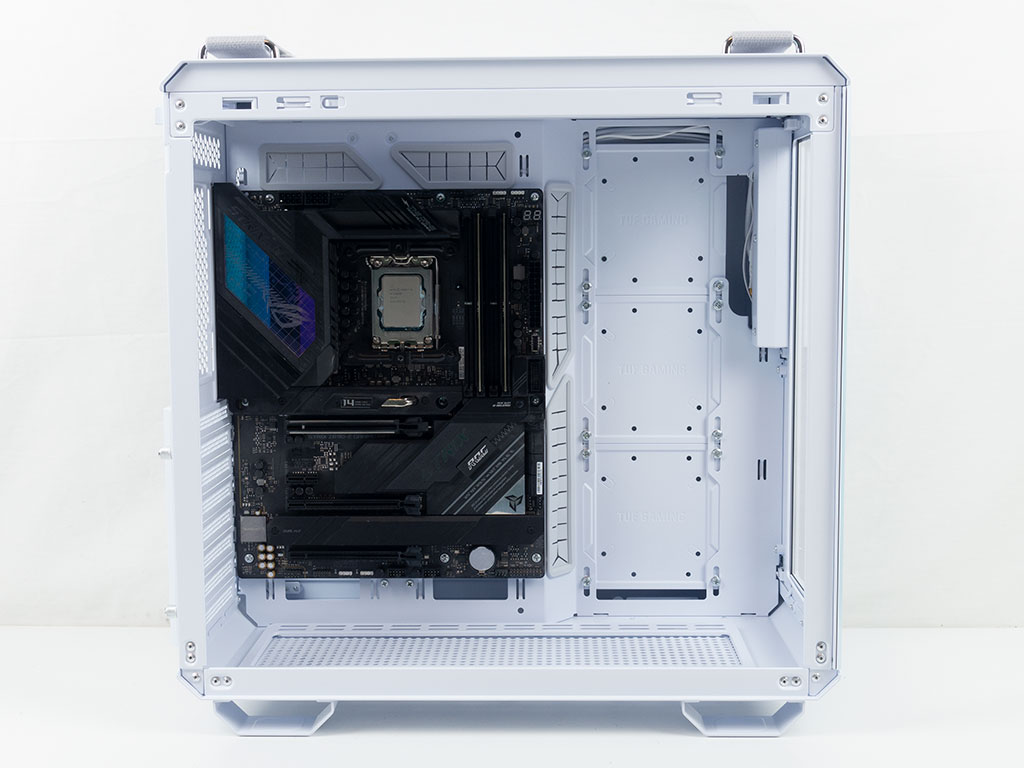
Installing the motherboard requires using the supplied screws and pre-installed spacers. One of the screws towards the back was a bit hard to get to, but that was mostly specific to the ASUS motherboard, as the plastic contraption on it did not allow for the proper angle for a classic tool to fit. Once in place, there is lots of room above the board and plenty below as well.


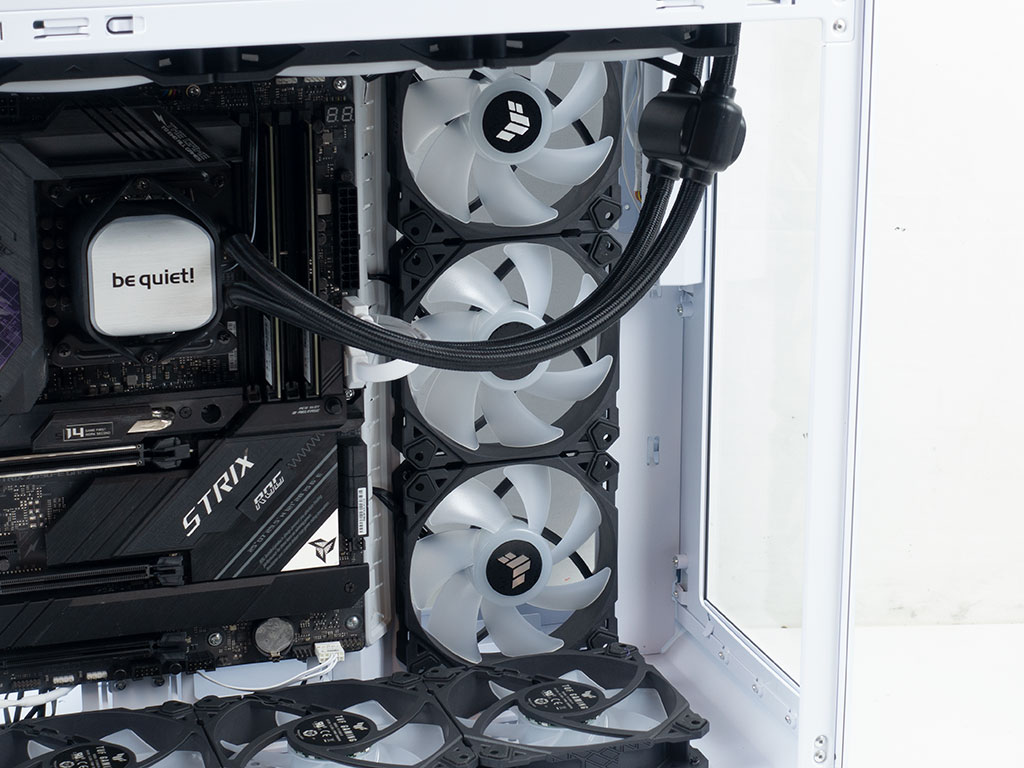
The initial idea was to install the 360 mm AIO on the side with the two sets of triple TUF Gaming TF120 fans on the top and bottom for symmetry. To do so, we removed the rear compartment bracket and hard drive cage and then detached the three plates from the desired AIO mounting location. The unit fits perfectly within the confines of the main compartment and GPUs will be able to clear it as well. However, with this setup, 120 mm fans won't work on the floor of the GT502 unfortunately. If ASUS had quite literally tweaked the position of the floor mounting frame just a few mm, this would have not been an issue. That said, you could install the radiator in the rear compartment and its fans inside the main compartment to solve that issue, but that would also mean that you will loose access to the 3.5" drive cage. Alternatively, you could hide your AIO by using the bracket in the rear compartment instead. We did not want to do this, as the ASUS TUF Gaming GT502 deserves all the RGB it can get.


So, in the end, we put the unit in the ceiling, where it fit perfectly, with plenty of room to spare, even allowing us to route and connect wiring at the top of the motherboard with ease. And, should you need to adjust things there, you could just pull off the whole mounting frame with the AIO attached, just for temporary access.


This setup allows for fans to be mounted on the floor as well as the side of the case without interfering with anything. To install the units on the flooring, you have to remove two screws and pull out the frame first. With them installed and cable routed, you can still see some cable mess due to the lack of grommets at the bottom holes. While this certainly may be quite picky, the TUF Gaming GT502 is so close to perfect, it hurts to see it fall short.
The fans on the side also fit perfectly with plenty of room for cable management. Yes, they are deliberately installed to push air out the front of the chassis in combination with the floor units pulling air up. This build is for aesthetics first and foremost, but you may - rightfully so - argue that the side fans should be intake instead. It just doesn't look as good, that's all.


The ASUS TUF Gaming GT502 case can hold up to four 2.5" or 3.5" drives, as both the plates as well as the single cage have mounting holes for both. As such we opted to install the 3.5" drive inside the cage and the 2.5" unit on a plate at the end of the build. The drive itself fit just fine inside the cage and we used the screws provided, which where also mentioned in the manual explicitly. However, these are too tall and will block the lip that hooks the cage from falling into place - something ASUS clearly needs to fix by providing flat screws and updating the manual. The workaround was to remove the two screws from that side of the cage, which still provides enough security to keep it in place nicely.

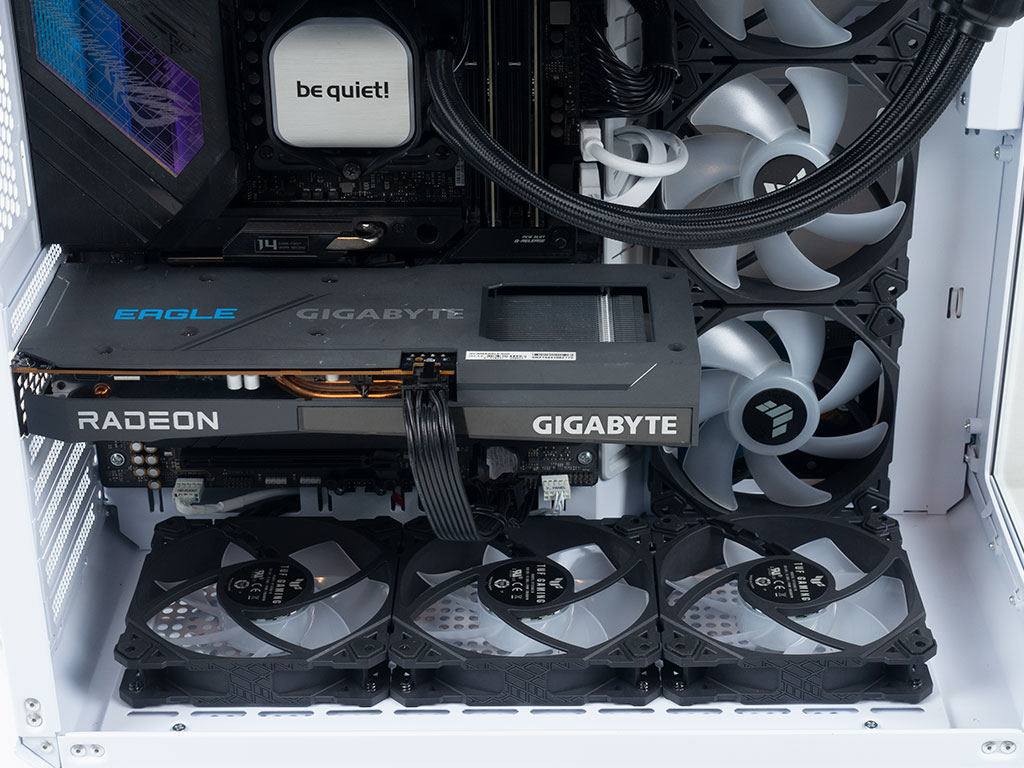
Adding a GPU to the system is easily done by first opening the little hinged cover and then installing the GPU into its slot. As you can see, it clears the side fans with ease, meaning you have all the room needed, regardless of how big your unit is. However, with this build, using the magnetic GPU support bracket is not possible, as it needs to latch on to the floor of the case where we now have the fans getting in the way.
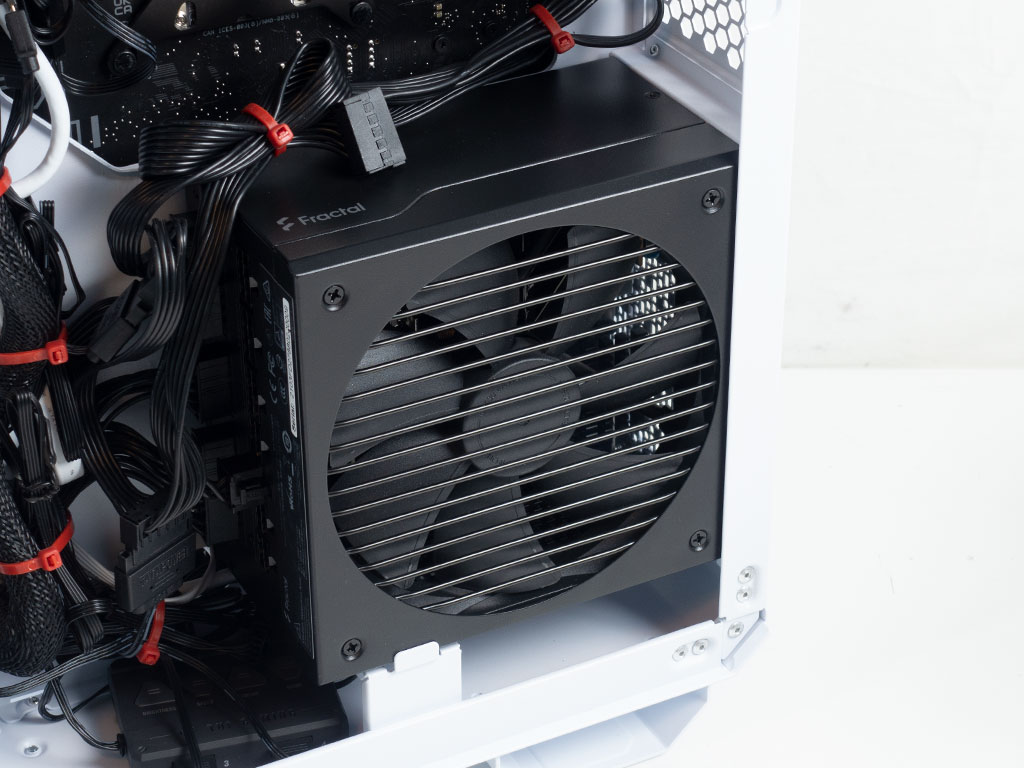
The power supply also fits easily and is secured with classic screws. There is plenty of additional space, should your choice be longer than the one we used. Naturally, you will want the fan facing out, so that it may pull in fresh air from the exterior through the side panel vent.


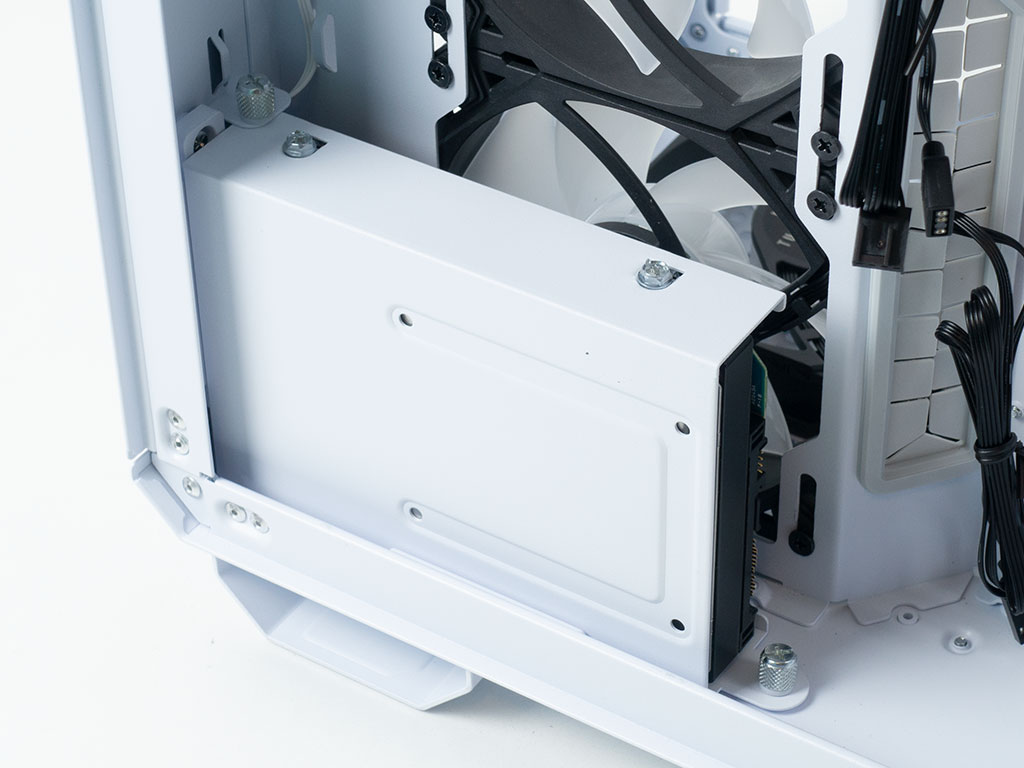
As all the internal placement opportunities for the hard drive placement are taken by fans, you are left with the rear compartment mounting frame. The plates feel sturdy and are designed to provide a bit of extra space around the SATA connectors. Once filled, you may simply screw them down. As we only installed one, we did so with the connectors facing sideways and the TUF Gaming branding in the right position. However, should you put multiple next to each other, you may want to rotate them 90° so that the drive's connectors face downward and are easier to reach.


With everything installed, the interior of the case makes a very clean impression. Impressively clean despite there being a total of nine ARGB fans built in that utilize two 3-way PWM splitter cables, one 5-way ARGB splitter and two daisy chained ARGB controllers, all of which is hidden from view with lots of room left. The side fans also remain unobstructed, but the singular HDD cage naturally does hamper airflow a bit for the bottom fan.
Finished Looks
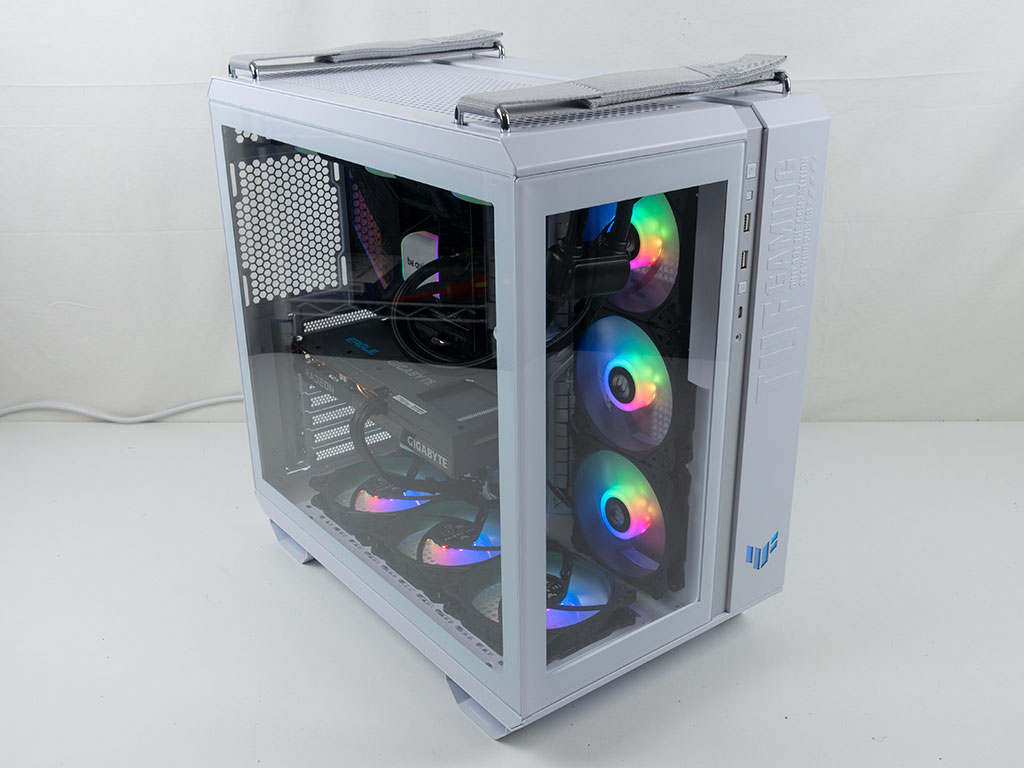

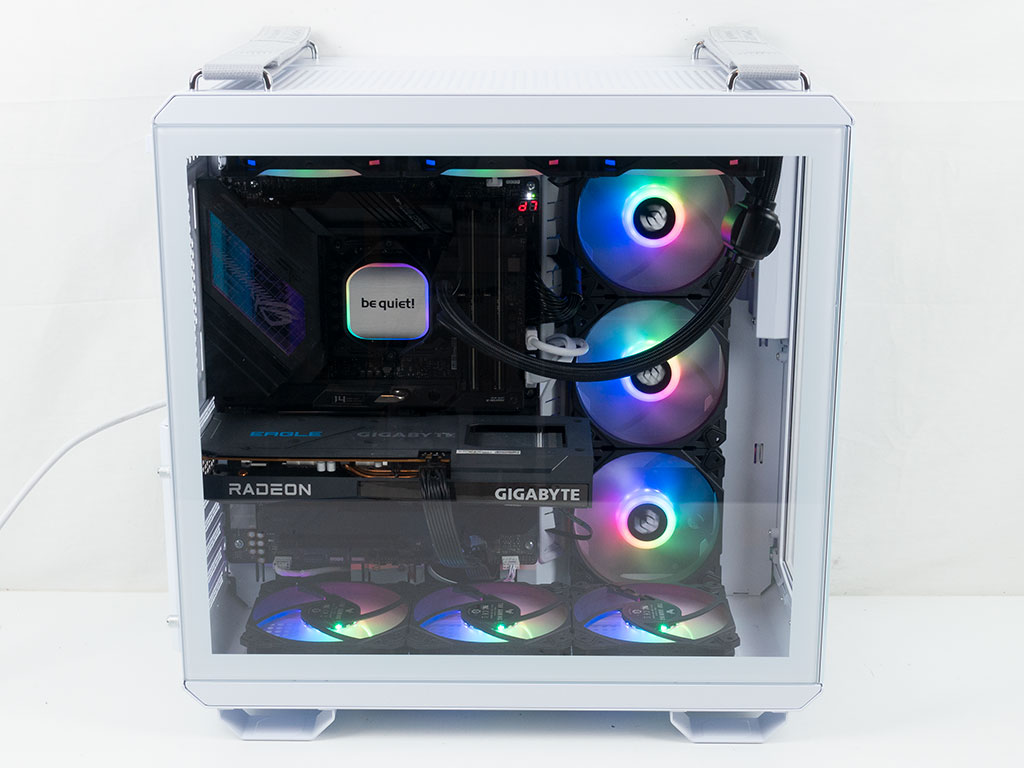
With the system turned on, all that labor connecting all the wiring results in a nifty looking build. As the ASUS TUF Gaming GT502 does not ship with any fans or a controller, you should really plan for adding your own cooling. ASUS could have at the very least included a color matched, non-ARGB fan in the rear of the case out of the box, just for added value, but the target audience for this chassis will likely go all out and pick their favorite units anyways. The TUF logo on the bottom lights up really nicely too with a bit of a silver tint that looks great, making for an excellent looking power on indicator LED.
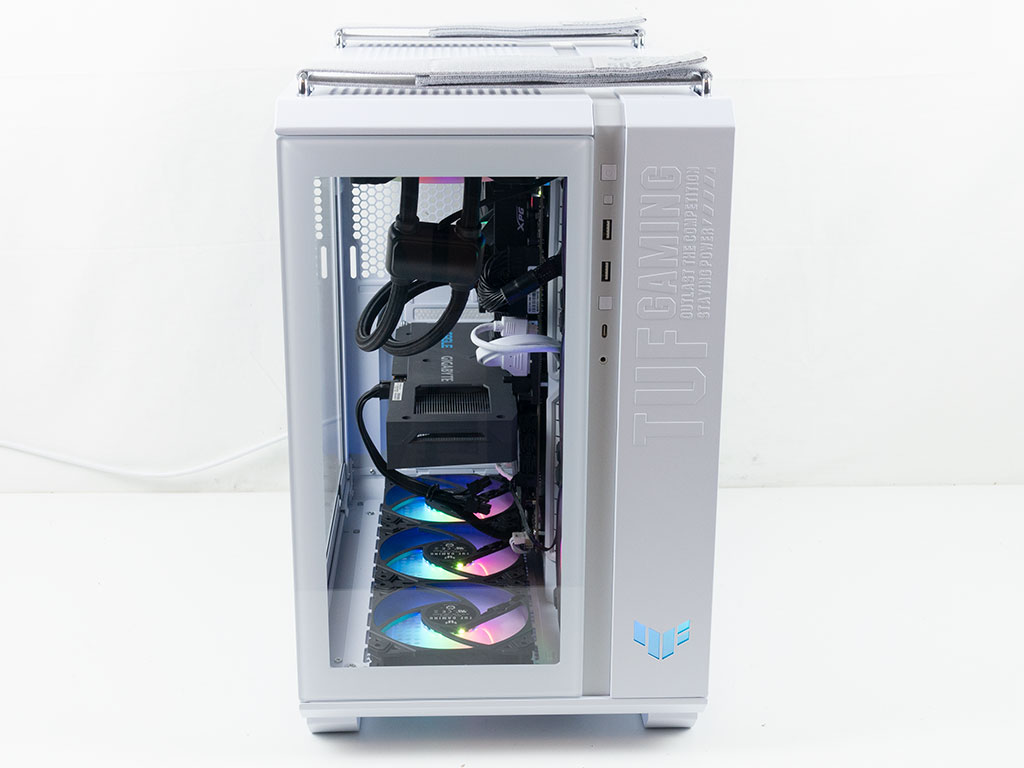

Looking at the front, you can clearly see the three fans on the floor and white case cabling. As the glass is completely clear, all the components and AIO tubing is also perfectly visible. In the rear, you can see the glow of the various components as well - including from the side fans in the rear compartment venting.

Viewed from the side, the ASUS TUF Gaming GT502 looks gorgeous with all the parts within and while some may not be a fan of ARGB lighting, the chassis can really make it pop nicely nonetheless. Taking a quick look at the opposite side, you can clearly see the glow of the side fans shine through the air vent as well. As such, any AIO installed in the horizontal rear compartment bracket should be noticeable too.
Mar 30th, 2025 03:47 EDT
change timezone
Latest GPU Drivers
New Forum Posts
- Can you guess Which game it is? (19)
- Did Nvidia purposely gimp the performance of 50xx series cards with drivers (126)
- RTX 5090 very slow while rendering or video/photo editing. (8)
- What are you playing? (23313)
- Windows 10 Vs 11, Which one too choose? (124)
- 13500 or 14500 or 12700 or 12700k (0)
- GPU Crashing System From Hibernation (10)
- Upgrade from a AMD AM3+ to AM4 or AM5 chipset MB running W10? (61)
- PCI 4.0 16x slot reported as a PCI 5.0 8x with the AMD 9070 XT Reaper GPU (39)
- The TPU UK Clubhouse (26006)
Popular Reviews
- Sapphire Radeon RX 9070 XT Pulse Review
- ASRock Phantom Gaming B850 Riptide Wi-Fi Review - Amazing Price/Performance
- Samsung 9100 Pro 2 TB Review - The Best Gen 5 SSD
- Palit GeForce RTX 5070 GamingPro OC Review
- Assassin's Creed Shadows Performance Benchmark Review - 30 GPUs Compared
- Sapphire Radeon RX 9070 XT Nitro+ Review - Beating NVIDIA
- ASRock Radeon RX 9070 XT Taichi OC Review - Excellent Cooling
- Enermax REVOLUTION D.F. 12 850 W Review
- AMD Ryzen 7 9800X3D Review - The Best Gaming Processor
- AMD Ryzen 9 9950X3D Review - Great for Gaming and Productivity
Controversial News Posts
- AMD RDNA 4 and Radeon RX 9070 Series Unveiled: $549 & $599 (260)
- MSI Doesn't Plan Radeon RX 9000 Series GPUs, Skips AMD RDNA 4 Generation Entirely (142)
- Microsoft Introduces Copilot for Gaming (124)
- AMD Radeon RX 9070 XT Reportedly Outperforms RTX 5080 Through Undervolting (119)
- NVIDIA Reportedly Prepares GeForce RTX 5060 and RTX 5060 Ti Unveil Tomorrow (115)
- Over 200,000 Sold Radeon RX 9070 and RX 9070 XT GPUs? AMD Says No Number was Given (100)
- NVIDIA GeForce RTX 5050, RTX 5060, and RTX 5060 Ti Specifications Leak (96)
- Retailers Anticipate Increased Radeon RX 9070 Series Prices, After Initial Shipments of "MSRP" Models (90)