 5
5
Cherry MX Board 5.0 Review
Software & Performance »Disassembly
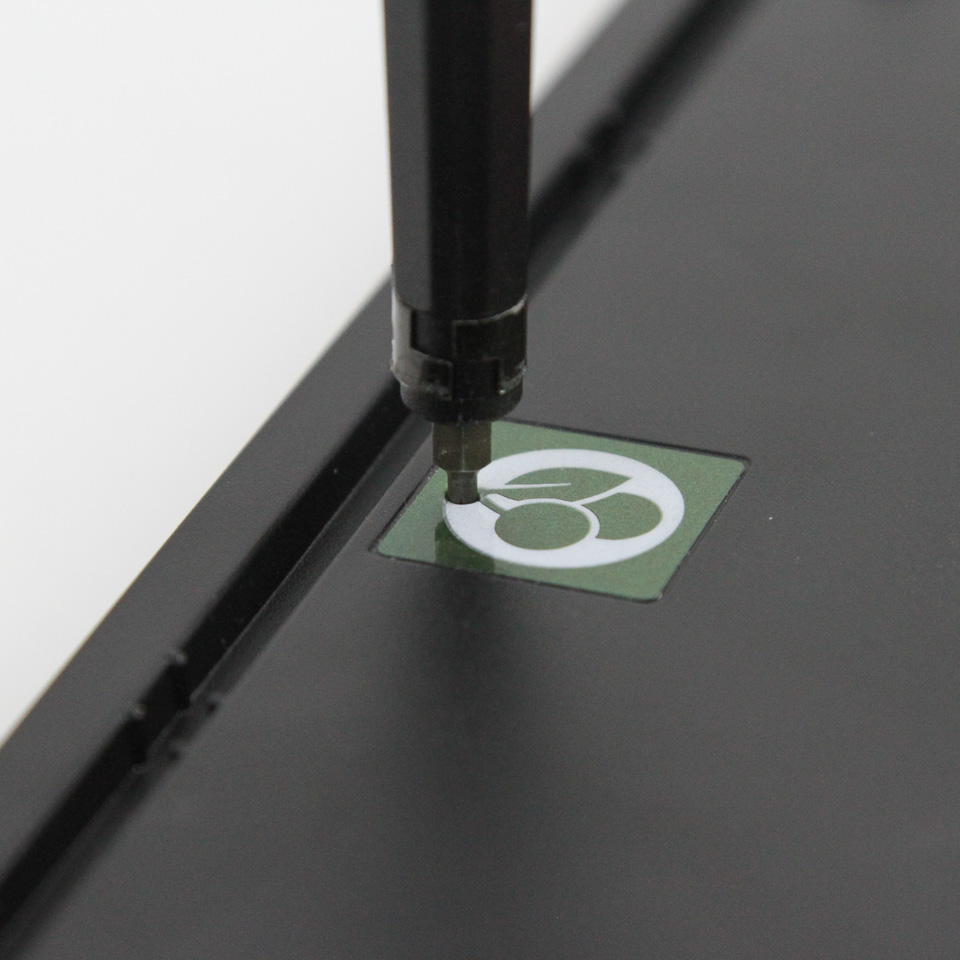

With eleven easily accessible screws on the back, including the two holding the keyboard feet in place, disassembly of the Cherry MX Board 5.0 is fairly easy. There is also a hidden 12th screw under the Cherry logo sticker, and a precision Phillips head screwdriver comes in handy here. Once all the screws are removed, the bottom ABS plastic case panel comes loose, and there is enough room to dislodge the internal USB connector from the PCB.
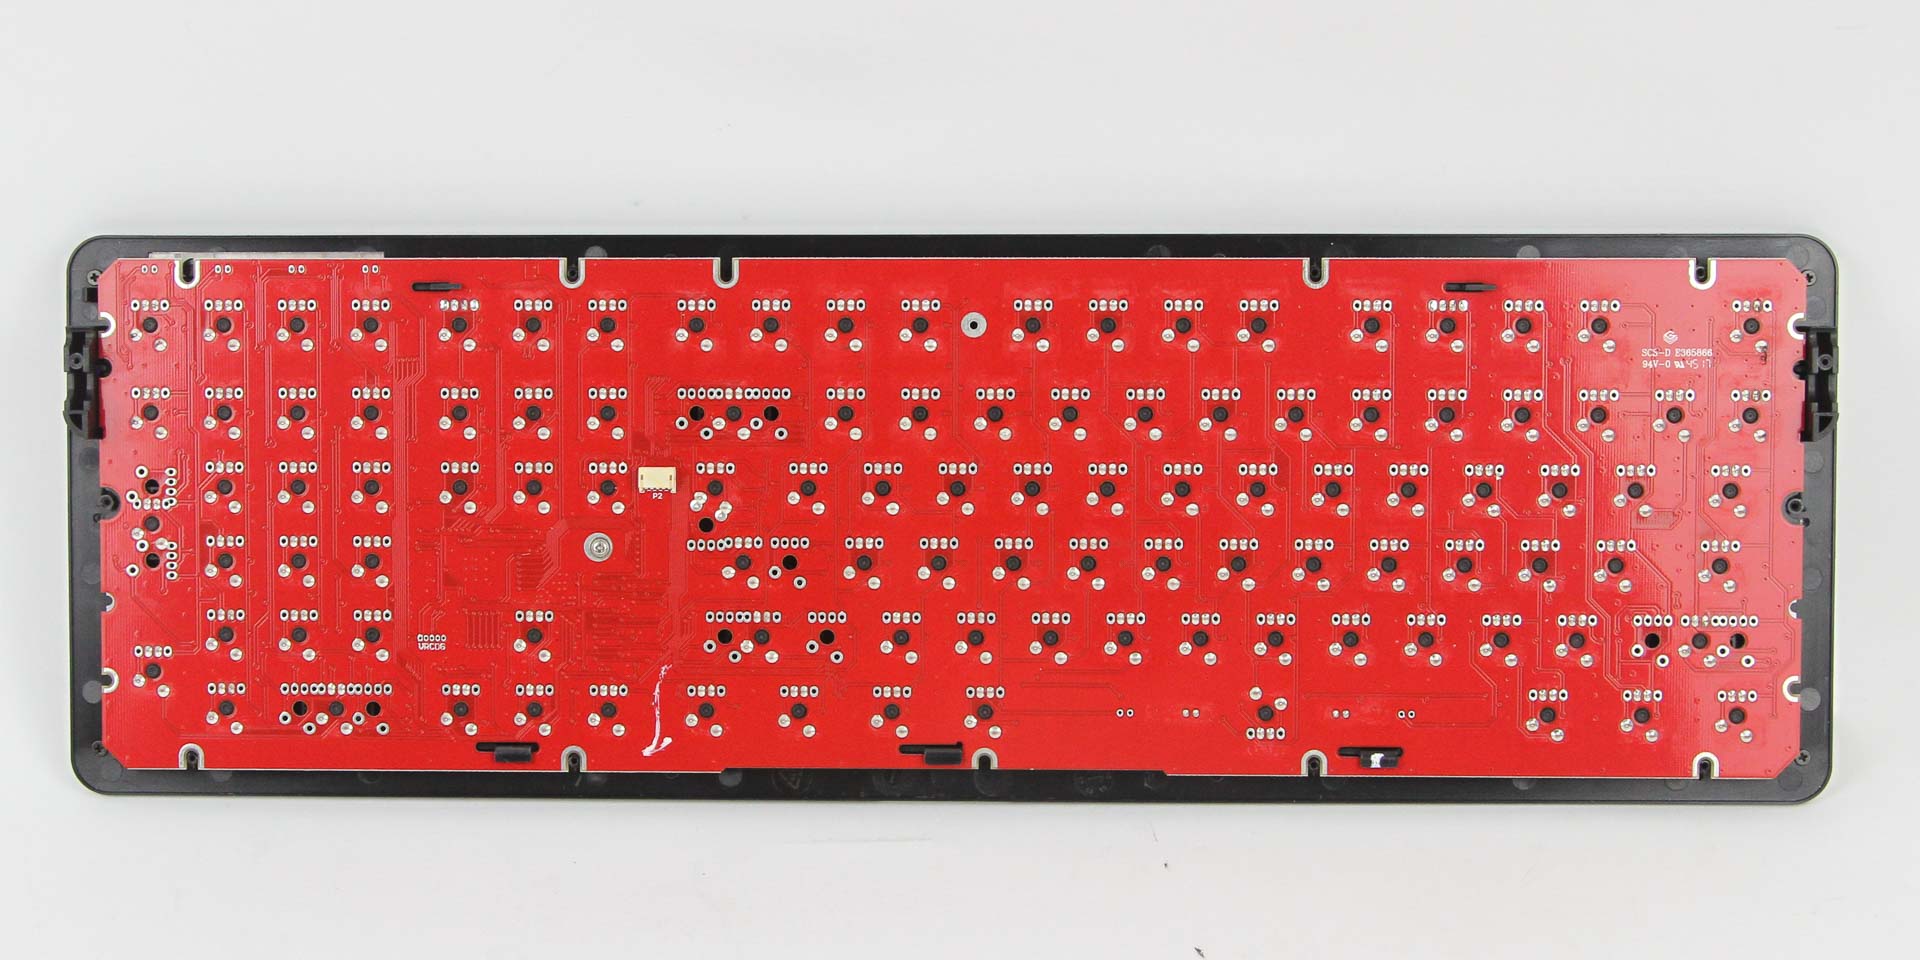

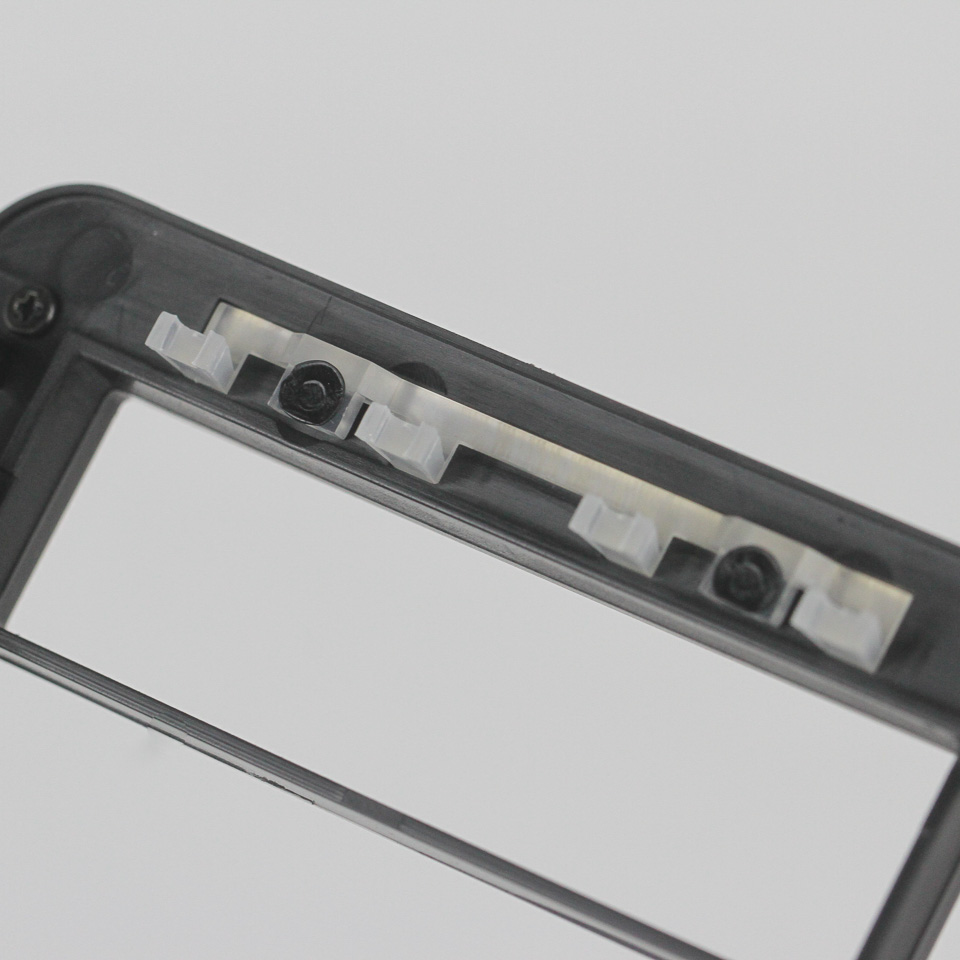
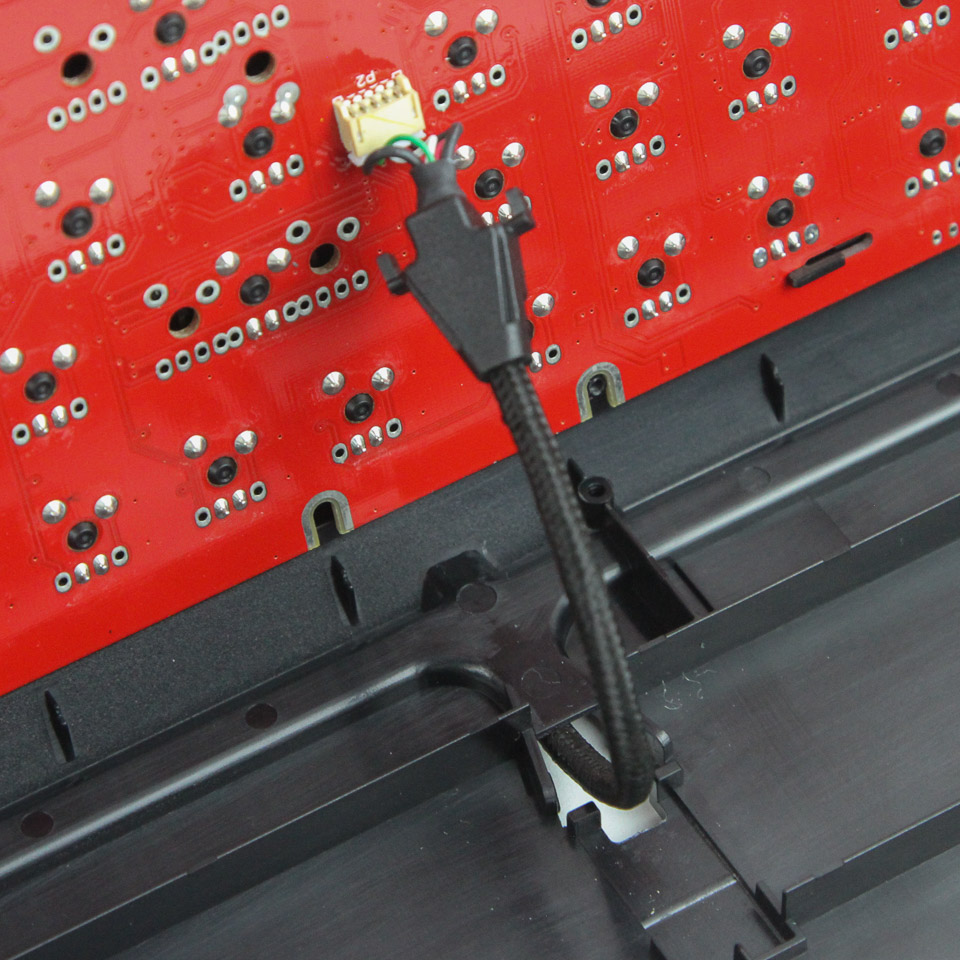
The MX Board 5.0 employs a two-piece plastic case design, which is why I was pleasantly surprised to see everything held in place via screws instead of the usual interlocking plastic tabs that make my life harder. A single screw holds the top panel piece with the PCB, and we see it has a silver finish and houses plastic diffusers for the indicator LEDs. The PCB is red and has the switches soldered through a steel plate and into the PCB for structural integrity.

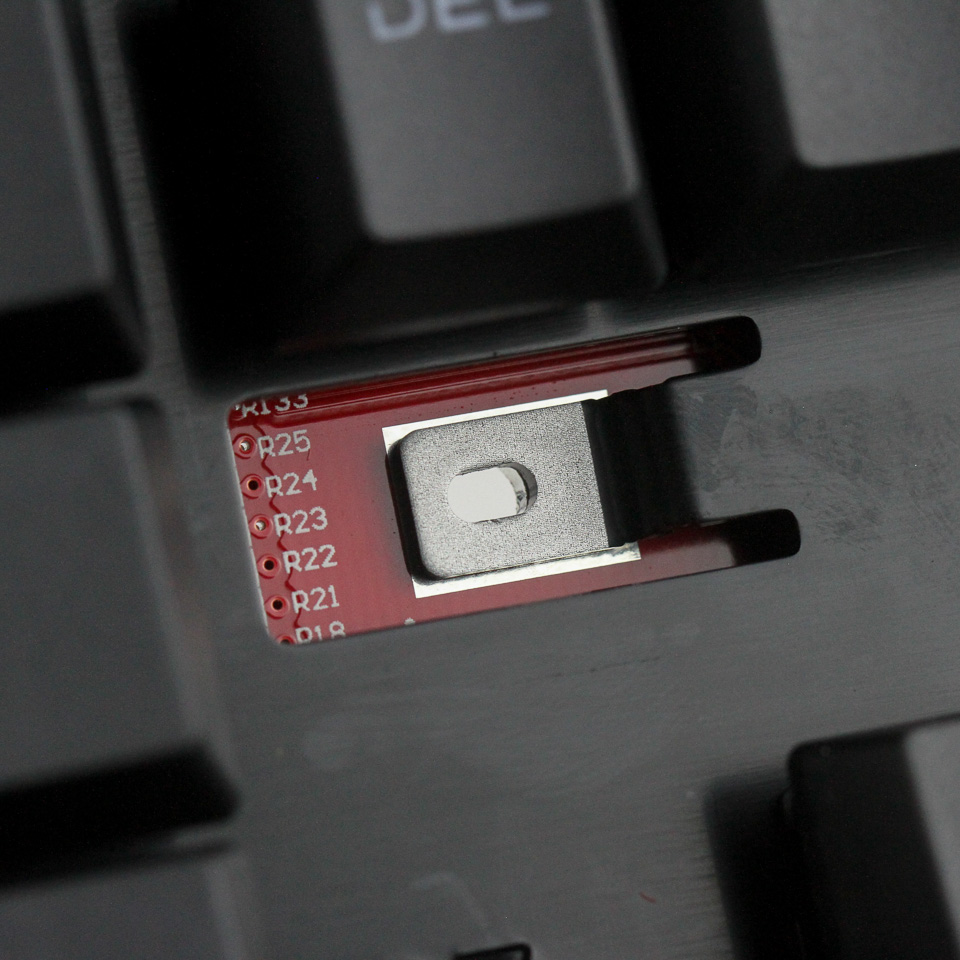
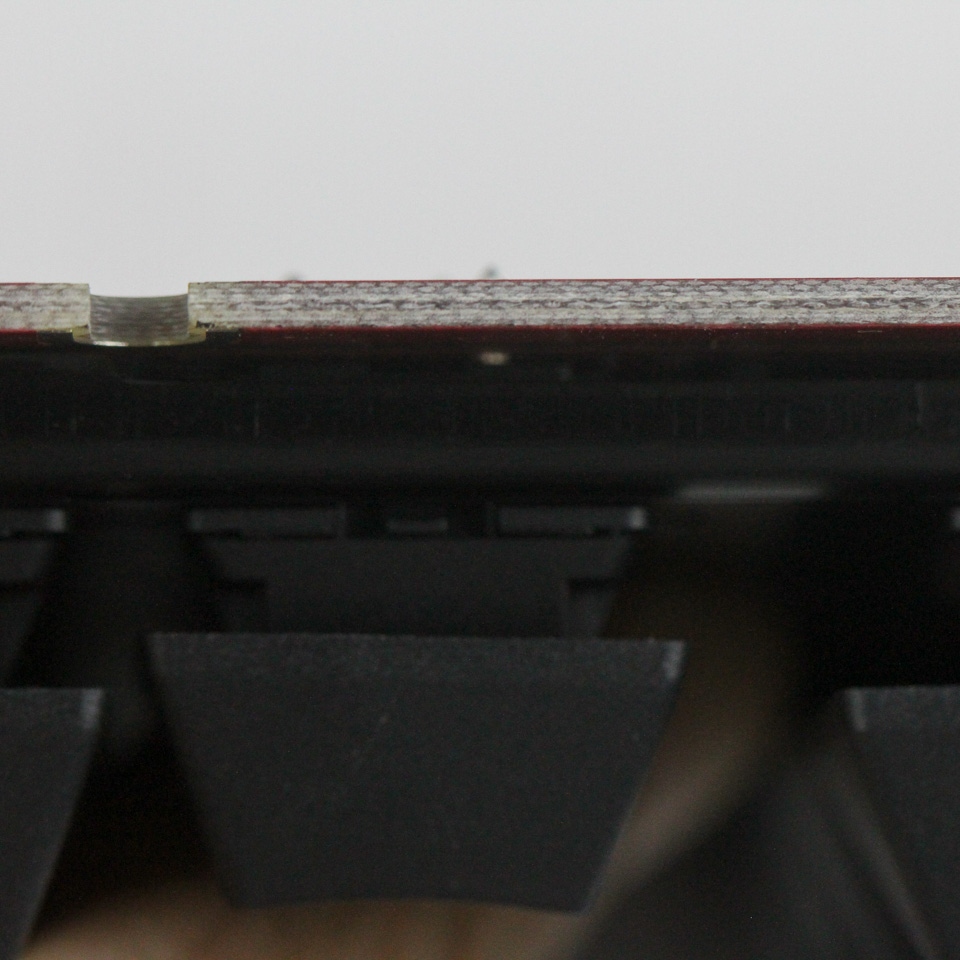
Solder quality is really good, although there is not a lot to see here. Presumably, the USB microcontroller and any other drivers are on the other side of the PCB, so there is really nothing to talk about unless you de-solder the switches. All components, including the switches and LEDs, are soldered to a multi-layered PCB.
Before we move on, be advised that disassembly may void the warranty and that TechPowerUp is not liable for any damages incurred if you decide to go ahead and do so anyway.
Jul 12th, 2025 05:42 CDT
change timezone
Latest GPU Drivers
New Forum Posts
- Chrome has removed uBlock Origin 1.64.0 (remove google search suggestions) (1)
- Can you guess Which game it is? (228)
- Will you buy a RTX 5090? (646)
- Gigabyte graphic cards - TIM gel SLIPPAGE problem (146)
- What's your latest tech purchase? (24240)
- Best motherboards for XP gaming (103)
- ASUS ProArt GeForce RTX 4060 Ti OC Edition 16GB GDDR6 Gaming - nvflash64 VBIOS mismatch (3)
- Steam Deck Owners Clubhouse (535)
- What are you playing? (23923)
- 'NVIDIA App' not usable offline? (9)
Popular Reviews
- Fractal Design Epoch RGB TG Review
- Corsair FRAME 5000D RS Review
- Lexar NM1090 Pro 4 TB Review
- NVIDIA GeForce RTX 5050 8 GB Review
- NZXT N9 X870E Review
- Our Visit to the Hunter Super Computer
- Sapphire Radeon RX 9060 XT Pulse OC 16 GB Review - An Excellent Choice
- AMD Ryzen 7 9800X3D Review - The Best Gaming Processor
- Upcoming Hardware Launches 2025 (Updated May 2025)
- Chieftec Iceberg 360 Review
TPU on YouTube
Controversial News Posts
- Intel's Core Ultra 7 265K and 265KF CPUs Dip Below $250 (288)
- Some Intel Nova Lake CPUs Rumored to Challenge AMD's 3D V-Cache in Desktop Gaming (140)
- AMD Radeon RX 9070 XT Gains 9% Performance at 1440p with Latest Driver, Beats RTX 5070 Ti (131)
- NVIDIA Launches GeForce RTX 5050 for Desktops and Laptops, Starts at $249 (119)
- NVIDIA GeForce RTX 5080 SUPER Could Feature 24 GB Memory, Increased Power Limits (115)
- Microsoft Partners with AMD for Next-gen Xbox Hardware (105)
- Intel "Nova Lake‑S" Series: Seven SKUs, Up to 52 Cores and 150 W TDP (100)
- NVIDIA DLSS Transformer Cuts VRAM Usage by 20% (97)